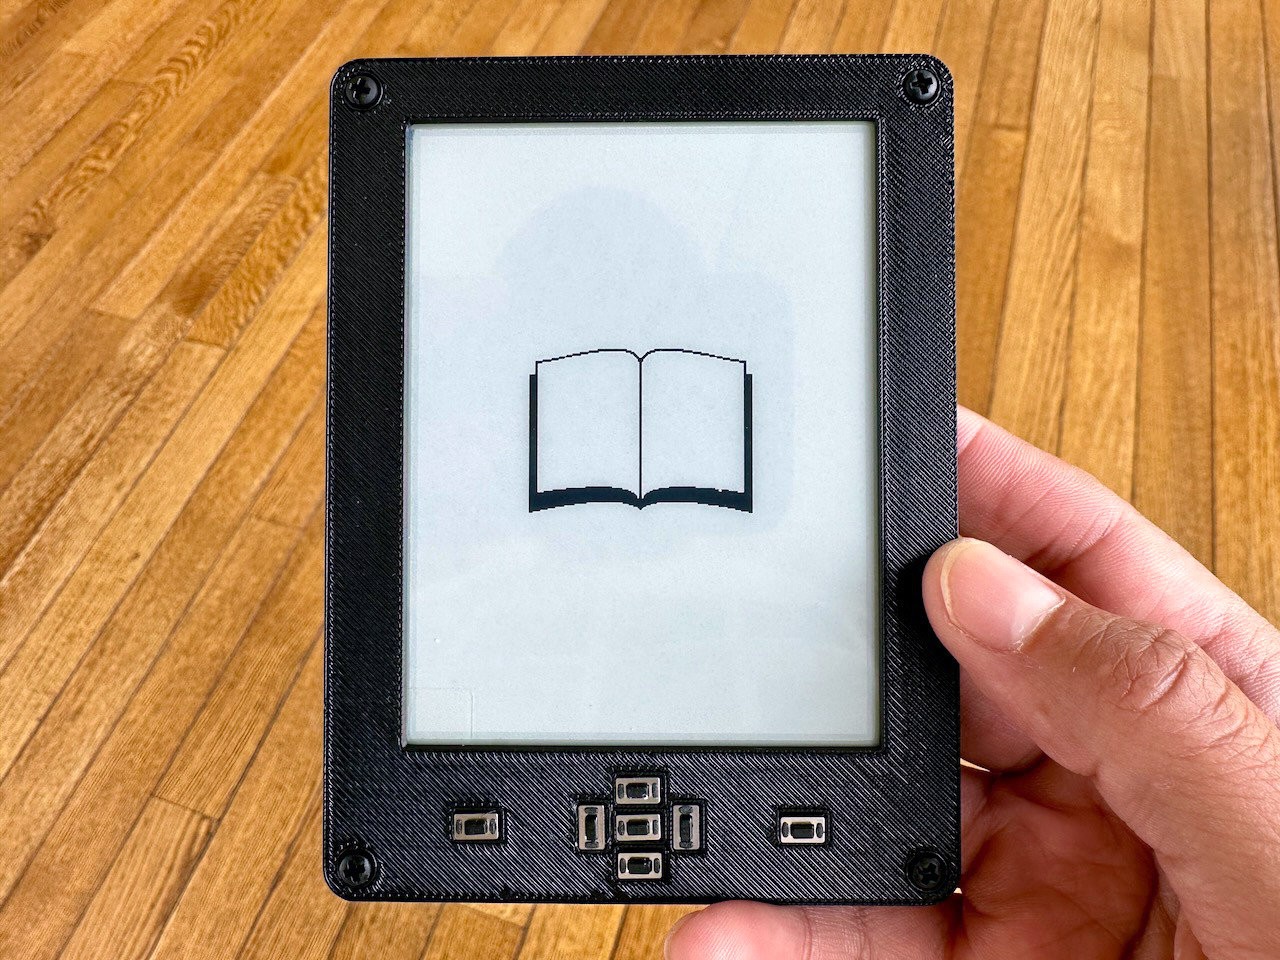
-
The Hackaday Prize Video
10/10/2023 at 12:22 • 1 commentI’m going to be honest: I had a whole long post I wanted to write this week about ideas for working with writers, a whole “Open Book Quarterly” where, if this thing took off, we could use royalties from the book to commission short stories, and pay writers to publish new works for the Open Book and the world.
Alas, making this video completely took it out of me.
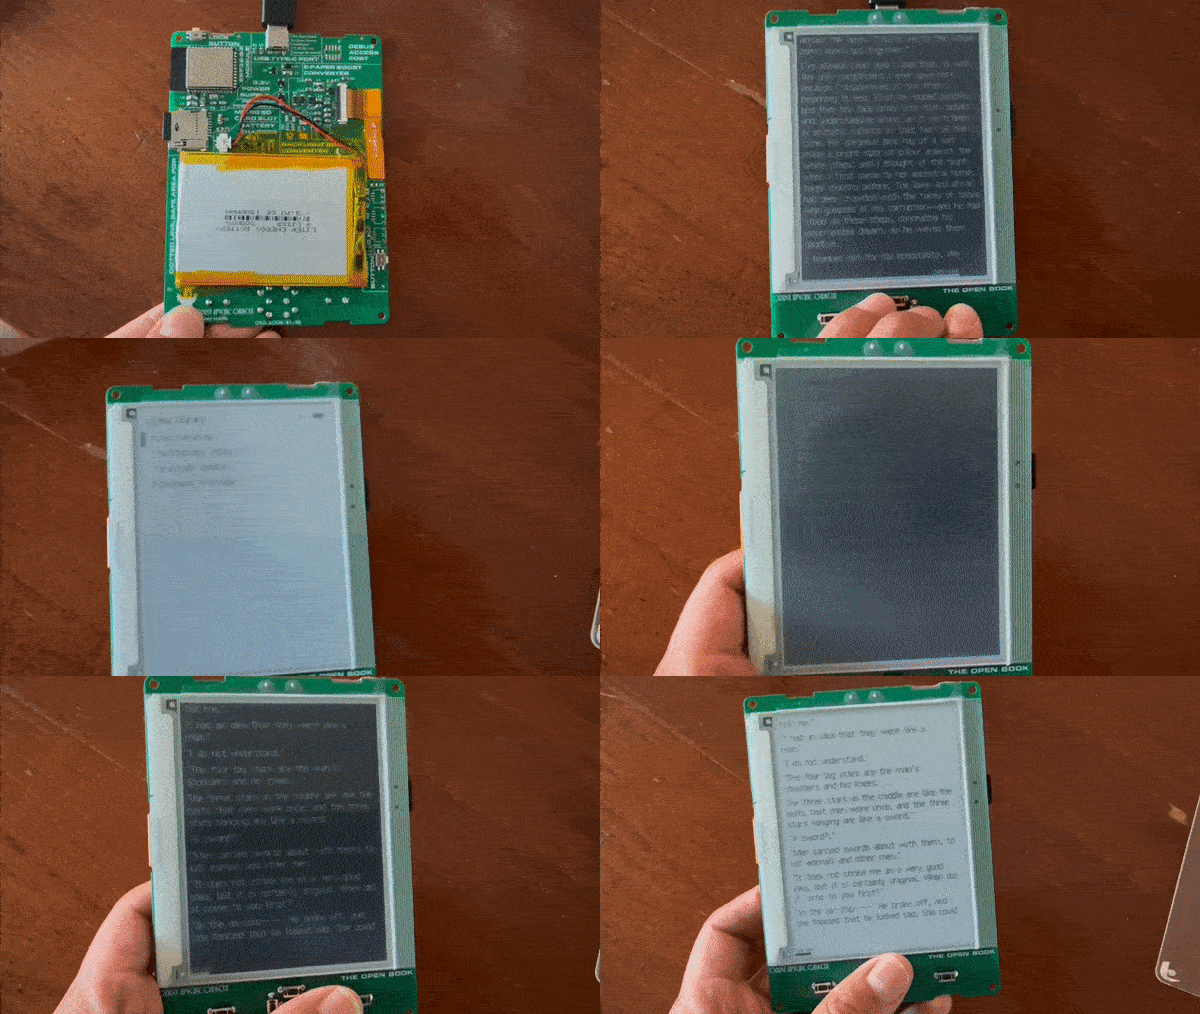
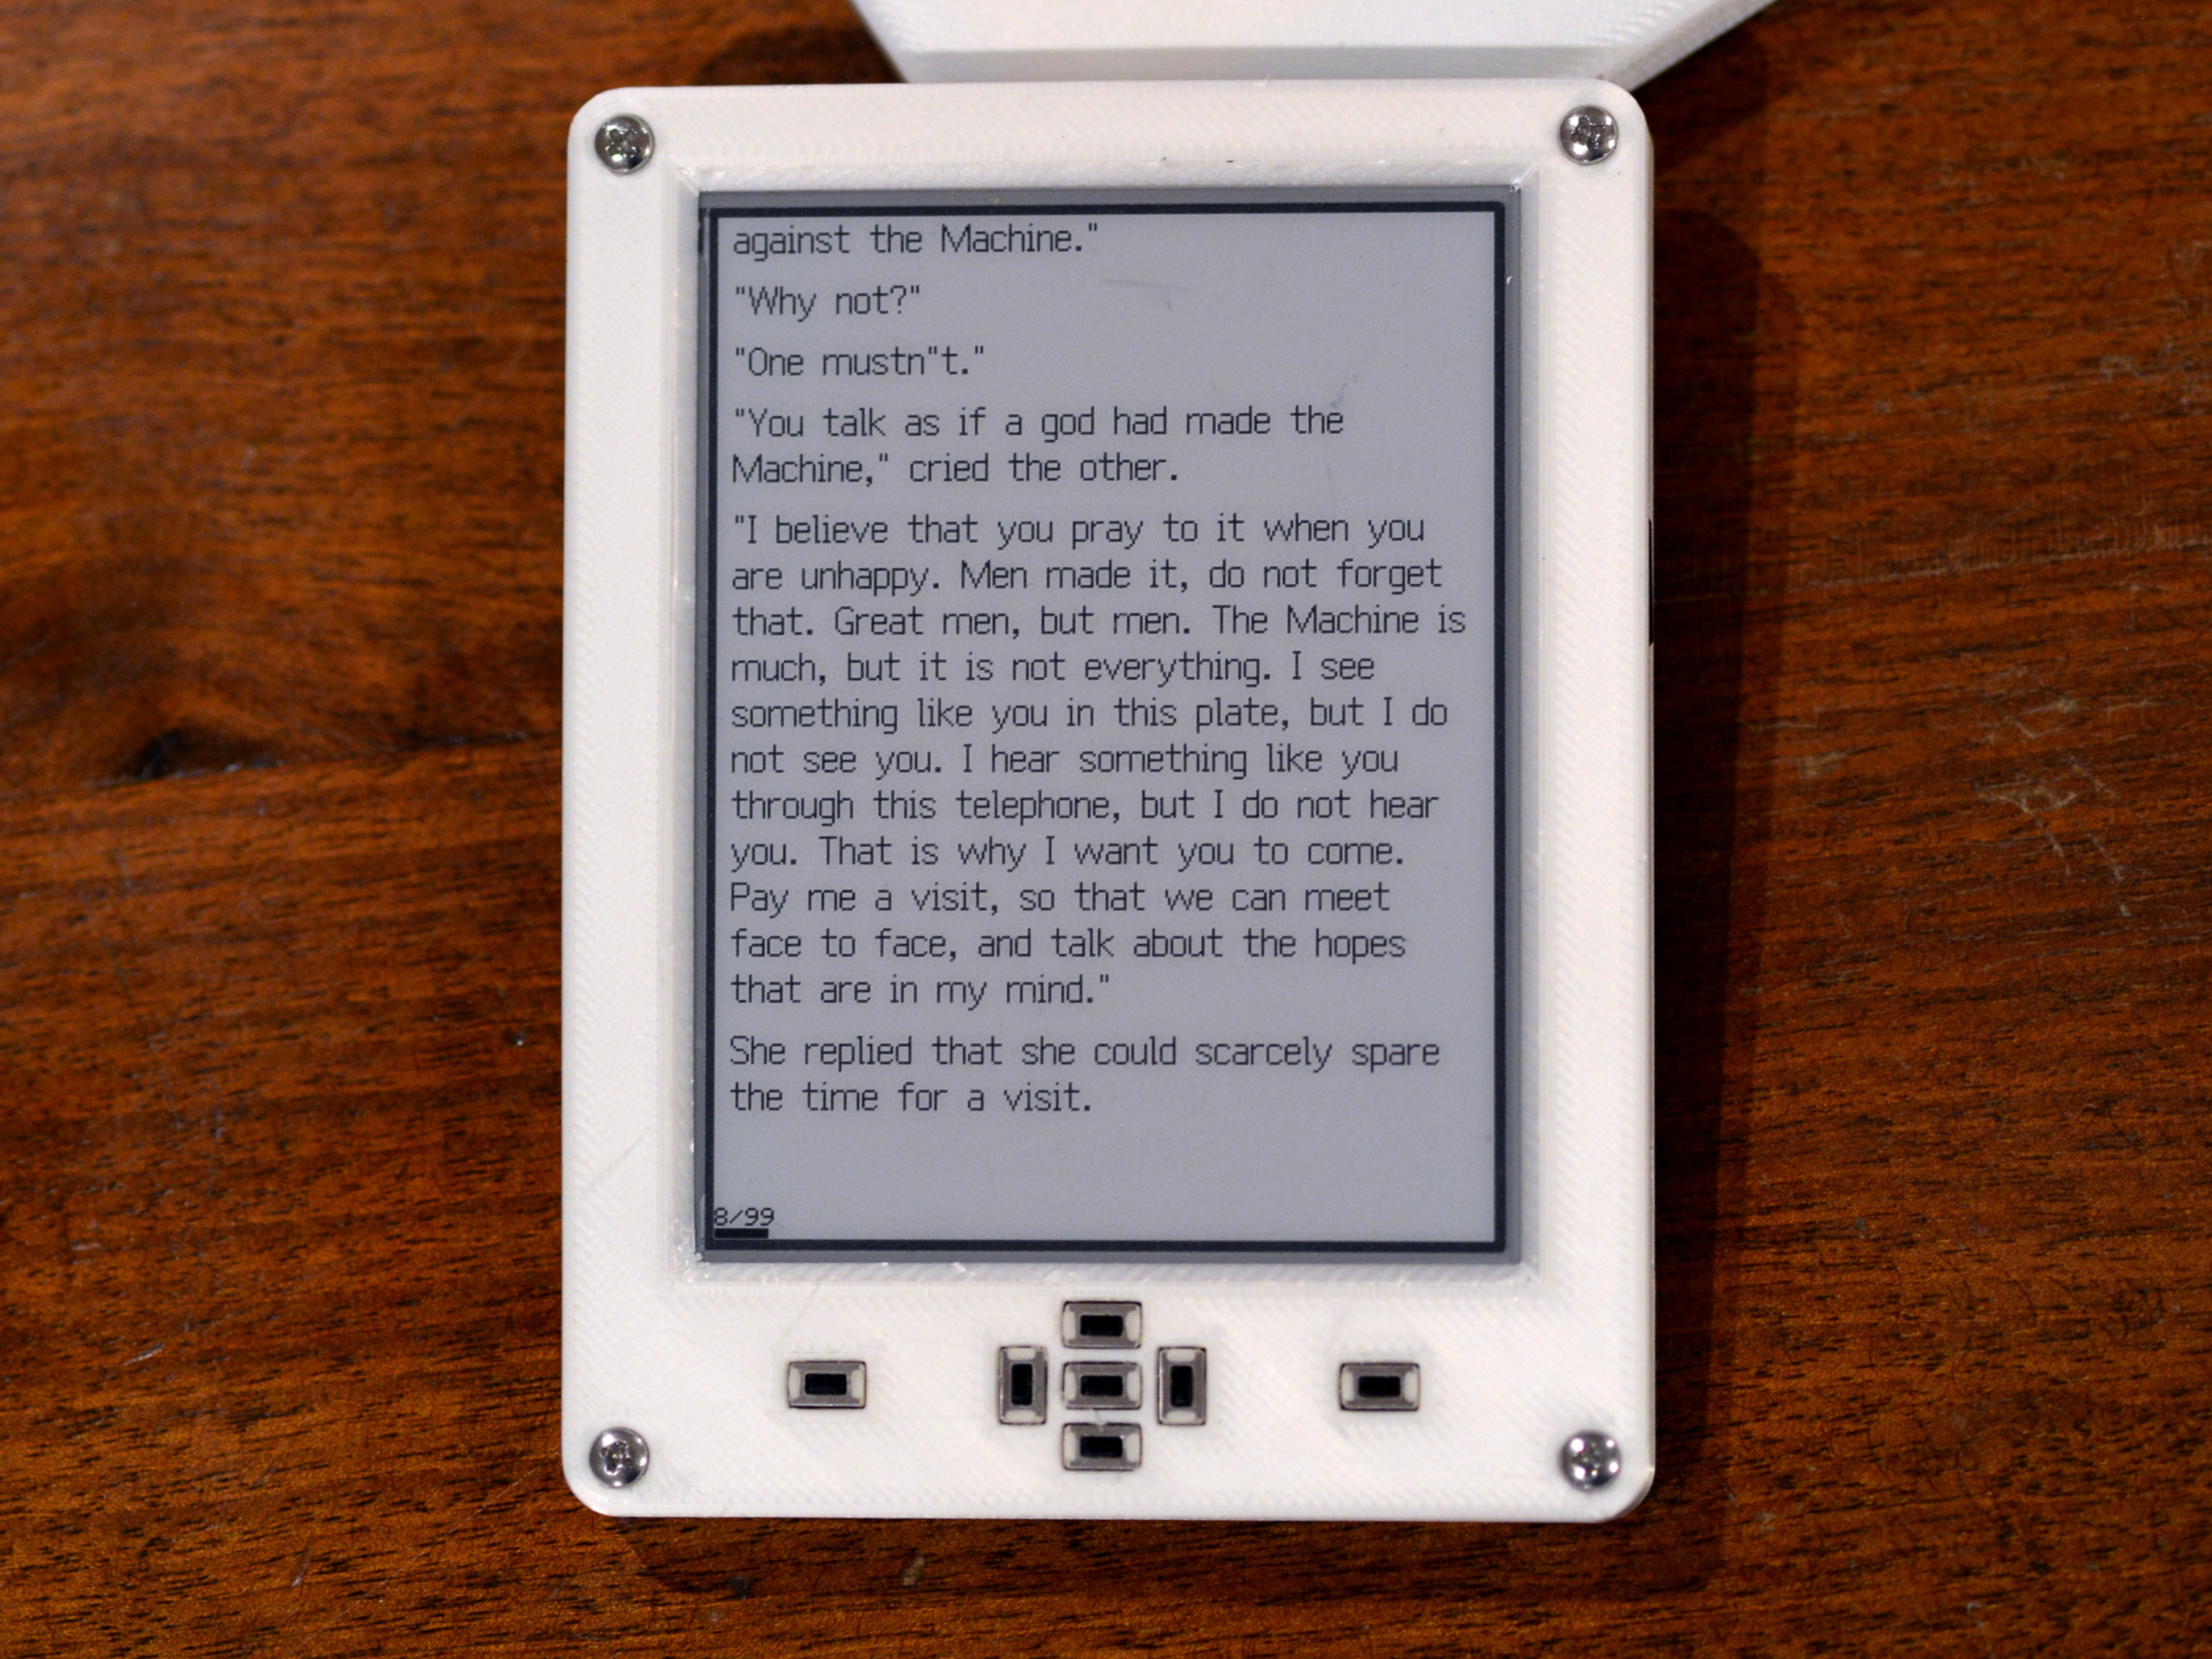
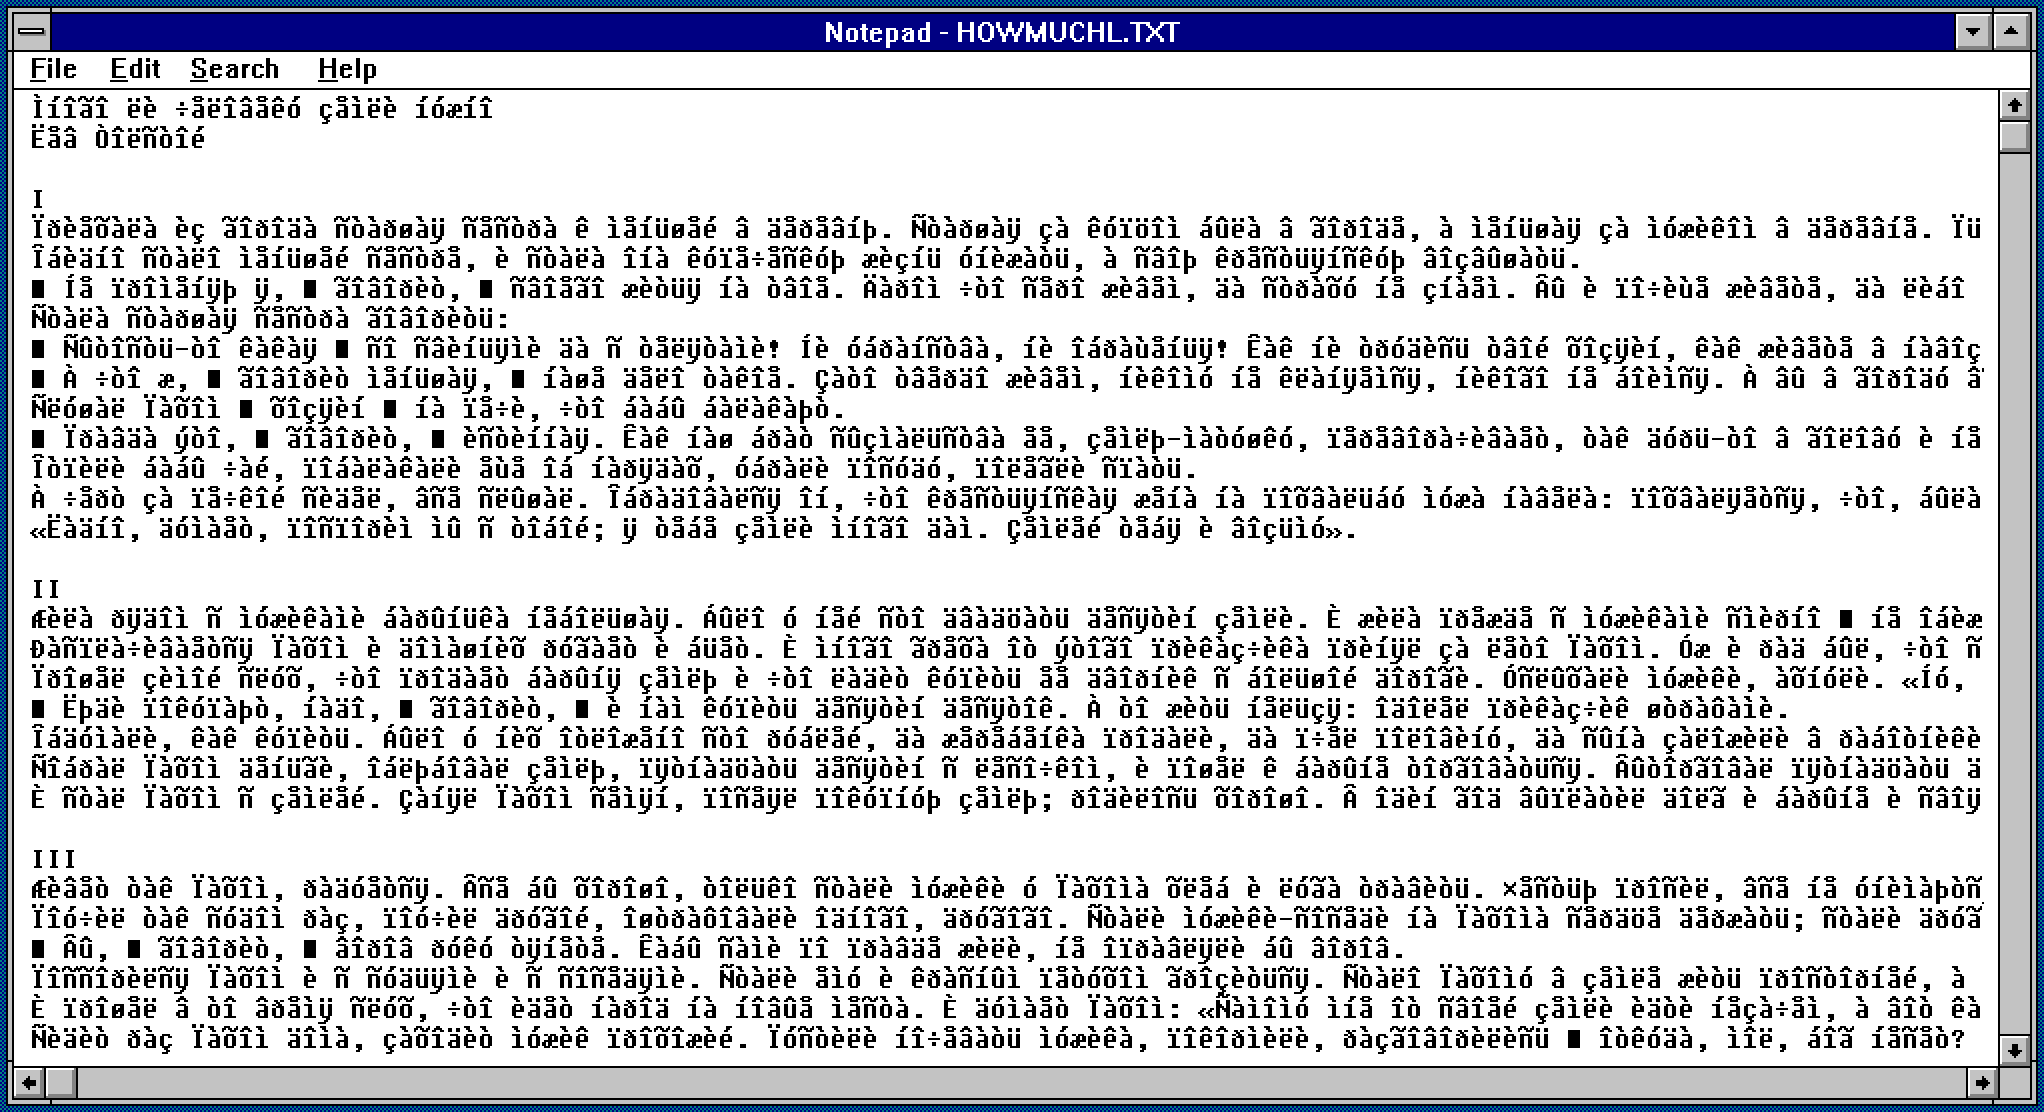
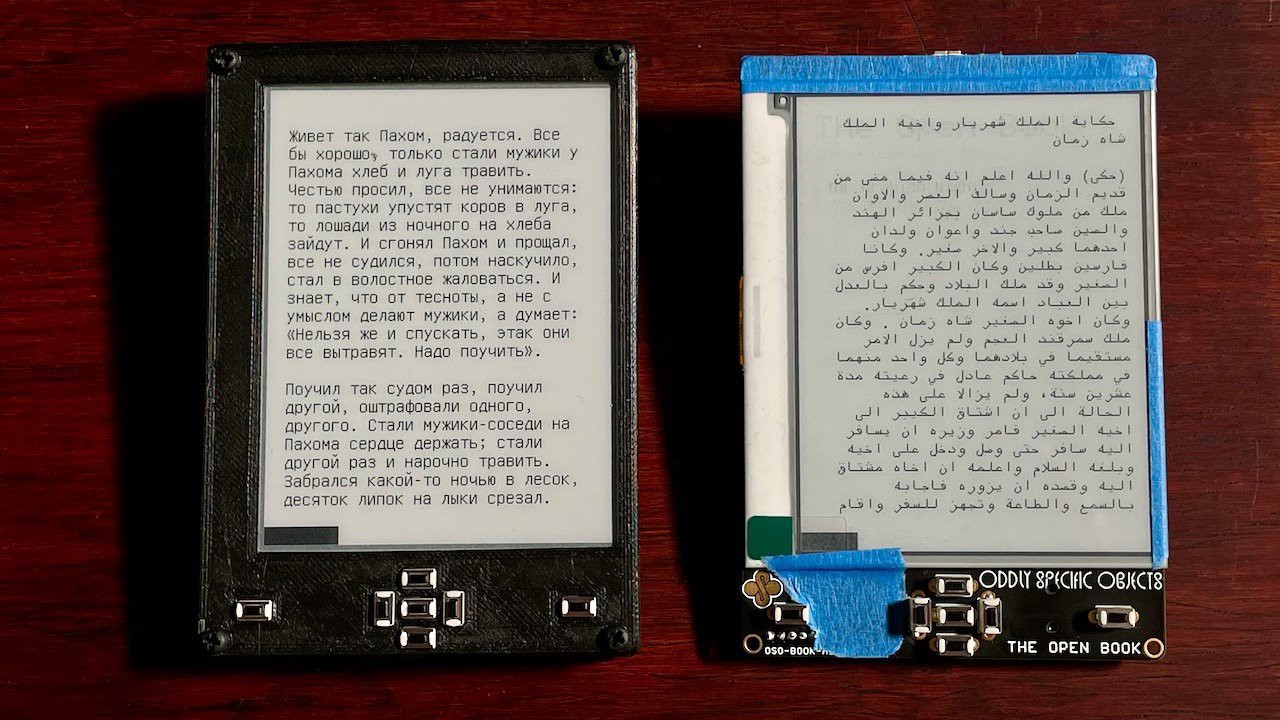
It was a crazy weekend of soldering and screenshotting, building a second prototype with a camera in front of my face and enlisting the help of so many of my colleagues to film me even as I begged to film them. I contended with cursed text encodings (the Windows-1251 Cyrillic text file from a previous post came back to haunt me). I even managed, in the space of a half an hour, to design, mill out, assemble and demonstrate the first Open Book add-on board: a simple external input device with a pair of buttons that demonstrates how an accessibility add-on might be made.
I want to thank several of my colleagues for making this video possible: Amrit Kwatra and Ilan Mandel for helping to shoot video, Evan Kahn for his advice and notes, and Zaq Landsberg for offering to be my hand model and ending up with a starring role as one of the readers of the Open Book. (I'm the other one)
Featured works in this video include the Odyssey by Homer, How Much Land does a Man Need by Leo Tolstoy, The Art of War by Sun Tzu, and the opening poem from Langston Hughes’ collection of poetry, The Weary Blues.
The Odyssey I’ve loved ever since my high school hosted a weekend-long recitation of the work; we read the Fagles translation, but I’ve heard good things about Emily Wilson’s new version. How Much Land does a Man Need is a gut punch of a short story that feels incredibly relevant to our time. The Art of War requires no introduction. And Langston Hughes’ first book of poetry is as powerful today as it was when it was published in 1926.
-
A working prototype!
10/01/2023 at 20:32 • 0 commentsIt's funny: while I knew the new Open Book with ESP32 was working — it booted up as far as the boot screen, and our Focus UI framework was working well though to throw an error message about the SD card — I had not actually gotten the Libros firmware fully functioning on the new prototype.
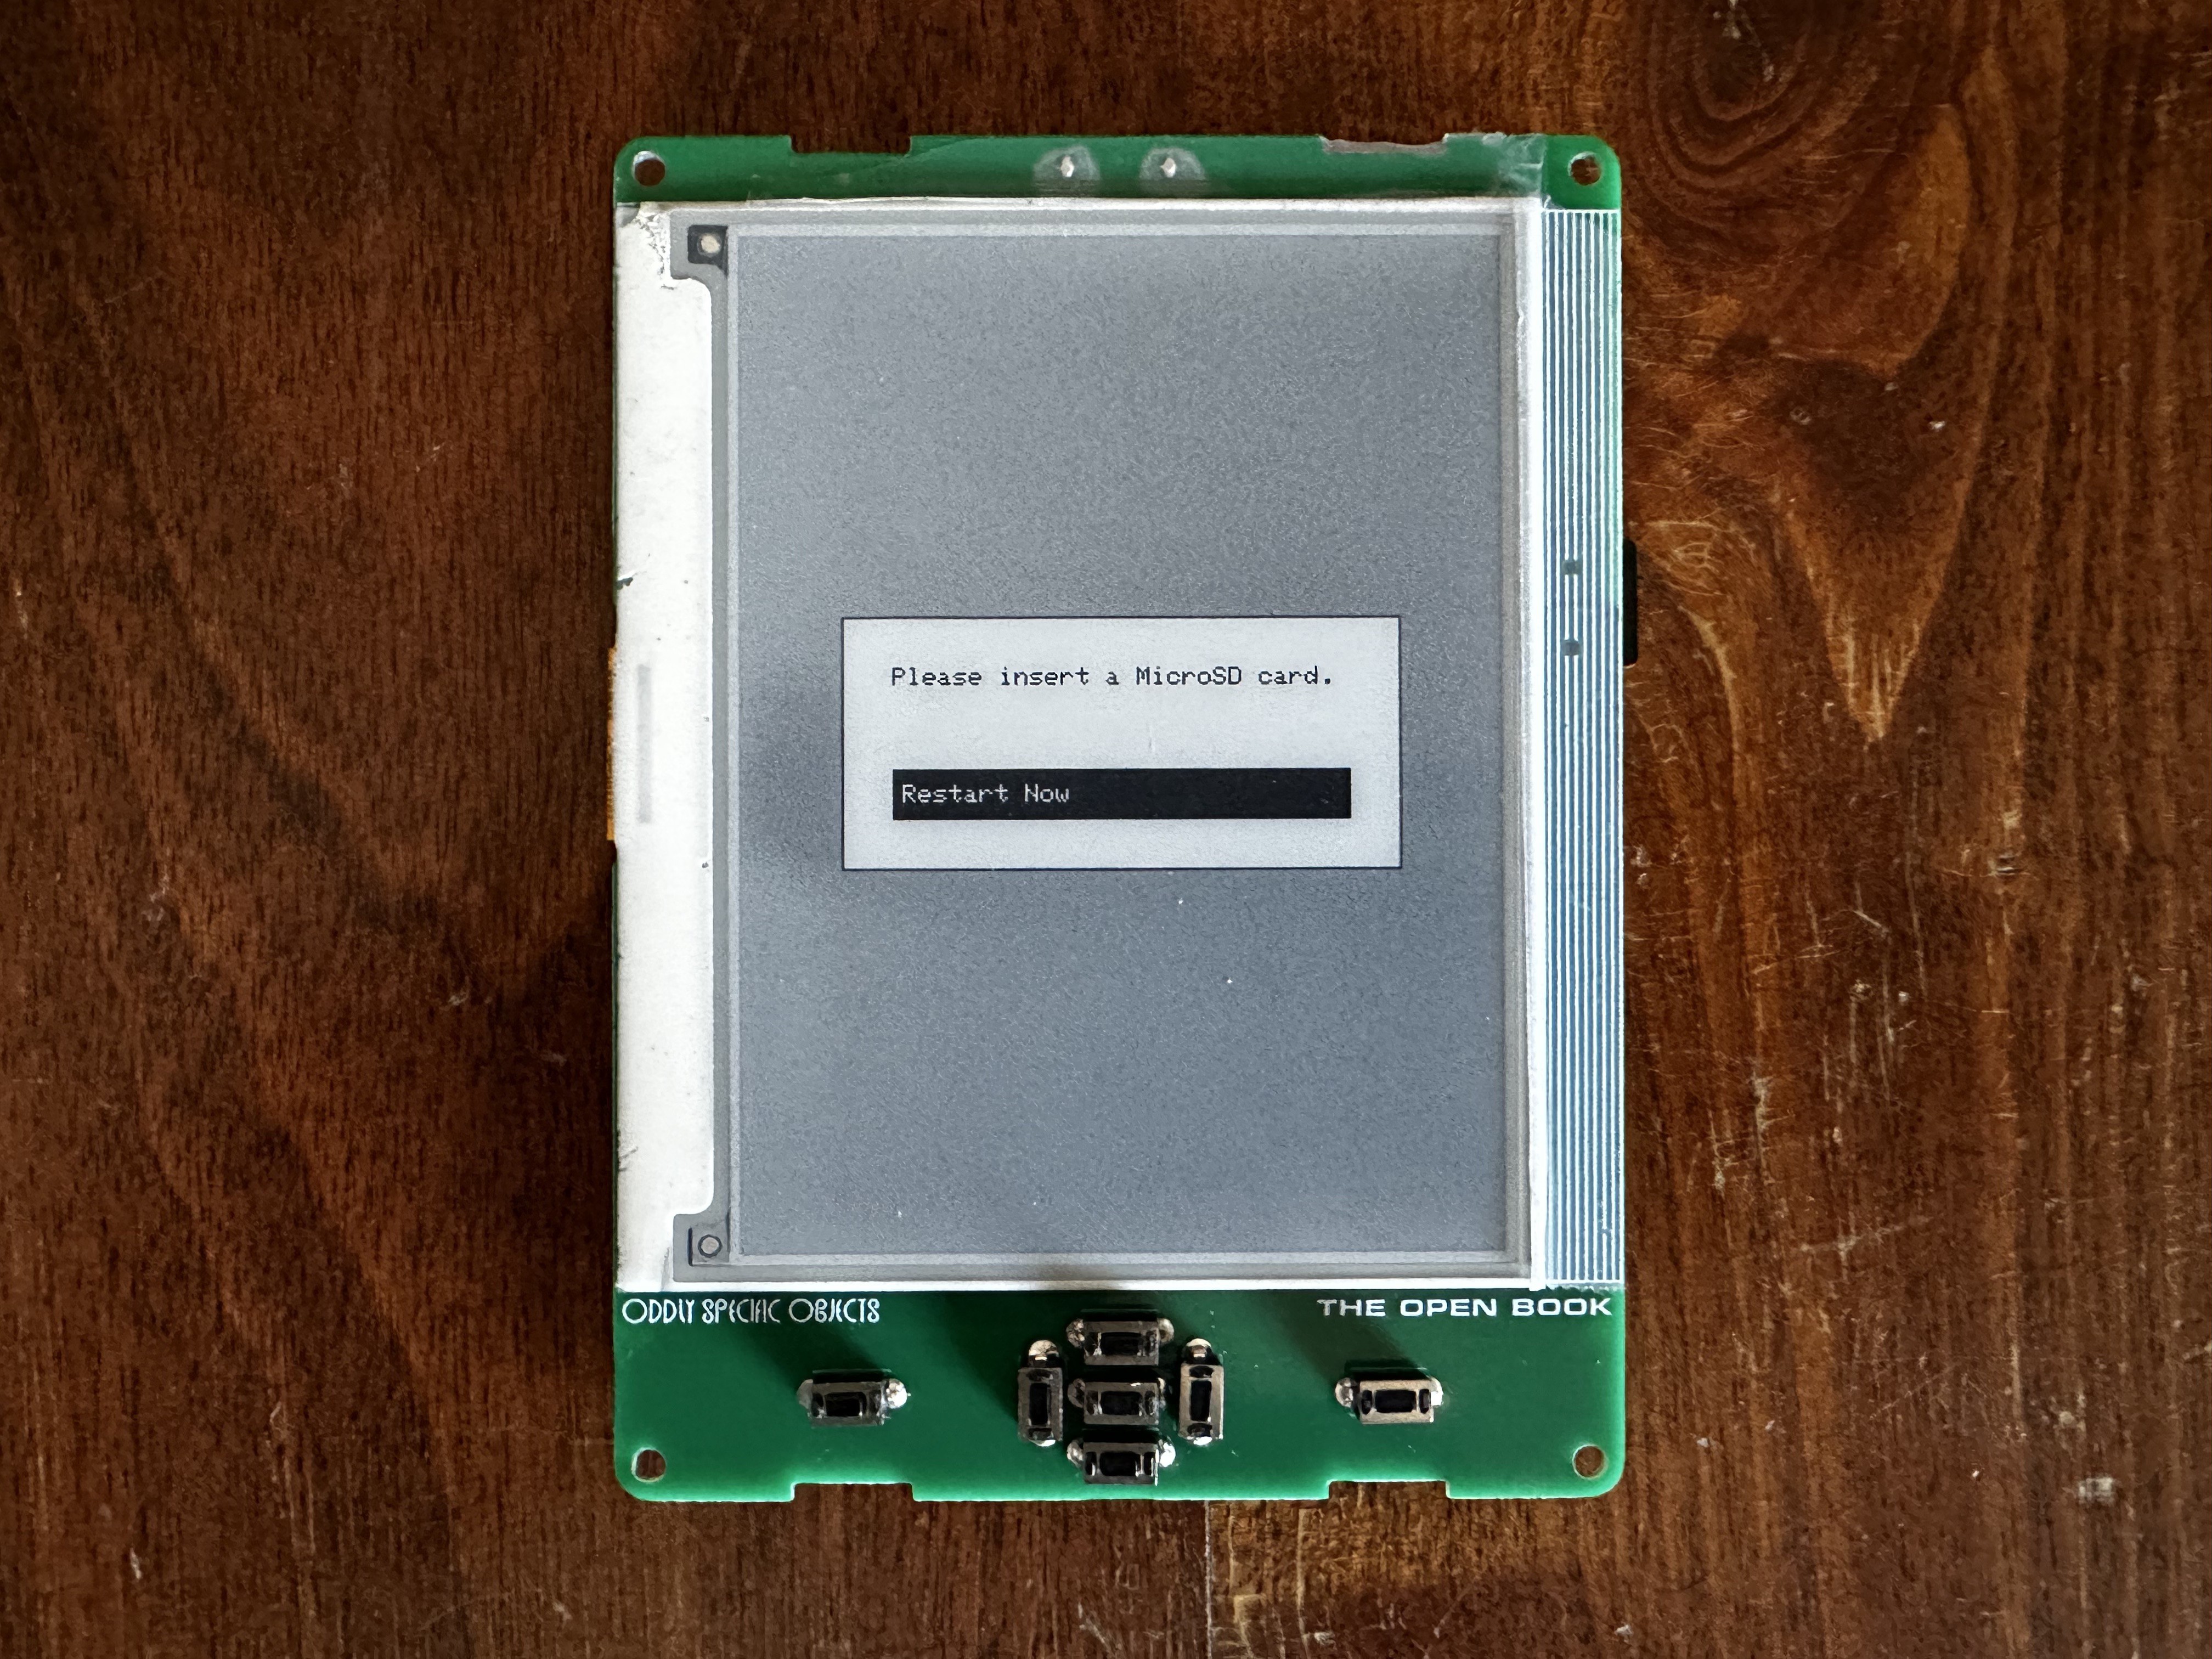
To be clear, I knew what needed doing — the TODO list was short, just two items long — but up until this morning, I hadn't made time to do them, and the prototype only made it this far:

Yes, if you look closely, there IS a MicroSD card in the card slot at the right; I just hadn't written the code to, y'know, deal with it yet. I also hadn't yet dealt with the bigger issue: getting the reams of language data to work not from an external SPI flash chip, but from the ESP32-S3's own Flash memory, in a dedicated partition set aside for global language support.
TL;DR: I checked off both items on the TODO list this afternoon, and now the Open Book with ESP32-S3 is a fully functioning prototype, with all the same functionality of the Abridged Edition crammed into a svelte profile with a slim, rechargeable LiPo.
Item 1: get sd card working
This ended up being a super simple two-line fix. Essentially, the Open Book has two SPI buses, one for the SD card and another for the E-Paper display, and I just needed to coax the SDFat library into accepting the desired SPI bus as a parameter.
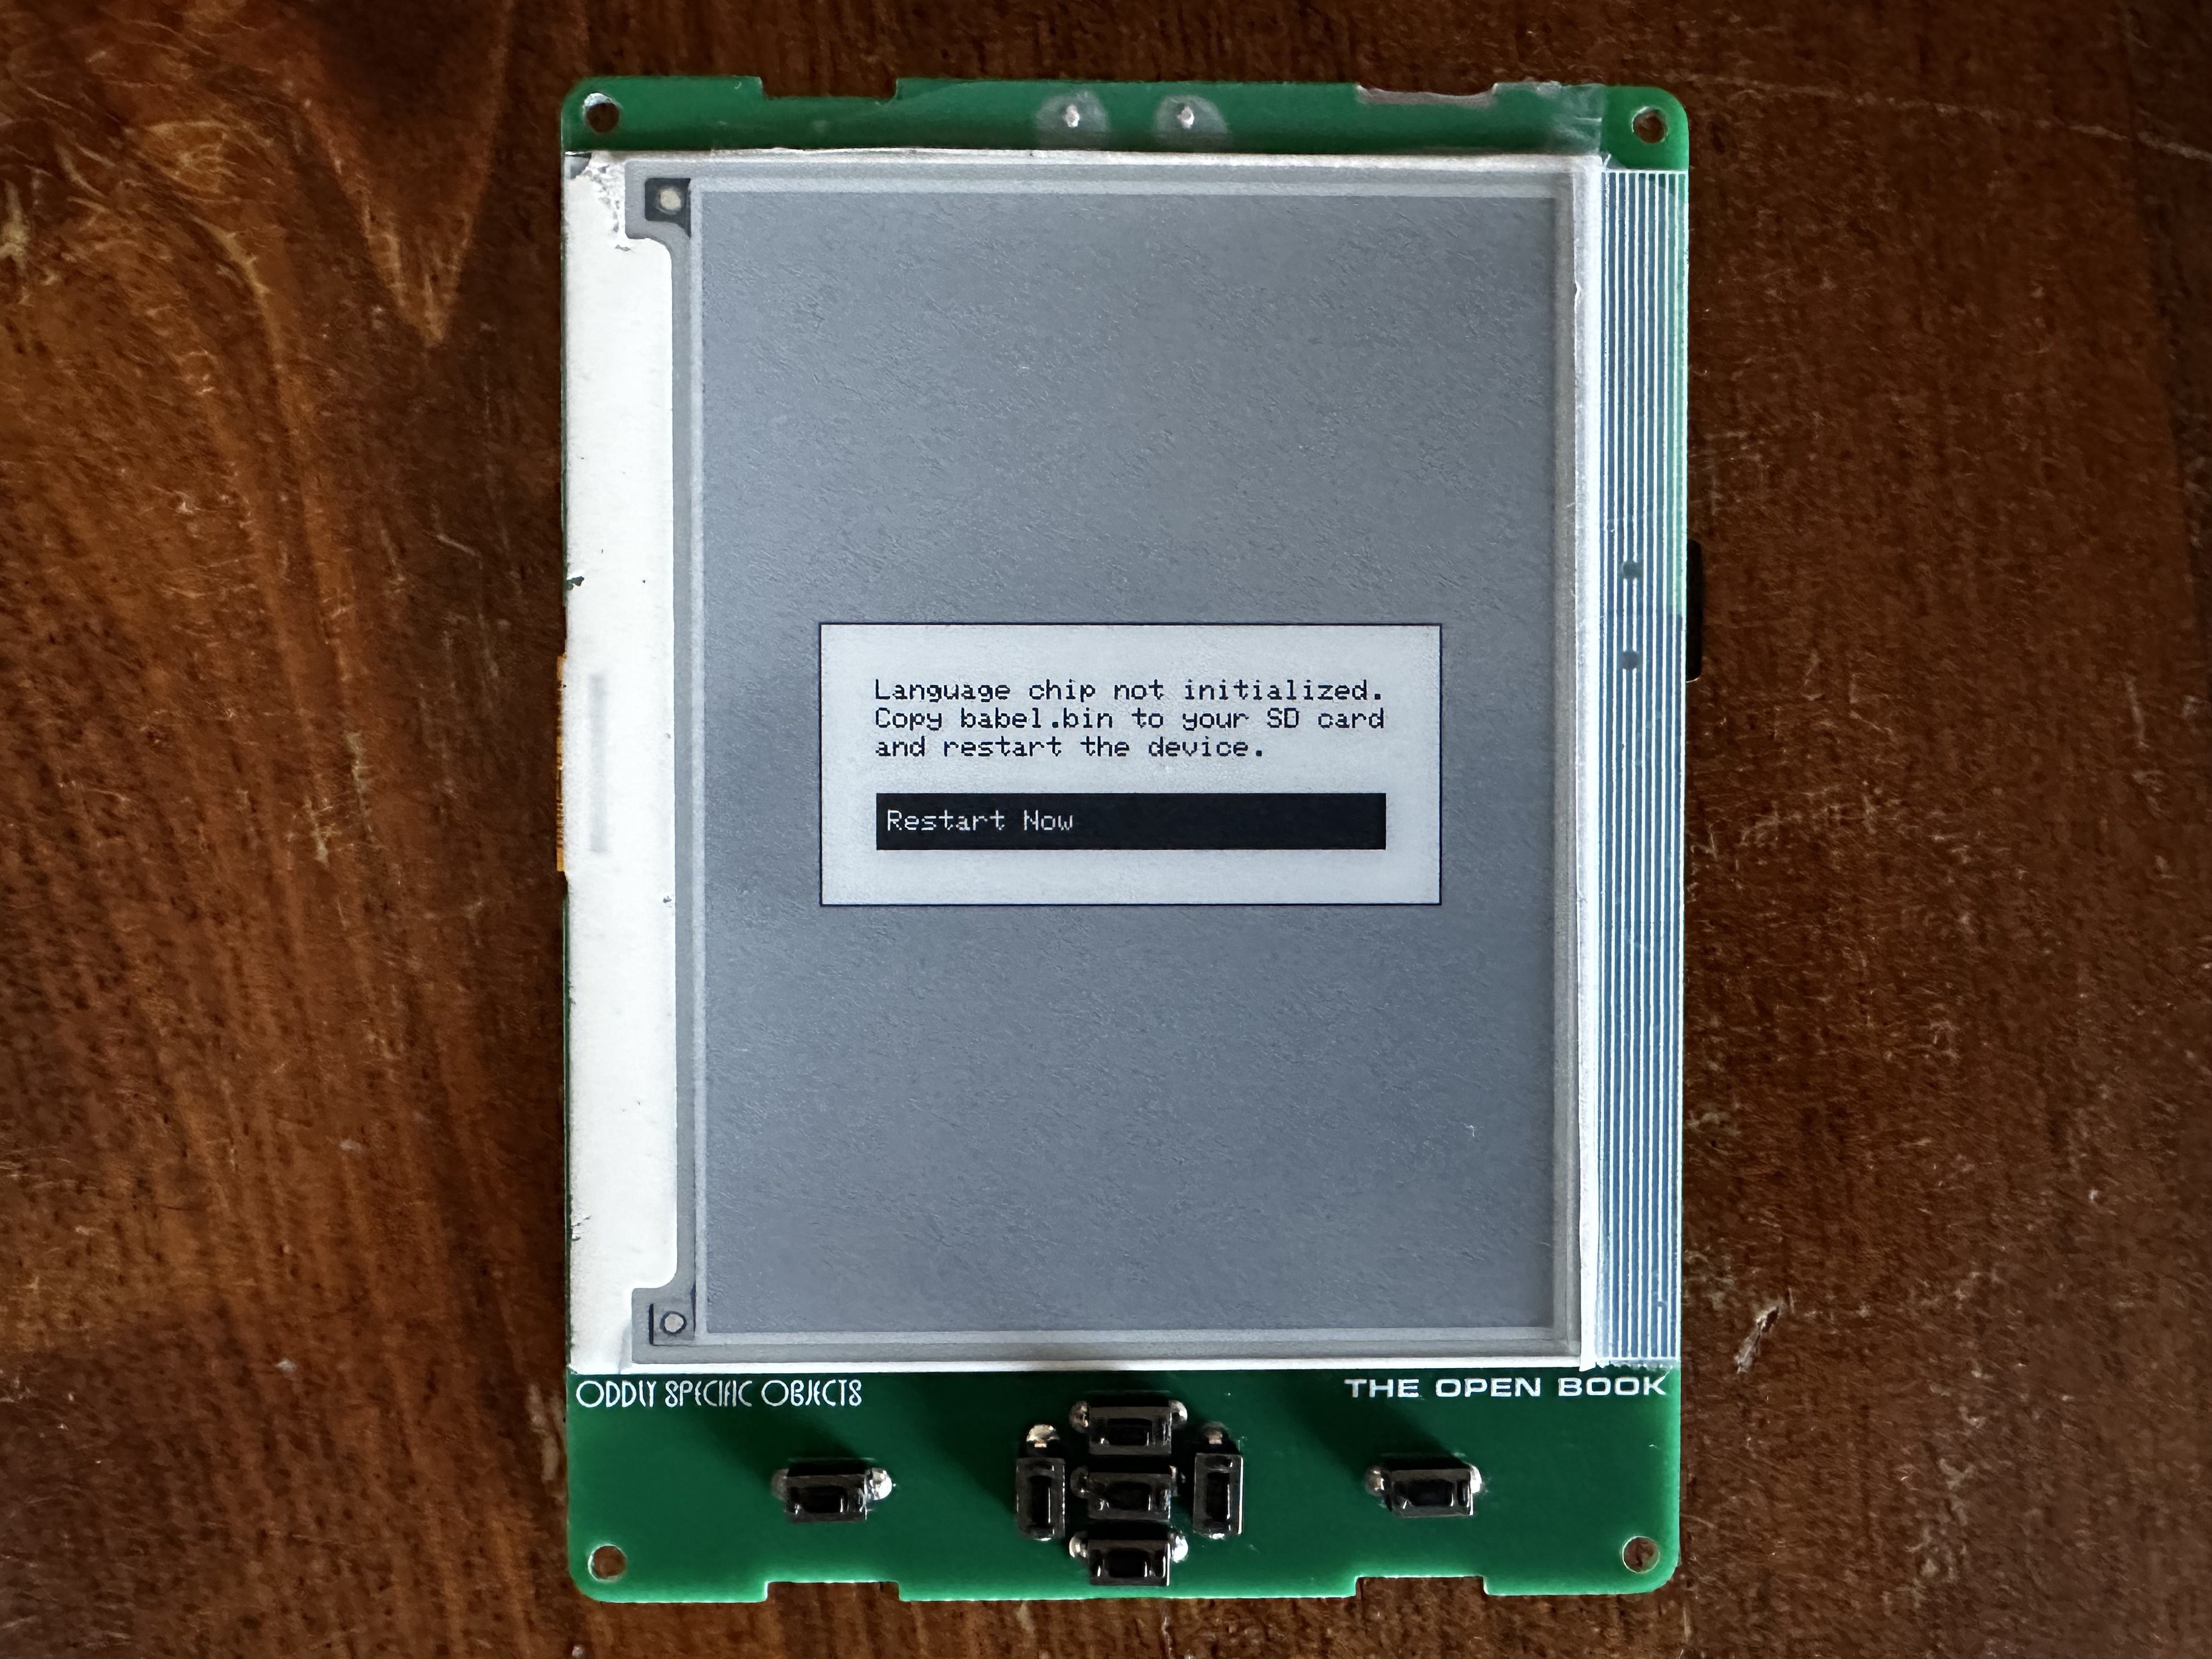
With one tweak to an #ifdef in the library's configuration, and a one line change to specify the SPI bus passed into the configureSD function, the SD card was working, and we were able to make it to the next error screen:

Item 2: get babel working from a partition on ESP32-S3's flash
This one ended up being trickier. First we had to add a partition table to the project, which tells the ESP32-S3 which parts of the Flash to use for our app, and which parts to use for our data.
Then, instead of configuring the Babel universal language library to look for language data on a chip on the SPI bus, we point it at the partition we just created, called "babel".
There's some boilerplate around four-year-old implementations of the Babel abstraction and the typesetter, but the cruxy bit is that we more or less only have to implement one function to make this work:
void BabelESP32S3::read(uint32_t addr, void *data, uint32_t len) {
    esp_partition_read(this->babel_partition, addr, data, len);
}
This is just the generic read method that the Babel language library uses to read language data. In the BabelSPIFlash class, this would manipulate a chip select pin and read data over hardware SPI. In the case of the ESP32-S3, we just read data from the partition. Easy peasy.
With these two changes, the Open Book with ESP32-S3 — the Hackaday Prize entry Open Book — is able to read books from an SD card and display them on the screen.
Which, like, I always knew that it would! I just needed one clear Sunday afternoon to make it happen.

-
Transparency in Gadget Design
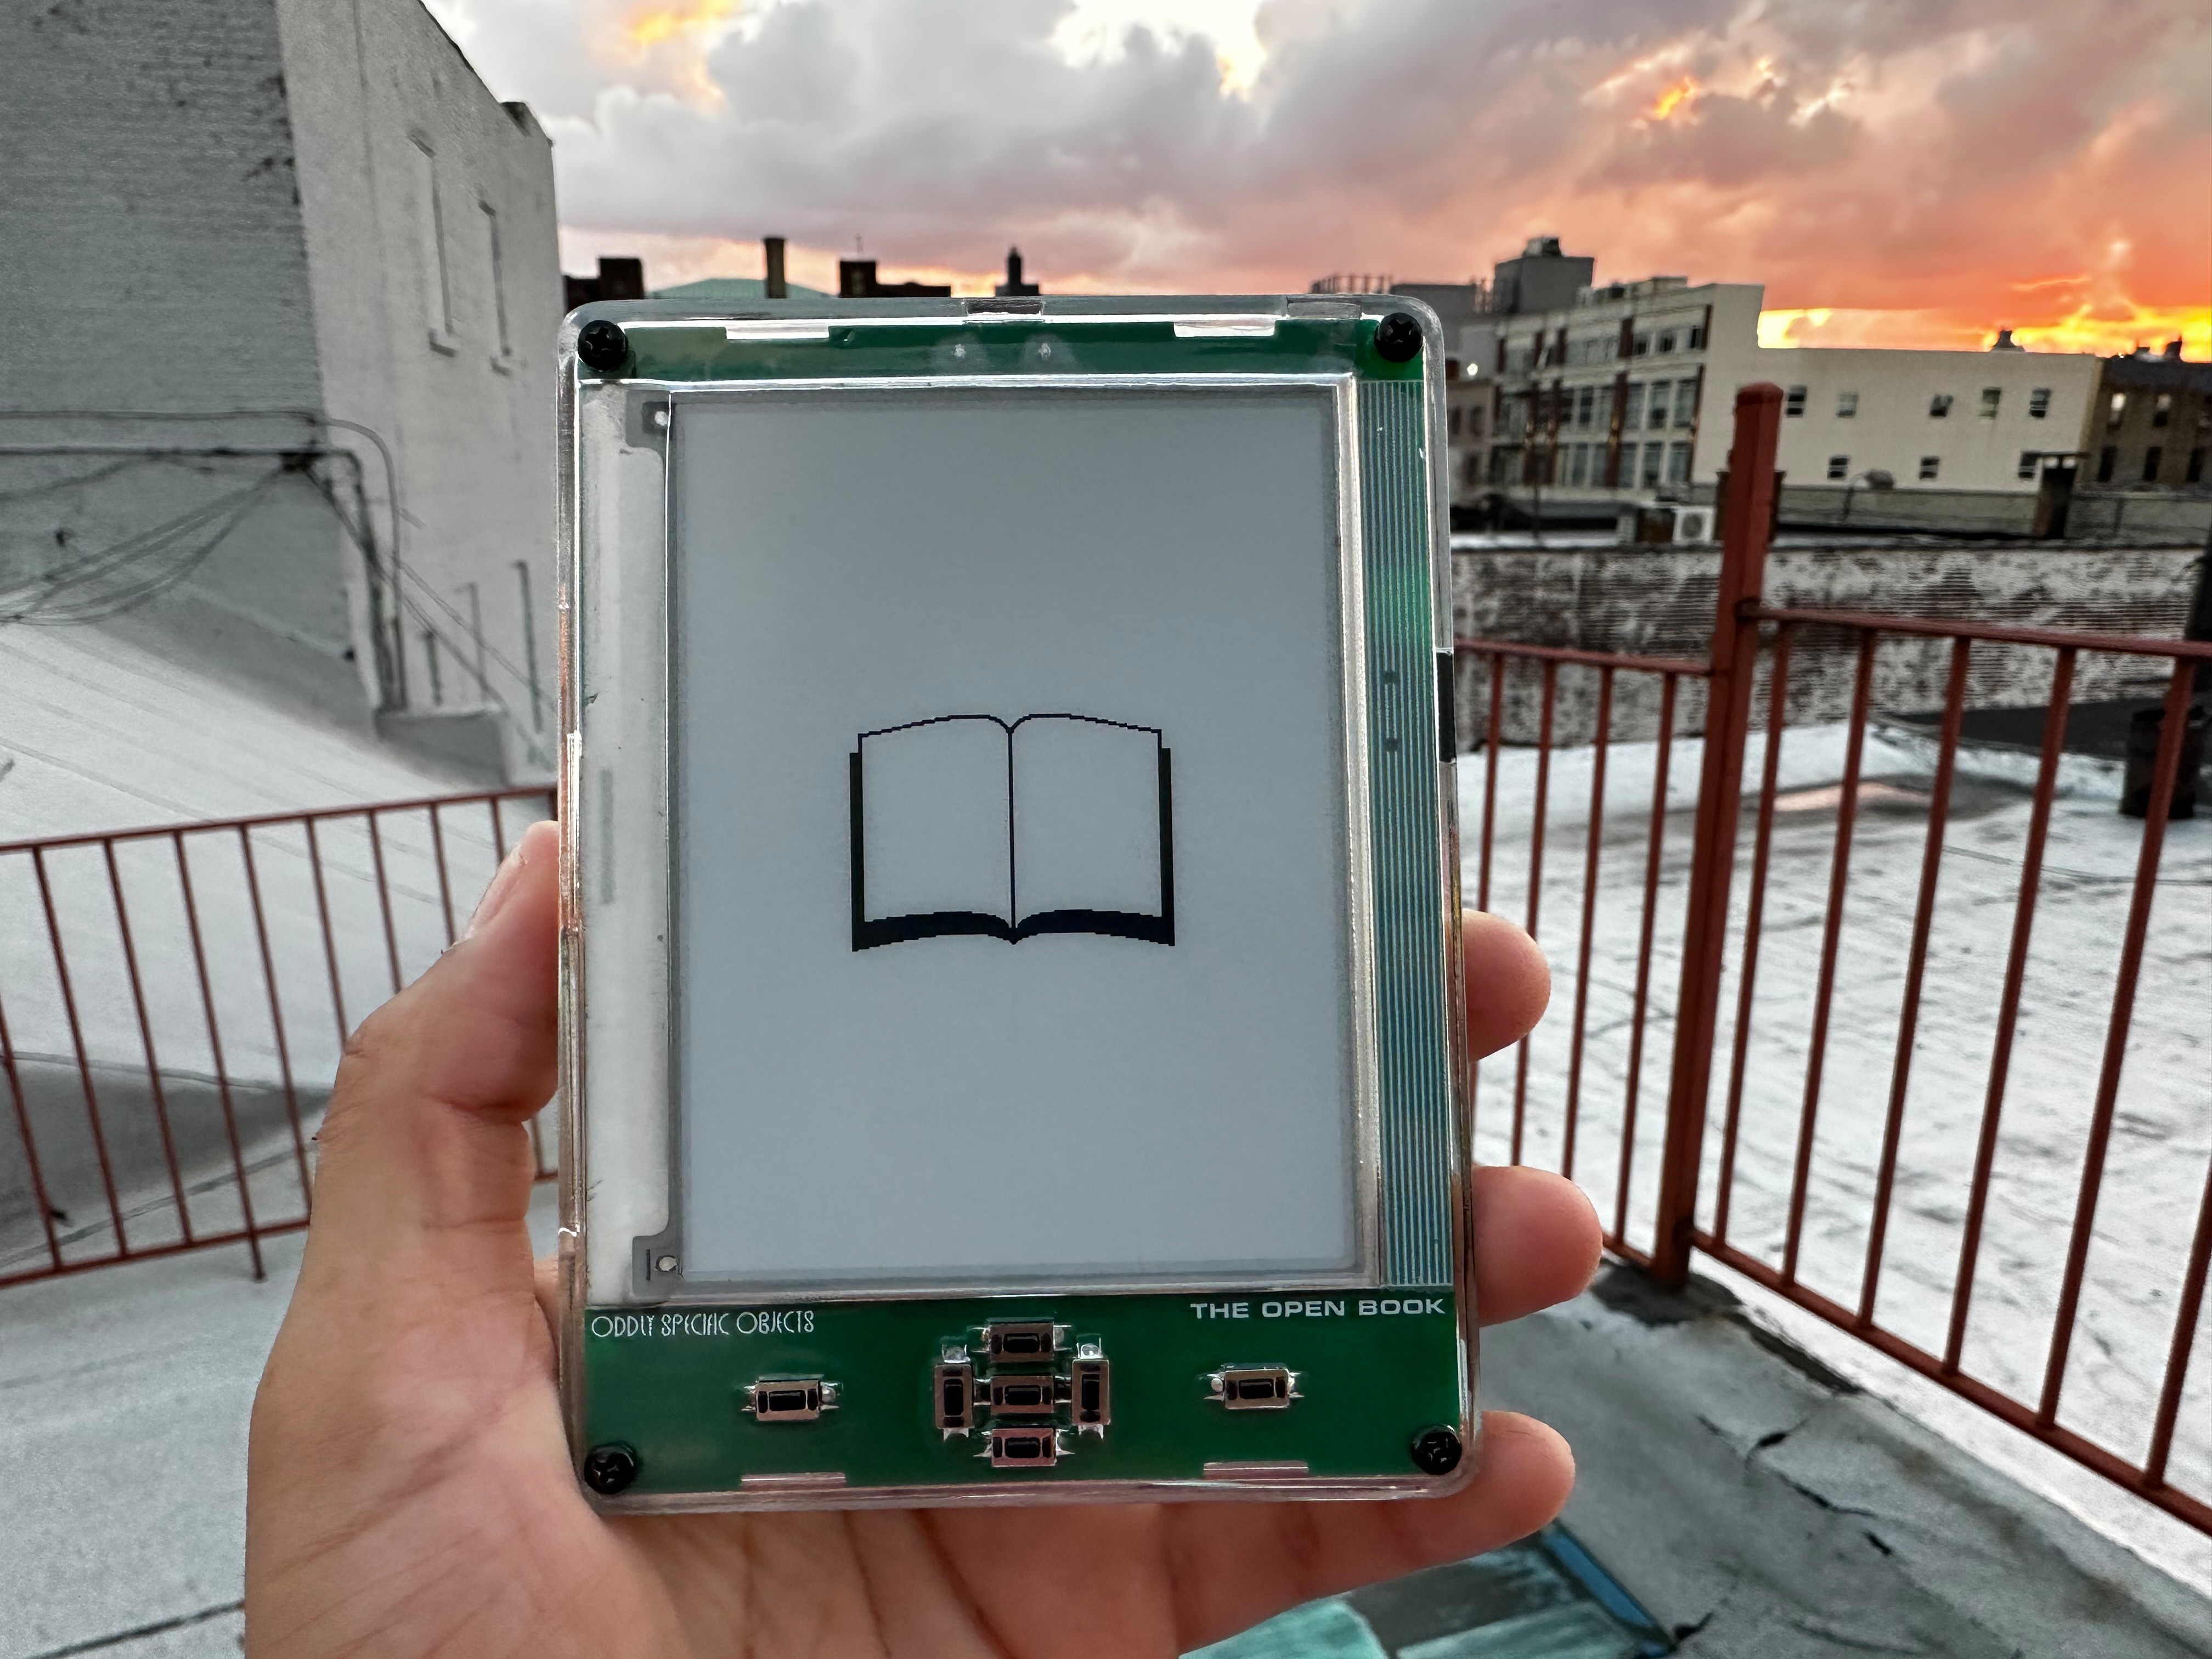
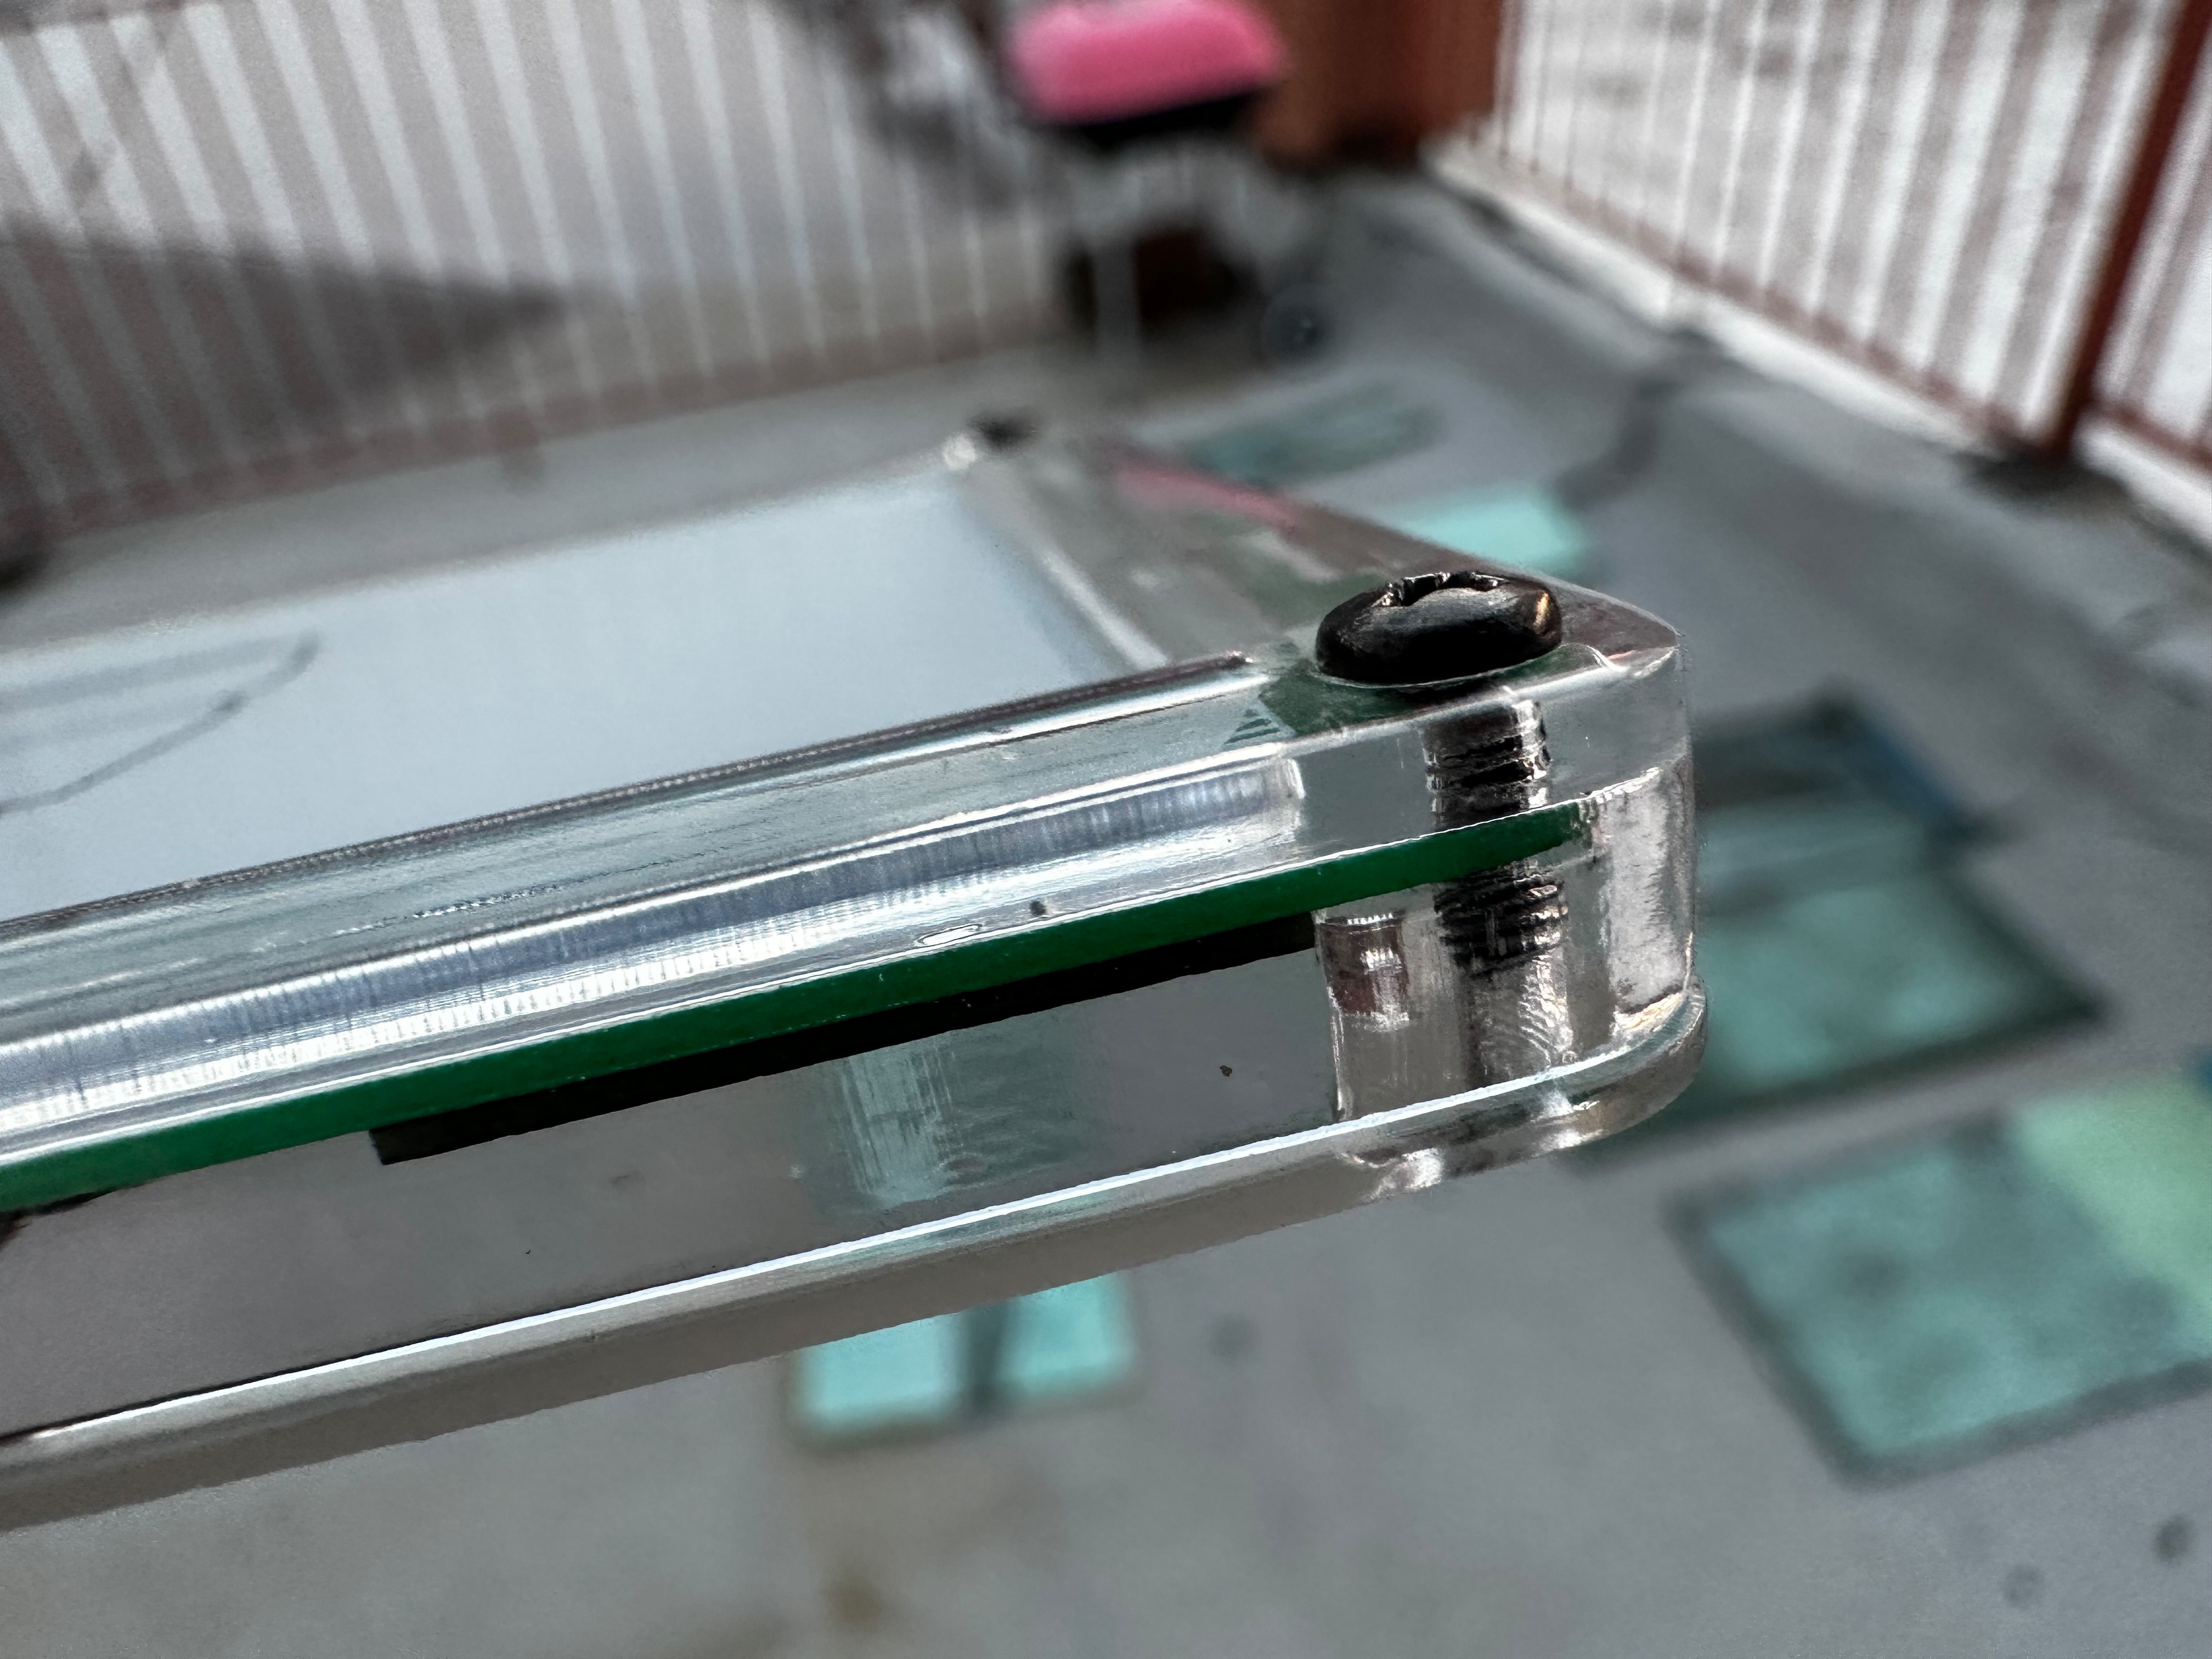
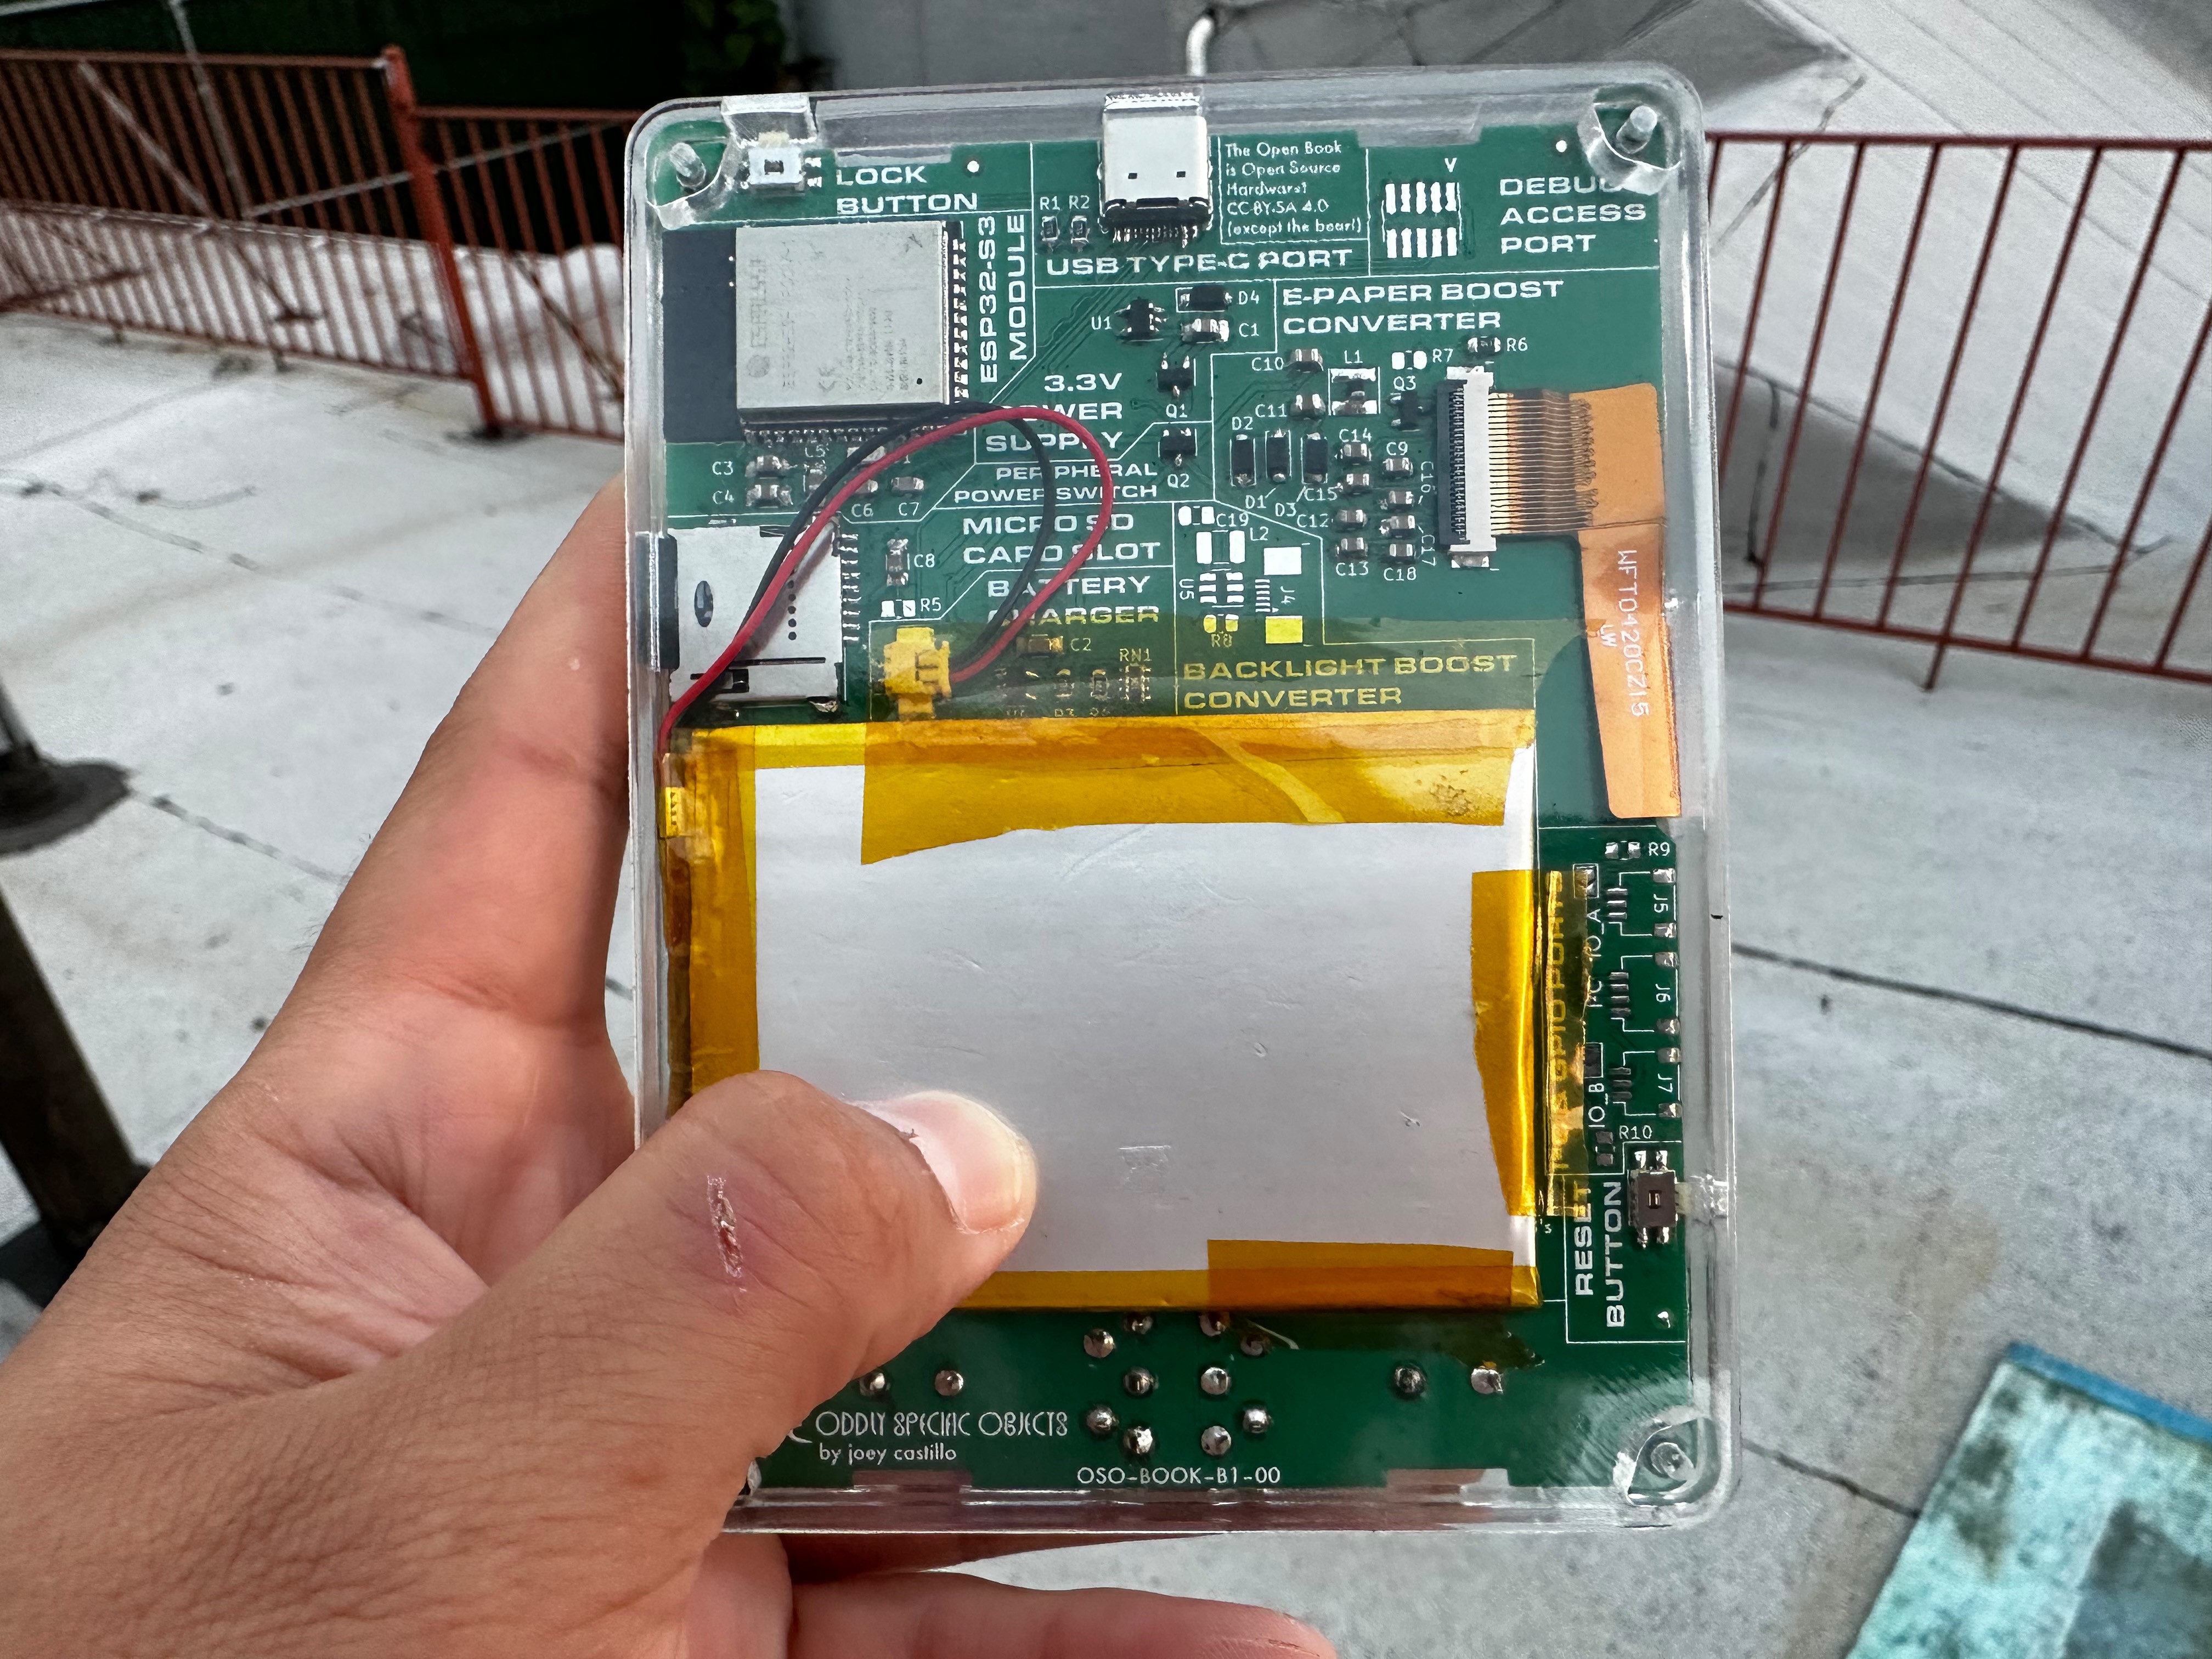
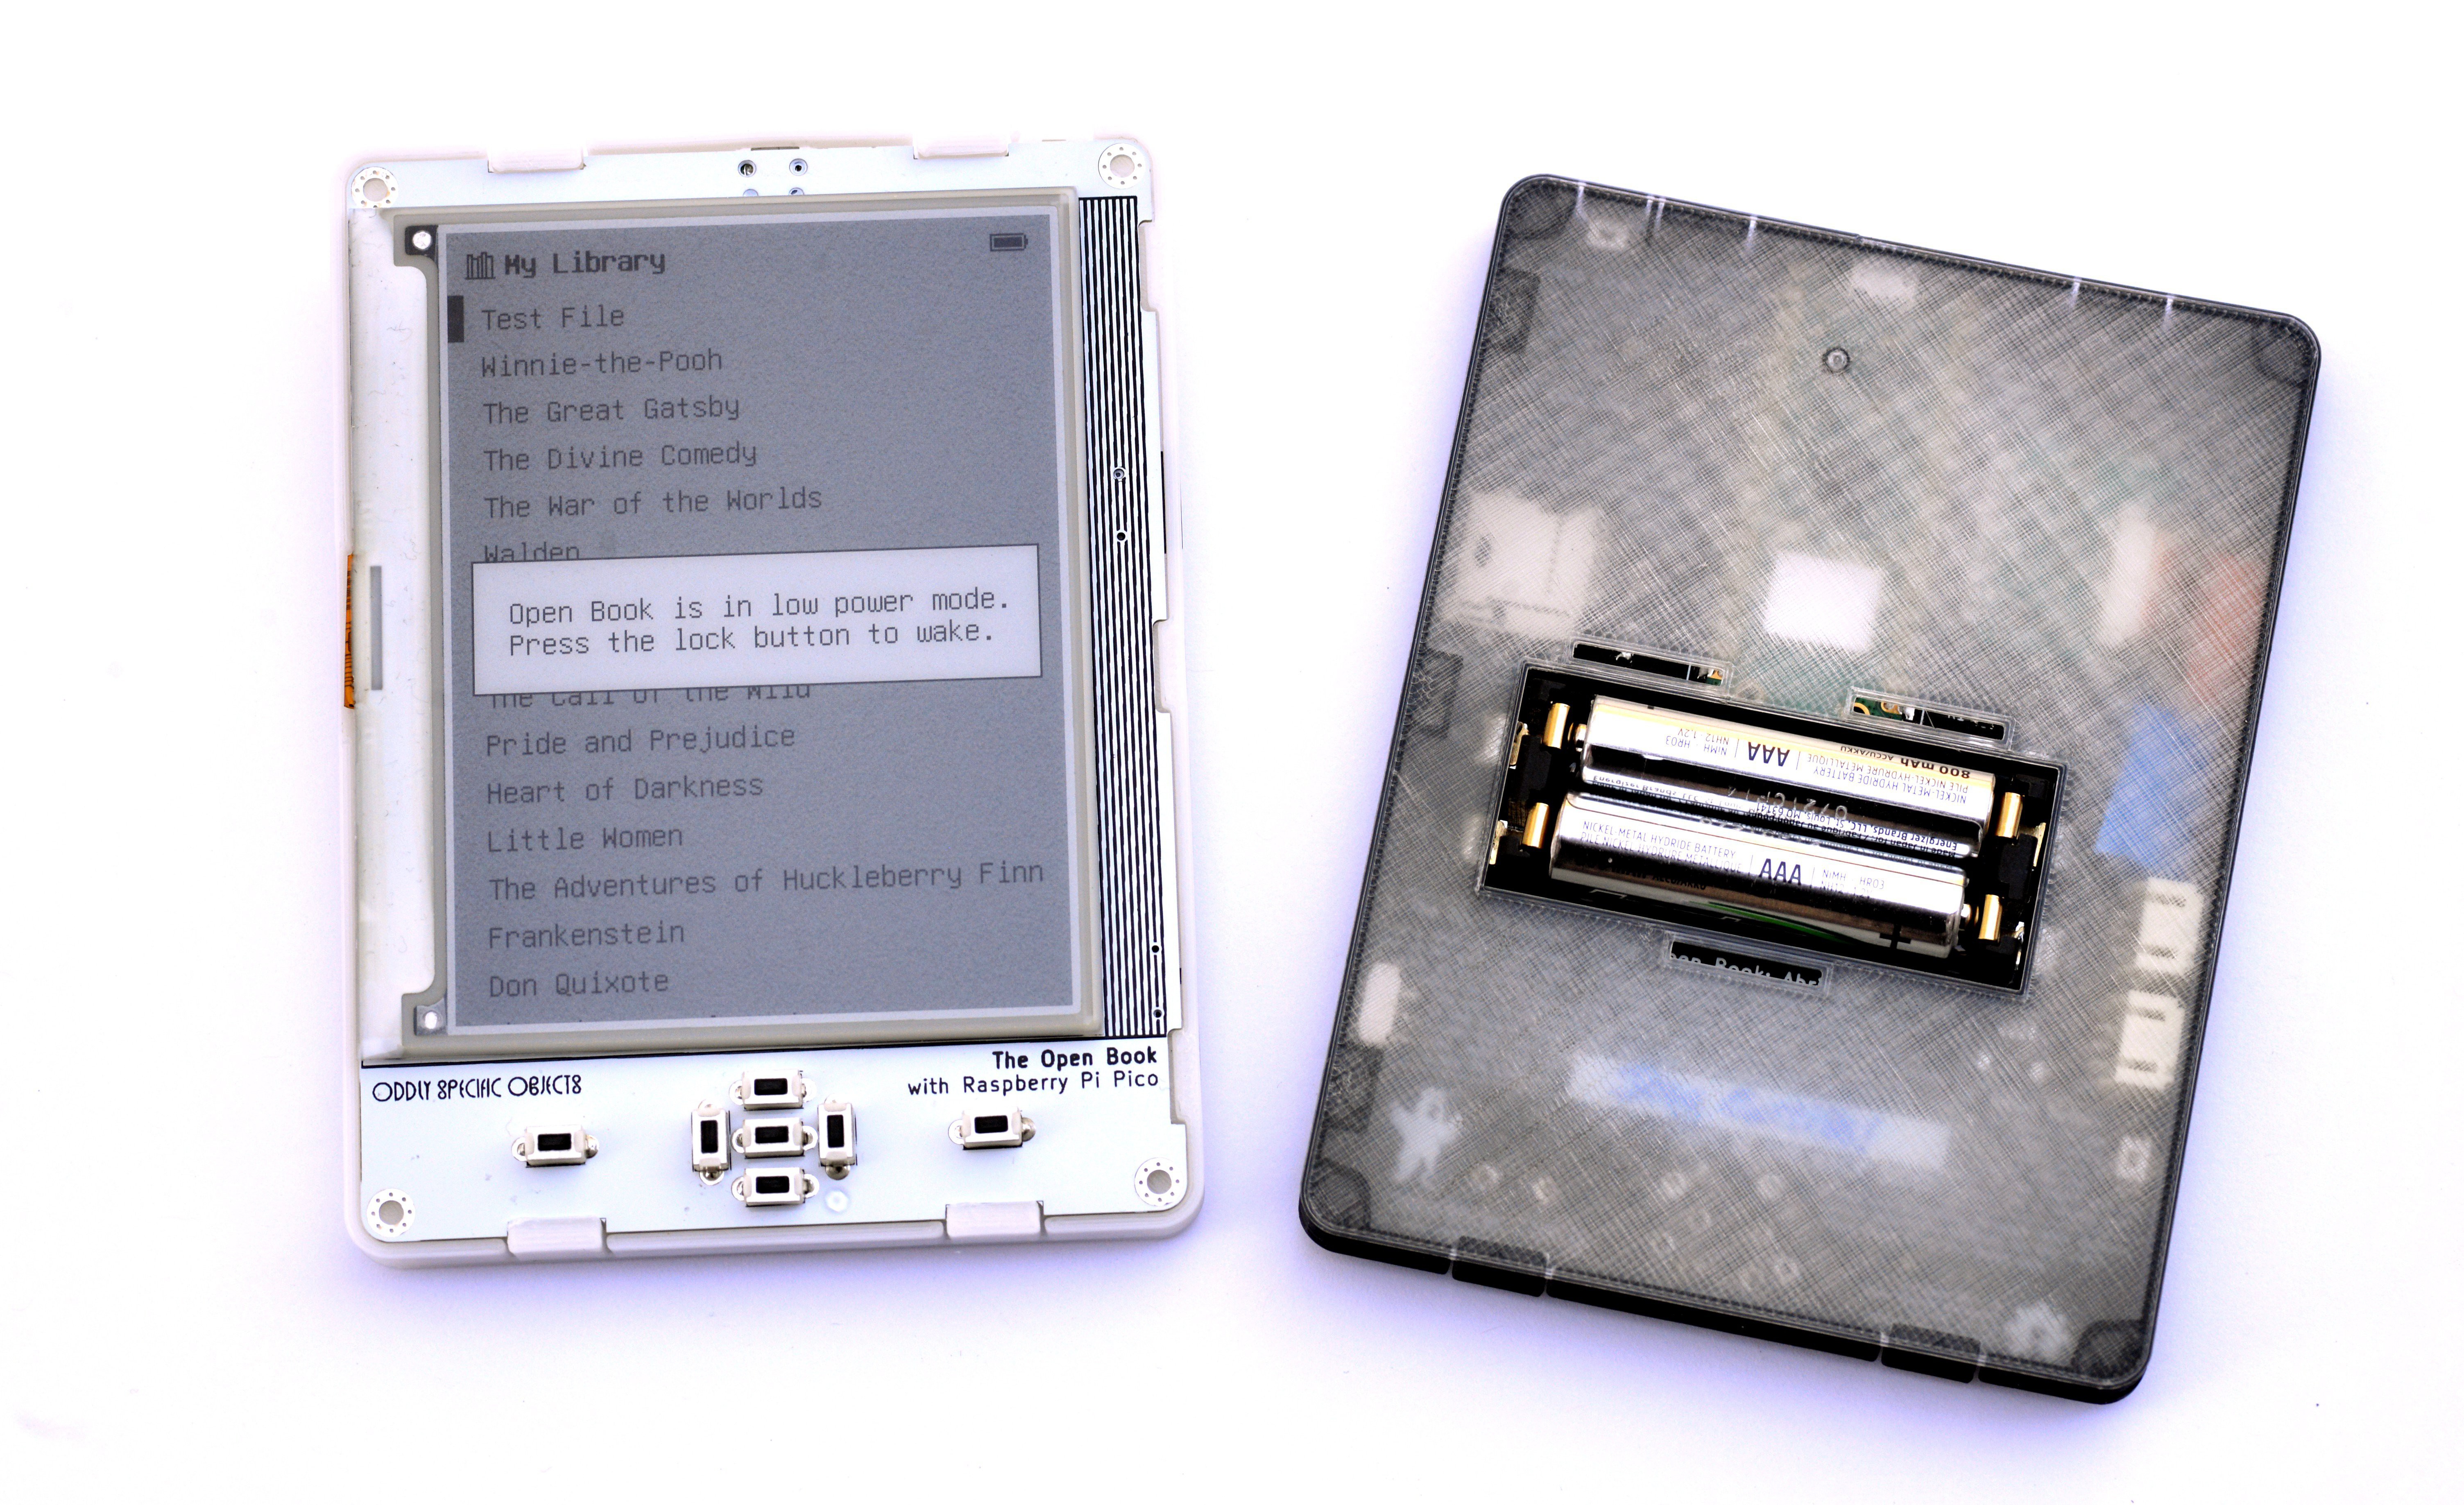
09/27/2023 at 19:56 • 0 commentsOn a lark a few weeks ago, I took my existing Open Book enclosure designs and sent them to PCBWay to try out their 3D printing service. For the record, this was not a PCBWay sponsorship thing; although they have sponsored runs of the circuit boards for workshops in the past, this was just me forking over some cash to try out a new process, as sometimes I do. Anyway, on seeing that they offered an option for printing in completely transparent resin, I leaped at the opportunity to check it out.

I know it's hard to see something whose entire purpose is to be transparent, so here's a close-up of one of the corners, showing how the black metal M2.5 screw connects the front of the enclosure to the backplate:

Anyway, for the record, I don't think you should order this just yet; I can see where I'd like to change the design to implant standoffs for the screws, and the backplate isn't as rigid as I'd like, which is something I think I need to iterate on.
Still, it does look extremely cool, and I think it's rad especially for a project like this that aims to demystify the object inside the enclosure.

-
How the Open Book Saves the World
09/07/2023 at 23:31 • 2 comments
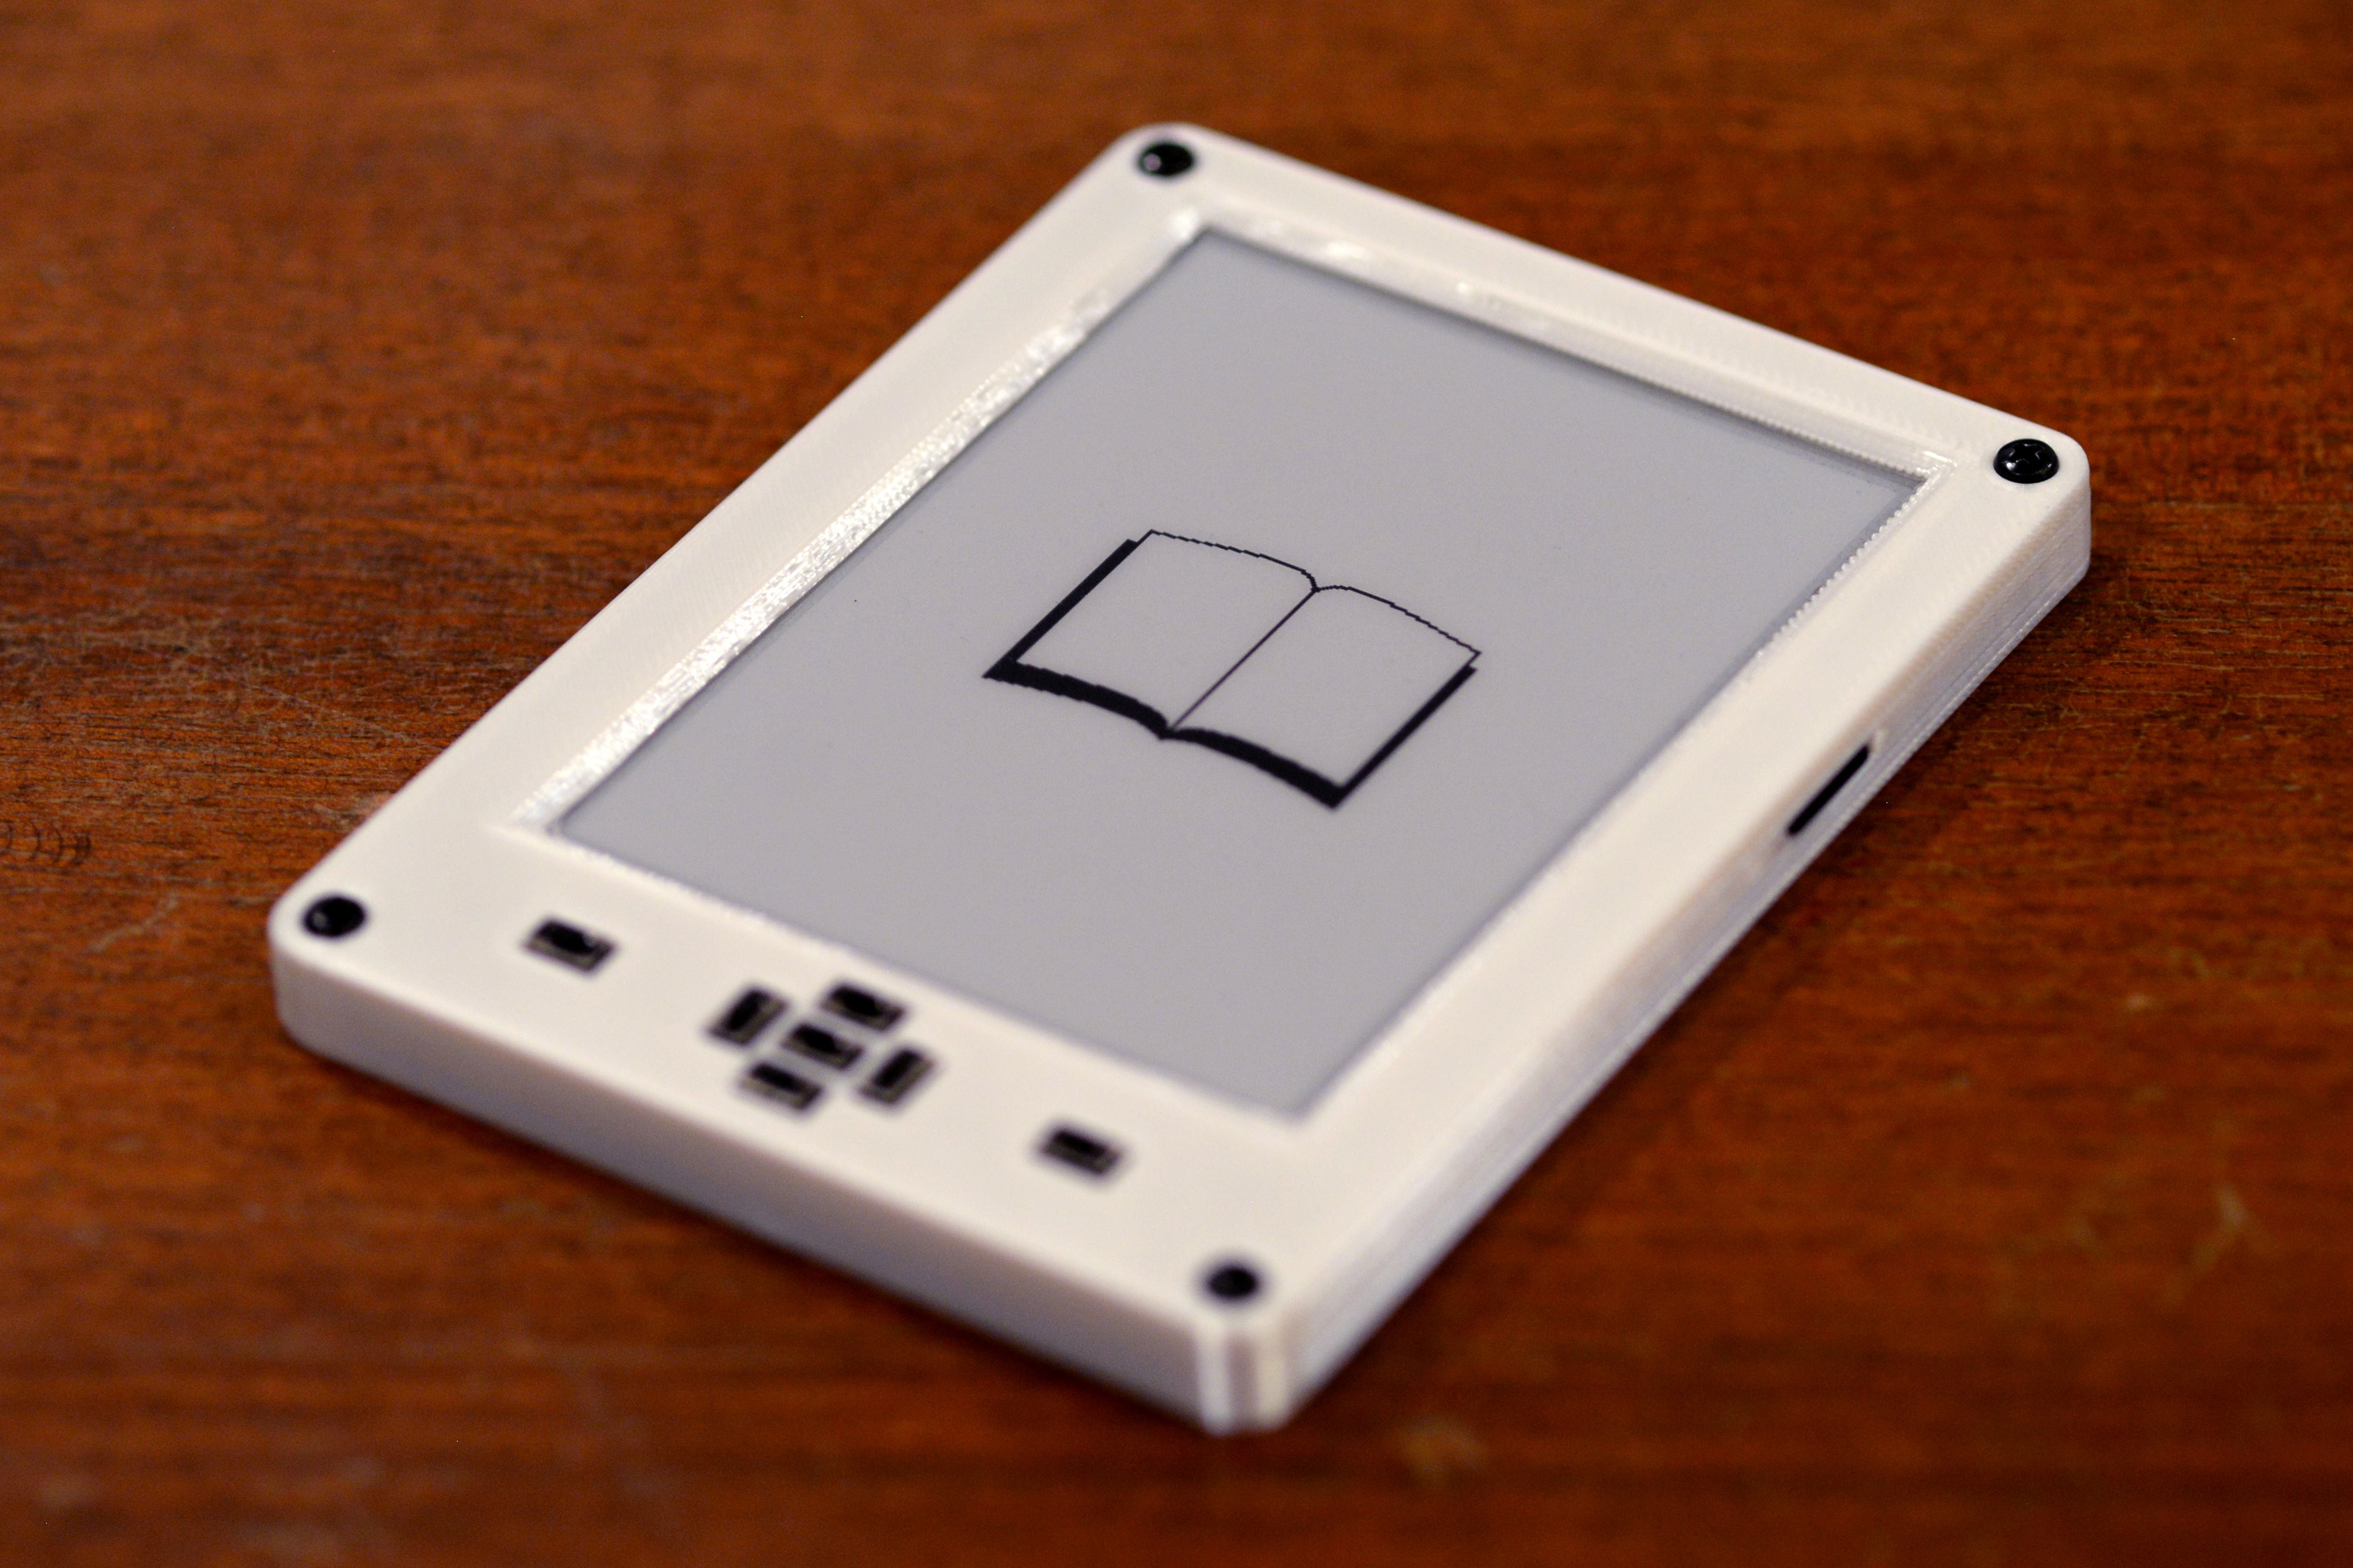
This is my submission for the Hackaday Prize: the ESP32-S3 based Open Book, an open hardware e-book reader that traces its origin to an ancient (or at least pre-pandemic) contest on this very web site. I designed the circuit board from scratch in KiCad in June, after the Hackaday Prize brunch at Teardown inspired me to enter. I prototyped in July, hand-soldering and bodging even as I coded proportional width fonts into the typesetter and worked on new enclosure designs. I wrote project logs in August, describing details about the journey and diving deep into the code and the vision. And I submit it now in September.
This is the first version of this object that meets my high standards, the first version that I consider worthy of consideration for the Hackaday Prize. It is, in just about every way except form factor, very different from the device that I was hacking on in 2019. It’s benefitted from years of lessons learned about what it takes to ship a real object:
- It’s physically slimmed down to a centimeter thin, thanks to a dramatic redesign that also slimmed down the part count, and added a wireless MCU that can do more with less.
- The software’s been rewritten from the ground up, moving from a world of fragile Arduino sketches to a PlatformIO project with a house-built GUI framework, Focus, that’s allowed for massive community involvement.
- And, for what it's worth, the form factor has a ton of subtle changes, accumulated over years of learning about the ergonomics of the object by using it.
ANYWAY. The reason I bring up the differences is that one thing hasn’t changed since the very first commit: the statement of the problem, and the proposed solution. They’re both in the project description above, but I’ll quote the problem statement here:
As a society, we need an open source device for reading. Books are among the most important documents of our culture, yet the most popular and widespread devices we have for reading are closed objects, operating as small moving parts in a set of giant closed platforms whose owners' interests are not always aligned with readers'.
That was true in 2019, and it’s true today.
It is true that we have more and better open source software for e-books now. The KOReader project has matured greatly, and offers an alternative operating system for many e-readers (at least the ones you can jailbreak). Inkbox has also emerged as a promising alternative OS for Kobo. And the reMarkable tablet has spawned a whole ecosystem of community projects.
Still, these are all options for running open source software on closed source hardware. The problems remain — especially the problem that platform owners’s interests are not aligned with readers’. Amazon in particular has made recent versions of their Kindle more resistant to jailbreaking, because they make more money by showing you ads and reading your reading habits.
It also remains a problem that all of these objects are complex and opaque, resisting efforts that would help the user of the object understand how it’s made and how it works. That matters. If the companies making hacker-friendly devices decided to get out of the e-book business, squeezed out by the Amazons of the world — this sort of thing has happened before — we’d have no hardware on which to run the open source software.
For most hardware companies, the incomprehensibility of the object is a feature. It’s the moat that keeps competitors from copying them, and the gate that keeps users locked into their platform. The Open Book proposes a different model for making a personal computing device, one outlined in its solution statement (which also hasn’t changed since 2019). In this final post before submitting for the Save the World Wildcard, I figured I’d step through each clause, section by section.
The Open Book aims to be a simple device that anyone can build for themselves.
The simplicity of the Open Book is maybe the biggest departure from the current crop of e-book readers, in that it's built around a microcontroller rather than a full-featured, Linux-capable SoC. This makes it low-power by default, and helps us to avoid many of the complexities like power management that come with designing a single-board computer. The ESP32-S3 gives us a CPU, Flash memory for program storage and font data and enough RAM to buffer a two-bit grayscale display, plus WiFi and Bluetooth (which we don’t even make use of yet) — all in one package whose external component requirements boil down to a pull-up resistor and some 10µF capacitors.
It’s very simple.
The second clause, “that anyone can build for themselves”, has taken on different meanings over the course of the project. At first I thought it meant that one person, alone with a soldering iron, should have the capacity to build this object. Over the years I’ve learned that not everyone wants that. It’s still possible, of course; I hand-solder every Open Book prototype myself. But the ESP32-S3 Open Book is designed for manufacturability, and it’s designed for manufacturability by even the most home-brew setup possible:
- It’s a two-layer board with design rules that any PCB house can fabricate cheaply.
- All passives are 0805 or 1206, which means you can place them with tweezers or an open source pick and place.
- Assembly is single-sided, except for some through-hole buttons that we may be able to get rid of.
- All pads are exposed, which makes rework easy.
- The part count is low: on the order of 45 surface mount parts in a minimal configuration, and 55 with all features included.
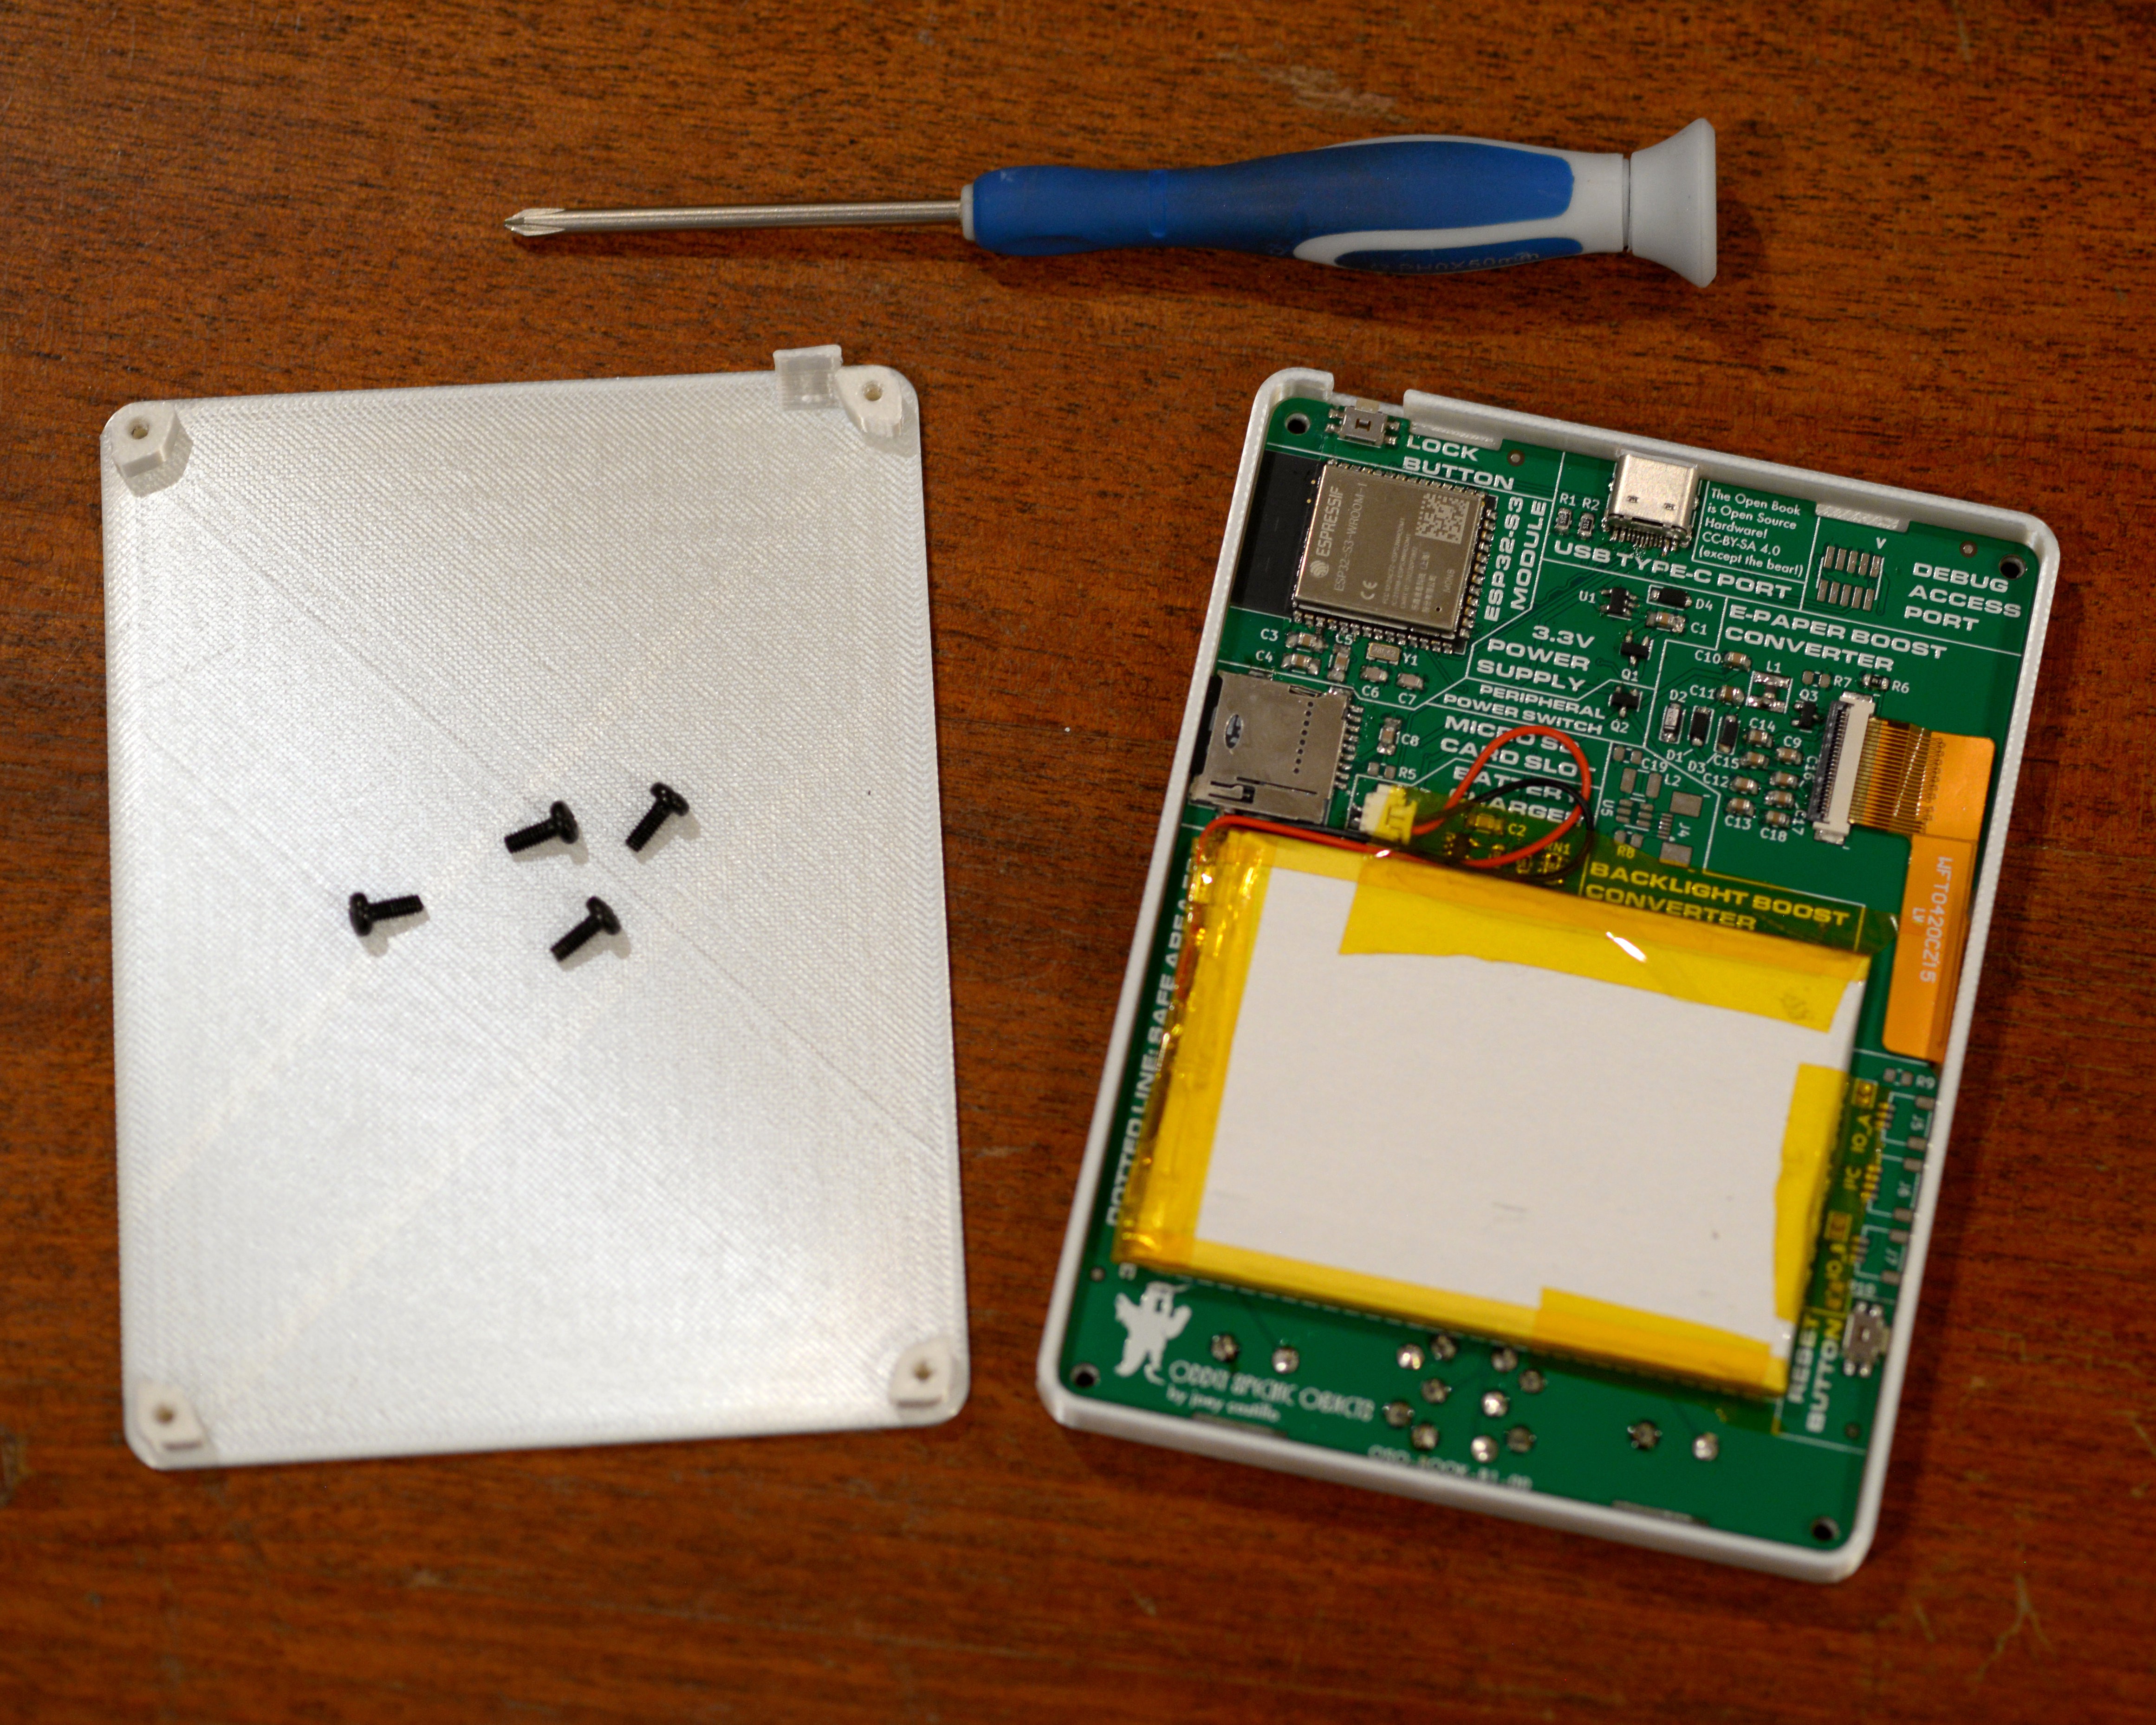
- Finally, the enclosure is 3D-printable on even the most basic 3D printers, and it’s held together with nothing more than four M2.5 screws.

I think this object is simple enough to build now that anyone with a membership at a hacker space could spin up a little Open Book manufacturing side hustle.
The Open Book should be comprehensible: the reader should be able to look at it and understand, at least in broad strokes, how it works.
While it doesn’t have quite the same “Dr. Bronner’s” energy as the 2019 Open Book, which strove to explain every aspect of its operation, this ESP32-S3 Open Book still leans in to comprehensibility.

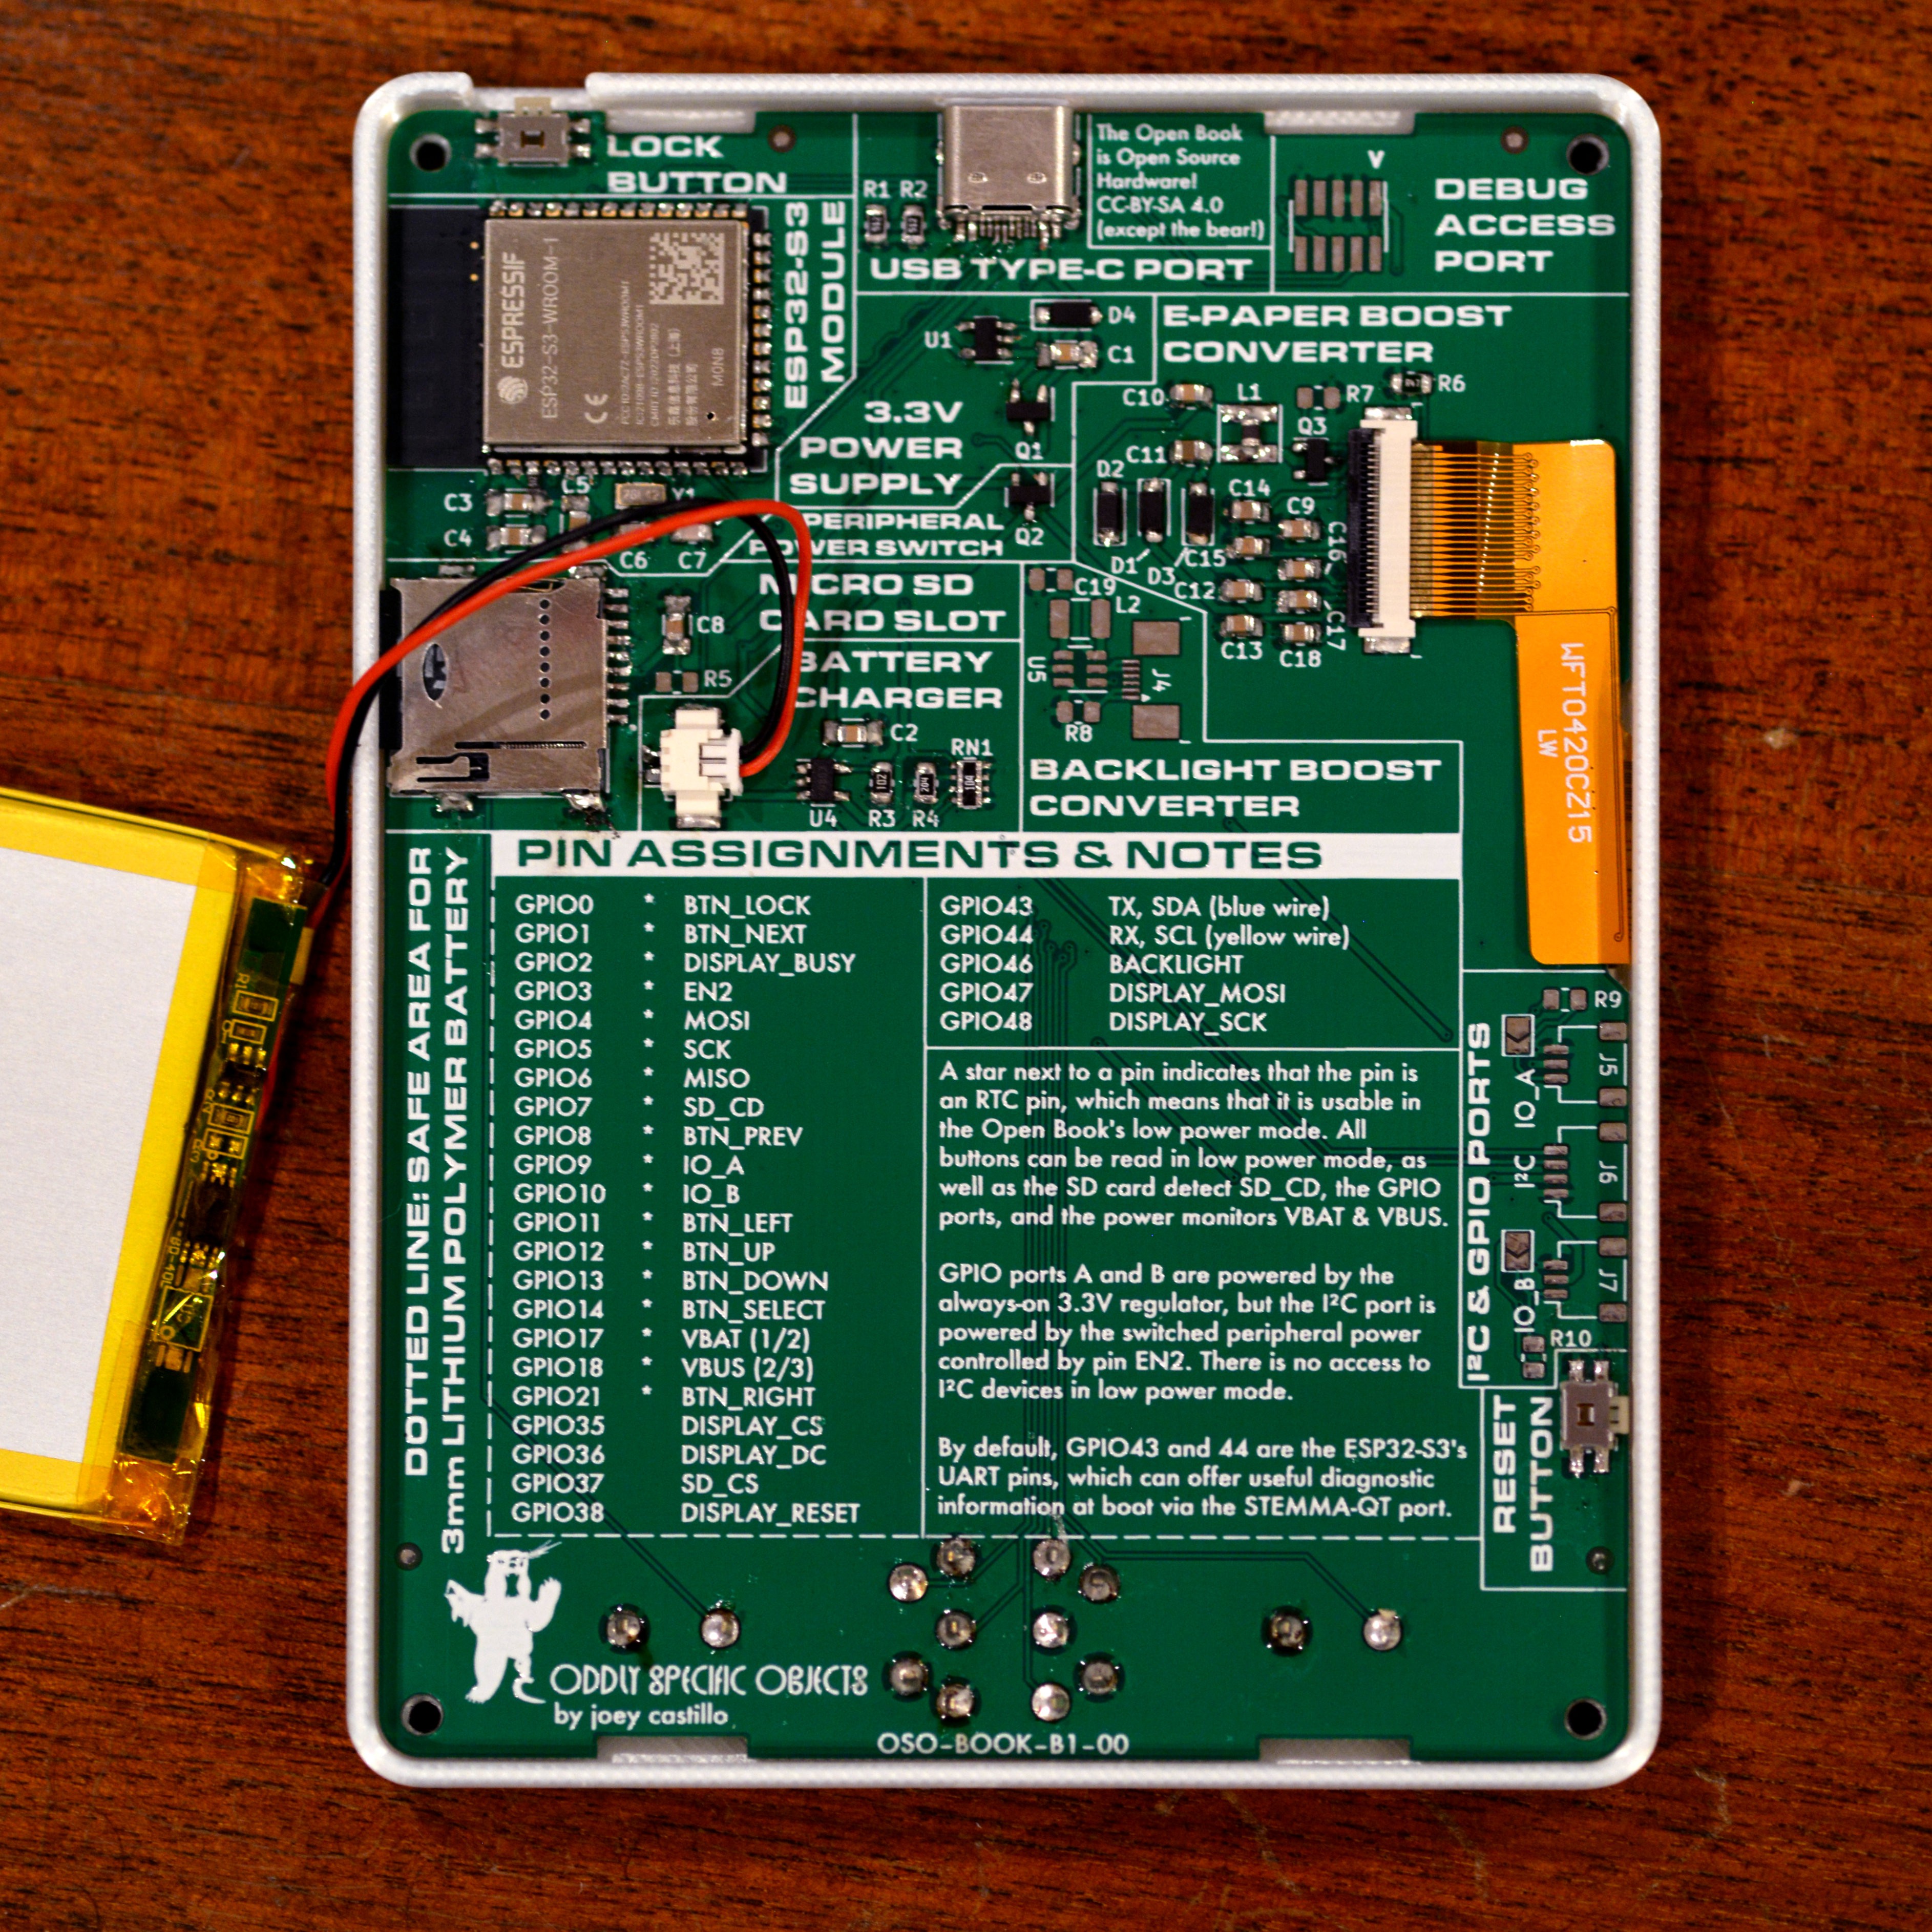
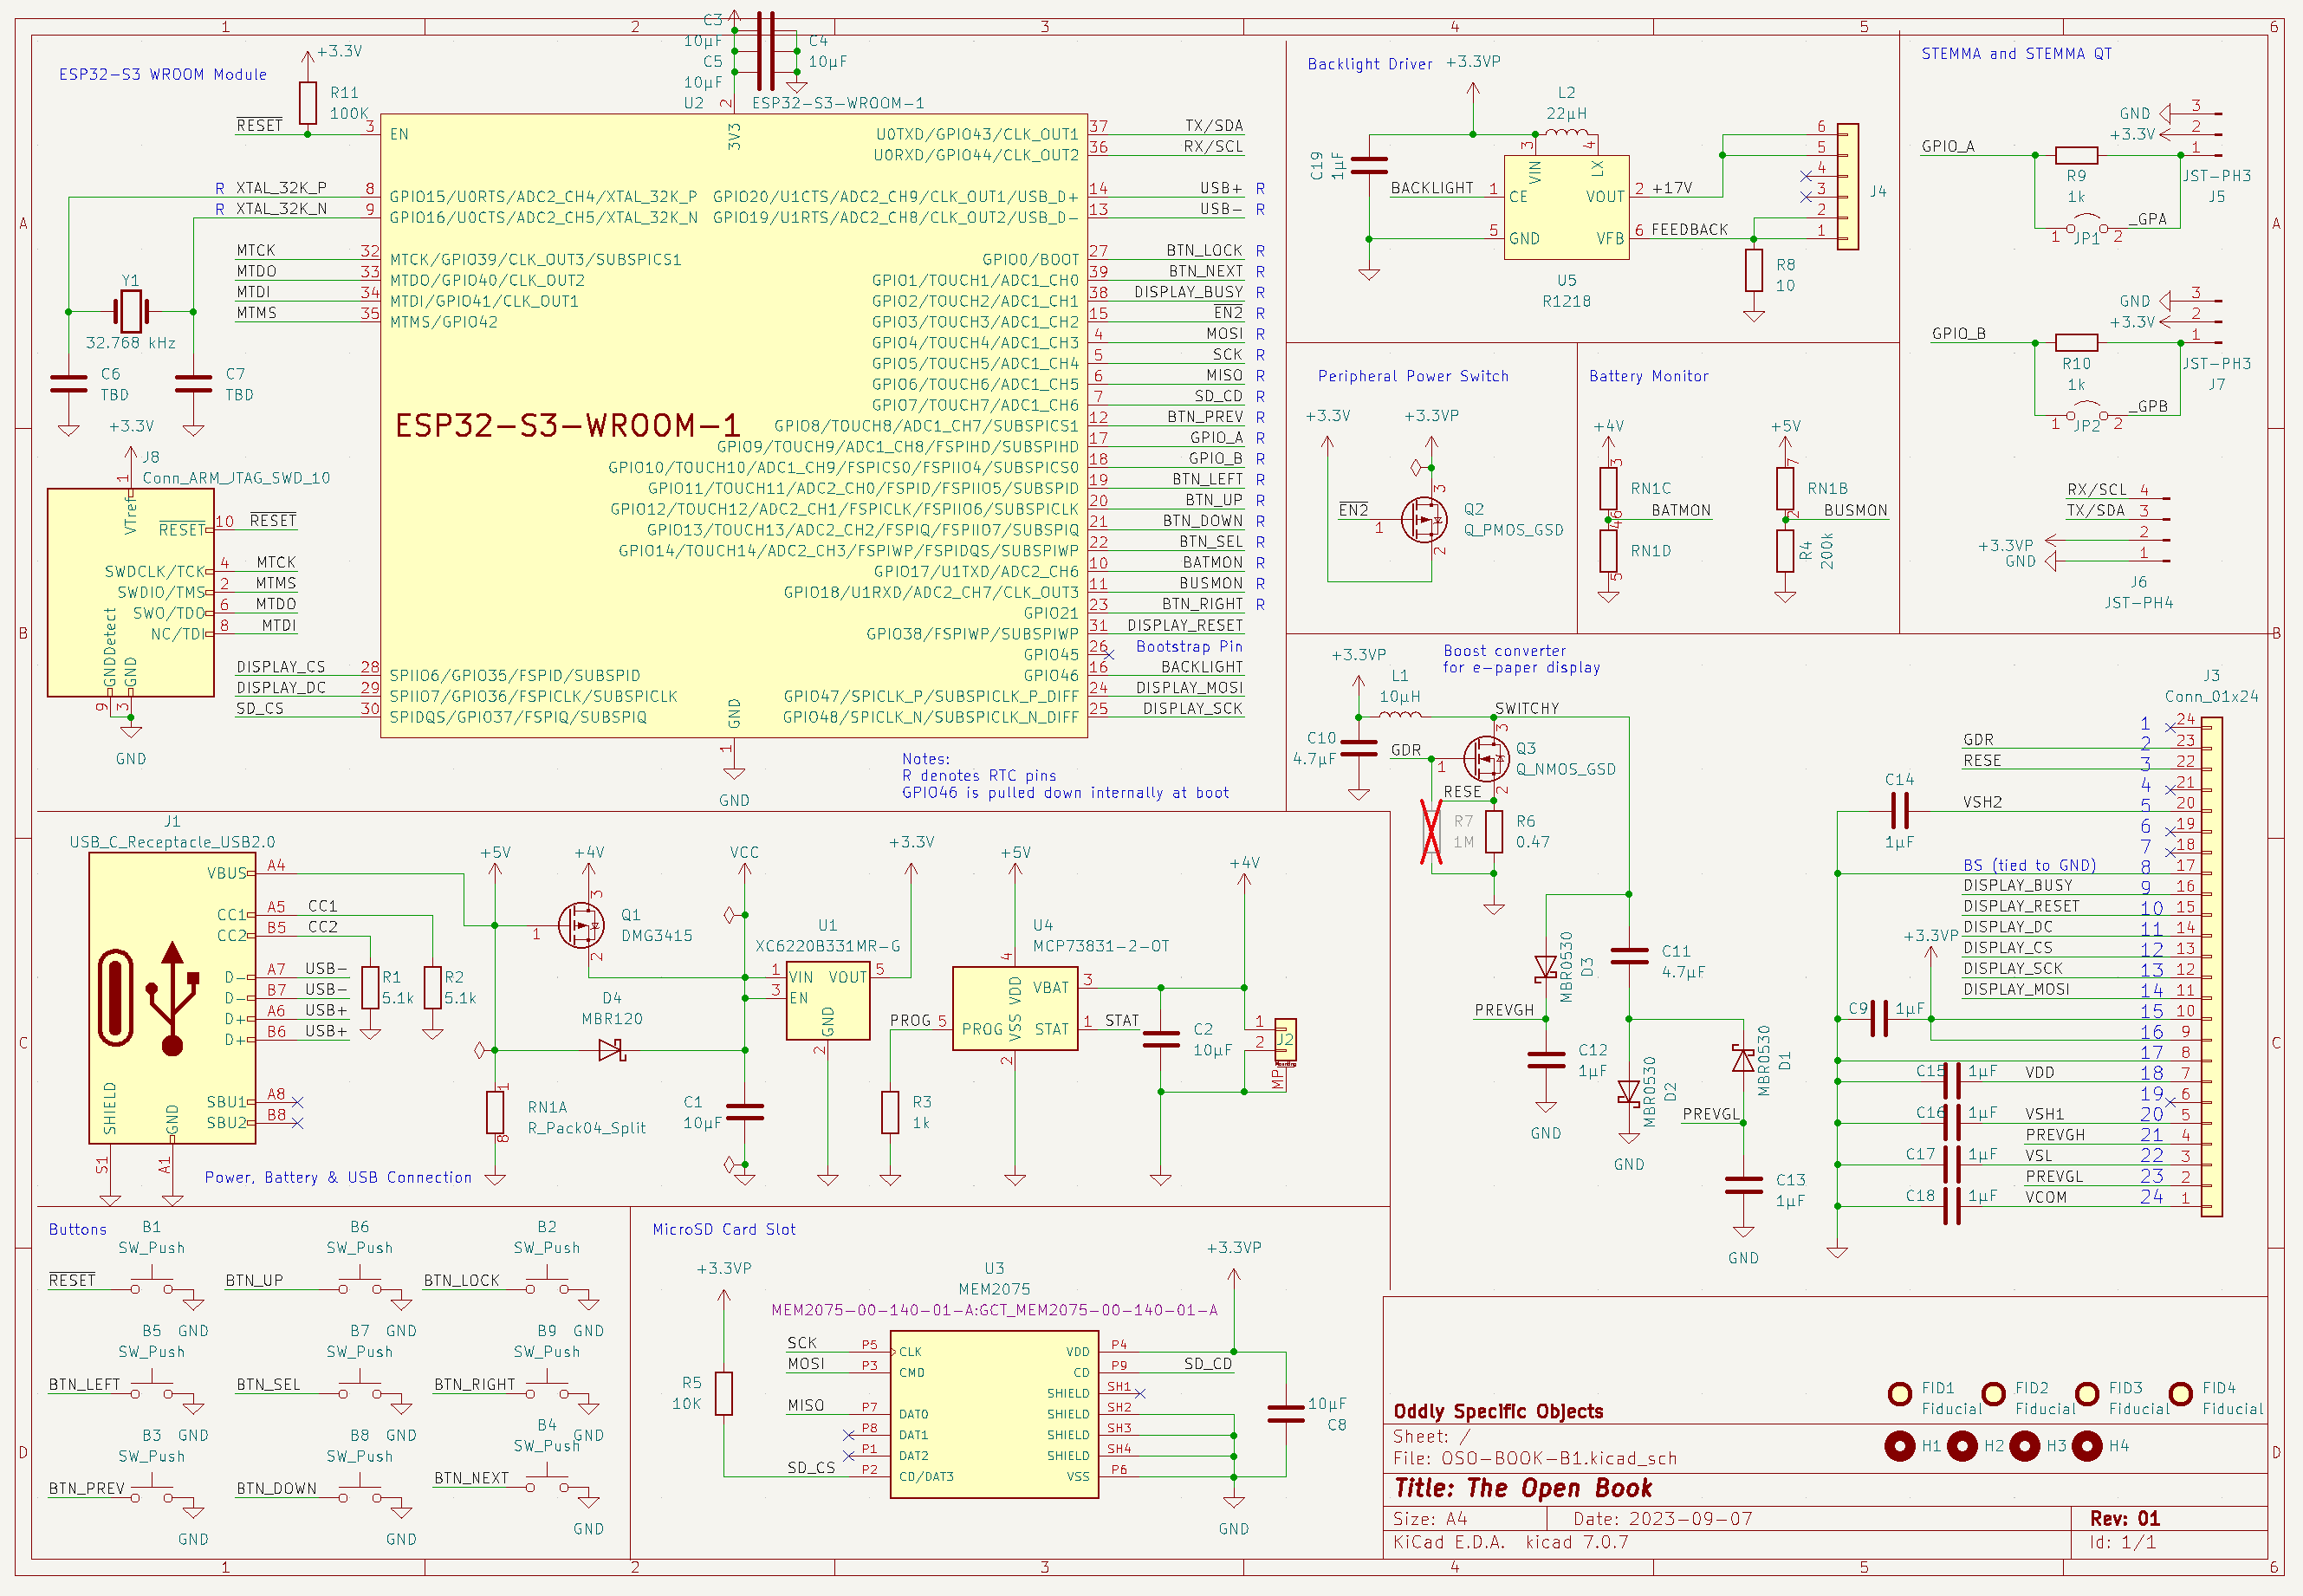
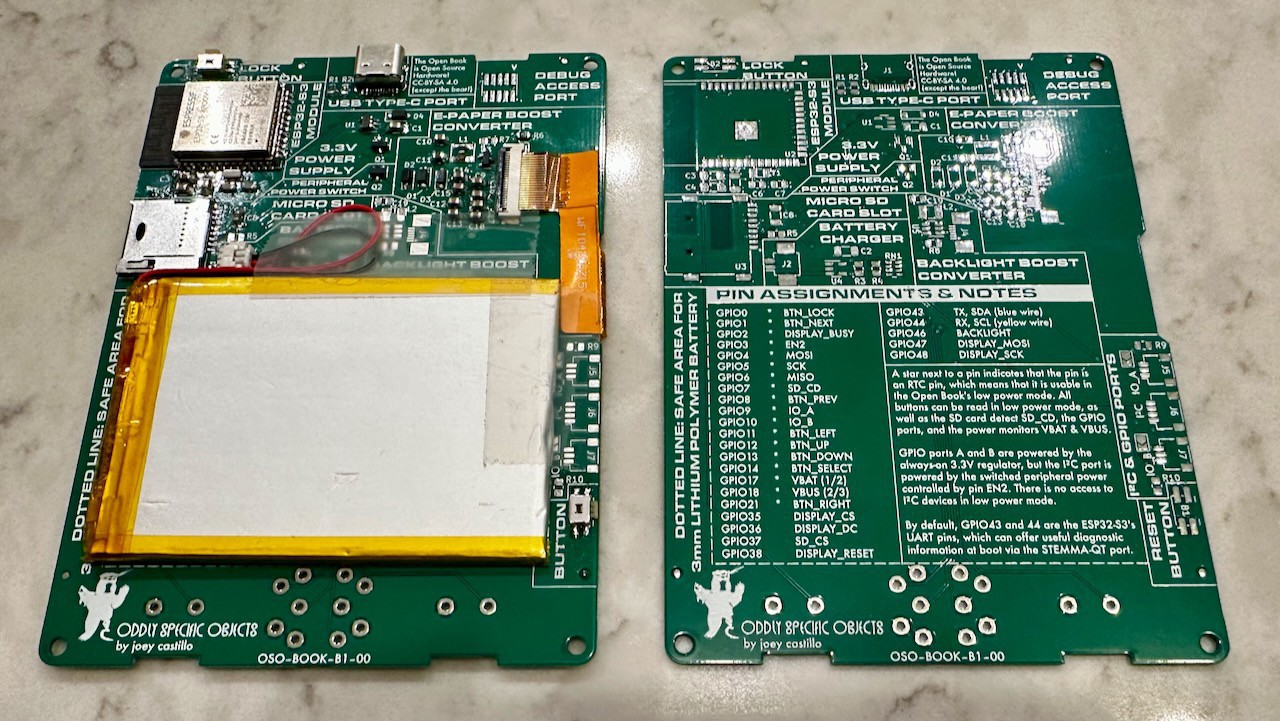
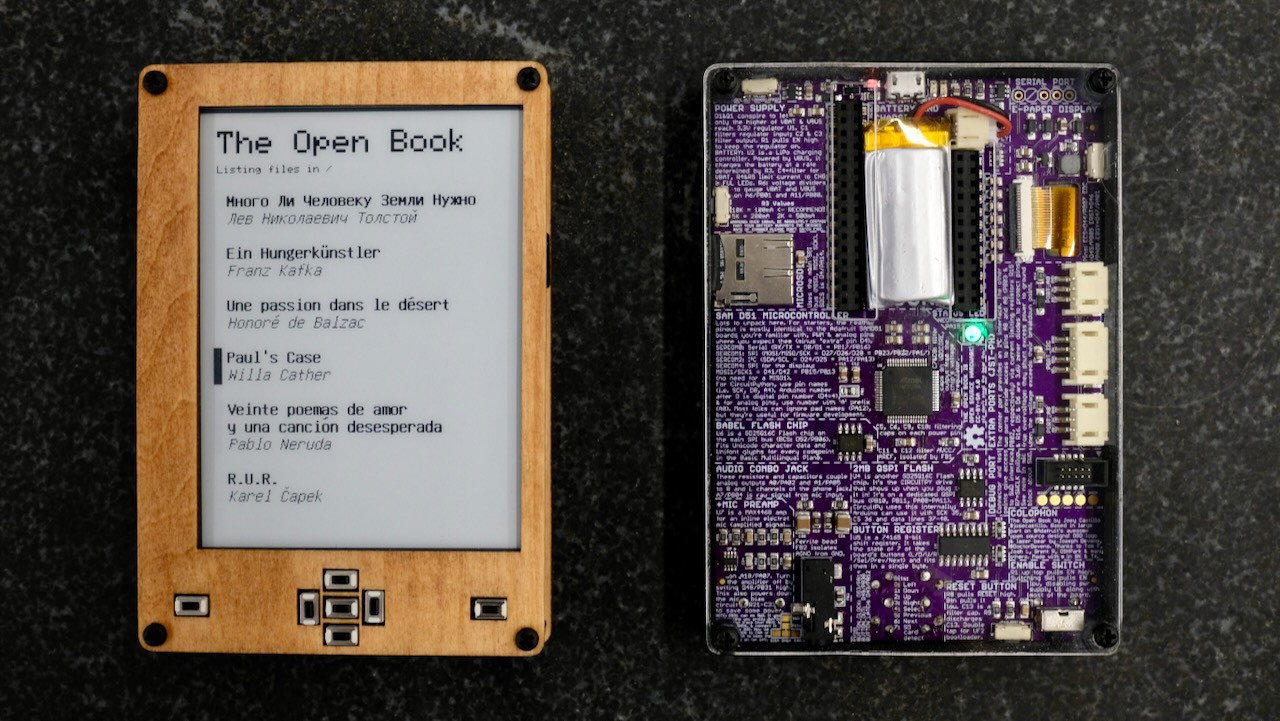
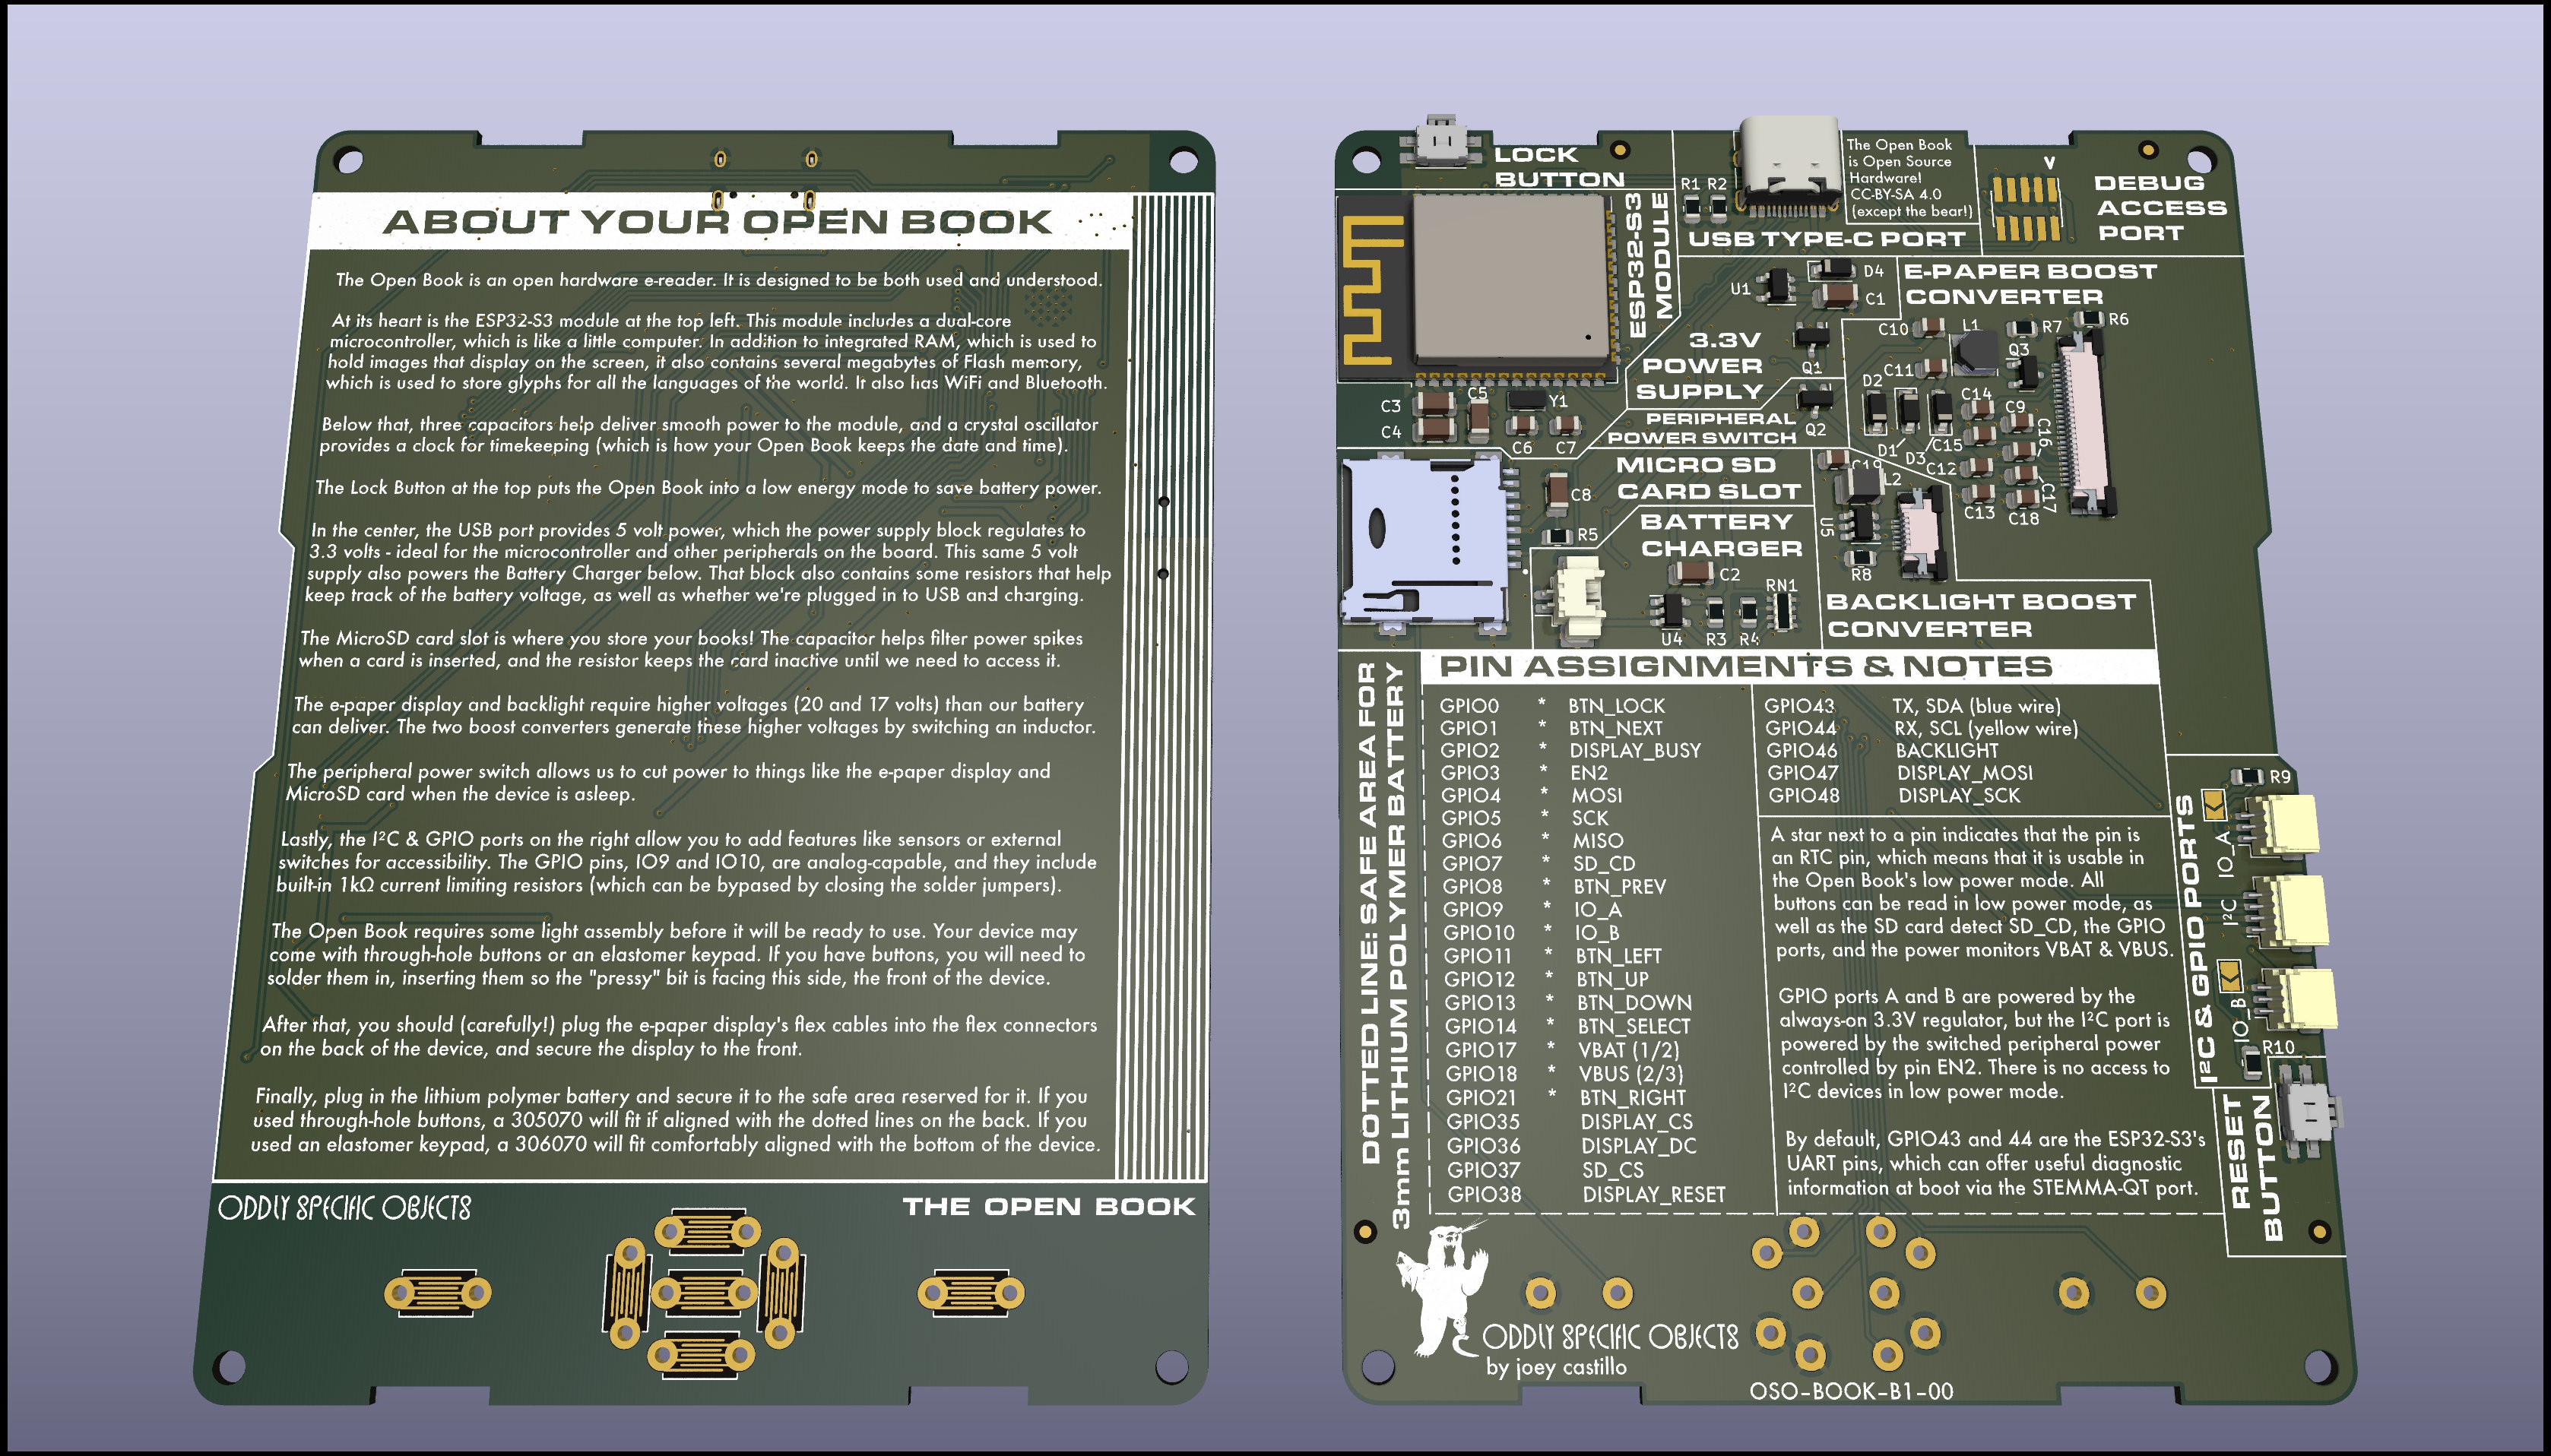
All parts are placed in groups, with their purpose clearly marked. I may not have the room to explain just how the e-paper boost circuit works, but at least it’s clear that that cluster of parts relates to that aspect of the object — and if you want to go to the schematic, you’ll find the same grouping of components there too.

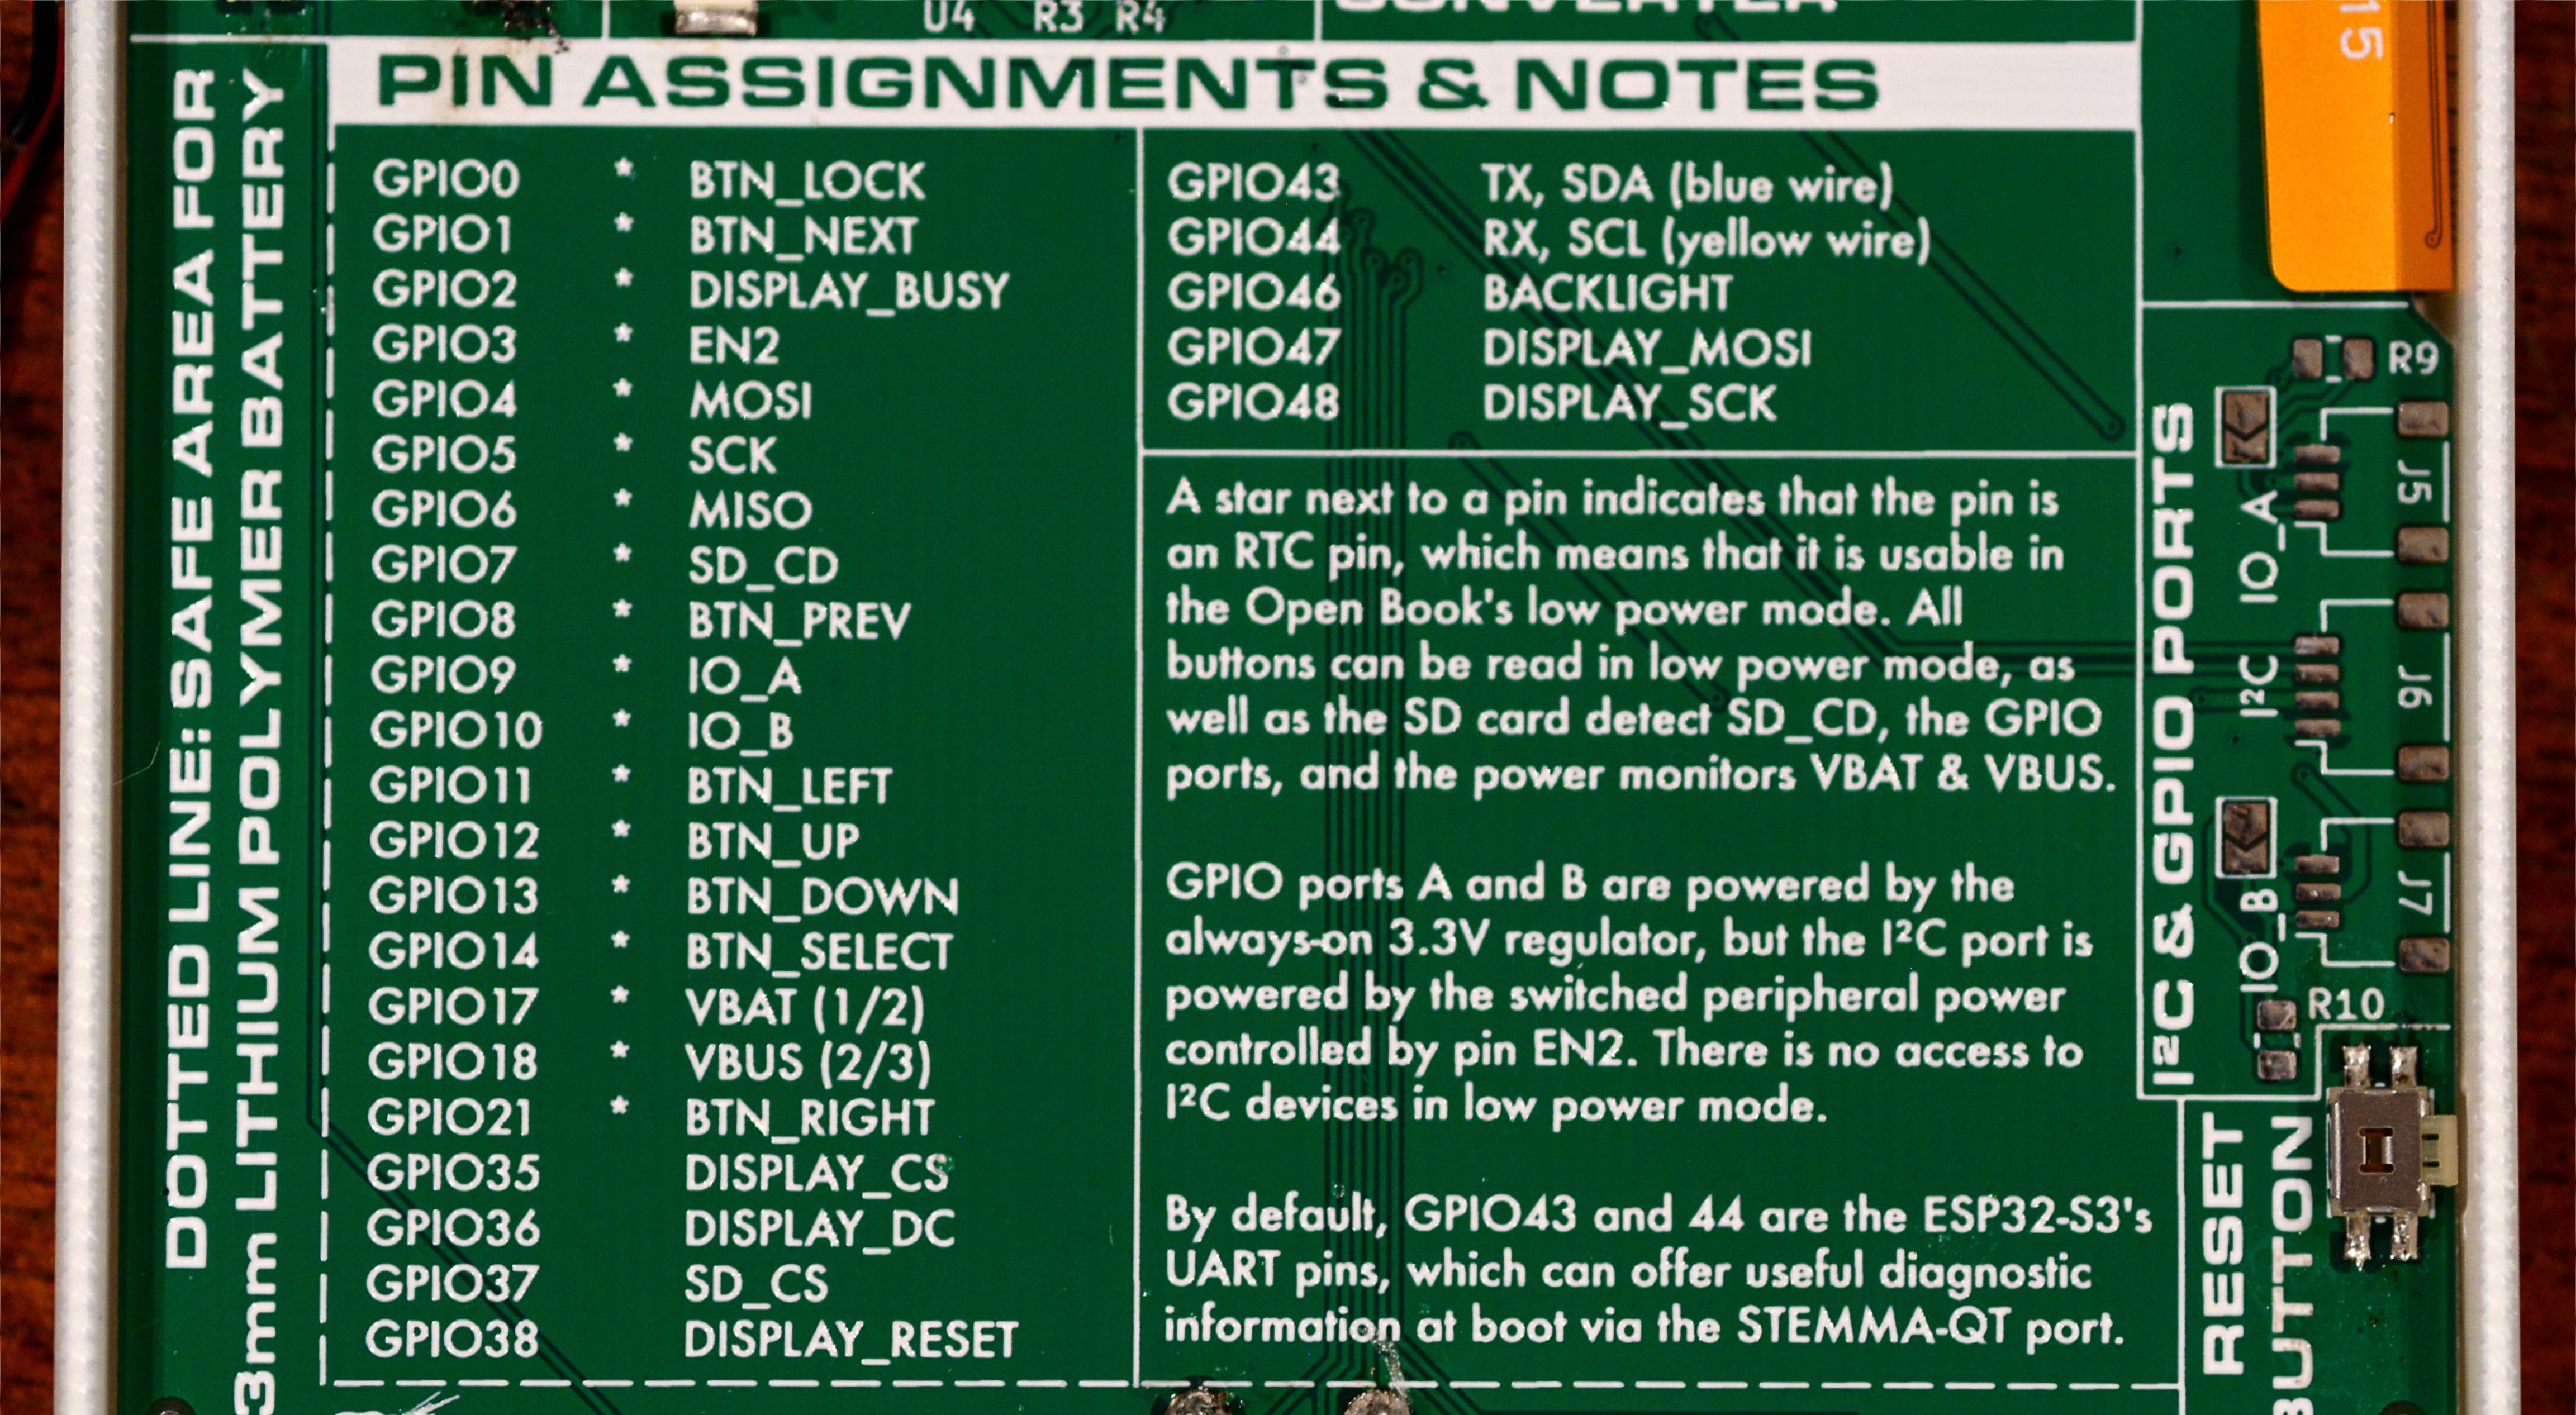
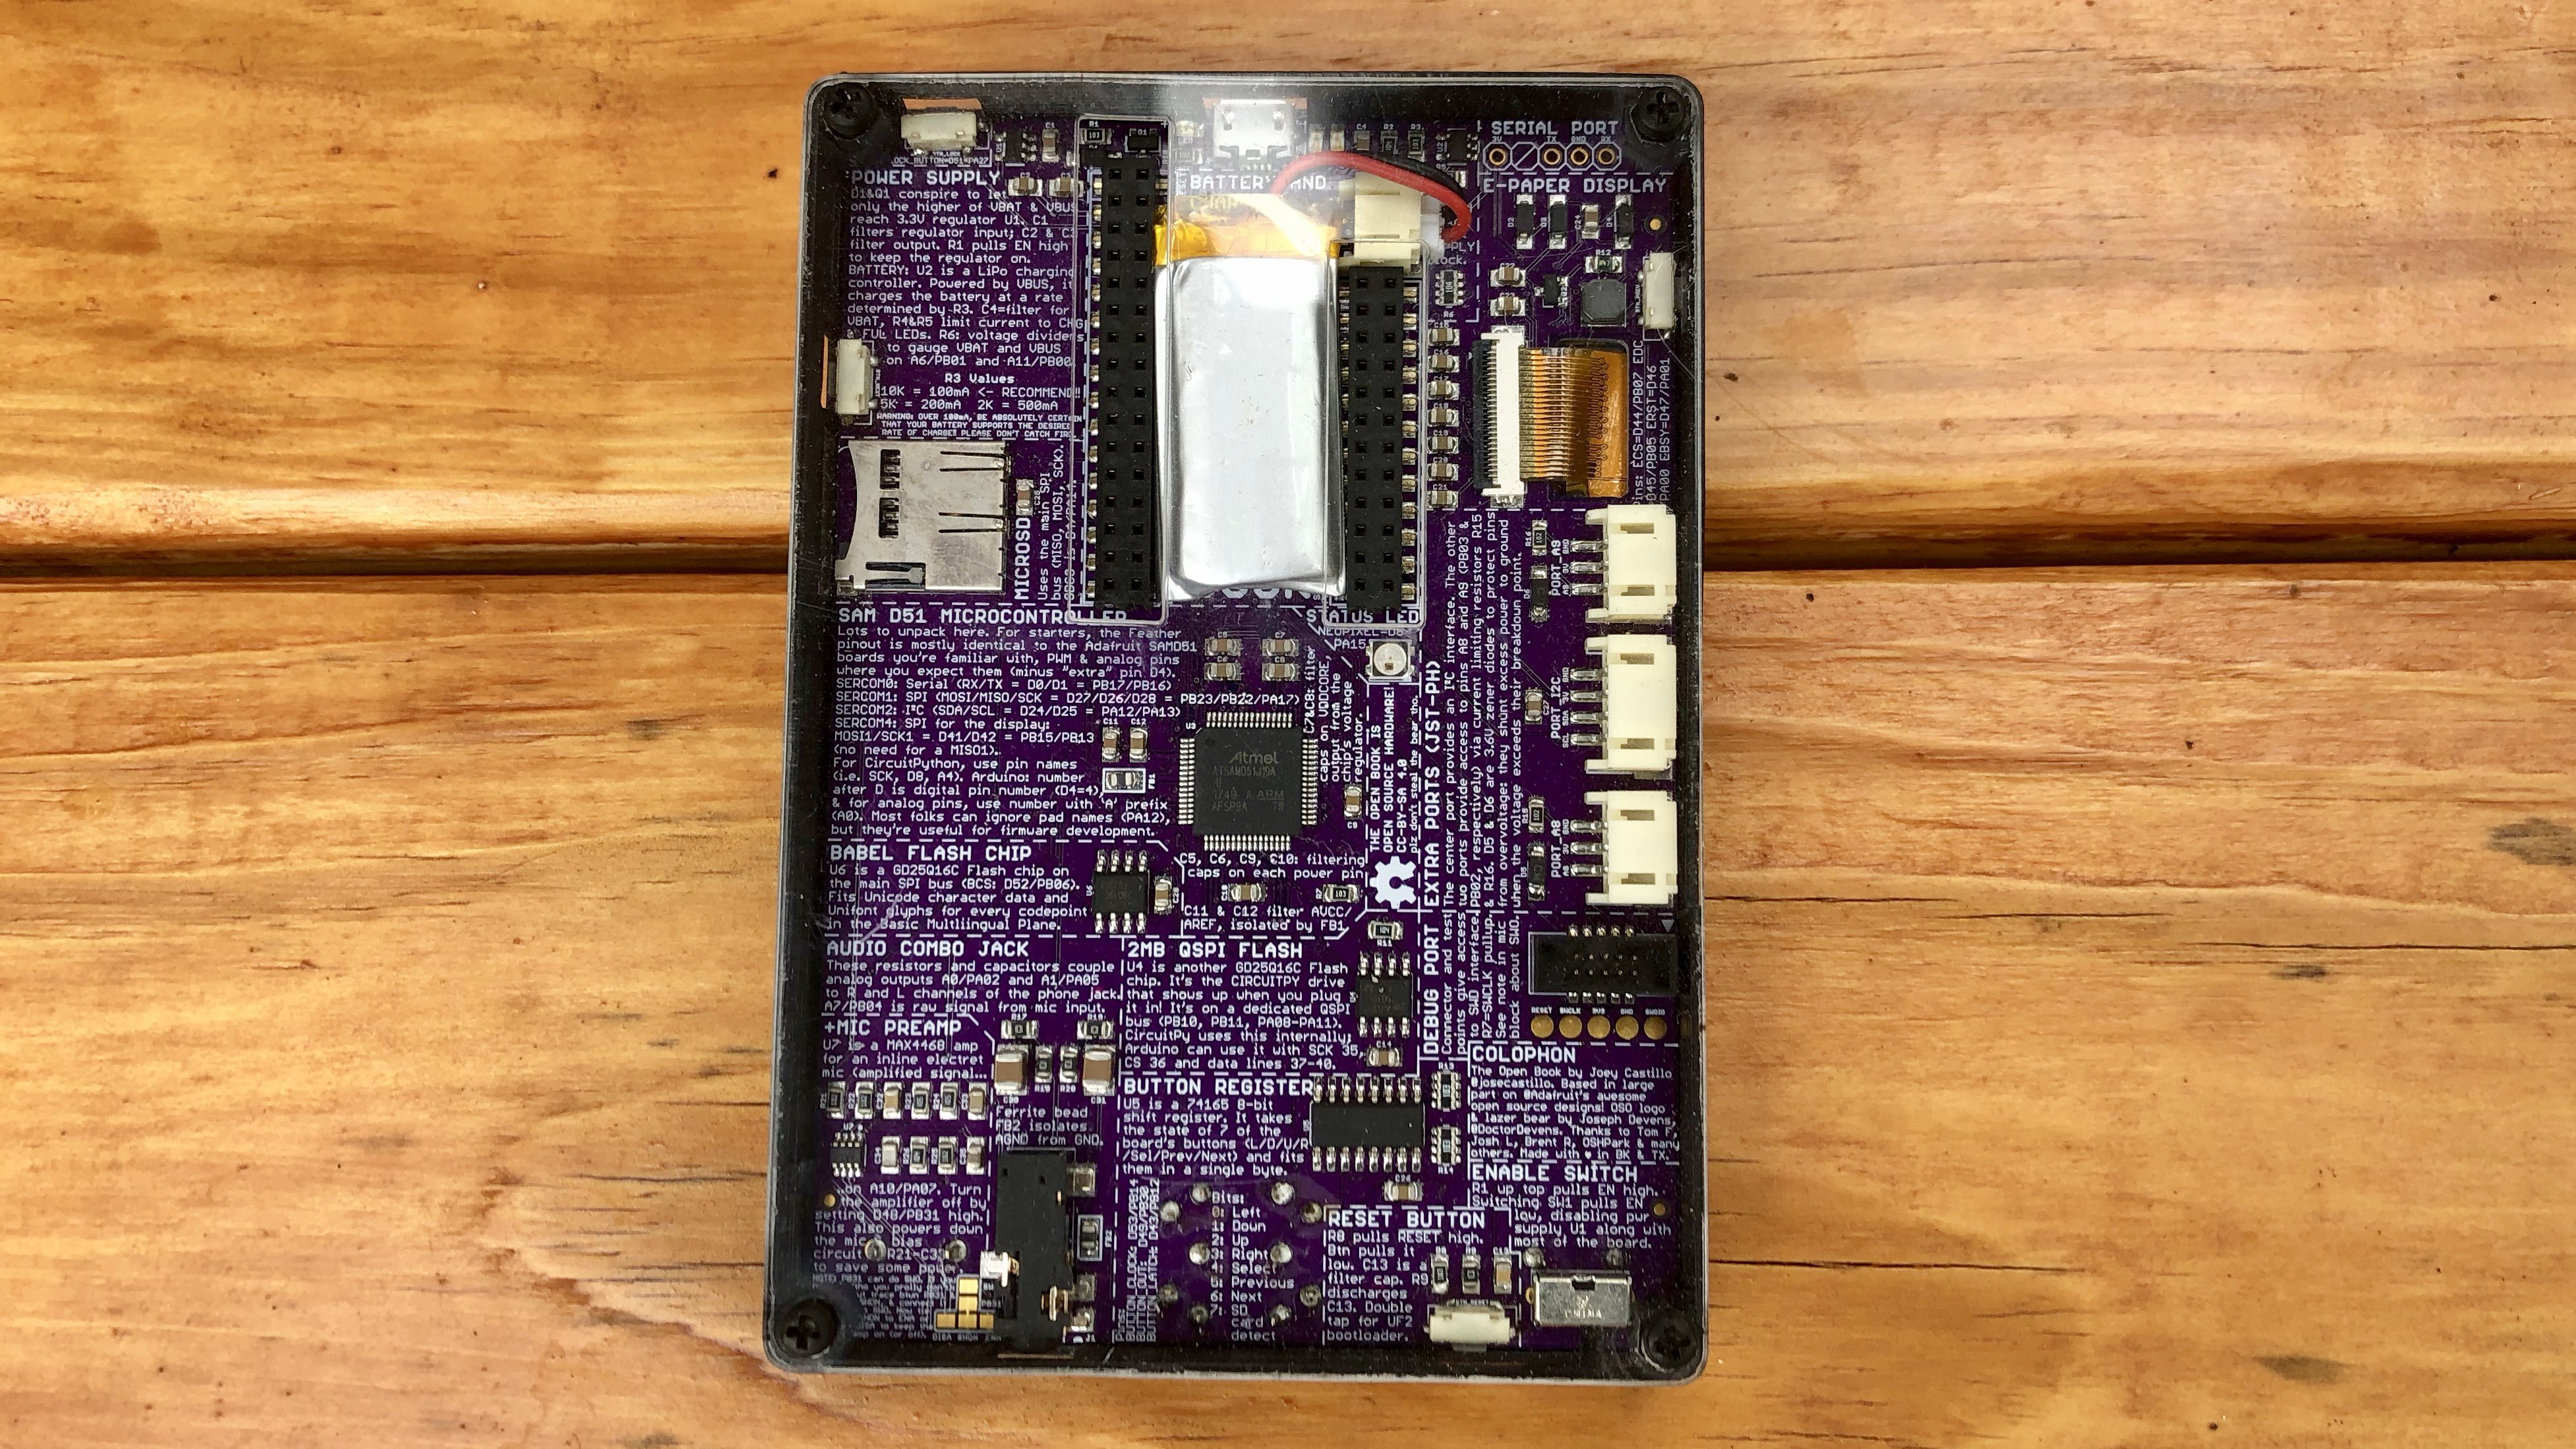
Down below, I've used the battery keepout area to offer something that I’ve realized is even more useful than a narrative explanation: the Open Book includes a technical description of all the pins and functions of the microcontroller, along with a short narrative that describes some of the subtler aspects of the design.

I’m going to be honest: this is partly to make the object comprehensible to me; I can’t count the number of times I’ve referred back to this guide when hacking on the new firmware build for this version of the hardware.
It should be extensible, so that a reader with different needs can write code and add accessories that make the book work for them.
At the end of that narrative description, you’ll notice the bit about the I²C port and GPIO’s A and B. This is a feature of the Open Book that’s been there since the beginning, and that I still think remains important and valuable. Not everyone has the same physical abilities or even wants to use the device in the same way; some people have trouble hand-holding a device; others may struggle with pressing the physical buttons on a gadget like this.
The two GPIO ports could allow for the addition of alternative input methods like a foot pedal or analog dial (both IO’s are on ADC pins). The I²C port could be used to add a variety of digital sensors, such as a gesture sensor or a GPIO expander that would allow for more and more complex types of input.
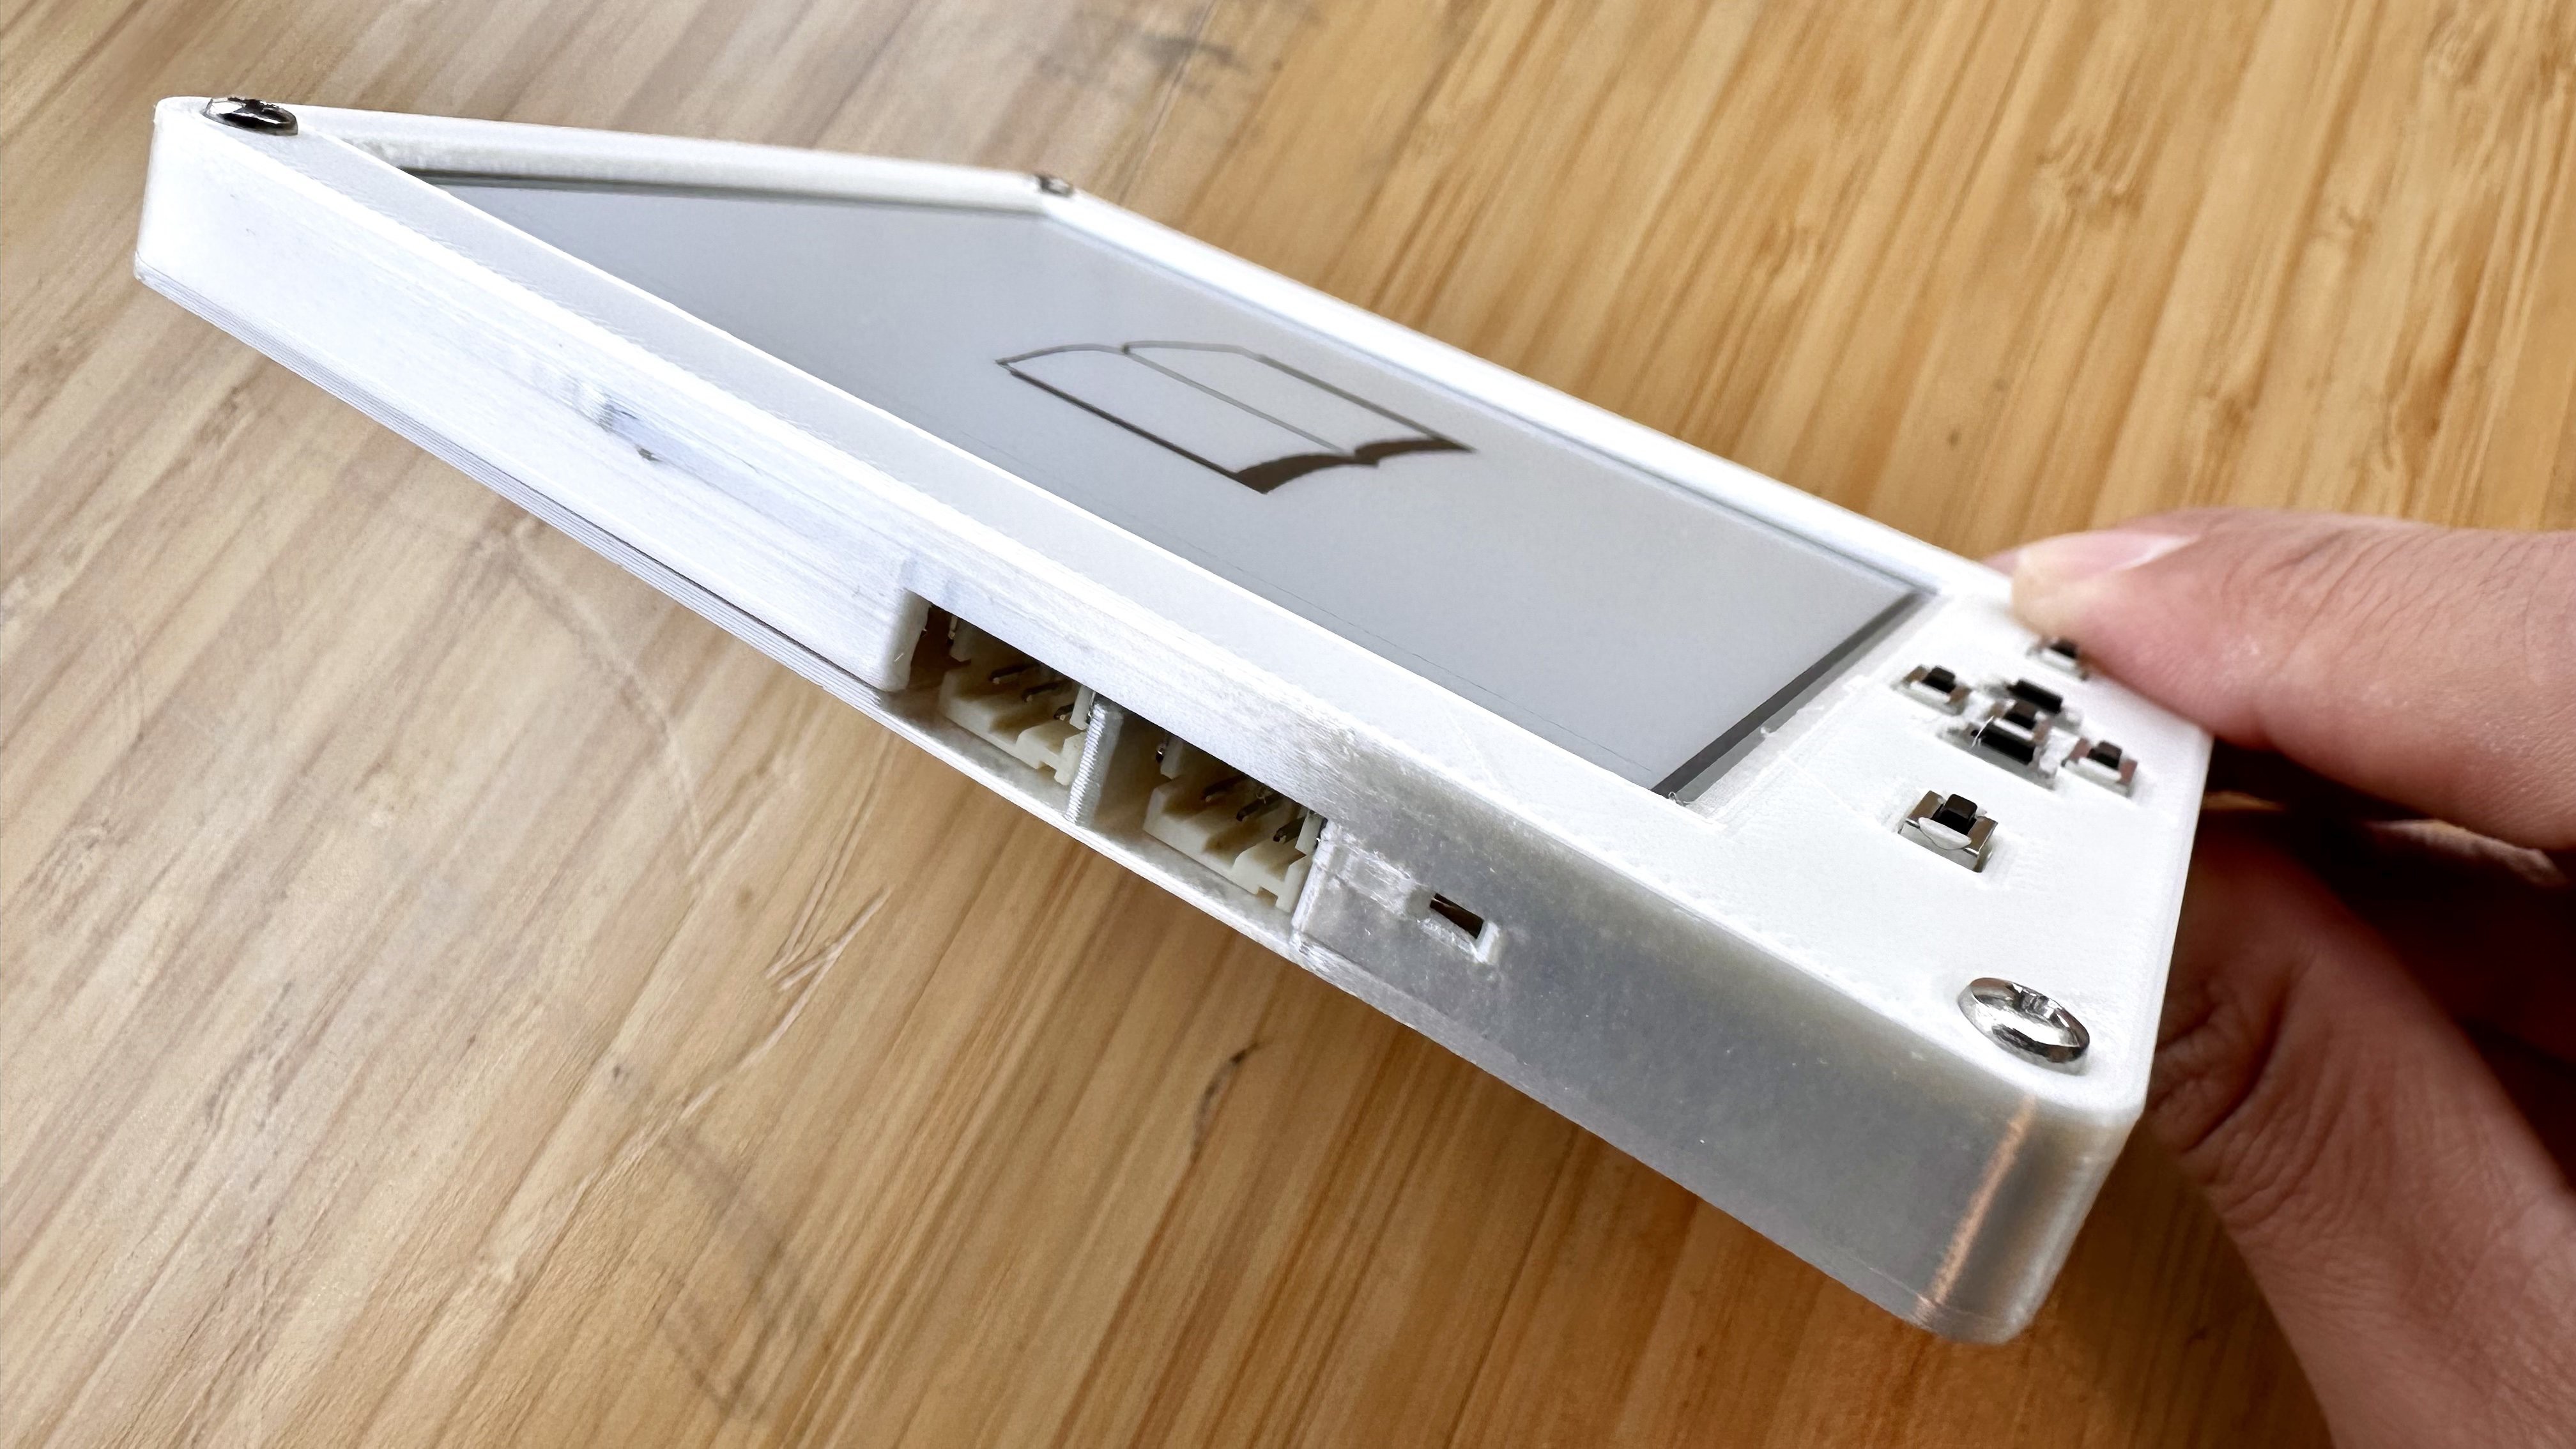
The I²C port uses Adafruit’s STEMMA-QT standard, which makes use of a very common JST-SH 4-pin cable. GPIO’s A and B use a JST-SH 3-pin cable, which is becoming more common ever since Raspberry Pi decided to use it as the debug connector on their new Pi Pico H series of boards. (The 2019 Open Book used the chunkier JST-PH standard; moving to SH slims down the case design and leaves more room for a bigger battery.)
It should be global, supporting readers of books in all the languages of the world.
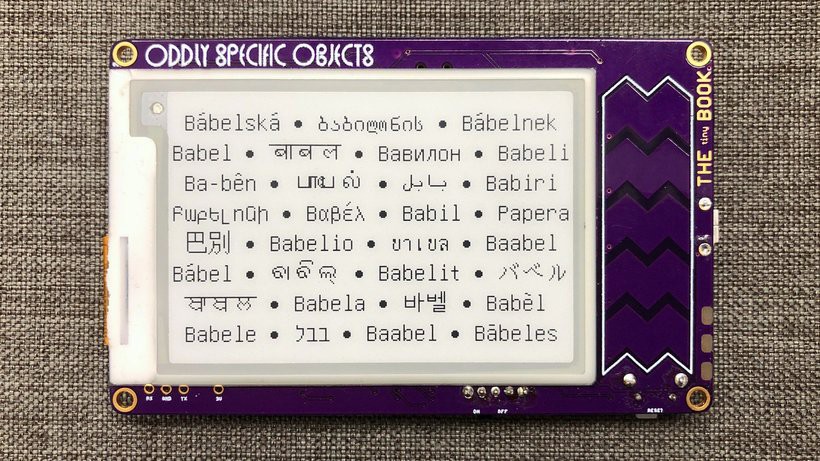
We’ve already talked about this in a profound degree of detail, but just to recap: where the original Open Book from 2019 was able to support the entire Unicode Basic Multilingual Plane, I believe this new version of the Open Book could also support the Supplemental Multilingual Plane, which would open the doors to displaying works in ancient languages, add support for more obscure and historical CJK glyphs (and of course let us read books written with emoji).
I want to be clear: this isn’t done yet; right now we still only — ”only” — have the Basic Multilingual Plane. But the 8 MB of Flash capacity on the ESP32-S3 makes this a reasonable and achievable goal with some software work in the months to come.
Most of all, it should be open, so that anyone can take this design as a starting point and use it to build a better book.
We also talked about this a bit last week, but the bottom line is the openness of the Open Book has already inspired folks to build a better book. Right now it’s mostly taking the form of new enclosure designs, and software forks that make the book do the things that folks want it to do. But I’m also seeing folks designing their own e-book readers these days, including one that’s submitted for this very same Hackaday prize.
Folks also reach out to me and open GitHub issues asking if it’s possible to make one with a bigger screen, or a touchscreen, or a screen from a recycled Kindle. I sense these folks may just be a few steps away from deciding to build it themselves. Personally I’d love for a well-designed, highly manufacturable open source e-book reader to kick off a Cambrian explosion of form factors and functionality for portable reading, a reimagining of this sector that’s so far been largely a closed source world.
Conclusions
A few months back, a colleague interviewed me for a paper she was working on. In that conversation, the question came up of, y’know, my “deal”, and I found myself describing my sense of resentment toward technology as we’ve built it. A Kindle comes into your life fully formed: a gray slab of glass and silicon. You’re invited to use it; you’re invited to consume with it; but you’re not invited to understand it. You’re not invited to customize it or change it, at least outside the narrow lines drawn for you.
The device is not “yours”.
I contrast that with the kind of computing I grew up with, that Windows 3.1 era, when you could build your own computer with your own accessories, and then go into display settings and change every color of every window to make garish color schemes that would make designers in Redmond cringe. The thing is, that was okay! It empowered the user; it showed them that the computing device was something that they had power over. It showed the user that they could make this technology serve them. Whereas now, it feels like companies make technologies that don’t serve the user; if anything, these technologies make the user the servant of some other vision, a vision that none of us really signed up for.
When I say I want to build comprehensible open source objects, what I’m trying to say is I want to show people another way. I want to say, “No, you built this thing. You can understand this thing. You don’t serve it; it serves you.” This object represents a vision for an alternative way of designing objects: in the open, shared and forkable, in a manner meant to empower the user instead of the platform owner.
Plus you can read books on it.

-
You’ll Never Make It On Your Own: Community and The Open Book
09/07/2023 at 21:51 • 1 commentNOTE: This project log was originally posted on 08/30/2023 at 23:11 EDT, but due to a misunderstanding, it had to be deleted and remade.
My work on the Open Book spans a whole four years now, from the first idle thoughts of “We should have a DIY e-book” to now, when I think we have a prototype that’s worthy of that claim.
In between then and now, I’ve put three versions of the book forward, not counting the fourth one that I’m submitting here for the Hackaday Prize. Each of these concepts represents a refinement of the idea, from a FeatherWing accessory board, to a standalone object that was hard to build, to a standalone object that was easier to build.
Still, even as I put these versions of the book forward, I never actually put them forward as fully assembled objects. I put them forward as an open source hardware project, with full schematics, Gerbers and BOMs. Sometimes I sold boards or parts; in other cases I even led workshops. But the premise of the Open Book was always this: you participated in making it.
Supercon 2022: Joey’s Ad-Hoc Build-a-Book Workshop
Late last year, when the Abridged Edition design was trending toward done, I decided to bring some of the kits along to my first Hackaday Supercon. I didn’t really have a plan for them, other than to say that I was hoping that they wouldn’t come home with me. The kits, at this point, consisted of a printed circuit board, a display, and a little castellated e-paper driver module (plus a whole mess of cut tape strips in my canvas Hackaday bag).
This wasn’t an official workshop. It didn’t appear on the schedule, because I didn’t even know that I was going to do it until I got to Supercon. But while hanging out with some friends and colleagues that Friday, the conversation just drifted there: “Do y’all want to build a book? Let’s do it.”
“Let’s do it now.”

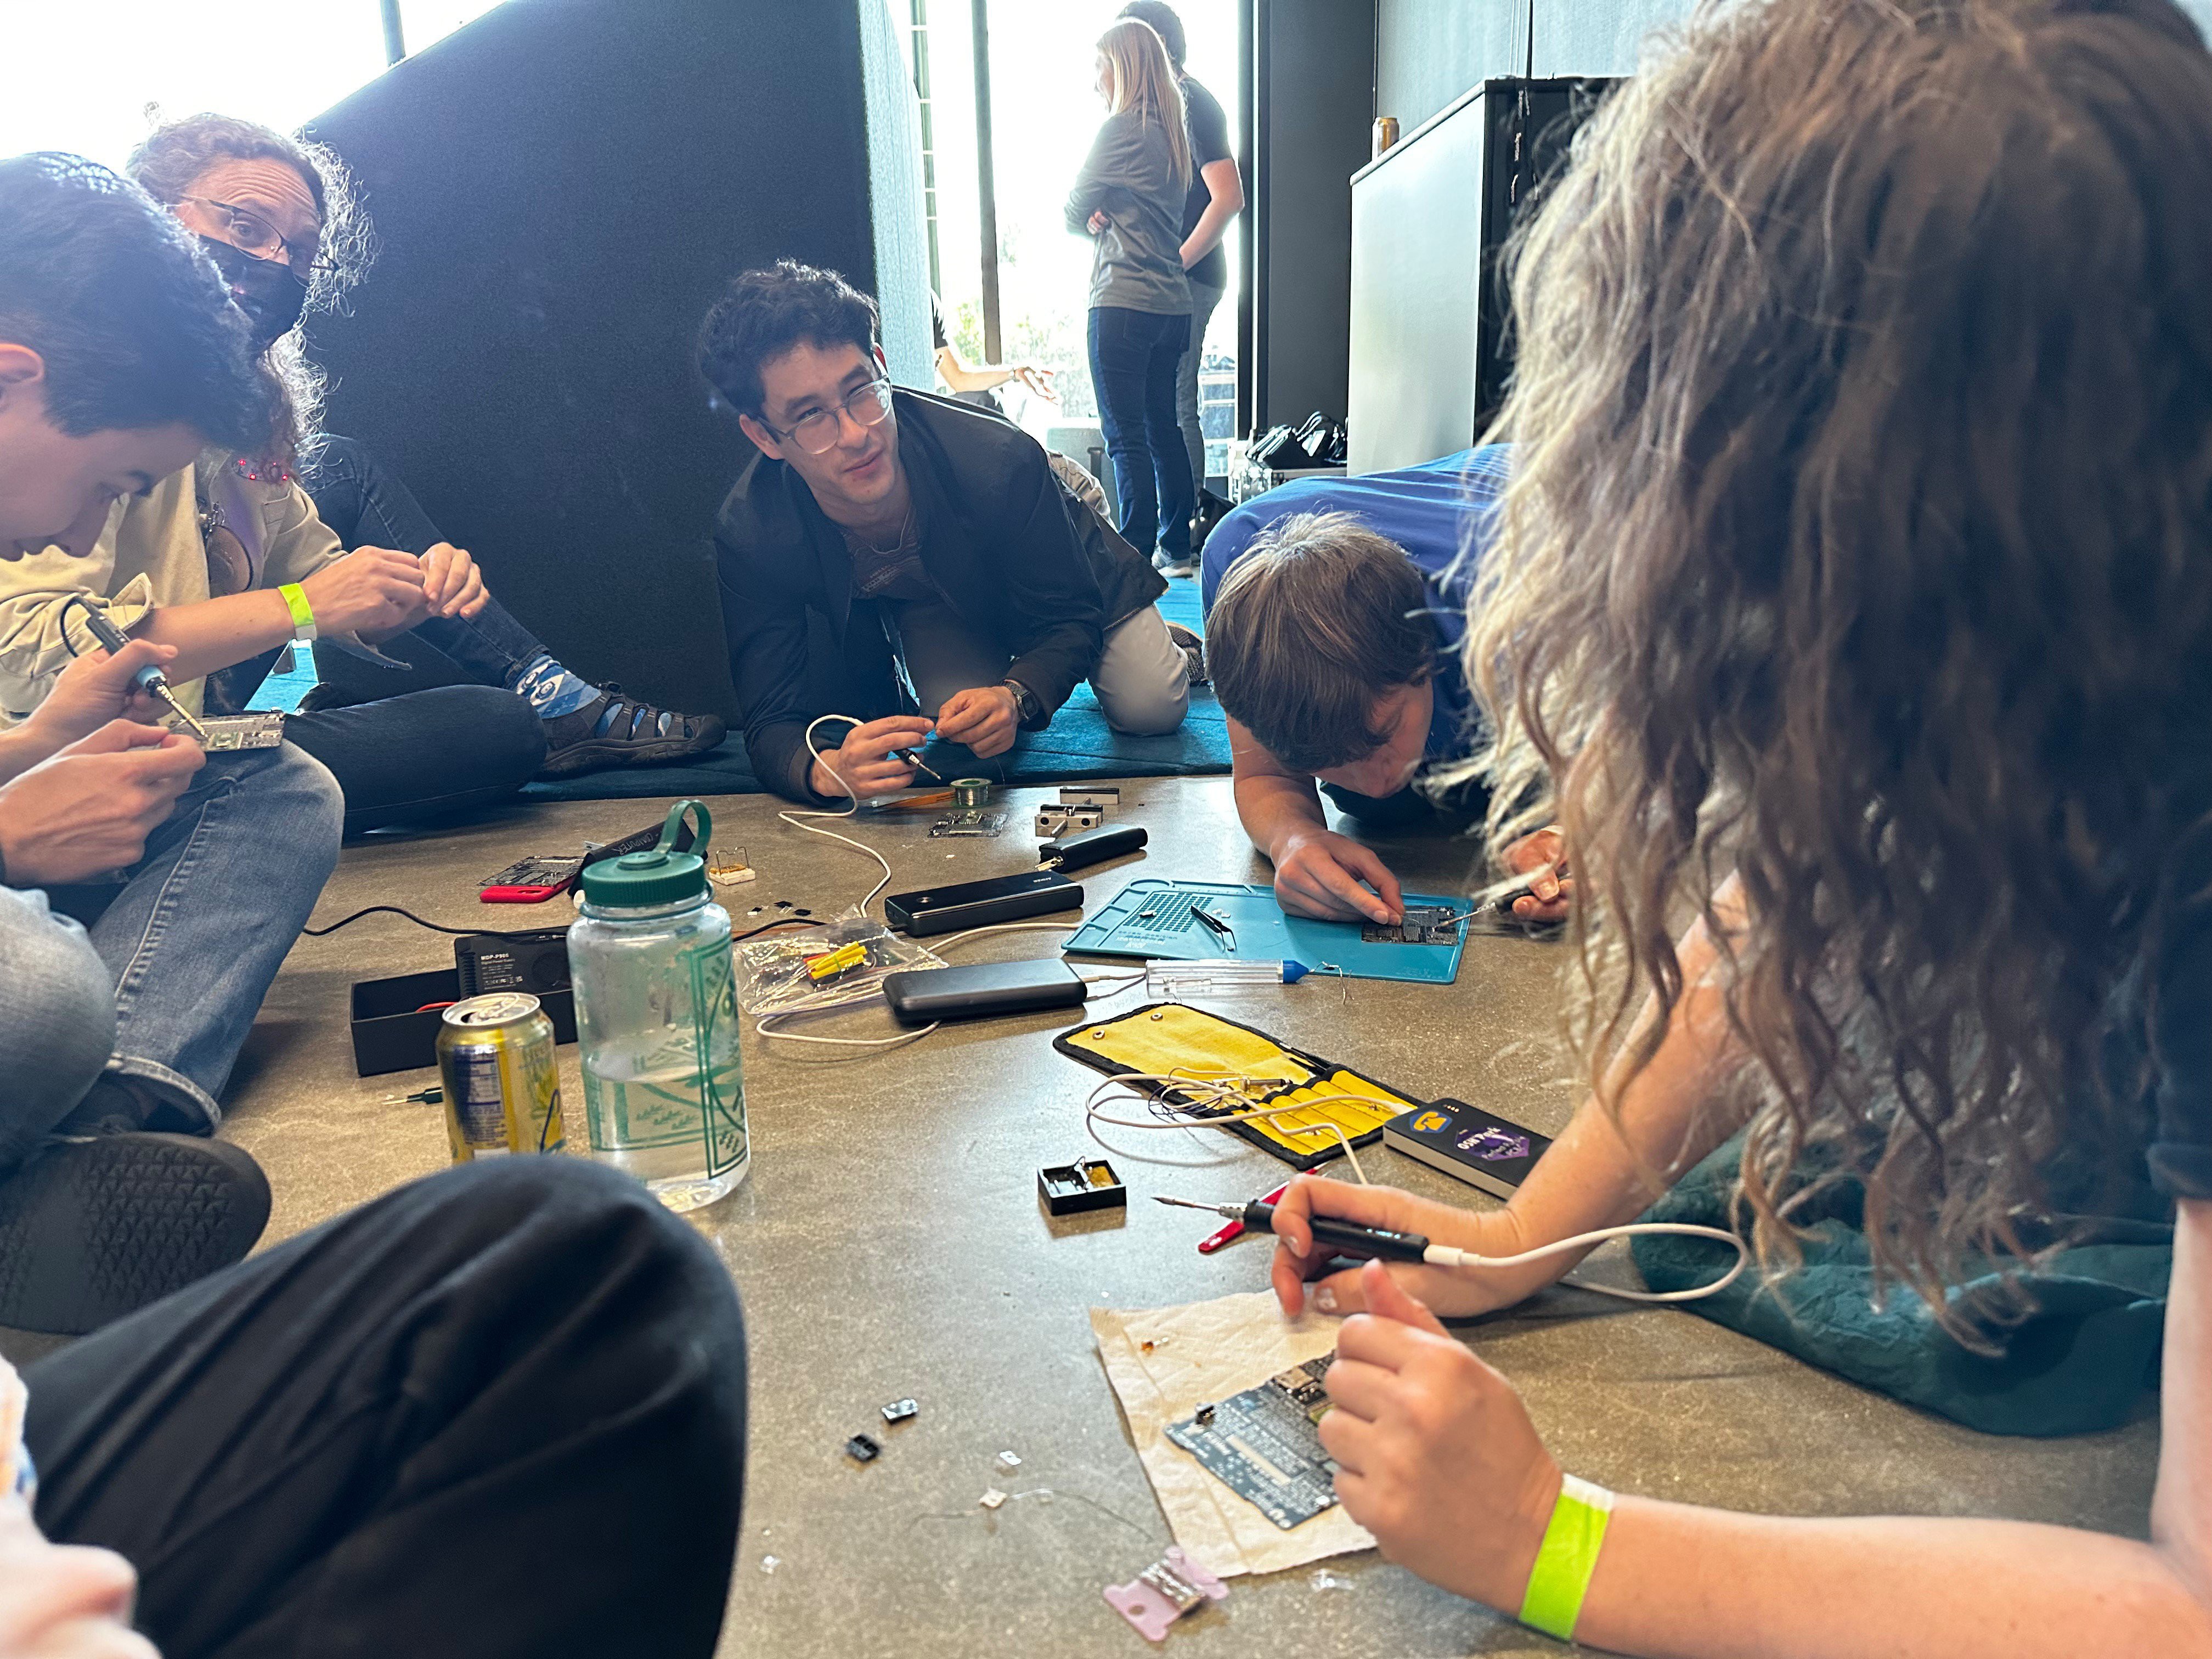
So, there, on the floor of Supplyframe HQ, armed with whatever Pinecils and battery packs we had on hand, a dozen folks started soldering. Not everyone in the group had surface mount soldering experience; at least one worried that they wouldn’t be able to build it. The BOM wasn’t kitted at all; rather, the instructions I'd printed on the circuit board said to solder parts in order, and I ran around like the parts fairy — “Anyone need a 10K resistor? Who needs MOSFETS?”
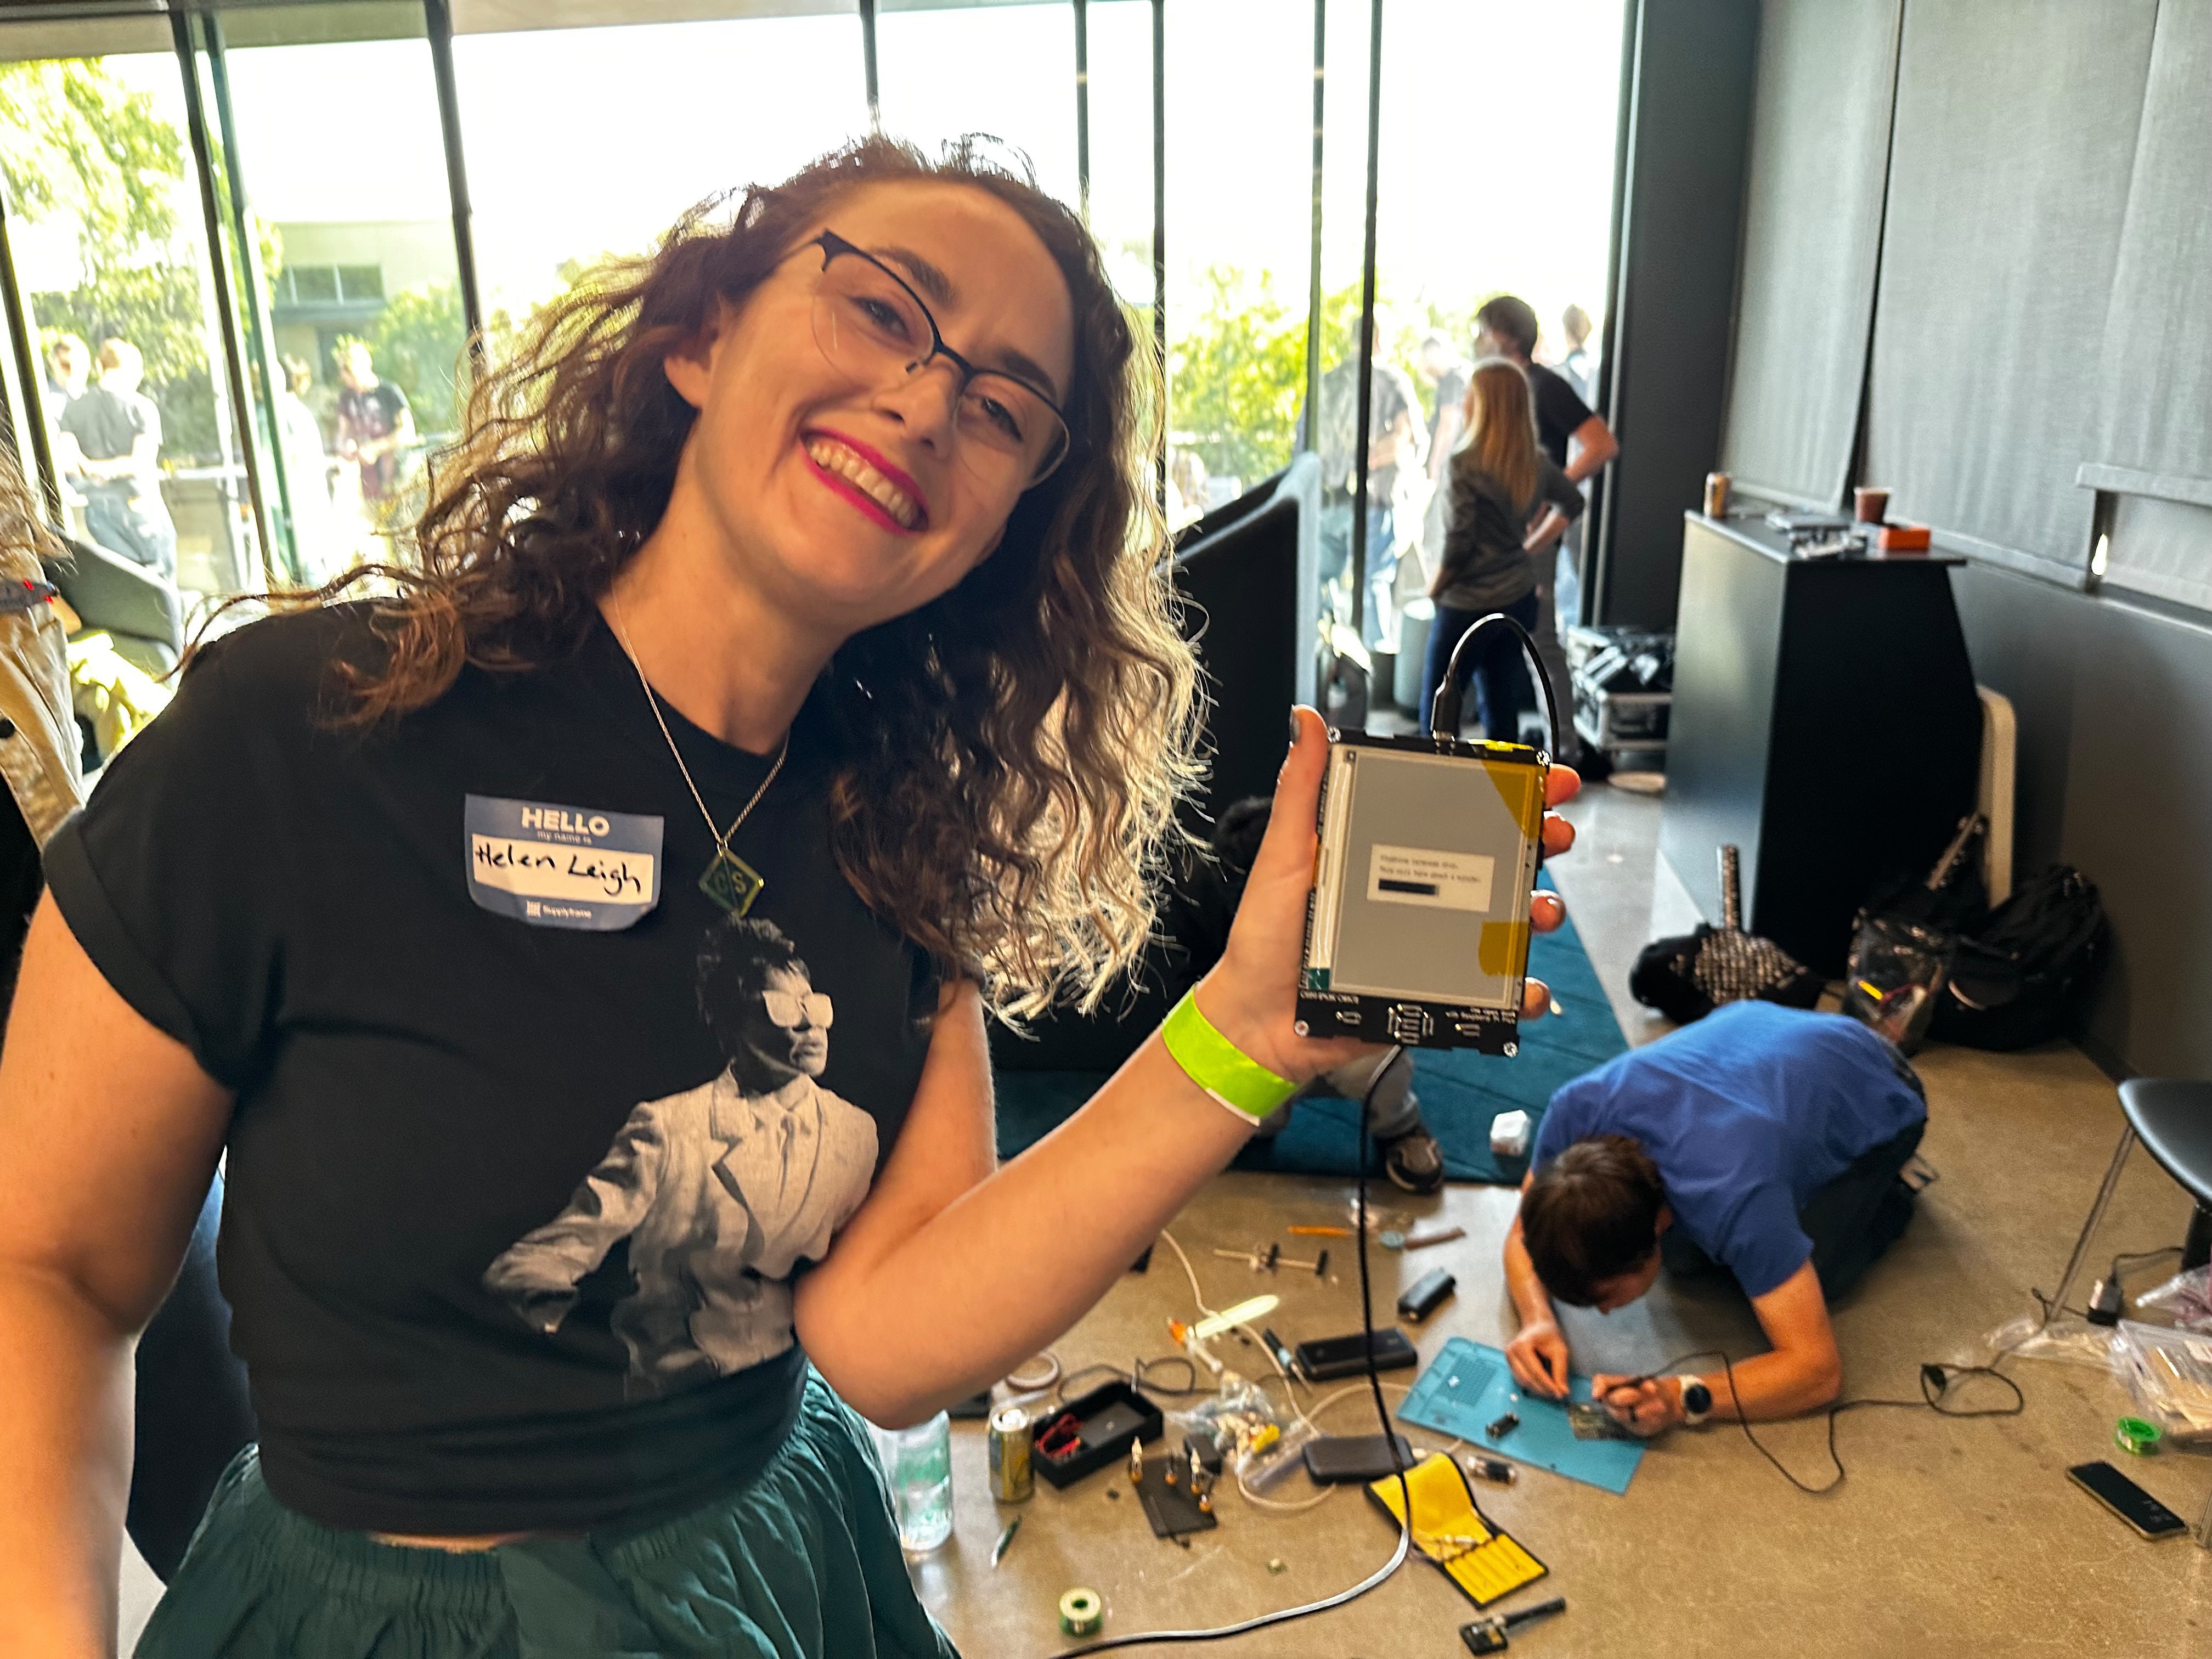
The hour was a chaotic scene, but by the end of it, all the books were assembled. We discovered that a couple of folks’ devices didn’t work completely. But I helped some members of the group, and other members of the group helped each other. By the end, with just a bit of rework, 100% of the people on that floor walked away with their very own working Open Book.

The experience of running that ad-hoc workshop taught me a couple of things. For one thing, I learned that this version of the design was in fact something that folks could DIY. Of course it also helped me to recognize that I couldn’t be everyone’s personal parts fairy; to make this thing make more sense, I would have to get organized.
A short phase two: selling kits
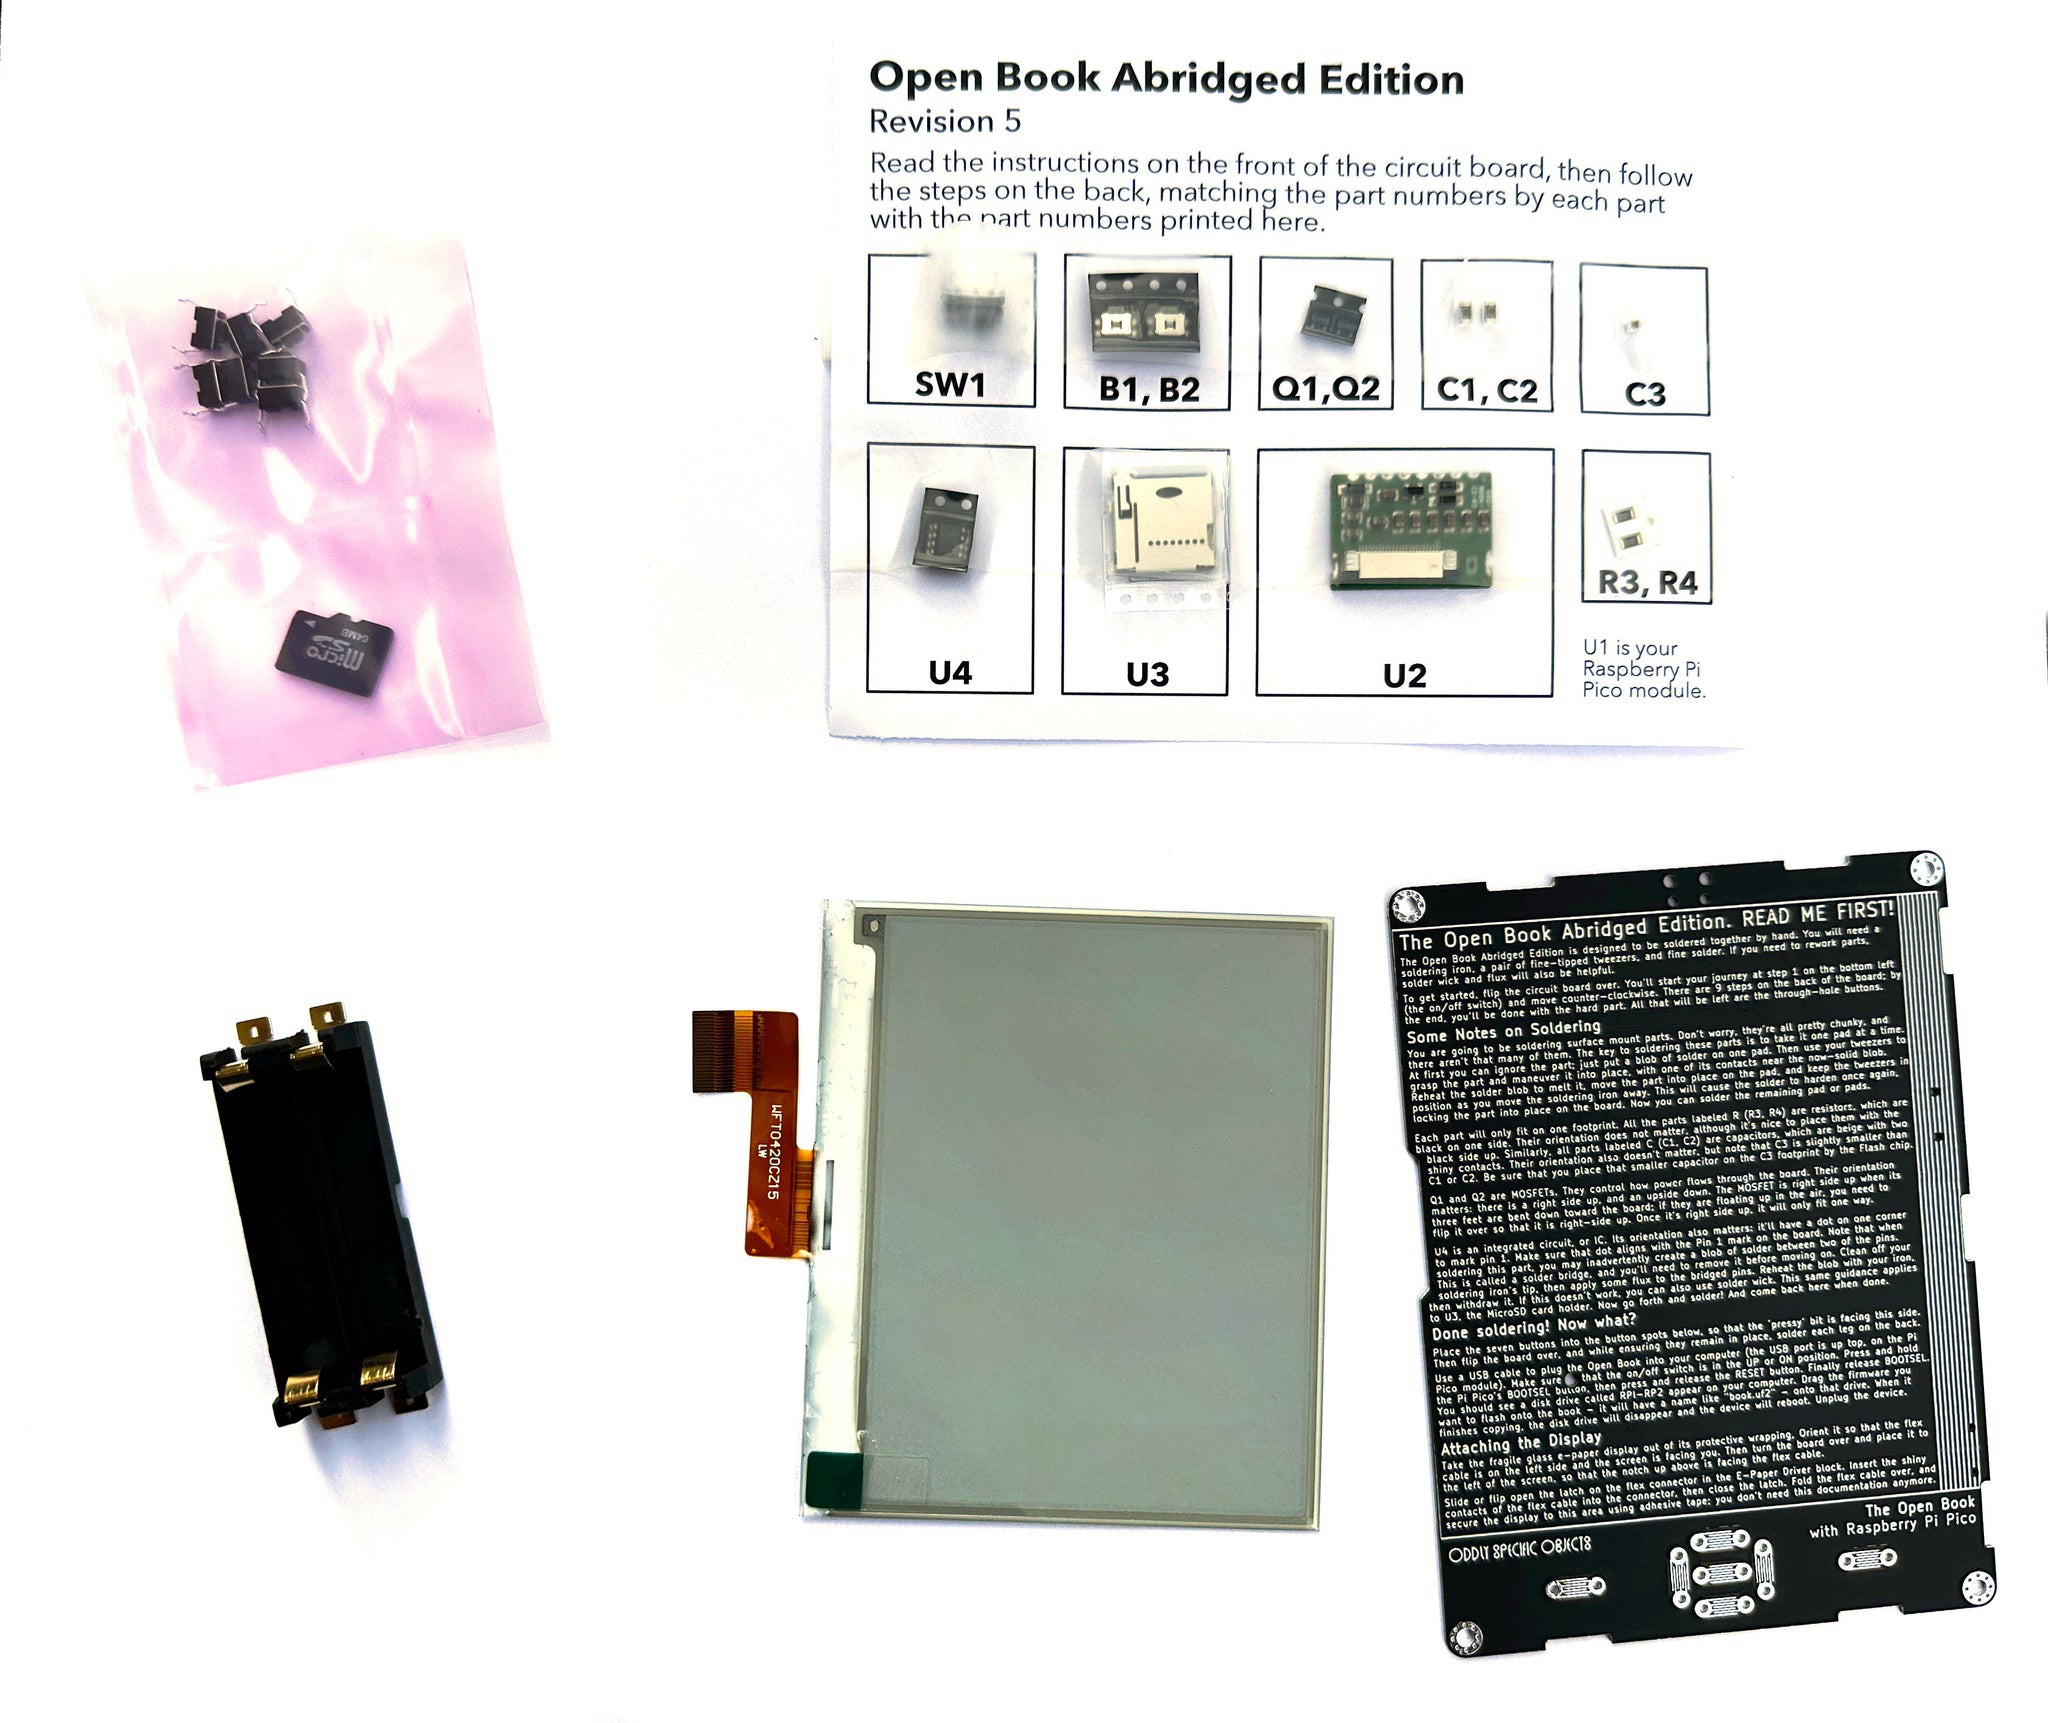
After the workshop, I gathered what remaining parts I had on hand, and I assembled a few kits. The Open Book Abridged Edition Kit is essentially the same design as the one in the workshop, but with a component card to keep the parts organized, and with a lot of very carefully placed bubble wrap (not pictured) to protect it when I sent it out, in the mail, to folks who ordered it on the Oddly Specific Shop.

Here’s the truth though: I never sold that many kits. They were time consuming to put together, and it was really hard to keep them in stock; I’d order ten sets of parts, make ten kits, and then use the proceeds from those ten kits to buy parts for the next ten. I found myself treading water, never quite operating at the volume that I needed to really churn these objects out.
But in the end, it didn’t really matter. Because when you open source hardware, suddenly you’re not the only one doing the work.
You’ll Never Make IT On Your Own
For most of 2023, I was out of stock of these kits. Lacking the time and the cash flow for Open Book stuff, I focused on other projects, like Sensor Watch and various LCD oriented gadgets. But then a funny thing happened. In some ways, it echoed what happened at the workshop, when members of the group helped each other rework their boards.
The community started working together.

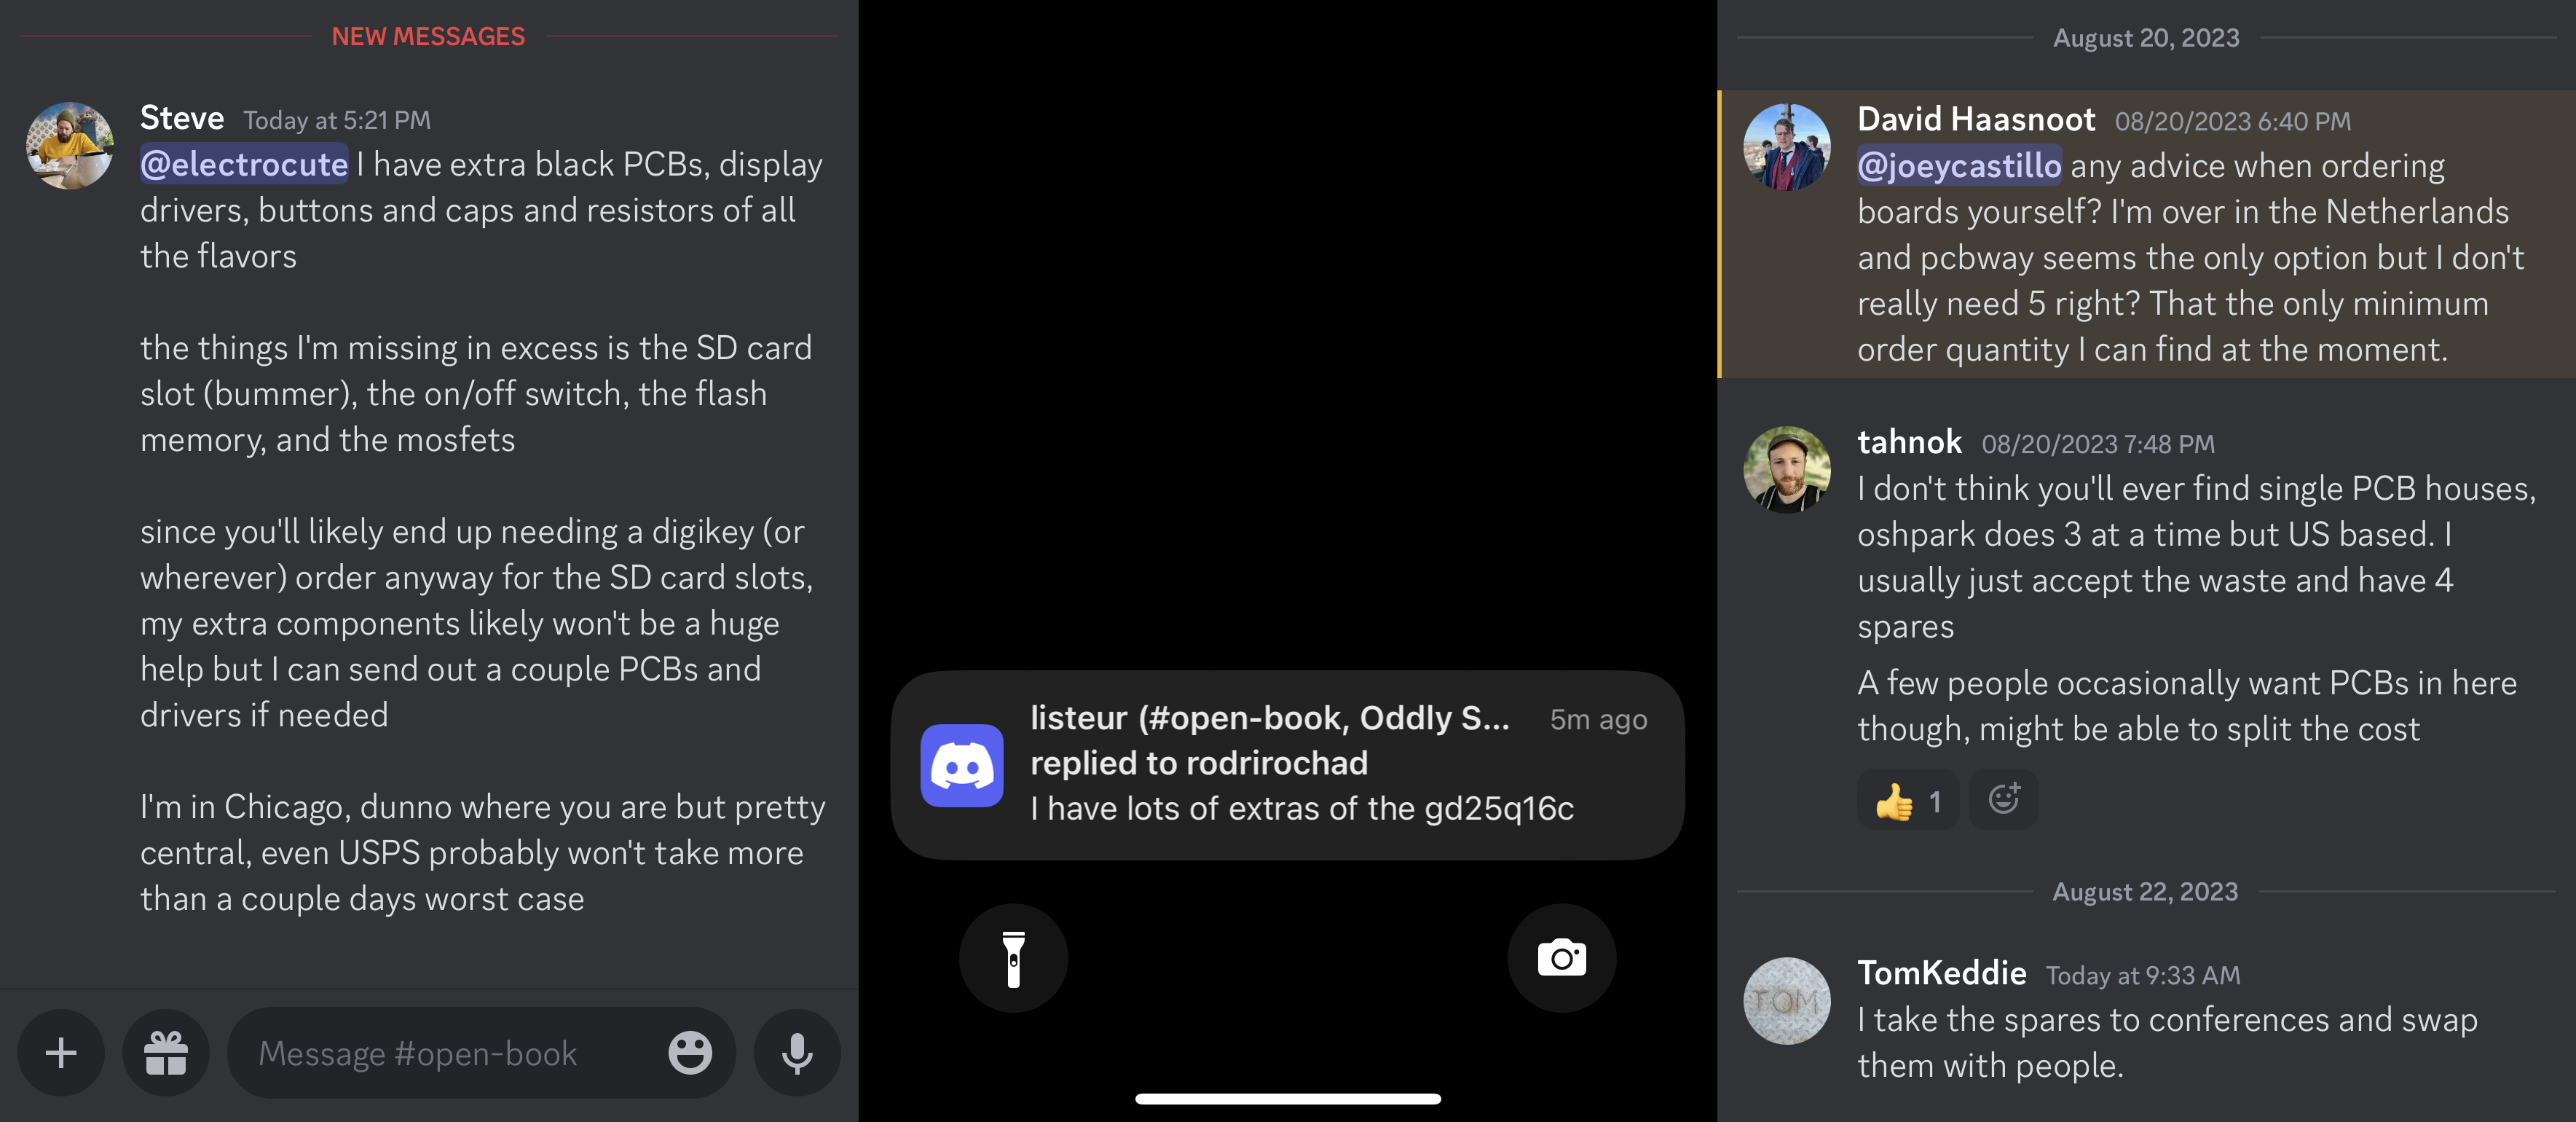
Empowered by the open source schematics and board design files, the shared STL’s and OpenSCAD scripts, folks started gathering the parts for the kits themselves, some placing not just their first ever PCB order for the Open Book boards, but their first PCBA order, to get the e-paper drivers built and assembled at quantities of five — and sharing the extras.
Over the course of the year, I’ve seen Open Book builds in colors of PCB that I’ve never ordered. Case designs that I'd never considered. And perhaps most impressive of all, software features that I never coded.

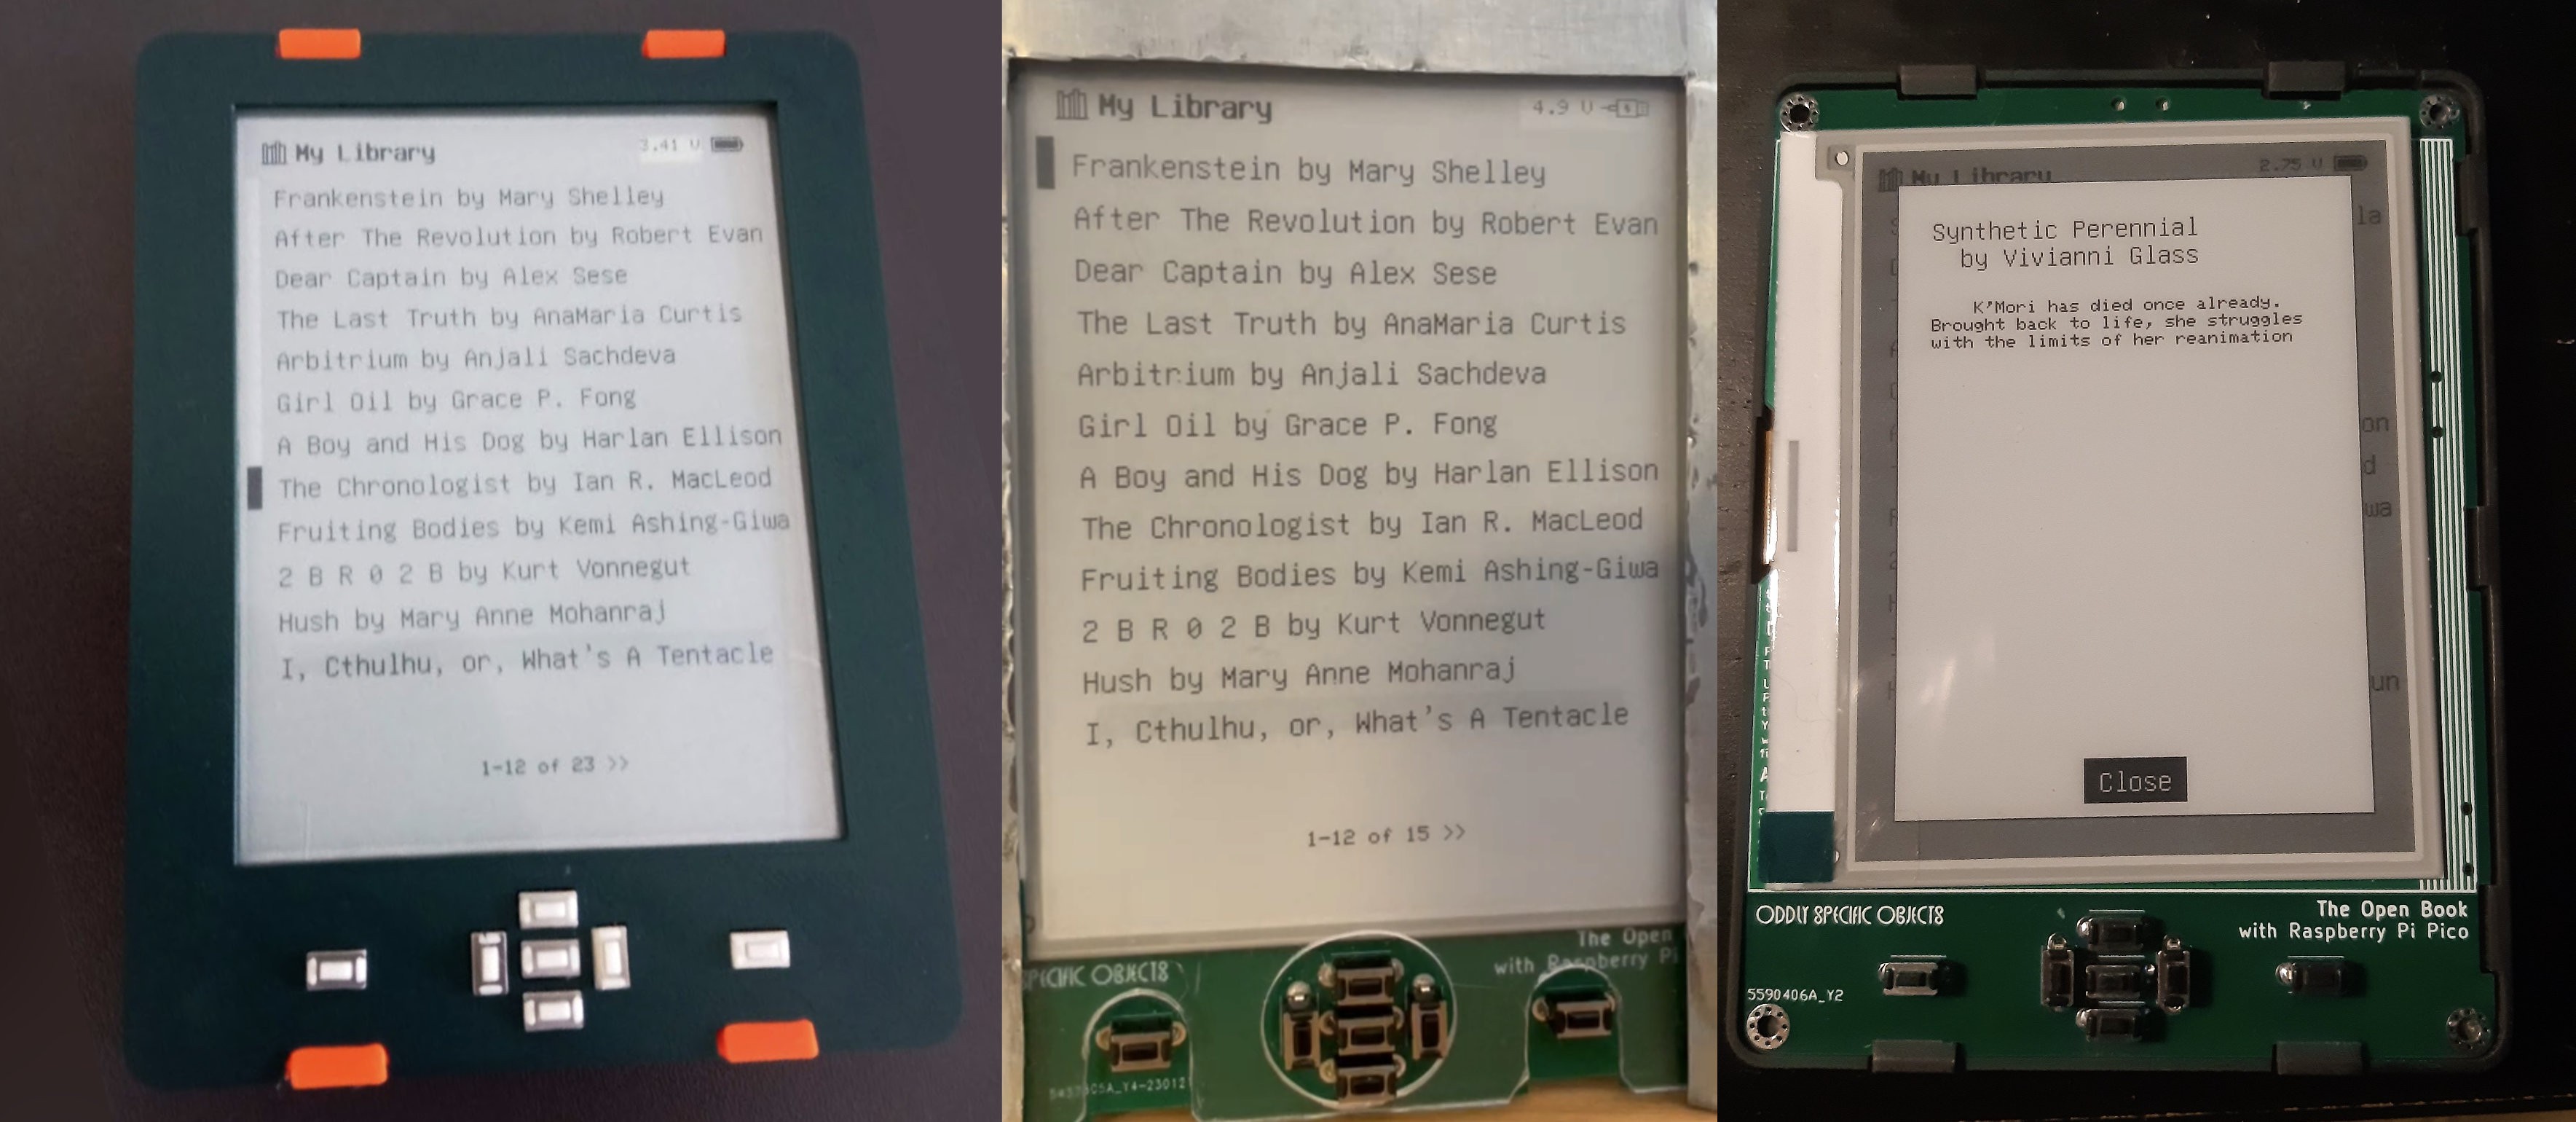
These are three Open Books, all built by members of the community using PCBs from at least two separate orders that I didn’t place, in cases that I didn’t fabricate (or in one case, even design). They’re all running a forked version of Libros, the open source firmware for the Open Book, that Steve (nvts8a) has been working on. He’s added pagination to the main menu, along with a nice looking book information card. He’s refactored the book database, enhanced the UI, and improved the speed of the pagination by an order of magnitude.
Like, he’s 40 releases in. Seriously.
Anyway, the title of this post is this phrase that keeps coming to mind when trying to make open source hardware. It’s not to say you’ll NEVER make it on your own, like there’s this insurmountable wall between you and me and making a thing. Clearly things get made. It’s also not to say YOU’LL never make it on your own, like there’s some personal thing stopping you. I don’t think any of us can make it on our own.
The point of the phrase is you’ll never make IT on your own. It, the thing you’re making. Working on our projects alone in basements and garages, without a ton of resources or free time, it’s true: making a thing is hard. But if you truly let the idea out into the world, if you document it well and give the community a chance to take ownership of it?
They’ll take it to places you never knew possible.
If the premise of the Open Book was that you participated in making it, its course over the last four years has shown me, in ways I didn’t anticipate, just how deep a seed like that could take root.
-
A Book for Every Language, Part II (plus: proportional-width fonts!)
09/07/2023 at 21:50 • 2 commentsNOTE: This project log was originally posted on 08/13/2023 at 21:28 EDT, but due to a misunderstanding, it had to be deleted and remade.
OK, right: languages. Where we last left this topic I was introducing Babel, the Open Book’s solution for displaying texts in all the languages of the world. I mentioned that it was a bit like an old school character ROM in a computer from the DOS era, except that instead of a few kilobytes, the Open Book has (up to now) used a two-megabyte SPI Flash chip, packed to the gills with well over 60,000 bitmap glyphs for every language on earth. 

GNU Unifont, our bitmap font of choice, is mostly an 8x16 bitmap font, which makes it easy to store glyphs: each 8x16 character is sixteen bytes long, with each byte representing the state of one line of pixels. So, for example, the ASCII letter A has a byte representation like this:
00 00 00 00 18 24 24 42 42 7E 42 42 42 42 00 00
…and it looks like this. You can almost visualize how the 00’s correspond to empty lines without pixels, the 7E represents the crossbar with nearly all pixels set, and the repeated 42’s represent the sturdy legs that keep the letter from tipping over:

The point though is that this glyph fits in 16 bytes, and if our goal is to support the whole Basic Multilingual Plane — which has code points that range from U+0000 to U+FFFF — you get the sense that naïvely, we could create a lookup table where each character occupies 16 bytes. Then we could look up a character by multiplying its code point by 16: for code point U+0041 (ASCII 65, the letter ‘A’), we could multiply 65 by 16 and expect to find 16 bytes of bitmap data right there.
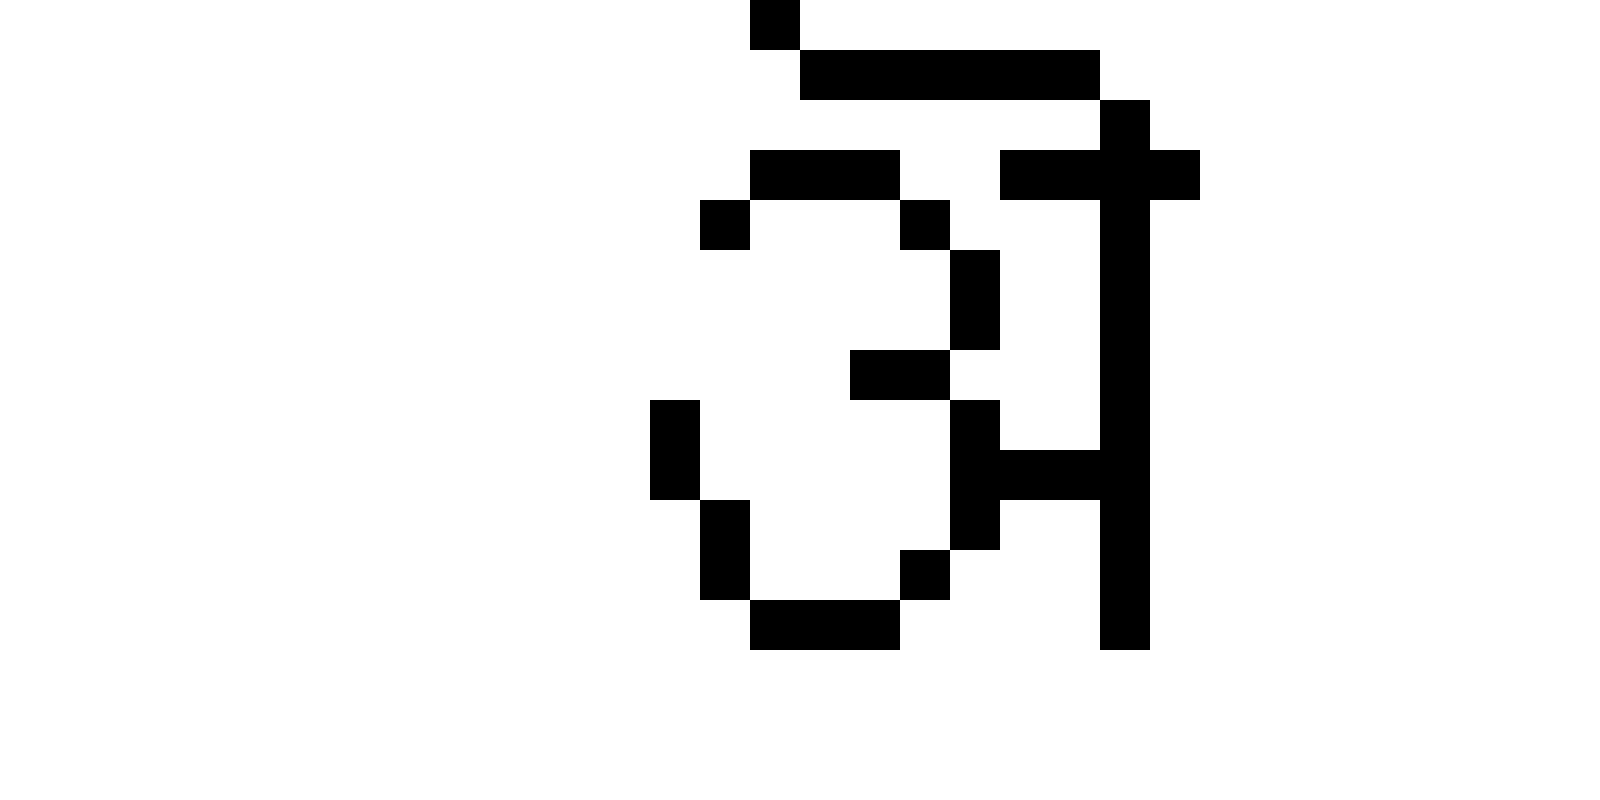
Alas, it’s not quite that simple. Remember, I said that Unifont was only mostly 8x16. The reality is, some languages' glyphs don’t fit into a tall skinny 8x16 bitmap. Some characters need more room to breathe. So GNU Unifont also includes a lot of double-width characters that are 16x16, like this Devanagari letter A:

This glyph is wider, and it requires 32 bytes to represent it. Needless to say, you can’t have a constant time lookup table when some entries are 16 bytes long and others are 32.
What to do?
I suppose we could make our lookup table 32 bytes wide, and just accept that some characters only use the first half of that. The Devanagari ‘A’ could occupy its 32 bytes, and we’d just have to pad out the ASCII ‘A’ with 16 bytes of zeroes. Technically, this would work! It involves a lot of wasted space, but 32 bytes × 65,535 code points = 2,097,120 bytes — just barely small enough to fit into our 2 megabyte Flash chip, with 31 bytes to spare.
And if we have all the glyphs, we have all the languages, right?
…right?
Alas — once again — it’s not quite that simple. When it comes to language, nothing is simple.
Code points and characters, nonspacing marks, text direction and connected scripts (oh my!)
As it turns out, there’s a lot more to rendering text than having all the glyphs. For one thing, not only is not every code point assigned, not every code point even represents a character. Some code points represent accent marks or diacritics. Others might be control codes that do things like override the direction of a run of text.
Wait: text direction? Yes, as it turns out, not every language reads from left to right. Hebrew and Arabic in particular render from right to left — and Unicode specifies that when a character with right-to-left affinity appears in a run of text — משהו כזה — the direction of the text run needs to switch until a character with a left-to-right affinity appears.
Not only that, some scripts like Arabic require connected forms to display correctly: a run of letters (م ث ل ه ذ ه) need to be connected (مثل هذه) not just to appear legible, but because it’s simply incorrect to render them disconnected. It’s not how the language works.
Babel is going to have to obey all of these rules to display the world’s languages, and that means we need space to store this sort of metadata. Luckily, in our naïve implementation above, there was a lot of wasted space: all the empty bitmaps at unassigned code points, and the wasted space in half-width characters. If we could just reclaim that space, we might be able to free up enough room to store this metadata about each of our characters.
Still, we’re going to need to come up with a scheme to store all that data and access it in a performant way.
babel.bin: Lookup Tables and Metadata
Okay: so for performance reasons, we need to use a lookup table. To unpack what that means: we need for some information about code point 0 to be at an address (n), and we need the same information for code point 500 to be at address (n + 500 * c), where c is some constant number of bytes. Previously, we stored a lookup table of bitmaps. Instead, what if we just stored a lookup table of metadata?

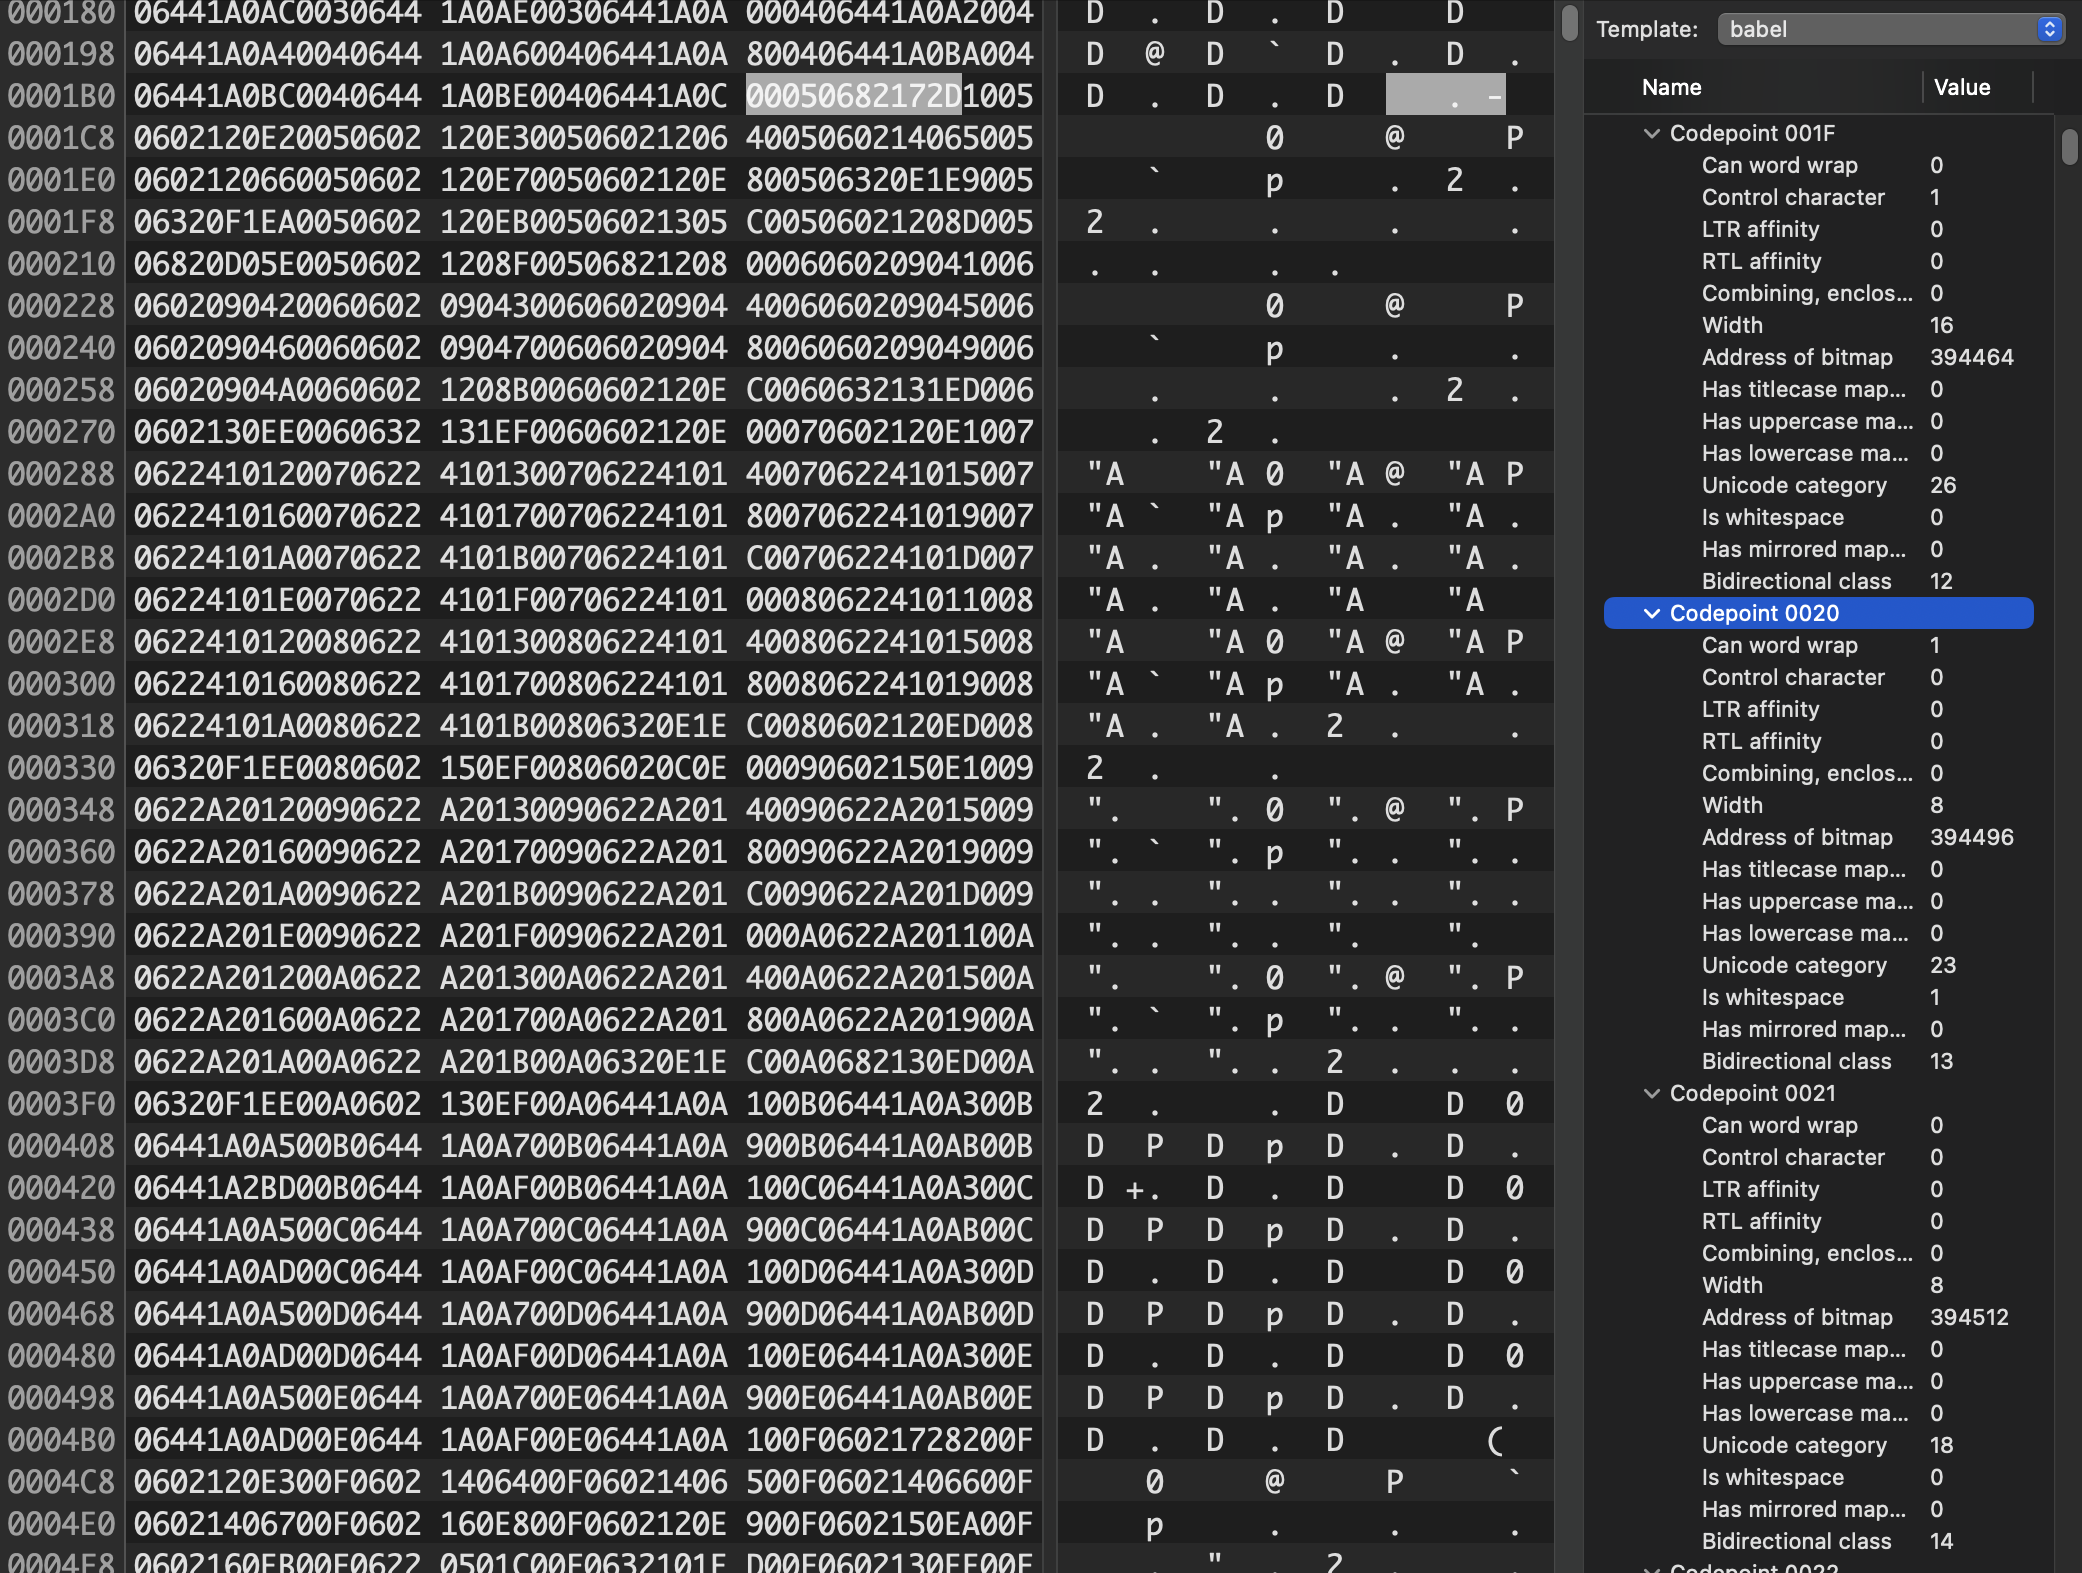
Well — spoilers! — that’s exactly what we did. At the very beginning of our SPI Flash chip, there’s a header, and then 65,536 six-byte metadata structures. This metadata contains flags for things like word wrapping opportunities, bidirectional layout information, the width of the glyph, and — yes — the location, later in memory, of the bitmap data for the glyph. After this lookup table (plus a few other extras for Perso-Arabic shaping and localized case mapping), comes the 16- or 32-byte bitmaps for each glyph.
This lookup table takes up about 393 kilobytes of storage — but crucially, it gives us constant-time lookup into the giant blob of bitmap data. With O(1) complexity, we now know where to look for a glyph's bitmap data, and how many bytes long it is. This lets us pack the bitmaps densely, with no gaps and no wasted space on unassigned code points.
This more than makes up for the 393 kilobyte hit.
Plus, with this information, we know a lot more about the glyphs! Take a look in the right column above, under "code point 0020". This is the classic ASCII space character, and the metadata tells us that it represents a valid point for word wrapping, that it’s got a width of 8 pixels, it’s whitespace, and it has no left-to-right or right-to-left affinity. This makes sense: a space in Hebrew text is the same as a space in English text. You can use it forward or backward; there aren’t any special leftward-facing spaces.

But here, for code point 0041( the ASCII ‘A’), we see different properties: you can’t word wrap on it, obviously, since it could appear at the beginning of a word, but it also has a distinct left-to-right affinity: if we were to mention “Apple Inc.” in the middle of a run of right-to-left Arabic text, we’d have to change the layout direction immediately (otherwise it would appear as “elppA” which I’m pretty sure is the name of an IKEA bookshelf that I once had in my dorm room).

Meanwhile, our Devanagari ‘A’ at code point 0904 has similar directional affinity, but a width of 16 pixels instead of 8. Other glyphs, like those in the Hebrew block, would have a different directional affinity. The metadata would also tell us about some characters that mirror in right-to-left text runs (parentheses need to flip around, for example), whether a mark is a combining or enclosing mark, like the ´ in José or the "NO" symbol over this snowman (indicating, of course, that no snowmen are allowed): ☃⃠.
But I digress. The point is that with this information, we know all the relevant details about the glyph, including where to look for the bitmap data, how much bitmap data is stored there, and how many pixels to advance after drawing the character. Which, for Unifont, is always 8 or 16 pixels.
But here’s the thing…
In theory, I could have made the “width” property a single bit. Unifont is monospace, except for those big double-wide glyphs, and a boolean indicating whether the glyph is double-wide would have been enough to capture the size of the bitmap. Still, back in 2019 when I was coding Babel, I made the width field five bits long, which means it’s able to express any value from 0 to 31 pixels. In a comment defending this choice, I wrote that I was doing it “in case a variable width font becomes a thing.”

Fast forward to four years later, and a variable-width font has become a thing. In particular, the Ark font by designer TakWolf aims to be a pan-CJK pixel font at three sizes — but it also includes a healthy selection of proportional-width glyphs from the ASCII, Latin, Greek and Cyrillic blocks. To make a long story
shortless long, I did some hacks and started using that four-year-old width field to store proportional spacing data. With an export of Ark’s library of proportional width glyphs to Unifont's preferred hex format, it basically “just worked”.
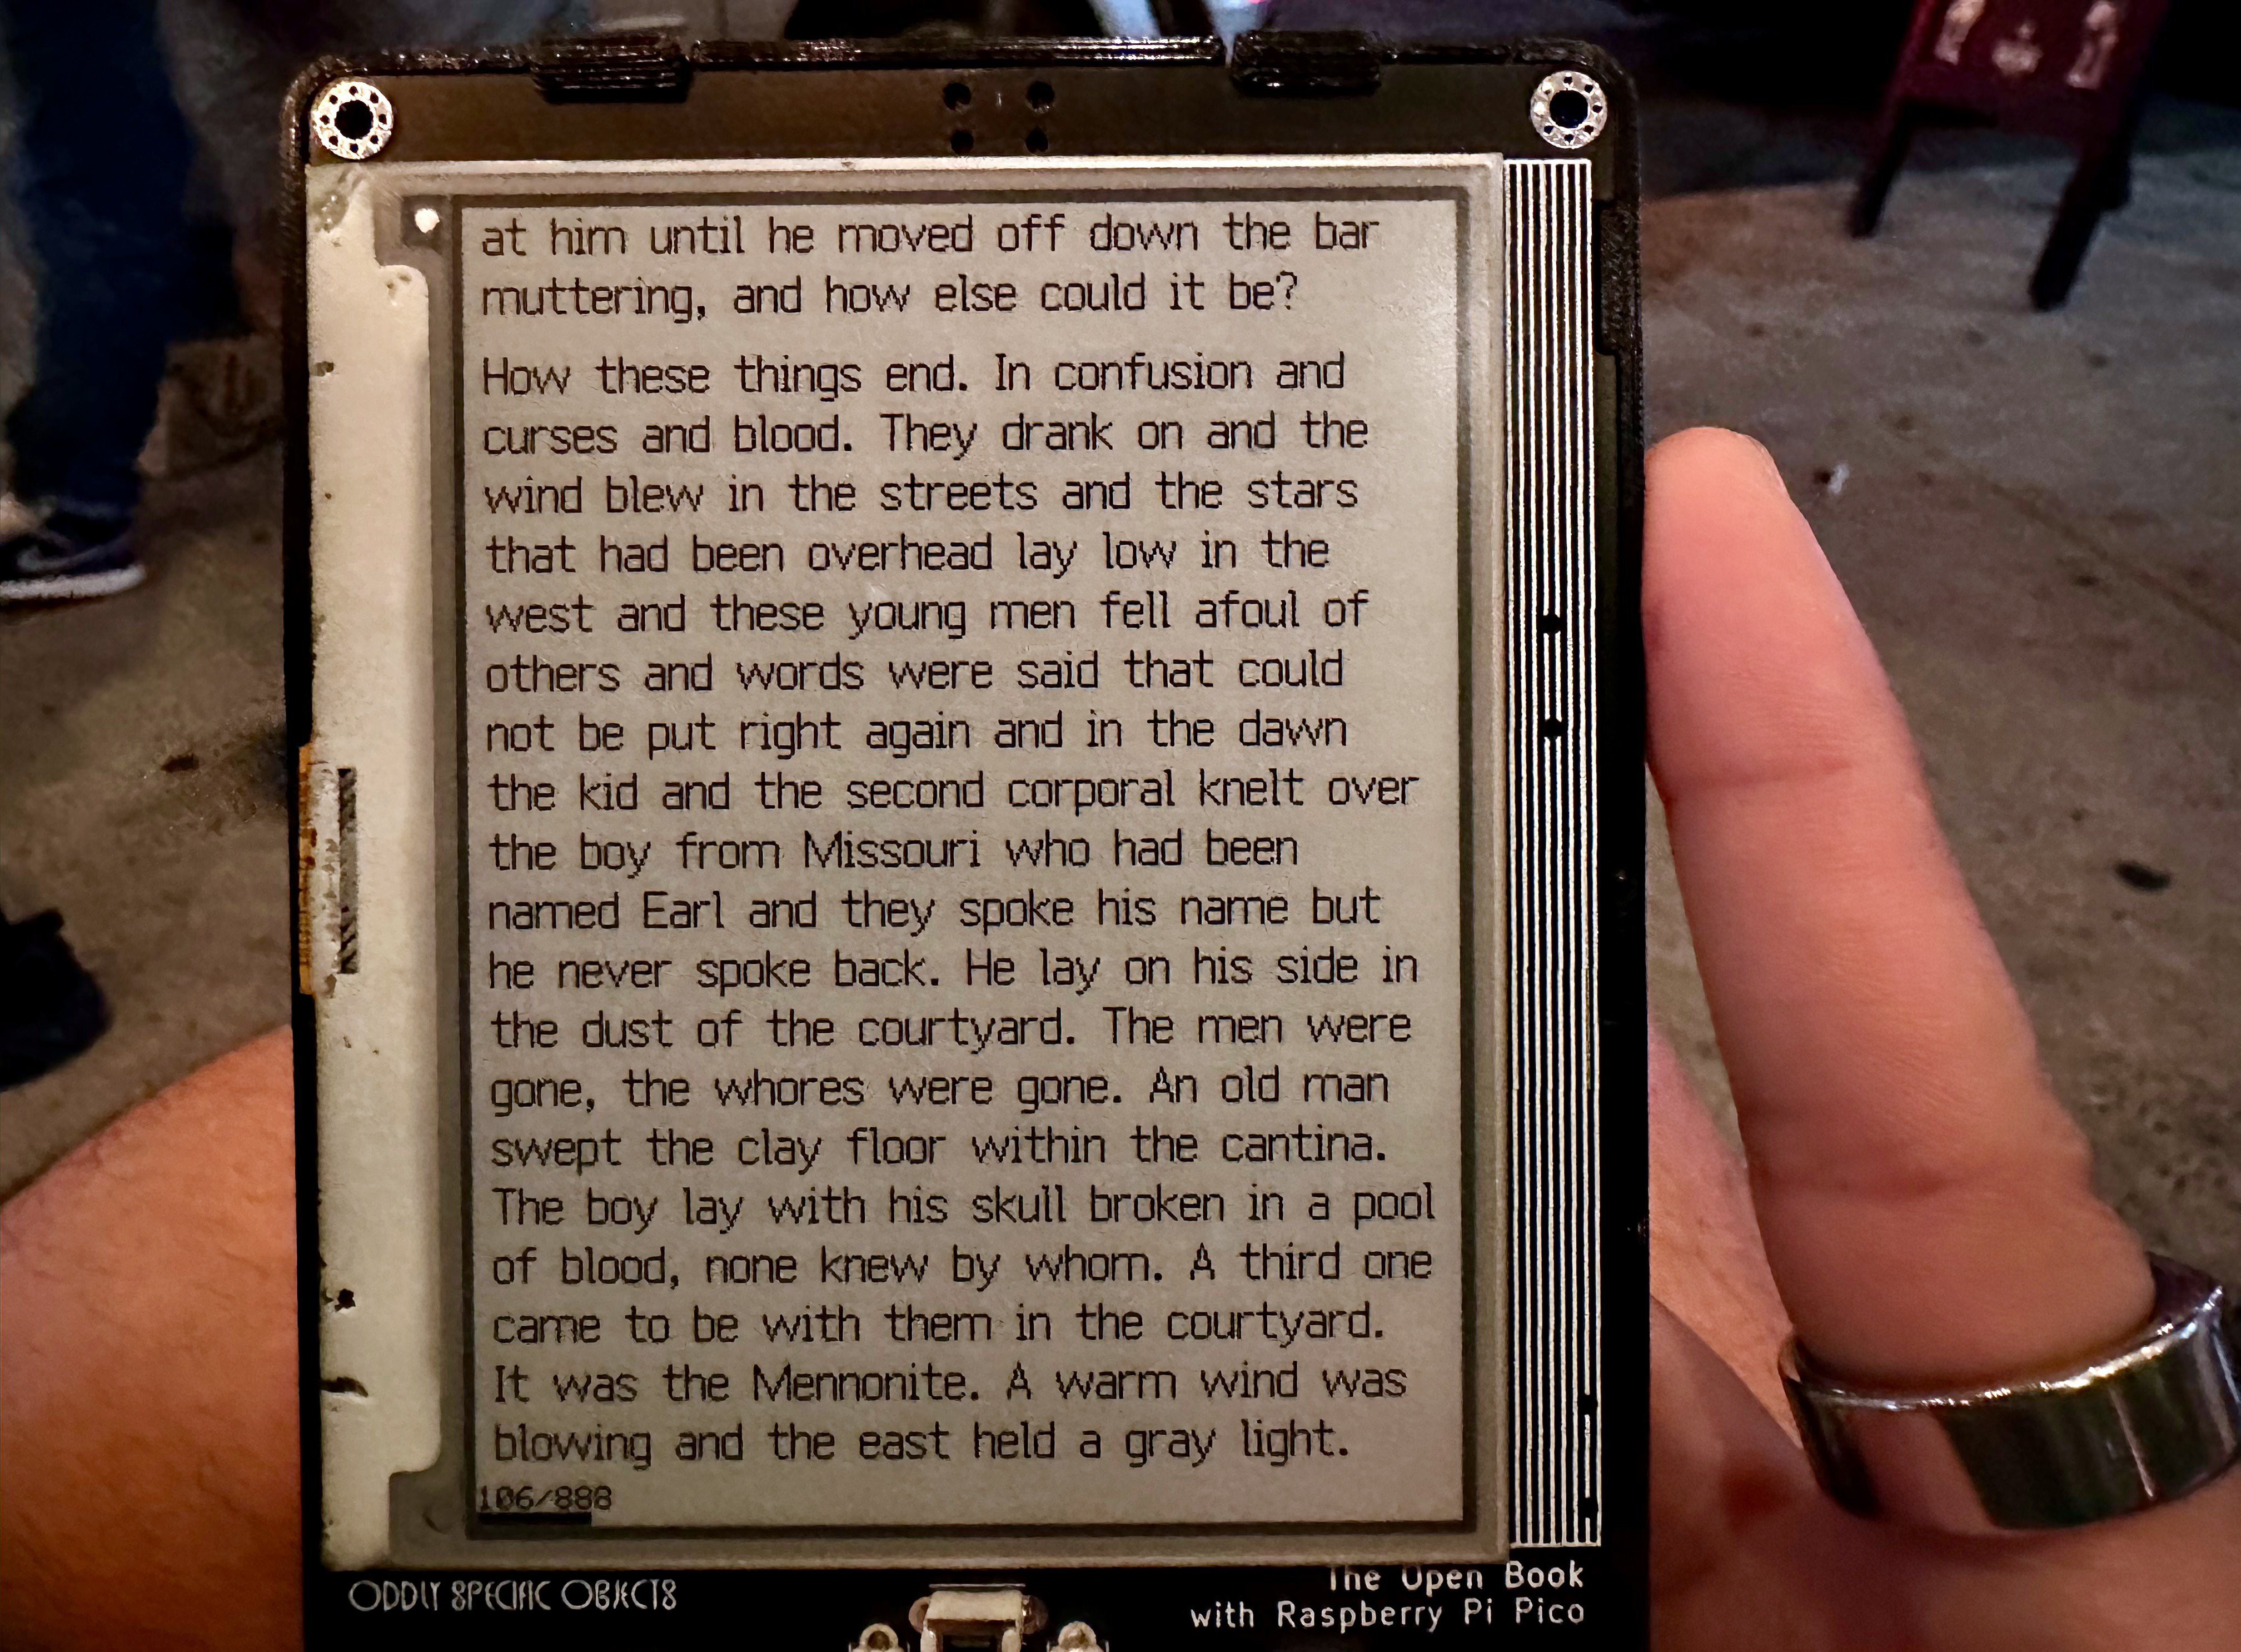
Like I said a couple of weeks ago, I’ve been reading Cormac McCarthy’s “Blood Meridian” on one of the latest prototypes, and this proportional width typography has been an unmitigated joy to read (even if the book itself is a violent fever dream of breathtaking depravity).
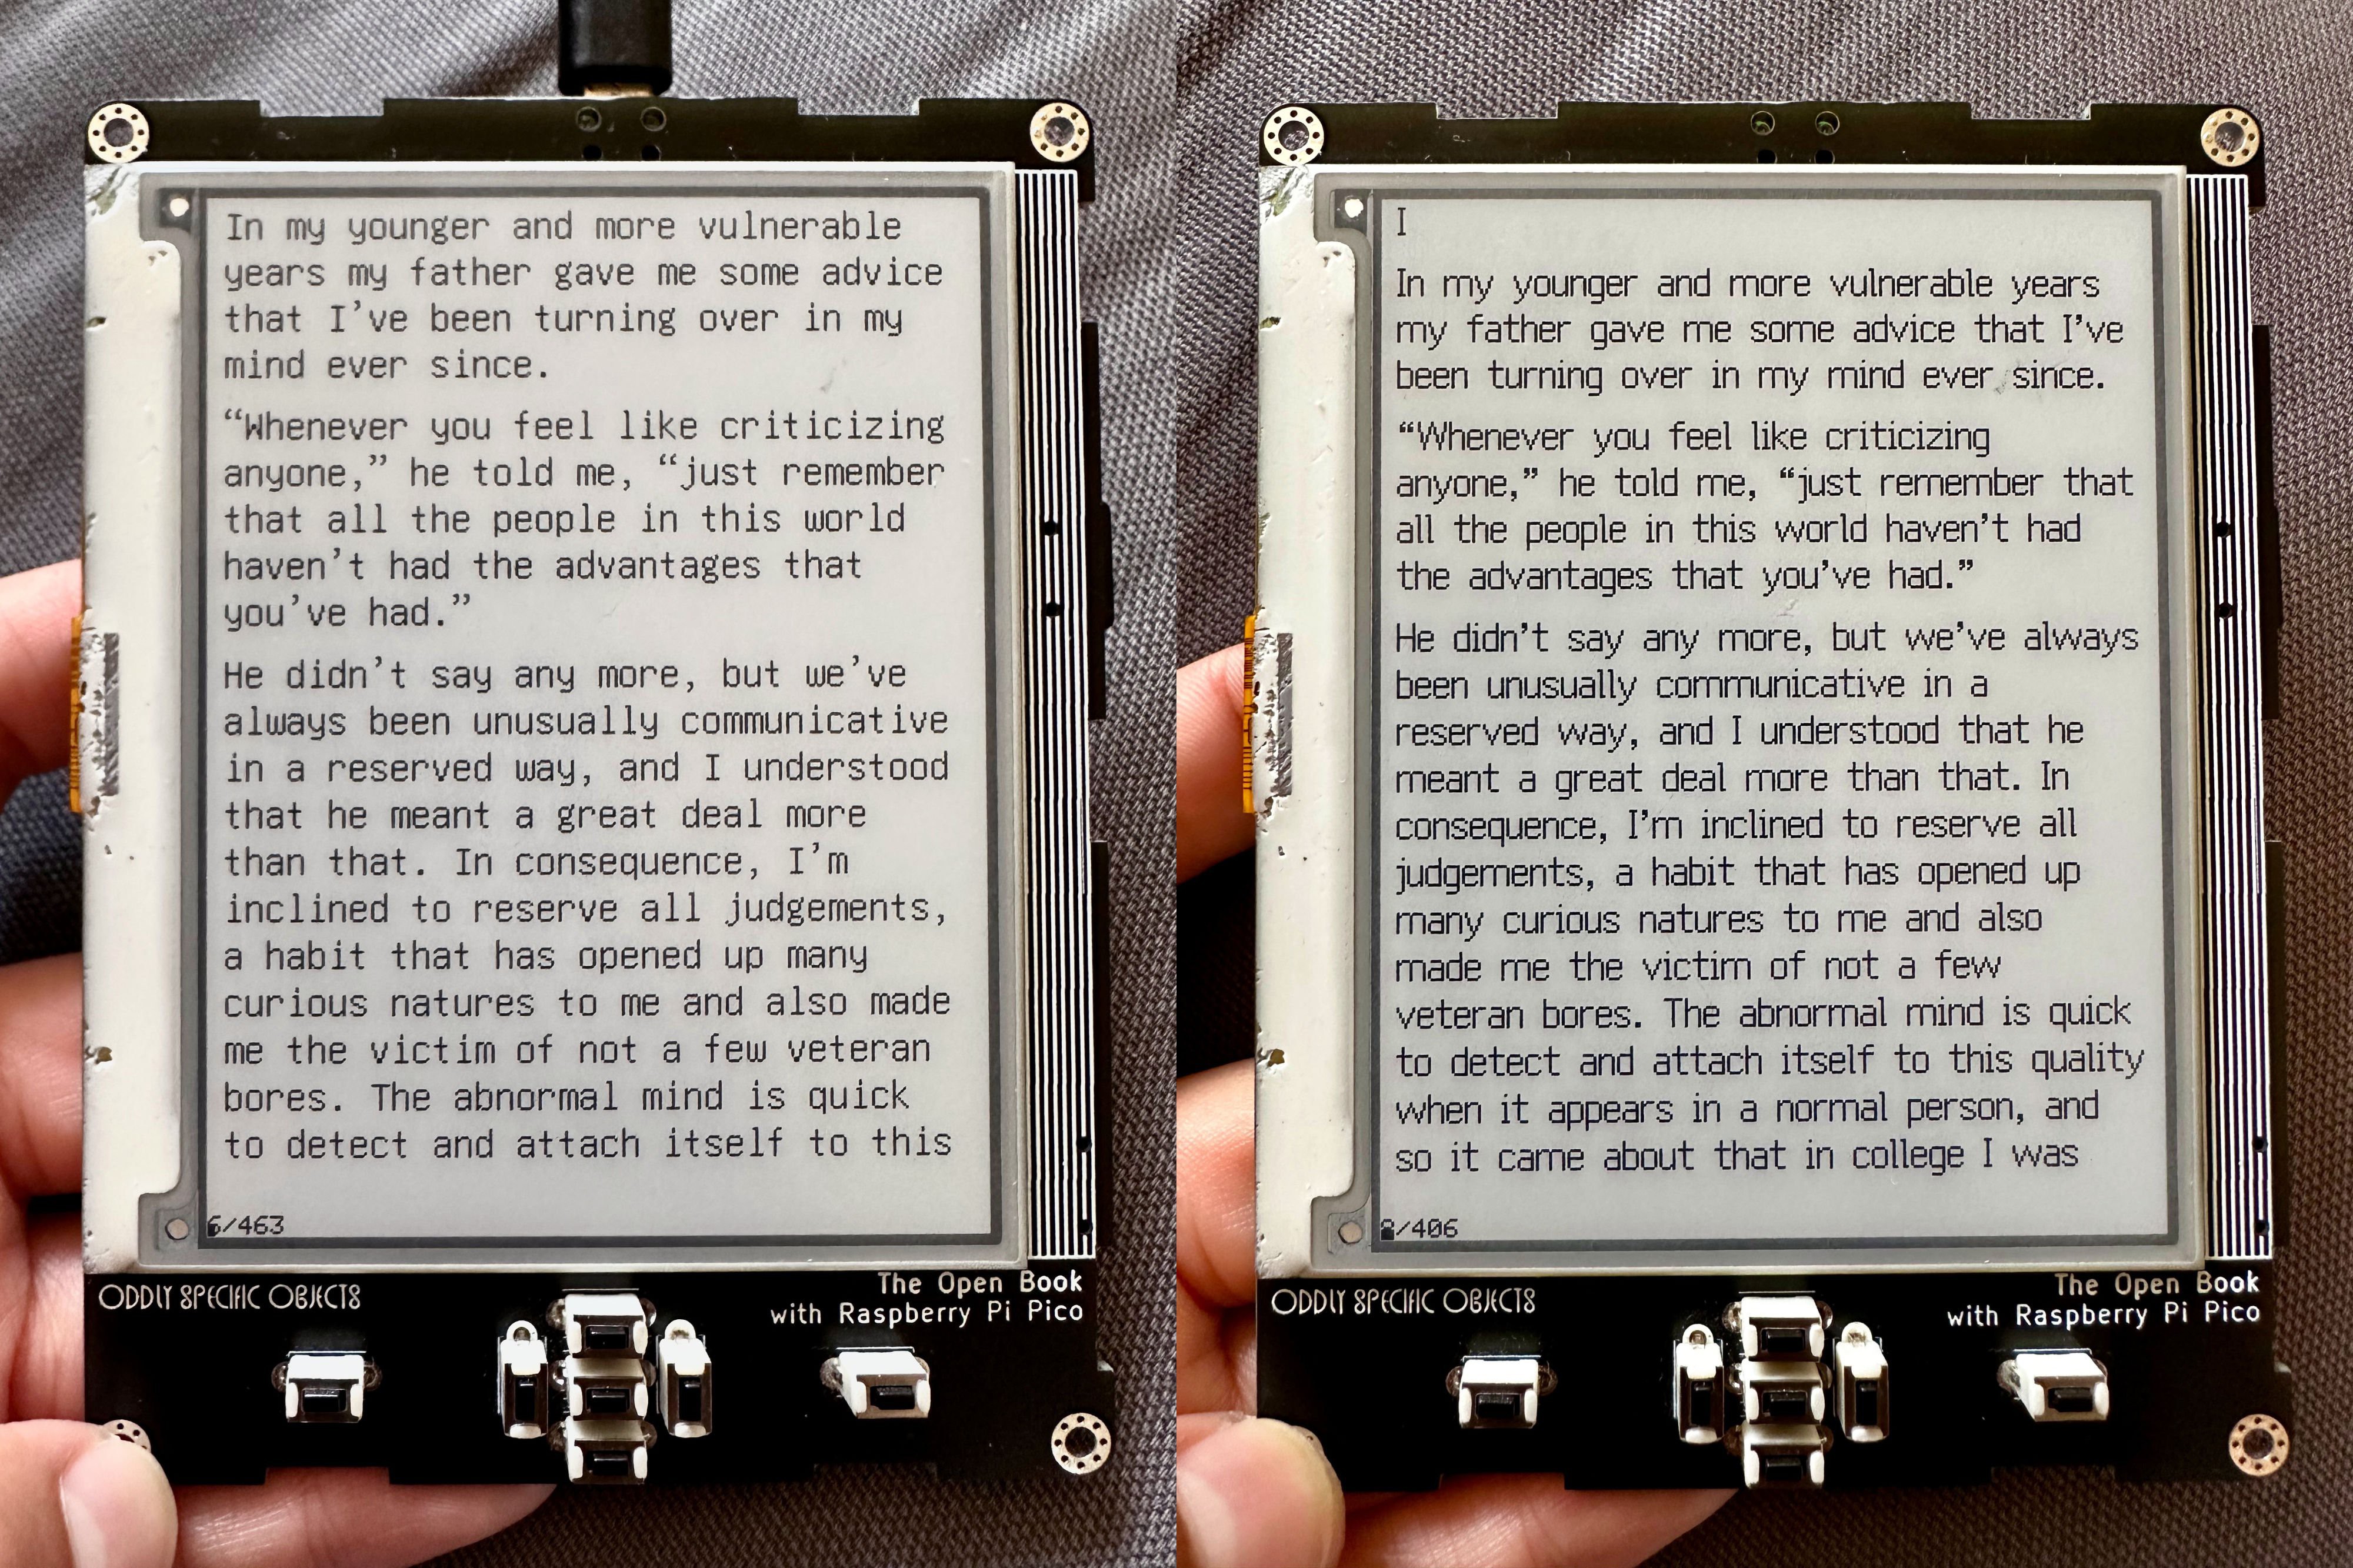
For a less blood-soaked excerpt, here’s a comparison of the first page of The Great Gatsby, rendered with the old Unifont glyphs on the left and the new Ark glyphs on the right:

I, for one, know which one I want to read. And the best part is, I think we can have this feature without sacrificing on global coverage! I see no reason why we can’t import the Ark glyphs for English and Western European languages, while falling back on Unifont’s 100% coverage of the basic multilingual plane for the rest of the world. In fact, with the ESP32-S3 version of the book (the one I’m submitting for the Hackaday prize) we may be able to go even further. With eight megabytes of Flash memory, right there on the ESP32-S3 module, I think we can fit the basic AND supplemental multilingual planes onto the device — at a lower cost, AND with fewer part placements.
Anyway: if you made it this far, congratulations! I know it was something of an epic read, but this pair of posts represents the fullest possible accounting of the importance of the Open Book's universal language support, and the technical details of how we implement it on a resource constrained microcontroller. For more information, you can check out the Babel repository on GitHub, where you can download babel.bin along with an Arduino library that will let you add this universal language support to your own microcontroller-oriented projects. Ark's proportional-width glyphs aren't in there yet, but I hope to work on adding them in the next few weeks. They make the book even more of a joy to use, and I can't wait to share that experience with more people.
-
A Book for Every Language: Part I
09/07/2023 at 21:47 • 1 commentNOTE: This project log was originally posted on 08/05/2023 at 19:00 EDT, but due to a misunderstanding, it had to be deleted and remade.
There’s a note in my notepad, under the broad subject area of retrocomputing: “Fundamental tension: understanding the past vs inventing the future.” Today’s notions of computing are the result of decades of choices, conscious and unconscious, by people in the past who invented the future. Some of those choices were the result of deep discussions of technical merit; others were based on expediency or commercial considerations. Either way, these choices ended up written into specifications and protocols, many of them coded in software, but many also implemented in in hardware, creating a built world of objects that represents the past’s implementation of the future.
Sometimes, the past got it right. Sometimes, it got it wrong. I think it’s important to understand what the past got wrong so that we can invent a better future.
One big area where the past intersects with the Open Book is in the encoding of languages. I’ve long felt strongly that the Open Book should support readers of books in all the languages of the world. That means it needs to have some way to store texts in all the world’s languages, and display them on an e-paper display — all on a tiny, low-power microcontroller with the RAM of a computer from the late 1980s and the compute power of a computer from the mid 1990s.
Let’s take a trip back in time: what did this era of computing look like?

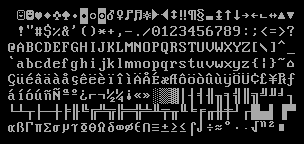
Well, in the late 1980s, you had ASCII, which is lines 2, 3 and 4 of this graphic, and includes glyphs for English letters, numbers and punctuation marks. Many computers also supported “Extended ASCII,” which the first line and the bottom half of this graphic. With this extension, you got characters for several more Western European languages, as well as some symbols for math and engineering. The way this worked was this: your graphics card would have stored bitmap representations of each of these glyphs on a little ROM chip (probably 8 kilobytes), and when displaying text, it would look up the bitmap for each character and copy it into display RAM, so it could render on your monitor.
This worked fine if you were an English-speaking writer (or a Spanish-speaking mathematician). But if you were interested in transcribing works in a rare or endangered language (like, say, the Cherokee language), your computer wouldn’t be able to do that out of the box. In a world of 8 kilobyte character ROMs, those well-intentioned folks in the past couldn’t fit every language into your computer and make it commercially viable. Moreover, ASCII only has 128 code points (256 if you really stretch it).
Those folks in the past had painted themselves into a corner: there was literally no room left to encode more languages.
Unicode: Solving the Encoding Problem
If you’re not familiar with Unicode, here’s the one sentence pitch: it’s an attempt to unify all the world’s writing systems — ancient and modern, past, present and future — into a single universal character encoding. Under Unicode, every glyph for every character that is or ever has been is assigned a unique code point. There are 1.1 million of them available, and we haven’t yet hit 10% utilization.
Technically, Unicode was invented in 1991, and computers were getting more capable and powerful throughout the 1990s. Seeing as we had solved this problem from a technical perspective, surely operating systems and users all adopted this new universal character encoding quickly, ushering in a golden age of interoperability, peace and prosperity.

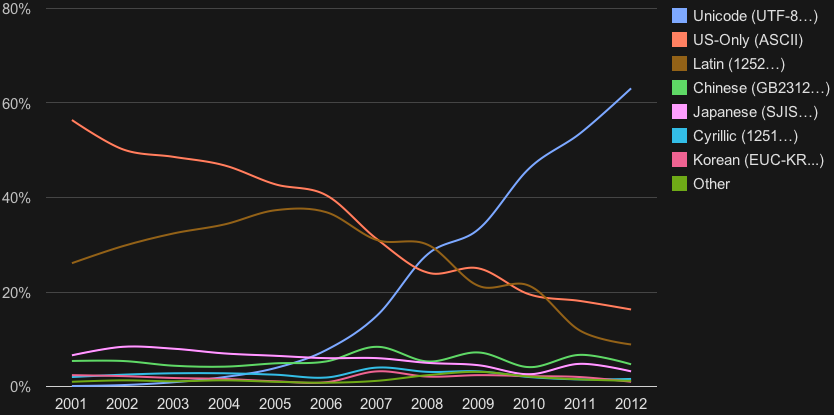
Of course, I’m only joking! In reality a patchwork of mutually incompatible code pages dominated the early days of personal computing, remapping the 256 ASCII code points to different languages in a manner that all but guaranteed that any attempt to open a non-Western file would result in completely incomprehensible mojibake. It wasn’t until the 2010s that Unicode achieved a majority share of the text on the Internet.

And yet! Even then (and even now), there was/is no guarantee that your operating system could/can actually display these properly encoded texts. Because even today, with a smartphone thousands of times more powerful than the most iconic supercomputer of the 20th century, there’s no guarantee that your operating system vendor cared enough to draw glyphs for the Cherokee language (ᏣᎳᎩ ᎦᏬᏂᎯᏍᏗ).
This is a choice.
GNU Unifont, and an Introduction to Babel
I hope that earlier when you read the description of Unicode — an attempt to unify all the world’s writing systems — you read that as as ambitious as it actually is. Like, seriously: 🤯.

The Open Book builds on another ambitious project: GNU Unifont. Unifont is an attempt to create one universal bitmap font, with a glyph for every single character in this universal character encoding. The Open Book, up to now, has done something very similar to what the IBM graphics card did with its 8 kilobyte character ROM: it’s included a 2 megabyte Flash chip, flashed on first boot with bitmap glyphs for every code point in the Unicode Basic Multilingual Plane (or BMP).
For reference, the BMP contains 65,520 glyphs. The majority of these are Chinese, Japanese and Korean characters, but it also encompasses characters for essentially every language in use today: Latin and non-Latin European scripts (Greek, Cyrillic); Aramaic scripts like Hebrew and Arabic; Brahmic scripts for Hindi, Nepali and Sanskrit; and yes, tribal languages like Cherokee. Without getting exhaustive, the gist of GNU Unifont is this: you name it, we’ve got it.
I call my Unicode support library “Babel” (for obvious reasons), and I have some fun notes about how the book gets good performance out of its massive library of glyphs. I think I’ll write about that in a Part II next week, just because this project update is getting long. Mostly I want to close this post by talking about the importance of universal language support, why for me it’s the sine qua non of this whole thing.
Universal Language Support: Why it Matters
It’s a bit of a truism to say that language and culture are deeply linked, so sure, it’s not surprising that a device that aspires to display cultural works would aspire to support many languages. But it’s more than that. Throughout history, attacking language has been a tool for erasing culture. Often this was explicit and overt, like the Native American boarding schools that forbade students from speaking their native tongues. And to be clear, I’m not suggesting that the engineers who made English characters the lingua franca of computing were committing an intentional act of colonialism. But you don’t need intent to have an effect: the hegemony of ASCII, for years, made second-class citizens of billions of computer users by excluding their languages by default.

On the other hand, seeing your language acknowledged and being treated as worthy of inclusion? That, to me, feels empowering. The Open Book doesn’t have a separate code path for rendering ASCII glyphs versus glyphs for any other language. There’s no extra configuration to read Leo Tolstoy in the original Russian, or The Thousand and One Nights in the original Arabic. The Open Book aims to support all languages and treat them the same way.
This, too, is a choice.
A couple of years back, I saw a talk by Rebecca Nagle, a writer and activist and citizen of the Cherokee nation. Her talk specifically called out the link between tribal language and world view; the idea that the Cherokee language is a crucial link to a way of life that’s been under attack for centuries. The Cherokee language is deeply endangered language today; by some estimates, only about 2,000 Cherokee speakers remain. One dialect is extinct.
Coordinated efforts are underway to save the Cherokee language. Technology can help that effort with its support, or harm that effort through indifference. In both encoding code points for the Cherokee Language and drawing glyphs to represent it, Unicode and Unifont support those efforts — and by building on those foundations, the Open Book does too.
To me, this represents the best that technology can aspire to. It shows the good that can come when we focus on universal access over bells and whistles, when we focus on choices that empower every user.
That’s the kind of future I want to invent.
-
Enclosure design and the new Open Book
09/07/2023 at 21:45 • 1 commentNOTE: This project log was originally posted on 07/27/2023 at 18:51 EDT, but due to a misunderstanding, it had to be deleted and remade.
One key requirement for the Open Book has never changed: I want it to be portable. I mean, it has to be, right? You want to toss it in your purse to read on the subway, and that means that it has to be battery-powered and self-contained. As this requirement goes, the original Open Book actually looked OK at a glance:

But if you look just a little closer, it becomes clear how it failed on both of these metrics.

Let’s take battery power first: when I was laying out that manic Dr. Bronner’s style circuit board, I wasn’t thinking about where a battery would fit. As a result, we were limited to placing a battery in the one spot without any components on it: the area between the Feather headers. Luckily there is a 400 mAh battery that fits there. But let’s face it: 400 mAh is not a lot of juice. Also, putting the battery on top made the device feel a bit top heavy, which is not a great hand feel.
Then there’s the issue of an enclosure, and the fact that the fit and finish wasn’t great. You can see big holes for the USB port and the lock button, as well as holes for plugging in a FeatherWing — not a ton of ingress protection. The enclosure also wasn’t as thin as I’d hoped it could be: that 400 mAh battery only manages to pack as much power as it does by being 8 millimeters tall, which makes it the thickest object on the board, and all but ensures that the device will be more than a centimeter thick when placed in its housing.
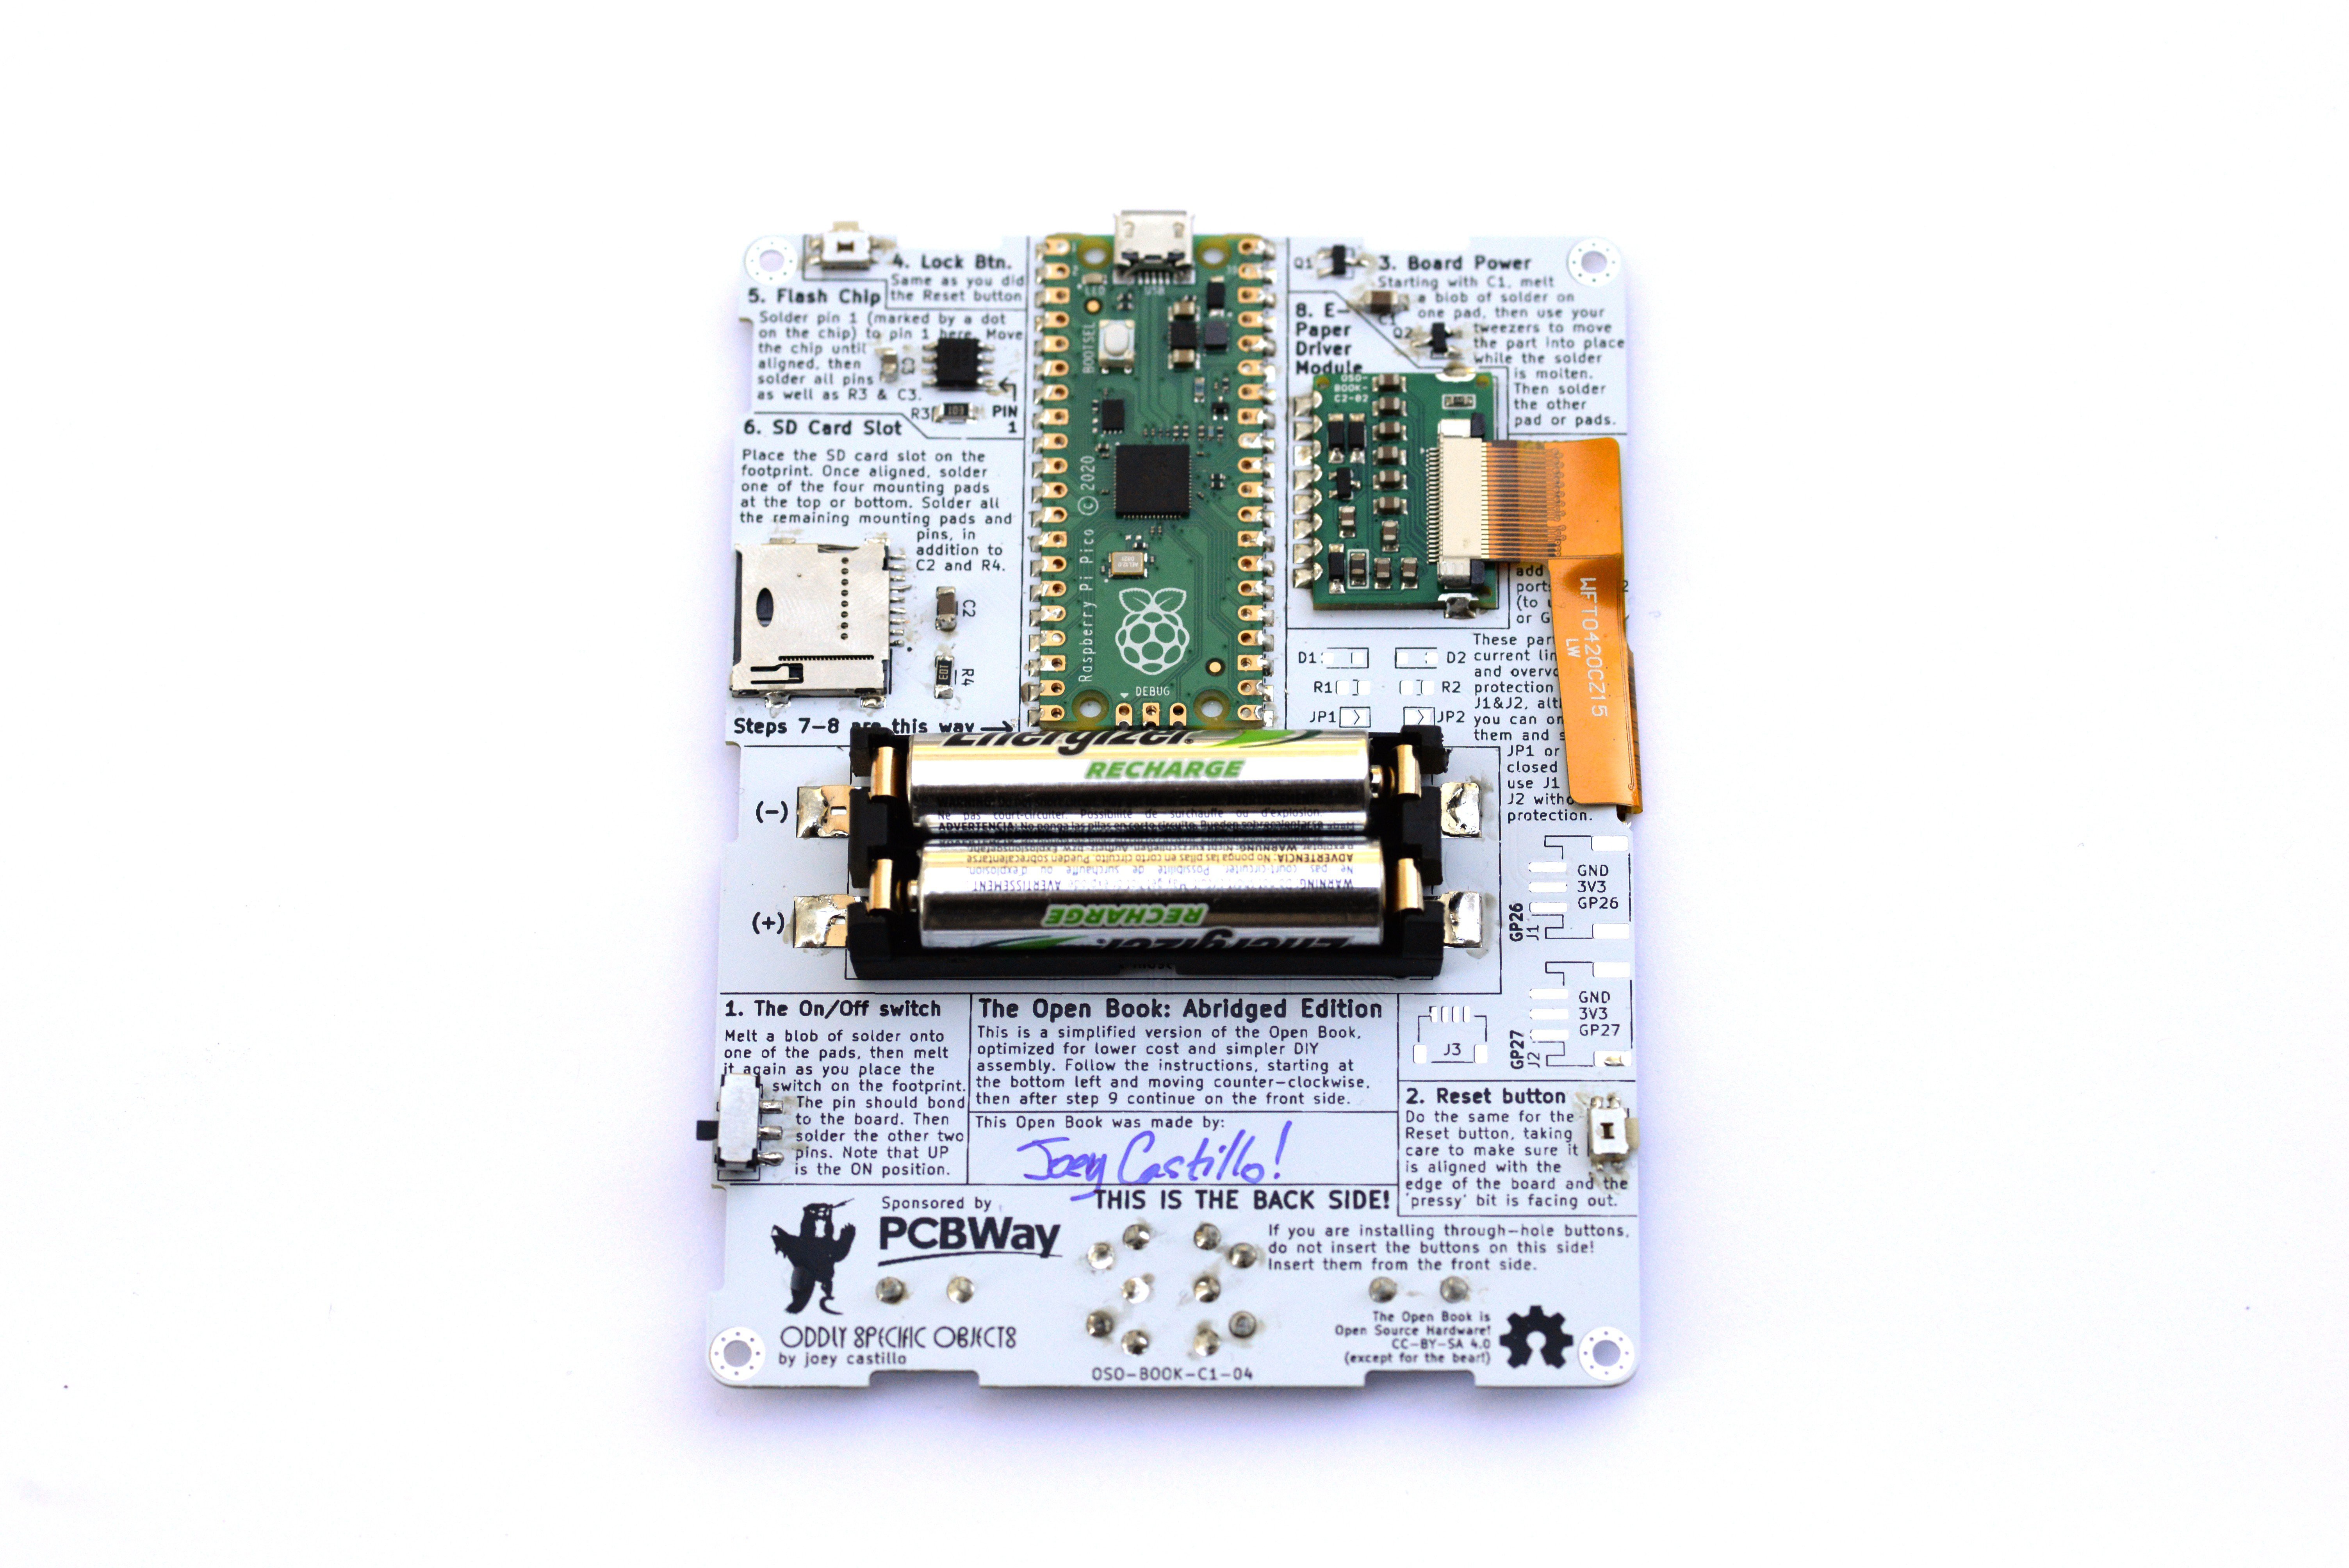
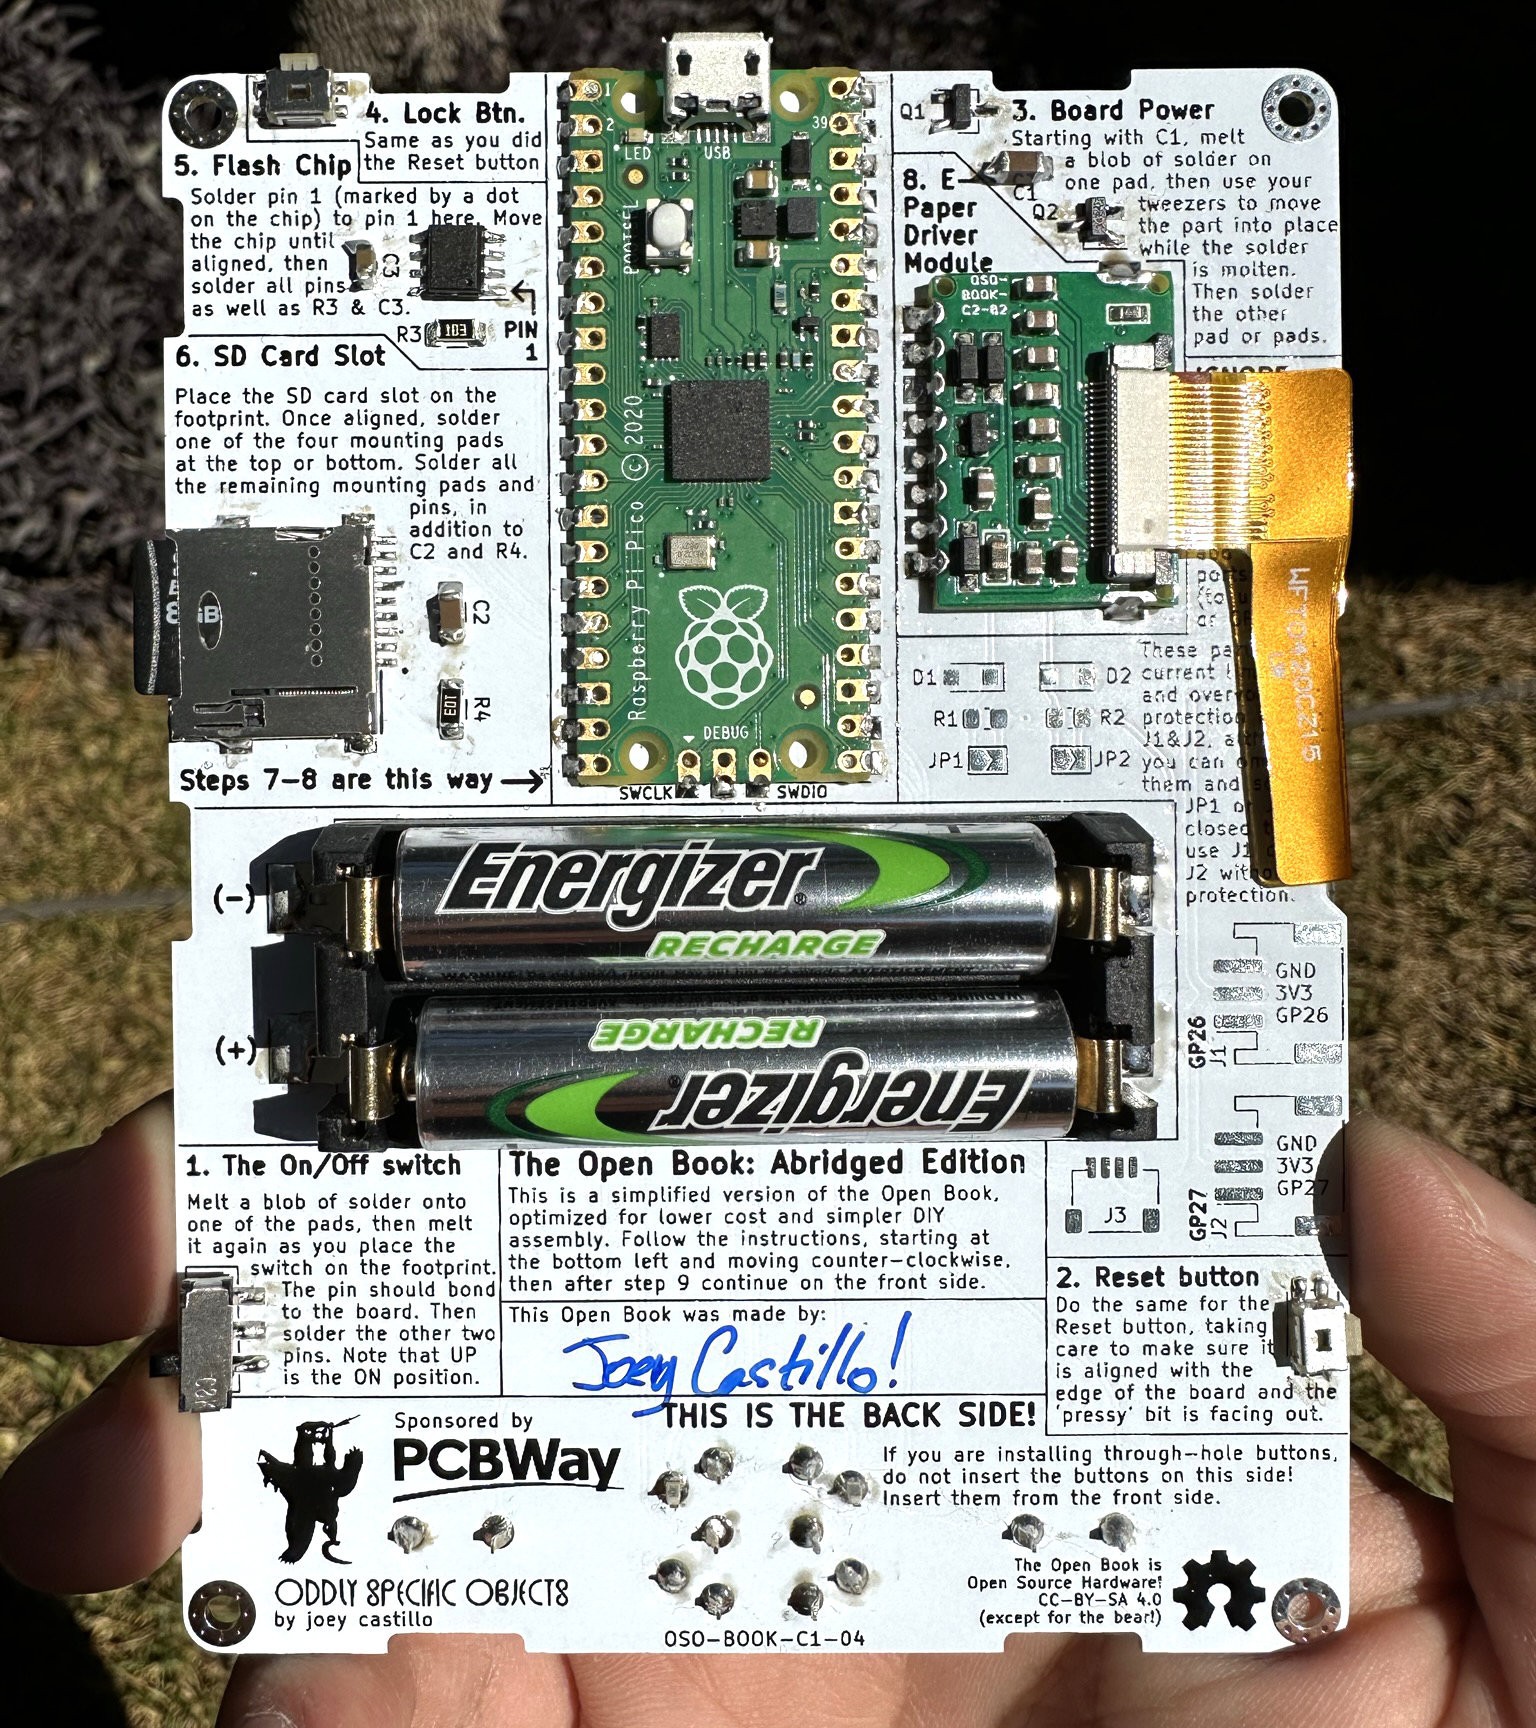
Later I moved on to the Abridged Edition, which was designed to be easier to hand-solder. Here’s one of the assembled boards — generously sponsored by PCBWay when I wanted to try out their white silkscreen:

This part worked! Folks had a lot more success assembling this one. But how does it score on the portability factor? Let’s examine those same two metrics: battery power and enclosure design.

To keep the part count low and the hand-soldering easy, this version did away with the entire lithium polymer charging circuit. Instead, it’s powered by a pair of AAA cells, which gives the device something like 1,000 mAh of capacity!
Alas, it’s a tradeoff when it comes to enclosure design: the device has a chunky “backpack” sticking out. It also lacks a front plate, largely because industrial design hasn’t traditionally been my strong suit: for a long time, I had designer’s block on how to make a “good” 3D printable enclosure.
This begs the question, as I work toward a final version of the Open Book: what would a no-compromises version of this design look like?
The new Open Book
First off, I think the circuit board looks something like this. The Lipo charging circuit is back, along with a slim Molex Picoblade connector. You can find batteries with this connector on Aliexpress, and boy did we find one: that huge gray rectangle is a 1,500 mAh battery that’s just three millimeters thin. I was careful to keep a 50 by 70 millimeter area completely devoid of parts, which means the battery can safely fit there, flush with the 1.0 millimeter circuit board.

This gives the Open Book a much bigger power budget, while keeping the device slim in the extreme. And placing the heavy battery toward the bottom of the board puts its center of gravity in the bottom center of the device — just where we want it for the object to have a satisfying feel in the hand.
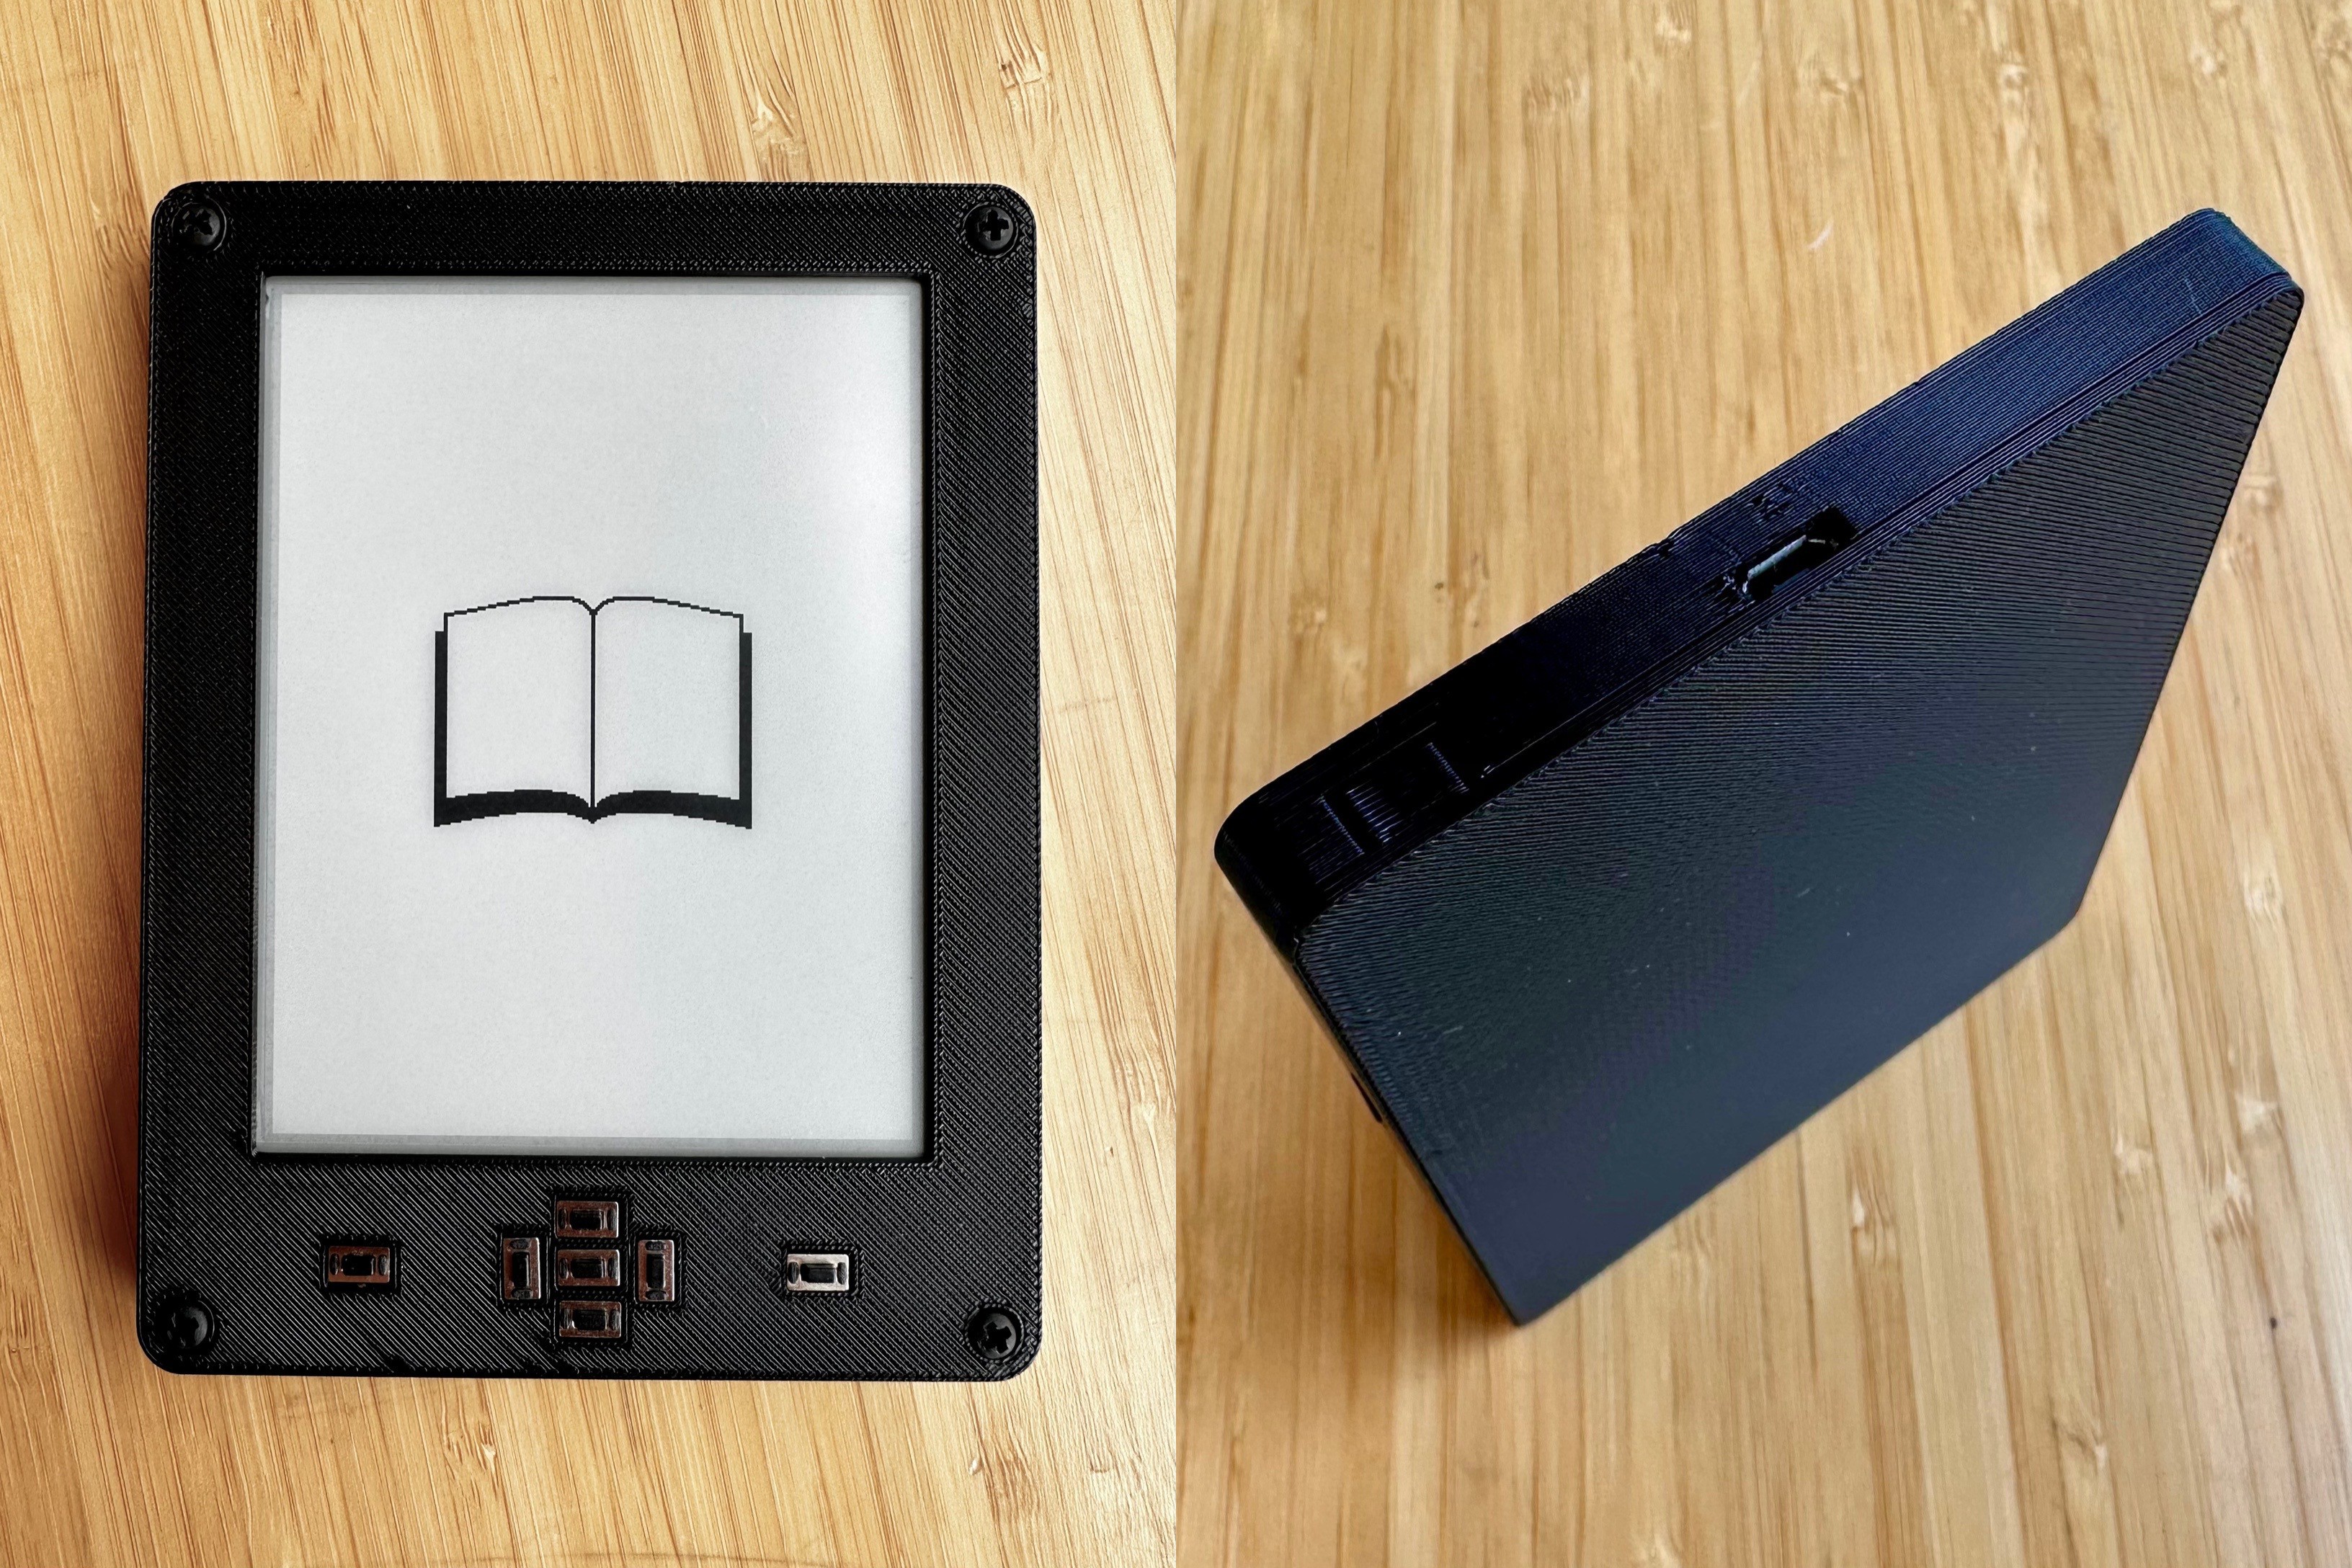
As far as an enclosure design? Well, ideally I’d like to enclose it entirely, save for slim openings for the MicroSD card and USB port. To be clear, I haven’t designed a final version of this yet — I just assembled the first of the new prototypes late last night — but I have been experimenting with an old Abridged Edition with its battery holder pried off and a Lipo shoved inside. As of now, I’m able to enclose that device in a 3D printed enclosure that's under one centimeter thin.

The improved fit and finish — plus the slim lock button pusher, which allows you to push the lock button from outside the case — makes it much more resilient to dust and debris.

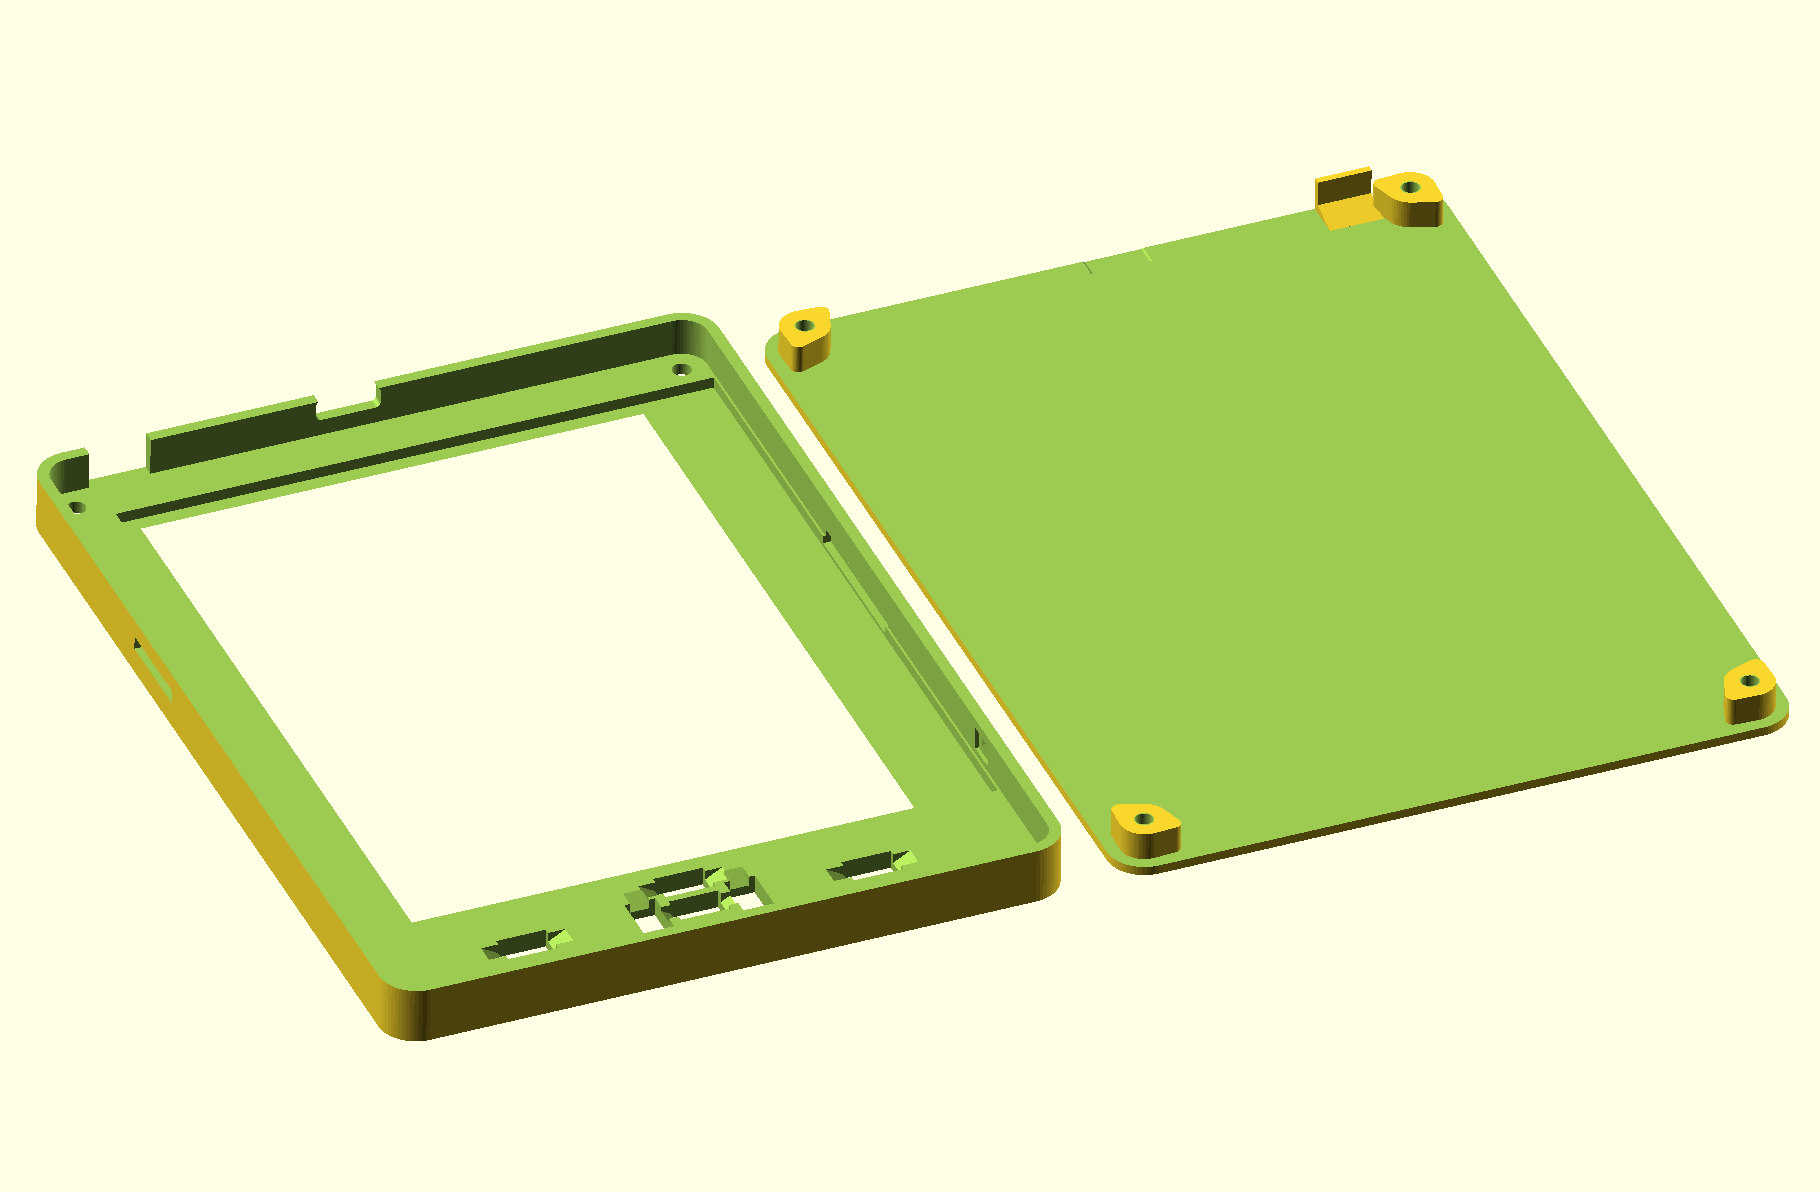
In fact, I’m so stoked for this new enclosure design that I made a version of it that works with the current Abridged Edition boards, and I’m sharing that today. It’s largely parametric, meaning that you can change the board thickness (if you have 1.6mm PCBs), tweak screen beveling options and even check off a box to add cutouts if you added JST-PH ports for accessibility features like foot pedals or external buttons.

The whole thing is held together with four 6mm long M2.5 screws, and this part couldn’t be simpler: four holes in the backplate are just a hair narrower than the M2.5 threads, which allows a metal screw to carve its way into the plastic. The holes in the front bezel are countersunk, allowing the screws to inset slightly. (if you use M2 screws instead, they can inset almost completely).

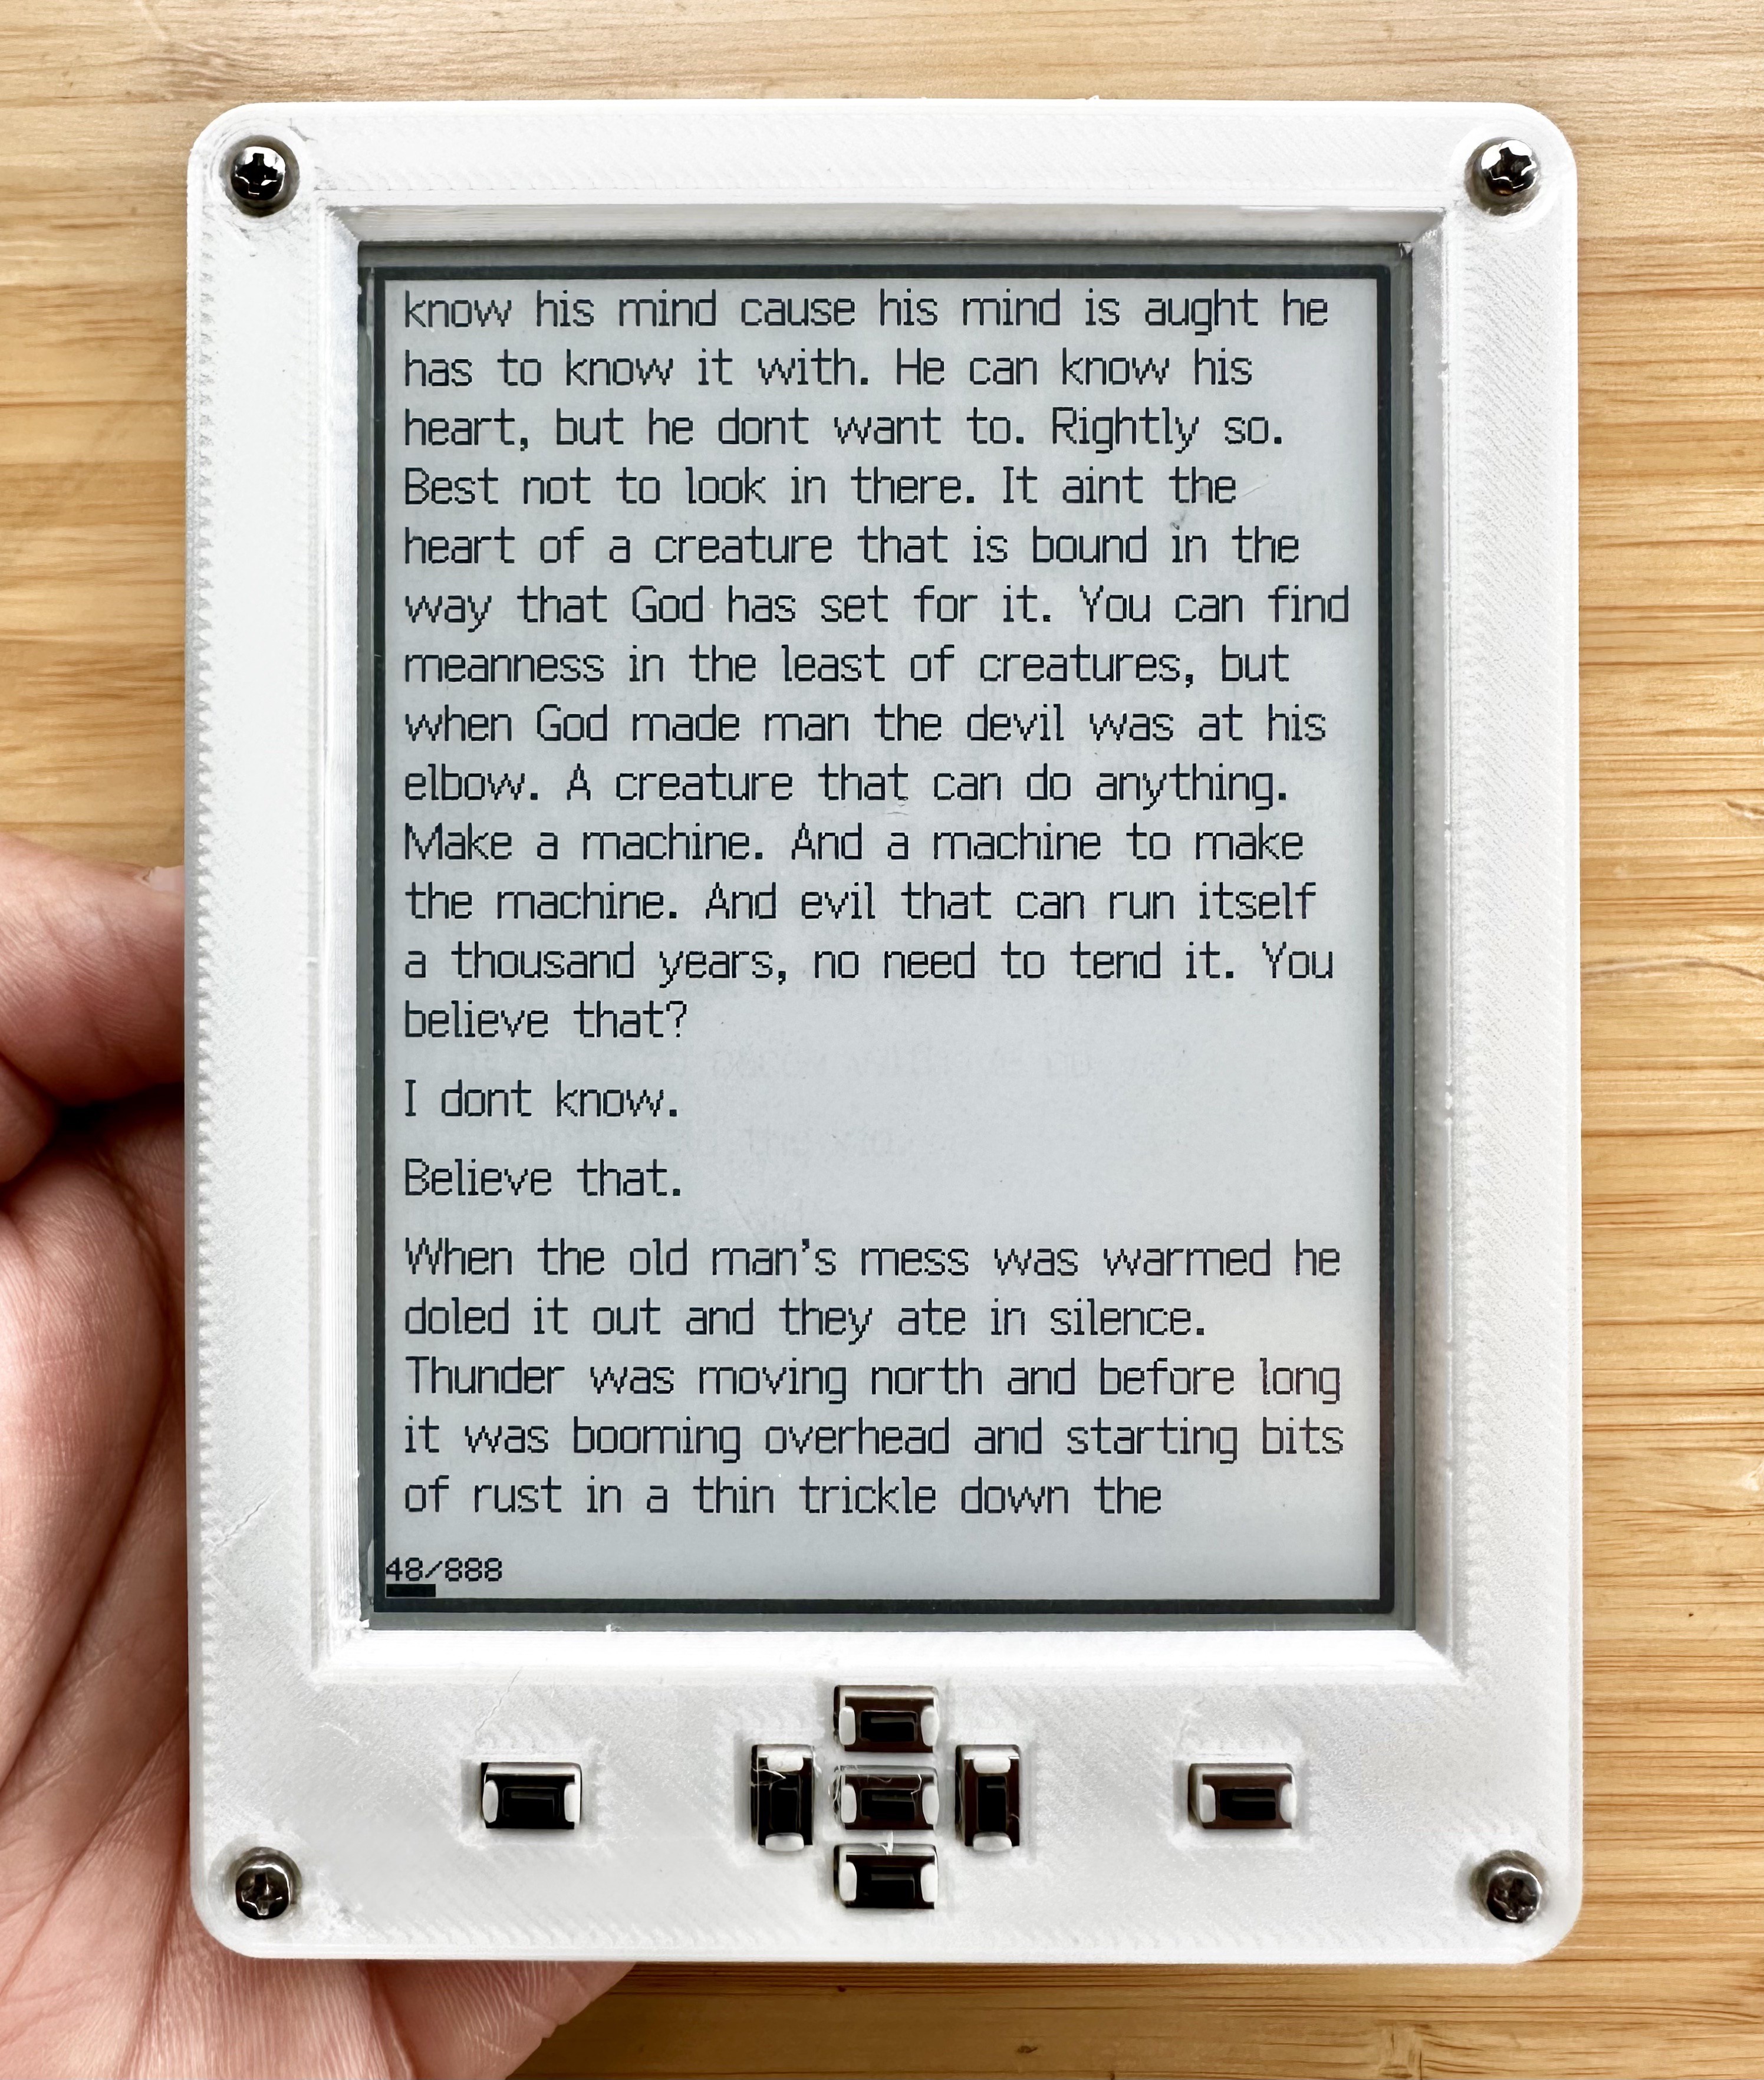
I’ve been carrying this latest version of the device around for a week now, (reading Blood Meridian, which I somehow never finished), and I've been enjoying the improved fit and finish of the device. Also — easter egg! — this last photo actually showcases a brand new feature: proportional type rendering.
More on that next week.
-
The Quest for a Sub-$100, DIY E-Book Reader
09/07/2023 at 21:44 • 3 commentsNOTE: This project log was originally posted on 07/20/2023 at 18:38 EDT, but due to a misunderstanding, it had to be deleted and remade.
The other night I was jotting down some notes about the Open Book, trying to figure out how to write about what we did right and what we did wrong, about how we got to where we are from where we came from. In broad strokes, I imagined two parallel tracks to understanding: there’s the engineering of the gadget, the set of choices that make the thing what it is, and then there’s the economics of the gadget, the set of choices that make the thing a viable product.
Of course, one of the key lessons learned from this project is that those things are so deeply intertwined that there’s no way to talk about them in isolation.
The original Open Book design got a few things right on the engineering side. It got almost nothing right on the economics side. Over the course of this project, I’ve made several revisions of the concept that got closer to threading the needle and getting both right. I think I’m finally close with this latest design, the design I intend to submit for the Hackaday prize.
But before we get into that, a quick aside on how these two sides of the equation relate.
The Economics of the Gadget, or: What does it cost?
When I was first designing the Open Book, I imagined that I’d buy a circuit board and a pile of parts, and that would add up to the cost of the gadget. This is one of the reasons I threw the kitchen sink at that board; it had everything from a display and buttons to a headphone jack and a microphone preamplifier for voice commands. I felt okay with it because (in my recollection) the cost of all the parts added up to something like $70 — still less than a Kindle!

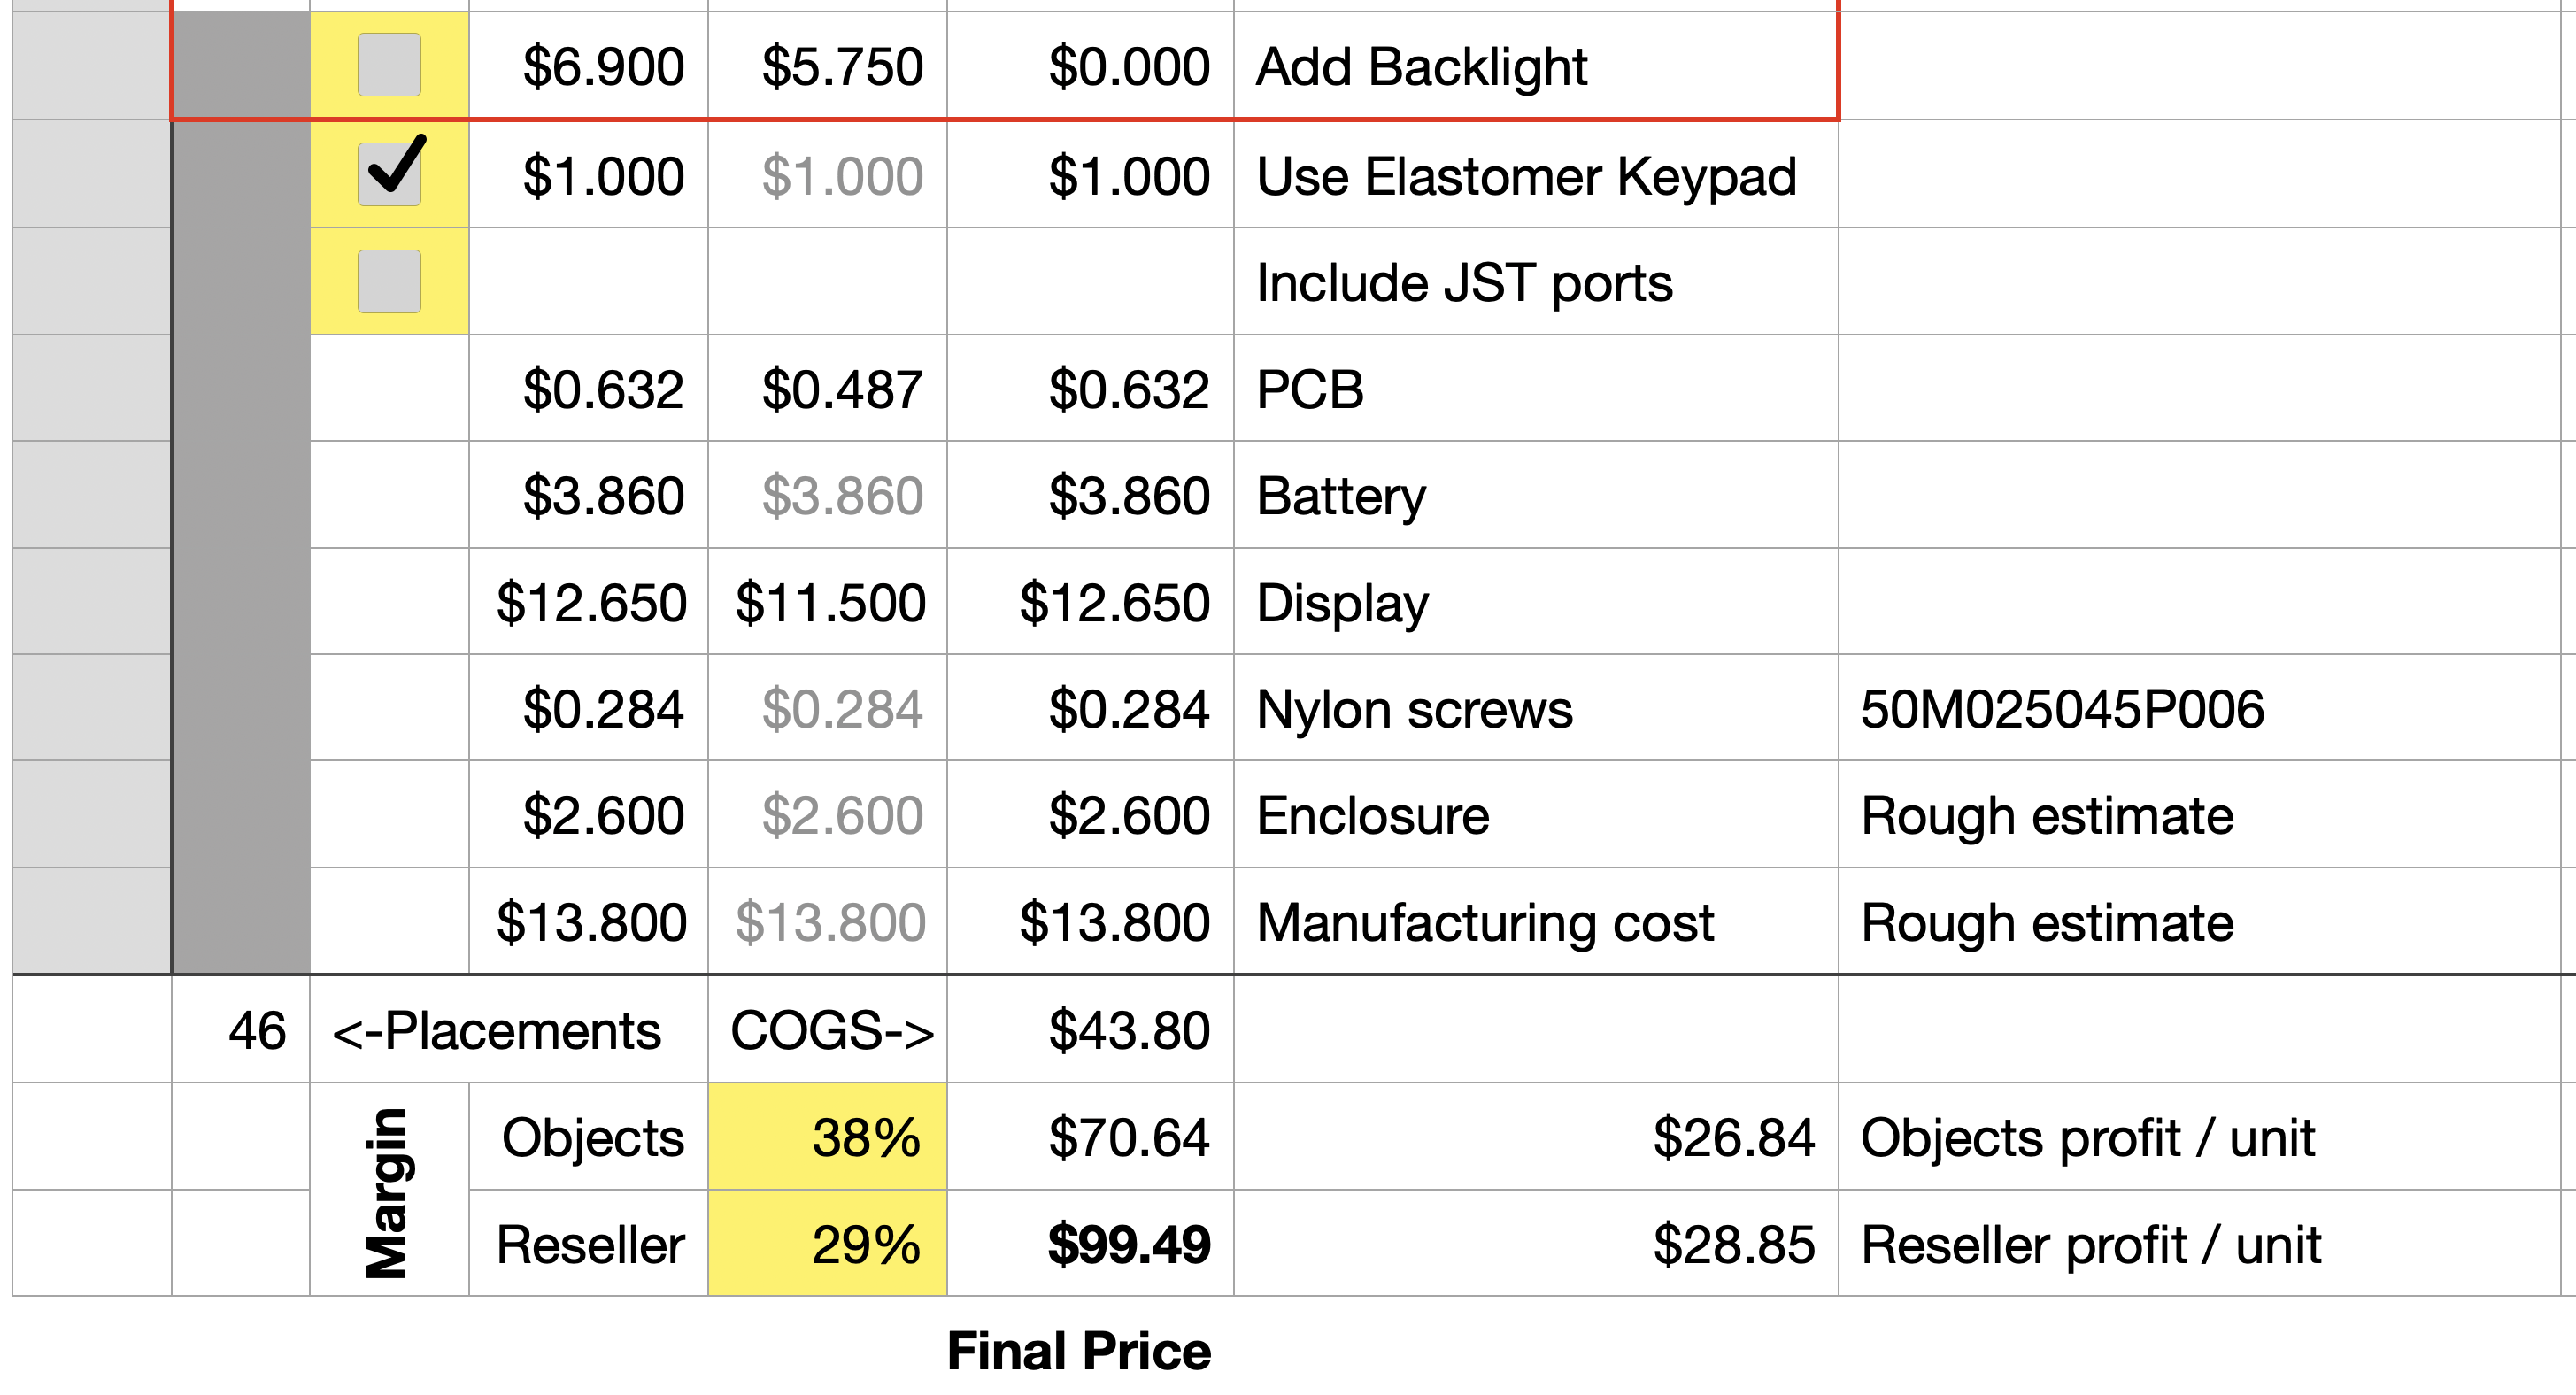
But here’s the thing: that’s not what the gadget costs. First off, you have to pay someone to assemble the board, and with dozens of lines on the bill of materials (BOM) and more than 130 individual part placements, that would add up to quite a lot. Let’s pencil in $15 for assembly costs, just as a rough guesstimate. Now the board costs $85. (There are other costs like packaging and testing and eventually an enclosure, but for the moment let’s keep it simple.)
If I sold the board for $85, I would in theory break even. But that doesn’t pay me for any of the work I’ve done on the gadget. It also doesn’t help recoup the money I spent on prototypes, fund development of the software that runs on the gadget, or plan ahead for costs associated with designing a future version of the gadget. This $85 is just the cost of goods sold, or COGS, and selling a gadget at cost means you’re losing money.
If I want to make the Open Book a sustainable thing, I need to add margin to this number — money I get to keep to run the business (and maybe pay myself a little bit if there’s anything leftover). In my experience running Oddly Specific Objects, I need a minimum of 40 points of margin for the business to even remotely make sense. So how do we add that margin? The math on it looks something like this:
sale_price = cost / (1 - margin)
Or
$85 / (1 - 0.4) = $141.67
So the gadget costs $142, right? Well, not so fast. My core competency is in designing and making gadgets. It’s not in logistics or marketing. Which is all to say, I don’t want to be in the business of shipping these things individually. I’d much prefer to do something like a Crowd Supply campaign, where we make 1,000 of them, and then we ship them all at once to a distribution partner.
In essence, this $142 is my wholesale price, what I’d charge for selling 1,000 of them to a reseller. But that reseller also needs to make money, and a reasonable number might be 30 points of margin for them. Luckily we already know the math for this; we just need to change our perspective. From the reseller’s perspective, my sale price is their cost of goods sold, and we can add their margin on top like this:
$141.67 / (1 - 0.3) = $202.38
This is the sale price you'd need to hit to make the gadget into a product, and suddenly this thing that cost less than a Kindle needs to sell for over $200 to be sustainable.
The Engineering of the Gadget, or: What Matters?
So what happened here? Clearly, we lost the plot a bit. In trying to do too many things, we blew up our costs, and made an object that does a lot but also costs a lot. Instead, let’s think back to the core values of the object. Let's ask ourselves what it needs to do, and figure out what we need to put on the board to do that:
- It needs to display books (so, a screen) in all the languages of the world (which requires 2 megabytes of fast storage for font data)
- It needs some mechanism for user input (buttons)
- It needs to be portable (a battery) and low power
The question then becomes: can we achieve our goals for the book while making it economically viable?
Putting it All Together
If you aspire to make and sell gadgets, I’m going to give you the one key takeaway right here, and I’m going to do it by rerunning the calculations above, but for a COGS of $1:
$1 / (1 - 0.4) = $1.67 wholesale price

$1.67 / (1 - 0.3) = $2.38 retail price
If you take nothing else from this project log, let it be this: every dollar you add to your BOM adds more than $2 to the sale price of your gadget. And, by the same token, if you can shave $1 off the cost of your BOM, you can cut the price of your gadget by $2, expanding the audience of folks who are able to buy it.
I hadn’t quite articulated it this way at first, but in hindsight, this is the key lesson that’s been driving all the various revisions of the Open Book between 2020 and today. This is the calculation that led to the Open Book Abridged Edition:

This version optimized for easy hand assembly, but it also optimized for low cost by placing on the board only what was absolutely necessary. You can look at every block and see how each part contributes to one of the goals:
- The e-paper driver module drives the screen to show
- books stored in the SD card slot, using
- global font data stored on the flash chip.
- The front-facing buttons, plus the reset and lock buttons, are our user interface.
- The AAA batteries make the whole thing battery powered, and
- the on/off switch and board power block ensure low power consumption.
This relentless optimization allowed me to get hardware into people’s hands: not counting my labor, the parts for an Abridged Edition kit cost $33.57, which meant I could sell them for $60 ($55 at OSHWA) and manage 44 points of margin (39 at OSHWA).
But the truth is, this is still not enough to make the gadget real. For one thing, it’s expecting a lot to ask folks to assemble their own e-book reader with a soldering iron. For another: I can’t spend my days taping components to component cards and stuffing envelopes.
We need to make an assembled Open Book PCB for this thing to make sense.
The Hackaday Prize Entry

I haven’t assembled this board yet. I hope to, perhaps as soon as next week. But this is my vision for an integrated version of the Open Book that we can make affordably and sustainably.
- It uses an ESP32-S3 with dual-core XTensa LX7 — but most importantly, an additional low power RISC-V core that can supervise the power and the buttons.
- The S3 has 8 megabytes of Flash: plenty of room for all the world’s languages, with no need for an external Flash chip
- The whole bottom half of the board is largely devoid of components, leaving room for a substantial lithium polymer battery.
- There’s also an option for a backlight driver, although I don’t yet know if I can get screens with this feature without a substantial minimum order quantity.
Feature-wise, it ticks the boxes — and it does it with only 46 surface mount components, a third of what we had on the original Open Book. The design is deeply optimized for cost, and while it’s still napkin math at this point, I think it’s not impossible to hit a wholesale price around $70, and a retail price under $100.

It’ll still be a book you build yourself, to some extent: while the circuit board is designed to be fully assembled, I imagine it, the screen and the enclosure could come in the style of Watchy, where you still plug in and tape down the screen, then place the assembled gadget inside its housing. I think this still gives the reader a sense of ownership of their gadget: even if they’re not comfortable wielding a soldering iron, they still assembled their book themselves.
Anyway. That’s more than you probably wanted to know about the economics of the Open Book, but hopefully exactly what you wanted to know about the vision for the Open Book, and why this version of the gadget is the version I’m submitting.
Next week, we’ll talk about the battery and the enclosure — and who knows, maybe we’ll even have a fully assembled version of this board to take a look at!
-
The Open Book at Four: Graduation Day
09/07/2023 at 21:42 • 3 commentsNOTE: This project log was originally posted on 07/13/2023 at 18:10 EDT, but due to a misunderstanding, it had to be deleted and remade.
Hi y’all. It’s been a long time.
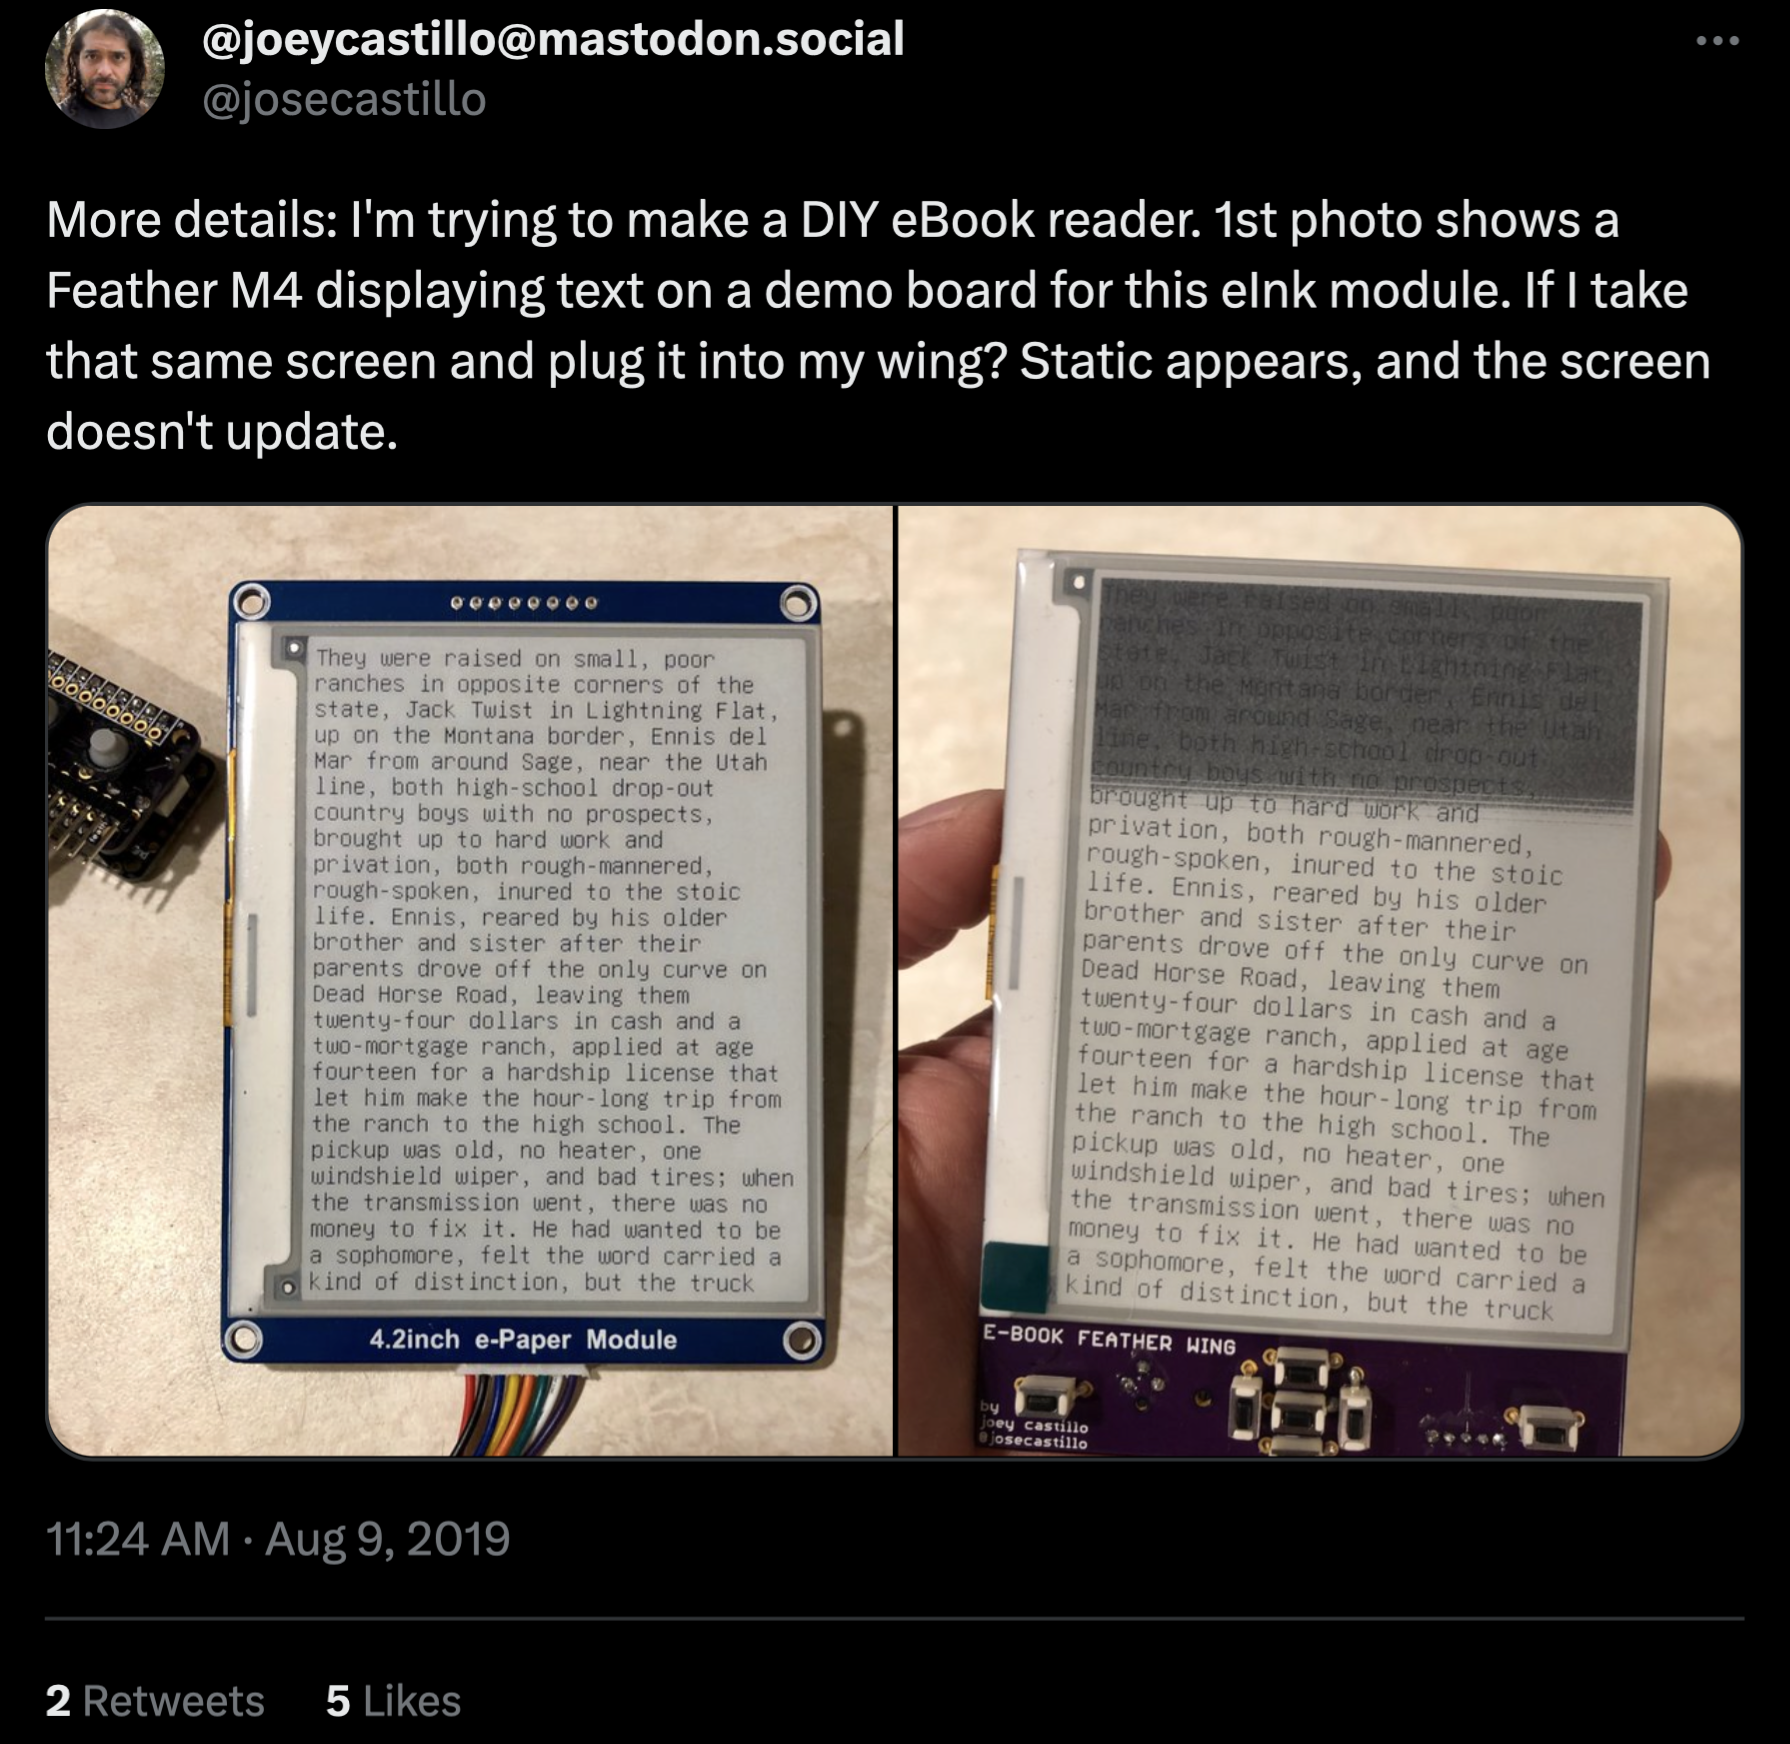
In case you’ve forgotten why you followed this project in the first place, a brief recap: the Open Book is an open hardware e-book reader, designed to be built from parts and understood by the reader who uses it. I searched today for the earliest references I could find to this project, and came up with this tweet from August 9th, 2019:

Looking back, it’s wild to think how little I knew back then — or perhaps more optimistically, it’s wild to think of how much I’ve learned since then. I didn’t have a background in electrical engineering when I set out to build this gadget; I wanted to build an e-book, and along the way, I taught myself what I thought I needed to know. To be clear: I’ve made mistakes along the way. In many ways, the early version gracing the cover of the Hackaday project page embodies a lot of those mistakes. But I’ve been working on it on and off ever since, learning more and refining the concept.
Several times over the years, I’ve commented to friends that this project has been my education in engineering and product design; I built my own curriculum, and taught myself what it takes to ship a product and build a business; I learned accounting and parts sourcing at the same time I learned low power design and firmware development. But if this were a four year program, now would be the time for it to come to a close, and that means a final project.
The Open Book is that project, and over the next nine weeks, I intend to get it into shape and submit it for the Hackaday prize.
There’s a lot to do between now and then, and a lot to update y’all on. For my part, I’m finalizing the circuit board design in the next 48 hours, and I have a new enclosure design printing even as we speak. I hope to be able to share some images and details of those things as soon as next week, with weekly updates to follow in advance of the September 12th “Save the World Wildcard” deadline.
Do I think the Open Book is meant to save the world? In a way, yes; it stakes out an alternate vision for technology, using the humble e-book reader as its ideological canvas:
- It posits that technology should be understood by the user, not act like a black box.
- It posits that technology should serve the user, not the platform owner that created the technology.
- It posits that technology should be extensible, offering expansion points for accessibility features that make it work for differently abled users.
- It posits that technology should aim to support users around the globe as equals, supporting all the world’s languages by default instead of leaving some behind.
- Most of all, it posits technology as a thing that you make out in the open, not a thing that you buy that is closed. I will admit, the exact level of “makiness” may vary a bit from where we started. But the core vision remains as strong as ever.
Anyway. All will be revealed soon. Until then, thank you so much for your interest in Open Book, and your patience with me as I’ve drawn this vision into the world over the last four years.

The Open Book
An open hardware reading device that's easy to build, easy to manufacture, and easy to make your own.
 joey castillo