Before I explained the environment setting in another project but I here would like to explain again from the beginning. We need three softwares and before setting up all of them should be installed in your computer
Preparation of softwares:
(1) Xilinx ISE
The update of this software is finished at 2013 but still we can download from Xilinx's homepage. ISE has some stability problem for 64bit Windows and it can be fixed bysome additional procedure.
(2) USB CPLD Programmer
I would like to thank the author of this software for releasing on the net. This software support .svf file upload to various Xilinx CPLD devices. The zip can be downloaded at the bottom of this page.
(3) FTDI D2XX driver
From FTDI official homepage, we can download up-to-date D2XX driver.
After installing all of them, let's get started!
ISE setting:
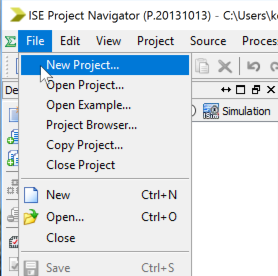
Just selecting "New Project" leads to "New Project Wizard". We need to set up the information of the new project. Please set up as is in below and click "Next".
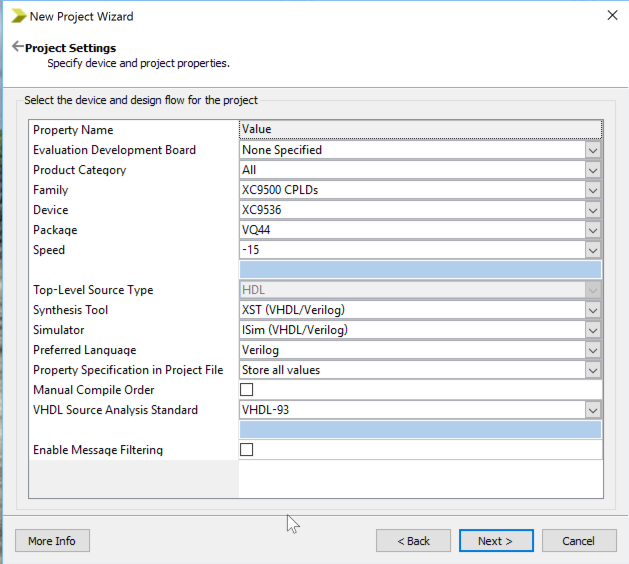
For making something on CPLD and FPGA, we need at least two files
xxxxxx.v (verilog-source file, contains description of logic)
and
*******.ucf (pin assignment between verilog description and real device)
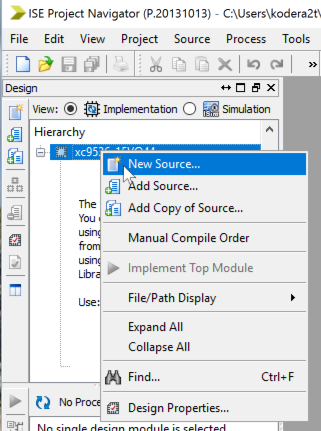
Firstly we can add verilog source by selecting "new source" and selecting type of "velilog"
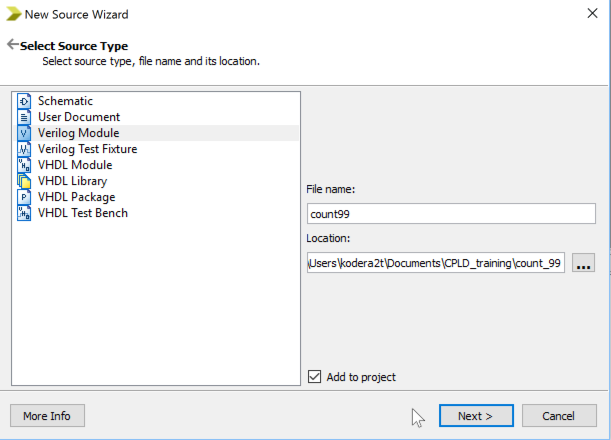
After selecting "Verilog Module" and, put name of verilog source file and click next...
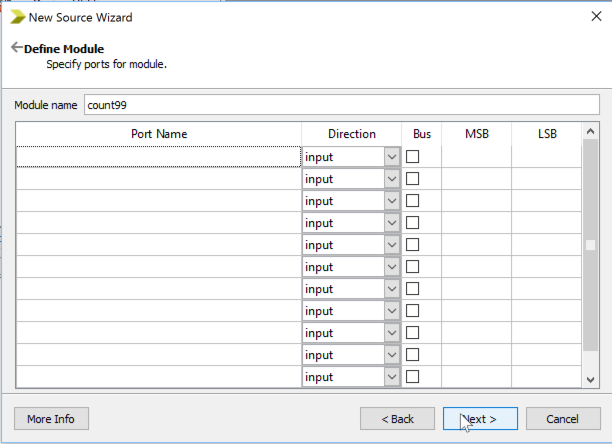
We will see define module but just ignore (we can write these information directly in source file) and click next will see the addition of .v file in the source tree. Here again we need to add "New Source" by right-click on the added .v file and
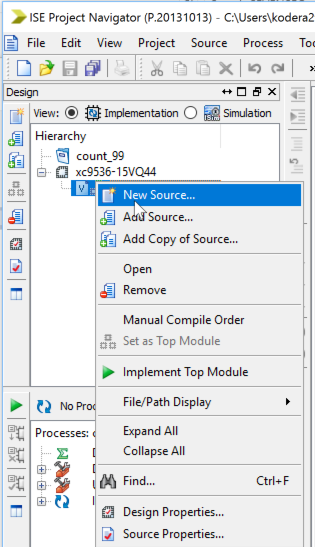
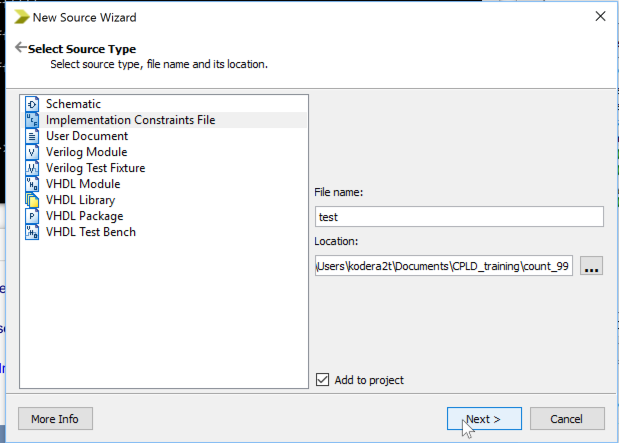
This time we need to select "Implementation Constraints File" as a file type. Just putting name and click next, we will finish the file preparation.
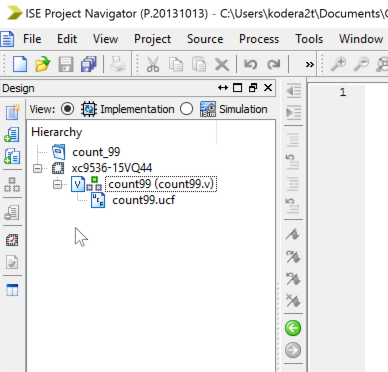
In the .v file, let us write very simple program which drives two LEDs on board by one tact switch.
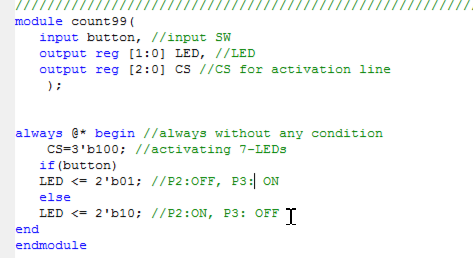
Please find details of description on books or website but this short verilog source will enable two LEDs controlled by the state of input SW. However, just write this source is not enough, because CPLD does not know which is LEDs and which is switch. In order to add these information we need to write .ucf file as follows:
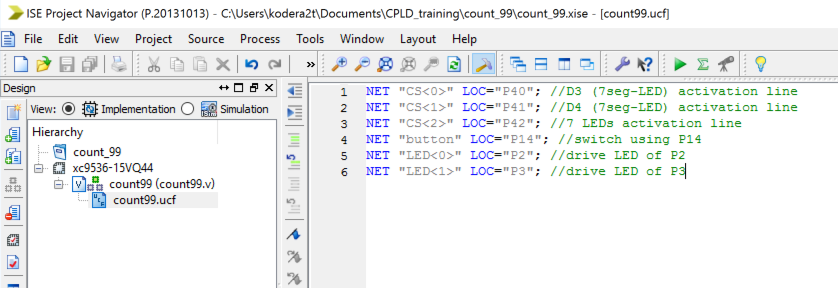
In these expression, "Pxx" corresponds to physical pin number of CPLD, so P40 corresponds to 40-pin of XC9536. NET "xx" connects the real device with verilog source. So LED0 is connected to P2 of CPLD.
After finish preparation and writing verilog and ucf, we can "synthesise" logic just by right-click on "Implement Design" and "Run"
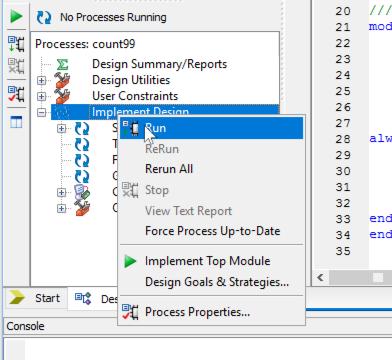
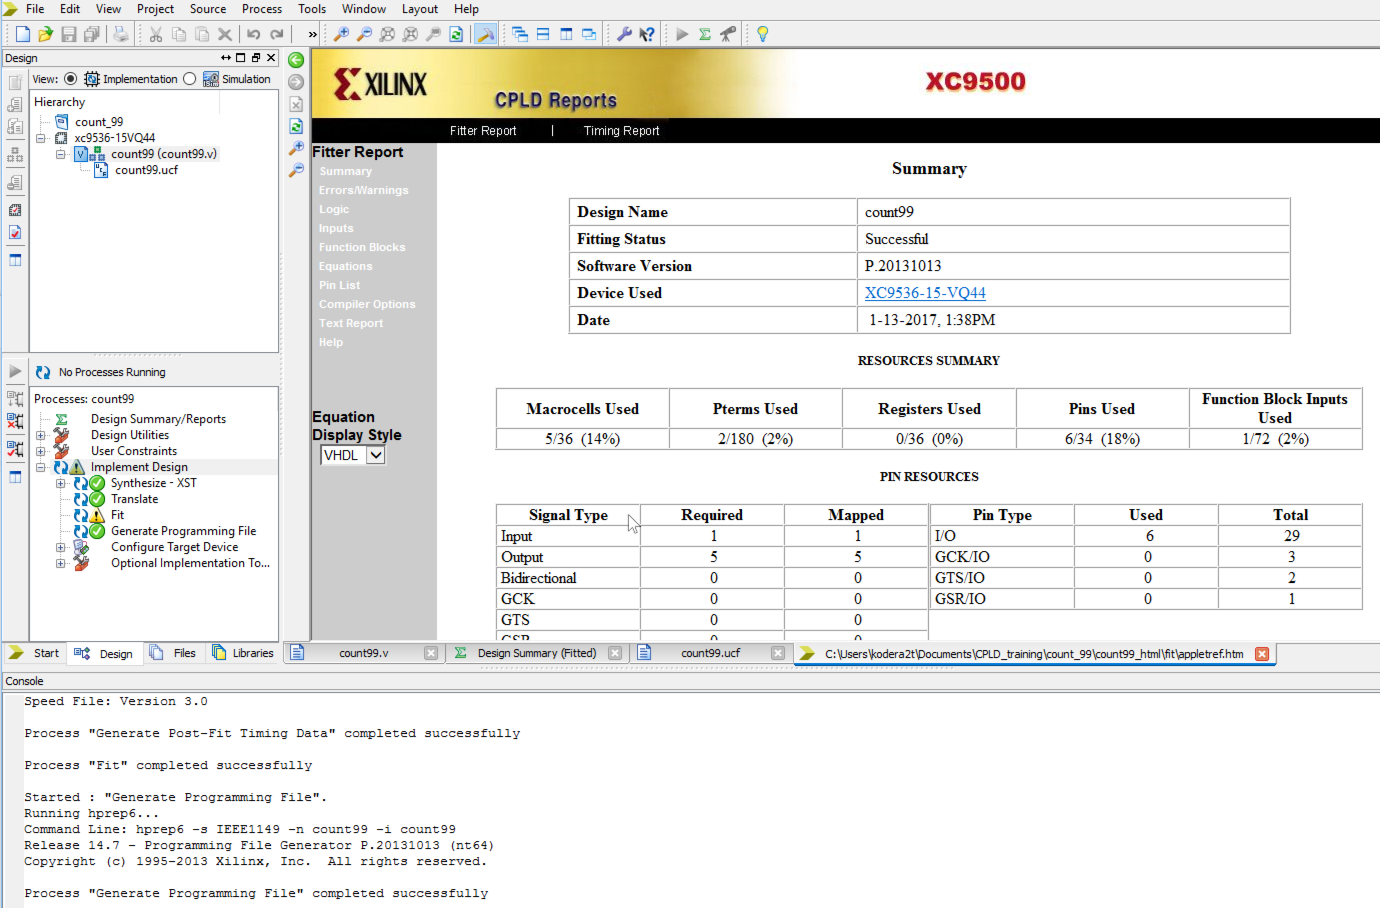
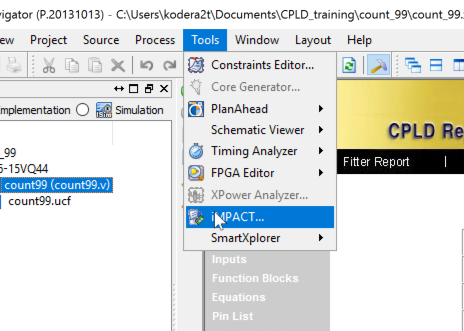
If no error, we will see the result of implementation in CPLD. As we see. Now we need to prepare .svf file which can be uploaded to CPLD. Selecting Tools->iMPACT,
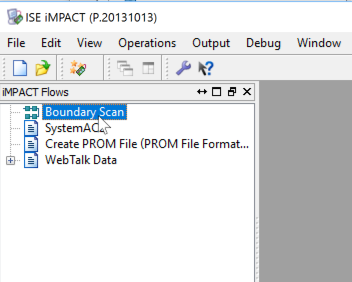
Double clock the Boundary Scan and,,,
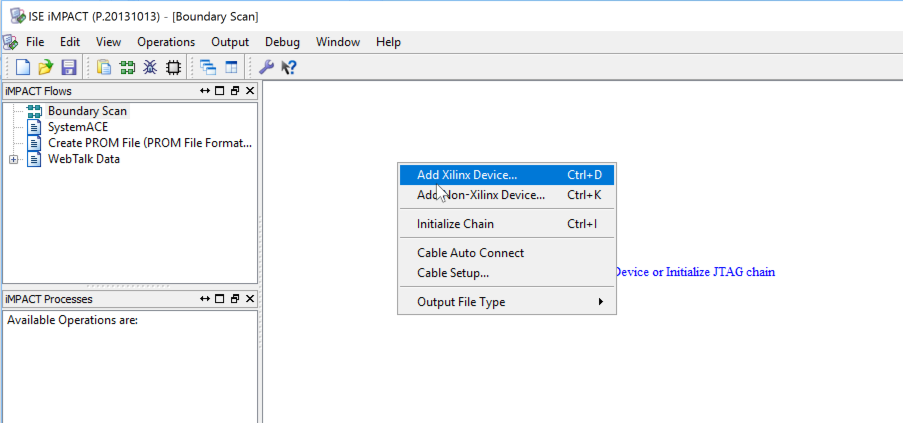
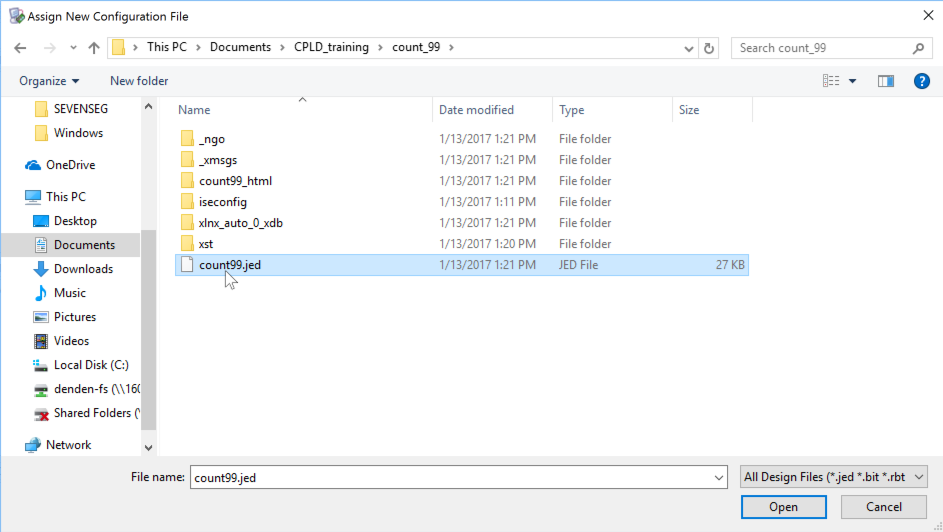
Select "Add Xilinx Device..." by right-click on the right windows, and select .jed file, which is automatically generated in the previous step.
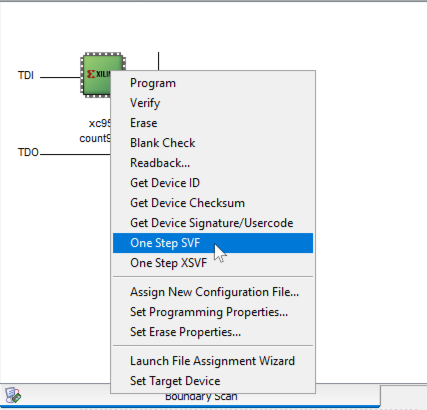
Right click the icon of xc9536 and select "One Step SVF" will generate .svf file, which should be uploaded to CPLD.
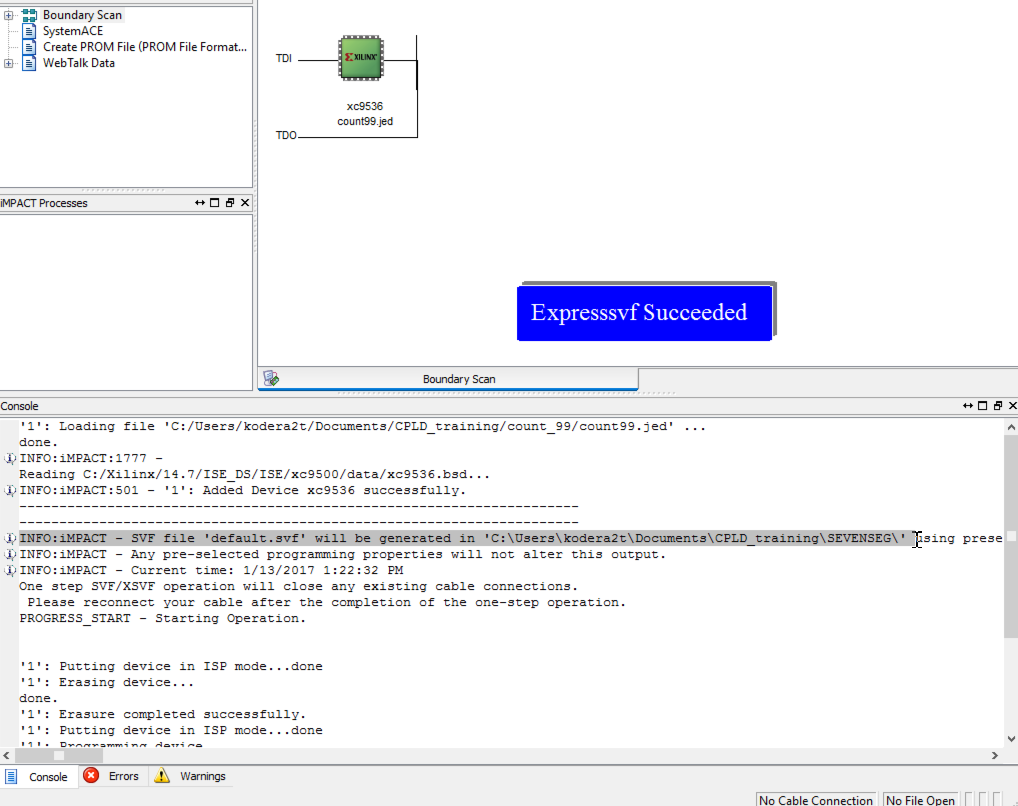
Sometimes we lost where the .svf file is generated but we will see the location of .svf file in the lower window. These are all done in ISE environment.
Now connect the board to computer, copying the generated .svf file into the directory of CPLD programmer and execute the command,

where the last argument is the .svf file name and modify as you wish.

After several time we will see this message, DONE!!!!!!!
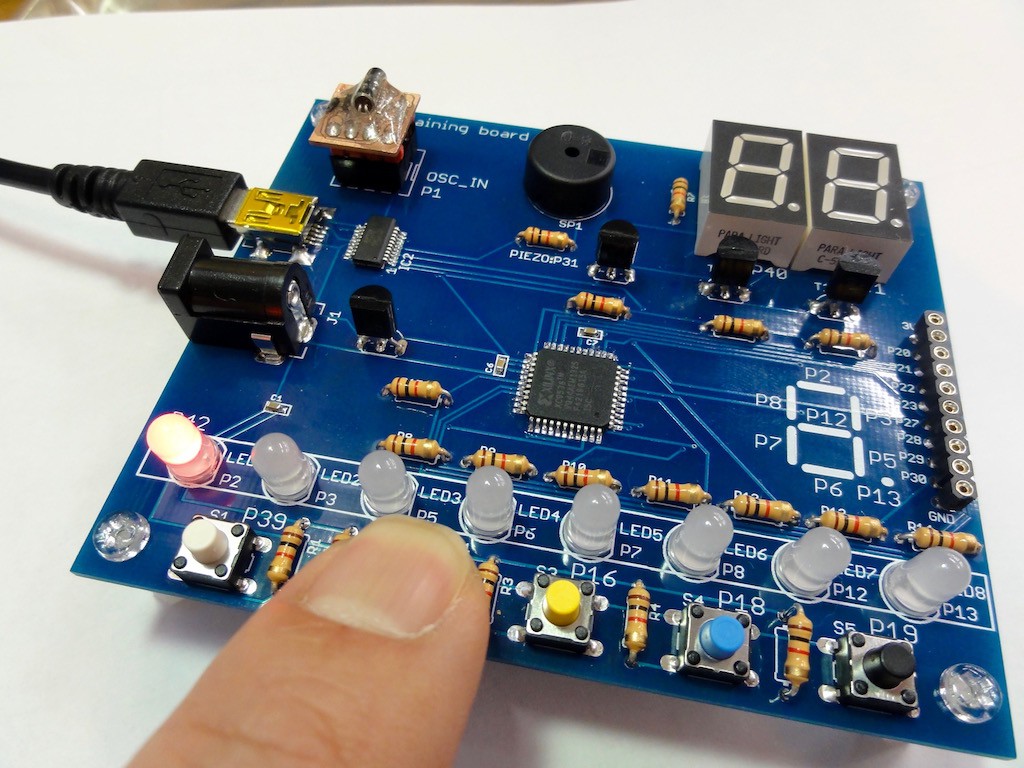
After writing, we once plug-off USB and plug-in USB cable again and we will get "two LEDs controlled by switch connected to P14". YES! We made logic circuit without soldering nor wiring, just writing verilog source!!!! WELCOME TO SOFTWARE DEFINED CIRCUIT WORLD!!
 kodera2t
Discussions
Become a Hackaday.io Member
Create an account to leave a comment. Already have an account? Log In.
Inspiring! I rather had a similar question to myself - how to create a favorable space for writing all student papers at the end of the semester and I was lucky to find https://sky-writer.com/blablawriting-review/. In fact, it's all about motivation and a specific goal. If you want to have your own blog and you have thoughts along with experience, you will be able to learn.
Are you sure? yes | no
Very nice in-depth instruction. I like such step by step guides. We do the same at https://www.araxwindows.com/services/skylight-sunny-room-repair/ ARAX Windows Work Company. Do you need skylight sunny room repait? Our team of professional workers will do it promptly and with the highest quality.
Are you sure? yes | no