-
11. Creating the maze
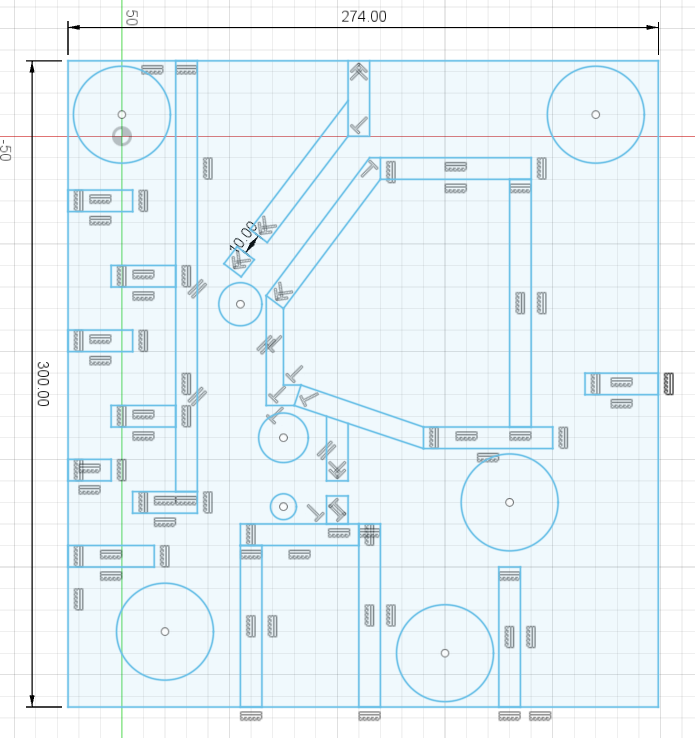
The first step to all of this is to decide the dimensions of the maze and the pattern. We chose 27.4 x 30 cm.
You'll also need to choose a ball size. We went with a 5mm diameter aluminium ball.
![]()
We used Fusion 360 to design it and exported it as DXF for laser cutting.
Every length from this point on will be in mm.
-
22. Designing the frames
Next we designed the frames using Fusion once again.
The first frame comes in direct contact with the maze hence why the dimensions are very similar. They are the exact same on the small side (274mm) and are extended by 24mm on each side (348mm) because that's the width of the wood battens we used.
![]()
For the second frame, we left ~4mm between it and the first frame to allow movement. Then, we repeat the same procedure and end up with 330 x 404mm battens.
The final battens are slightly thinner at 20mm, but longer than the others because we'll need to drill holes in it for the rods later on. We didn't know this initially which is why we modelled with a 24mm width in mind.
![]()
The line in the middle was originally for the rod but was later discarded due to technical issues.
-
33. Buying and cutting
The next step is buying whatever material you need based on the previous steps.
You'll also need a bunch of screws, dowellings, a saw, a metal rod with 5-10mm diameter based on the dimensions you chose, a wooden rod long enough to be cut in half and still used (we bought 2 just in case), a small wooden batten of 10mm thickness that will be used for the maze walls.
If you don't have a laser cutter available, you'll also need a plank for the maze, a tool to drill holes big enough to let the ball pass and a pen to make the pattern.
Then, start cutting. Make sure to make a straight line to not cut at an angle
-
44. Assembling part 1
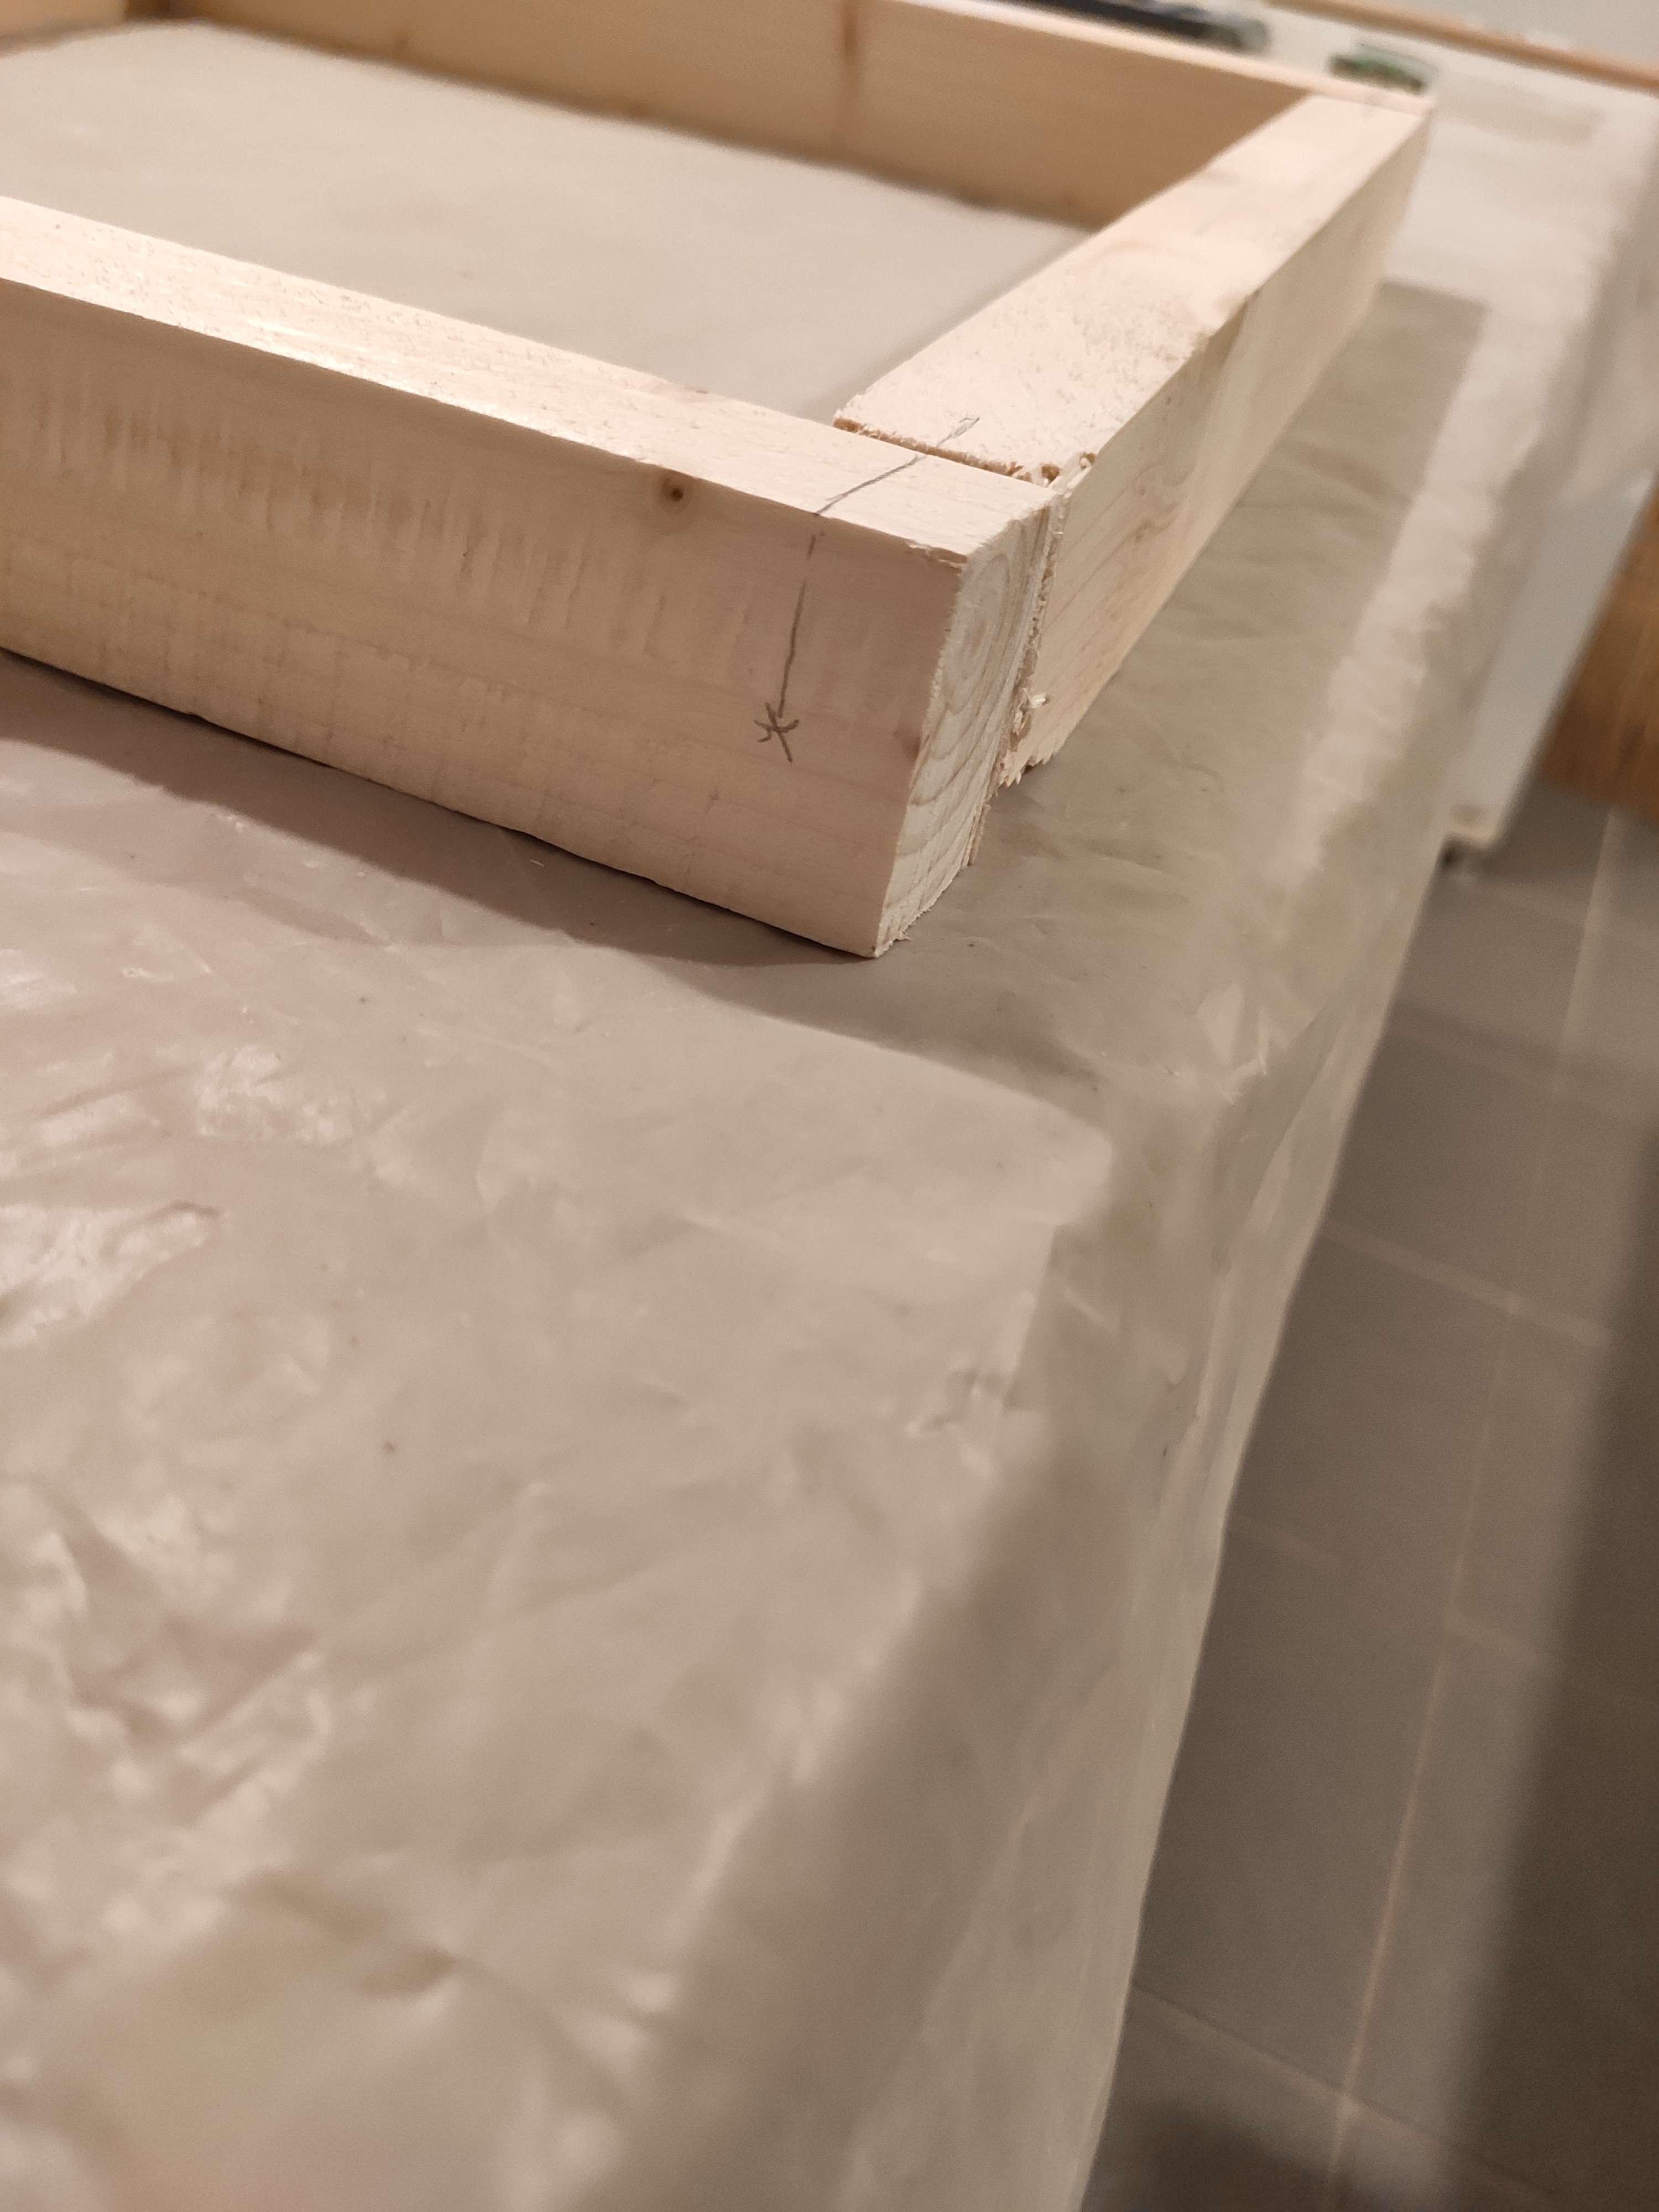
Once you cut everything, you have to create the frames by screwing them together. Make sure to seperate the battens in small groups in order to not mess up.
Position the battens at a 90° angle and draw a line on the one you wish to screw, preferably the longest one.
![]()
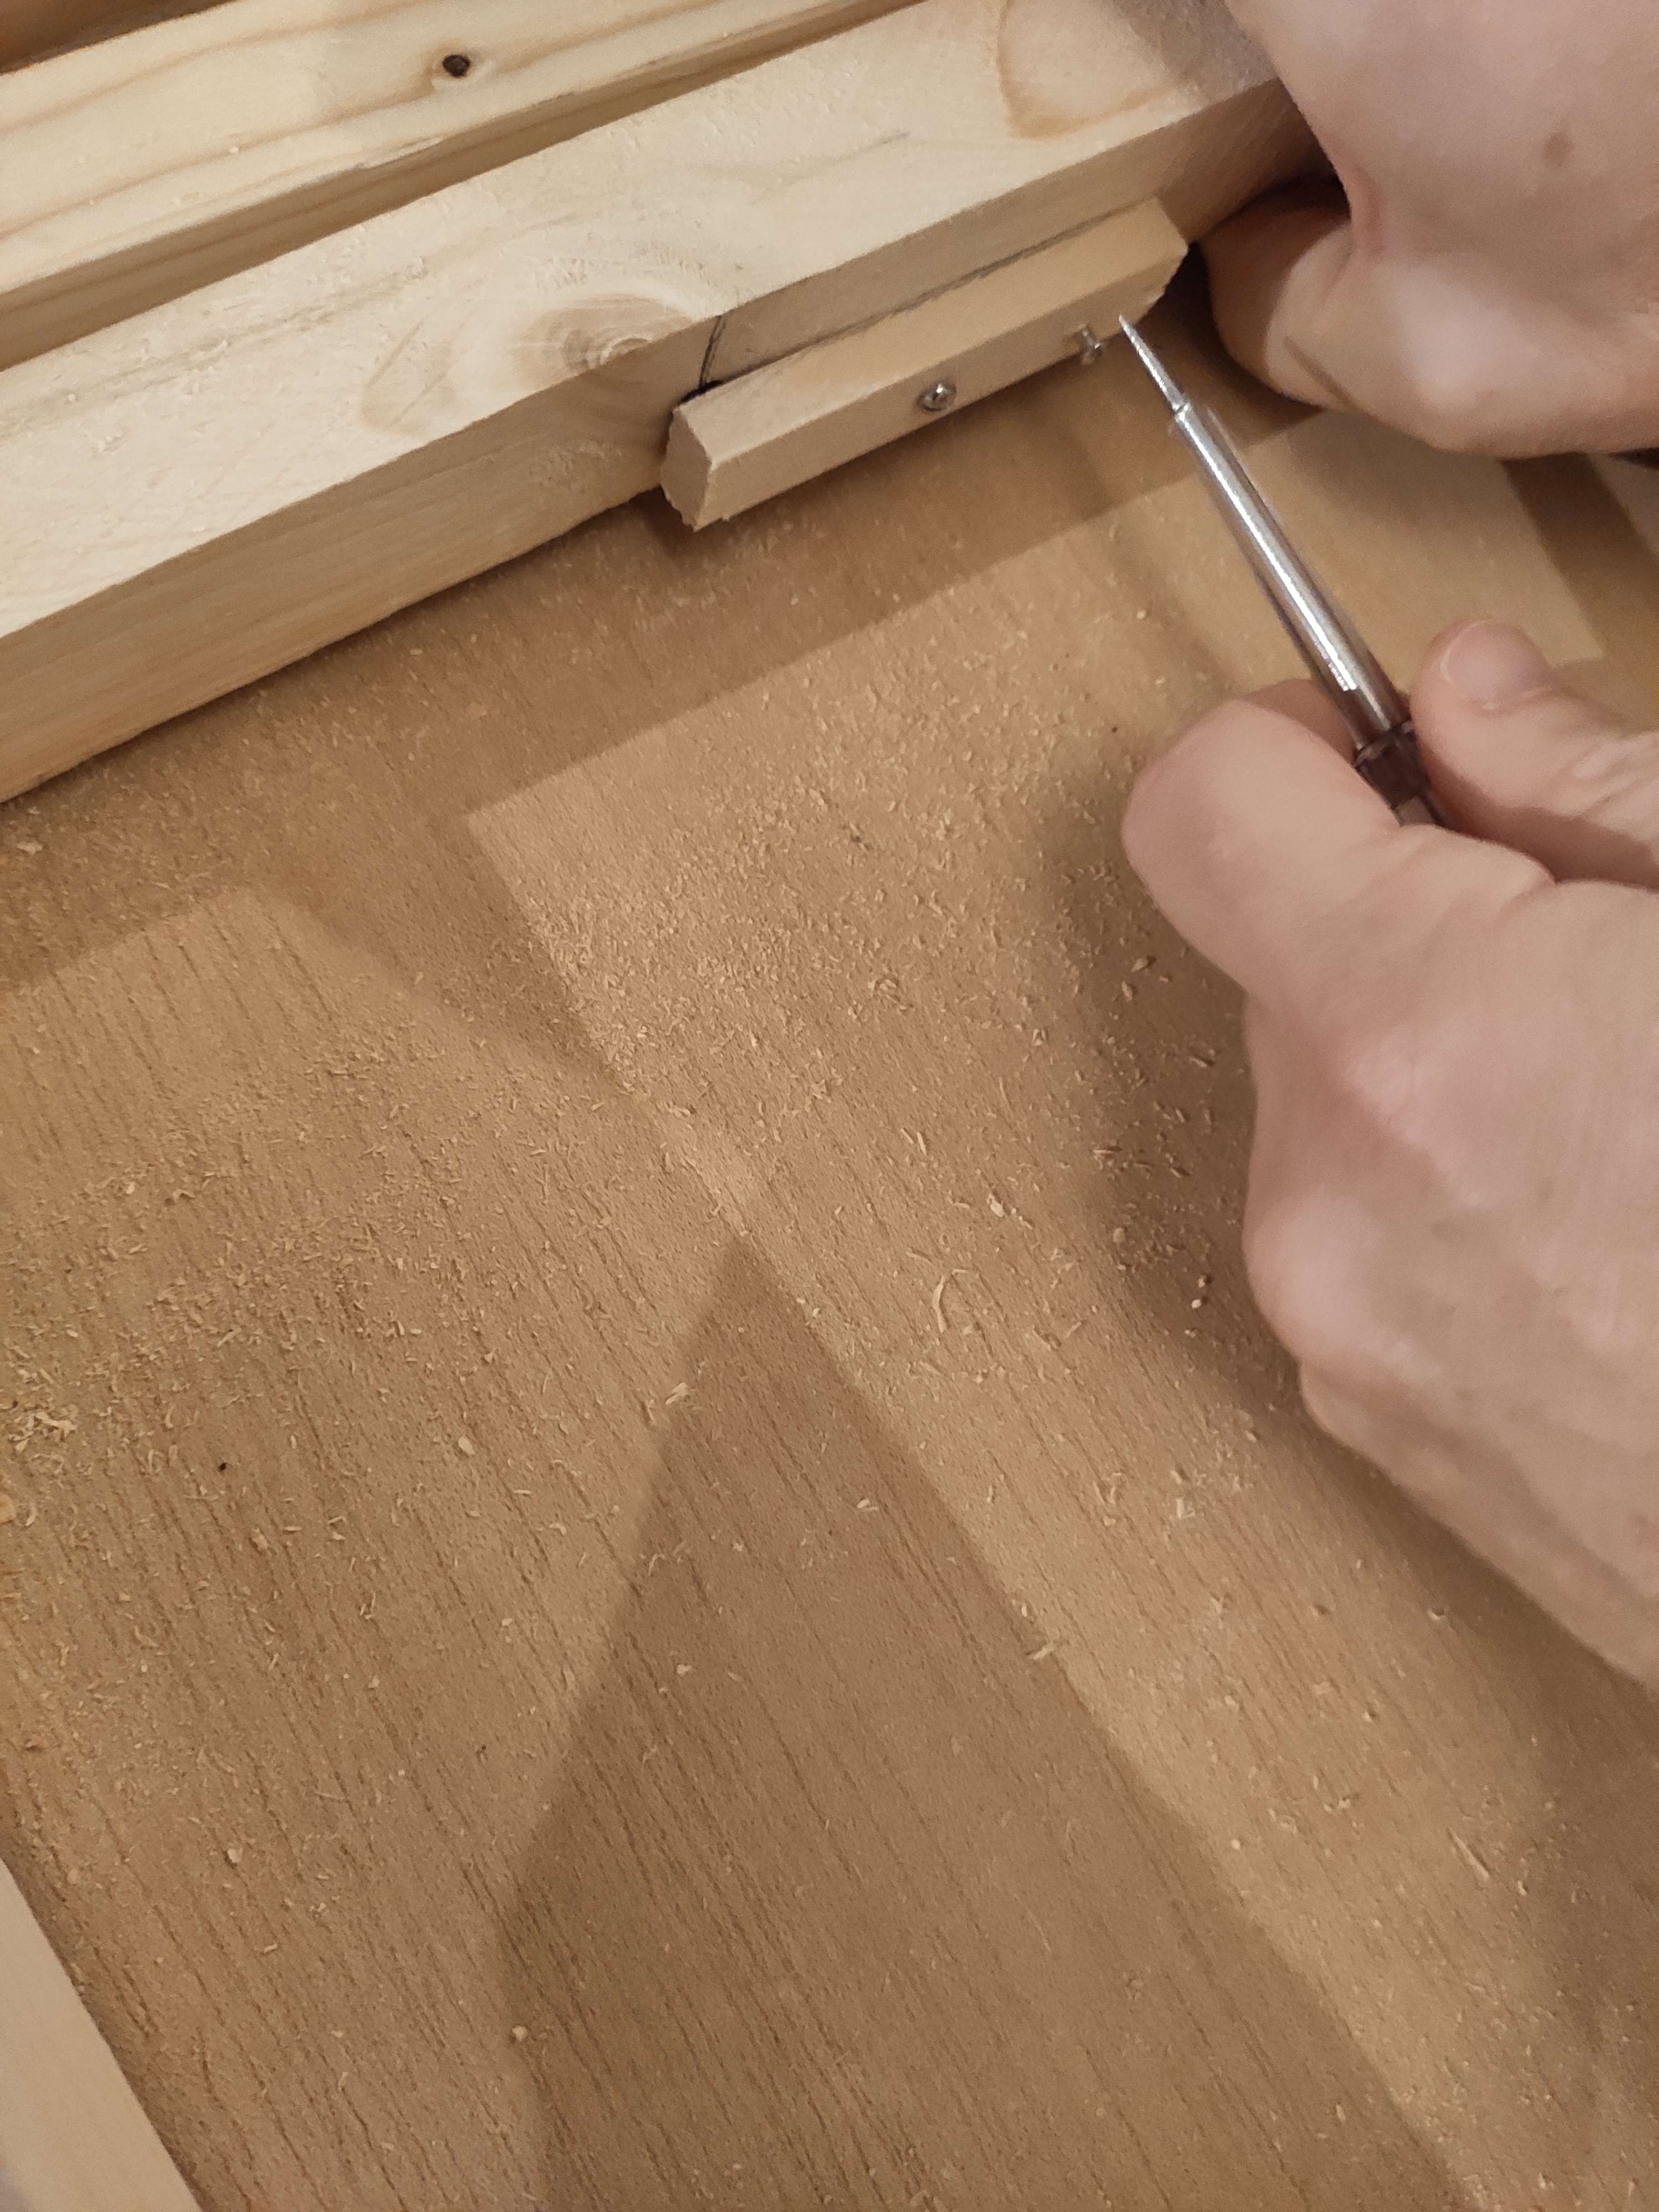
Then drill and screw. We used 4x35mm screws because it was the right size for our batten.
![]()
Make sure to hold both sides of the wood when screwing.
-
55. Assembling part 2
Once the frames are done, you have to link them using the metal rod.
Cut the metal rod to make a piece of 3.7 cm.
You have to drill a hole in the center of the inside batten that goes all the way through using a drill bit that matches the diameter of the steel rod, and only go about a centimeter in for the outside batten, on the side facing the small frame.
![]()
If you don't have small bits of wood to make the inner walls you also have to cut a small plank to make them.
![]()
This is what the finished maze looks like.
![]()
Finally, make the supports with the same plank as the walls. Make sure to make them low enough so that tha ball doesn't go ver the edge.
![]()


Discussions
Become a Hackaday.io Member
Create an account to leave a comment. Already have an account? Log In.