-
1Download and install Arduino software
It required for install and edit the code onto the arduino board.
-
2Go to the site below to find the box shape that fit for our project.
https://www.festi.info/boxes.py/BasedBox
Also we need to adjust the dimension according to what we need and laser cut it.
-
3Use Fusion360 for the 3D printed material
We used it to design our thunderbolt with a hollow in the thunder shape.
-
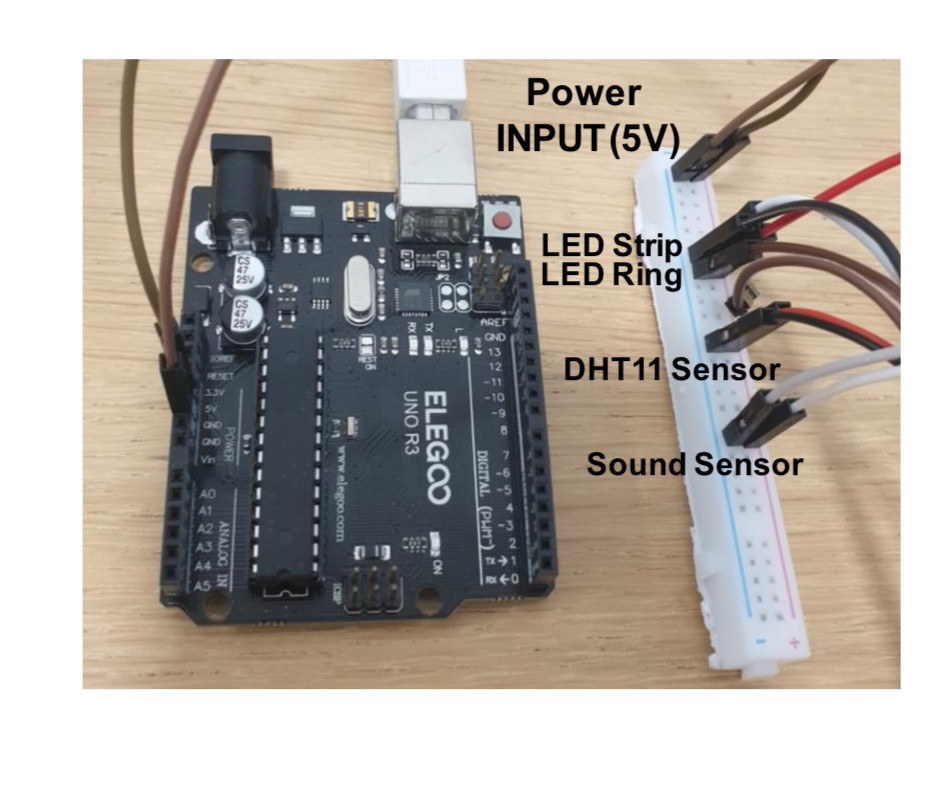
4Use sound sensor, temperature and humidity sensor
Gather all those sensors for our project so that we can have it to help create interactive feedback.
-
5Program Arduino Uno
We used to upload the code for all the sensors.
-
6Upload the code to sound sensor
We linked the sound sensor and the LED strip whenever there sound it lit up. (The code is in the file)
-
7Upload the code to temperature and humidity sensor.
Whenever there is a weather temperature change the color of the LED neopixel will change accordingly.
-
8Print the case
Use the box file that we uploaded in the file folder to create the case for our project.
-
9Print the thunderbolt
Use our thunder STL file to print the shape with the 0.5mm thickness.
-
10Use the breadboard
We only use a small part of it which is the the side of the small breadboard. (So that it fit
![]()
better inside the case)
Tensegrity Cloud Lamp
The lamp is inspired by a fusion of interactive art, technology, architectural tensegrity innovation structure, and nature-inspired.
Discussions
Become a Hackaday.io Member
Create an account to leave a comment. Already have an account? Log In.