kasik
kasik-
Building a model
03/29/2024 at 18:59 • 0 commentsNow when I have my dataset prepared, it's time to create a model. Many papers, tutorials, videos, blog posts have been written about neural networks for image recognition. For me this topic is fascinating and very broad. I am just going to summarize here the key points - what steps I took and what I learned.
Preparing and training a model is quite a complex task - model architecture, hyperparameters (parameters that are not learned by the model, but are configured by us) setting, minimizing overfitting. Despite many guidelines, rules of thumb, I still see that tuning all of the parameters properly is kind of an art.
I am going to use Python and TensorFlow to build and train the model - the script is available in my repository and is called person_detection.py
I will first focus on the network architecture itself.
The most popular neural network architecture for image recognition is a convolutional neural network (CNN). It is based on performing a convolution of the image pixels with a set of filters. This technique helps preserve spatial structure and helps the network extract the features.While creating the CNN architecture, it is worth to keep in mind that we are working on a model for a microcontroller, so we need to keep the number of trainable parameters low - to ensure that we can still fit the model in our limited memory.
In the beginning, I use a series of convolution layers, activation and pooling layers - in order to extract as many features as possible. There are various parameters worth tweaking - the kernel size (size of the filter matrix), number of filters, padding, stride (step). The output of this layer is called an activation map. We need to keep in mind that the more filters we use, the more features are extracted, but at the same time the size and number of activation maps increases - which leads to the increase of trainable parameters. And as already mentioned, we need to be careful about that.
Each convolution layer is then passed via the activation function - ReLu - to introduce some non- linearity (interesting lecture from Stanford describing activation functions)
Next, there is a pooling layer - to downsample and minimize the size of the activation maps. Decision about the number of pooling layers to use is often a trial and error based - we want to make the input smaller, but at the same time we need to make sure we don't lose any important information.Next, I need to convert the data from 2D array to 1D array (flatten) as the input to the dense (fully connected) layer. In convolutional layers each filter focuses on the same spatial location and extracts the important information, while in dense layer - each of the neurons looks at the same full image. The number of neurons is the parameter to play with here..
After that I use a dropout layer - which is considered a type of regularization (how to penalize model complexity) - and is one of the ways to reduce the overfitting. This happens when the network becomes to specialized for the training set and is not able to properly generalize for the unseen data. Here you can specify the rate - fraction of the input units to drop. The last one is dense layer with softmax - the output of which gives me the probability score for each of the labels, in my case - whether a person is detected or not.
I build the model using:
model = tf.keras.models.Sequential
and as an input I use a list of the layers, for example:
        # Convolutional layer.
        tf.keras.layers.Conv2D(
            8, (3, 3), activation="relu",  input_shape=(IMG_WIDTH, IMG_HEIGHT, 1)

        ),

        # Max-pooling layer, using 2x2 pool size
        tf.keras.layers.MaxPooling2D(pool_size=(2, 2)),
When I have all this ready I need to create the model using
model.compile()where I can specify a number of parameters. I think the most important are:
- optimizer - how to minimize the loss - algorithm that calculates how the parameters of the network shall be changed. I chose 'Adam' - one of the most popular and usually a safe choice - solves the problems of local minima, overshoot or oscillation caused by the fixed values of the learning rates during the updating of network parameter. And about the learning rate - it specifies the step size towards minimizing loss. Too high learning rate - the weights may "explode", too low learning rate - the loss will be barely changing.
- loss - how good our classifier is. I chose 'categorical_crossentropy'. Most commonly used for image classification, where the model outputs a vector of probabilities that the input image belongs to
- metrics - I selected 'accuracy' - the fraction of the images that are correctly classified.
Easy, right..?
-
Gathering dataset
03/19/2024 at 09:22 • 0 commentsI believe gathering a proper dataset is the key in any machine learning project - it may seem trivial, but this task shall not be underestimated. The model's accuracy depends on the data that is used. The algorithms need thousands of examples to learn the patterns and to be able to make predictions. Additionally, the dataset needs to have the proper representation of of each class.
Regardless whether you decide to go through a full chain of machine learning experience or want to use platforms like Edge Impulse or Neuton - you still need to prepare your dataset.
Nowadays there is plenty of available free datasets one can use for ML algorithms. However, for the project like this one (on embedded system), it is best to build the dataset using the same sensor as the one planned to be used for the inference after deployment. It is possible though to make use of transfer learning (thus a network already pretrained on another dataset), however I will leave this topic for later.As I am working on the binary classification algorithm - I need to gather 2 subsets of images - one containing a person (I started with various pictures of me and my partner) and another without a person - all sorts of the background in our house and additionally some images of our dog. I used test_camera.ino sketch (from my repository) that sends an image over a serial port after pressing a button. Additionally I created a python script image_viewer.py that receives data from serial port, displays it and asks whether to save it. I found that option very handy as it turns out it is not so easy to aim with that camera! Also it seems my hand is not that stable as I thought.
I'll be using 96x96 grayscale images for inference thus I decided to transmit such images straight away from the microcontroller. Another option is to send the pixels retrieved from the camera and then pre-process it on the PC just before training - however, I wanted to be sure of my processing algorithms on the arduino and keep the images consistent - both for training as well as for inference.
I collected 60 images including a person and 60 images not depicting a person. Additionally I placed them in the folders marked 1 and 0 respectively. I know that this is a small dataset (1000 images per class is considered a decent dataset), however should be sufficient for first trials.
![]()
-
Retrieving images from OV7675 - not that easy as I initially thought!
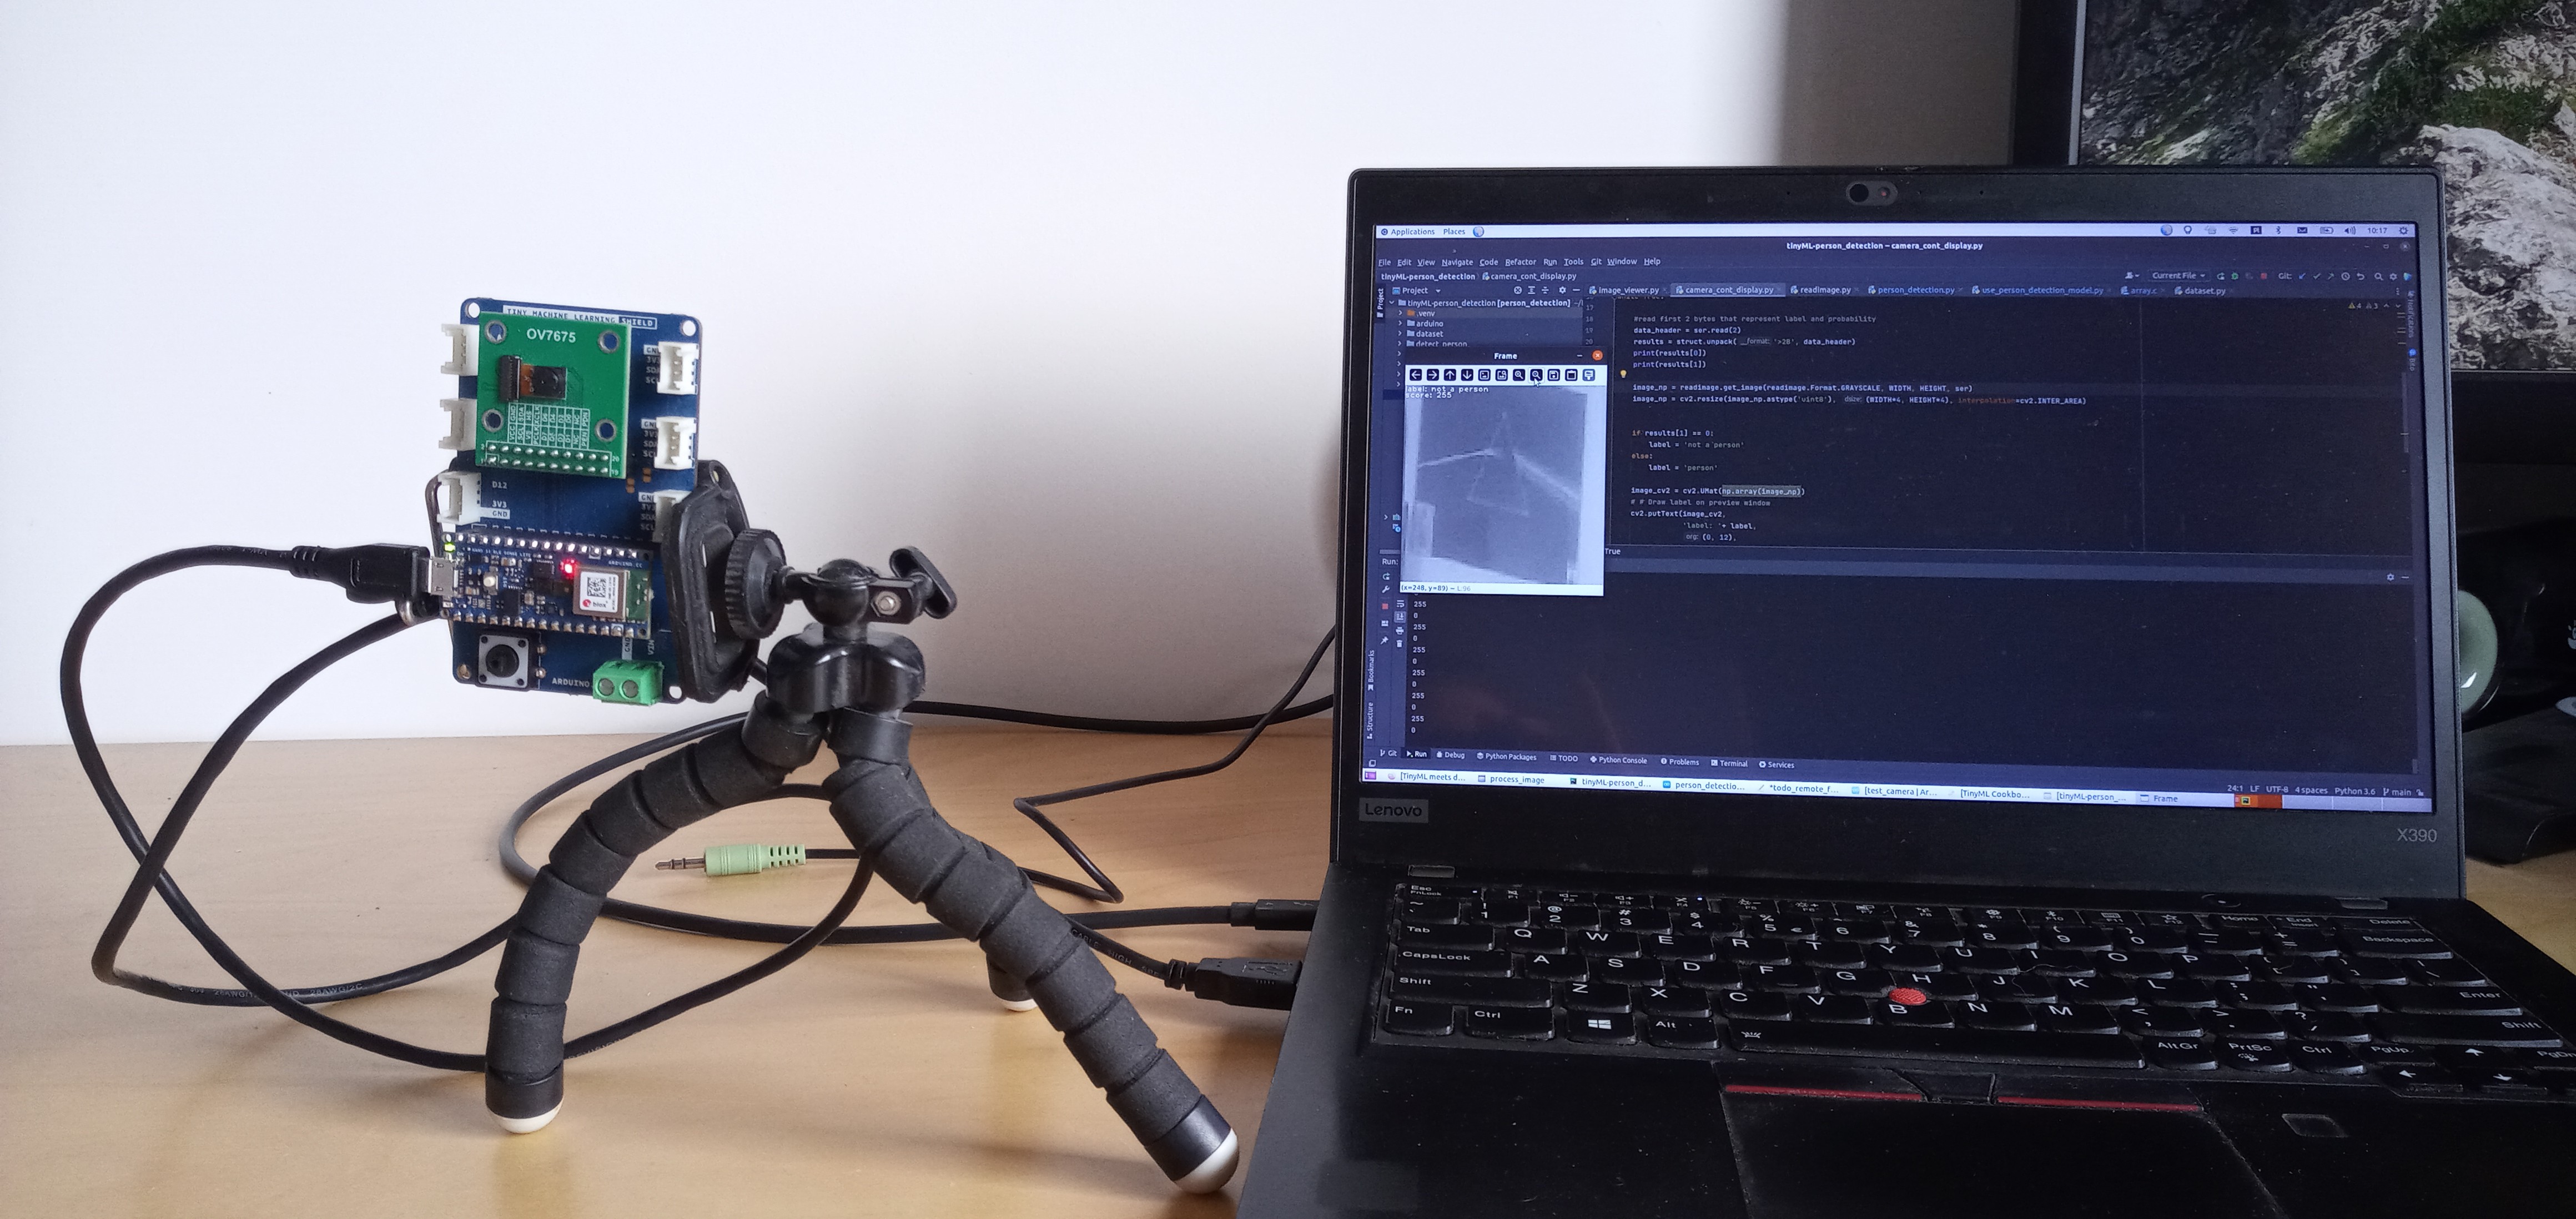
03/17/2024 at 19:06 • 0 commentsI decided to describe here my struggles with retrieving and displaying images from OV7675 camera as I stumbled across some unexpected events, but that's the part of the fun, isn't it?
I wanted to understand well what is retrieved from a camera, play a bit with basic preprocessing (having in mind future inference) and be able to stream the image live on the PC.
Having that in mind I prepared an arduino sketch test_camera.ino and a Python script camera_cont_display.py. Both available in my repository.
I looked through the available examples that are provided with the libraries (mentioned in a previous log) as well as workshop provided by Edge Impulse.OV7675 can return images in RGB565 or grayscale format - I played with both and python script can handle both as well. However, I decided to use grayscale to reduce the size. And...that's when the weird things started to happen. The camera libs say that the camera returns 2 bytes per pixel in grayscale (nothing found in the datasheet though). However, the image I received was either double or I had some kind of "halo" effect. To my surprise the lib already filters that, while the method Camera.bytesPerPixel() still returns 2. Well - as my university professor told me - never trust any specification!
I went on to implement scaling and cropping methods (to be found here: ), inspired by the Edge Impulse example. I was a bit surprised to see that there is a number of image arrays allocated dynamically, but I thought to give it a try. Only 2 arrays need to be allocated at the same time for each operation - this way we reduce the size of memory used in comparison to static allocation. However, it took only a few seconds before arduino started to have issues with memory allocation, I presume due to memory fragmentation. Static allocation then! After creating 3 arrays (for image retrieved from camera, for the scaled one, for the cropped one) for QVGA resolution I reached as much as 98% of dynamic memory usage. This managed to put my arduino to some unexpected state, where the program didn't work and the PC didn't recognize the device anymore.
![]()
TIP: double-click of the reset button brought it back to life and I could flash the arduino once more. I searched through documentation and various fora and I failed to find any mention of this. Anyone could point me to some explanation?
Finally, after some trial and errors I decided to use QCIF (176x144), scale it to 117x96 and then crop to 96x96. It takes 35% of dynamic memory (perhaps I shall consider in-place operations) and takes 8ms to process
-
Hardware and libs
03/11/2024 at 10:00 • 0 commentsFor my first trials I decided to use the TinyML kit: which contains Arduino Nano 33 BLE Sense and the OV7675 camera (kit).
I use the following libraries on arduino IDE:
- Arduino Mbed OS Nano Boards v3.0.1
- Arduino_OV767X v0.0.2
- Arduino_TensorFlowLite (from repository) v latest in the repository
There is another library available as well: Harvard_TinyMLx (pepared for TinyML course available on EDX) - which contains the library for the camera and tensorflow. However, I wanted to use to official ones as this would enable me easier comparison of the results with Edge Impulse and help me avoid unexpected issues when searching through available examples.
In the Arduino_OV767X library there is an example available to retrieve the image - which is very useful to make sure the hardware works.
The Arduino_TensorFlowLite library also comes with several interesting examples, even person recognition - however I am interested to do a full chain - hopefully with the same (or perhaps even better..?) results. -
Simple plan and next steps
03/11/2024 at 09:53 • 0 comments![]()
I will soon reveal what the purpose of the end product is supposed to be, however, for now the journey is the goal.
I've become fascinated by machine learning and then about the idea of using it on microcontrollers only about 6 months ago, so it is a whole new world to explore! And what's better way to learn then working on a project?
In the following logs I want to cover the topics:
- hardware description for first trials
- gathering data from the camera
- preparing a dataset
- basic model and training
- model preparation for microcontrollers
- inference on arduino
- trying out Edge Impulse
I am sure more will come on the way!
Disclaimer: Please note, that I am not the expert (yet..?) on tinyML, thus it's to be treated with a grain of salt!
TinyML meets dog training
Learning ML on microcontrollers and perhaps building something fun on the way!