-
1Step 1
These instructions assume some familiarity with the Pi and it's command line. You're also going to be disassembling the laptop, cutting bits away, and soldering. Make sure you're comfortable with that.
PREPARE THE SD CARD FOR THE ZERO
- Download the latest Pixel_x86 iso from here and copy it to the flash drive using the same method you'd use to copy a Raspbian image to an SD card (Win32DiskImager, dd, etc). Don't worry that it's not an .img file.
- Plug the flash drive into the laptop and boot from it. You may need to configure the laptop's BIOS to allow USB booting.
- Get some kind of network connection working on the laptop.
- Download the latest Raspbian image from here, unzip it and rename the image to raspbian.img
- Download the latest Pixel_x86 iso from here and rename it to pixel.iso
- If you're using the Pixel_x86 dated 12/2016, you need to upgrade Chromium. Run the following command: apt-get update;apt-get install chromium
- Download setup.sh, rc.local, and watchdog.sh from this project's files page. You might want to have a look at the setup.sh script so you're familiar with what it does.
- Insert the SD card into the card reader and plug it into a free USB port on the laptop.
- Change to the directory where the downloaded files are and run : sudo ./setup.sh
- After it finishes (it can take a half hour) remove the card reader, remove the SD card from it and insert the SD card into the Pi Zero.
TEST IT OUT
- Power off the laptop and remove the flash drive.
- Connect the Pi Zero to the laptop with the USB cable.
- Power up the laptop. You need to delay booting for around 40 seconds until the emulated flash drive is ready. Set a boot delay, go into BIOS setup, request a boot menu, whatever. CTL-ALT-DEL is your friend.
- As soon as the Pixel desktop appears start a terminal and type: sudo ifconfig usb0 10.0.0.2
- To make the network configuration automatic, add the following two lines to /etc/dhcpcd.conf:
interface usb0
static ip_address=10.0.0.2
- and add the following two lines to /etc/network/interfaces:
allow-hotplug usb0
iface usb0 inet manual
- Change any laptop preferences, such as the keyboard layout.
- To connect to the Zero type: ssh pi@10.0.0.1
- Type yes to accept the connection, then enter raspberry as the password. You are now connected to the Zero and can finish setting it up, such as changing the password.
- To close the connection to the Zero type: exit
- To shut everything down, open a terminal on the laptop and type: shutdown -H now
- In about 25 seconds the Pi Zero will automatically shut down. You know it's shut down when it's LED stays off.
- You can now power off the laptop with it's power button. You may have to hold it down for several seconds.
TO AVOID SD CARD CORRUPTION
- To shut down, type "shutdown -H now" in a terminal window on the laptop. Never use any other command. Never use the desktop shutdown menu options.
- Never use any type of shutdown or poweroff command on the Pi Zero. The watchdog script will automatically power it off around 25 seconds after the laptop halts, or anytime the Pi can't successfully ping the laptop at 10.0.0.2.
- If for some reason the laptop doesn't boot up, the Zero will shut itself off 180 seconds from power-up. Only then is it safe to turn off the laptop using it's power button.
MOUNTING THE ZERO
Once everything is working (try a few boot cycles to be sure), you can mount the Zero inside the laptop. I'm going to leave the specifics on how to do this up to you. It will certainly require partial disassembly of the laptop. Seek out Internet videos to help with that.
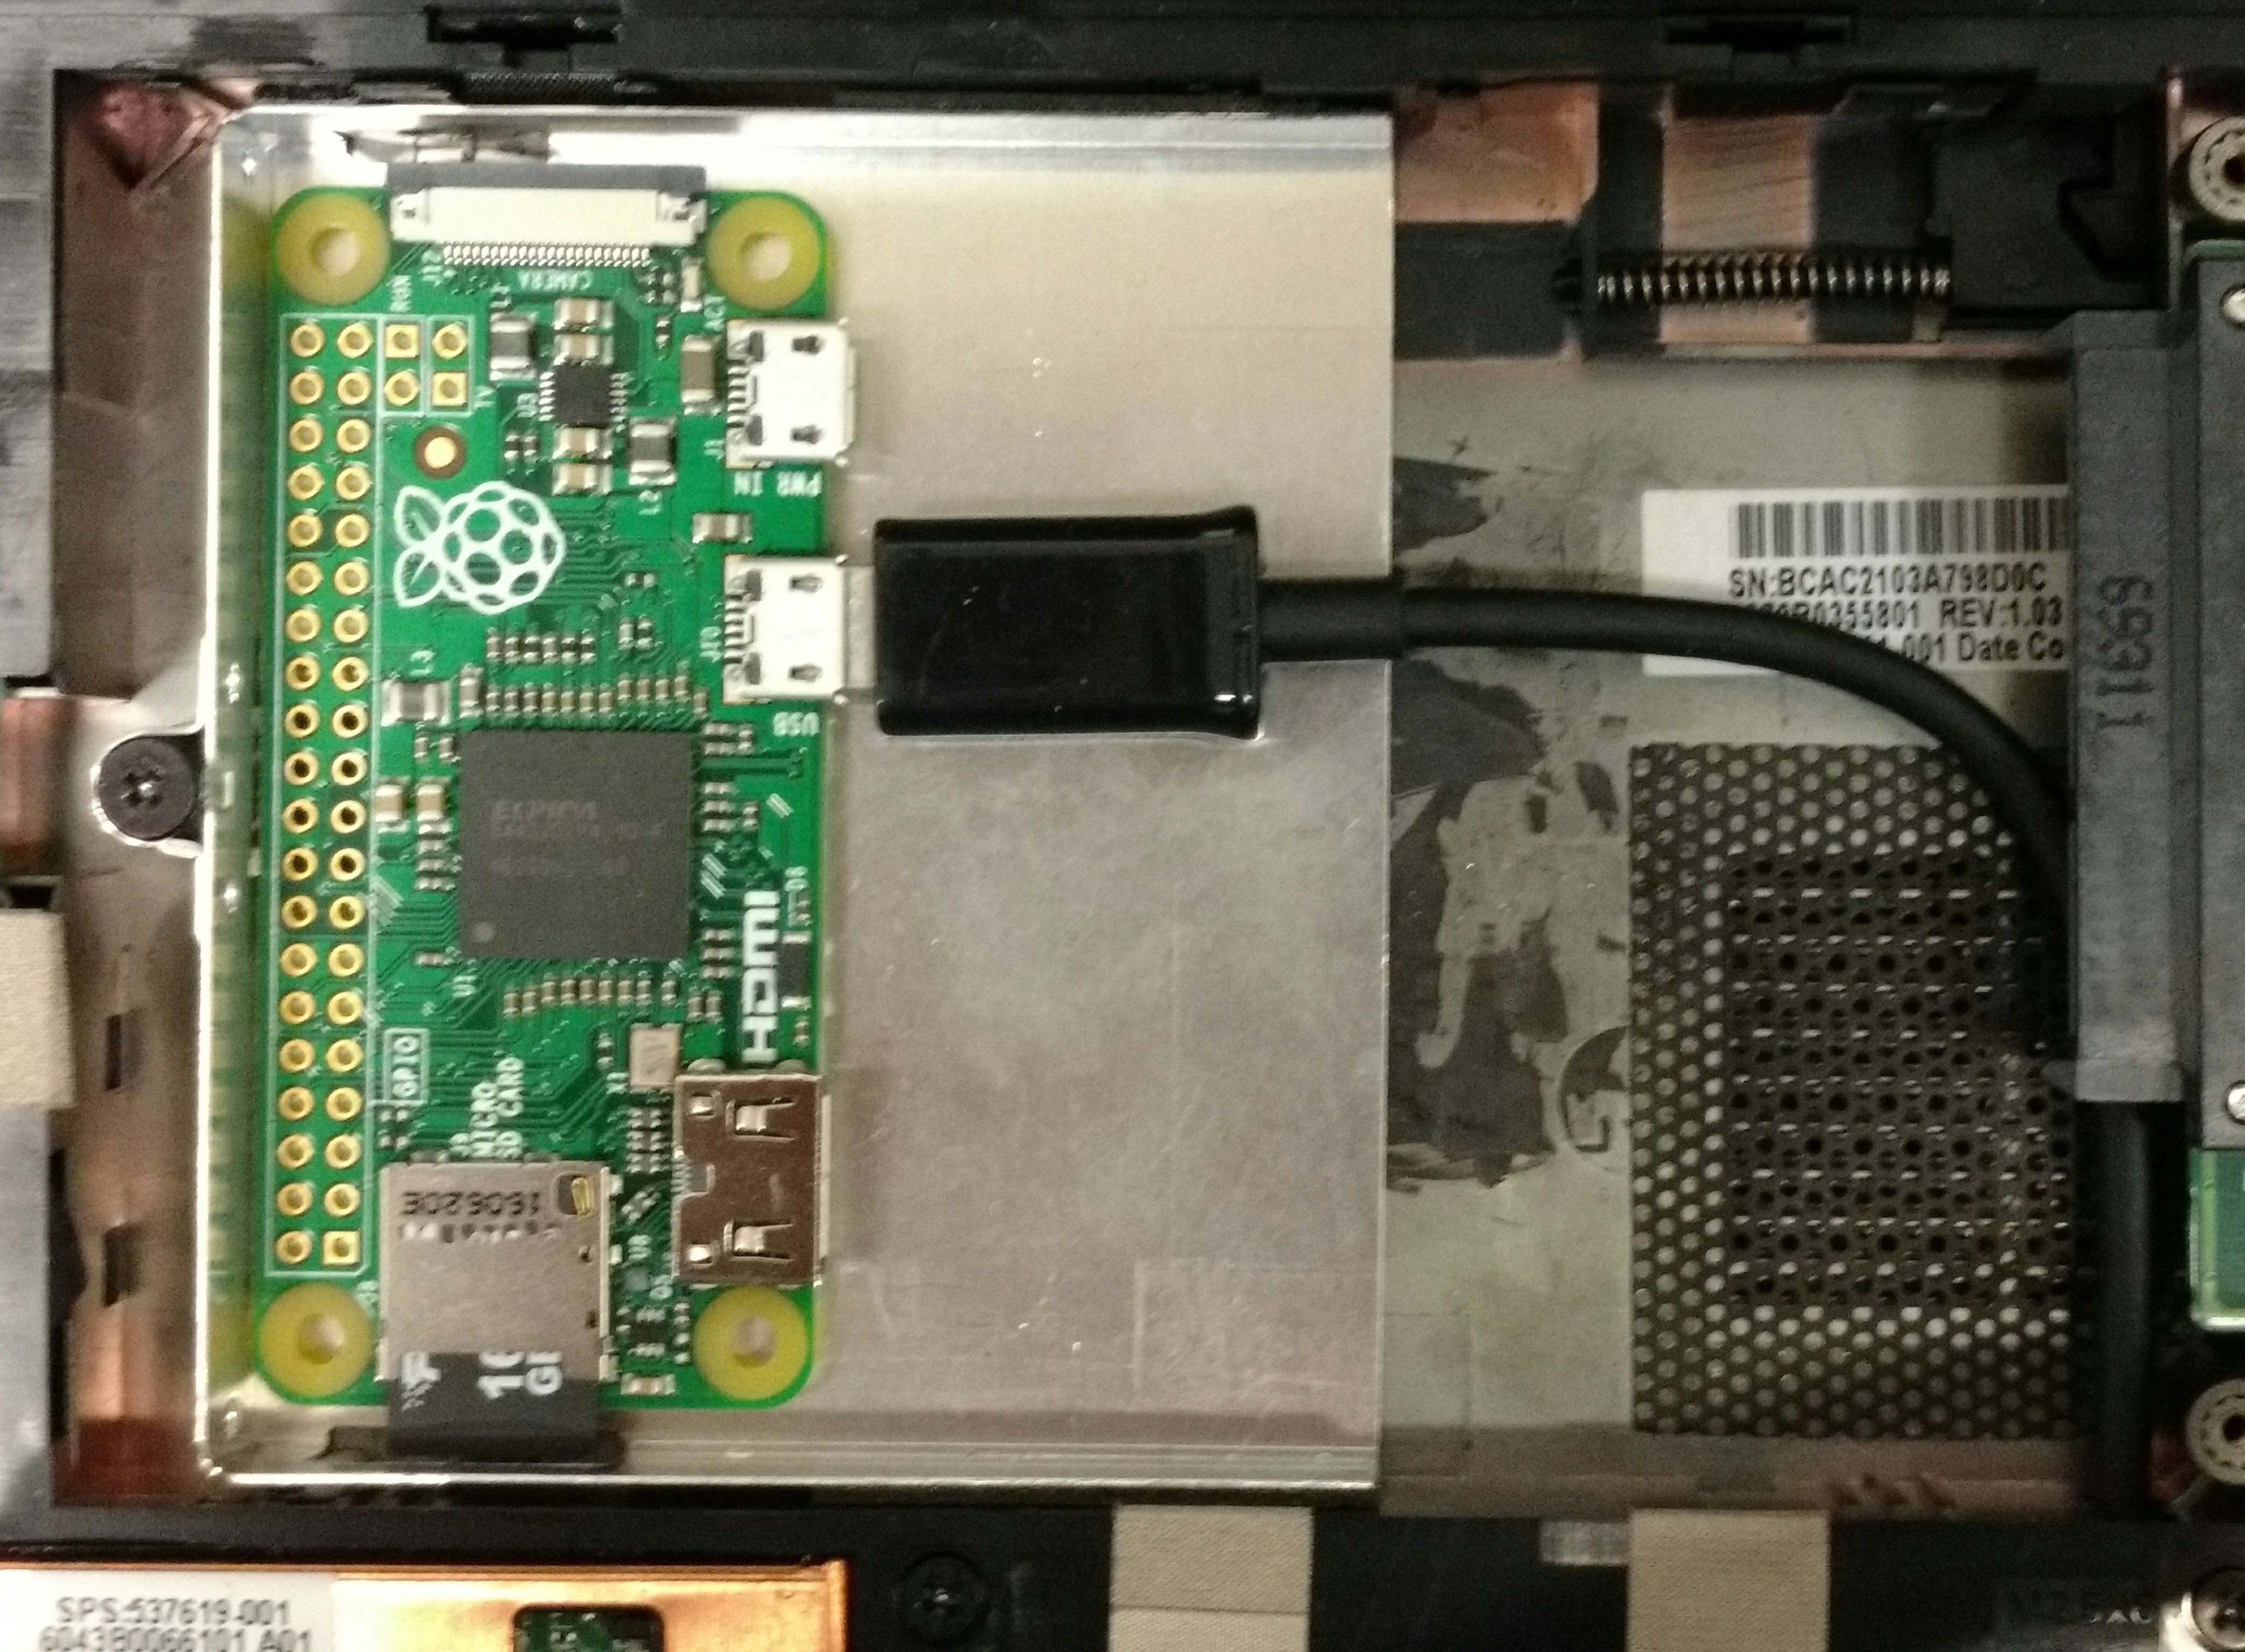
The Zero can be located in the hard disk bay, the CDROM bay, the second battery bay, or any other place it will fit. Remember to provide some way to remove/insert the SD card in the Zero and to leave room for the micro USB connector. Secure the Zero with double sided tape, Velcro, or something similar. Laptop internal plastic is often coated with conductive paint, so make sure the Zero is insulated from it.
On my laptop the hard disk bay is directly below the keyboard, so I leave the keyboard unsecured and I lift it up to access the Zero. You may be able to do something similar if your hard disk is below the keyboard. If there is plastic in the way you can probably cut it out. If your hard disk is below the palm rest area you'll have to access the Zero from the bottom of the laptop. This is the time to be creative!
Here's what mine looks like with the keyboard lifted up. I cut down and inverted the hard disk carrier so the Zero could be removed by undoing one screw:
![]()
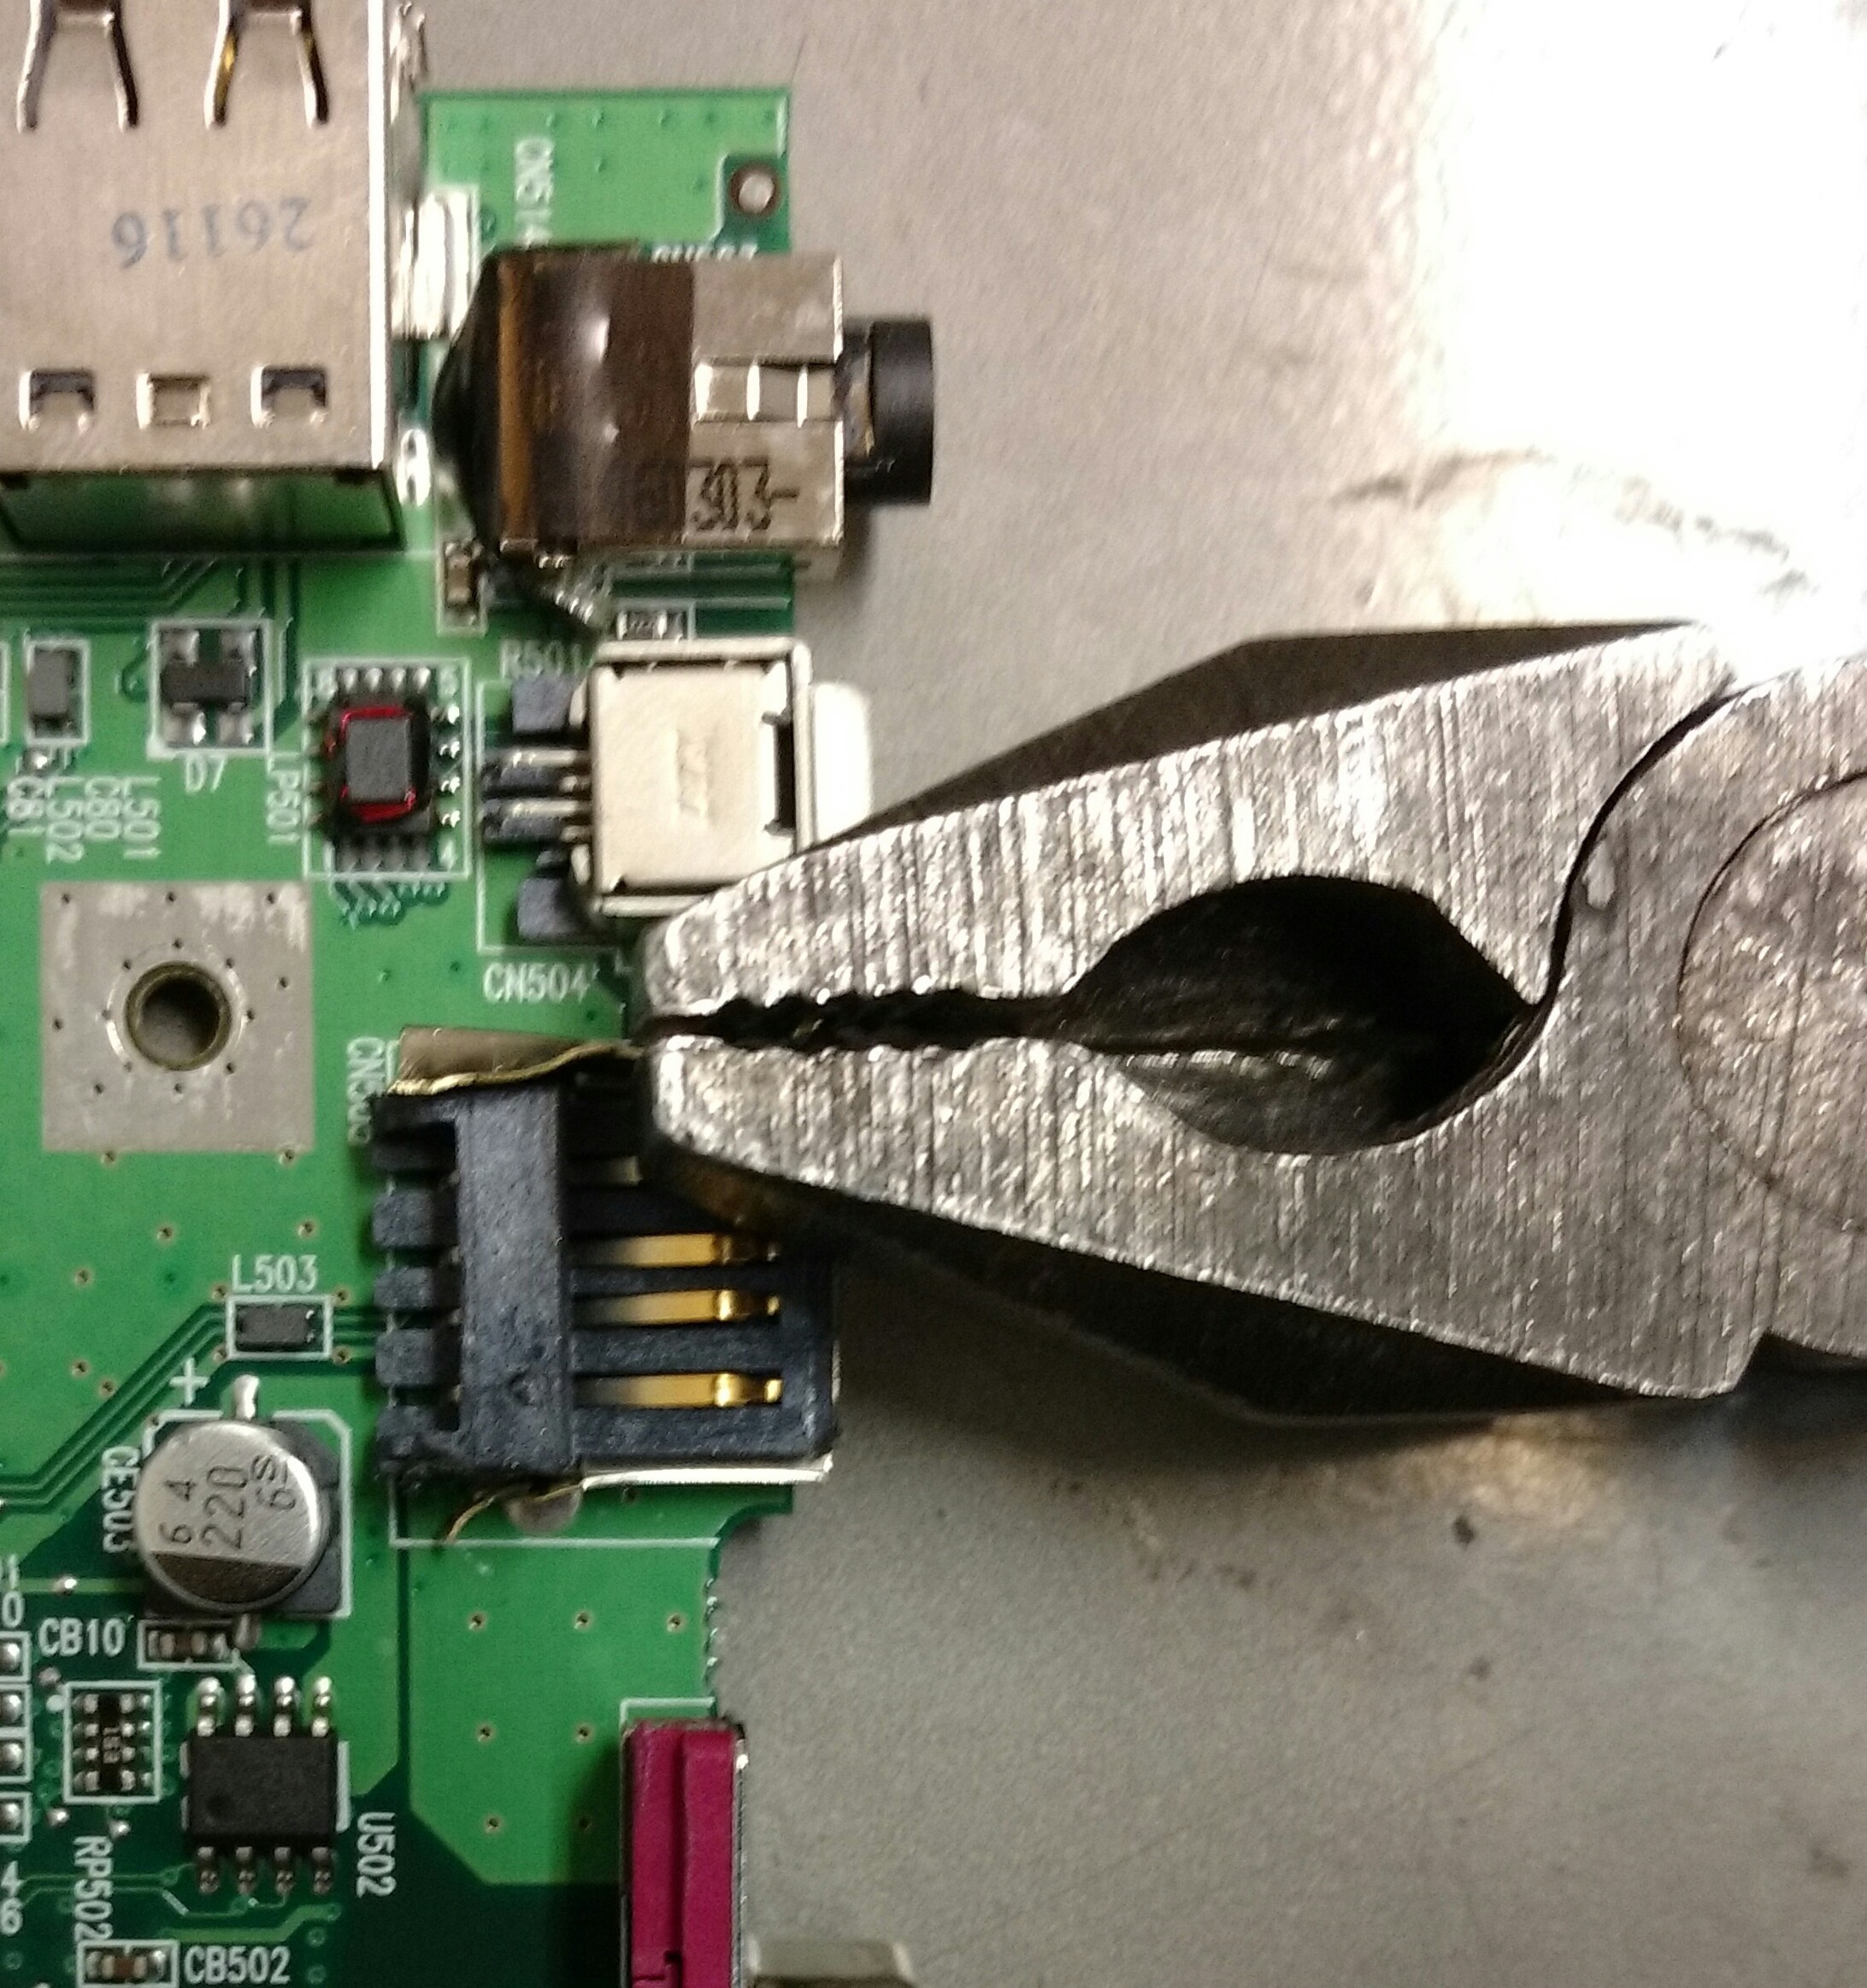
Find a path to route the USB cable inside the laptop to one of the USB ports. Remove part of the metal shell from the laptop's USB connector to expose the contacts:
![]()
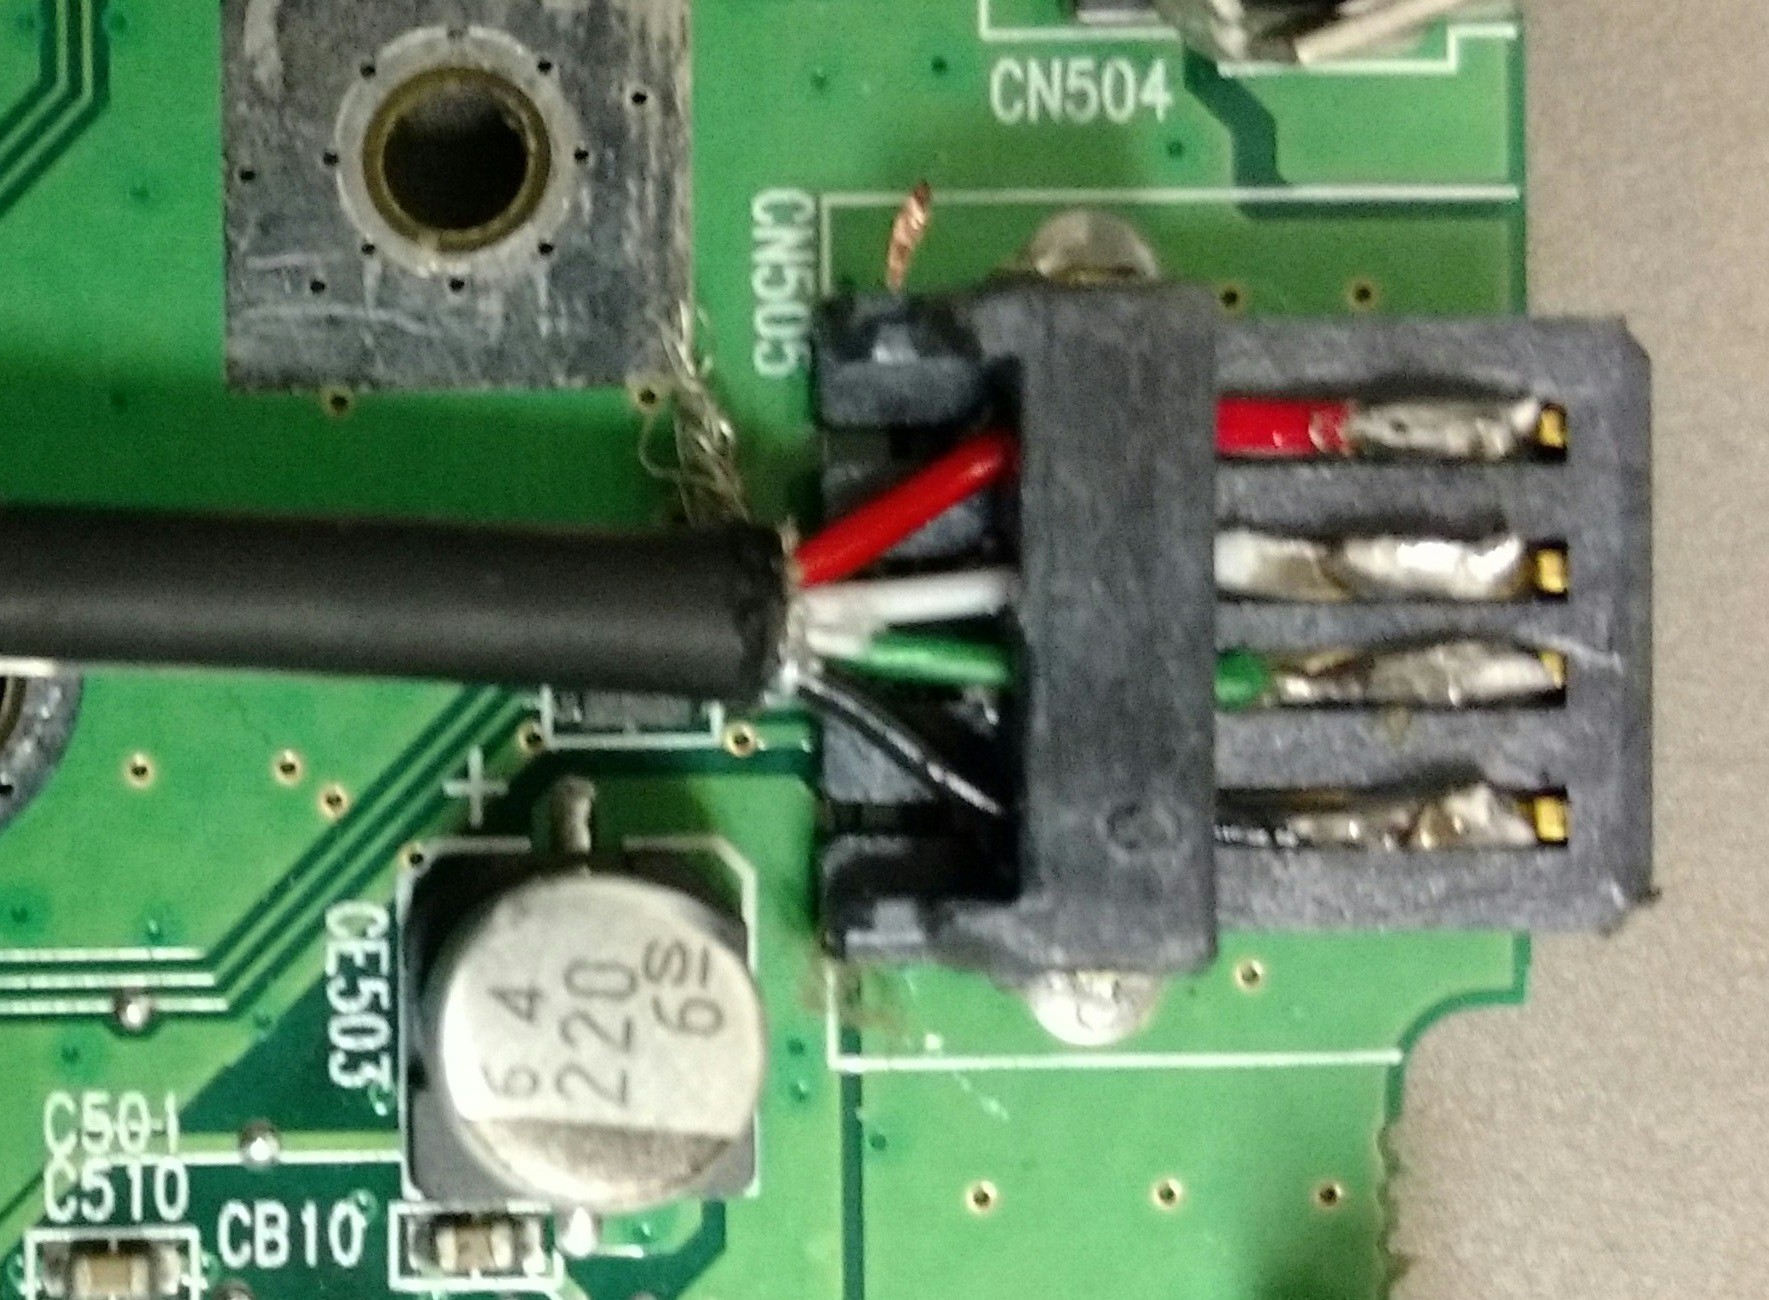
Cut the cable to the proper length (measure twice, cut once!) strip the end, then solder the wires to the contacts. Only strip as much as absolutely necessary to preserve USB signal integrity. You might also want to solder some of the shield wires to a good ground, such as what's left of the metal shell:
![]()
MAKE SURE YOU WIRE IT PROPERLY. The USB color codes are standardized, but that doesn't mean the cable manufacturer followed them! Double check everything, especially the power wires. A micro USB breakout would be a handy tool to have. Getting the data wires reversed won't cause any permanent damage, it just won't work, but reversed power wires will destroy the Zero. (If you have a Pi A+, B+. 2, or 3, you can use it as a power polarity tester since it has reverse protection circuitry and won't be damaged. If it powers up you know the power wiring is correct.)
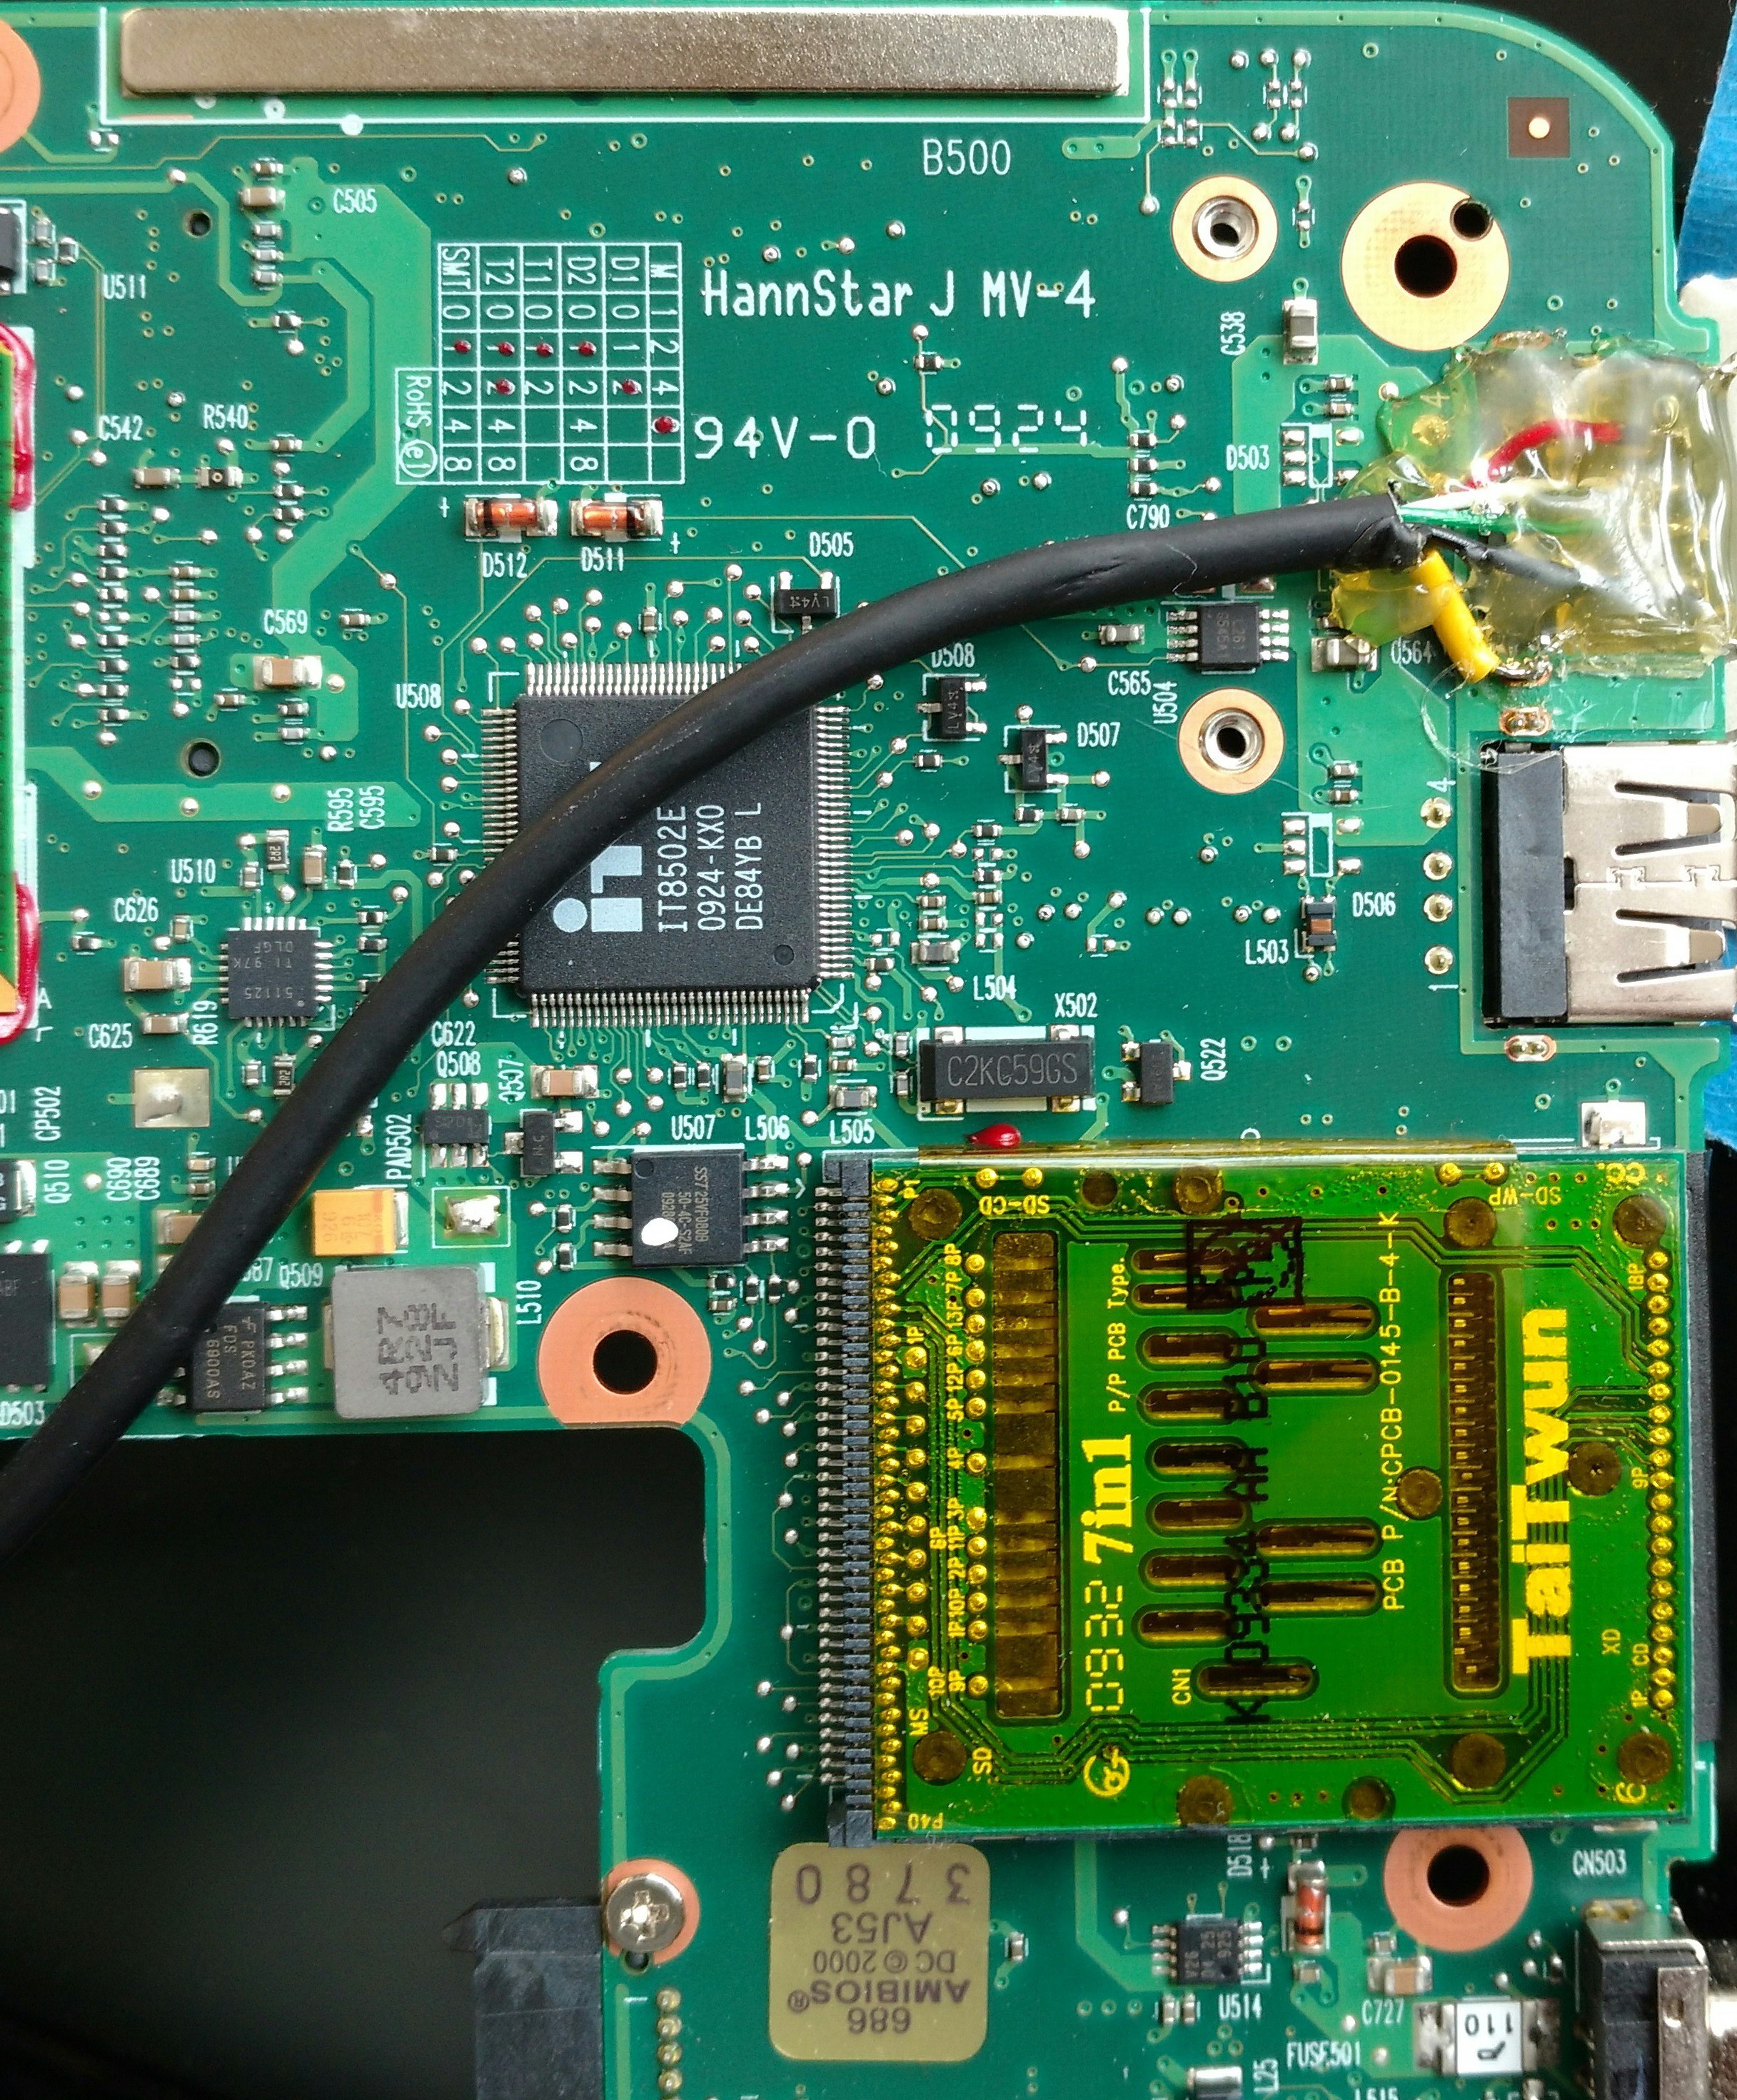
Cover the soldered connections in hot glue. Here's what it looks like on my HP Mini 110. It's ugly but it works:
![]()
It's always a good idea to test it out before full reassembly. You know the saying, "test twice, assemble once". Or something like that. Reassemble the laptop and you're done!
REMOTE X
Download the XWindow.sh script to the laptop and run it. It will switch to vt8, and after 10 seconds present you with a login prompt for the Zero. Log in, and after about 20 seconds you will have a full graphical desktop connected to the Zero. You can switch back and forth between the laptop and the Zero using Ctrl-Alt-F7 and Ctrl-Alt-F8. Exiting the terminal window will kill the connection.
The XWindow system was designed to be used remotely, where the display is on a different computer than the one running the programs. That's exactly the setup we have here. I prefer this arrangement over using VNC, but you can use it if you wish.
INTERNET CONNECTION SHARING
Get an Internet connection working on the laptop, download the nat.sh script to the laptop, and run it. The Zero will now be able to access the Internet via the laptop. Note that the script will need to be re-run after each laptop boot. I've done it this way for security reasons, you can set the script to automatically run on each boot if you wish.
If you build this please let me know!
Also, if you notice any problems with these instructions please contact me (hackaday.io message or mincepi at gmail dot com) so I can fix them.
laptop2pi
Frankentop (noun): A laptop created by combining parts from disparate computers, e.g. an HP 1101 combined with a Pi Zero.
Discussions
Become a Hackaday.io Member
Create an account to leave a comment. Already have an account? Log In.