 kutluhan_aktar
-
1Step 1: Designing and soldering the Squid-inspired PCB
Before prototyping my Squid-inspired PCB design, I inspected the detailed pin reference of Nano ESP32, the micro:bit connector-based UNIHIKER pinout, and the supported transmission protocols of the measurement sensors. Then, I checked the wireless (Wi-Fi) communication quality between Nano ESP32, UNIHIKER, and the web application while transferring and receiving data packets.
![]()
![]()
![]()
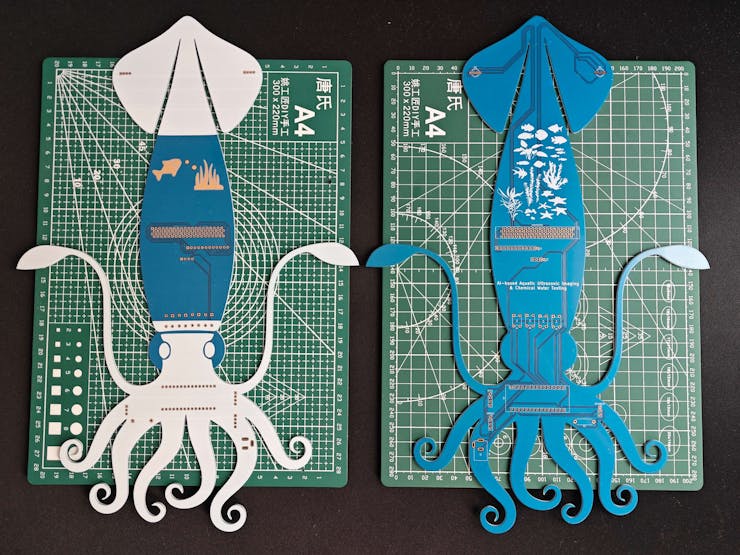
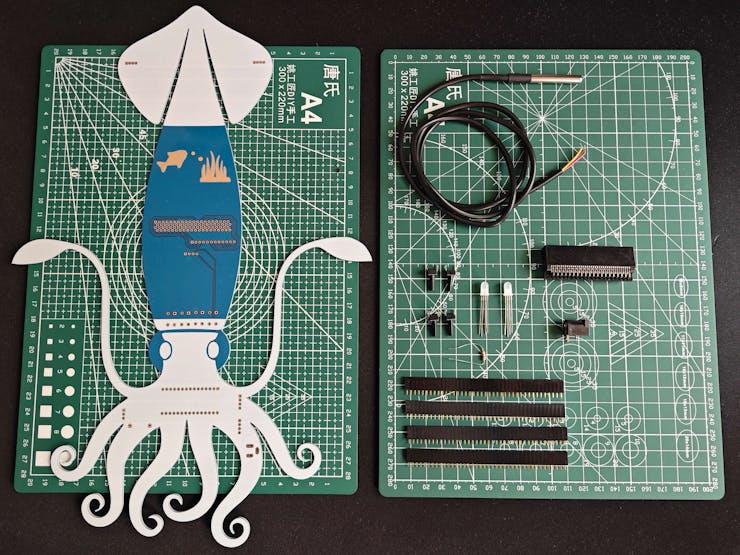
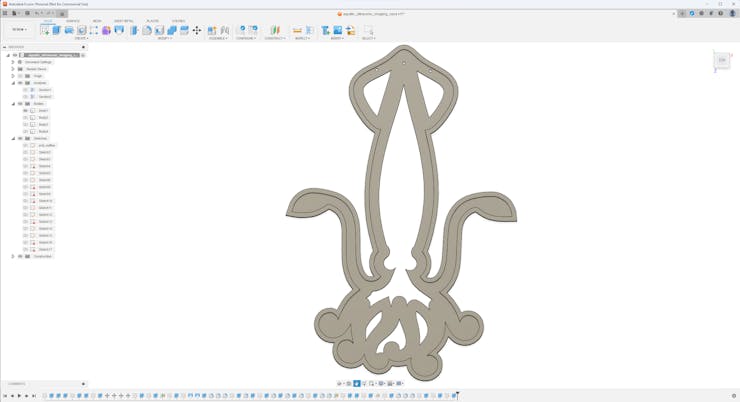
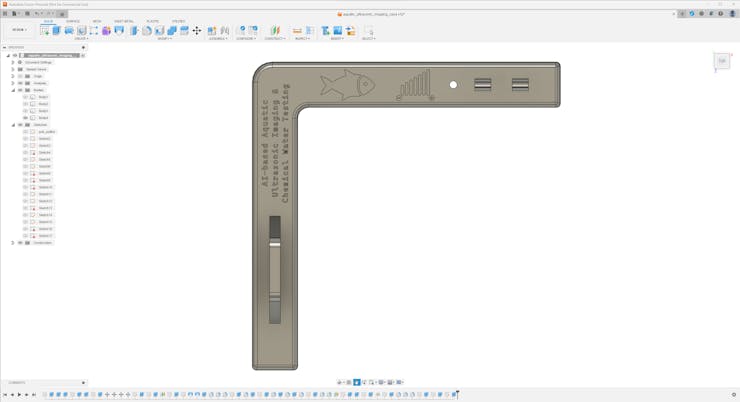
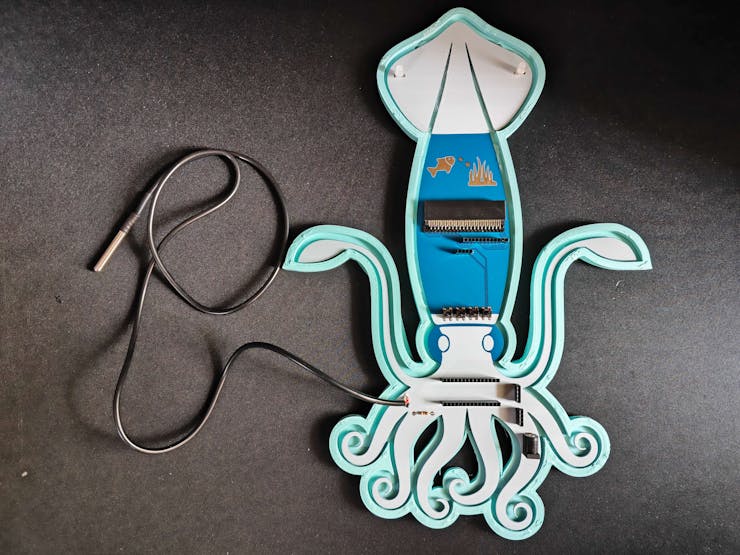
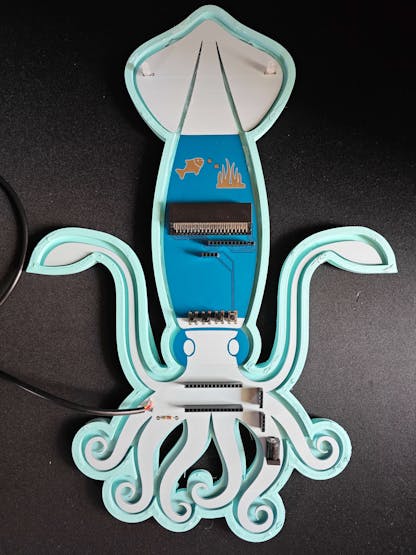
Then, I designed my Squid-inspired PCB by utilizing Autodesk Fusion 360 and KiCad. Since I wanted to design a distinctive 3D-printed hang-on holder to simplify the PCB placement on the simulated fish farm (aquarium), I created the PCB outline on Fusion 360 and then imported the outline file (DXF) to KiCad. As mentioned earlier, I decided to utilize squid as the fulcrum of my PCB design since I wanted my device to resemble the enchanting underwater atmosphere.
To replicate this air bubble and water pollution detection device, you can download the Gerber file below and order my PCB design from ELECROW directly.
![]()
![]()
![]()
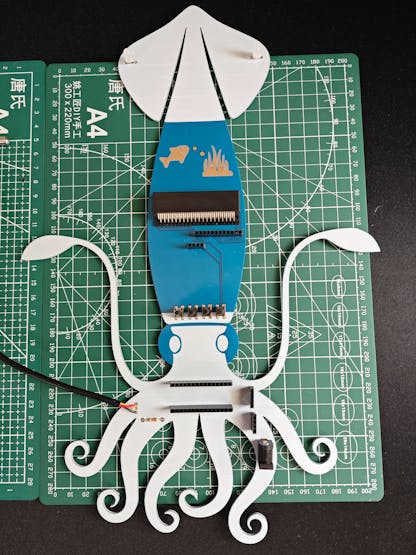
Normally, it would not be possible to embed most of the commercial single-board computers directly into a PCB without applying arduous disassembly methods. Nevertheless, UNIHIKER provides a micro:bit-compatible connector to access the GPIO interface of the microcontroller coprocessor (RISC-V). Therefore, I was able to embed UNIHIKER as the centerpiece of my PCB by utilizing a micro:bit-compatible edge connector from Kitronik.
If you want to add the Kitronik edge connector to your PCB designs, you can inspect its KiCad component library and footprint.
![]()
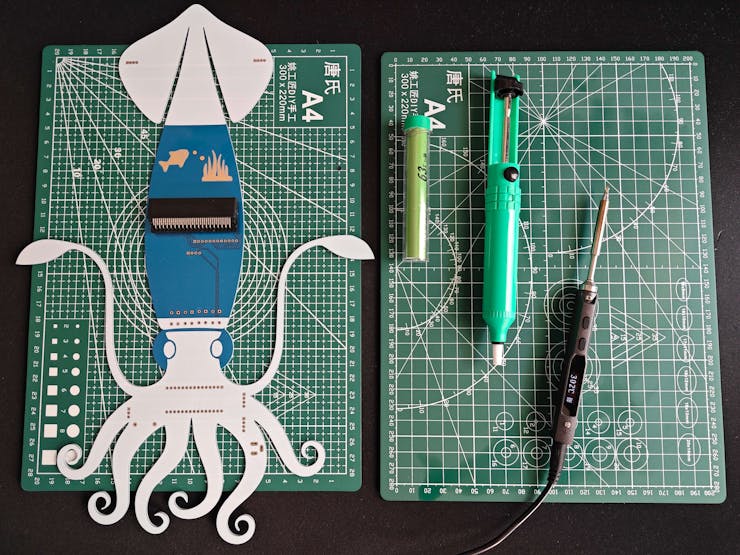
By utilizing a TS100 soldering iron, I attached headers (female), a DS18B20 waterproof temperature sensor, a Kitronik micro:bit-compatible edge connector, pushbuttons (6x6), 5 mm common anode RGB LEDs, a 4.7K resistor, and a power jack to the Squid PCB.
📌 Component list on the PCB:
A1 (Headers for Arduino Nano ESP32)
UNIHIKER1 (Kitronik micro:bit-compatible Edge Connector)
DS18B20 (DS18B20 Waterproof Temperature Sensor)
URM15 (Headers for RS485-to-UART Signal Adapter Module)
ACC1 (Headers for Serial 6-Axis Accelerometer)
S1 (Headers for SSD1306 OLED Display)
R1 (4.7K Resistor)
K1, K2, K3, K4 (6x6 Pushbutton)
D1, D2 (5 mm Common Anode RGB LED)
J2 (Headers for Available UNIHIKER Pins)
J1 (Power Jack)
![]()
![]()
![]()
![]()
-
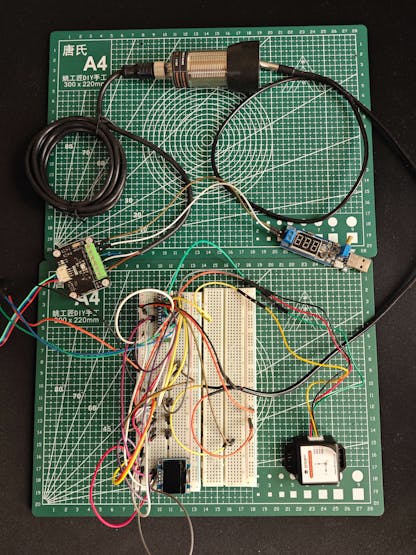
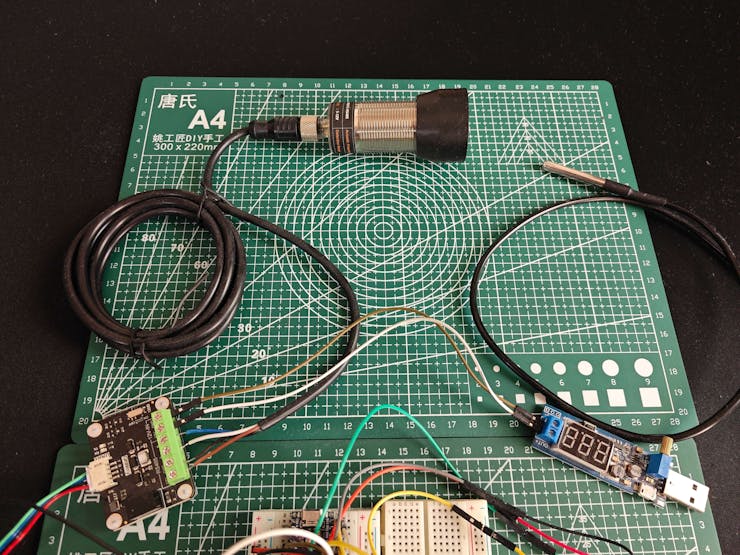
2Step 1.1: Making connections and adjustments
// Connections
// Arduino Nano ESP32 :
//                                URM15 - 75KHZ Ultrasonic Sensor via RS485-to-UART Signal Adapter Module
// D3      ------------------------ TX
// D2      ------------------------ RX
// 3.3V    ------------------------ +
// GND     ------------------------ -
//                                Serial 6-Axis Accelerometer
// 3.3V    ------------------------ VCC
// D5      ------------------------ RXD
// D4      ------------------------ TXD
// GND     ------------------------ GND
//                                DS18B20 Waterproof Temperature Sensor
// A1      ------------------------ Data
//                                SSD1306 OLED Display (128x64)
// A4      ------------------------ SDA
// A5      ------------------------ SCL
//                                Control Button (A)
// D6      ------------------------ +
//                                Control Button (B)
// D7      ------------------------ +
//                                Control Button (C)
// D8      ------------------------ +
//                                Control Button (D)
// D9      ------------------------ +
//                                5mm Common Anode RGB LED
// D10     ------------------------ R
// D11     ------------------------ G
// D12     ------------------------ B
&
&
&
// Connections
// UNIHIKER :
//                                5mm Common Anode RGB LED
// P4      ------------------------ R
// P5      ------------------------ G
// P6      ------------------------ B
#️⃣ Although the URM15 is an exceptional ultrasonic ranging sensor providing an IP65 waterproof probe with a measuring range of 30 cm - 500 cm, it does not support direct data transmission and requires the standard Modbus-RTU protocol for stable communication. Thus, I utilized an RS485-to-UART signal adapter module (active-isolated) to obtain the generated ultrasonic distance measurements from the ultrasonic sensor and transfer them to Nano ESP32 via serial communication. Since Nano ESP32 cannot supply the stable 12V required for the URM15 ultrasonic sensor, I connected a USB buck-boost converter board to an external battery to obtain the demanding 12V to power the ultrasonic sensor through the signal adapter module.
#️⃣ Since the URM15 ultrasonic sensor supports the external temperature compensation to obviate the undulating ambient temperature effect, I utilized a DS18B20 waterproof temperature sensor to tune the ultrasonic sensor. As shown in the schematic below, before connecting the DS18B20 waterproof temperature sensor to Nano ESP32, I attached a 4.7K resistor as a pull-up from the DATA line to the VCC line of the sensor to generate accurate temperature measurements.
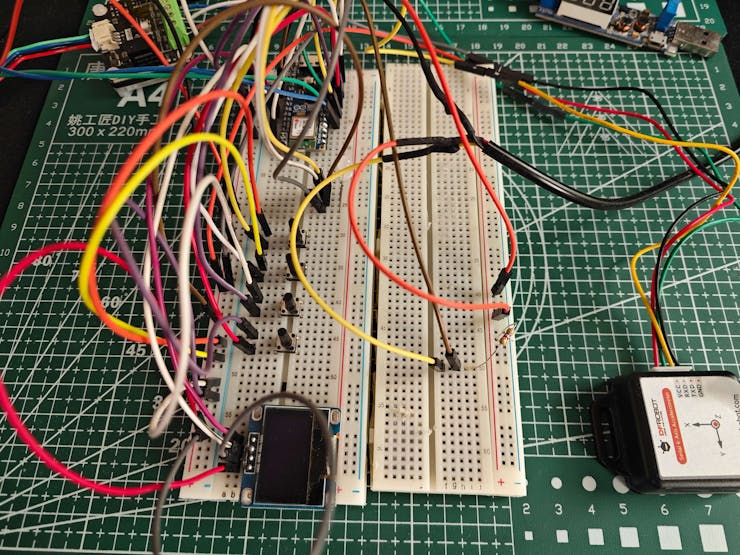
#️⃣ To detect the movement of the ultrasonic sensor probe underwater while collecting data, I utilized a 6-axis accelerometer supporting UART communication. Since I employed Nano ESP32 to pass the collected data buffers directly to the web application, I did not need to connect an external storage module such as a microSD card module.
#️⃣ To provide the user with a feature-rich interface, I connected an SSD1306 OLED display and four control buttons to Nano ESP32. I also added an RGB LED to inform the user of the device status while performing operations related to Nano ESP32.
#️⃣ Since UNIHIKER (RK3308 Arm 64-bit) is an outstandingly compact single-board computer providing a USB Type-A connector for peripherals, I was able to connect a high-quality USB webcam (PK-910H) to capture and save image samples effortlessly.
#️⃣ As explained earlier, UNIHIKER comes with a micro:bit-compatible connector to access the GPIO interface of the microcontroller coprocessor (RISC-V). I utilized the Kitronik edge connector to access the GPIO pins and adjust the secondary RGB LED to inform the user of the device status while performing operations related to UNIHIKER. In this regard, I was able to embed UNIHIKER into the Squid PCB as the centerpiece to build a single-unit device.
#️⃣ Before embedding UNIHIKER, I tested the micro:bit-compatible GPIO interface by utilizing a soldered Kitronik breakout board with the edge connector.
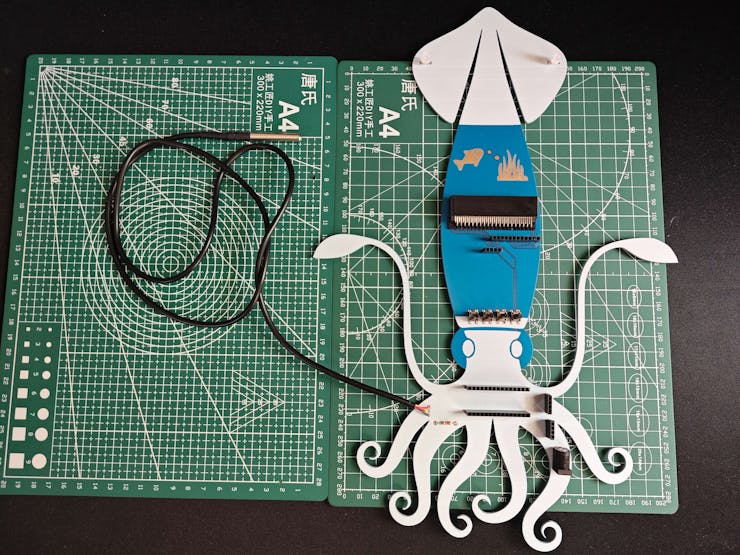
#️⃣ After completing soldering and adjustments, I attached all remaining components to the Squid PCB via the female headers.
![]()
![]()
-
3Step 2: Designing and printing the Aquatic-themed case
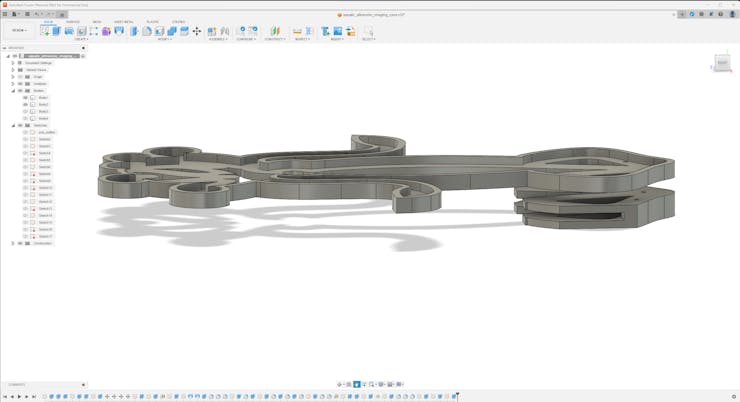
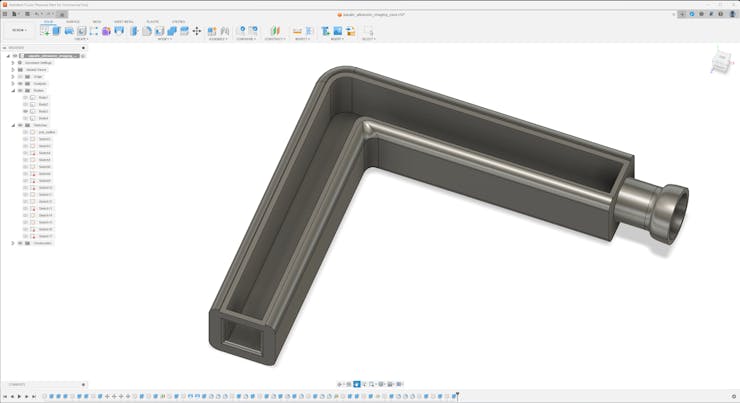
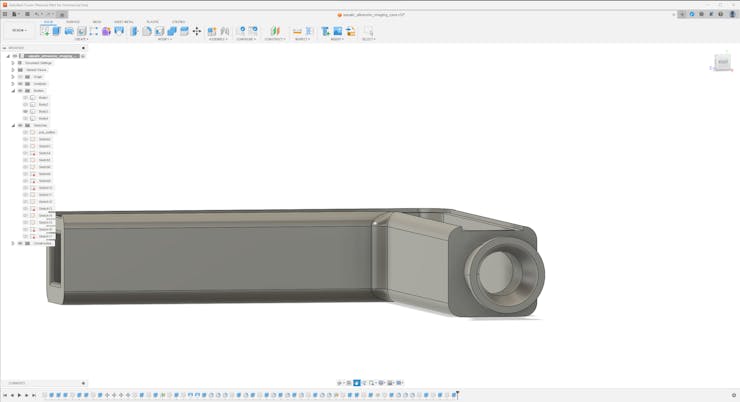
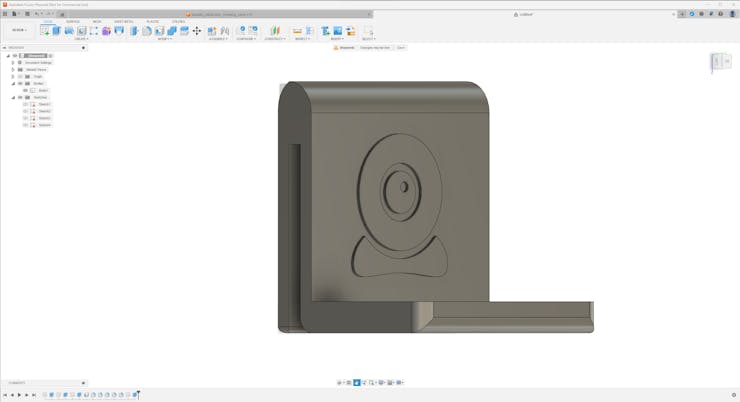
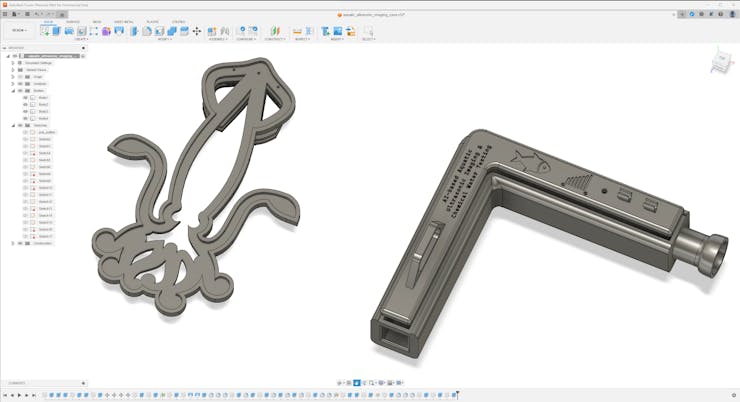
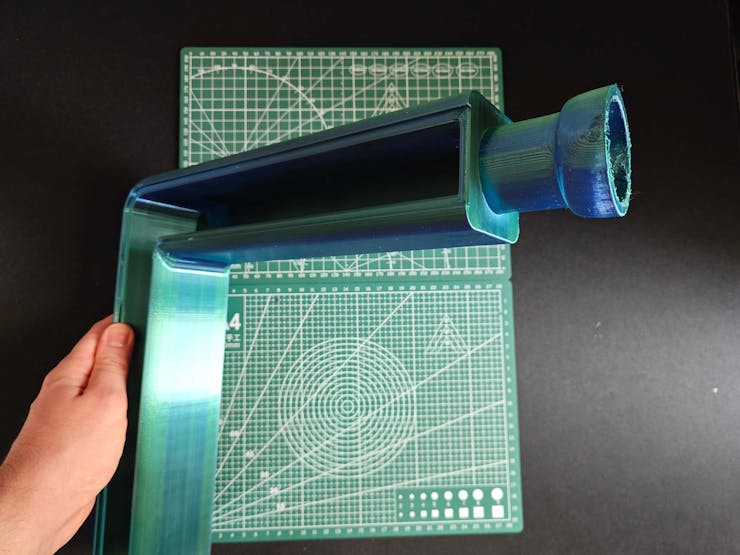
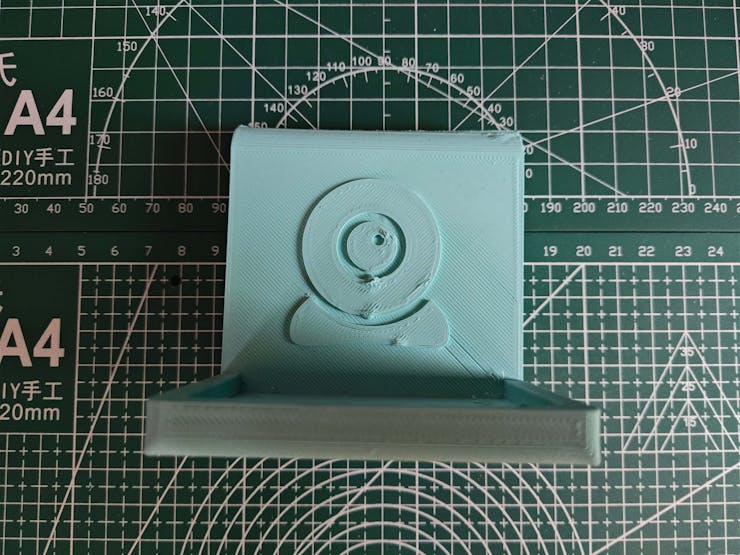
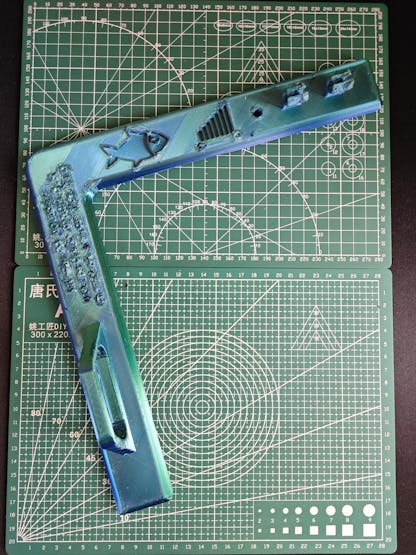
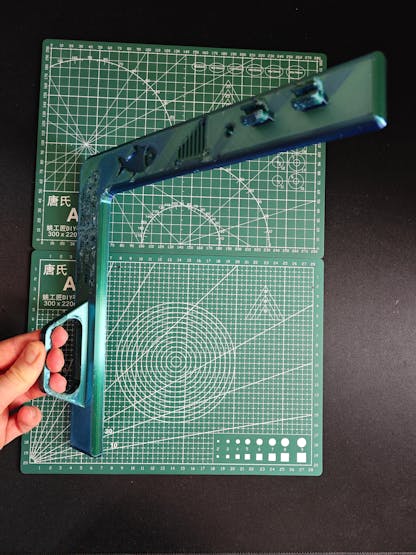
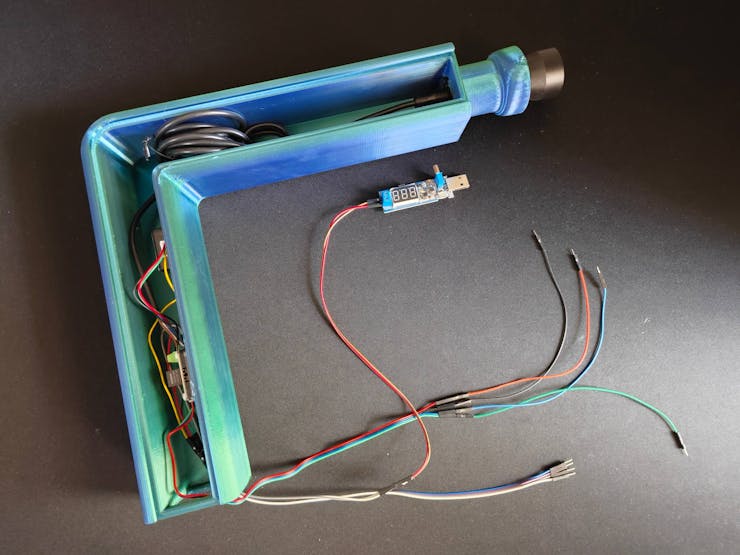
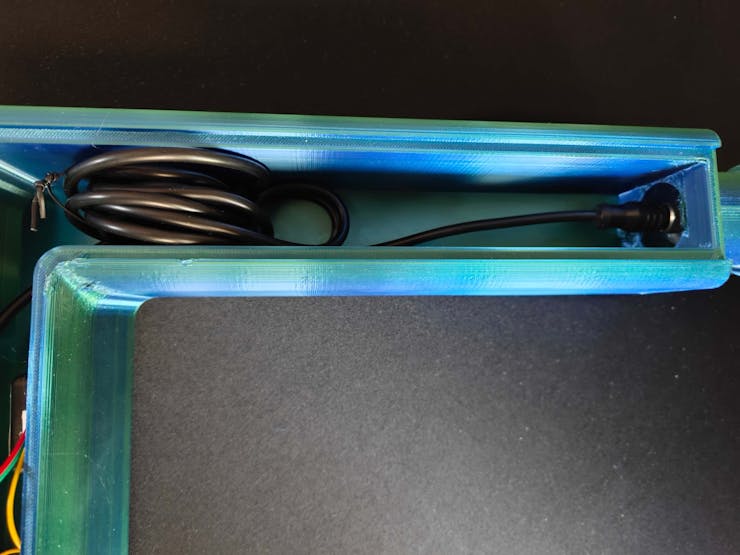
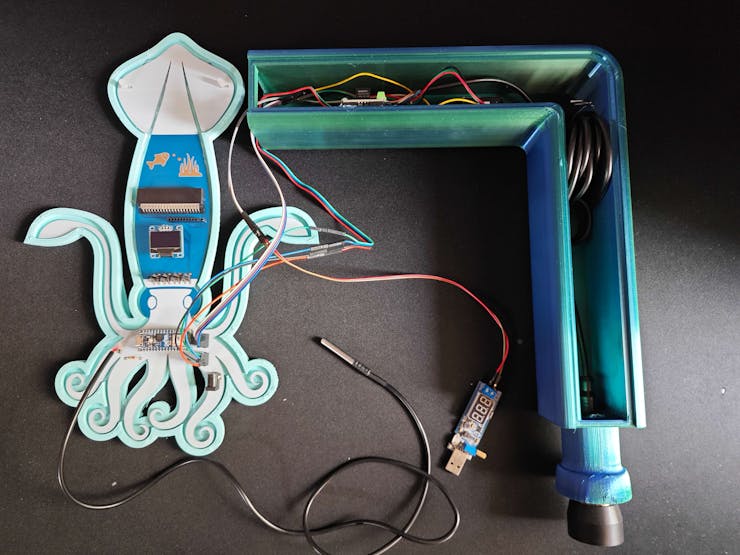
Since I focused on building a feature-rich and accessible AI-powered device that identifies noxious underwater air bubbles via aquatic ultrasonic scans and evaluates water pollution based on chemical water quality tests via object detection so as to inform the user via Telegram push notifications, I decided to design a robust and modular case allowing the user to hang the Squid PCB on the aquarium, place the high-quality USB webcam when standing idle, and position the ultrasonic sensor effortlessly while scanning underwater substrate. To avoid overexposure to water and prevent open wire connections from short circuits, I added a removable top cover mountable to the main case via snap-fit joints. The semicircular-shaped mounting brackets on the top cover let the user attach the DS18B20 waterproof temperature sensor effortlessly. Then, I designed a unique PCB holder encasing the Squid PCB outline and a hang-on aquarium connector mountable to the PCB holder via M3 screws and nuts. To place the high-quality USB webcam when standing idle, I also designed a hang-on camera holder attachable to the side of the aquarium. Furthermore, I decided to emboss aquatic life with sound-based graphic icons on the removable top cover and the camera symbol on the camera holder to highlight the qualifications of this AI-powered underwater air bubble detection device.
Since I needed to position the URM15 ultrasonic sensor accurately while scanning the underwater substrate and generating data buffers, I added a special cylindrical slot to the end point of the L-shaped main case in order to fasten the ultrasonic sensor seamlessly.
I designed the L-shaped main case, the removable top cover, the Squid PCB holder, the hang-on aquarium connector of the PCB holder, and the hang-on camera holder in Autodesk Fusion 360. You can download their STL files below.
![]()
![]()
![]()
![]()
![]()
![]()
![]()
![]()
![]()
![]()
![]()
![]()
![]()
![]()
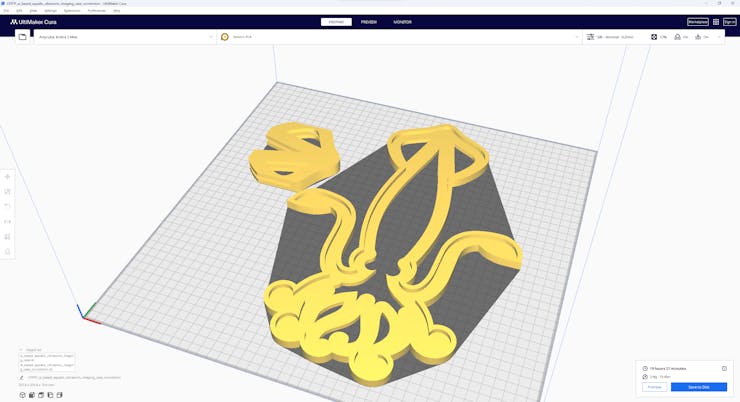
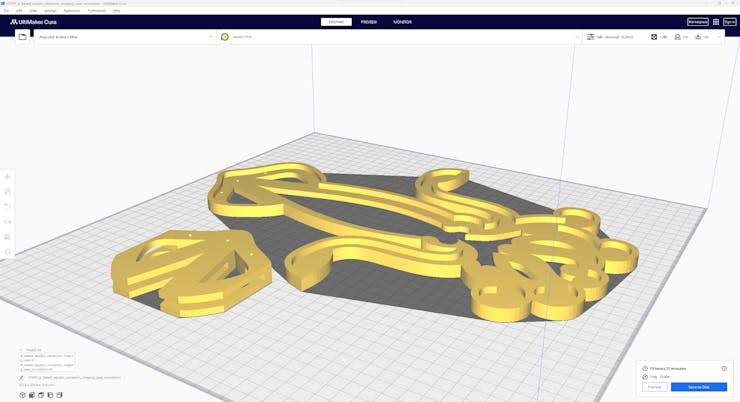
Then, I sliced all 3D models (STL files) in Ultimaker Cura.
![]()
![]()
![]()
![]()
![]()
![]()
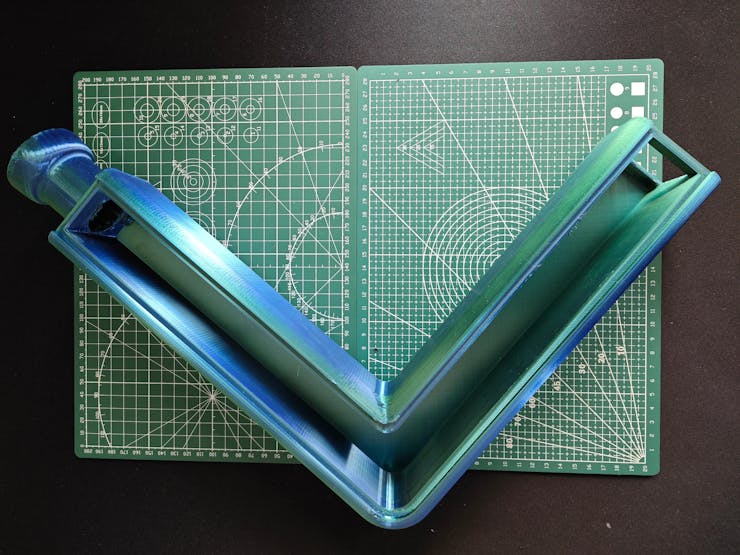
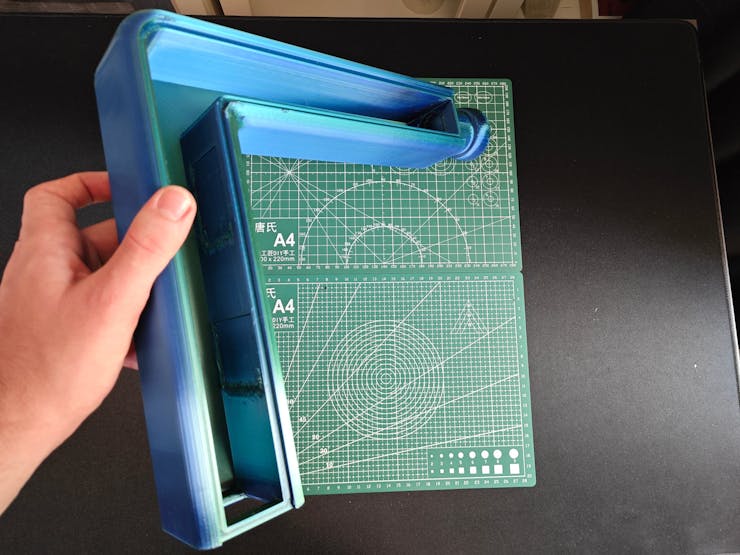
Since I wanted to create a mystique watery structure for the device case and apply a unique underwater theme representing the mesmerizing aquatic life, I utilized these PLA filaments:
- ePLA-Silk Magic Green-Blue (main case and top cover)
- ePLA-Matte Light Blue (PCB holder and hang-on connectors)
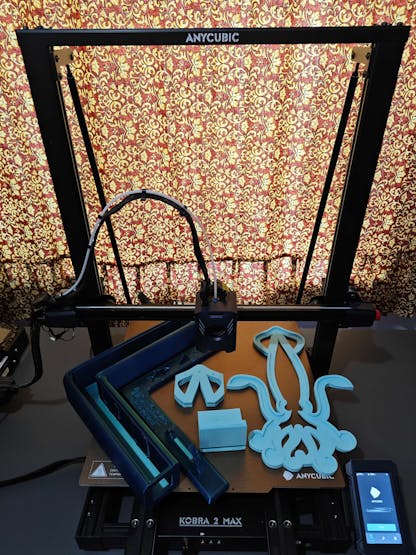
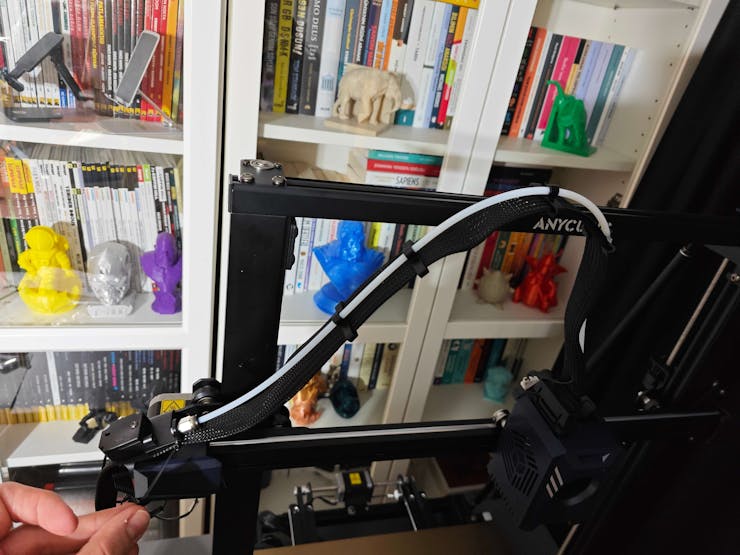
Finally, I printed all parts (models) with my brand-new Anycubic Kobra 2 Max 3D Printer.
![]()
Since Anycubic Kobra 2 Max is budget-friendly and specifically designed for high-speed printing with a gigantic build volume, I highly recommend Anycubic Kobra 2 Max if you are a maker or hobbyist needing to print large prints without compartmentalizing your design and losing structural integrity while working on multiple prototypes before finalizing a complex project.
Thanks to its upgraded direct extruder and vibration compensation features, Anycubic Kobra 2 Max provides 300 mm/s recommended print speed (up to 500 mm/s) and enhanced layer quality. Also, it provides a high-speed optimized cooling system, reducing visible layer lines and complementing the fast printing experience. Since the Z-axis has dual-motors and dual-support rods, it prevents vibration from affecting layer smoothness and integrity, even at higher print speeds.
Furthermore, Anycubic Kobra 2 Max provides a magnetic suction platform on the heated bed for the scratch-resistant PEI spring steel build plate, allowing the user to remove prints without any struggle, even for larger prints up to 420x420x500 mm. Most importantly, you can level the bed automatically via its user-friendly LeviQ 2.0 automatic leveling system and custom Z-axis compensation. Also, it has a smart filament runout sensor and supports Anycubic APP for remote control and management.
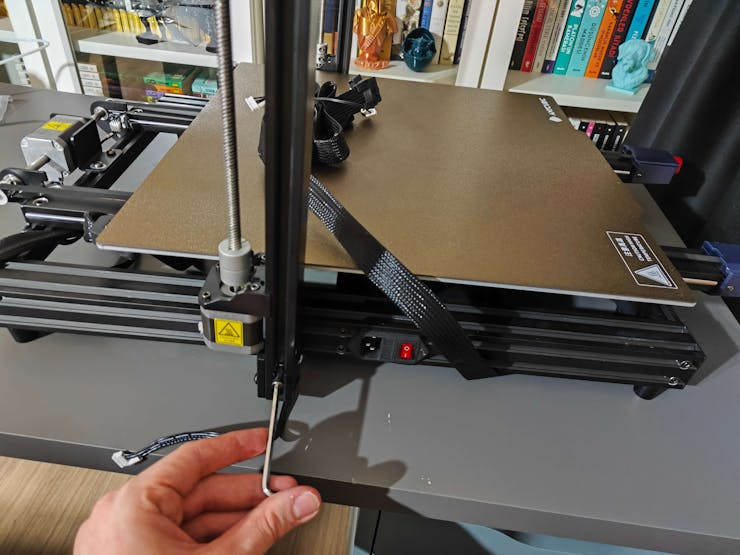
#️⃣ First of all, remove all fixing plates. Then, install the gantry frame and support rods.
![]()
![]()
#️⃣ Install the print head and adjust the X-axis belt tensioner. Then, install the touchscreen and the filament runout sensor.
![]()
![]()
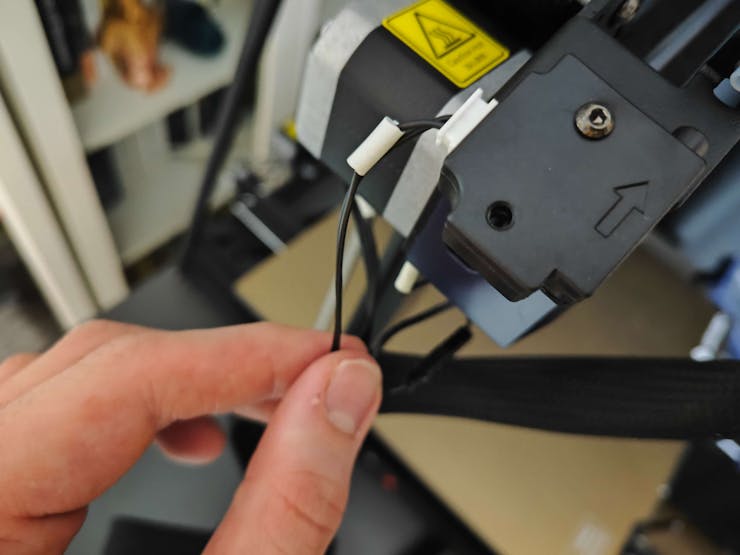
#️⃣ Connect the stepper, switch, screen, and print head cables. Then, attach the filament tube and use cable ties to secure the cables properly.
![]()
![]()
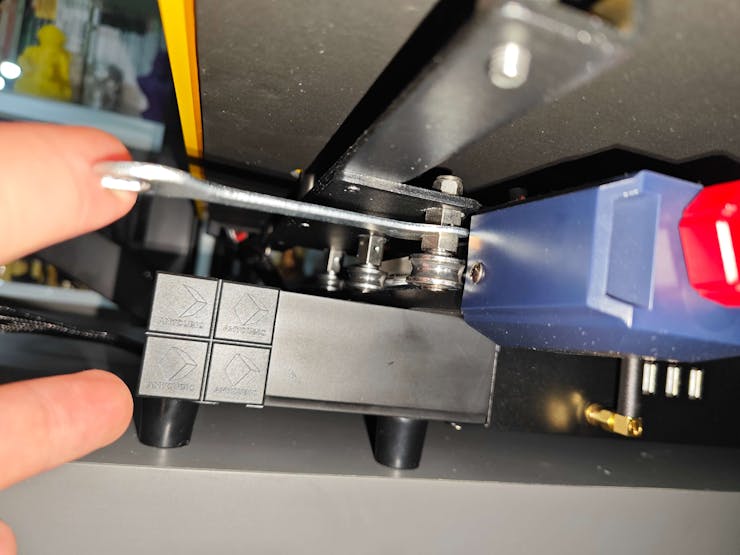
#️⃣ If the print head or bed is shaking, adjust the hexagonal isolation columns underneath them.
![]()
#️⃣ To avoid software-related print failures, update the device firmware manually via USB or directly over Wi-Fi.
I encountered some errors due to Cura configurations before the official 2.3.6 firmware.
![]()
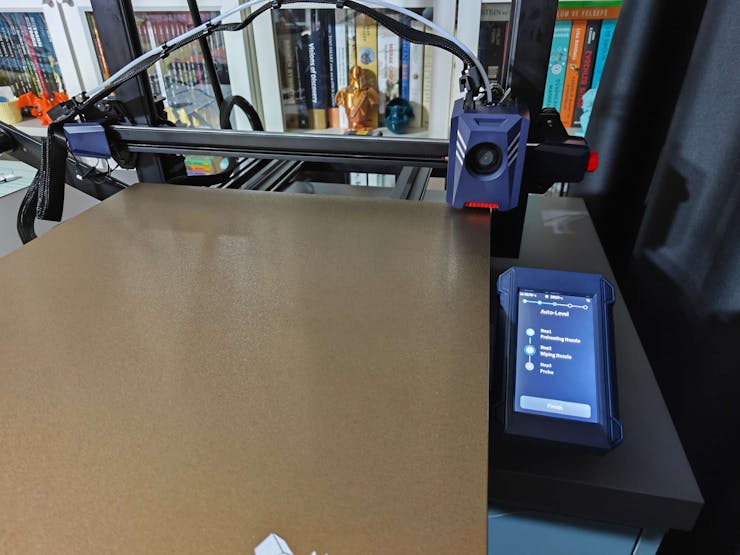
#️⃣ After the firmware upgrade, go to Settings ➡ More Settings ➡ Guide so as to initiate the LeviQ 2.0 automatic bed leveling system and configure vibration calibration.
![]()
#️⃣ Finally, fix the filament tube with the cable clips, install the filament holder, and insert the filament into the extruder.
![]()
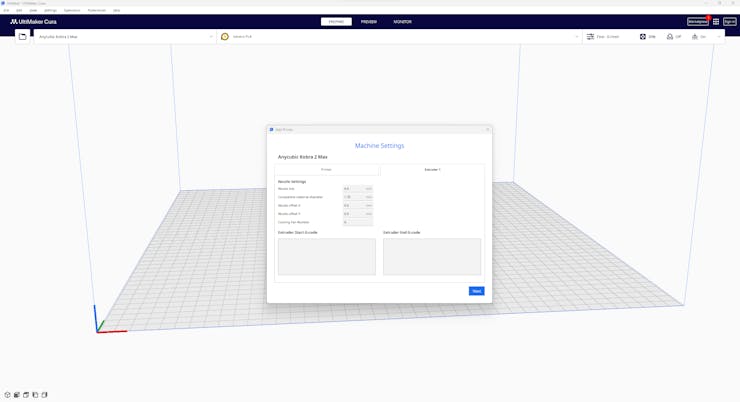
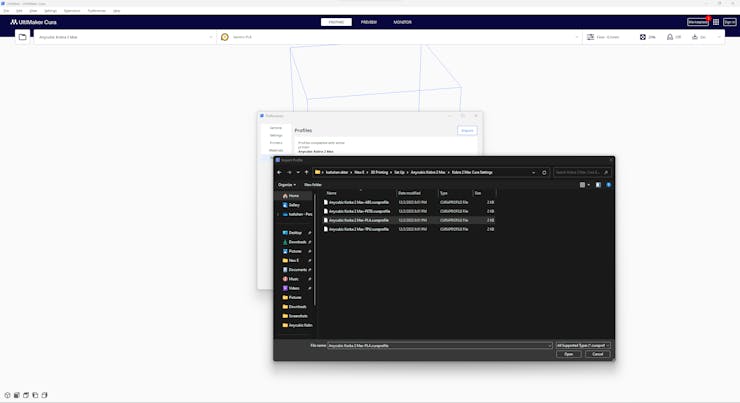
#️⃣ Since Anycubic Kobra 2 Max is not officially supported by Cura yet, we need to set it manually. Fortunately, Anycubic provides detailed configuration steps for Anycubic Kobra 2 Max on Cura.
#️⃣ First of all, create a custom printer profile on Cura for Anycubic Kobra 2 Max with given printer settings.
![]()
![]()
![]()
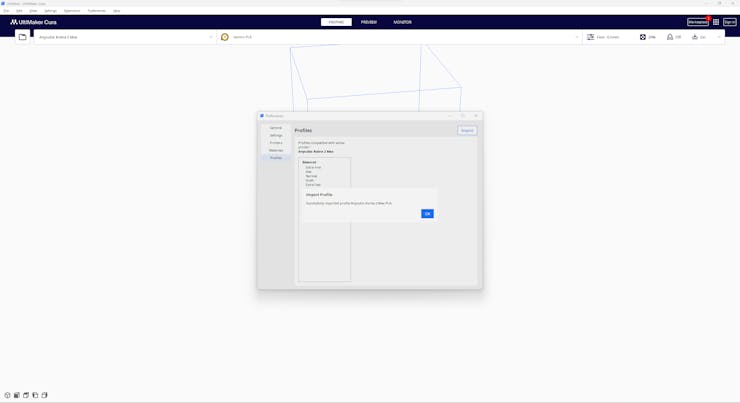
#️⃣ Then, import the printer profile (configuration) file provided by Anycubic, depending on the filament type.
![]()
![]()
-
4Step 2.1: Assembling the 3D-printed case
After printing all parts (models), I attached the URM15 ultrasonic sensor into its special cylindrical slot on the end point of the L-shaped main case and fastened the remaining components to their corresponding slots within the main case via a hot glue gun.
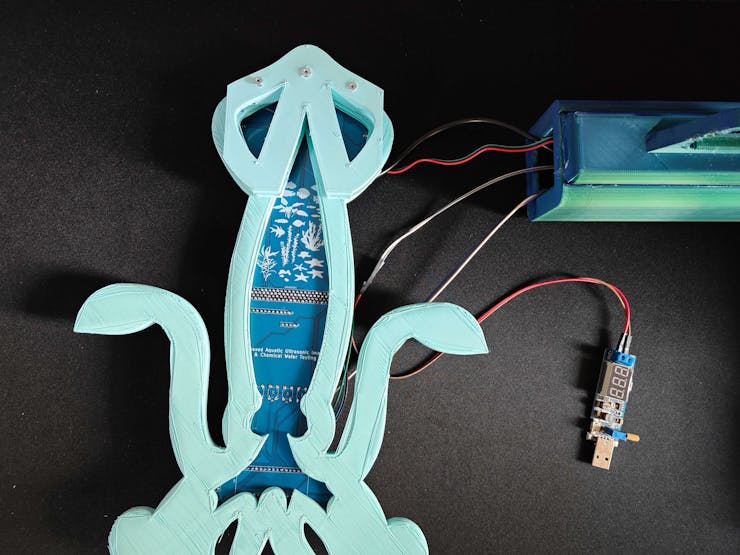
Then, I fastened the Squid PCB to its unique PCB holder via the hot glue gun, encasing the PCB outline. After fastening the Squid PCB, I attached the hang-on aquarium connector to the back of the PCB holder via M3 screws and nuts.
Since the removable top cover has special semicircular-shaped mounting brackets, the DS18B20 waterproof temperature sensor can externally be attached to the top cover.
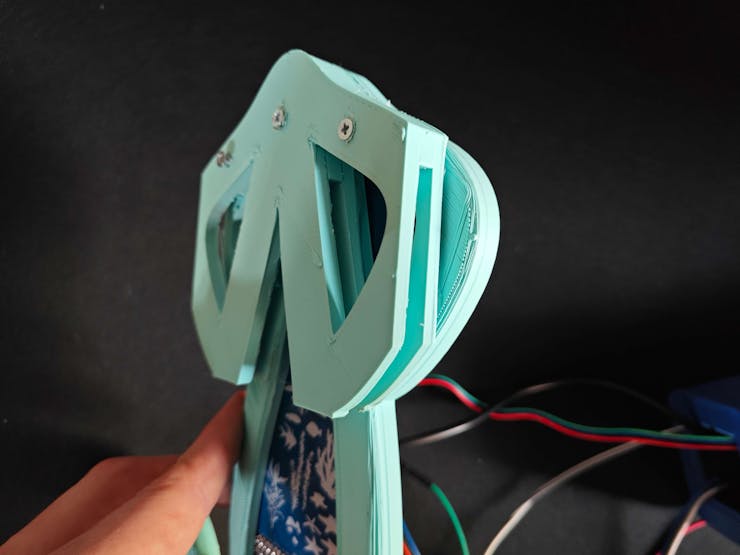
Finally, I affixed the top cover to the main case via its provided snap-fit joints.
![]()
![]()
![]()
![]()
![]()
![]()
![]()
![]()
![]()
![]()
![]()
![]()
![]()
![]()
![]()
![]()
![]()
![]()
![]()
![]()
![]()
![]()
![]()
![]()
![]()
![]()
Since the main case contains all cables required for the connections between the Squid PCB and sensors, the device provides a single-unit structure and operates without wiring redundancy.
![]()
-
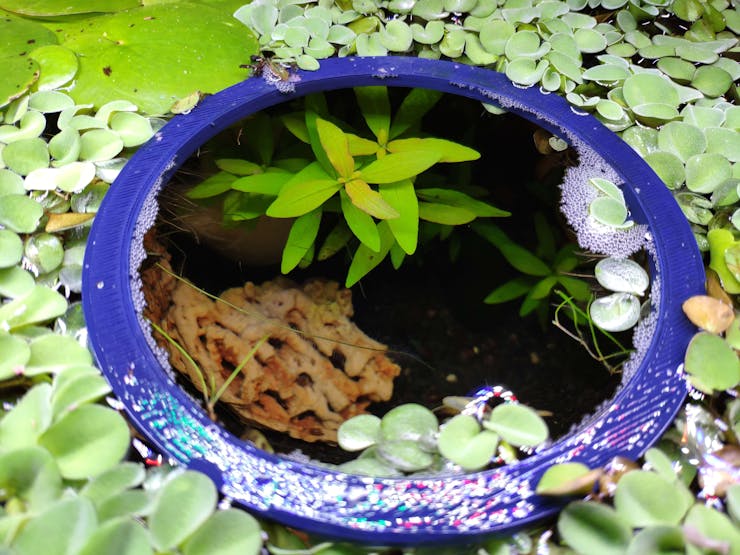
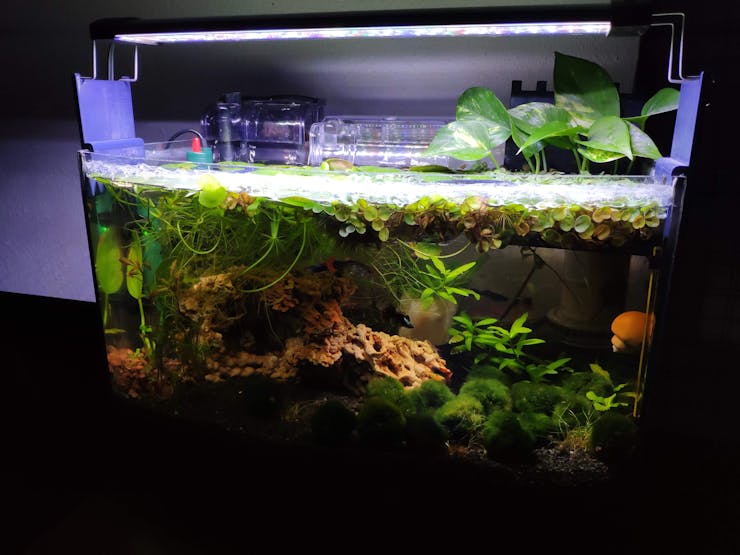
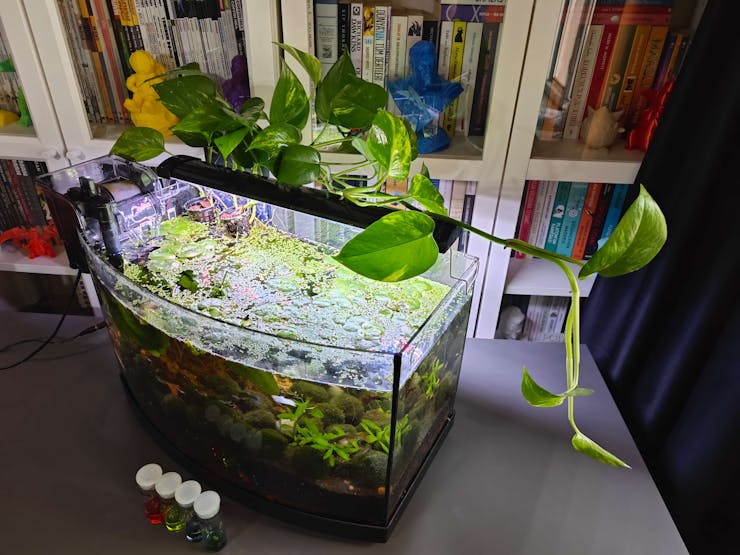
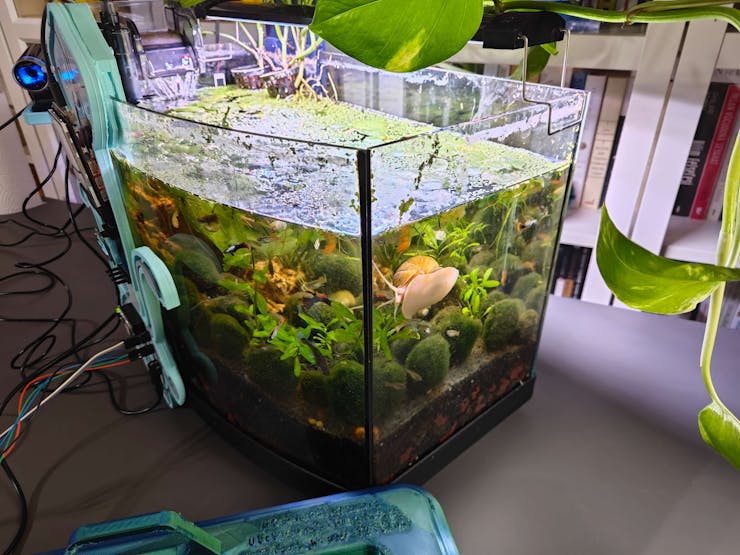
5Step 3: Setting up an aquarium with prolific breeders to simulate harsh fish farm conditions
As explained earlier, before working on data collection procedures, I needed to find a natural or artificial environment demonstrating the ebb and flow of underwater substrate toxicity and water quality fluctuations due to overpopulation and decaying detritus. Unfortunately, I could not find a suitable natural environment near my hometown due to endangered aquatic life, unrelenting habitat destruction, and disposal of chemical waste mostly caused by human-led activities. Since I did not have access to an aquaculture facility to observe underwater substrate toxicity because of commercial aquatic animal breeding or plant harvesting, I decided to set up an artificial aquatic environment simulating noxious air bubbles in the underwater substrate and potential water pollution risk. Instead of setting up a small artificial garden pond for the commercial breeding of profitable fish (mostly for food), I decided to utilize a medium-sized aquarium (10 gallons) to replicate fish farm (or pisciculture) conditions.
Since this aquarium setting let me inspect the abrupt changes in the lower underwater substrate, I was able to conduct precise experiments to collect aquatic ultrasonic scan data for air bubble identification with ultrasonic imaging and capture chemical water quality test result (color-coded) images for water pollution detection.
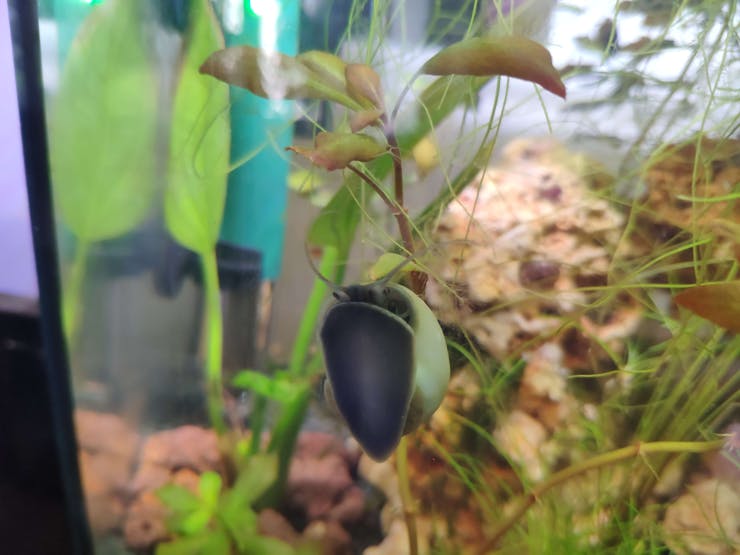
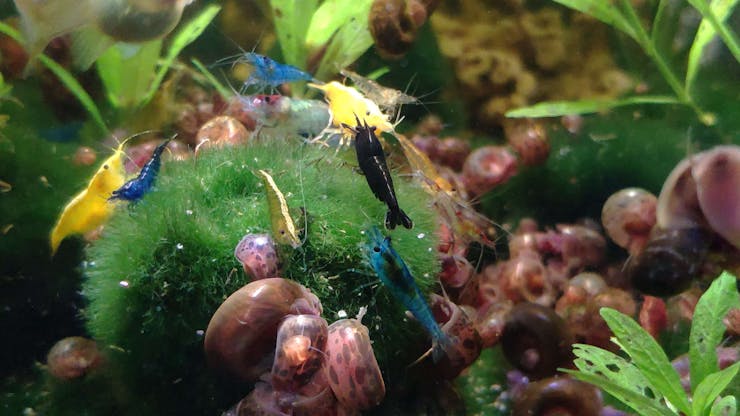
After conducting a painstaking analysis of prolific aquatic life with which I can observe commercial fish farm conditions affecting the lower underwater substrate with noxious air bubbles and exacerbating the decreasing water quality due to decaying detritus, I decided to set up a planted freshwater aquarium for harmonious and proliferating species that can thrive in a small freshwater aquarium — livebearers (guppies), Neocaridina shrimp, dwarf (or least) crayfish (Cambarellus Diminutus), etc.
To set up a self-sustaining aquarium manifesting harsh fish farm conditions, I added these aquatic species:
- 🐠 Mosaic Dumbo Ear Guppies
- 🐠 Snow White Guppies
- 🐠 Half Black Guppies
- 🐠 Green Snakeskin Cobra Guppies
- 🐠 Red Rose Guppies
- 🦐 Red Sakura Neocaridina Shrimps
- 🦐 Black Rose Neocaridina Shrimps
- 🦐 Vietnam Leopard Neocaridina Shrimps
- 🦐 Blue Angel Neocaridina Shrimps
- 🦐 Sakura Orange Neocaridina Shrimps
- 🦐 Red Rili Neocaridina Shrimps
- 🦐 Carbon Rili Neocaridina Shrimps
- 🦐 Green Jelly Neocaridina Shrimps
- 🦐 Yellow Fire Neon Neocaridina Shrimps
- 🦞 Cambarellus Diminutus — Dwarf (or least) Crayfish
- 🐌 Yellow Mystery (Apple) Snails
- 🐌 Blue Mystery (Apple) Snails
- 🐌 Black Poso Rabbit Snails
- 🐌 Bumblebee Horn (Nerite) Snails
- 🐌 Ramshorn Snails (removed due to overpopulation)
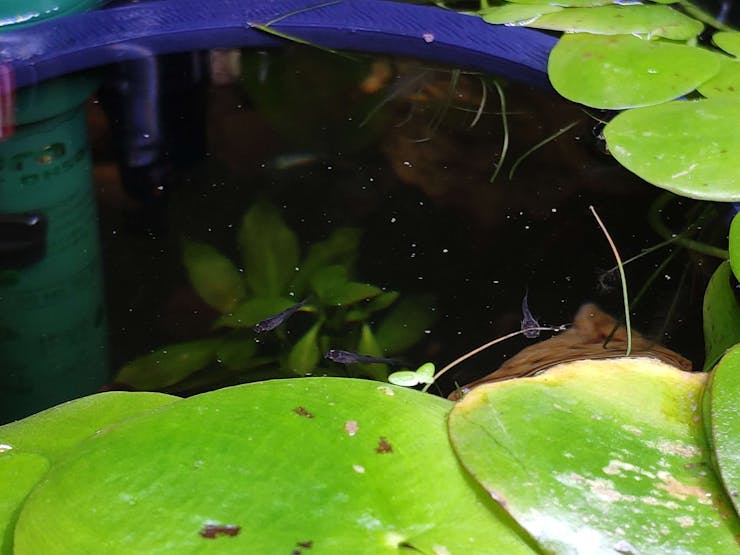
After deciding on the fecund aquatic species for my aquarium, I allowed them to spawn and breed for nearly five months and observed the changes in the aquarium due to overbreeding and decaying detritus.
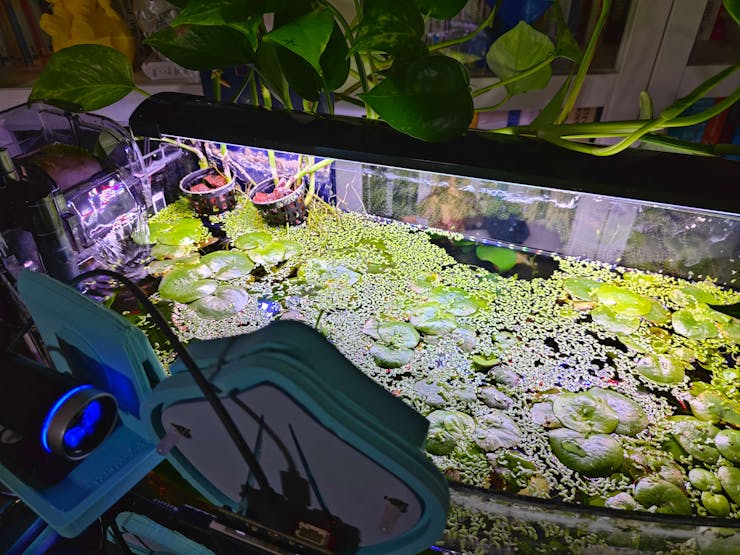
After my submerged aquatic plants, floating plants (frogbit and duckweed), and emersed (root-submerged) pothos flourished, they filtered free ammonia, nitrates, and phosphates, diminished excess algae, and provided oxygen. Therefore, I was able to eliminate the accumulating contaminants caused by the regular feeding schedule in a small aquarium and focus on detecting the underwater air bubbles and assessing water pollution due to prolonged overbreeding and decaying detritus.
⚠️ Disclaimer: To simulate the abrupt water quality fluctuations of a commercial fish farm, I let my aquarium go overstock with guppy fry and shrimplets, which led to the accumulation of excess waste, occasional Ramshorn snail blooms, and sporadic algae blooms. Thus, to maintain the ideal experiment conditions for identifying noxious air bubbles lurking in the underwater substrate, I needed to do regular water changes, sometimes every four days. After completing my experiments, I safely transferred abundant guppies and shrimps to my local fish store.
![]()
![]()
![]()
![]()
![]()
![]()
![]()
![]()
![]()
![]()
![]()
![]()
-
6Step 3.1: Observing the changing conditions due to overbreeding and decaying detritus
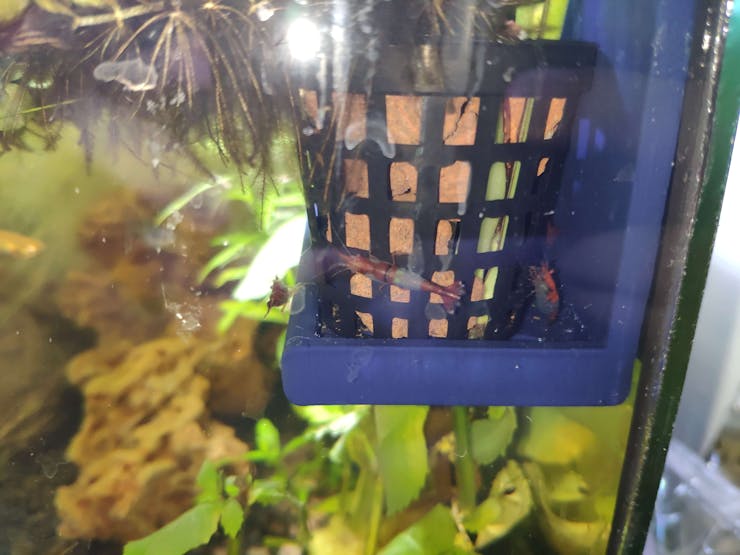
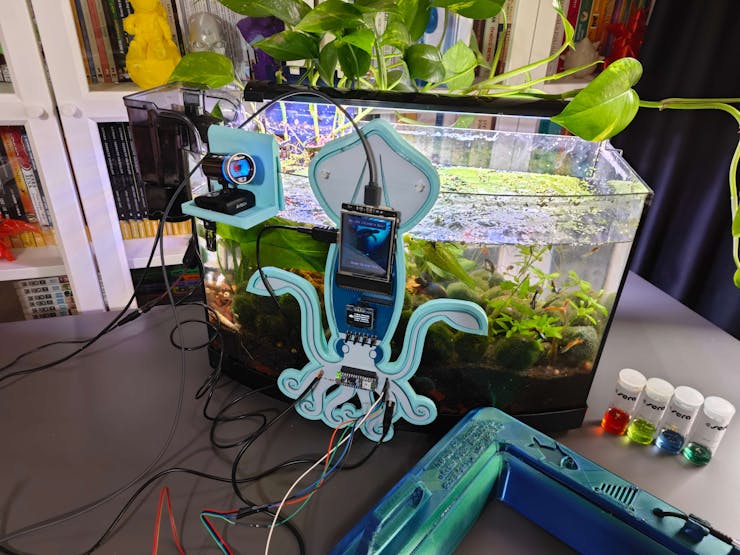
After concluding the device assembly, I hung the Squid PCB holder and the camera holder on the front side of the aquarium while collecting ultrasonic scan data buffers and capturing chemical water quality test result images. In this regard, I was able to place the high-quality USB webcam on the hang-on camera holder when standing idle and position the URM15 ultrasonic sensor precisely while scanning the underwater substrate to produce accurate ultrasonic images.
Since I designed a single-unit device structure, I did not encounter any issues while conducting extended experiments.
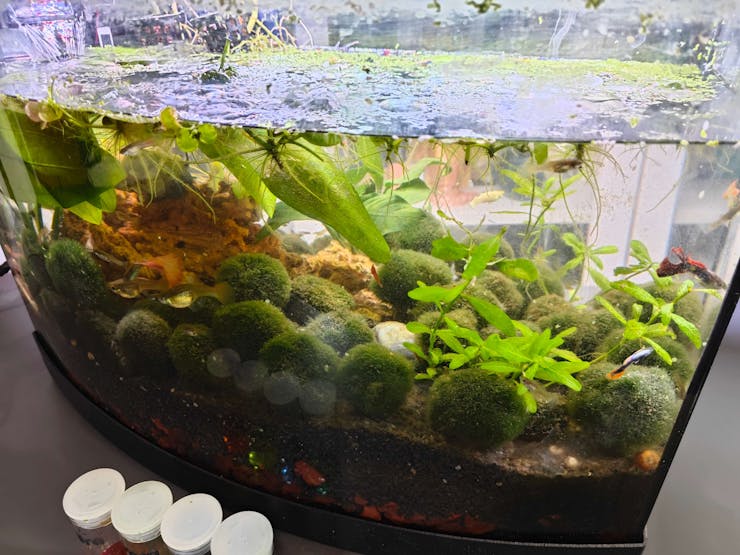
To increase the bottom surface area and observe abundant noxious air bubbles while collecting ultrasonic scan data, I added umpteen marimo moss balls covering the bottom of the tank. In this regard, I was able to provide plentiful underwater substrate gaps for incipient air bubbles to accumulate.
![]()
![]()
![]()
![]()
![]()
![]()
![]()
![]()
![]()
![]()
![]()
-
7Step 4: Building a Telegram bot with BotFather to send push notifications
BotFather is an official Telegram bot that lets the user build and manage bots within the Telegram app without any coding or subscription required. I utilized BotFather to create a simple Telegram bot to inform the user via push notifications.
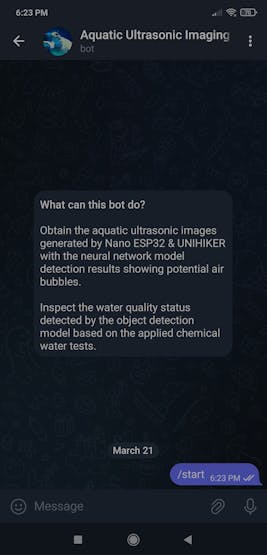
#️⃣ First of all, open BotFather on Telegram and enter /start to view the available command list and instructions.
![]()
![]()
#️⃣ Enter the /newbot command to create a new bot. Register the Telegram bot name when BotFather requests a name. It will be displayed in contact details and elsewhere.
Aquatic Ultrasonic Imaging and Water Testing
#️⃣ Then, register the bot username — tag. Usernames are 5-32 characters long and case insensitive but may only include Latin characters, numbers, and underscores. They must end in 'bot', e.g. 'tetris_bot' or 'TetrisBot'.
aquatic_ultrasonic_bot
#️⃣ After completing the steps above, BotFather generates an authorization token for the new Telegram bot. The authorization token is a string, such as 123456:ABC-DEF1234ghIkl-zyx57W2v1u123ew11, that is required to authorize the bot and send requests to the HTTP-based Telegram Bot API. Keep the generated token secure and store it safely.
![]()
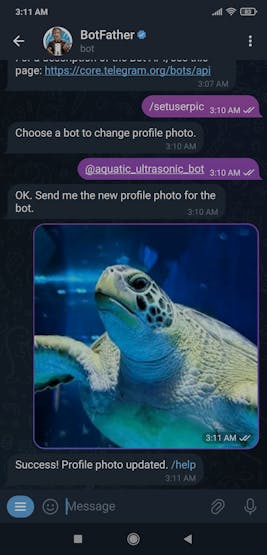
#️⃣ To change the profile picture of the Telegram bot, enter the /setuserpic command and upload a picture.
![]()
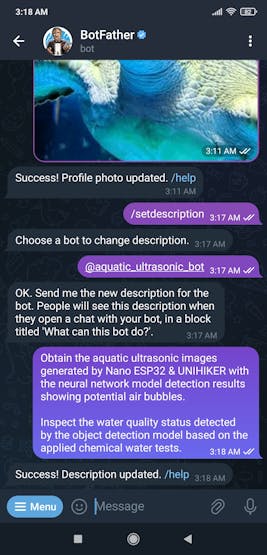
#️⃣ Finally, to add a description to the Telegram bot to be displayed whenever the user initiates a new chat, enter the /setdescription command and register the text description.
![]()
![]()
Since I wanted to send push notifications via the HTTP-based Telegram Bot API from UNIHIKER but not retrieve information back, I did not need to establish an SSL connection to set a webhook for the Telegram Bot API.
Thanks to the official Telegram Bot API, I only needed to obtain the chat id parameter to be able to send push notifications with the secured Telegram bot authorization token.
To fetch the required chat id, I utilized the getUpdates method (HTTP GET request), which shows all incoming bot updates by using long polling and returns an array of Update objects.
#️⃣ Make an HTTP GET request by utilizing the secured Telegram bot authorization token:
https://api.telegram.org/bot<_token_>/getUpdates
#️⃣ Then, initiate a new chat and send a message to the given Telegram bot. After refreshing the page, it should display the Update object list, including the chat id:
- message ➡ chat ➡ id ➡ 6465514194
![]()
![]()
![]()
-
8Step 5: Developing a web application to communicate w/ UNIHIKER and process requests from Nano ESP32
Since I needed to obtain the ultrasonic scan data buffers and the given air bubble class from Nano ESP32 so as to save the data records as text (TXT) files, I decided to develop a basic web application.
Also, the web application can generate a pre-formatted CSV file from the stored data records (text files) when requested via an HTTP GET request to construct a data set effortlessly.
In addition to the data collection features, similar to the ultrasonic scan samples, the web application can save model detection results transferred by Nano ESP32 via an HTTP POST request — buffer passed to the neural network model and the detected air bubble label — as text files in a separate folder.
As shown below, the web application consists of two folders and two code files:
- /detection
- /sample
- generate.php
- index.php
- scan_data_items.csv
![]()
📁 index.php
⭐ Obtain the current date and time.
⭐ Initiate the text file name for the received ultrasonic scan data buffer by adding the collection or prediction date.
$date = date("Y_m_d_H_i_s");# Define the text file name of the received ultrasonic scan data.$txt_file = "%s_%s__".$date;$save_folder = "";⭐ If Nano ESP32 transfers the data type and the selected or detected air bubble class for the received ultrasonic scan buffer via GET query parameters, modify the text file name accordingly. Then, select the folder to save the generated text file — sample or detection.
if(isset($_GET["scan"]) && isset($_GET["type"]) && isset($_GET["class"])){ $txt_file = sprintf($txt_file, $_GET["type"], $_GET["class"]); $save_folder = $_GET["type"];}⭐ If Nano ESP32 transfers an ultrasonic scan data buffer via an HTTP POST request as a new sample or after running the neural network model, save the received buffer with the selected or detected air bubble class to the folder associated with the given data type as a TXT file — sample or detection.
if(!empty($_FILES["ultrasonic_scan"]['name'])){ // Text File: $received_scan_properties = array( "name" => $_FILES["ultrasonic_scan"]["name"], "tmp_name" => $_FILES["ultrasonic_scan"]["tmp_name"], "size" => $_FILES["ultrasonic_scan"]["size"], "extension" => pathinfo($_FILES["ultrasonic_scan"]["name"], PATHINFO_EXTENSION) ); // Check whether the uploaded file's extension is in the allowed file formats. $allowed_formats = array('jpg', 'png', 'bmp', 'txt'); if(!in_array($received_scan_properties["extension"], $allowed_formats)){ echo 'FILE => File Format Not Allowed!'; }else{ // Check whether the uploaded file size exceeds the 5 MB data limit. if($received_scan_properties["size"] > 5000000){ echo "FILE => File size cannot exceed 5MB!"; }else{ // Save the uploaded file (TXT). move_uploaded_file($received_scan_properties["tmp_name"], "./".$save_folder."/".$txt_file.".".$received_scan_properties["extension"]); echo "FILE => Saved Successfully!"; } }}📁 generate.php
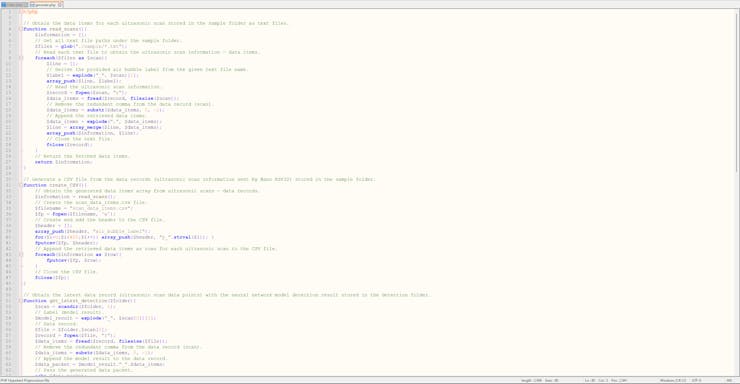
⭐ In the read_scans function:
⭐ Get all text file paths under the sample folder via the built-in glob function.
⭐ Read each text file to obtain the saved ultrasonic scan data buffers.
⭐ Derive the selected air bubble class of the data record from the given text file name.
⭐ Then, remove the redundant comma from the end of the data record.
⭐ After decoding 400 comma-separated data points from the given data record, append the retrieved data items with the selected class as a child array to the information array (parent) by utilizing built-in array_merge and array_push functions.
⭐ Finally, return the modified parent array consisting of the fetched data items.
function read_scans(){ $information = []; // Get all text file paths under the sample folder. $files = glob("./sample/*.txt"); // Read each text file to obtain the ultrasonic scan information — data items. foreach($files as $scan){ $line = []; // Derive the provided air bubble label from the given text file name. $label = explode("_", $scan)[1]; array_push($line, $label); // Read the ultrasonic scan information. $record = fopen($scan, "r"); $data_items = fread($record, filesize($scan)); // Remove the redundant comma from the data record (scan). $data_items = substr($data_items, 0, -1); // Append the retrieved data items. $data_items = explode(",", $data_items); $line = array_merge($line, $data_items); array_push($information, $line); // Close the text file. fclose($record); } // Return the fetched data items. return $information;}⭐ In the create_CSV function:
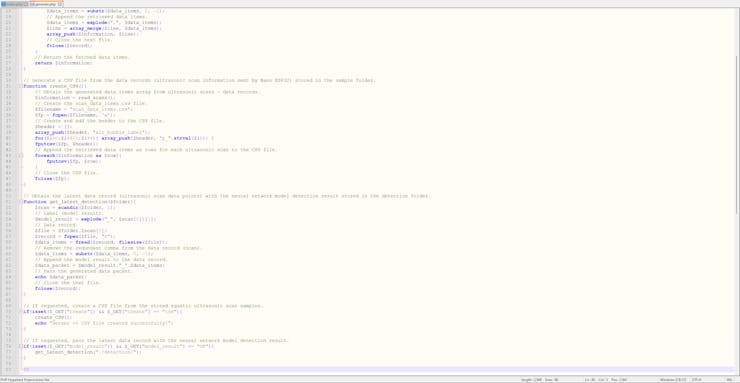
⭐ Obtain the generated parent array, including data items and the assigned class for each stored ultrasonic scan data record — sample.
⭐ Create a new CSV file — scan_data_items.csv.
⭐ Define and add the header (class and data fields) to the created CSV file.
⭐ Append each child array (element) of the parent array as a new row to the CSV file.
⭐ Finally, close the generated CSV file.
function create_CSV(){ // Obtain the generated data items array from ultrasonic scans — data records. $information = read_scans(); // Create the scan_data_items.csv file. $filename = "scan_data_items.csv"; $fp = fopen($filename, 'w'); // Create and add the header to the CSV file. $header = []; array_push($header, "air_bubble_label"); for($i=0;$i<400;$i++){ array_push($header, "p_".strval($i)); } fputcsv($fp, $header); // Append the retrieved data items as rows for each ultrasonic scan to the CSV file. foreach($information as $row){ fputcsv($fp, $row); } // Close the CSV file. fclose($fp);}⭐ In the get_latest_detection function:
⭐ Via the built-in scandir function, obtain the latest model detection result saved as a text file under the detection folder — ultrasonic scan buffer passed to the neural network model.
⭐ Derive the detected air bubble label from the given file name.
⭐ Remove the redundant comma from the end of the given buffer.
⭐ Add the detected label to the revised buffer.
⭐ Then, pass the generated data packet as a string.
function get_latest_detection($folder){ $scan = scandir($folder, 1); // Label (model result). $model_result = explode("_", $scan[0])[1]; // Data record. $file = $folder.$scan[0]; $record = fopen($file, "r"); $data_items = fread($record, filesize($file)); // Remove the redundant comma from the data record (scan). $data_items = substr($data_items, 0, -1); // Append the model result to the data record. $data_packet = $model_result."_".$data_items; // Pass the generated data packet. echo $data_packet; // Close the text file. fclose($record);}⭐ If requested by the user via an HTTP GET request, create a pre-formatted CSV file from the stored aquatic ultrasonic scan samples (text files) — data records.
if(isset($_GET["create"]) && $_GET["create"] == "csv"){ create_CSV(); echo "Server => CSV file created successfully!";}⭐ If requested by the user via an HTTP GET request, obtain the latest model detection result — ultrasonic scan buffer passed to the neural network model and the detected air bubble class — and return the generated data packet as a string.
if(isset($_GET["model_result"]) && $_GET["model_result"] == "OK"){ get_latest_detection("./detection/");}![]()
![]()
![]()
-
9Step 5.1: Setting and running the web application on LattePanda 3 Delta
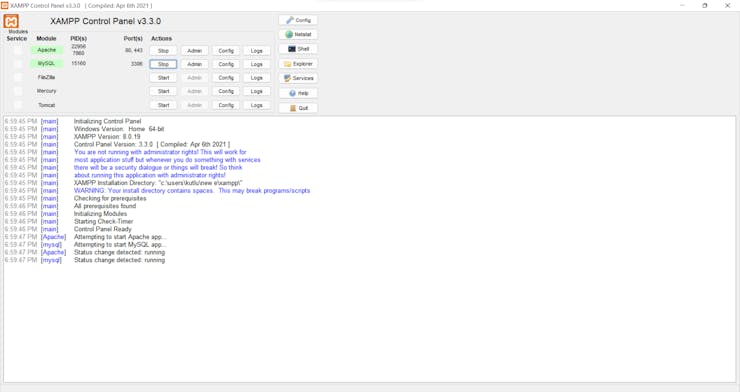
Since I wanted to build a feasible and accessible AIoT underwater air bubble and water pollution detection device not dependent on cloud or hosting services, I decided to host my web application on LattePanda 3 Delta 864. Therefore, I needed to set up a LAMP web server.
LattePanda 3 Delta is a pocket-sized hackable computer that provides ultra performance with the Intel 11th-generation Celeron N5105 processor.
Plausibly, LattePanda 3 Delta can run the XAMPP application. So, it is effortless to create a server with a MariaDB database on LattePanda 3 Delta.
#️⃣ Install and set up the XAMPP development environment.
![]()
-
10Step 6: Setting up Nano ESP32 on Arduino IDE
Since Nano ESP32 has the well-known Nano form and provides Wi-Fi connectivity via the u-blox® NORA-W106 (ESP32-S3) module, I decided to employ Nano ESP32 to transfer data packets directly to the web application, including the produced aquatic ultrasonic scan buffer, the selected air bubble class for samples, and the detected air bubble label after running the neural network model.
Nevertheless, before proceeding with the following steps, I needed to set Nano ESP32 on the Arduino IDE, install the required libraries, and configure some default settings.
#️⃣ To install the required core, navigate to Tools ➡ Board ➡ Boards Manager and search for Arduino ESP32 Boards.
![]()
![]()
#️⃣ After installing the core, navigate to Tools ➡ Board ➡ ESP32 Arduino (Arduino) and select Arduino Nano ESP32.
![]()
#️⃣ Download and inspect the required libraries for the URM15 - 75KHZ ultrasonic sensor, the 6-axis accelerometer, the DS18B20 waterproof temperature sensor, and the SSD1306 OLED display:
DFRobot_RTU | Download
DFRobot_WT61PC | Download
OneWire | Download
DallasTemperature | Download
Adafruit_SSD1306 | Download
Adafruit-GFX-Library | Download
AI-based Aquatic Ultrasonic Imaging & Water Test
Identify noxious air bubbles lurking in the substrate w/ ultrasonic scans and assess water pollution based on chemical tests simultaneously.


Discussions
Become a Hackaday.io Member
Create an account to leave a comment. Already have an account? Log In.
Wow pretty amazing work and description of it. Thanks so much for sharing. Pretty interesting work with the ultrasonic sensor - still grokking your direction. Wow.!!
I wonder did you post/release the ESP32 software anywhere , gitxxx?
Are you sure? yes | no
Thanks for your kind words :)
I only posted my code files here:
https://www.hackster.io/kutluhan-aktar/ai-based-aquatic-ultrasonic-imaging-chemical-water-testing-f6b233#code
Are you sure? yes | no