Close
0%
0%

Yet another BB-Pi

A Raspberry Pi powered pocket computer, utilizing CM4, Pisugar power supply, a blackberry keyboard and 4" display

Similar projects worth following
A Raspberry Pi powered pocket computer, utilizing CM4, Pisugar power supply, a blackberry keyboard and 4" display.

I will also add a 4-position DIP switch to alternate the only USB of the carrier board from the build-in keyboard to other peripherals.
The touch screen will come in handy with that. Maybe in the future i will add a small USB hub like this one https://www.tindie.com/products/tinkerboy/tinkerboy-4-port-usb-hub-breakout-board/ .

I have also used this top cover https://www.thingiverse.com/thing:5393306 , to help me design the coverplate of the device.

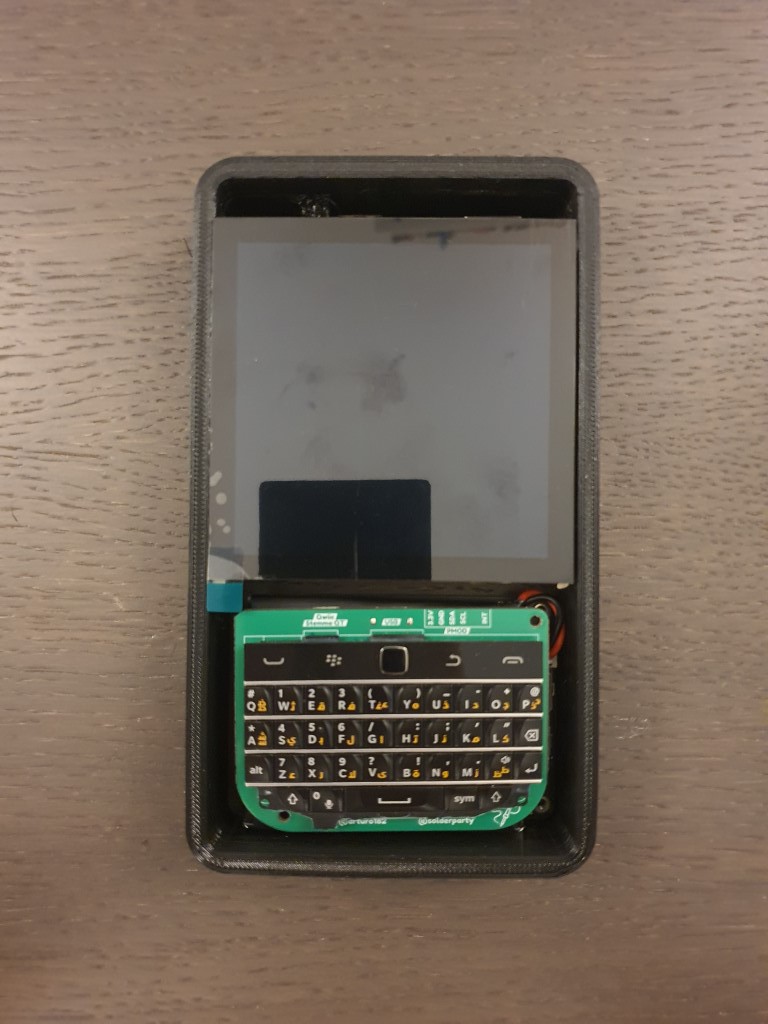
So in the past years i have a passion project. To create a portable pi computer that fits in my pocket(i know how original).

Over the years i have designed half-a-dozen prototypes that never got past the design stage.
Mainly because i could never settle-in on parts and new parts kept always coming.

This one came more natural to me. I think that is for two reasons:

- I have much more experience with design on Fusion 360
- I had 3 great projects to take inspiration from (i have linked them in the project page)
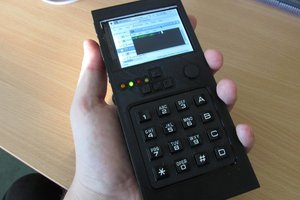
View all 6 components

  • First tests

    Chris Marketakis06/07/2024 at 14:16 0 comments

    Finally got the time to solder the 20-pin connector on the carrier board and tested the screen and everything works except the hold-to-right click.

    I also added a small heatsink.

    I followed the instructions on the wiki page but i cannot get it to work.

    This is a major issue for me since i originally planned to use a 4-position DIP switch to temporarily disable the keyboard so i could plug external devices on the sole USB port. Right click was essential to navigate the UI.

    So...

    There is a narrow space that a slim USB hub could fit.

    I ordered this one:

    Here you can see it on the top left corner:

    I have to check when it finally arrives if the cables fit and how easy it is to disassemble.

    Finally got some time to do a test print and fitting. Here are some pics:

    I am in the final stretch regarding the hardware. I still have to :

    • add the cutouts for the HDMI port as well as the hub (provided it works)
    • add the holes for the threaded inserts
    • do a series of test prints

    After that i can finally assemble the unit and turn to the software side

  • 31/05/2024

    Chris Marketakis05/31/2024 at 13:56 0 comments

    I have finalized the list of components and their layout on the 3D cad.

    The next steps are:

    •  to solder the 20-pin header on the carrier board and setup the screen.
    • I am also trying to change the firmware on the keyboard to include CTRL,ESC and the other missing characters. Someone has already done just that.
      The issue with that is that i am a completely newbie to that and i have no idea what i am doing and how to build the project.
    • Draw the cutouts for the power switch , HDMI port, USB port and the DIP switch

    After that i can do some test prints to see how everything fits

View all 2 project logs

Enjoy this project?

Share

Discussions

Similar Projects

Does this project spark your interest?

Become a member to follow this project and never miss any updates