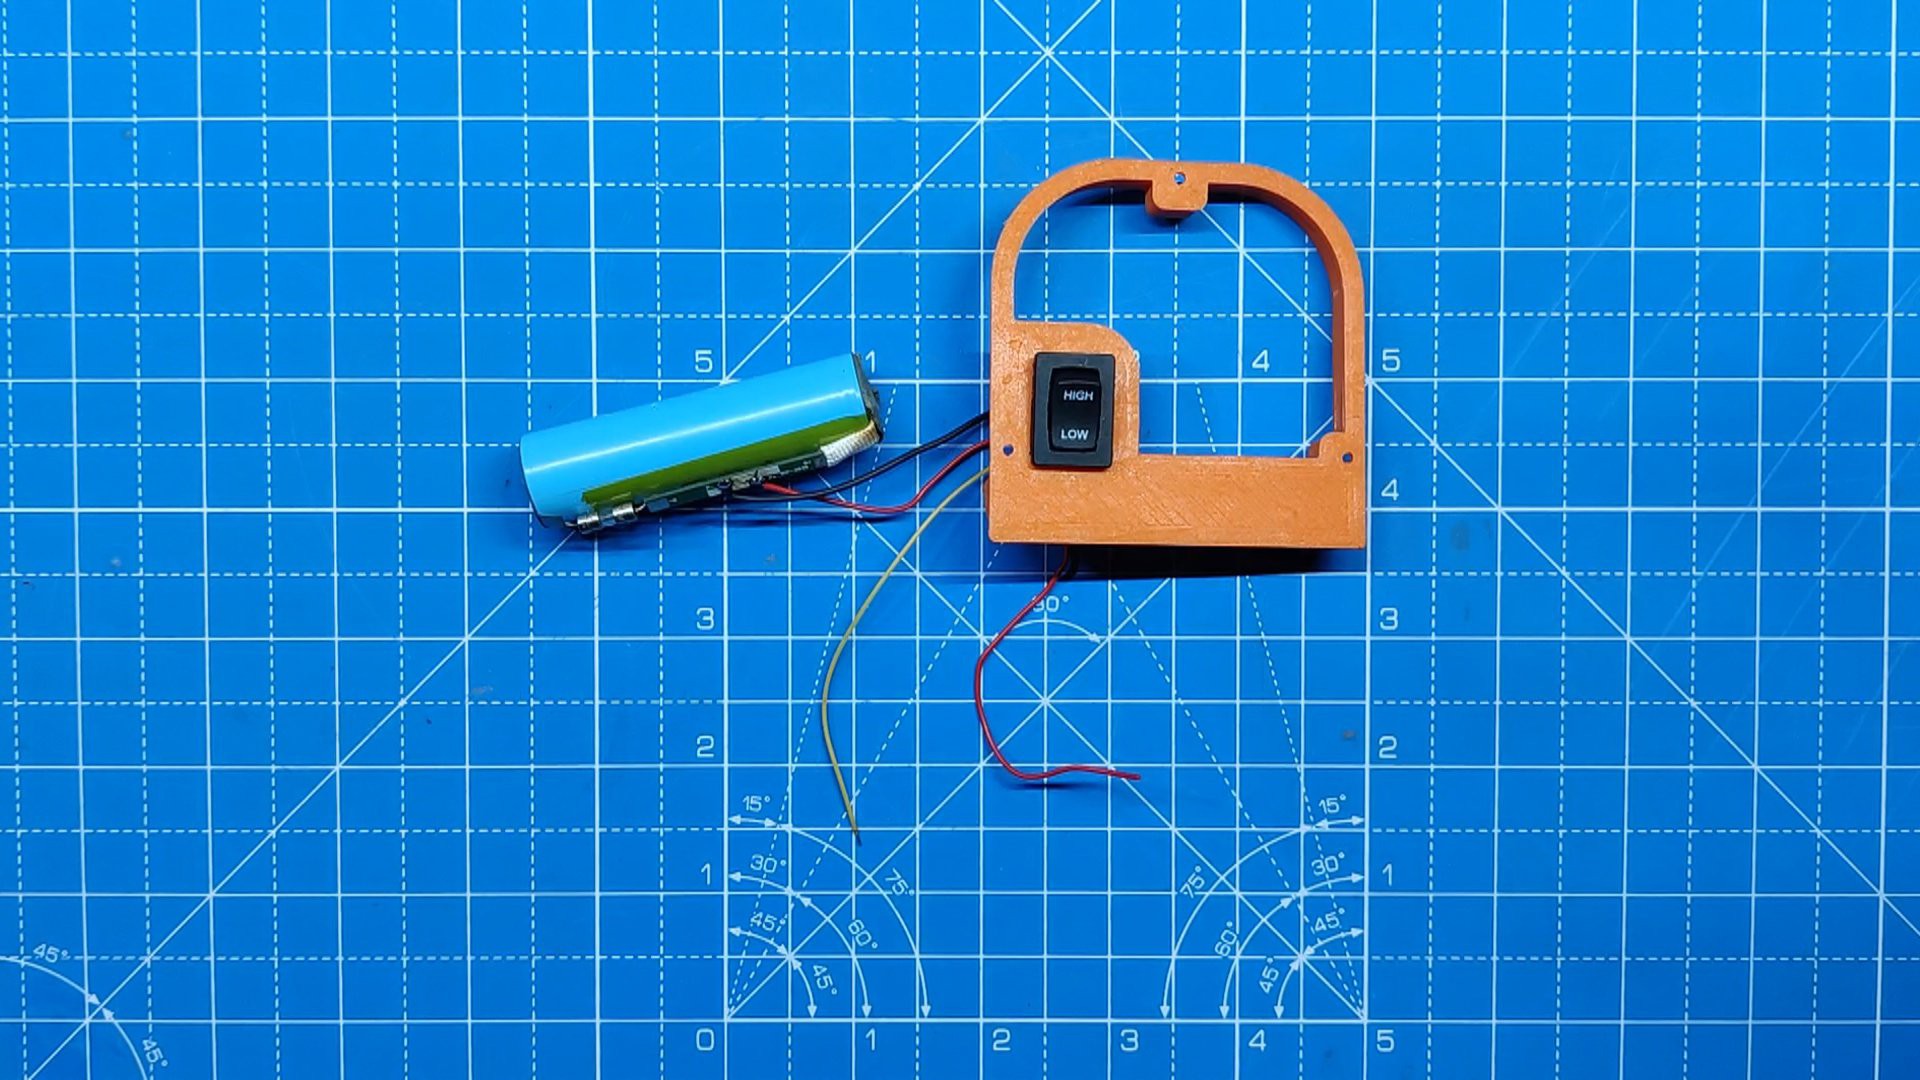
Installing the rocker switch on the upper lid part is the first step in the body assembly process.
Next, we soldered a second wire to the rocker switch's NC terminal and connected the negative of the Li-ion cell to the switch's NO terminal. This NC will be linked to the negative terminal of the expansion board's Li-ion cell connector.
The front holder part was then placed on the front face of the holder section, and it was fastened in place using four M2 screws.
The Li-ion cell is inserted into the holder section, and then the upper lid part is placed on top of it. Three M2 screws are used to fasten both sections together.
we connected the expansion board's battery terminal to the power supply, a li-ion cell.
We connect the positive and negative of the Li-ion cells to the expansion board's battery terminals using a soldering iron.
The XIAO expansion board is then positioned on the front face, and the circuit and holder are fastened together using four M2 screws.
Finally, we used four M2 screws to attach the nametag in its proper location.
The assembly is now complete.
2
EYES DILATING SKETCH
For testing the setup first, we added a simple animation-based sketch that we generated from CHAT GPT by giving it the below input.
"Write a sketch where the pupil dilates and two eyes are visible. The SSD1306 library from Adafruit is used in this sketch for the SSD1306 display."
We were able to generate code for a simple drawing like this with the help of AI Help, and the result is remarkable. Hopefully, artificial intelligence (AI) will progress well beyond this point and be able to help with the creation of intricate code.
#include<Wire.h>#include<Adafruit_GFX.h>#include<Adafruit_SSD1306.h>#define SCREEN_WIDTH 128 // OLED display width, in pixels#define SCREEN_HEIGHT 64 // OLED display height, in pixels// Declaration for SSD1306 display connected using I2C#define OLED_RESET -1 // Reset pin # (or -1 if sharing Arduino reset pin)Adafruit_SSD1306 display(SCREEN_WIDTH, SCREEN_HEIGHT, &Wire, OLED_RESET);
// Define eye parametersconstint eyeCenterX1 = 40; // X position for left eyeconstint eyeCenterX2 = 88; // X position for right eyeconstint eyeCenterY = 32; // Y position for both eyesconstint eyeRadius = 20; // Radius of the eyeconstint minPupilRadius = 5; // Minimum radius of the pupilconstint maxPupilRadius = 10; // Maximum radius of the pupilconstint animationSpeed = 10; // Speed of the animationvoidsetup(){
// Initialize the displayif(!display.begin(SSD1306_SWITCHCAPVCC, 0x3C)) {
Serial.println(F("SSD1306 allocation failed"));
for(;;); // Don't proceed, loop forever
}
display.display();
delay(2000); // Pause for 2 seconds// Clear the buffer
display.clearDisplay();
}
voidloop(){
for (int i = minPupilRadius; i <= maxPupilRadius; i++) {
drawCatEyes(i);
delay(animationSpeed);
}
for (int i = maxPupilRadius; i >= minPupilRadius; i--) {
drawCatEyes(i);
delay(animationSpeed);
}
}
// Function to draw the cat eyes with dilating pupilsvoiddrawCatEyes(int pupilRadius){
display.clearDisplay();
// Draw left eye
display.drawCircle(eyeCenterX1, eyeCenterY, eyeRadius, SSD1306_WHITE); // Eye outline
display.fillCircle(eyeCenterX1, eyeCenterY, pupilRadius, SSD1306_WHITE); // Pupil// Draw right eye
display.drawCircle(eyeCenterX2, eyeCenterY, eyeRadius, SSD1306_WHITE); // Eye outline
display.fillCircle(eyeCenterX2, eyeCenterY, pupilRadius, SSD1306_WHITE); // Pupil
display.display();
}
This code will animate the pupils of the cat's eyes on the OLED display, simulating a dilating effect. Adjust the eyeCenterX1, eyeCenterX2, eyeCenterY, and radius parameters if needed to fit the display properly
Finally, we tested out the next sketch, which was the Quote Sketch.
We first generated a bunch of witty "electronics-based pen holder with a screen" quotes from ChatGPT.
We then chose a couple quotes, such "I hold pens and your secrets." We are going digital, so hold onto your pencils!", "Shhh!", and more. For the SSD1306 display, we created a basic text display sketch and entered all of the quotes into it so that each text would appear after two seconds.
This was the sketch.
#include<Wire.h>#include<Adafruit_SSD1306.h>#include<Adafruit_GFX.h>#define OLED_WIDTH 128#define OLED_HEIGHT 64#define OLED_ADDR 0x3CAdafruit_SSD1306 display(OLED_WIDTH, OLED_HEIGHT);
voidsetup(){
display.begin(SSD1306_SWITCHCAPVCC, OLED_ADDR);
display.clearDisplay();
}
voidloop(){
display.clearDisplay();
display.setTextSize(1);
display.setTextColor(WHITE);
display.setCursor(0, 20);
display.println("I hold pens and your secrets. Shhh!"); //QUOTE01
display.display();
delay(2000);
display.clearDisplay();
display.setTextSize(1);
display.setTextColor(WHITE);
display.setCursor(0, 20);
display.println("Hold onto your pens, we are going digital!"); //QUOTE02
display.display();
delay(2000);
display.clearDisplay();
display.setTextSize(1);
display.setTextColor(WHITE);
display.setCursor(0, 20);
display.println("Penning down ideas, one byte at a time!"); //QUOTE03
display.display();
delay(2000);
display.clearDisplay();
display.setTextSize(1);
display.setTextColor(WHITE);
display.setCursor(0, 20);
display.println("Who needs a diary when you have a pen holder with a screen?!"); //QUOTE04
display.display();
delay(2000);
}
4
CONCLUSION
The end result was a pen holder with a programmable display, which is quite helpful for managing pens and other items.
Because of the display, there are a gazillion different concepts that we can try out here. To show the time, we can add an Internet Watch sketch to the XIAO. Alternatively, we can add a melody player sketch that uses the SD card, the display, and the buzzer. Finally, we can add a Flappy Bird-like game to the XIAO, which can be played using the onboard push button.
Applications are many and this project is a complete success and need no further revision.
Checkout the previous version of the Over Engineered Pen holder project from below links:
 Arnov Sharma
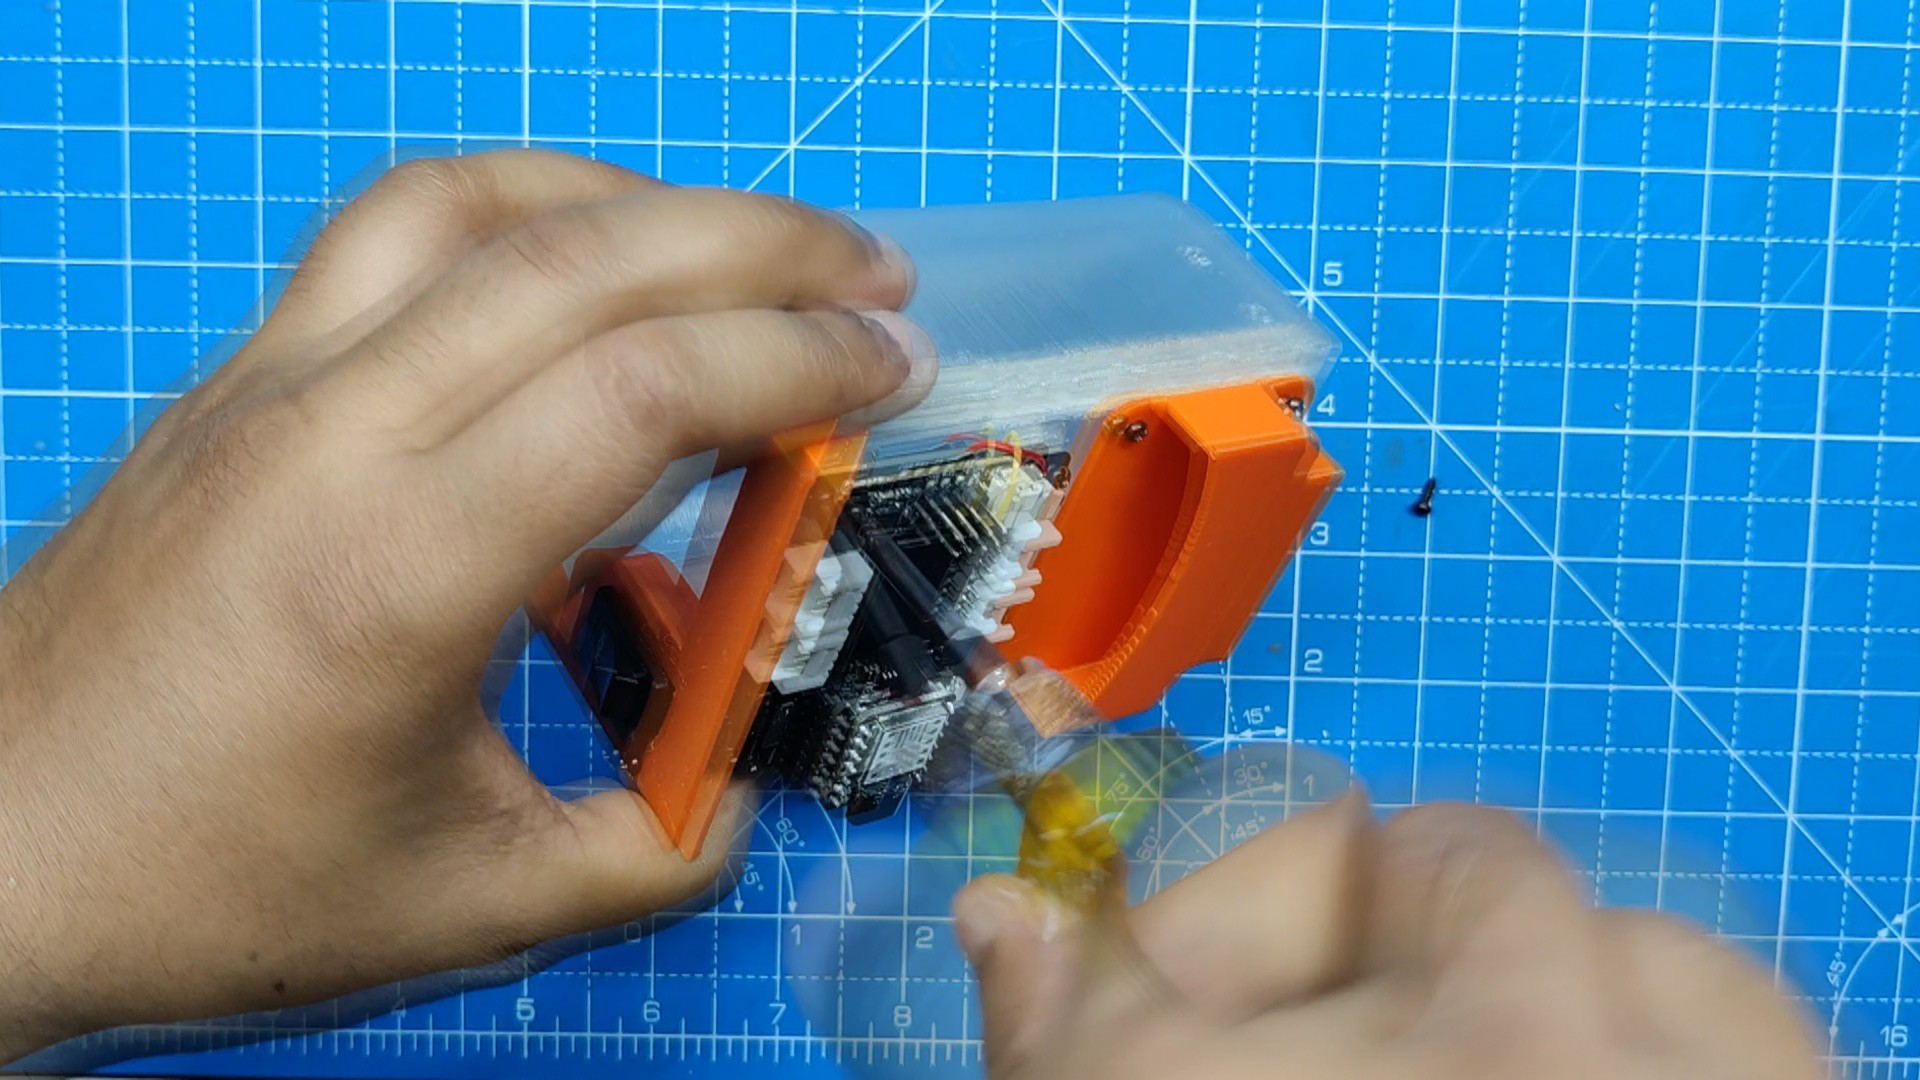


Discussions
Become a Hackaday.io Member
Create an account to leave a comment. Already have an account? Log In.