Icepat
-
Step 1 : First Prototype
06/22/2024 at 10:10 • 0 comments![]()
![]()
![]()
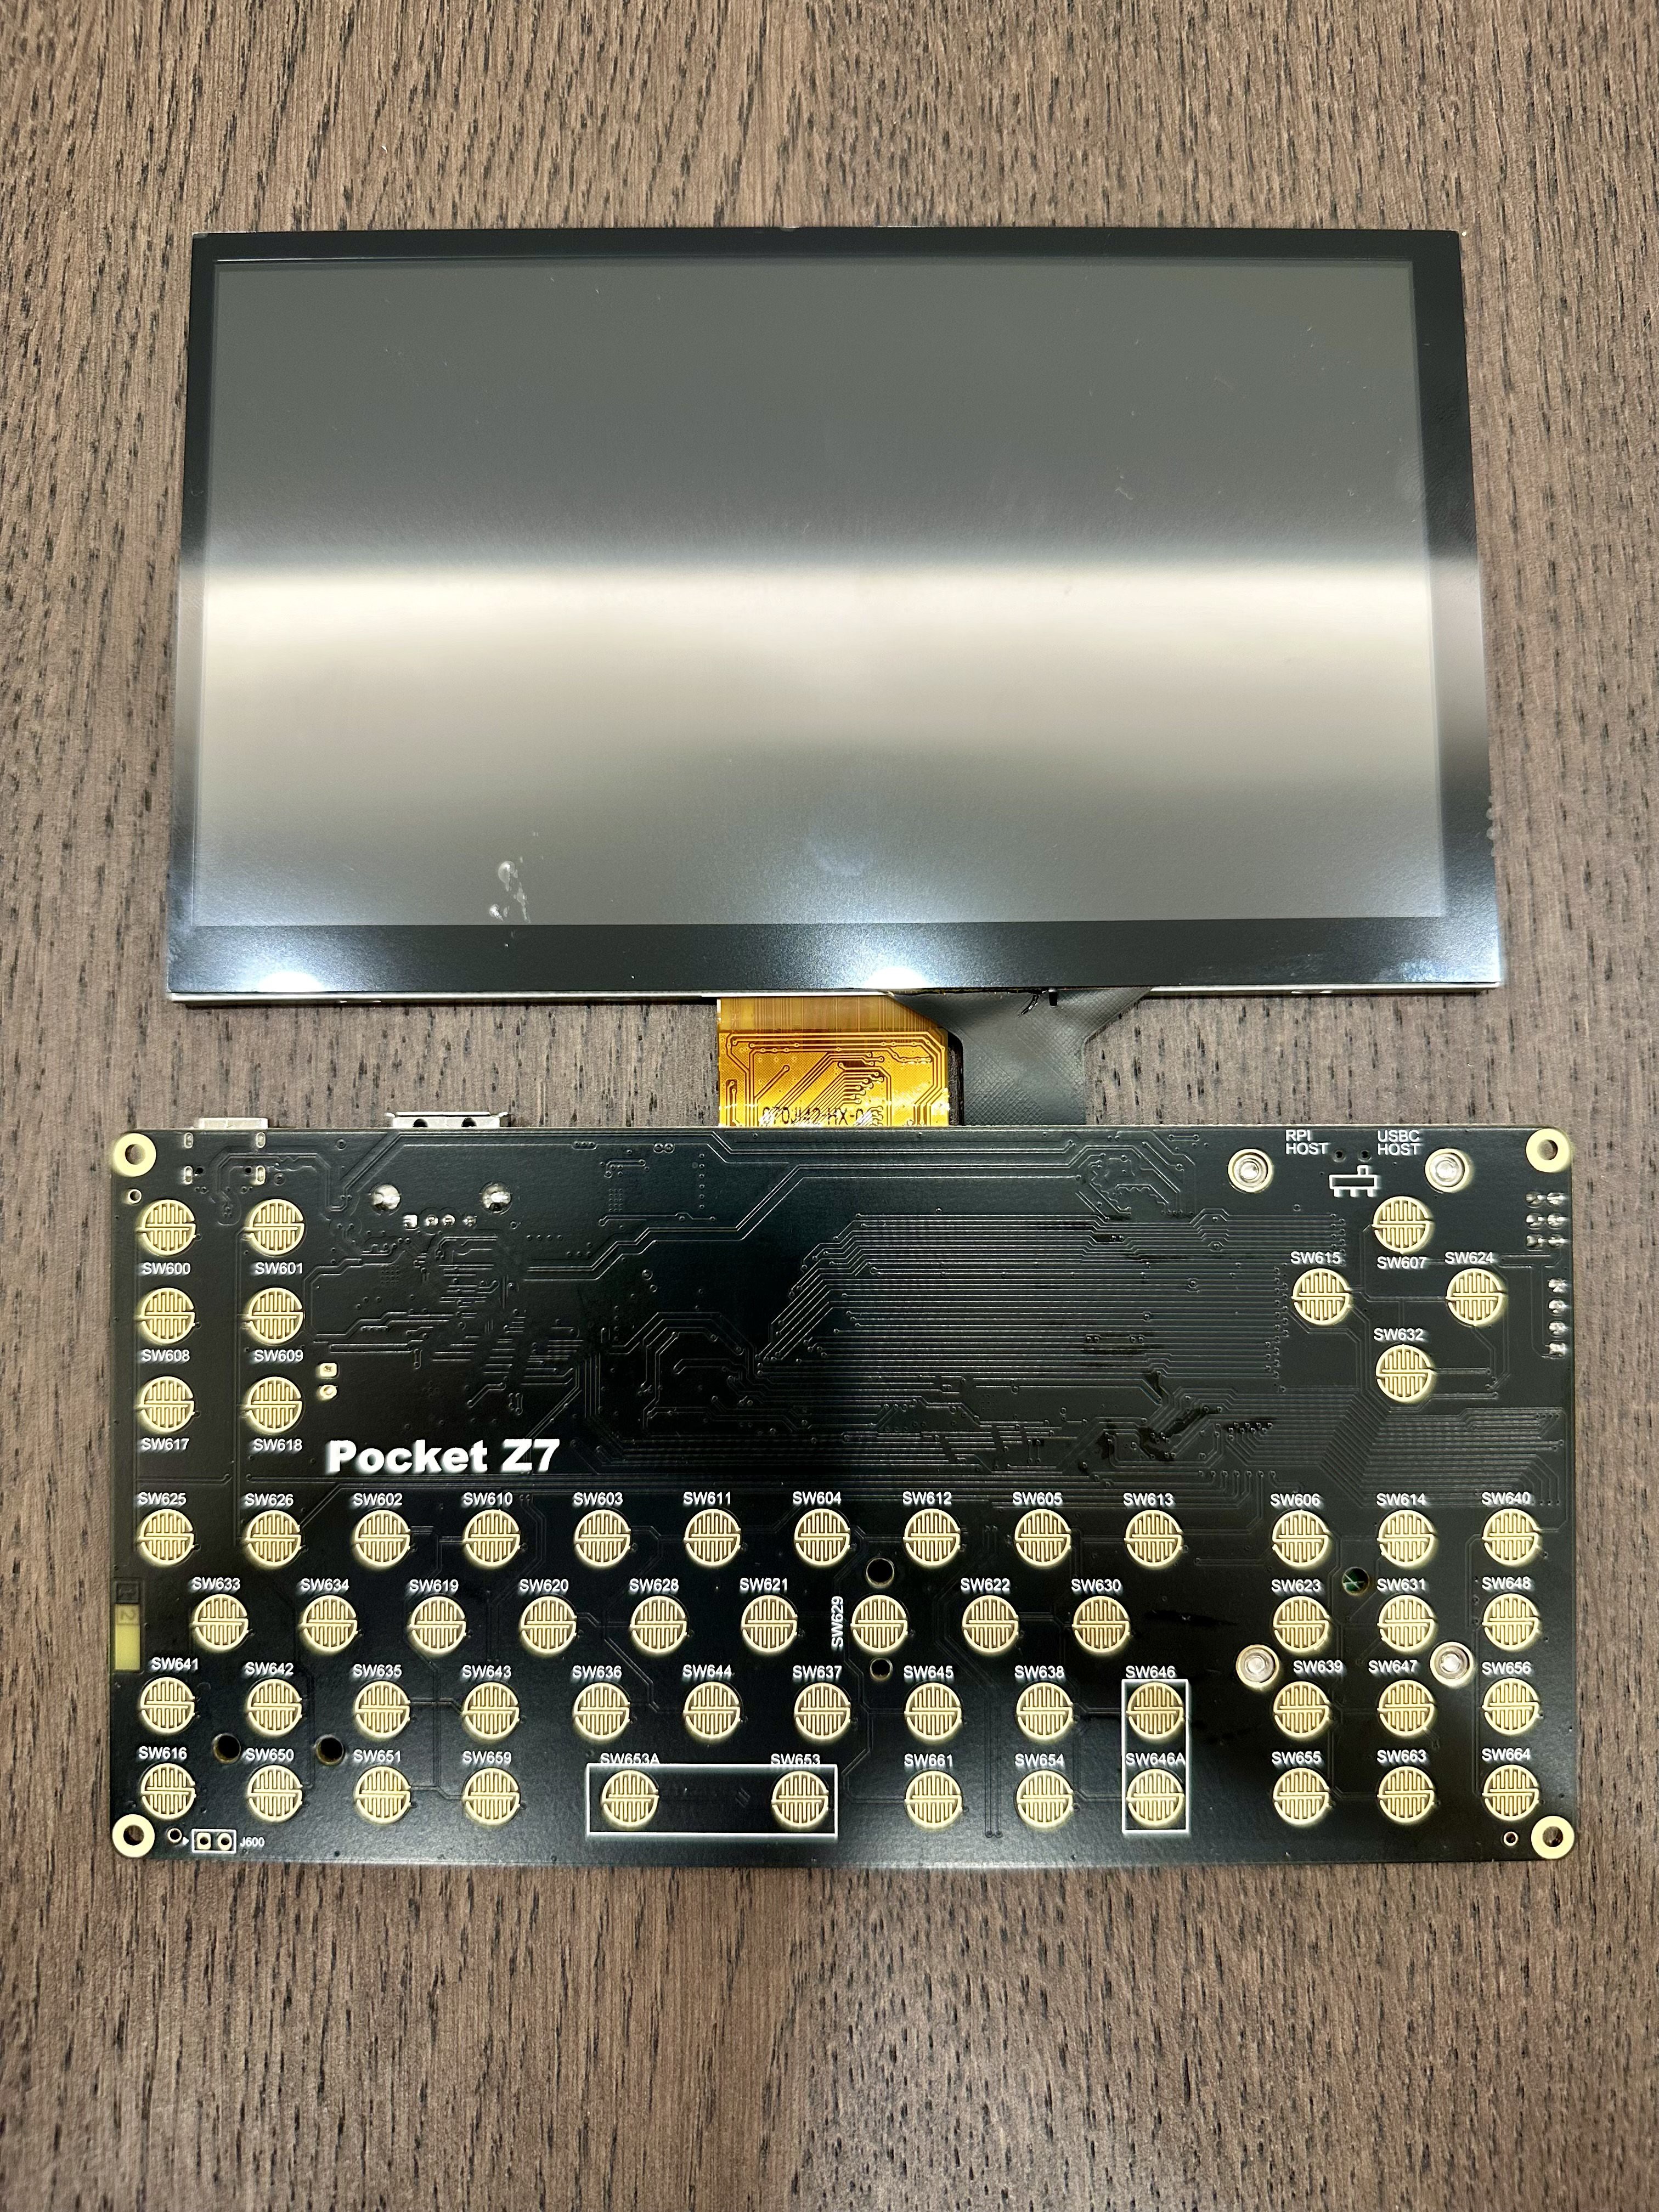
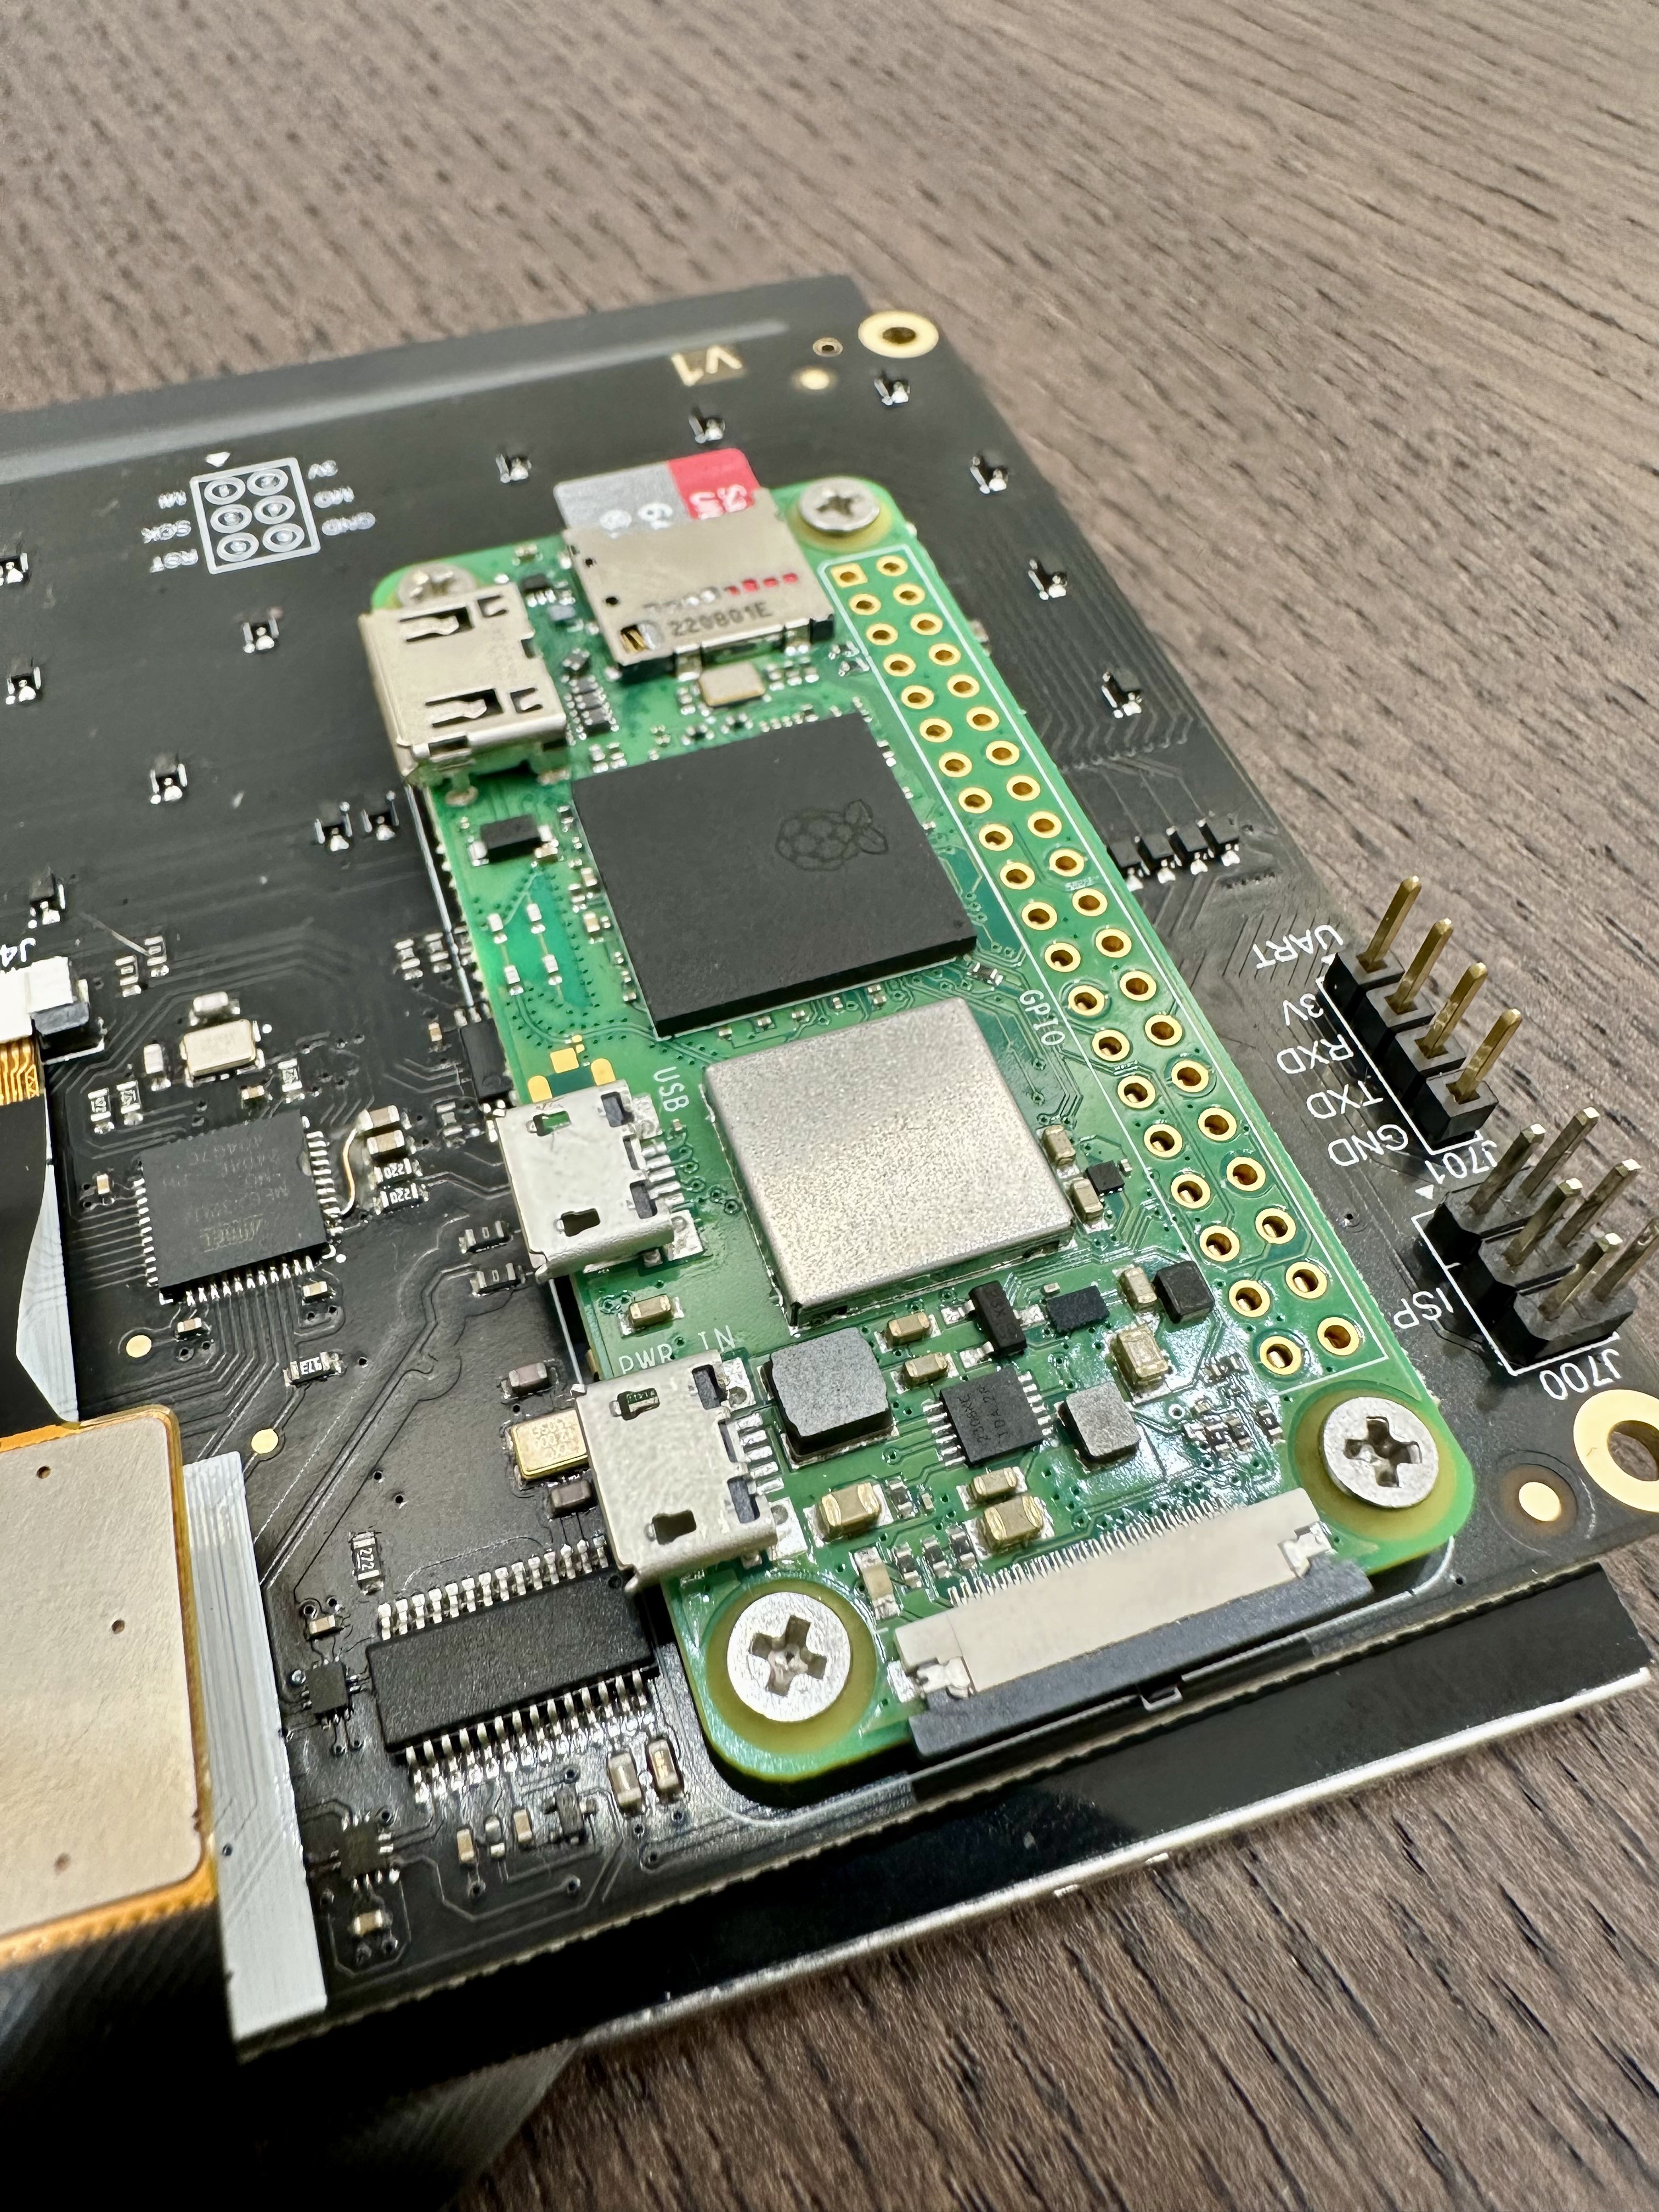
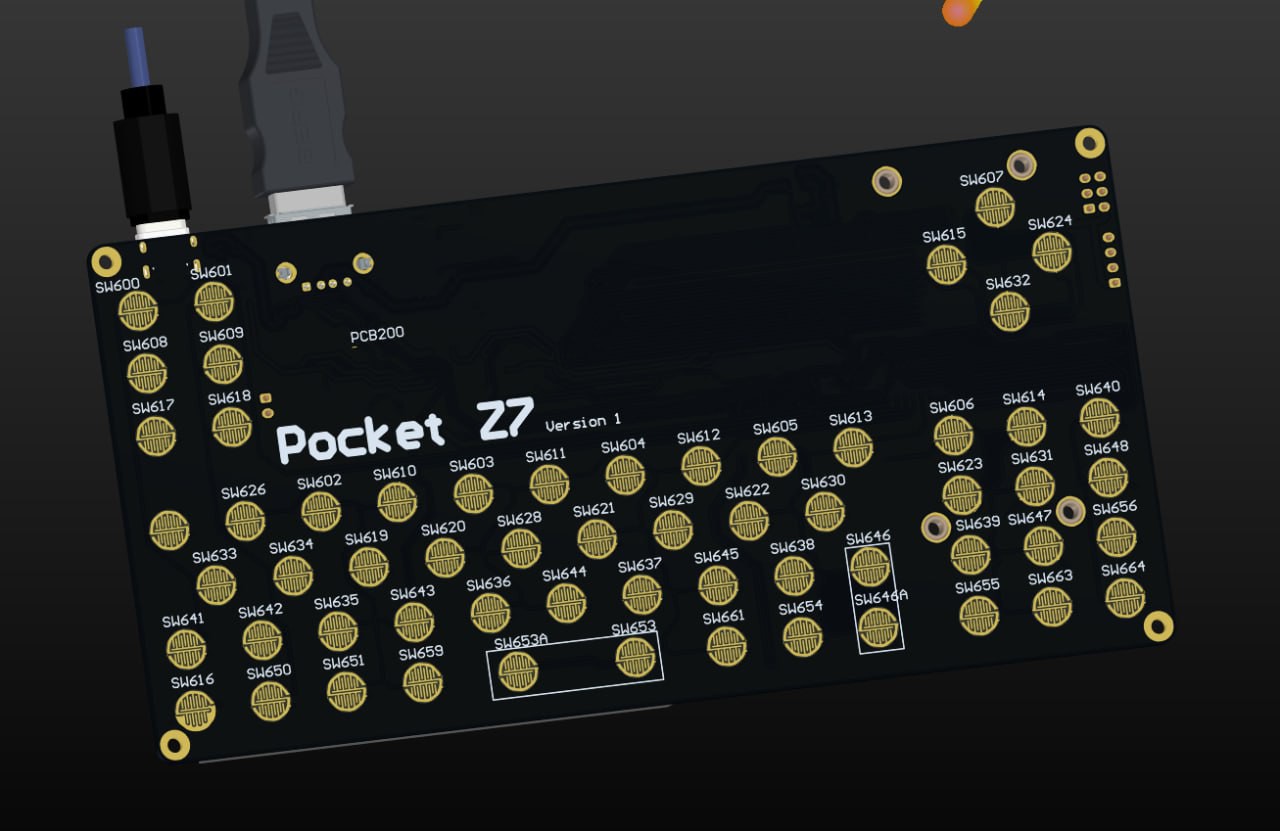
Like explained earlier for the keyboard we are using part of the Ti-92 layout (and silicone membrane & keycaps) to speed up development & reduce cost (two other Hackaday project were used for the PCBs, linked in the Project details). The keyboard is managed by an Atmega32U4 directly connected to the Pi's USB-OTG port (there is pins under the Pi). The Atmega32U4 is visible by Linux as an USB-HID device but we still have to write the software for it (currently waiting to get a Ti-92 from Ebay).
There is room on this version to have a touchpad area, we could integrate this later if there is demand for it (cost should be low). On top of the keyboard we have some action button and a d-pad.
![]()
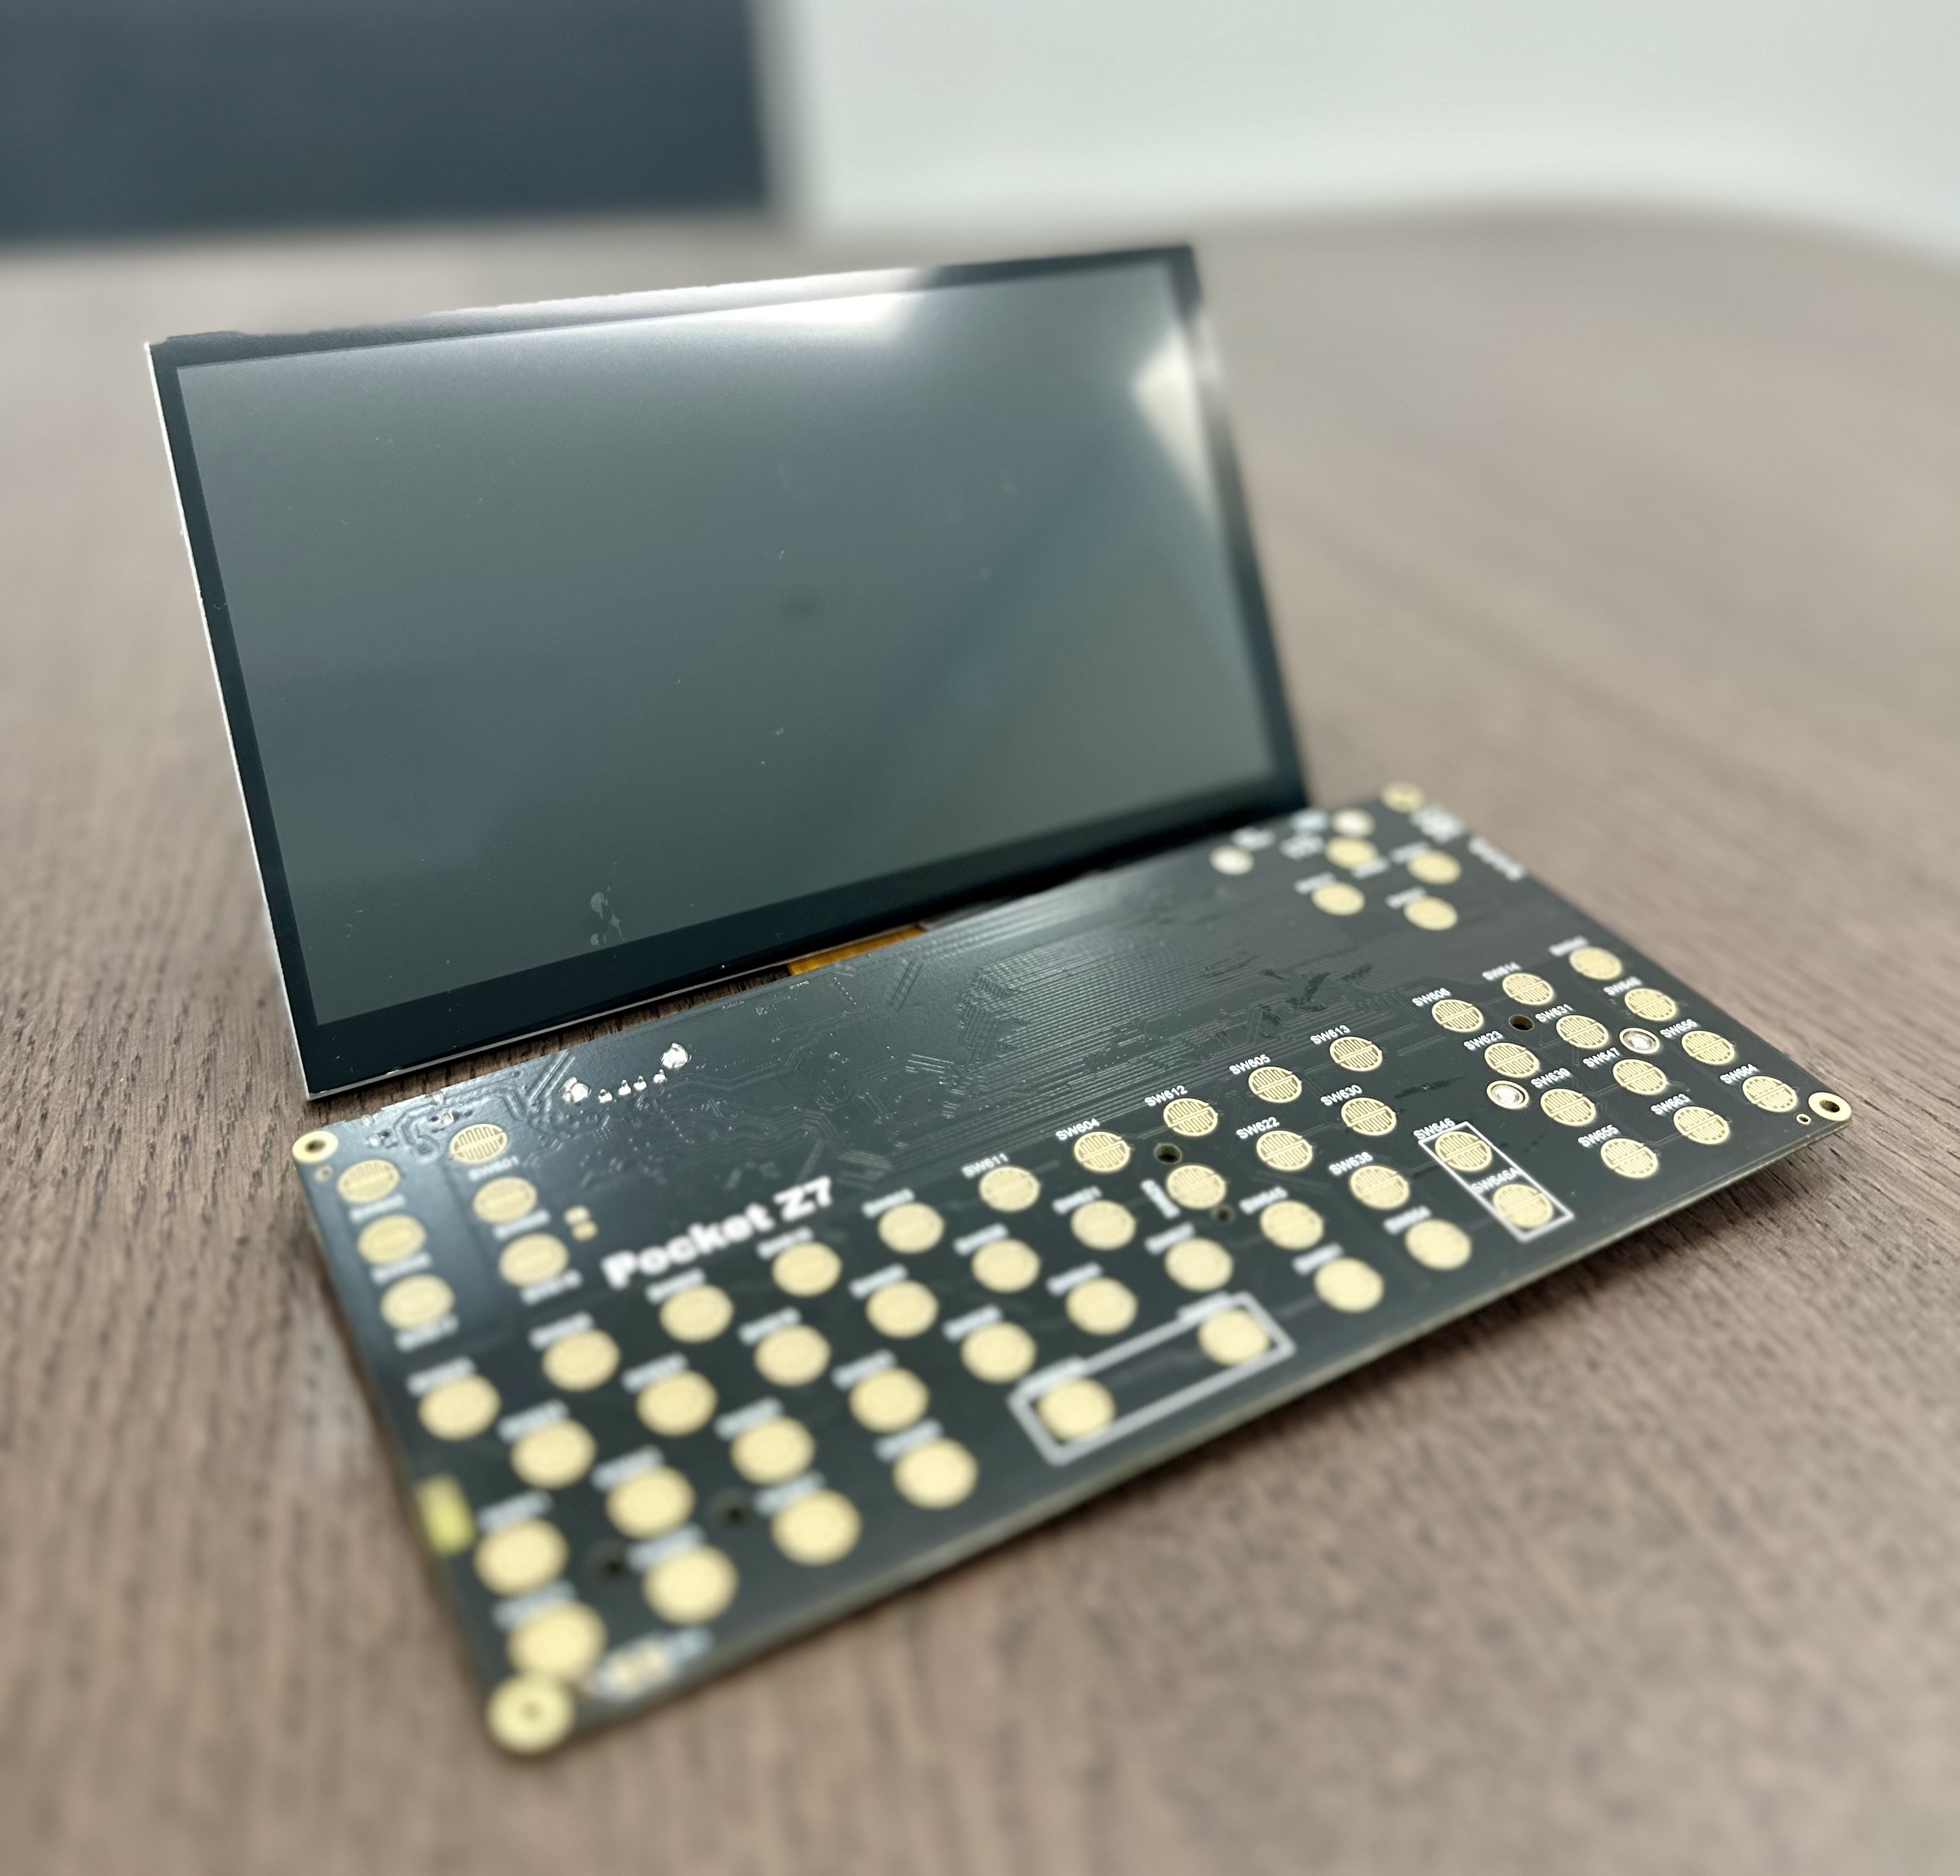
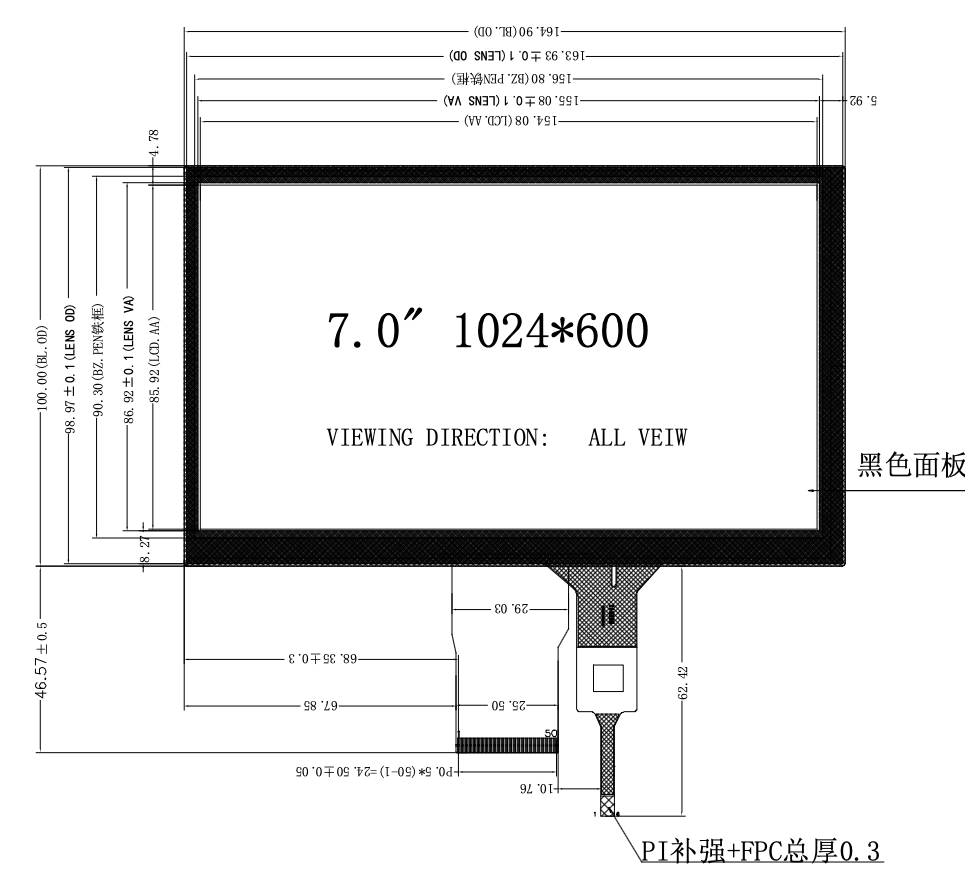
The display is a 7" 1024x600 24 Bits DPI RGB with a Capacitive Touch Panel (GT911 Controller) connected directly through the PI's GPIOs, reducing energy consumption & costs as we don't need extra hardware to drive these kind of displays apart from the backlight controller. The only "problem" is that this display takes up all the Pi's GPIO's so there is none left available for accessories. And the touch controller can't be connected to the Pi directly so we connected it to the Atmega32U4 act as an adapter between the touch controller and the Pi. A similar project is available here and we will most likely base our work on this code (not done yet).
![]()
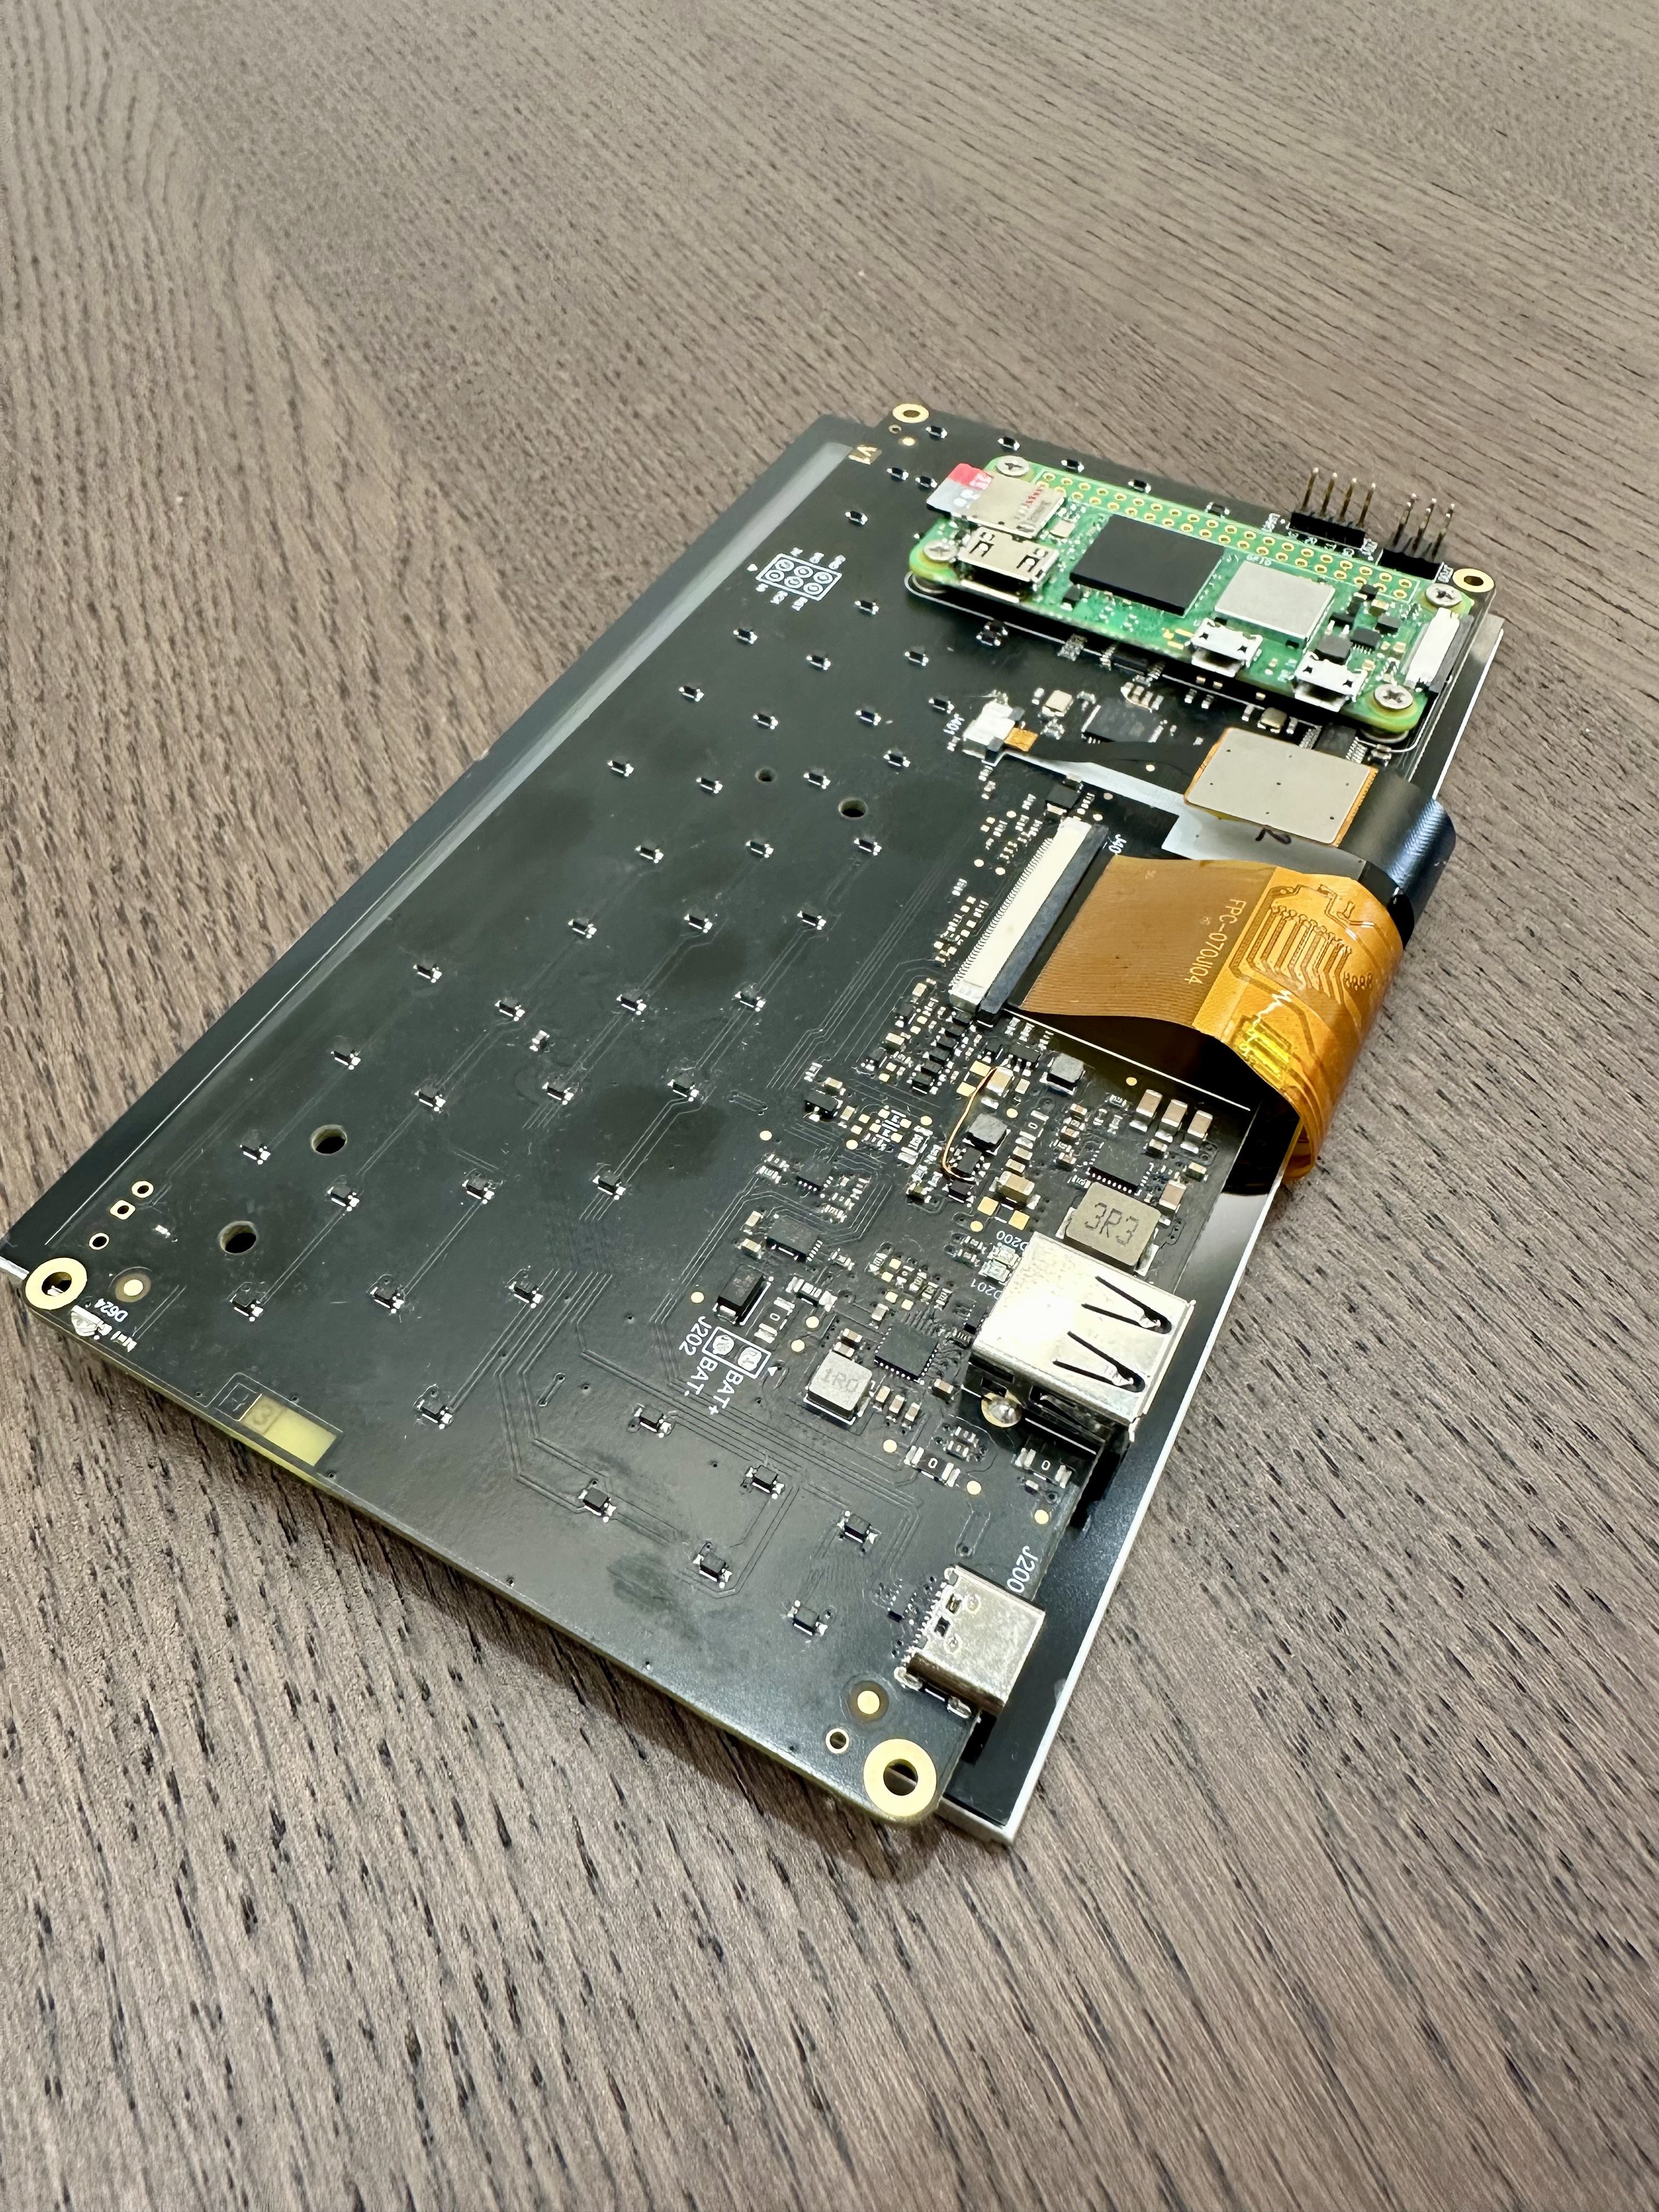
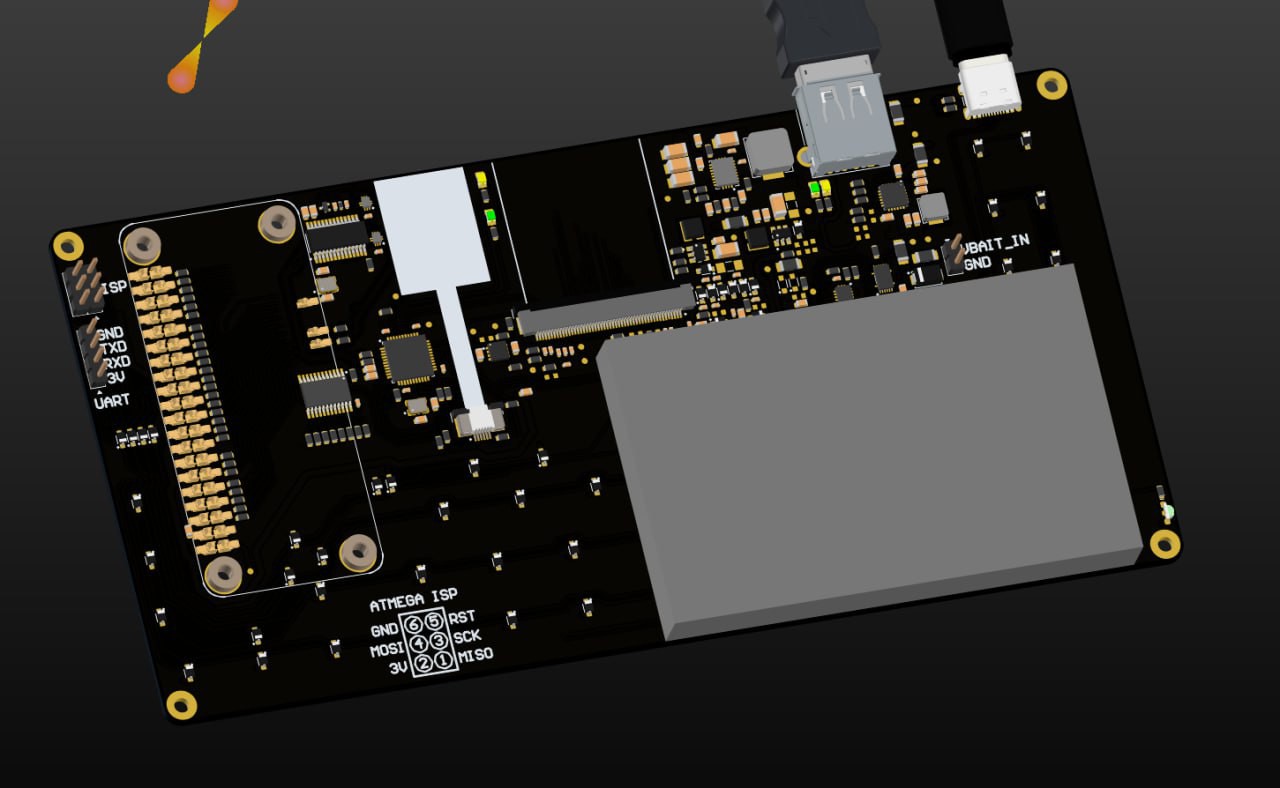
Here is the back of board, with a large emplacement for the Li-Po battery, the connectors, flex cables and the Pi itself. There is not many components and it doesn't take much space so we can definitely create a 5" version of this same board, the only difference will be that the display connector will be 40 pins instead of 50 and that we would have an extension port somewhere with the 8 available GPIOs left.
![]()
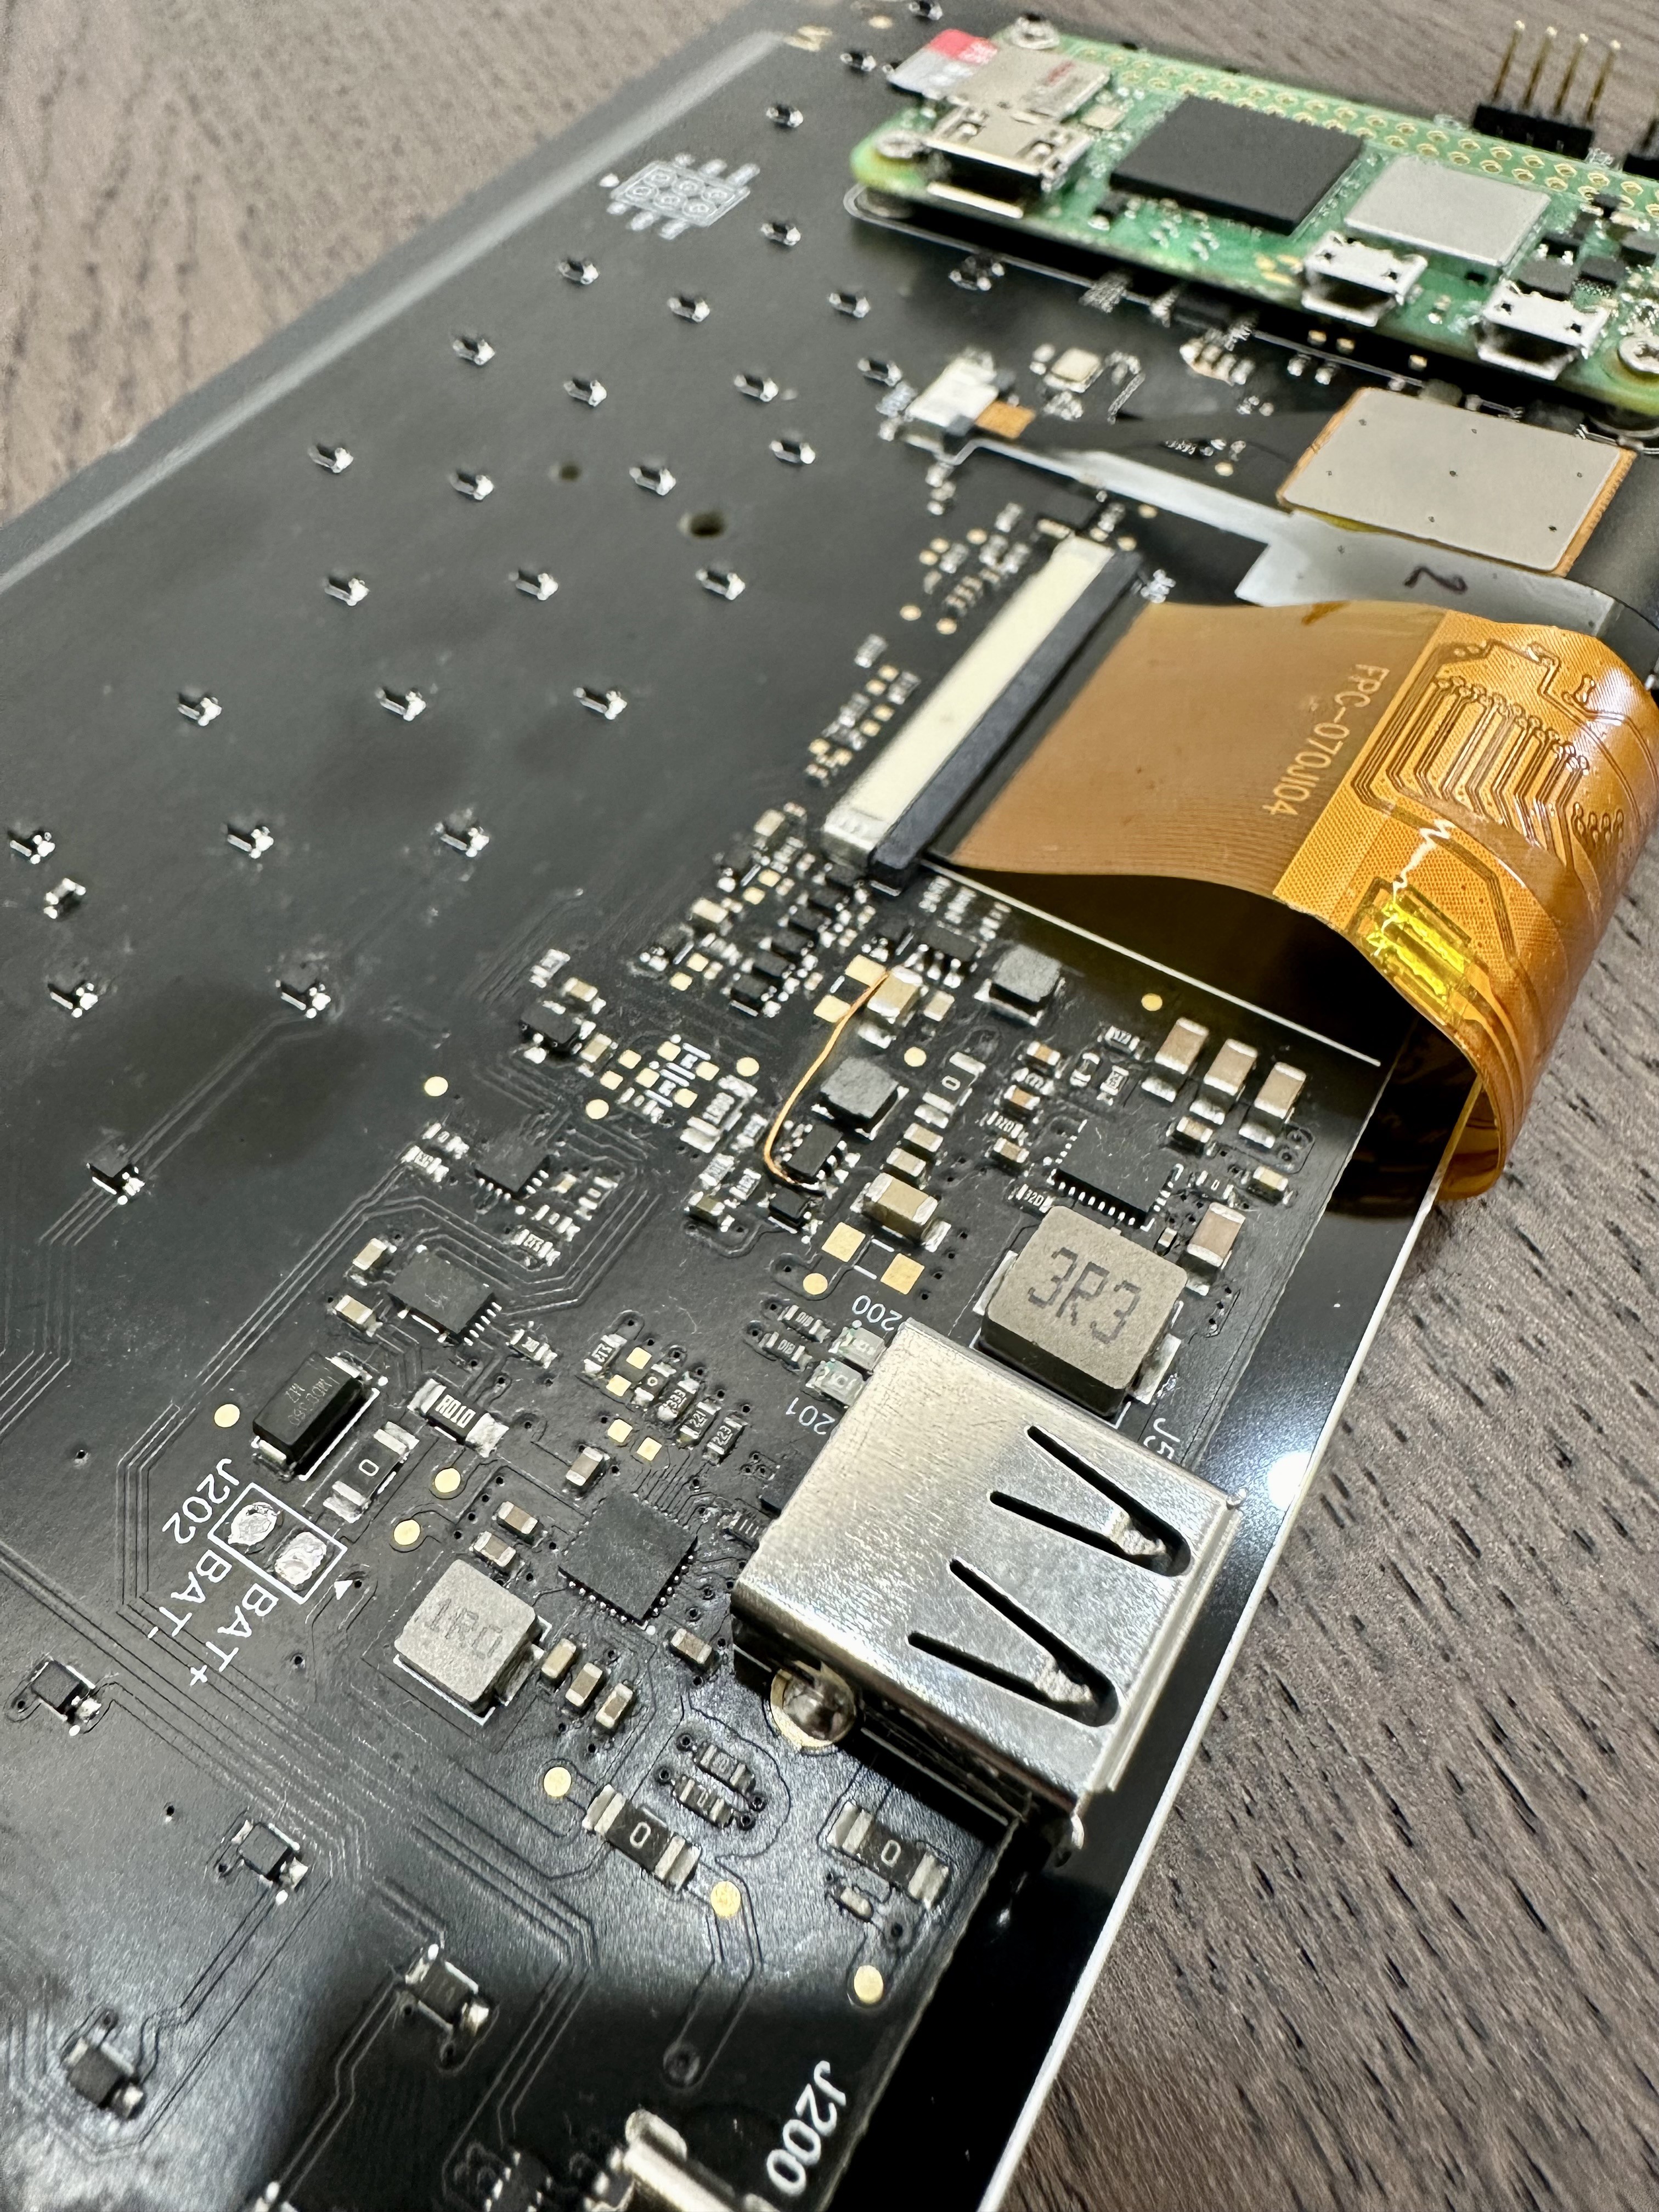
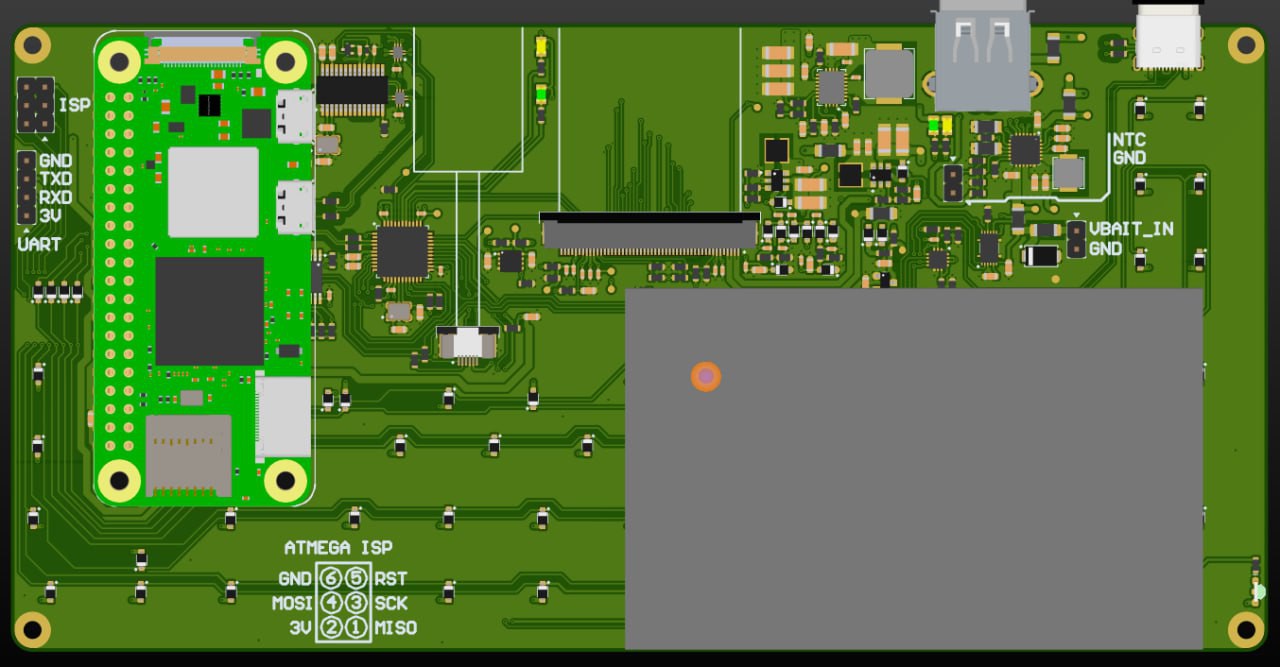
Here is most of the power management components, handling the main power of the boards, the Pi, display's backlight, battery charge/boost.
![]()
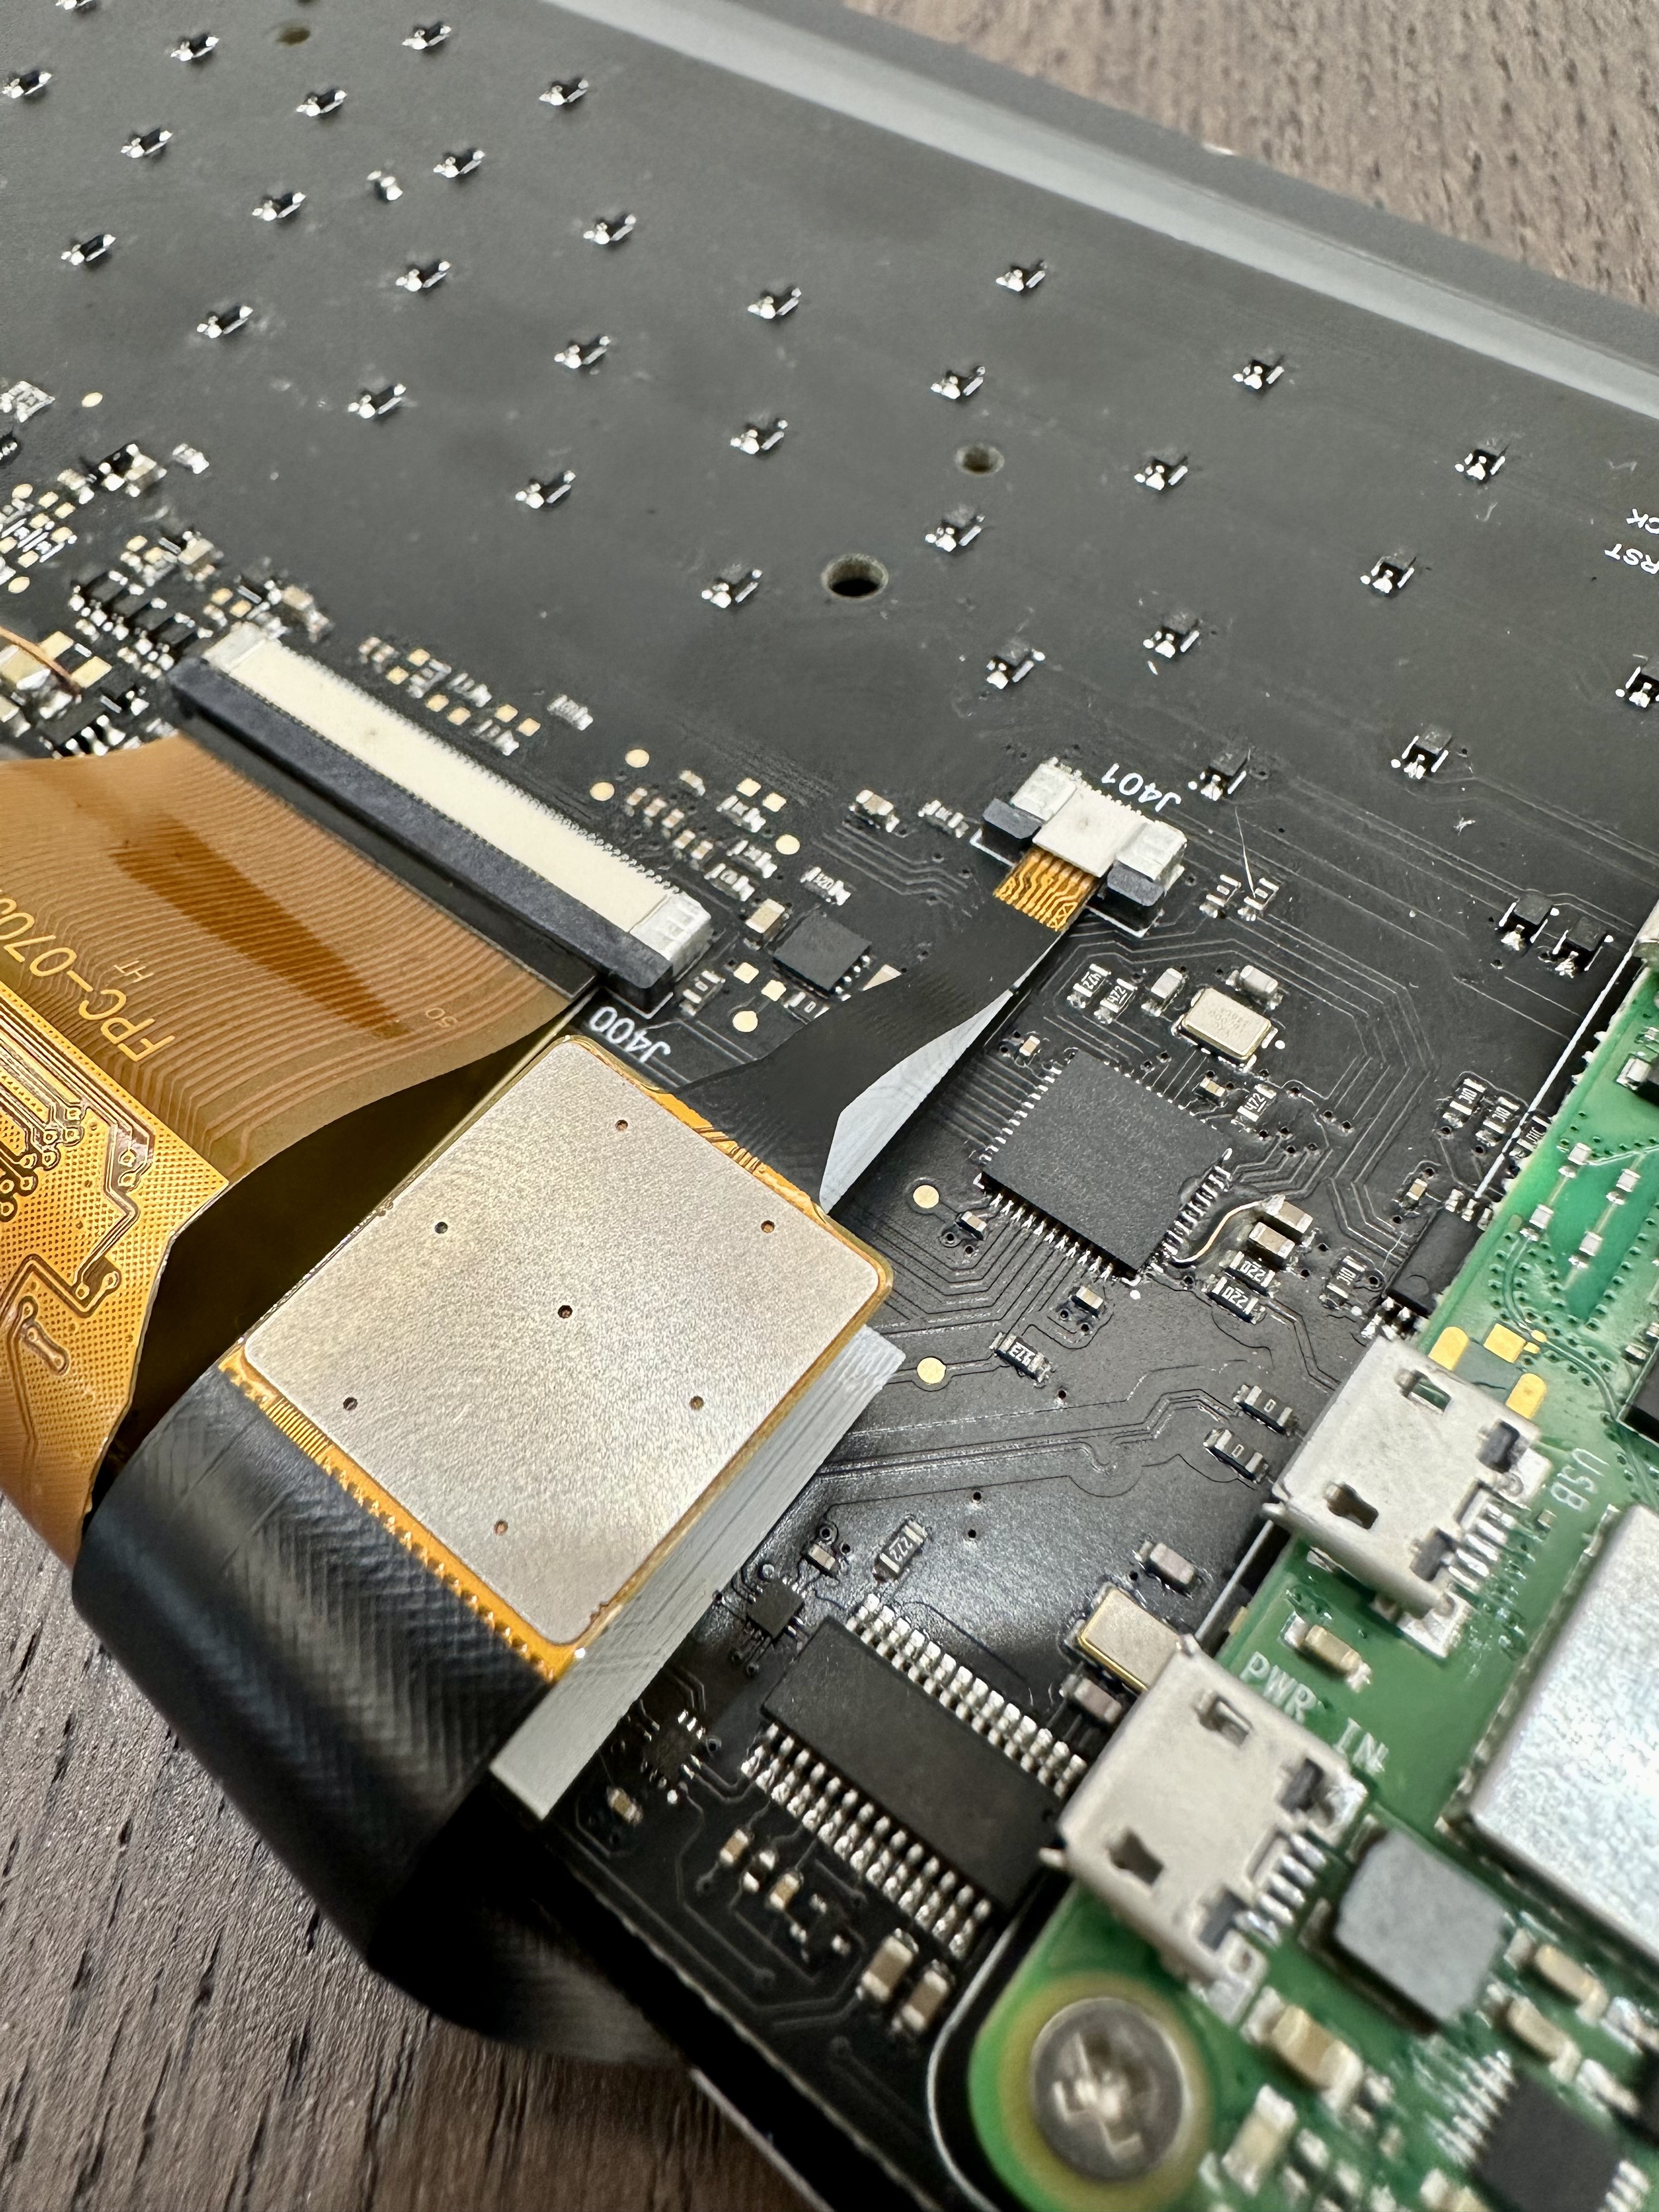
Here we can see the 50 pin display connector that's directly connected to the PI's GPIOs, the Capacitive Touch Pannel connector that's connected to the Atmega32U4 present just next to it, which also handles the keyboard and key presses and will send all this over USB-HID to the Pi through the USB-OTG connector (connected to it under the Pi itself).
![]()
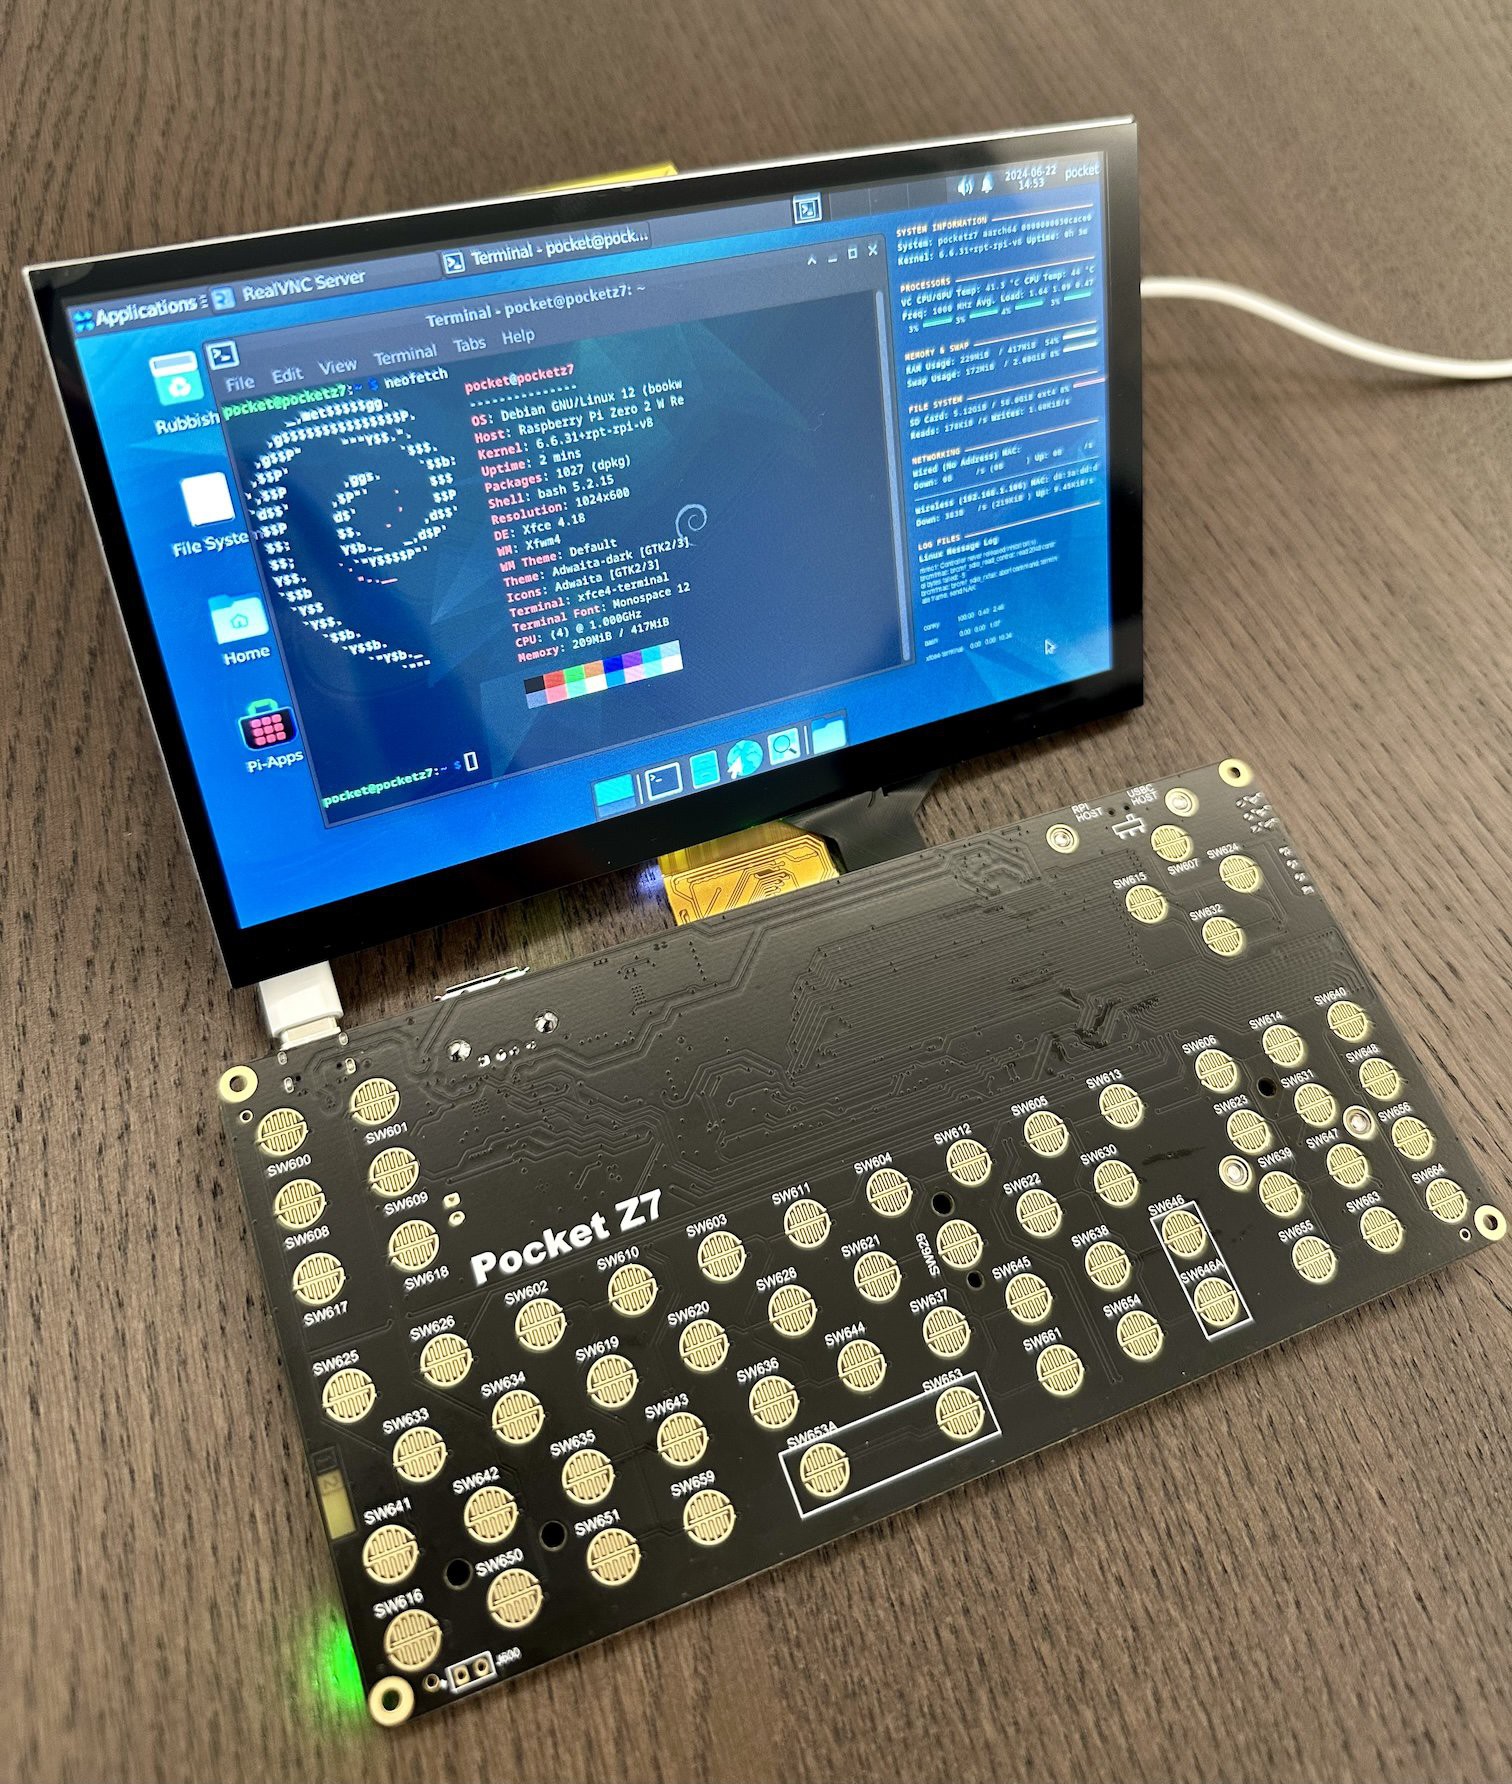
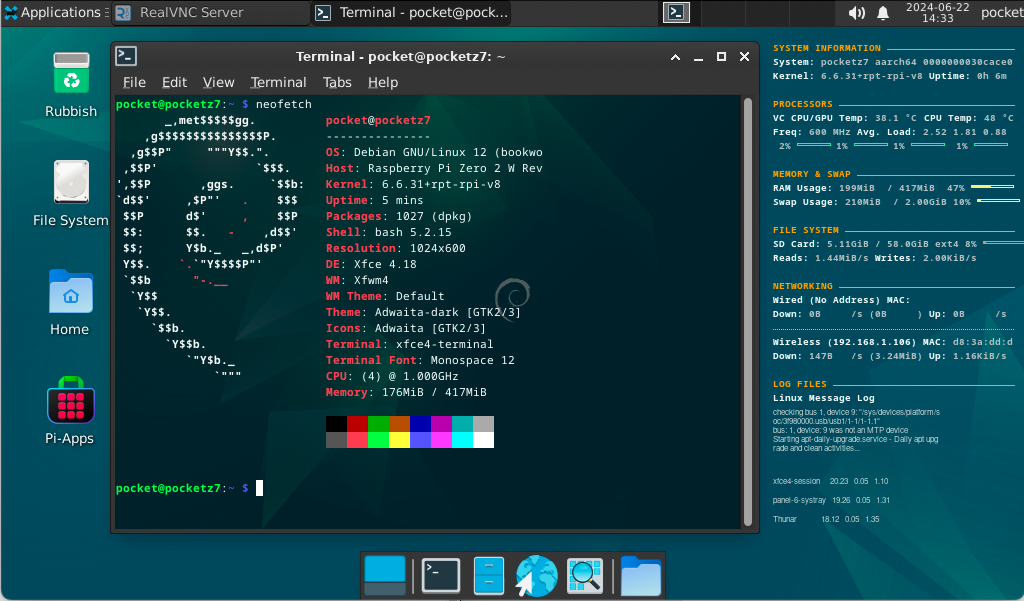
Here is a video of the prototype booting a Raspberry Pi OS Lite install customised with XFCE & Conky. There is probably many ways to make that thing boot way faster, nothing has been optimised at the moment. The Pi Zero 2W is definitely not the fastest out there, but it is very cheap, available anywhere, has great support and it has a DPI Display interface reducing the overall cost of the computer.
![]()
![]()
The display is quite good for the price (15$ with the Capacitive Touch) has acceptable viewing angles, contrast and colours. The Linux desktop could be more optimised, some windows will be too big to fit in that screen and it will be more of a problem on the 5" with the 840x480 resolution. But the goal here is not to play 4K HDR videos, but to have a super portable hacking linux computer.
![]()
![]()
![]()
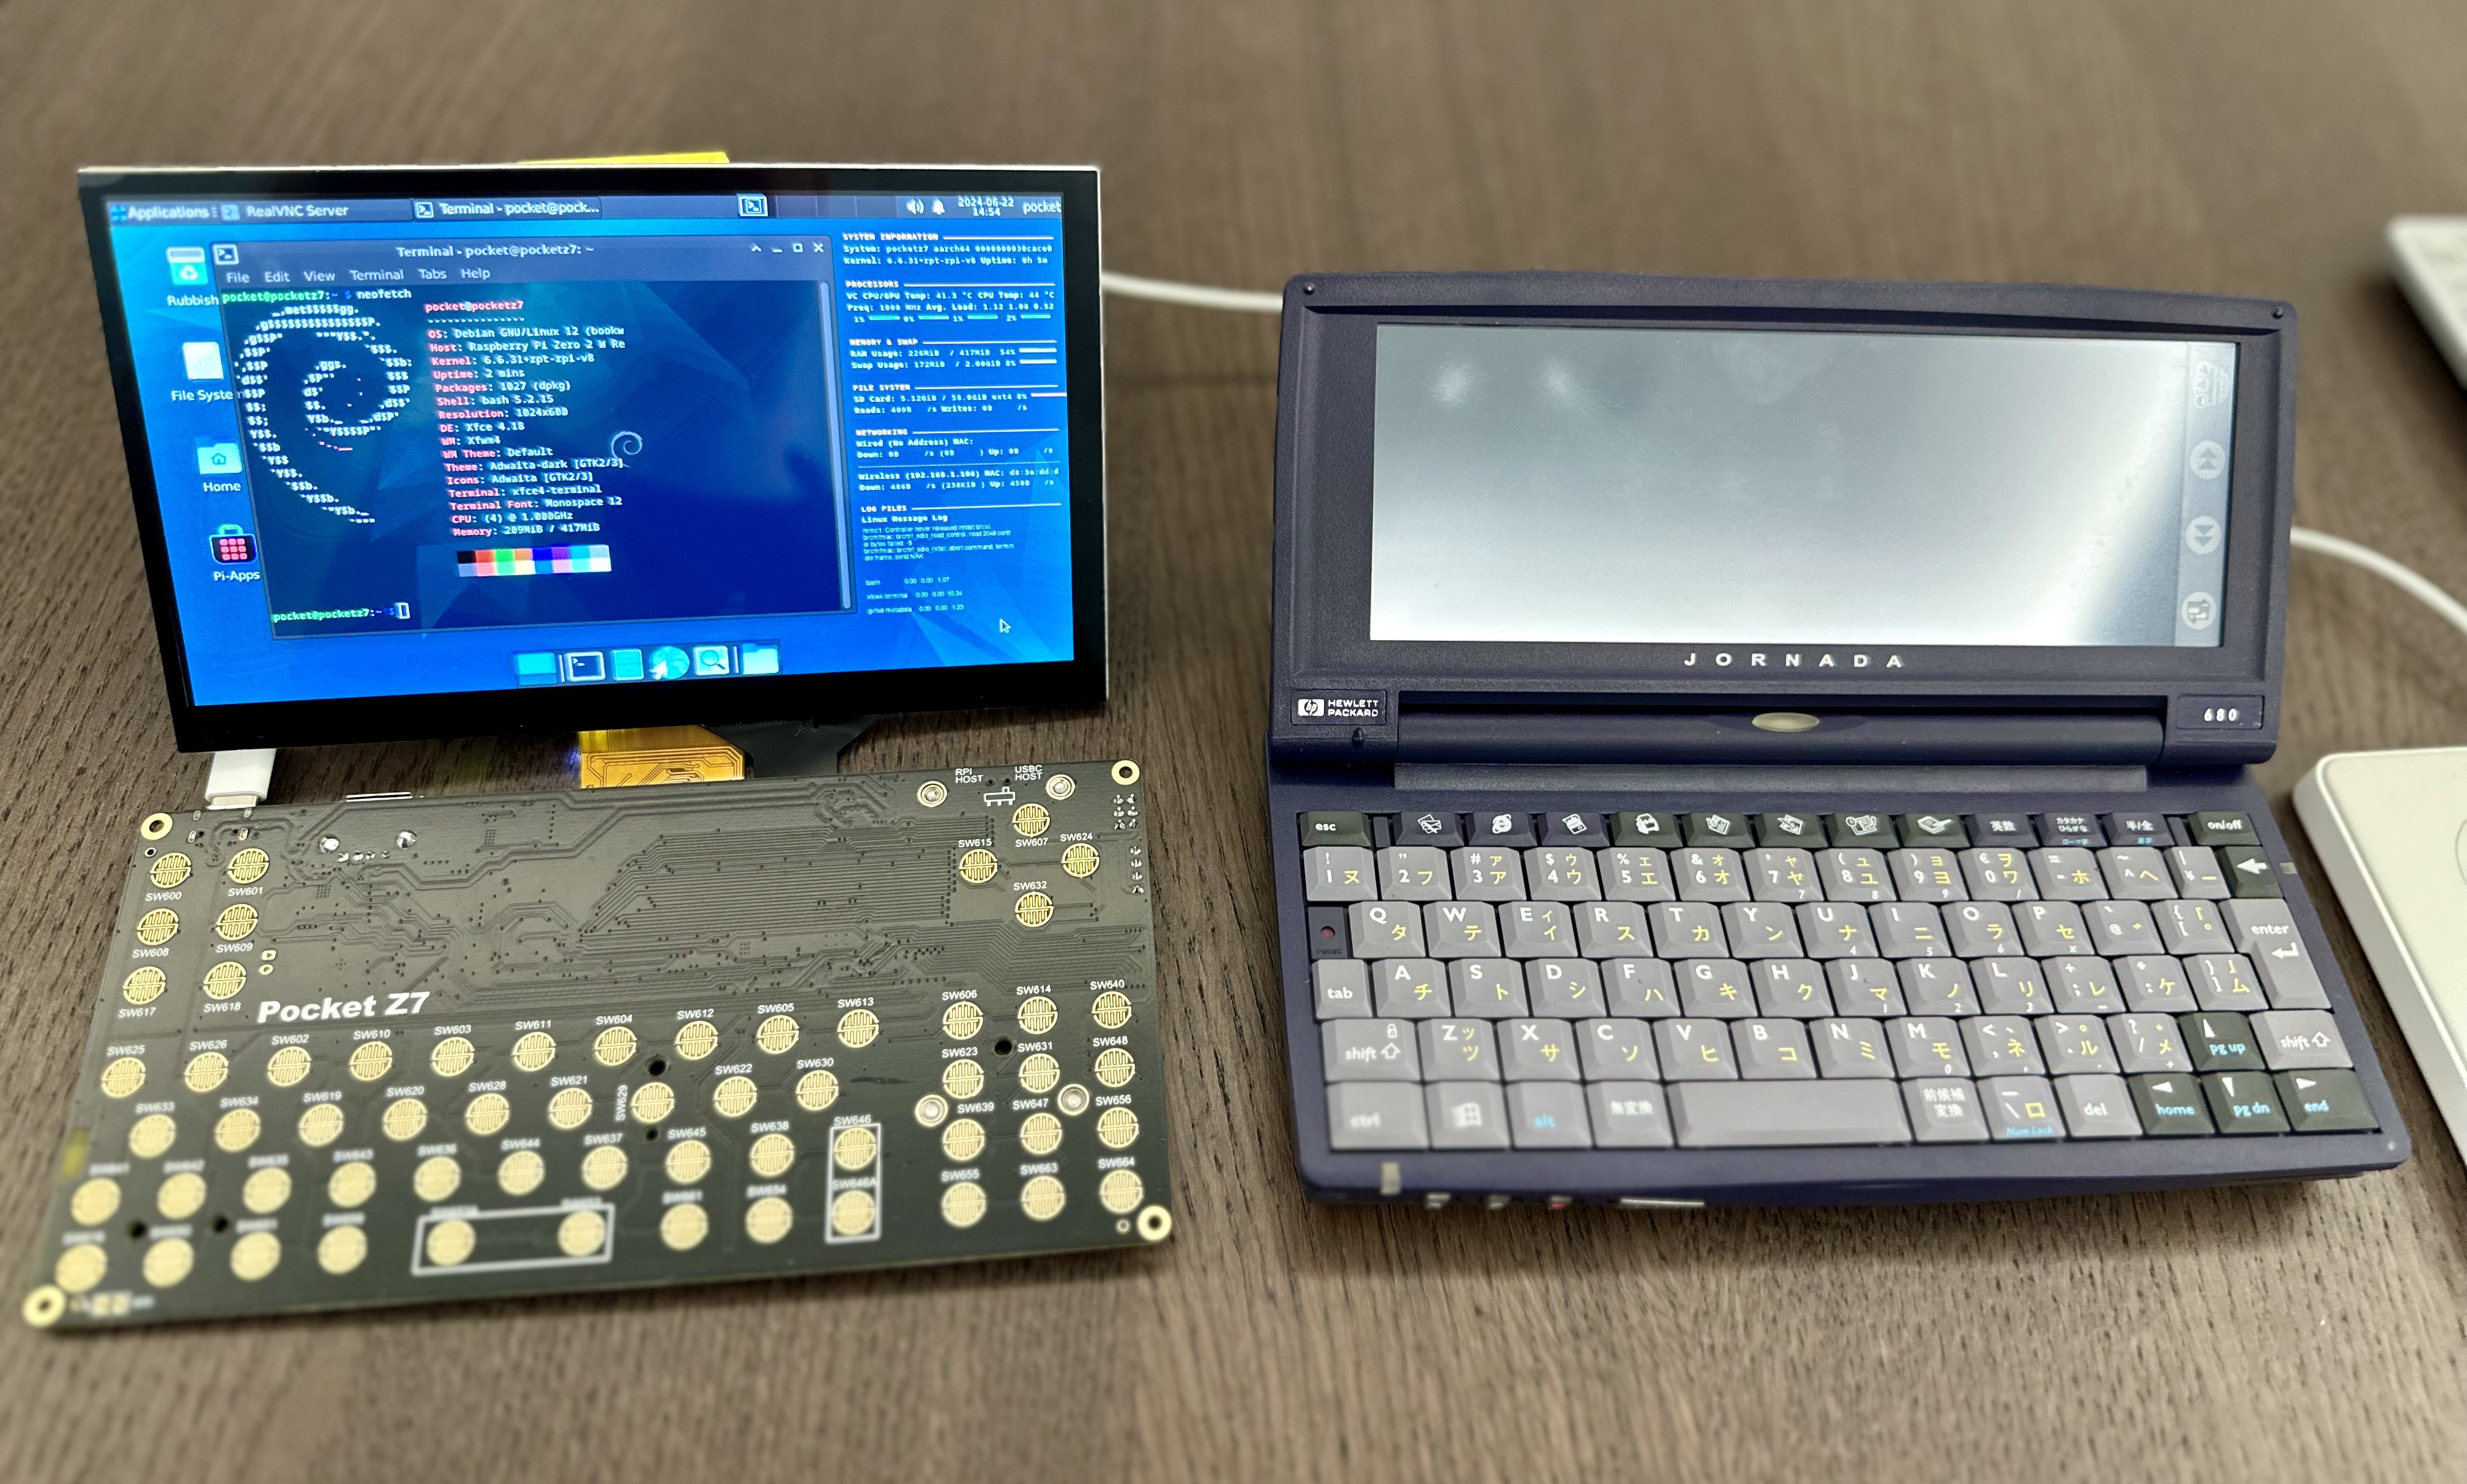
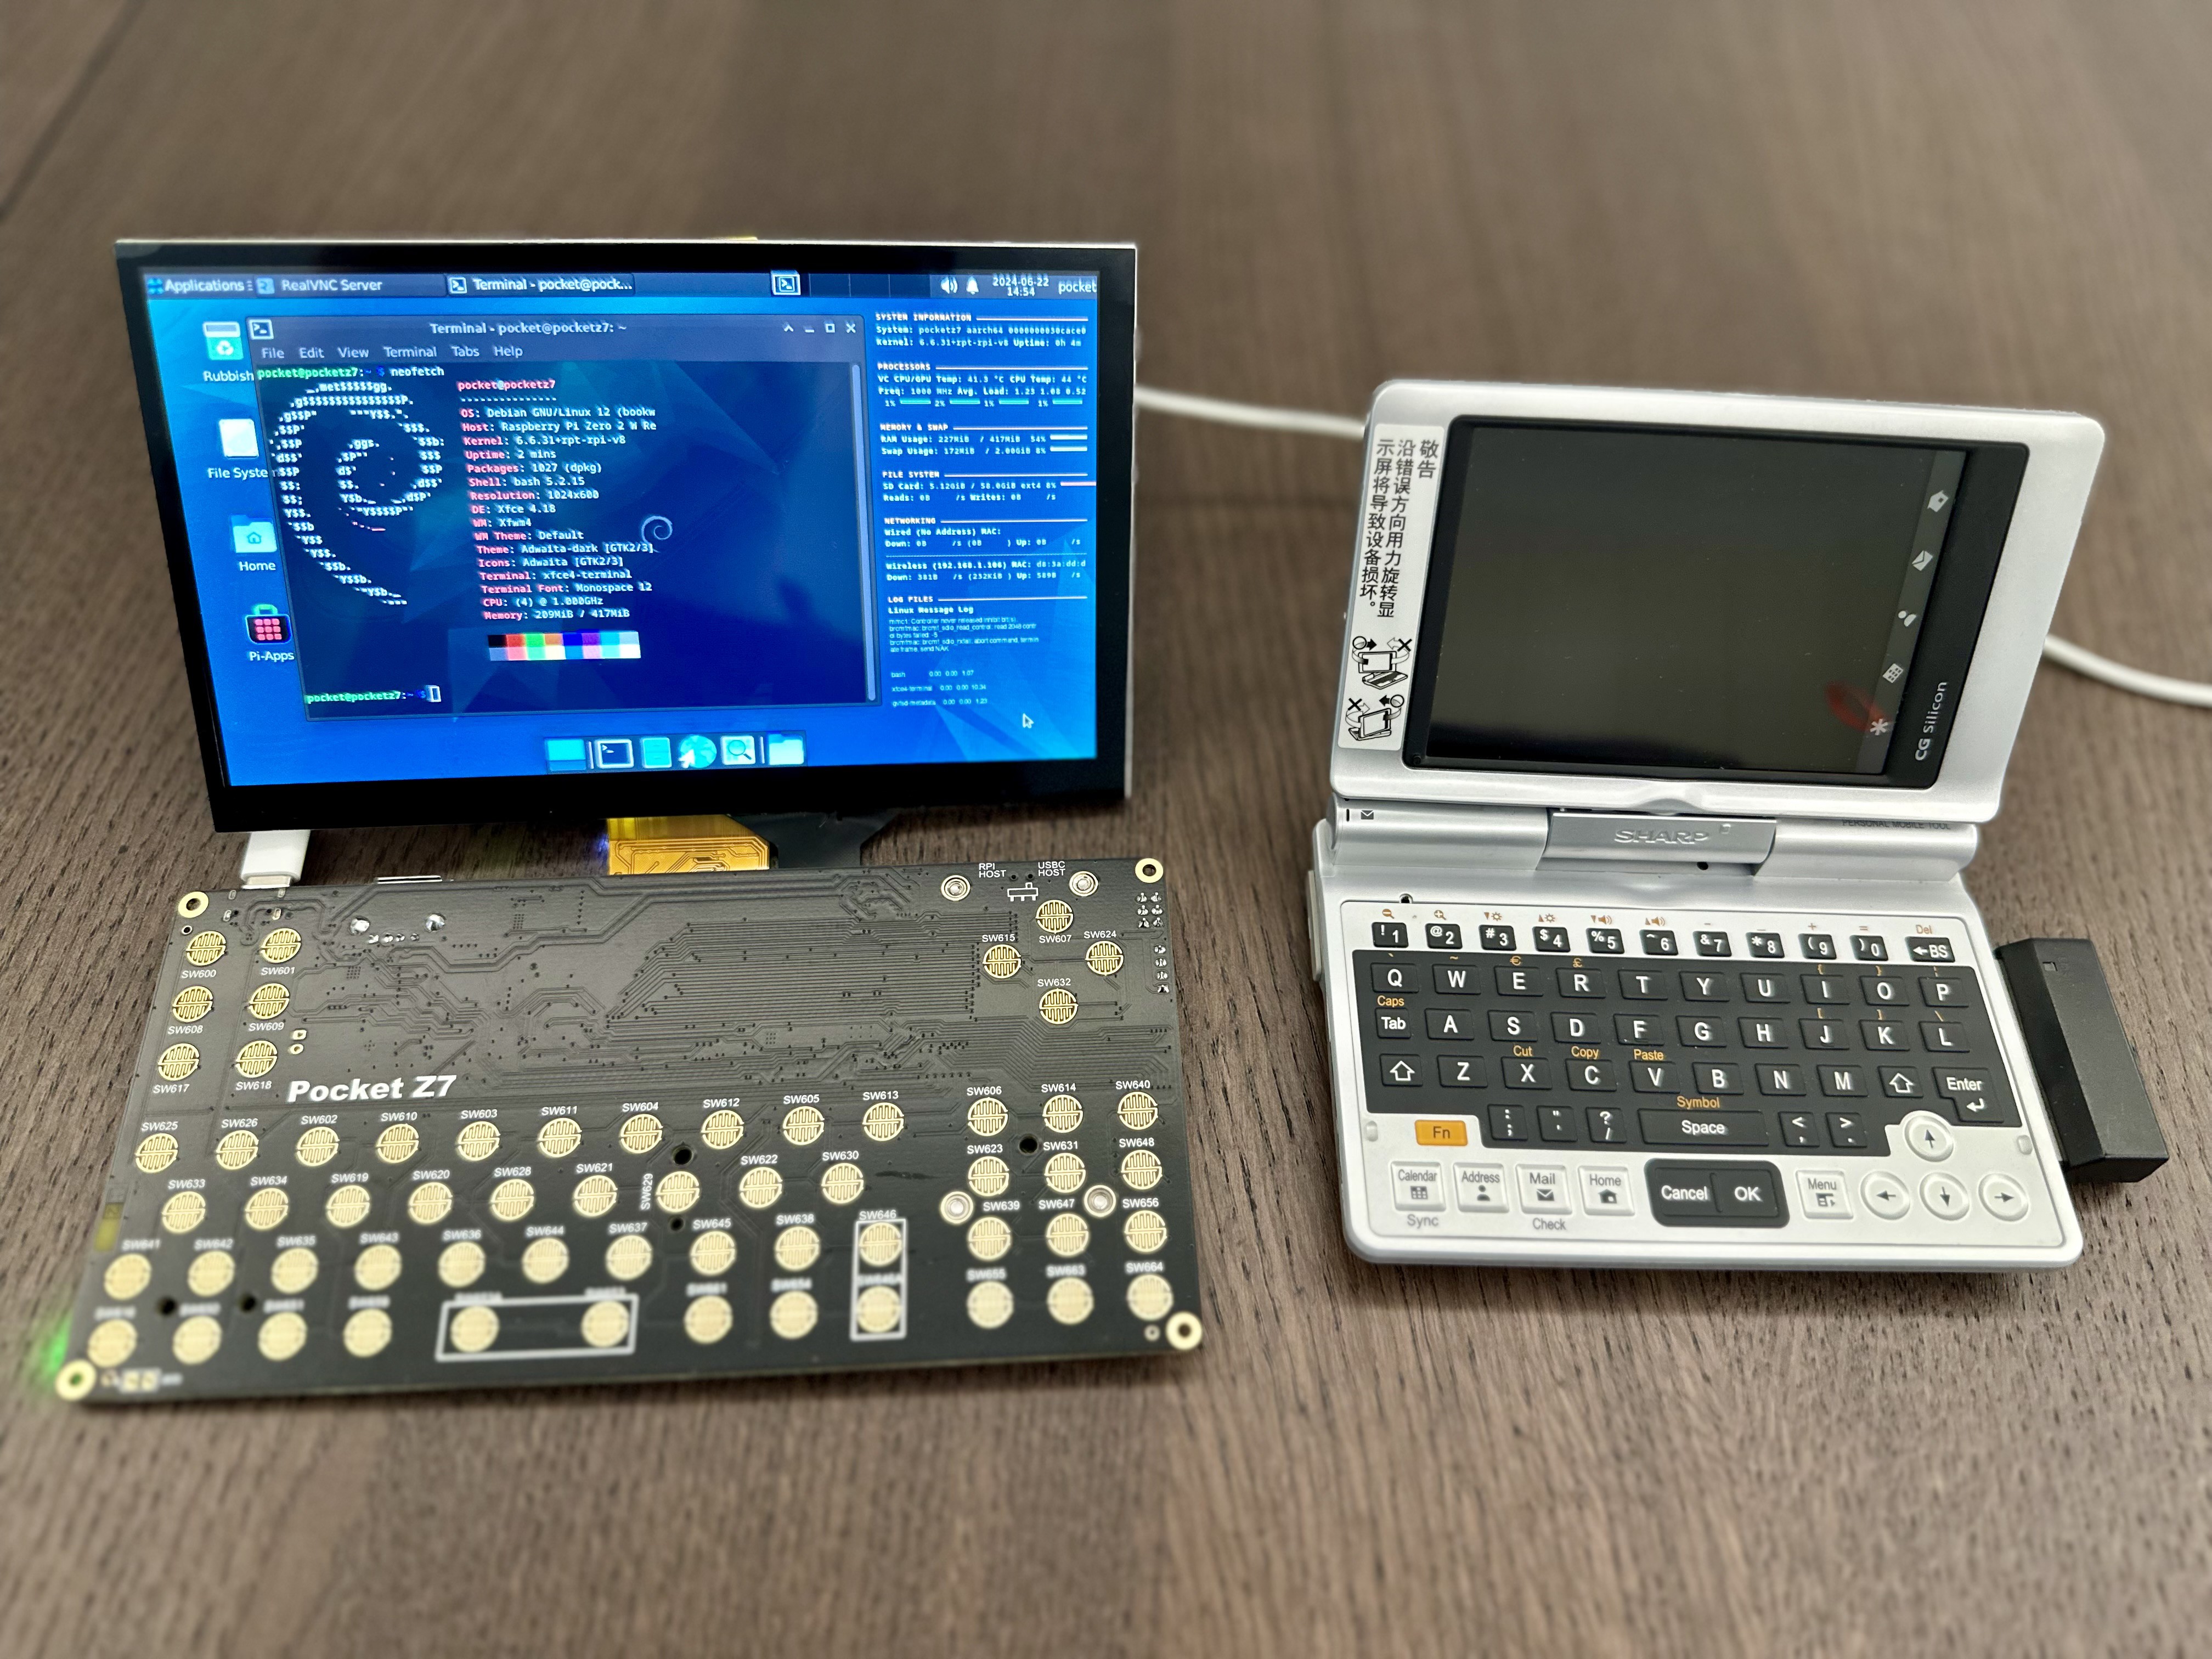
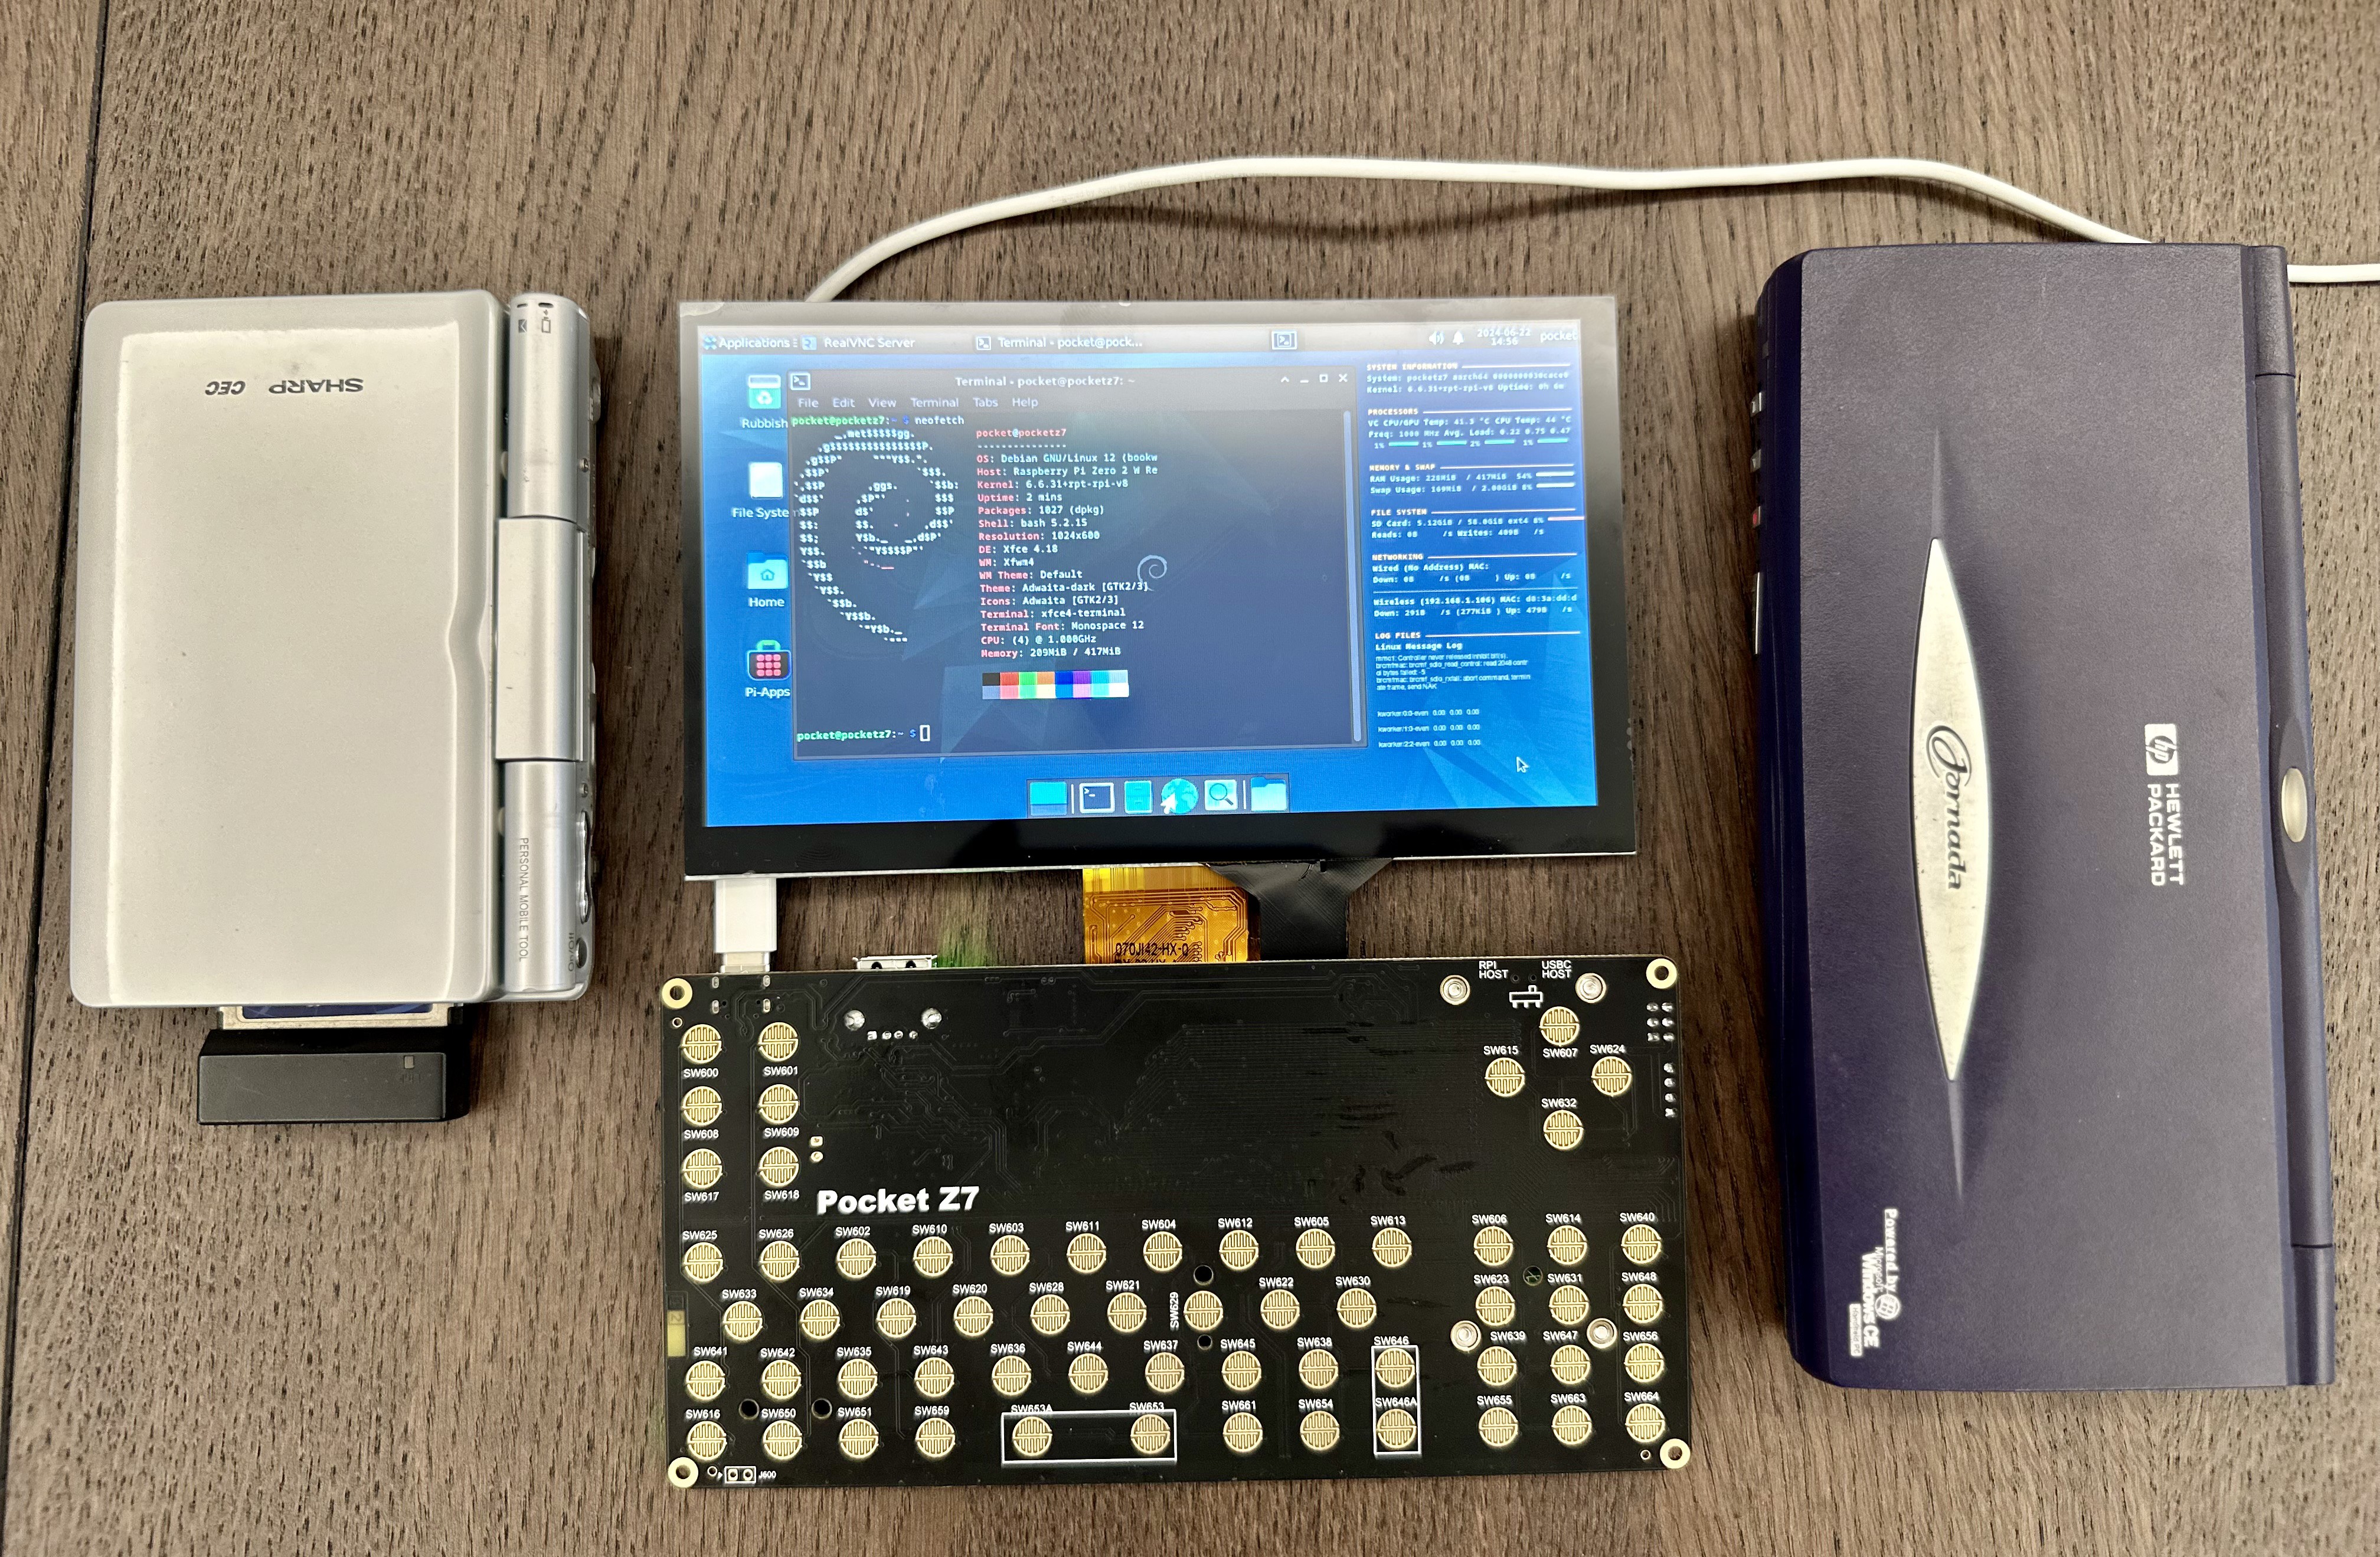
Here is a few pictures to get an estimation of the size compared to a HP Jornada 680 and a Sharp Zaurus SL-C7500c. This 7" version of the prototype will be a great mini linux laptop, while I believe a 5" version (comparable to the Sharp Zaurus in these pictures) will be the ultimate pocket hacking device especially with the 8 GPIOs (& I2C) available for expansion.
-
Design
06/22/2024 at 09:23 • 0 commentsFollowing these requirements, here is the hardware that was picked for the first design :
- Raspberry Pi Zero 2W : While not being the fastest SBC out there it has great advantages
- It’s cheap and available everywhere
- There is great support and many OS available
- It’s powerful enough to run a Linux Desktop Environment
- It’s low power
- It has a DPI RGB Interface reducing drastically the cost to have a decent display
- 7” 1024x600 DPI RGB Display 24 Bits + Capacitive Touch Screen
- These kind of displays are super cheap, widely available and good enough for this kind kind of device form factor
- The display is driven by the Raspberry Pi through the GPIOs (using all of them)
- This reduces cost as we do not need an display driver, HDMI converter or complicated DPI bridge
- The touch screen support will have to be implemented on the Atmega32U4 along with the keyboard
- Keyboard : Atmega32U4
- Probably the cheapest & most used keyboard controller, supports USB HID, plenty of examples out there
- We used the Ti-92 layout for the keyboard to just have a quick layout available
- A gutted Ti-92 will be used to prototype the case (using the silicon membrane & keycaps)
- A better keyboard will be nice to have on the next version of the device, but we are not sure of how we can do this (a Psion 3 type of keyboard ? A mechanical keyboard ?)
- Power Management
- The usual power management system supports charging a Li-Po battery through an USB-C connector (Power/Boost/Protect)
- Connectors
- 1 x USB-A has been added to connect accessories (mouse/keyboard, mass storage…)
- 1 x USB-C has been added to power the entire board + Raspberry pi
![]()
![]()
What did we learn ?
- The connector we used for the PI is nice for a prototype but will most likely have to be replaced with something better for a production build
- The Pi Zero 2W is definitely a slow device, but the direct support of a DPI display stills makes it the most relevant option ATM
- The 7” display is nice but is also quite “big”. A 5” version of the device the size of a Sharp Zaurus would be definitely better portability wise
- Having direct access to flashing the Atmega32U4 through the USB-C would be a nice improvement
- We could add an HDMI connector BUT the PI doesn't support HDMI while the display is set on the DPI Interface, so even tho the device could output on HDMI the user would have to edit some stuffs in the config.txt and reboot to get it to work
![]()
![]()
We are currently using the TI-92 layout and will be using the silicone membrane & the keycaps for this phase of the prototype (reducing cost). It would be nice to have our own keyboard eventually, but I'm not sure what type we should have. Building a good keyboard is really hard and a low price point is still one of the main goal. I don't think we should go down the Psion 5MX/Gemini/PinePhone road as it will be too complicated and costly. O ordered a Psion 2 and will gut it to see how it is build, I believe it should be similar to what we have now just with larger keys and slightly different layout (still a silicone membrane based keyboard). Welcoming feeback & suggestions on this from anyone.
Pocket Z : Bring back the PDAs & UMPCs
A high quality UMPC built around a 5" & 7" Display and a Pi Zero 2W