 Arnov Sharma
-
1PCB Assembly Process
![]()
![]()
![]()
![]()
![]()
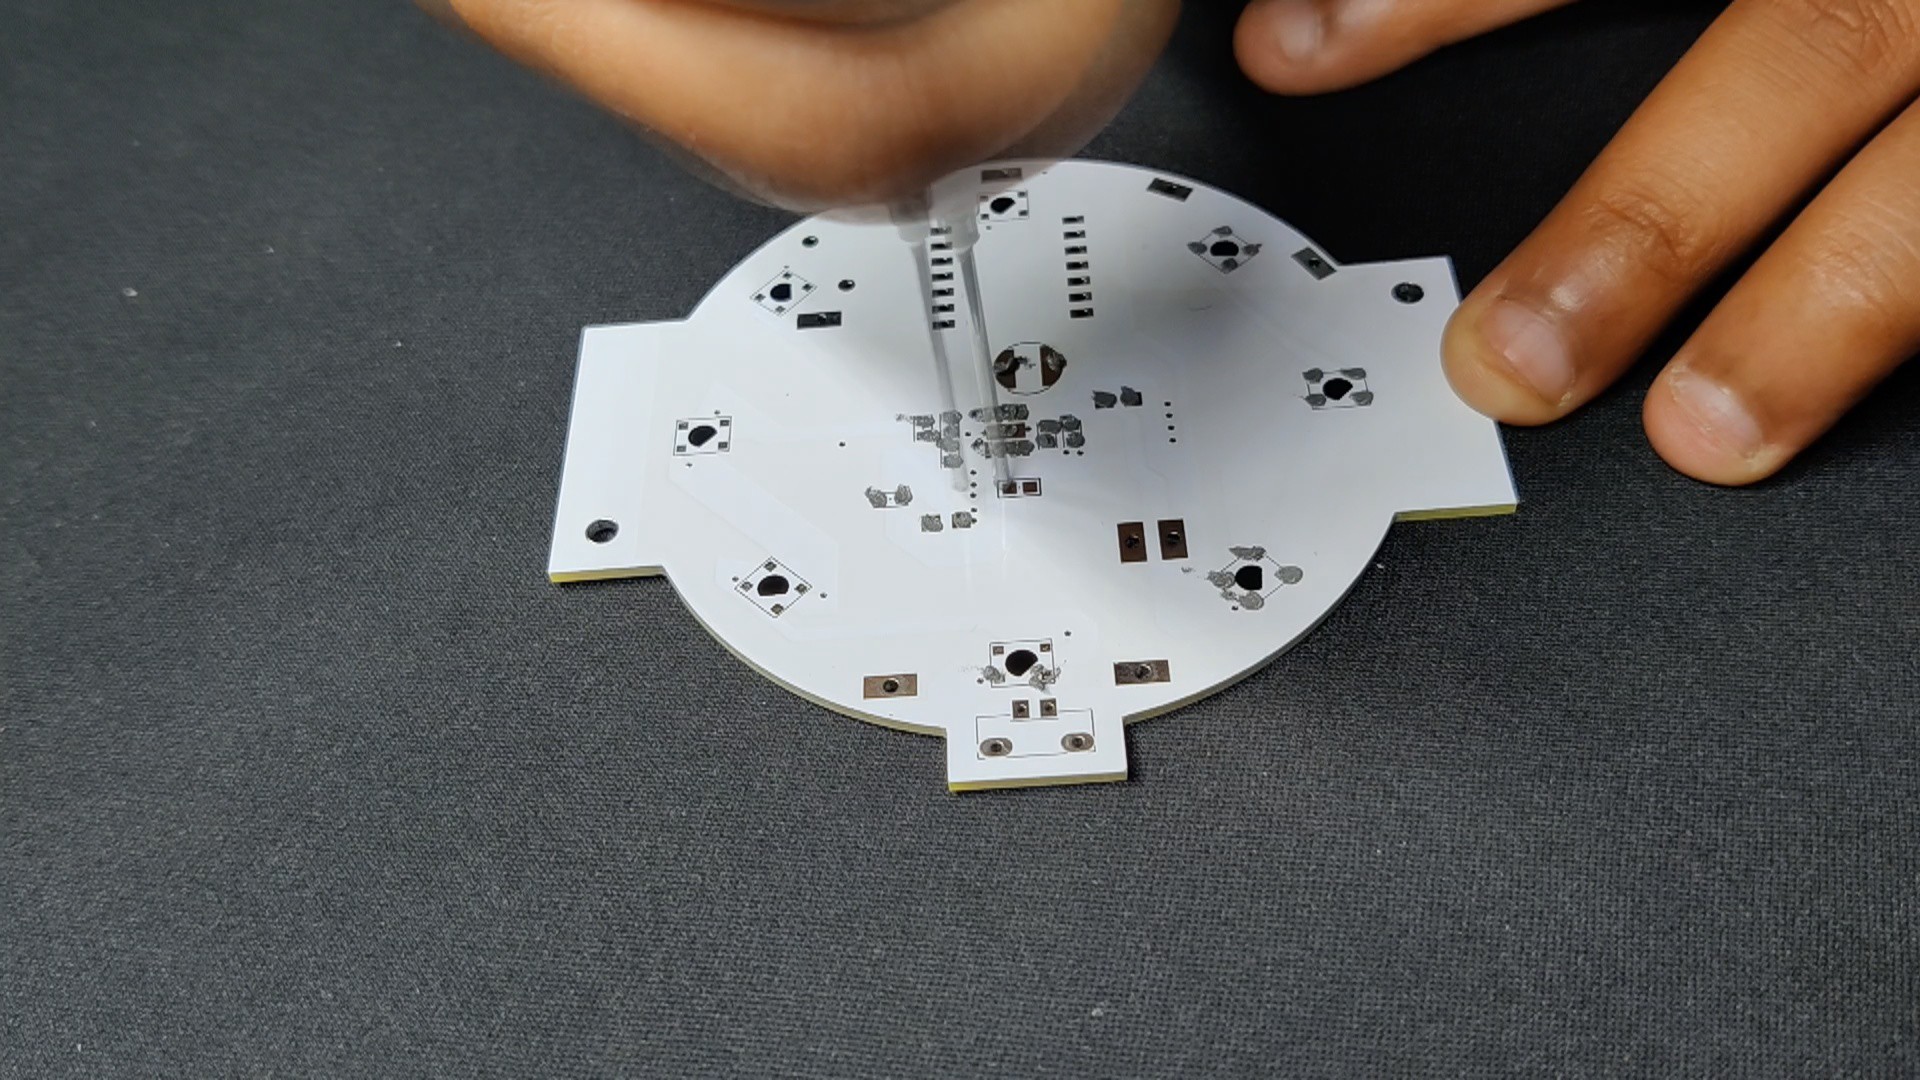
- Employing a solder paste dispensing needle, the assembly process began with the addition of solder paste to each component pad.
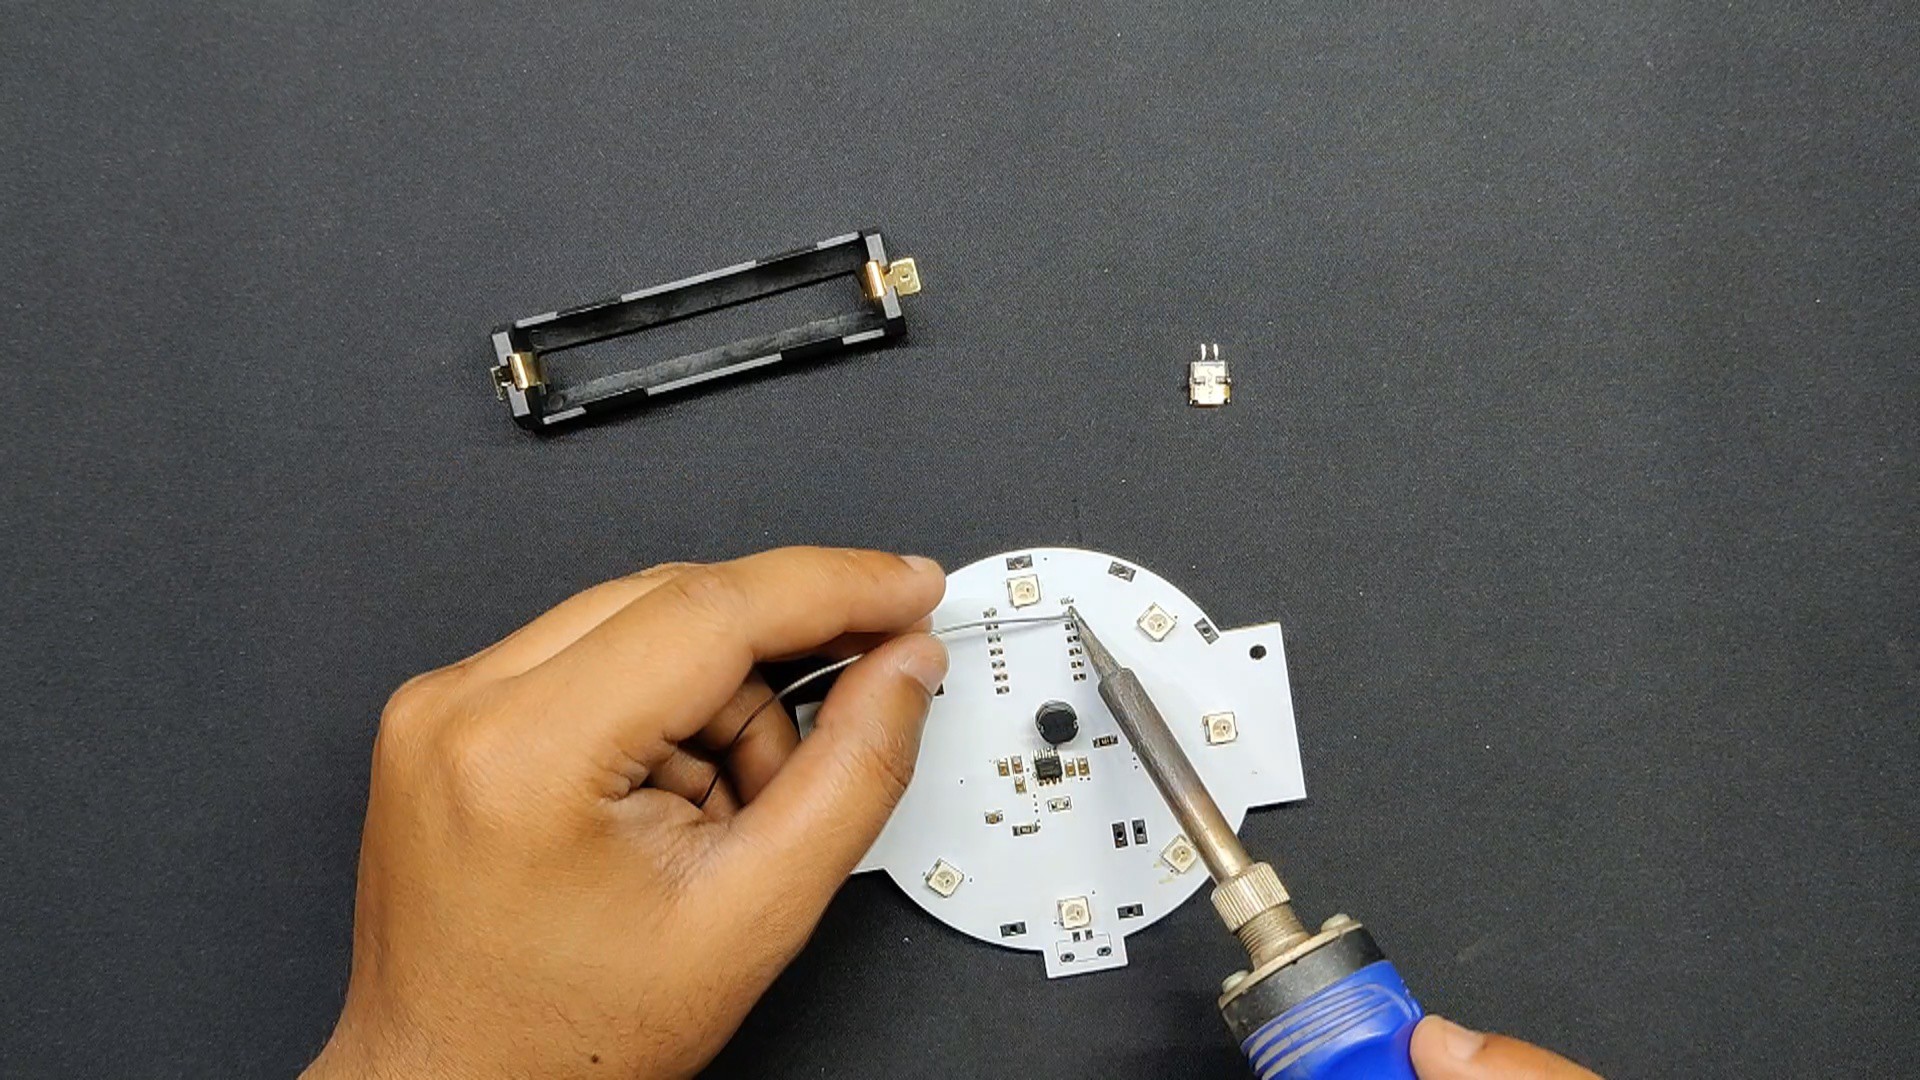
- Next, we use a tweezer to pick and position each SMD component in its designated location.
- The circuit was added to the reflow hotplate once the components had been assembled. The reflow hotplate heats the PCB from below to the temperature at which solder paste melts, leading the components to be soldered onto their pads.
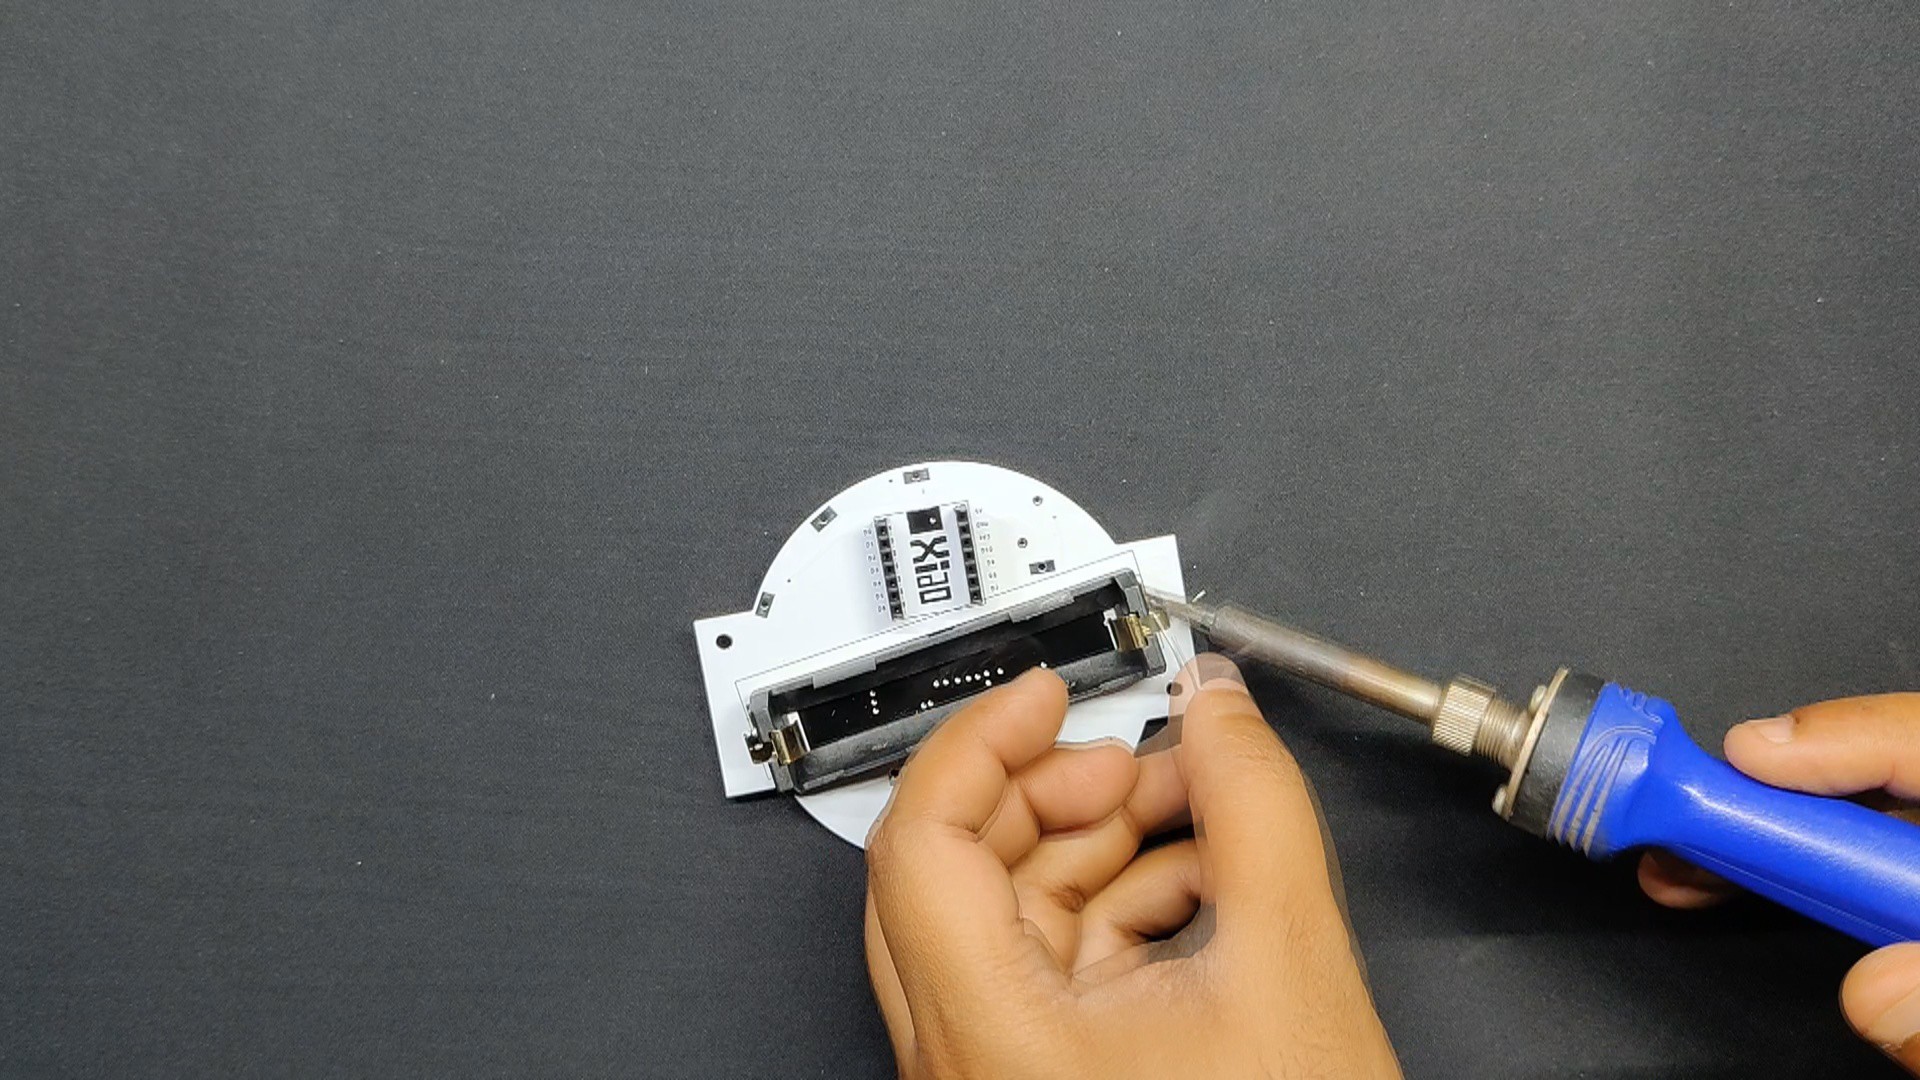
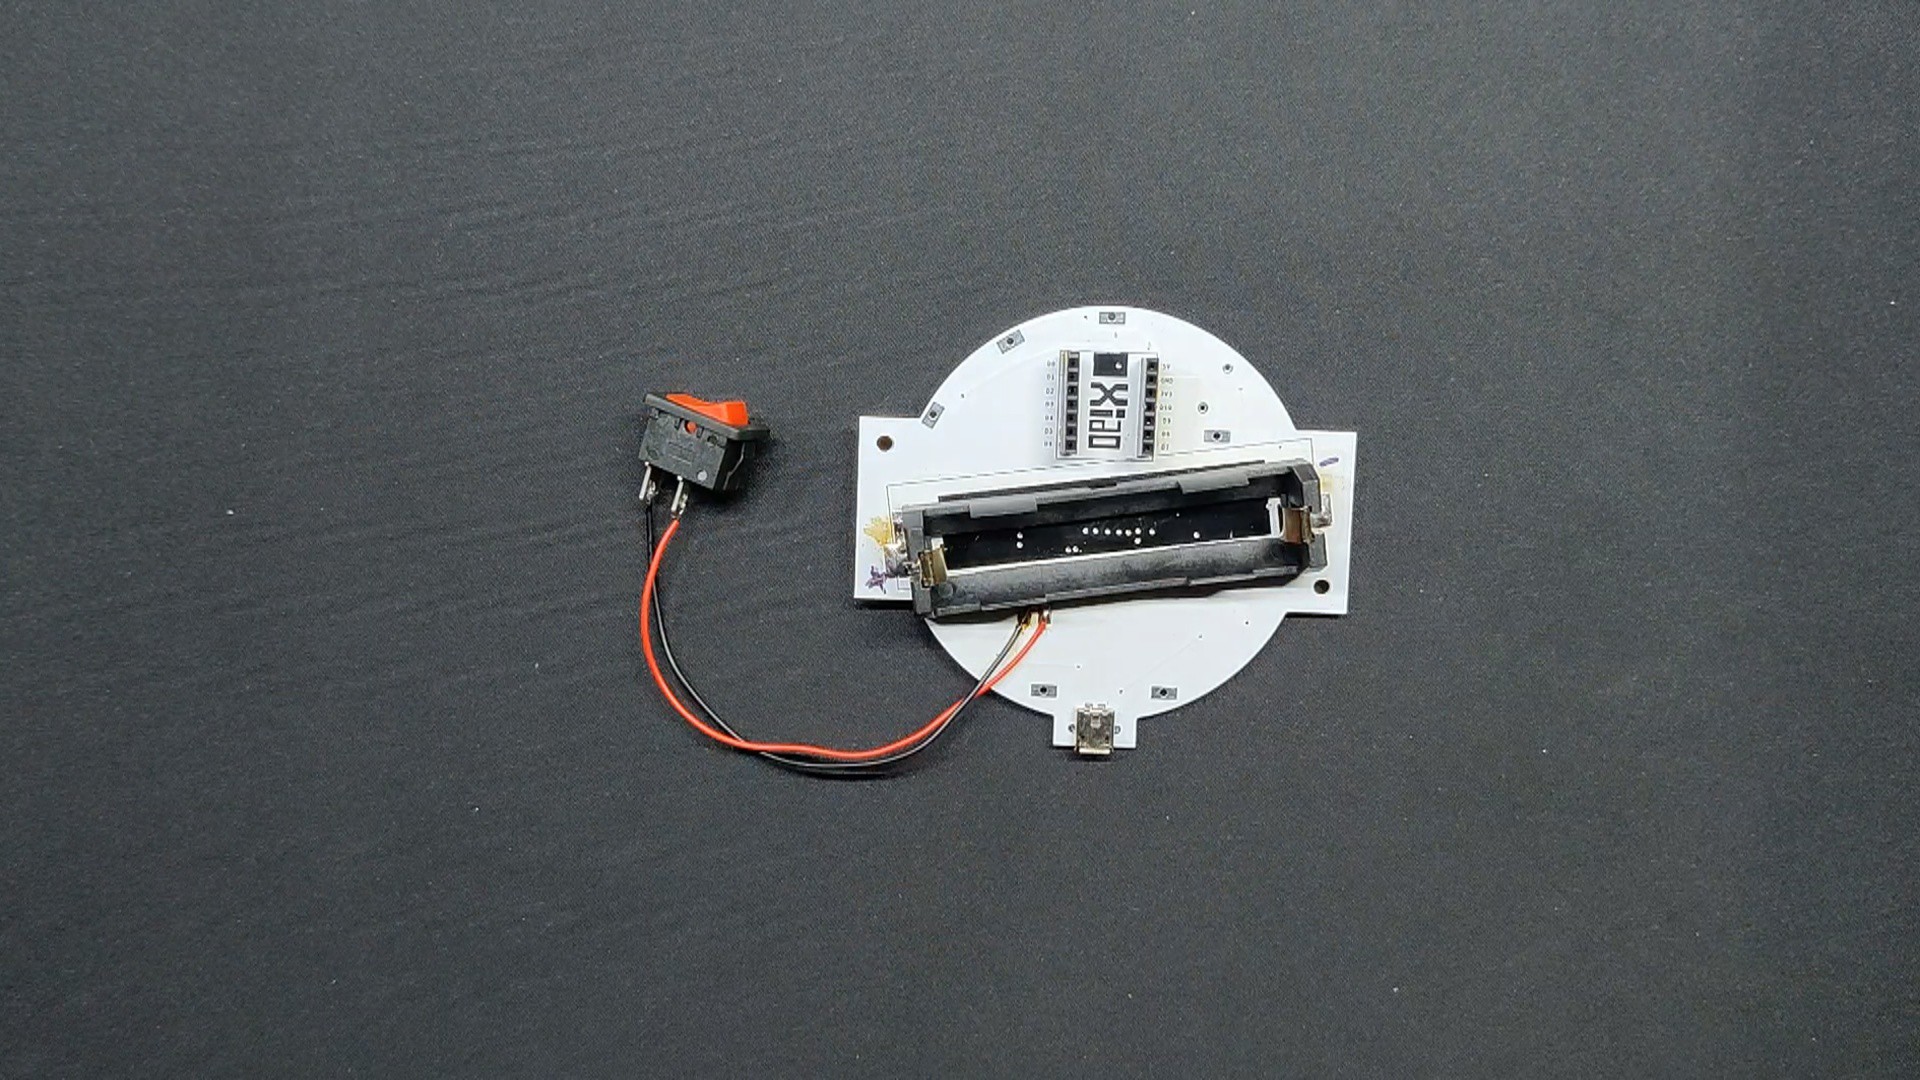
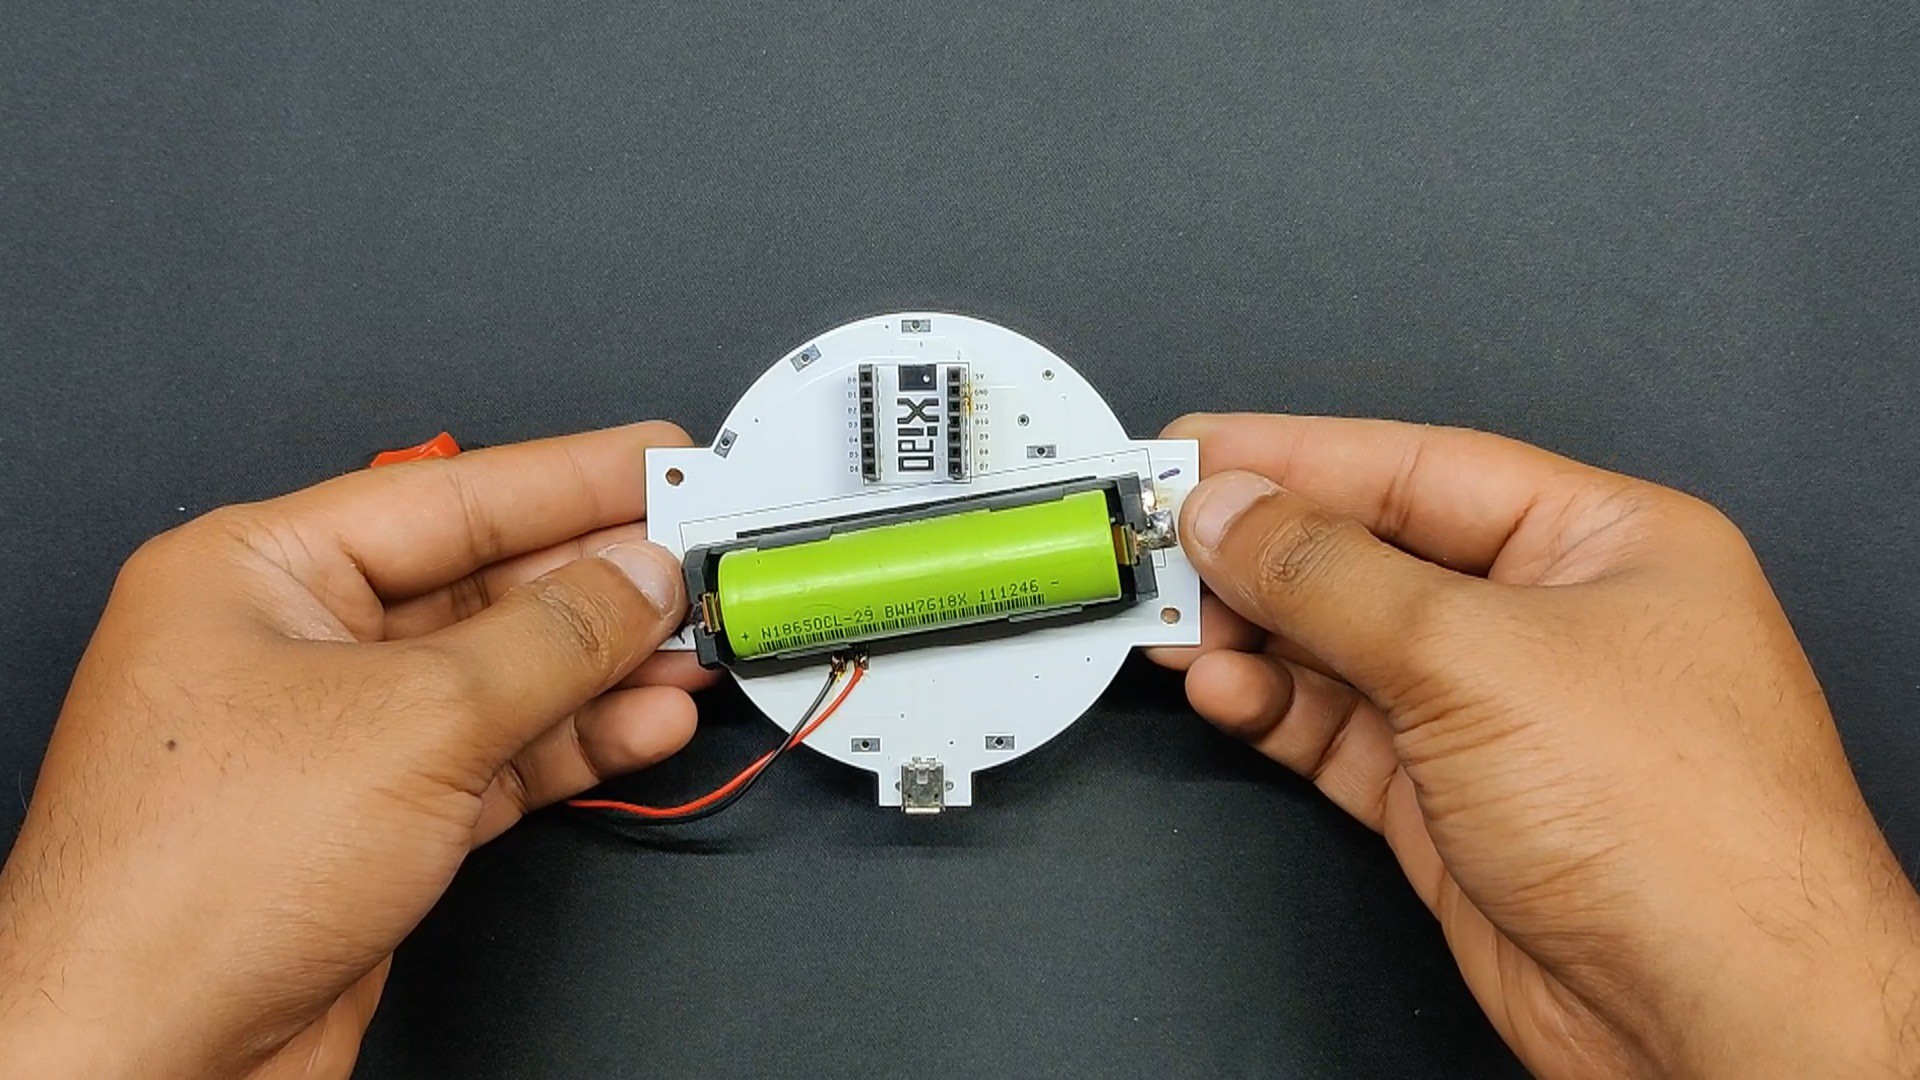
- After assembling the SMD components, we utilized a soldering iron to add the THT components, which included the USB port, the Li-ion cell holder, and header pins for the XIAO SAMD21 microcontroller, from the bottom of the board.
- Subsequently, the Push Style Rocker switch is attached to the circuit via the switch pads. The IP5306 Circuit can be turned on or off with this rocker switch.
-
2Power Source
![]()
![]()
![]()
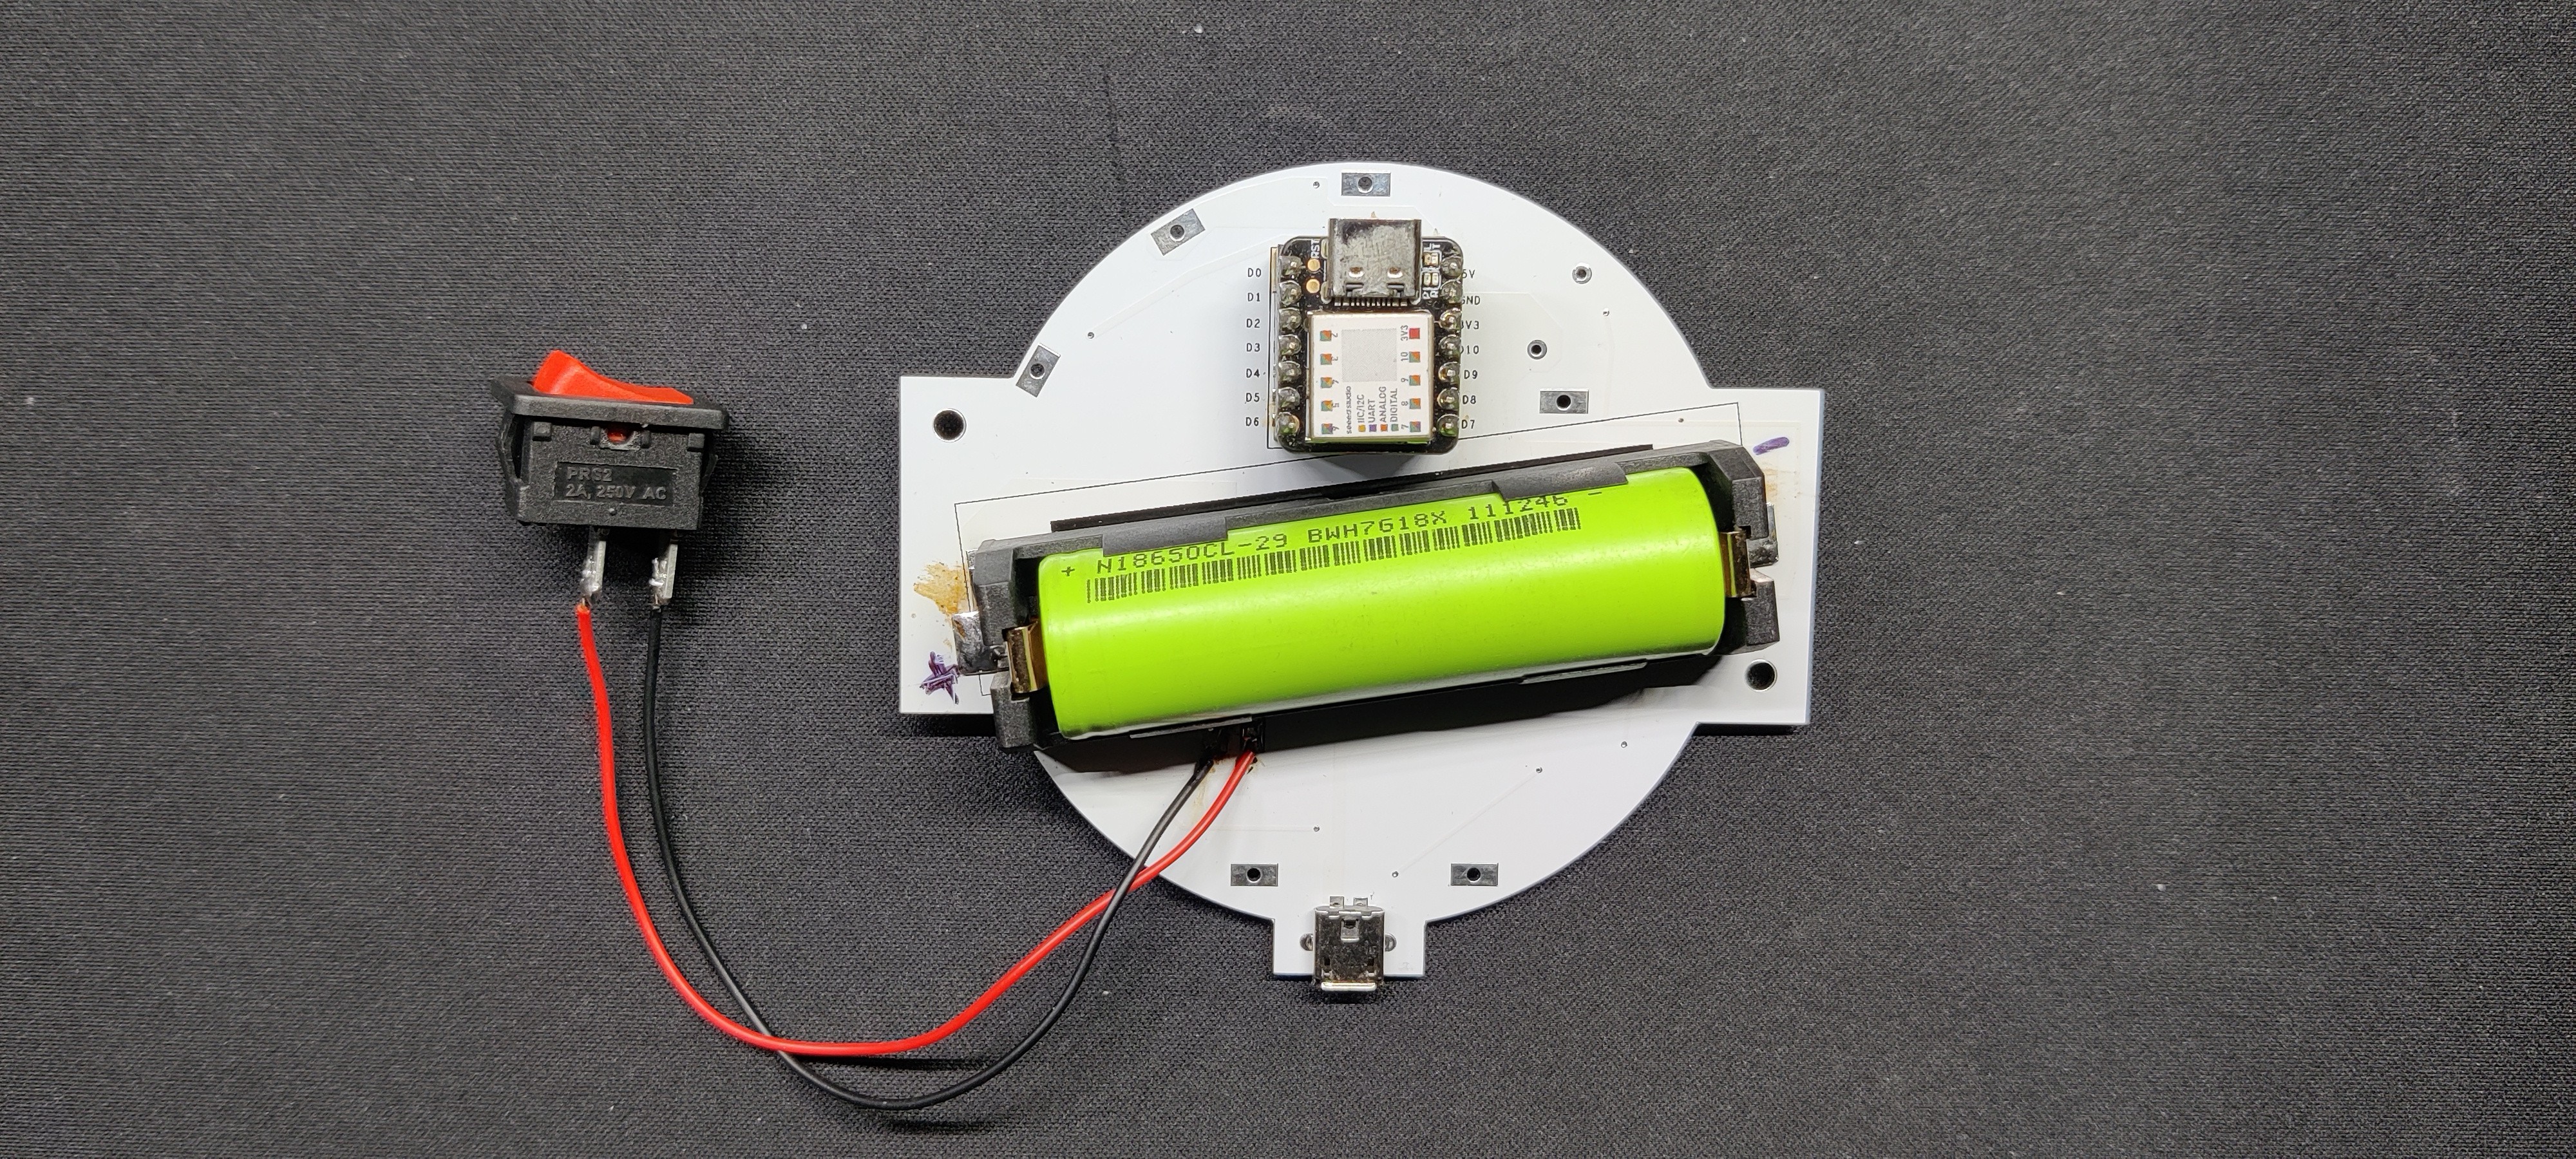
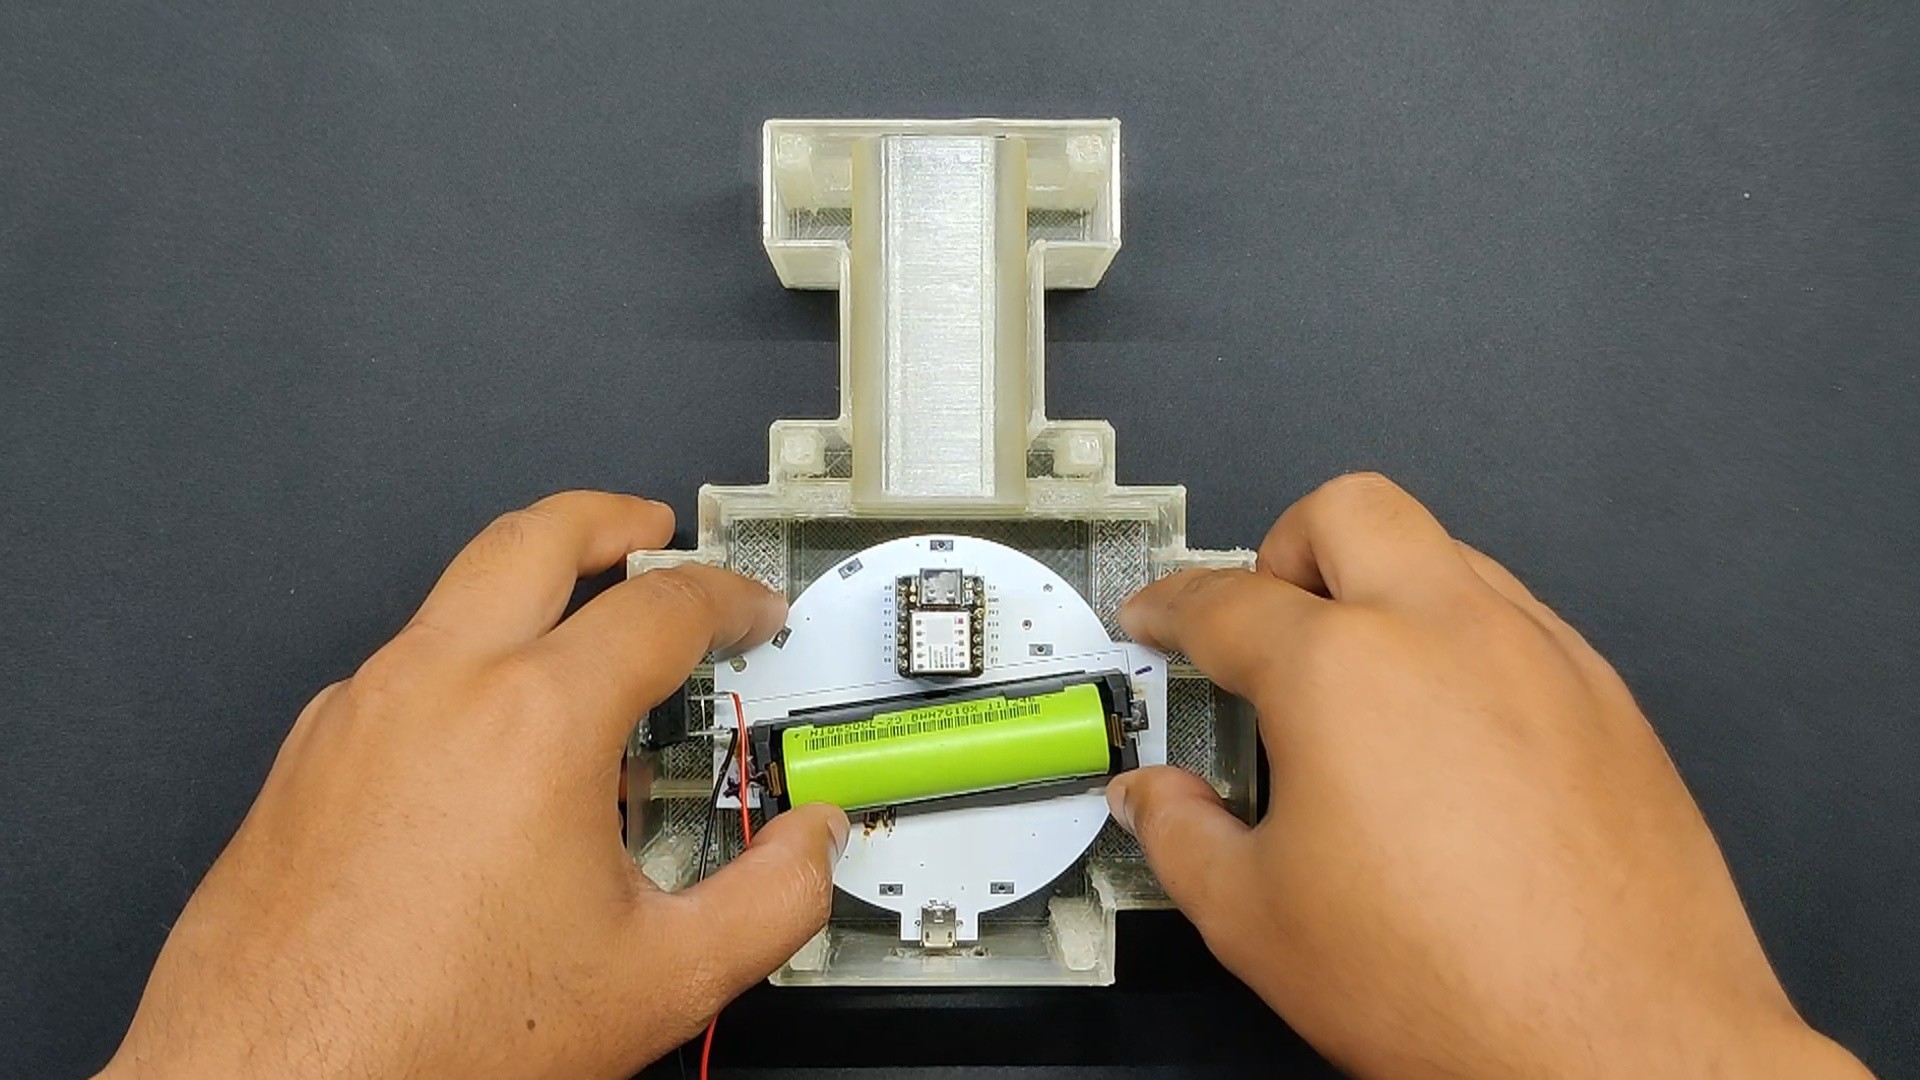
- We use a single 3.7V 2600mAh Li-ion cell that was added to the Li-ion cell holder with the right orientation.
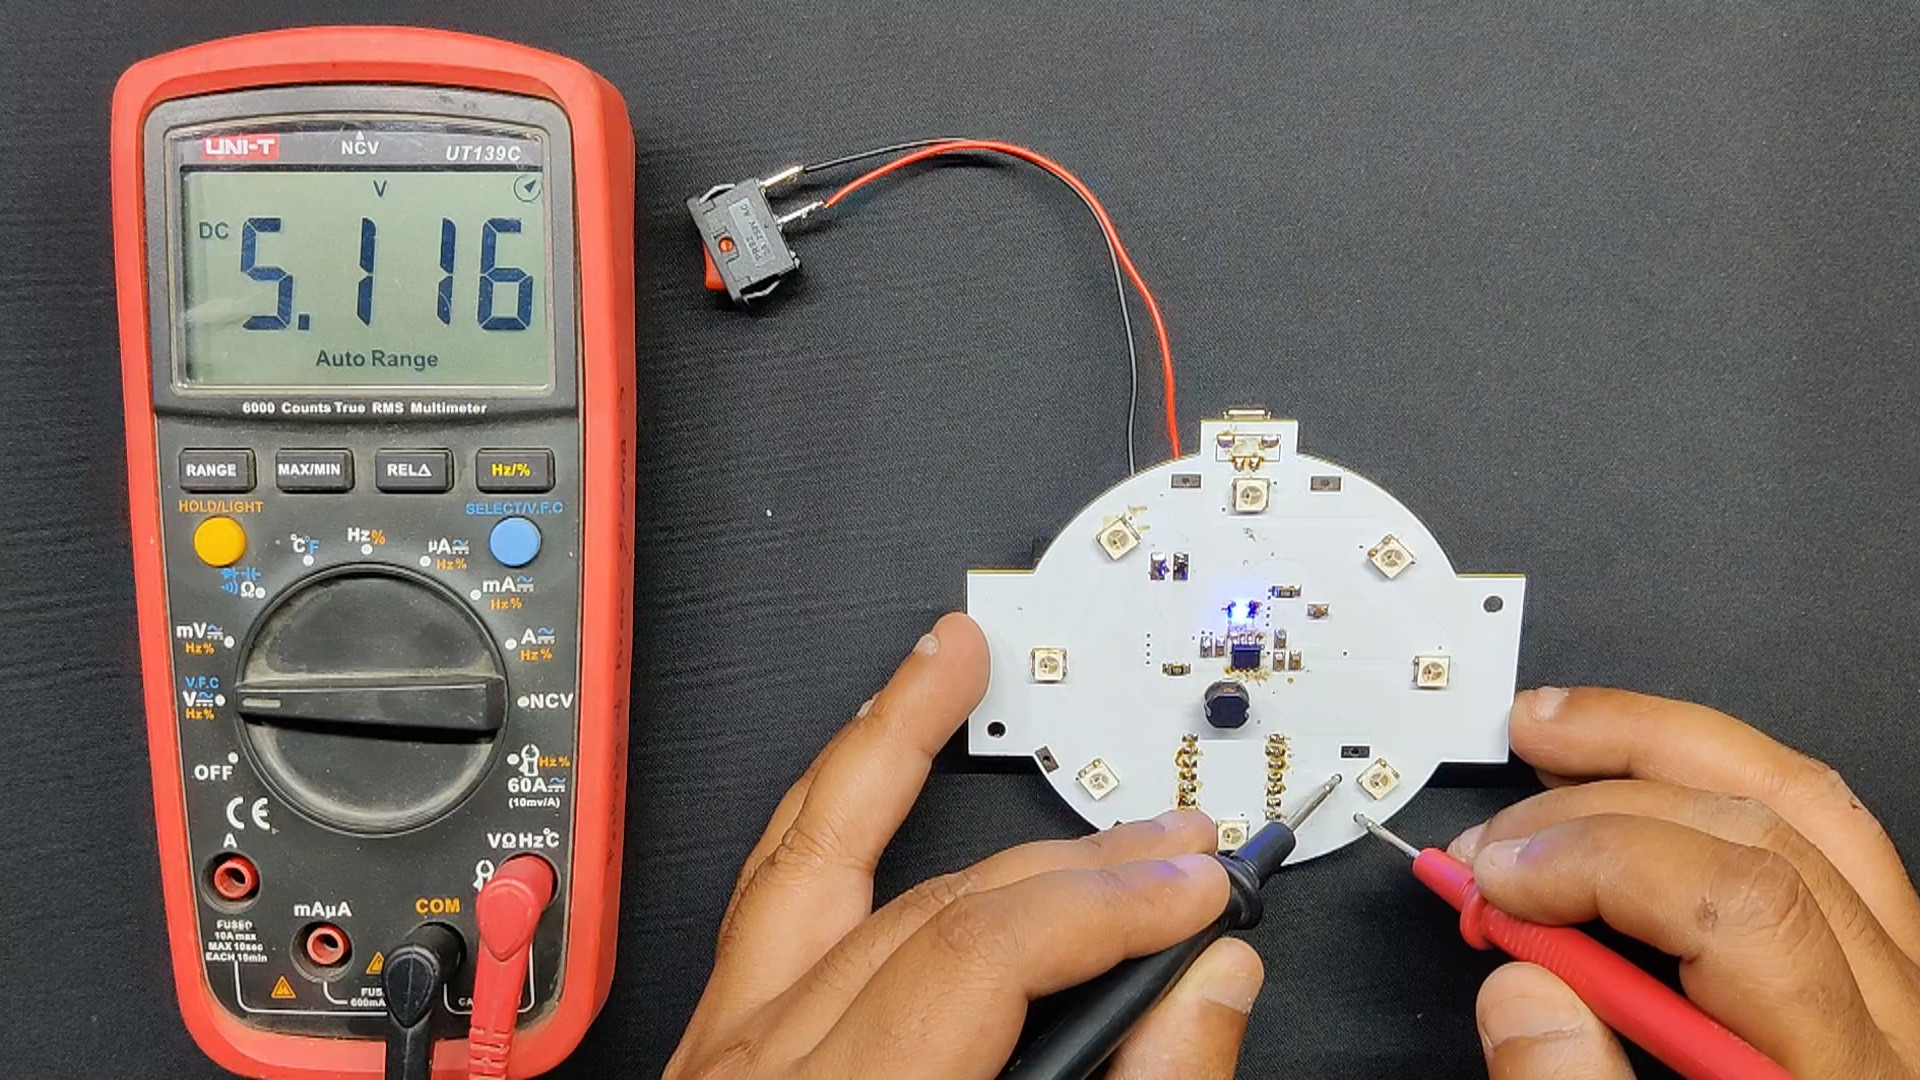
- Afterwards, we toggle the rocker switch. which will cause the IP5306 IC to be switched on; a double tap will cause it to switch off.
- We measure the IP5306 IC's output voltage using a multimeter; it is 5.1V, indicating that our configuration is functional. At this point, we can add XIAO to the device's header pins and proceed with the programming process.
-
3CODE
![]()
We loaded the following sketch into the XIAO SAMD21 microcontroller after completing the circuit. One of the sketches from the FastLED example is the Pacifica.
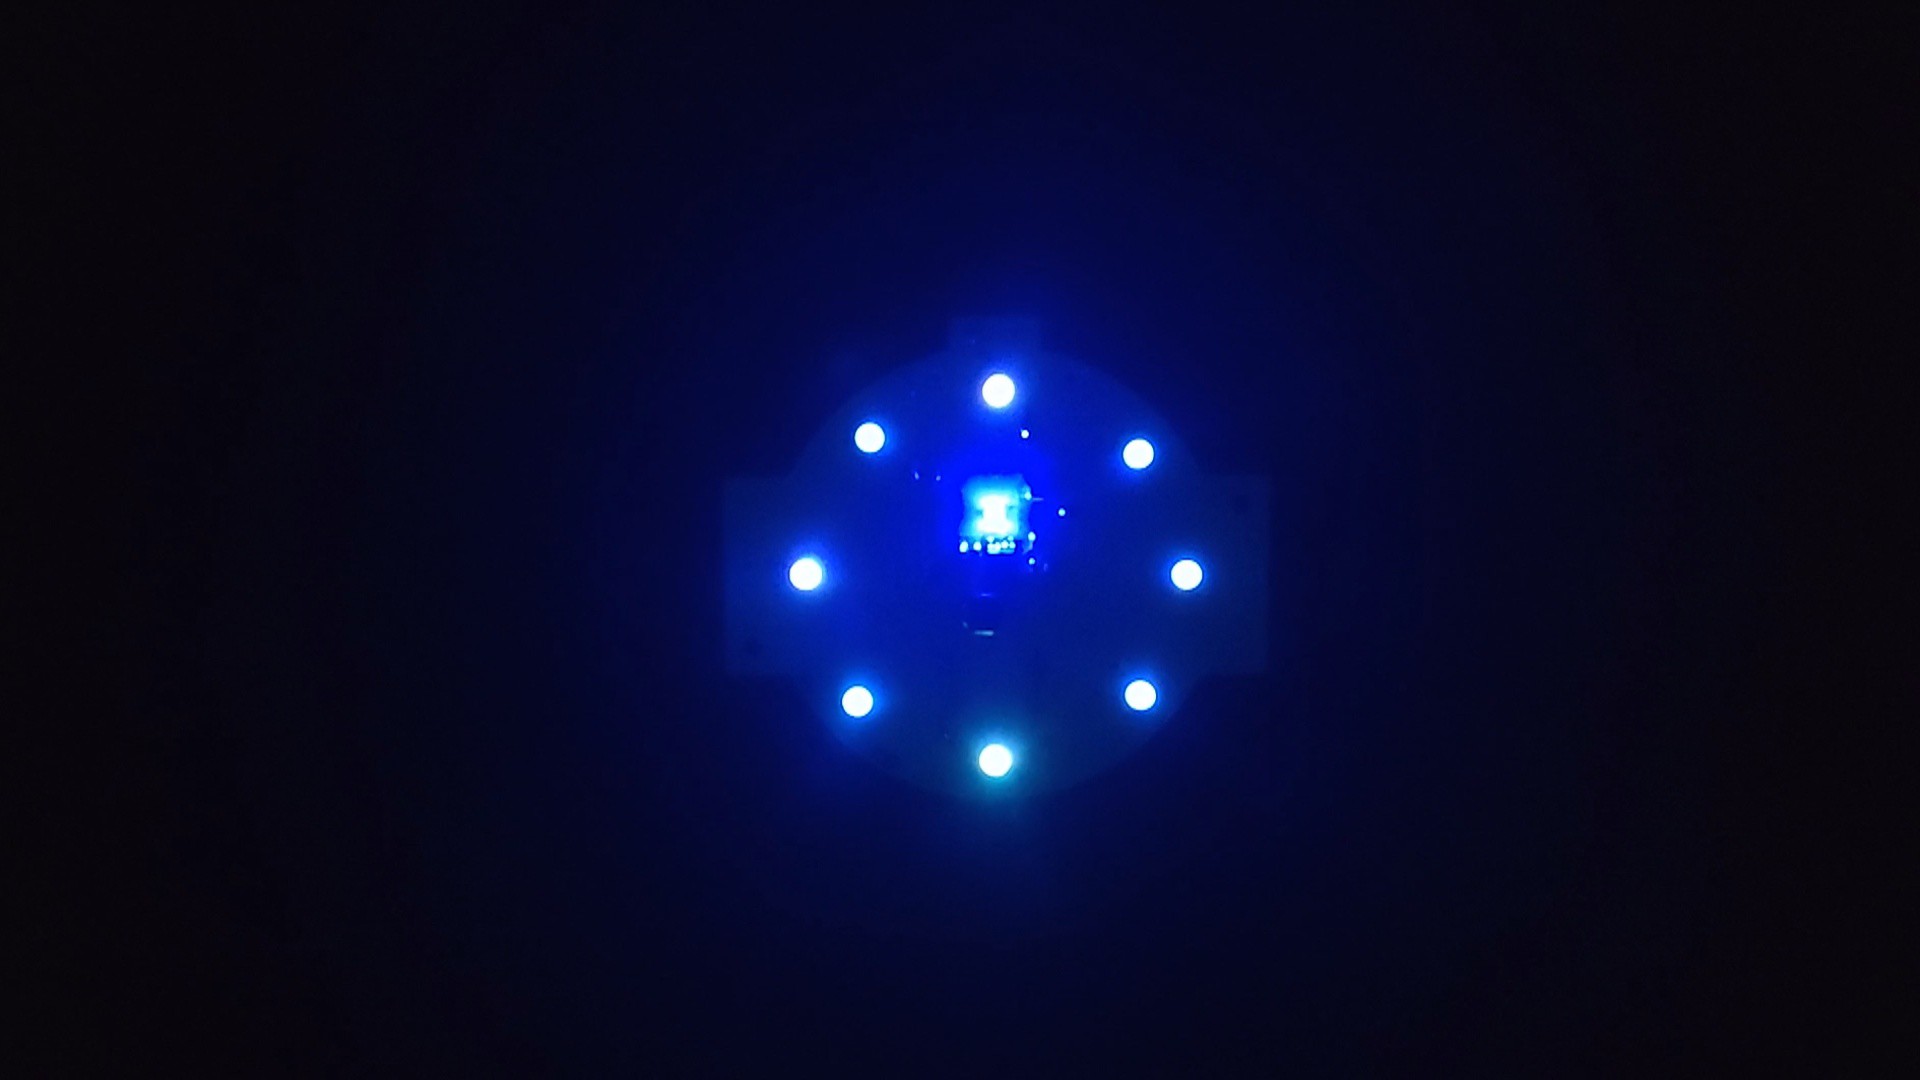
#define FASTLED_ALLOW_INTERRUPTS 0
#include <FastLED.h>
FASTLED_USING_NAMESPACE

#define DATA_PIN            D0
#define NUM_LEDS            8
#define MAX_POWER_MILLIAMPS 700
#define LED_TYPE            WS2812B
#define COLOR_ORDER         GRB

//////////////////////////////////////////////////////////////////////////

CRGB leds[NUM_LEDS];

void setup() {
  delay( 3000); // 3 second delay for boot recovery, and a moment of silence
  FastLED.addLeds<LED_TYPE,DATA_PIN,COLOR_ORDER>(leds, NUM_LEDS)
        .setCorrection( TypicalLEDStrip );
  FastLED.setMaxPowerInVoltsAndMilliamps( 5, MAX_POWER_MILLIAMPS);
}

void loop()
{
  EVERY_N_MILLISECONDS( 20) {
    pacifica_loop();
    FastLED.show();
  }
}

//////////////////////////////////////////////////////////////////////////
//
// The code for this animation is more complicated than other examples, and
// while it is "ready to run", and documented in general, it is probably not
// the best starting point for learning.  Nevertheless, it does illustrate some
// useful techniques.
//
//////////////////////////////////////////////////////////////////////////
//
// In this animation, there are four "layers" of waves of light.
//
// Each layer moves independently, and each is scaled separately.
//
// All four wave layers are added together on top of each other, and then
// another filter is applied that adds "whitecaps" of brightness where the
// waves line up with each other more.  Finally, another pass is taken
// over the led array to 'deepen' (dim) the blues and greens.
//
// The speed and scale and motion each layer varies slowly within independent
// hand-chosen ranges, which is why the code has a lot of low-speed 'beatsin8' functions
// with a lot of oddly specific numeric ranges.
//
// These three custom blue-green color palettes were inspired by the colors found in
// the waters off the southern coast of California, https://goo.gl/maps/QQgd97jjHesHZVxQ7
//
CRGBPalette16 pacifica_palette_1 =
    { 0x000507, 0x000409, 0x00030B, 0x00030D, 0x000210, 0x000212, 0x000114, 0x000117,
      0x000019, 0x00001C, 0x000026, 0x000031, 0x00003B, 0x000046, 0x14554B, 0x28AA50 };
CRGBPalette16 pacifica_palette_2 =
    { 0x000507, 0x000409, 0x00030B, 0x00030D, 0x000210, 0x000212, 0x000114, 0x000117,
      0x000019, 0x00001C, 0x000026, 0x000031, 0x00003B, 0x000046, 0x0C5F52, 0x19BE5F };
CRGBPalette16 pacifica_palette_3 =
    { 0x000208, 0x00030E, 0x000514, 0x00061A, 0x000820, 0x000927, 0x000B2D, 0x000C33,
      0x000E39, 0x001040, 0x001450, 0x001860, 0x001C70, 0x002080, 0x1040BF, 0x2060FF };


void pacifica_loop()
{
  // Increment the four "color index start" counters, one for each wave layer.
  // Each is incremented at a different speed, and the speeds vary over time.
  static uint16_t sCIStart1, sCIStart2, sCIStart3, sCIStart4;
  static uint32_t sLastms = 0;
  uint32_t ms = GET_MILLIS();
  uint32_t deltams = ms - sLastms;
  sLastms = ms;
  uint16_t speedfactor1 = beatsin16(3, 179, 269);
  uint16_t speedfactor2 = beatsin16(4, 179, 269);
  uint32_t deltams1 = (deltams * speedfactor1) / 256;
  uint32_t deltams2 = (deltams * speedfactor2) / 256;
  uint32_t deltams21 = (deltams1 + deltams2) / 2;
  sCIStart1 += (deltams1 * beatsin88(1011,10,13));
  sCIStart2 -= (deltams21 * beatsin88(777,8,11));
  sCIStart3 -= (deltams1 * beatsin88(501,5,7));
  sCIStart4 -= (deltams2 * beatsin88(257,4,6));

  // Clear out the LED array to a dim background blue-green
  fill_solid( leds, NUM_LEDS, CRGB( 2, 6, 10));

  // Render each of four layers, with different scales and speeds, that vary over time
  pacifica_one_layer( pacifica_palette_1, sCIStart1, beatsin16( 3, 11 * 256, 14 * 256), beatsin8( 10, 70, 130), 0-beat16( 301) );
  pacifica_one_layer( pacifica_palette_2, sCIStart2, beatsin16( 4,  6 * 256,  9 * 256), beatsin8( 17, 40,  80), beat16( 401) );
  pacifica_one_layer( pacifica_palette_3, sCIStart3, 6 * 256, beatsin8( 9, 10,38), 0-beat16(503));
  pacifica_one_layer( pacifica_palette_3, sCIStart4, 5 * 256, beatsin8( 8, 10,28), beat16(601));

  // Add brighter 'whitecaps' where the waves lines up more
  pacifica_add_whitecaps();

  // Deepen the blues and greens a bit
  pacifica_deepen_colors();
}

// Add one layer of waves into the led array
void pacifica_one_layer( CRGBPalette16& p, uint16_t cistart, uint16_t wavescale, uint8_t bri, uint16_t ioff)
{
  uint16_t ci = cistart;
  uint16_t waveangle = ioff;
  uint16_t wavescale_half = (wavescale / 2) + 20;
  for( uint16_t i = 0; i < NUM_LEDS; i++) {
    waveangle += 250;
    uint16_t s16 = sin16( waveangle ) + 32768;
    uint16_t cs = scale16( s16 , wavescale_half ) + wavescale_half;
    ci += cs;
    uint16_t sindex16 = sin16( ci) + 32768;
    uint8_t sindex8 = scale16( sindex16, 240);
    CRGB c = ColorFromPalette( p, sindex8, bri, LINEARBLEND);
    leds[i] += c;
  }
}

// Add extra 'white' to areas where the four layers of light have lined up brightly
void pacifica_add_whitecaps()
{
  uint8_t basethreshold = beatsin8( 9, 55, 65);
  uint8_t wave = beat8( 7 );

  for( uint16_t i = 0; i < NUM_LEDS; i++) {
    uint8_t threshold = scale8( sin8( wave), 20) + basethreshold;
    wave += 7;
    uint8_t l = leds[i].getAverageLight();
    if( l > threshold) {
      uint8_t overage = l - threshold;
      uint8_t overage2 = qadd8( overage, overage);
      leds[i] += CRGB( overage, overage2, qadd8( overage2, overage2));
    }
  }
}

// Deepen the blues and greens
void pacifica_deepen_colors()
{
  for( uint16_t i = 0; i < NUM_LEDS; i++) {
    leds[i].blue = scale8( leds[i].blue,  145);
    leds[i].green= scale8( leds[i].green, 200);
    leds[i] |= CRGB( 2, 5, 7);
  }
}
Here, a deep aquatic blue glow that gradually fades into lighter blue tones is given off by the LED.
Make sure to download and install the FastLED sketch before uploading it to your board.
-
4Final Assembly
![]()
![]()
![]()
![]()
![]()
![]()
![]()
![]()
![]()
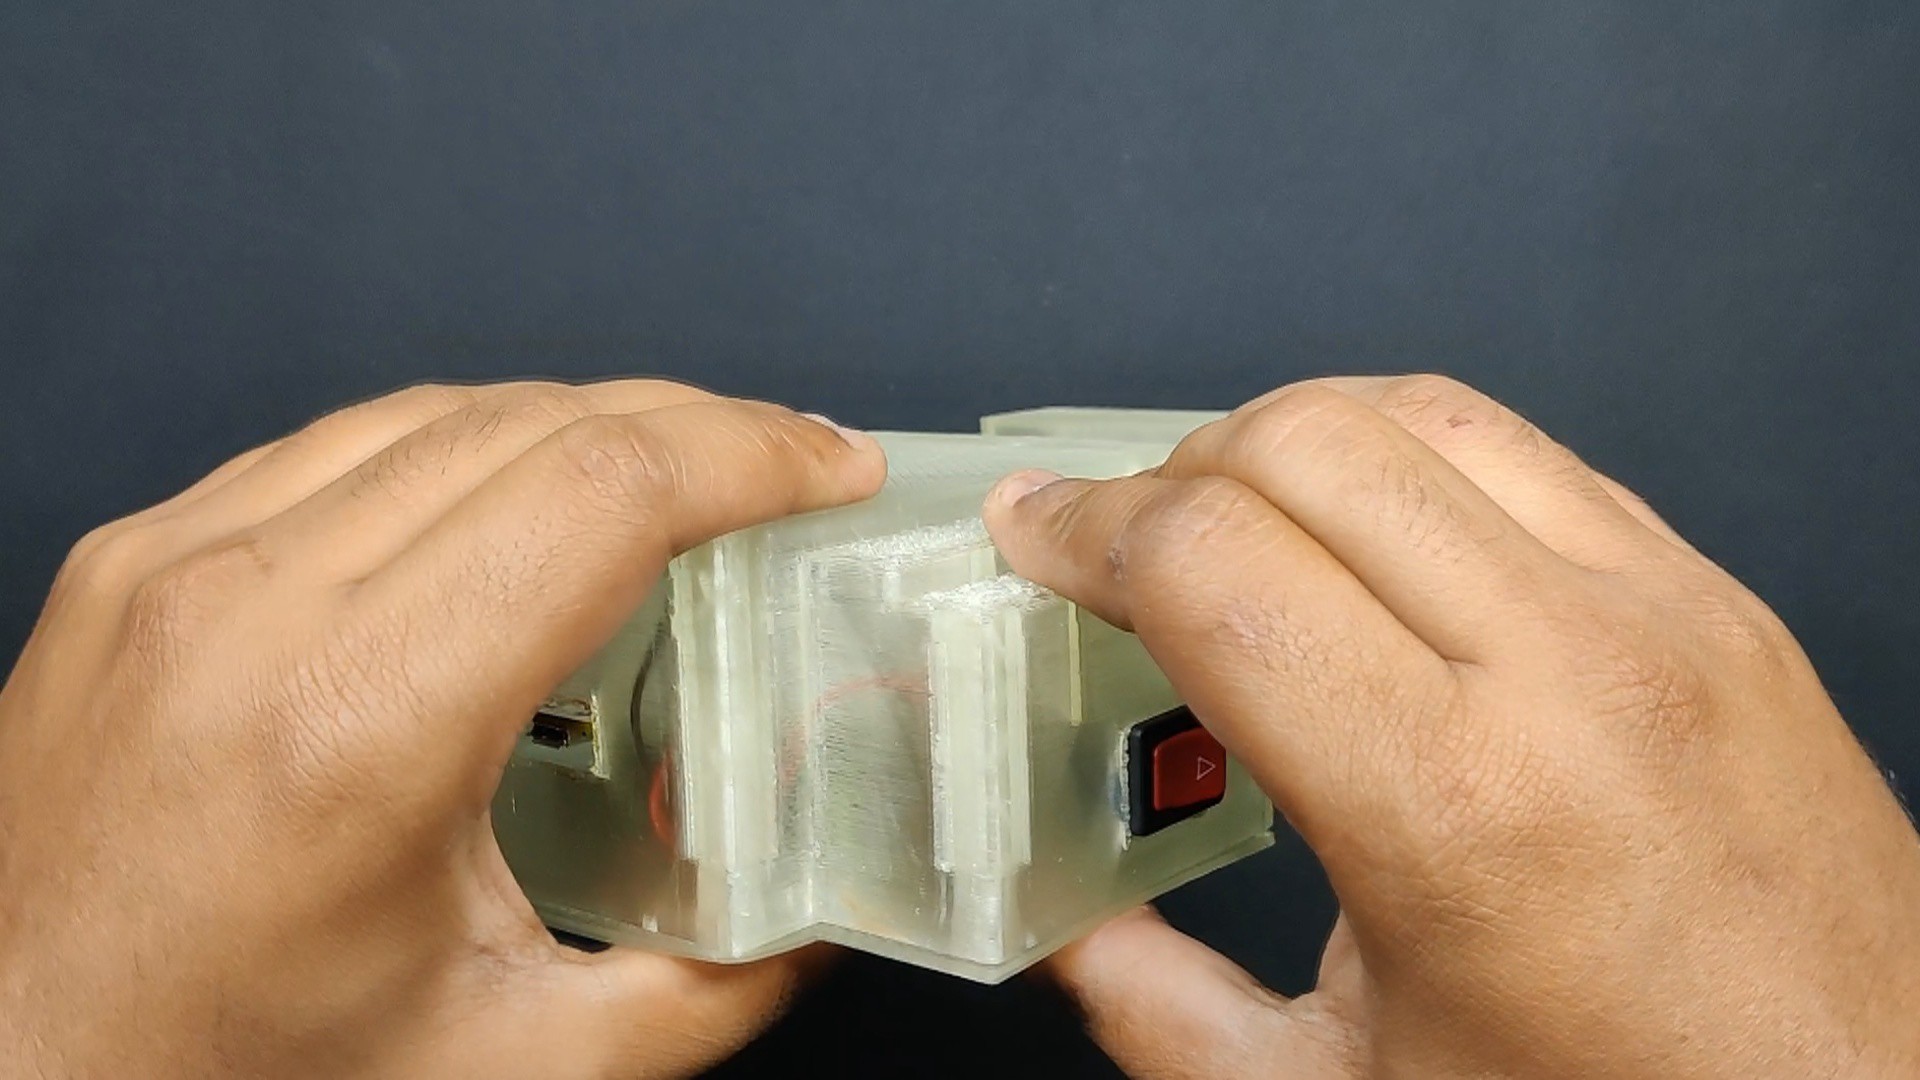
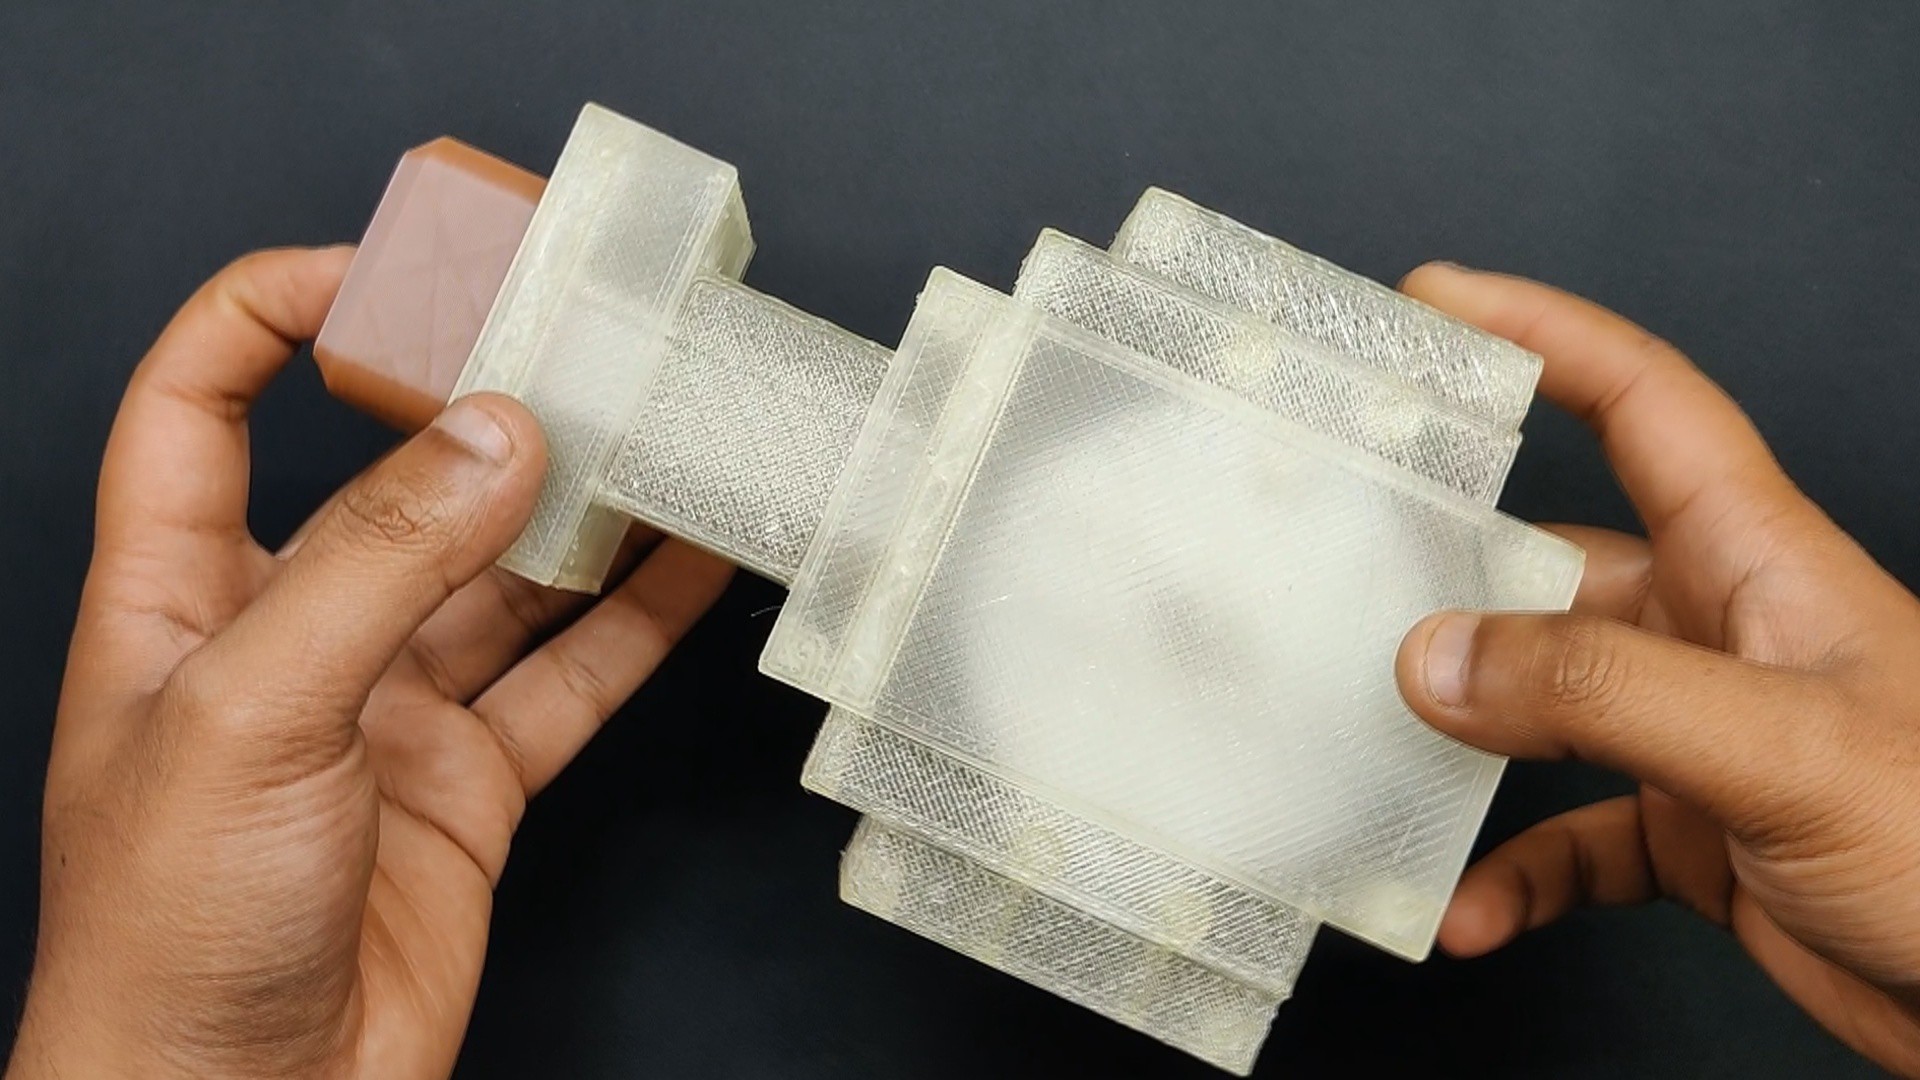
- The 3D-printed tray portion is right away placed inside the front part to start the main assembly. The neck section of the front part is modeled to keep the tray part in the correct orientation.
- Subsequently, we disconnected the switch's connections from the circuit and inserted the switch into the given Rocker switch slots on the body.
- After that, the circuit is installed using two M2 screws in the correct place.
- Rocker switch wires are then connected to the circuit.
- The lid is then positioned; it is a pressure-fitted part, which means that pressure is applied along the entire perimeter of the back lid section to secure it to the front part.
- The assembly is complete.
-
5RESULT
![]()
![]()
![]()
![]()
![]()
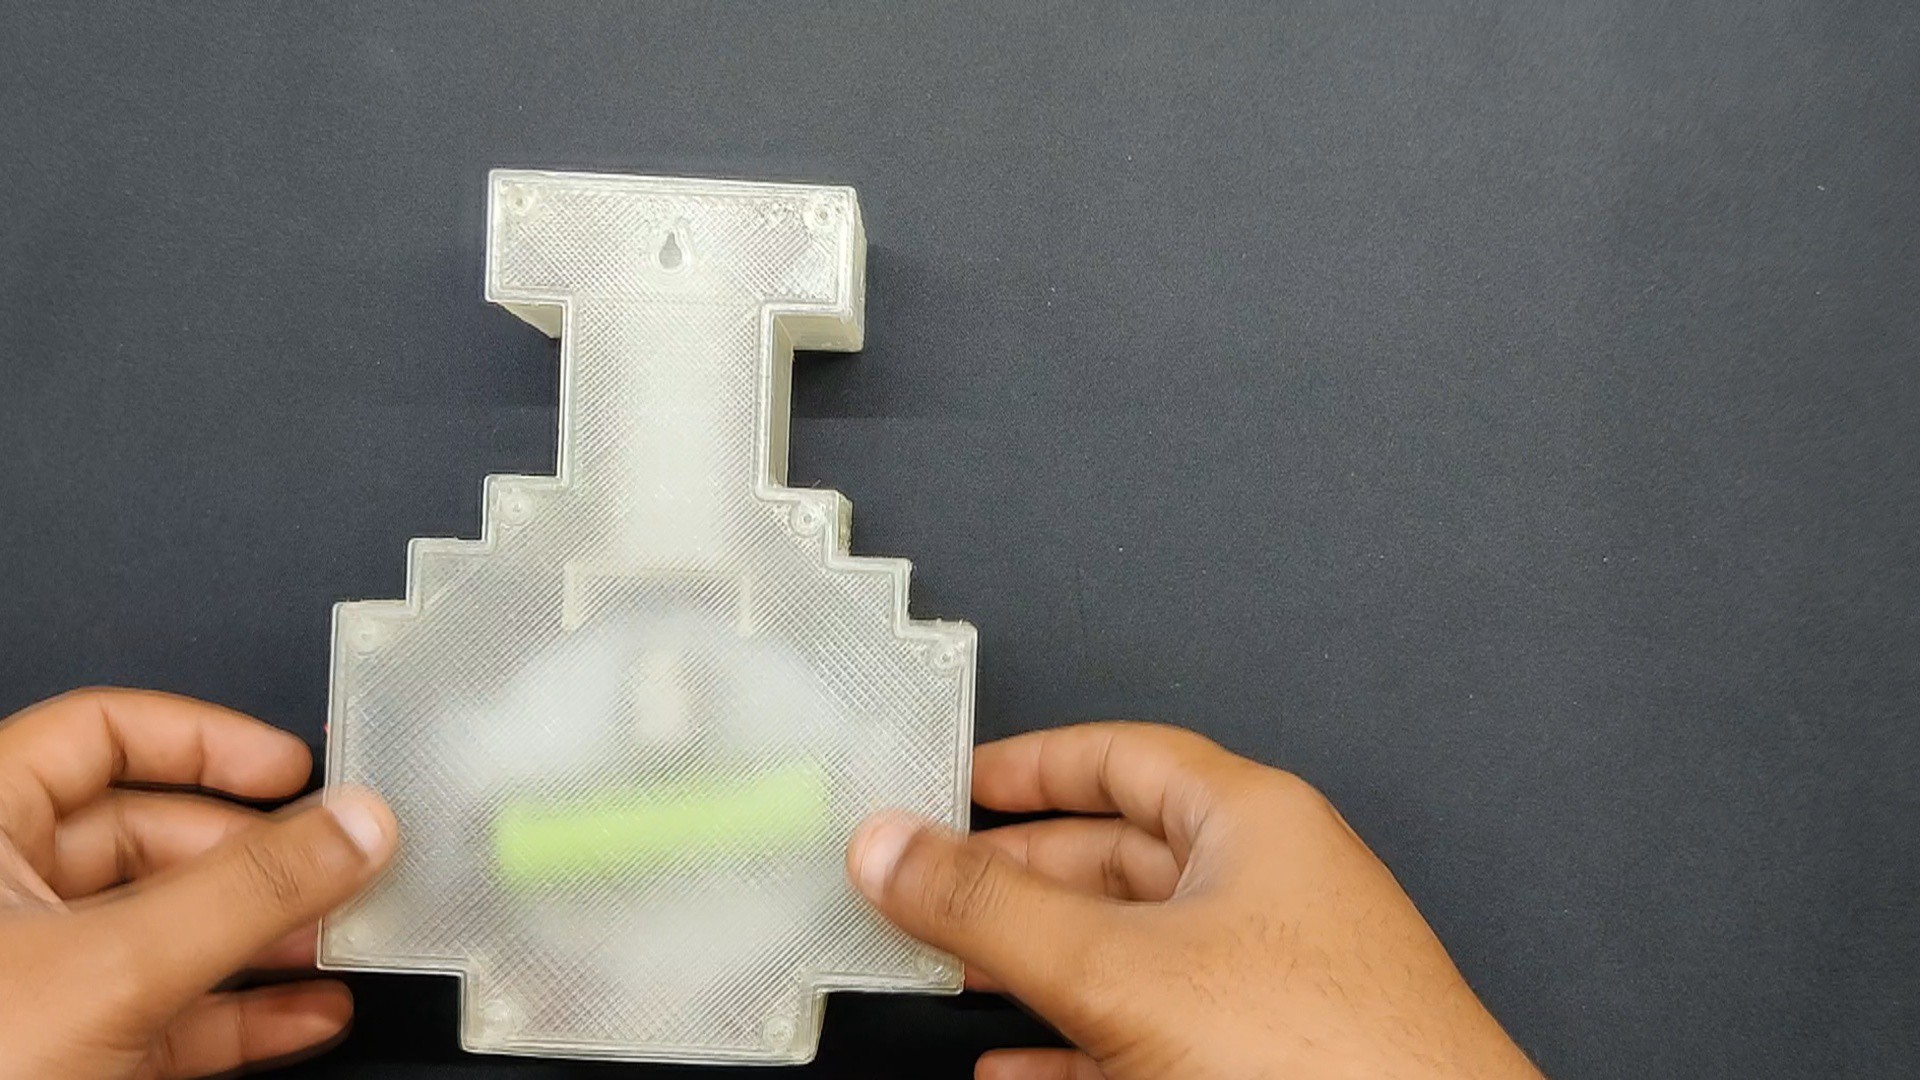
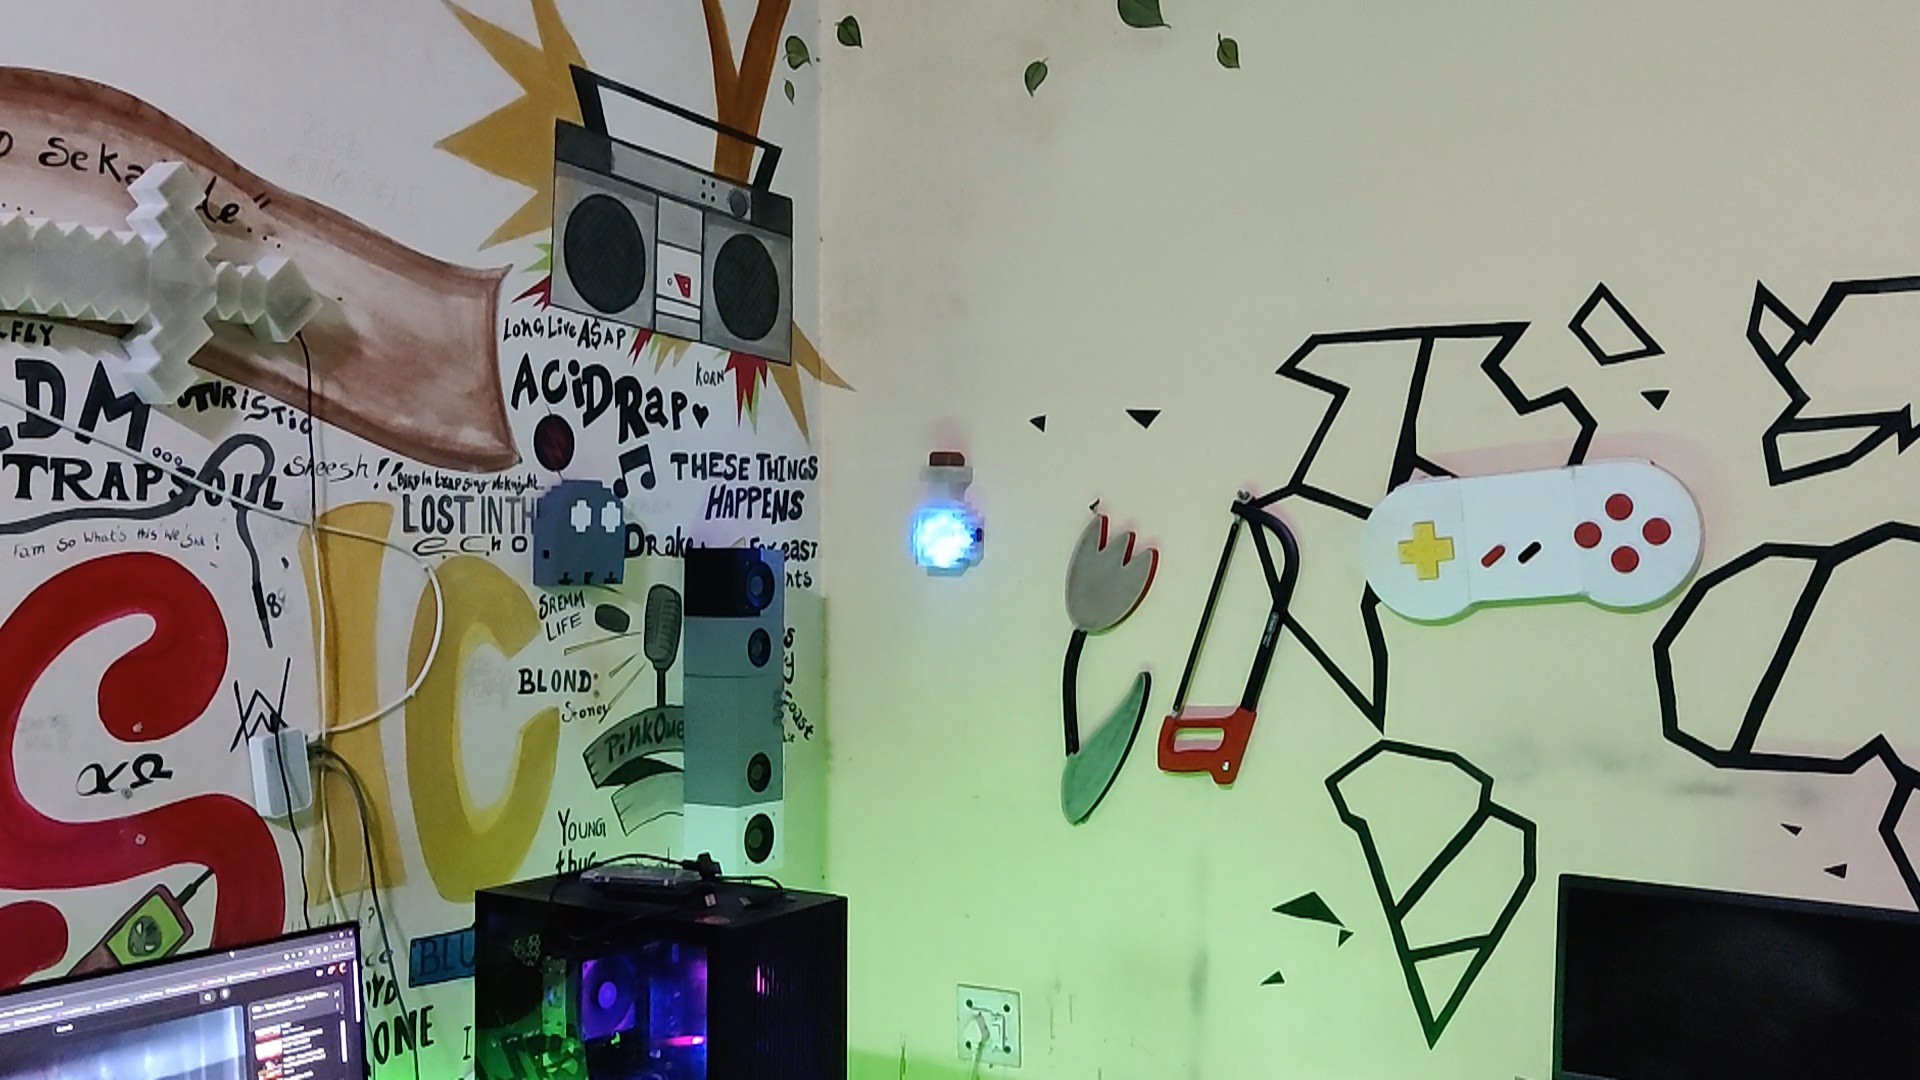
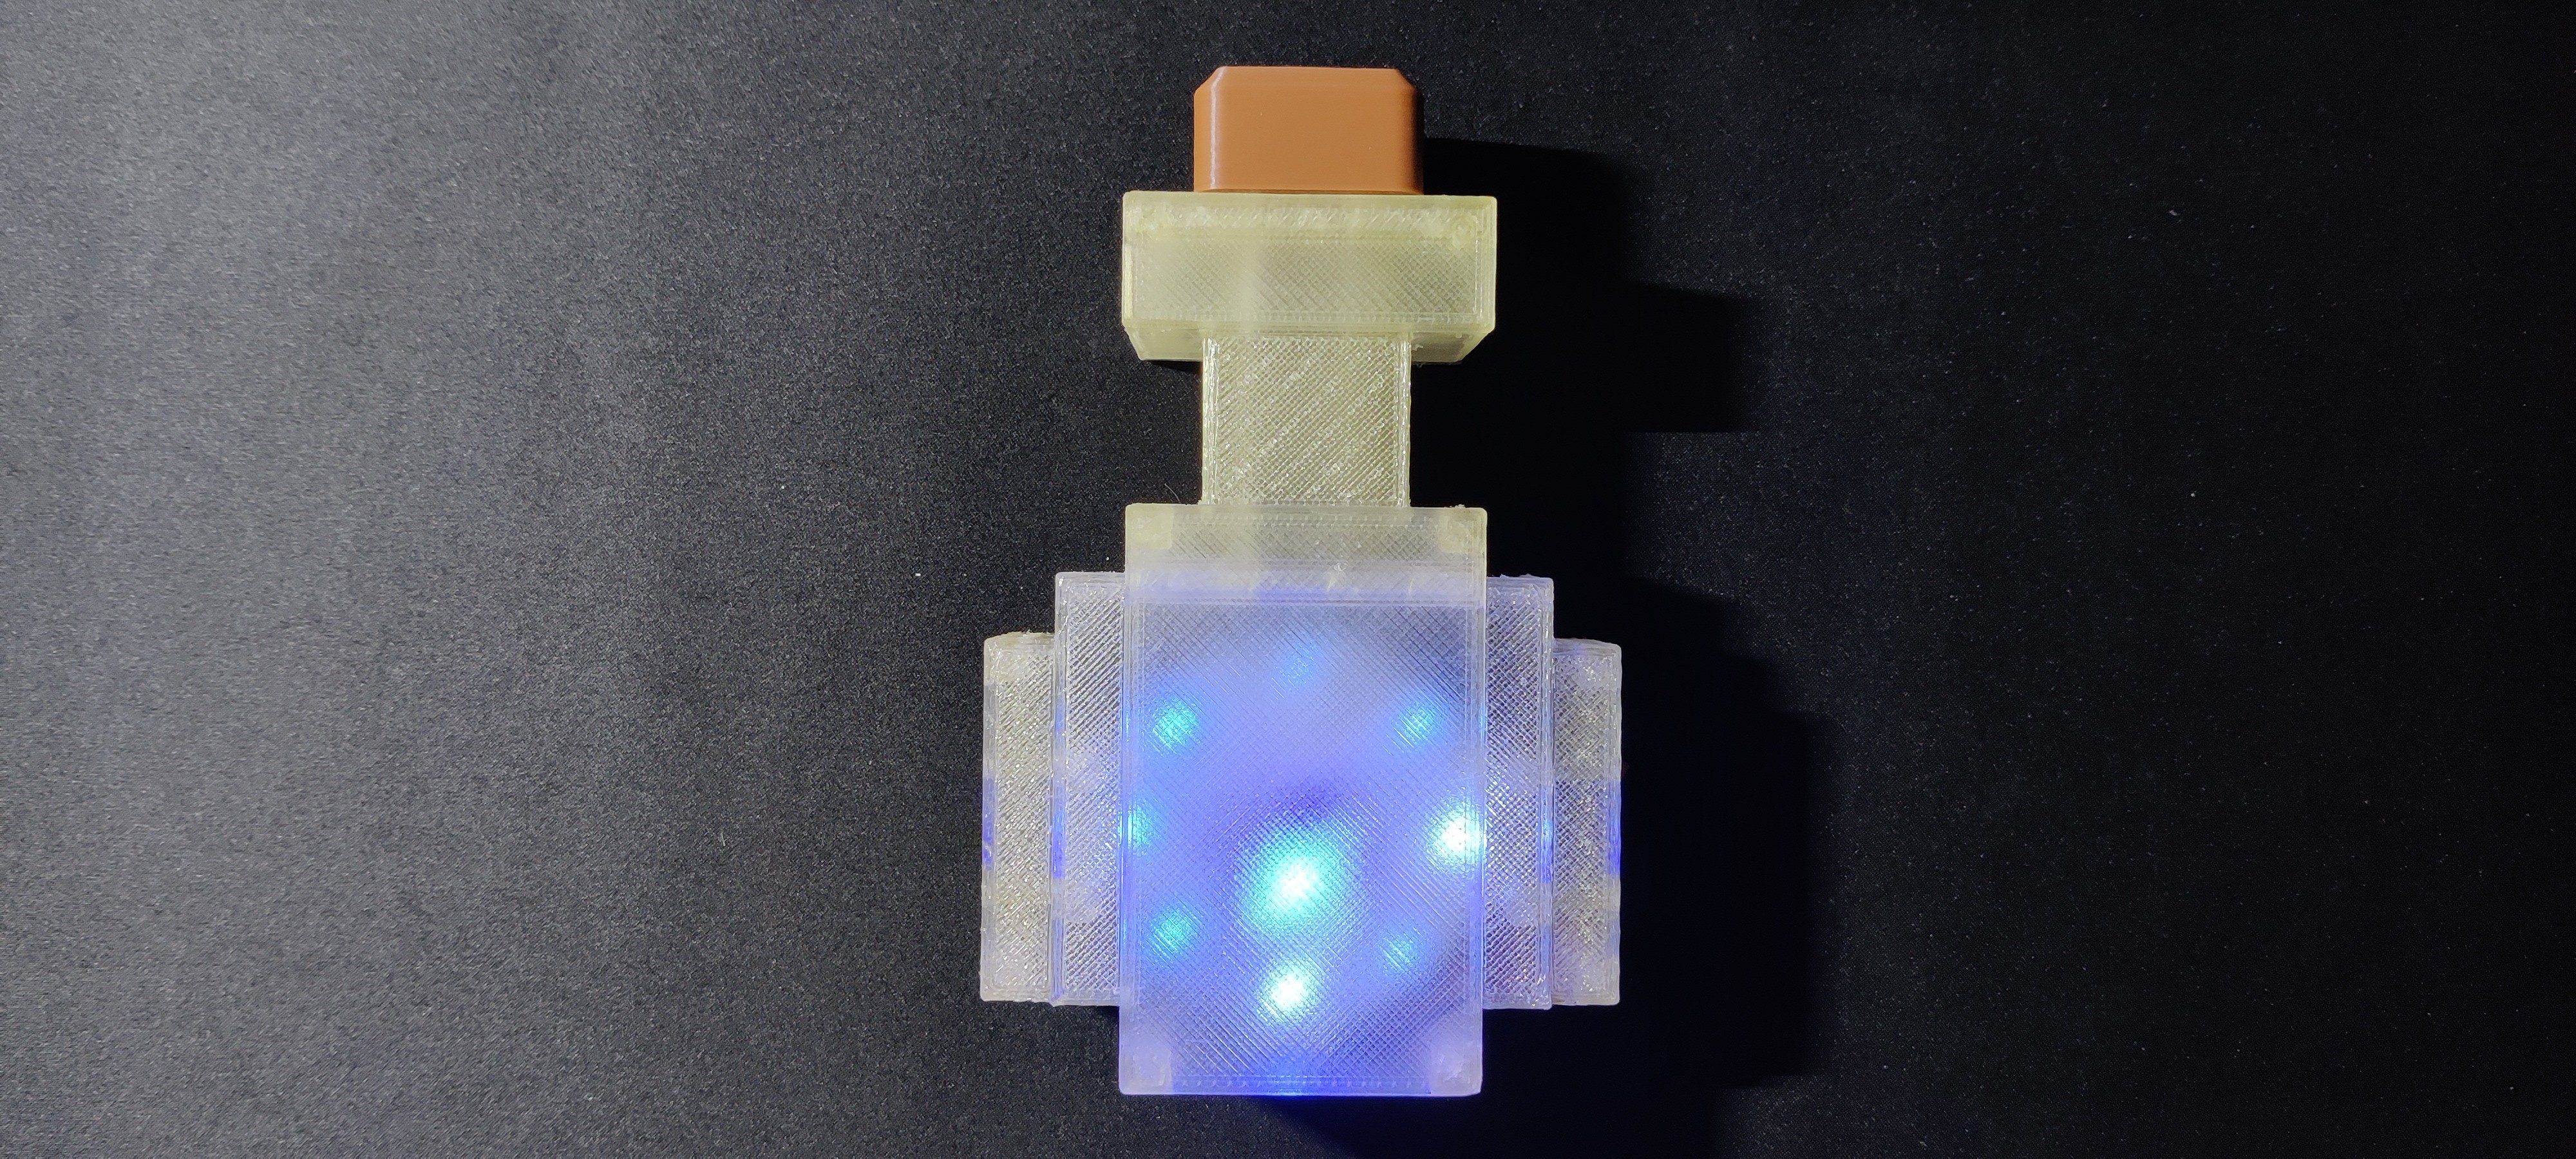
This is the end result of this little build: a full-sized Minecraft potion bottle that, unexpectedly, does not contain any fast speed, invisibility, or high jump potions. Instead, it has a hidden storage space and constantly glows in order to replicate the liquid within.
This arrangement was mounted on a wall for display. We did not need to add a power wire to power the setup because of the internal power supply. But when the setup discharges, the battery needs to be charged, and it is easy to do because the bottle has a micro USB outlet on the bottom.
Overall, this project was a success and needs no further revision.
Comment if you need any help or information regarding this project.
Checkout my preciously built Minecraft-themed projects-
https://www.hackster.io/Arnov_Sharma_makes/minecraft-torch-ef5757
https://www.hackster.io/Arnov_Sharma_makes/wall-mounted-minecraft-sword-b6edb6
Thanks to Seeed Studio Fusion for supporting this project.
You guys can check them out if you need great PCB and stencil service for less cost and great quality.
And I'll be back with a new project pretty soon!
Minecraft Potion Bottle
Made a full-size Potion bottle from Minecraft, Powered by XIAO MCU, it hides a few secrets.


Discussions
Become a Hackaday.io Member
Create an account to leave a comment. Already have an account? Log In.