 Rex.Tang
Summary
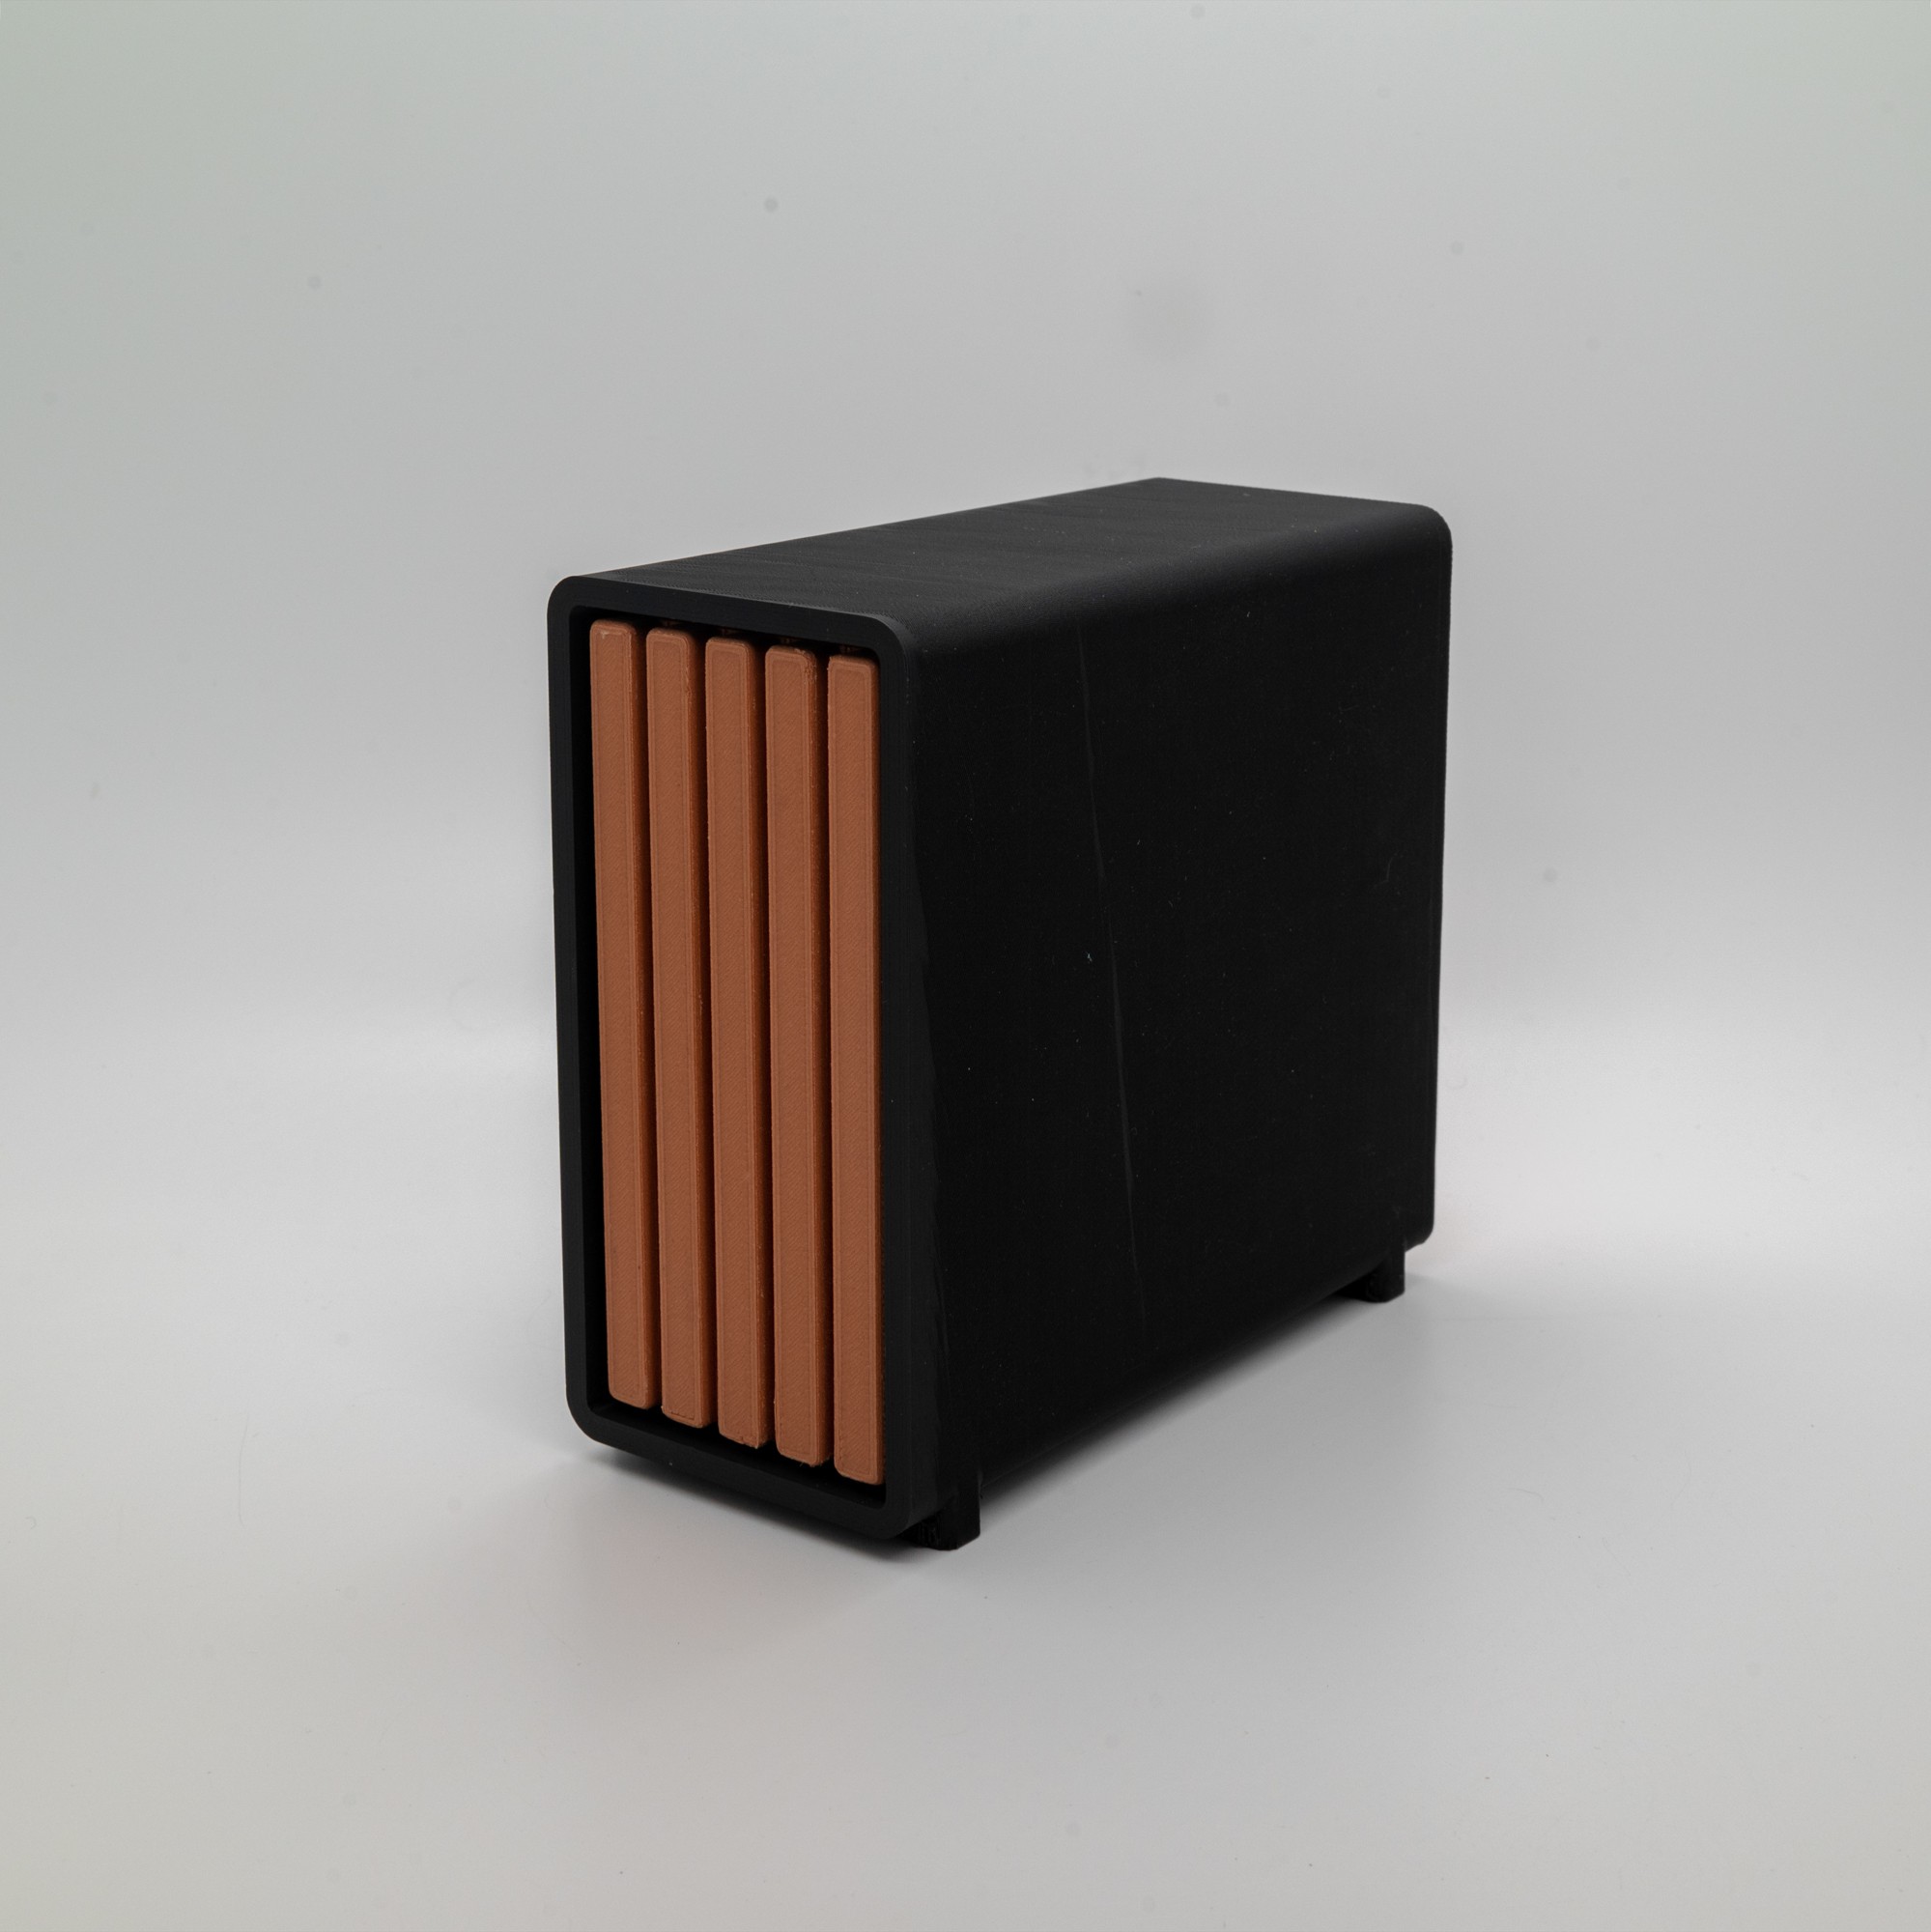
The design style of this case is inspired by Fractal Design's North Pi, but the structure is completely different.

But Swap Pi features a pull-out design overall, making it easy for quick disassembly and assembly.
production process
Electronic
Rear IO

Use the DeskPi KL-P24 Micro HDMI to HDMI expansion boardto route the USB and micro HDMI ports of the Pi 5 to the back.
NVMe expansion
On the other side, you can install an NVMe expansion board.
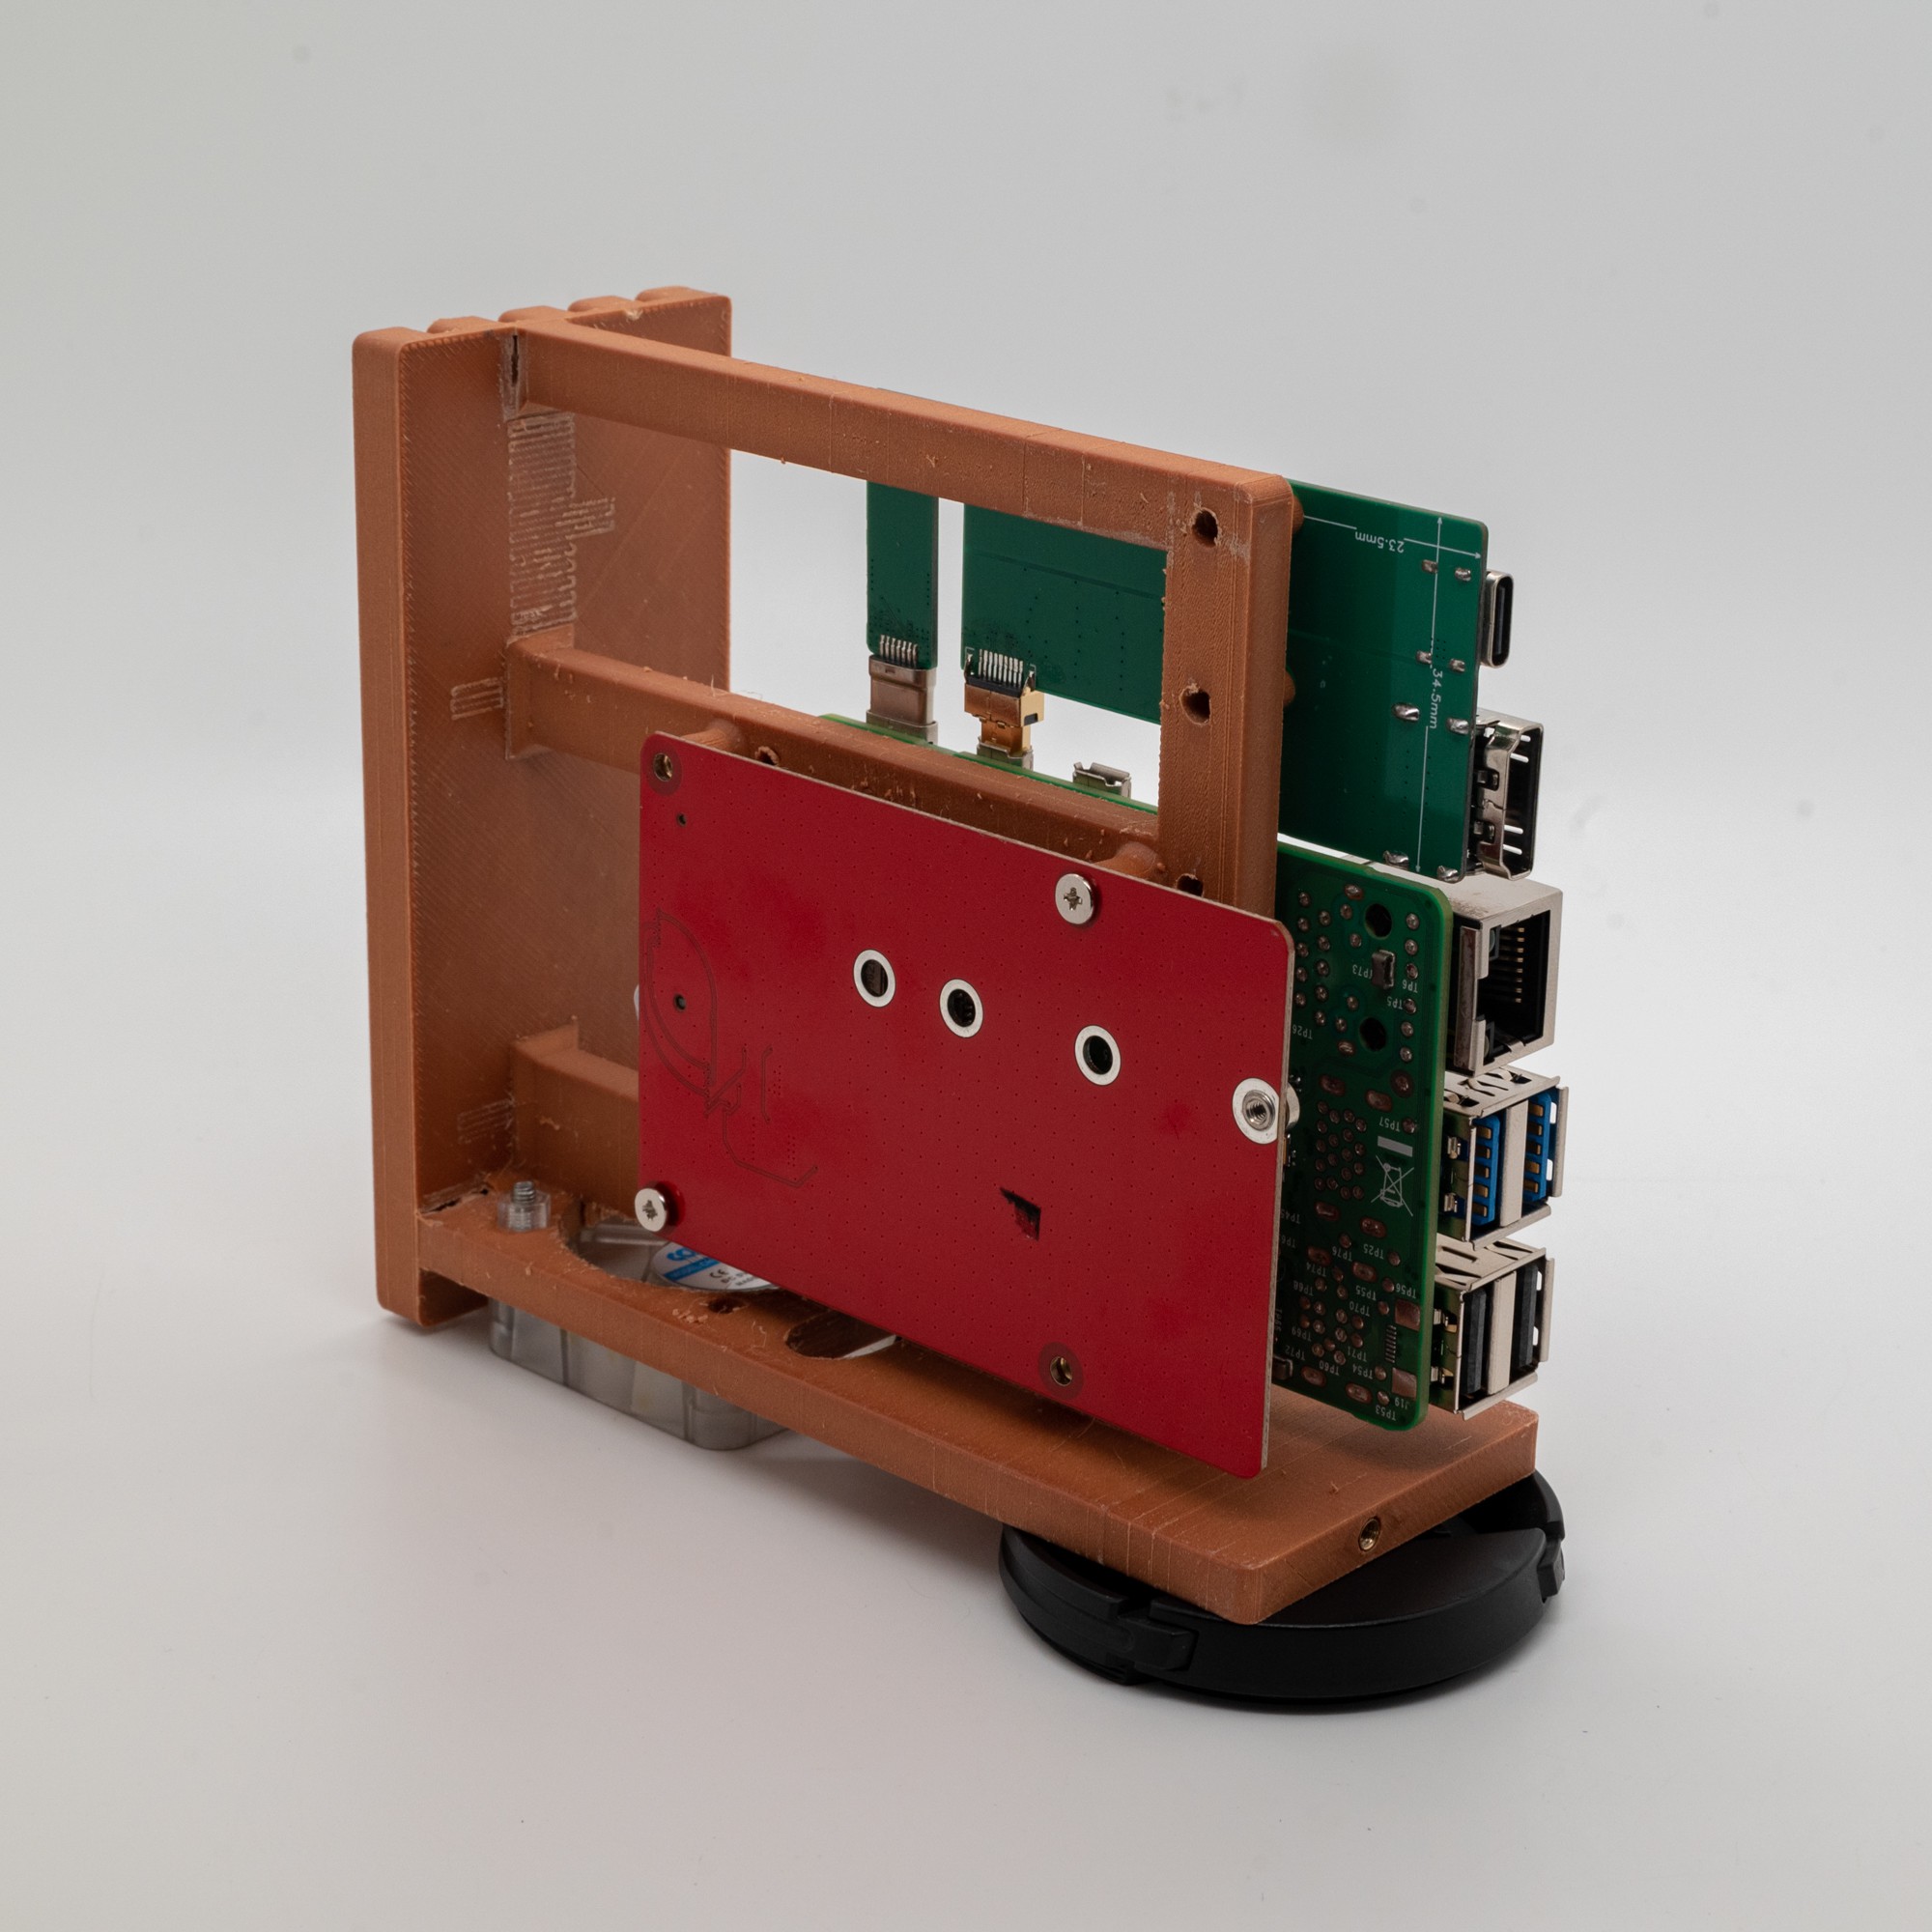
This red NVMe expansion board NVPI5-2280B from PCBWay comes with cables that can be used directly. It seems to be the only 2280 expansion board with just enough cable lengths
It also supports some other NVMe expansion boards, but some longer cables separately or you need modify fan power supply.
for more bords list, please visit my github: https://github.com/tltangliang/Swap-Pi-Raspberry-Pi-5-case
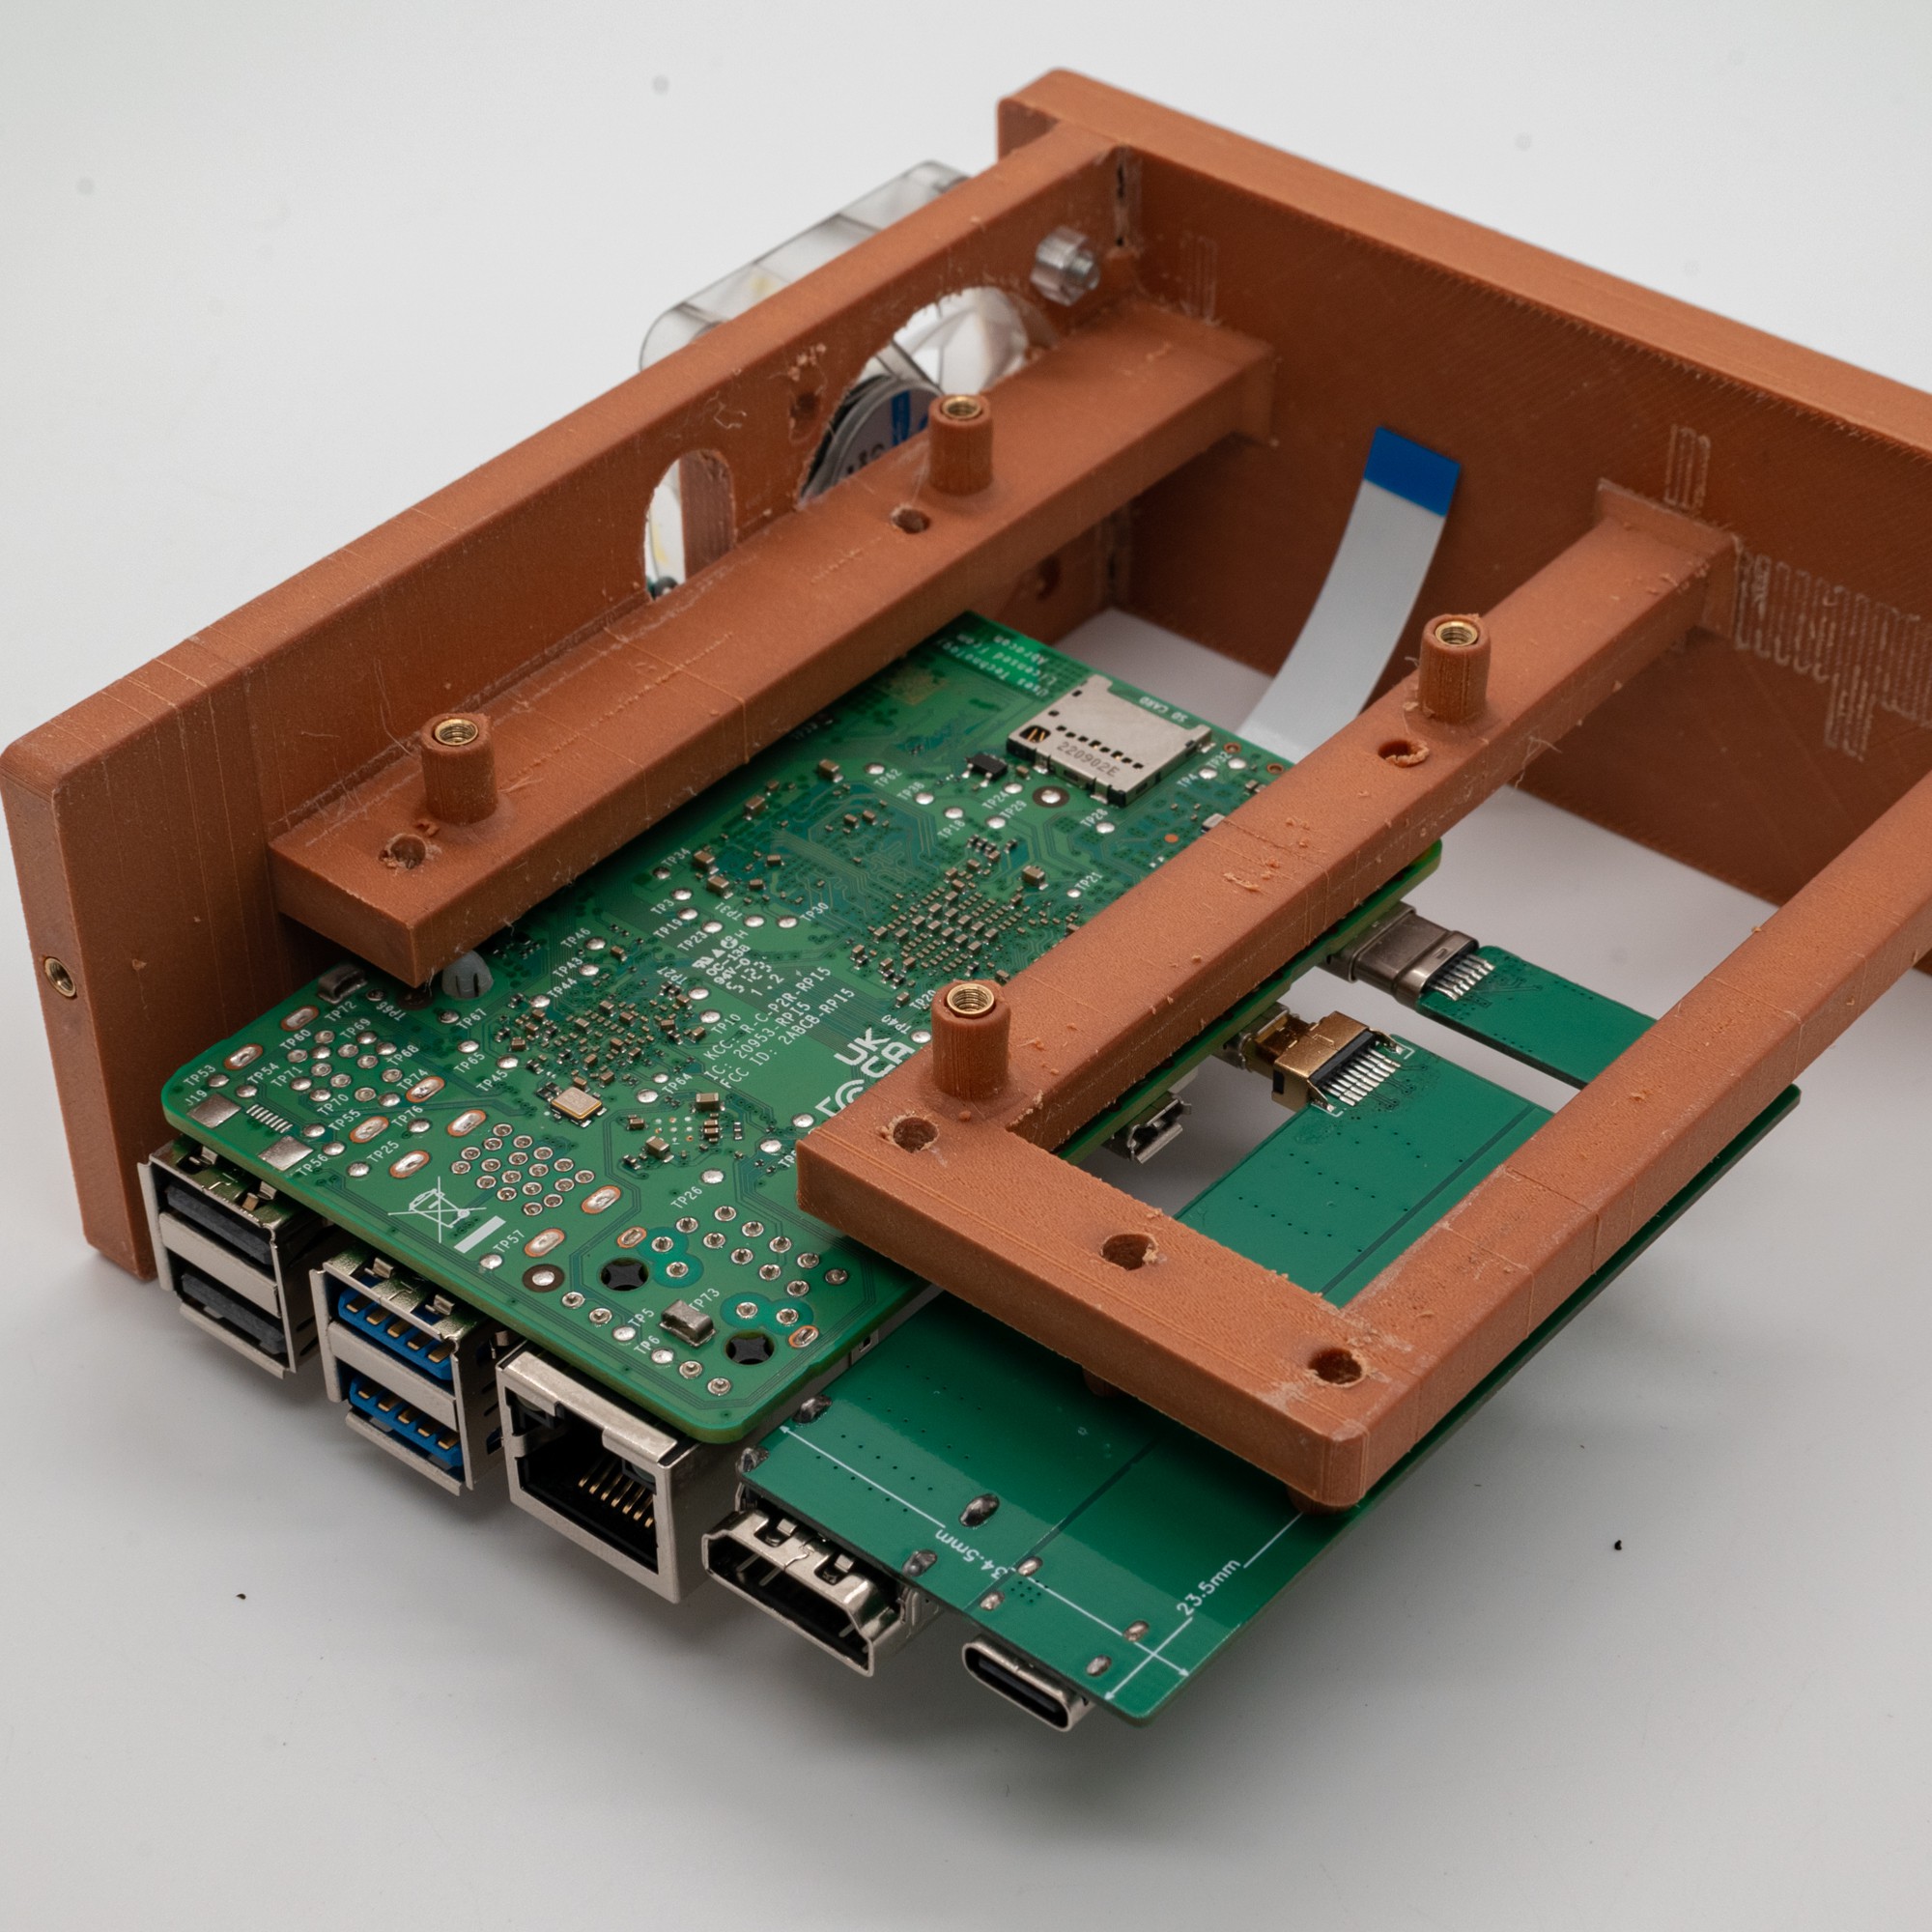
PWM WS2812 RGB 4010 FAN
I placed a interesting 4010 PI PWM RGB FAN at the bottom of the case.

This 4-wire fan is different from all other 4-wire fans, its four signals are 5V power, ground, pwm, data, there is no speed measurement, but a data line to control the ws2812 inside the fan.
It can be controlled directly using a raspberry pi gpio to synchronize the fan speed and the color of the RGB through the cpu temperature.
It's so cool.
Heat Set Insert
All screws are fixed with heat-set nuts, please use M2.554.
Assemble
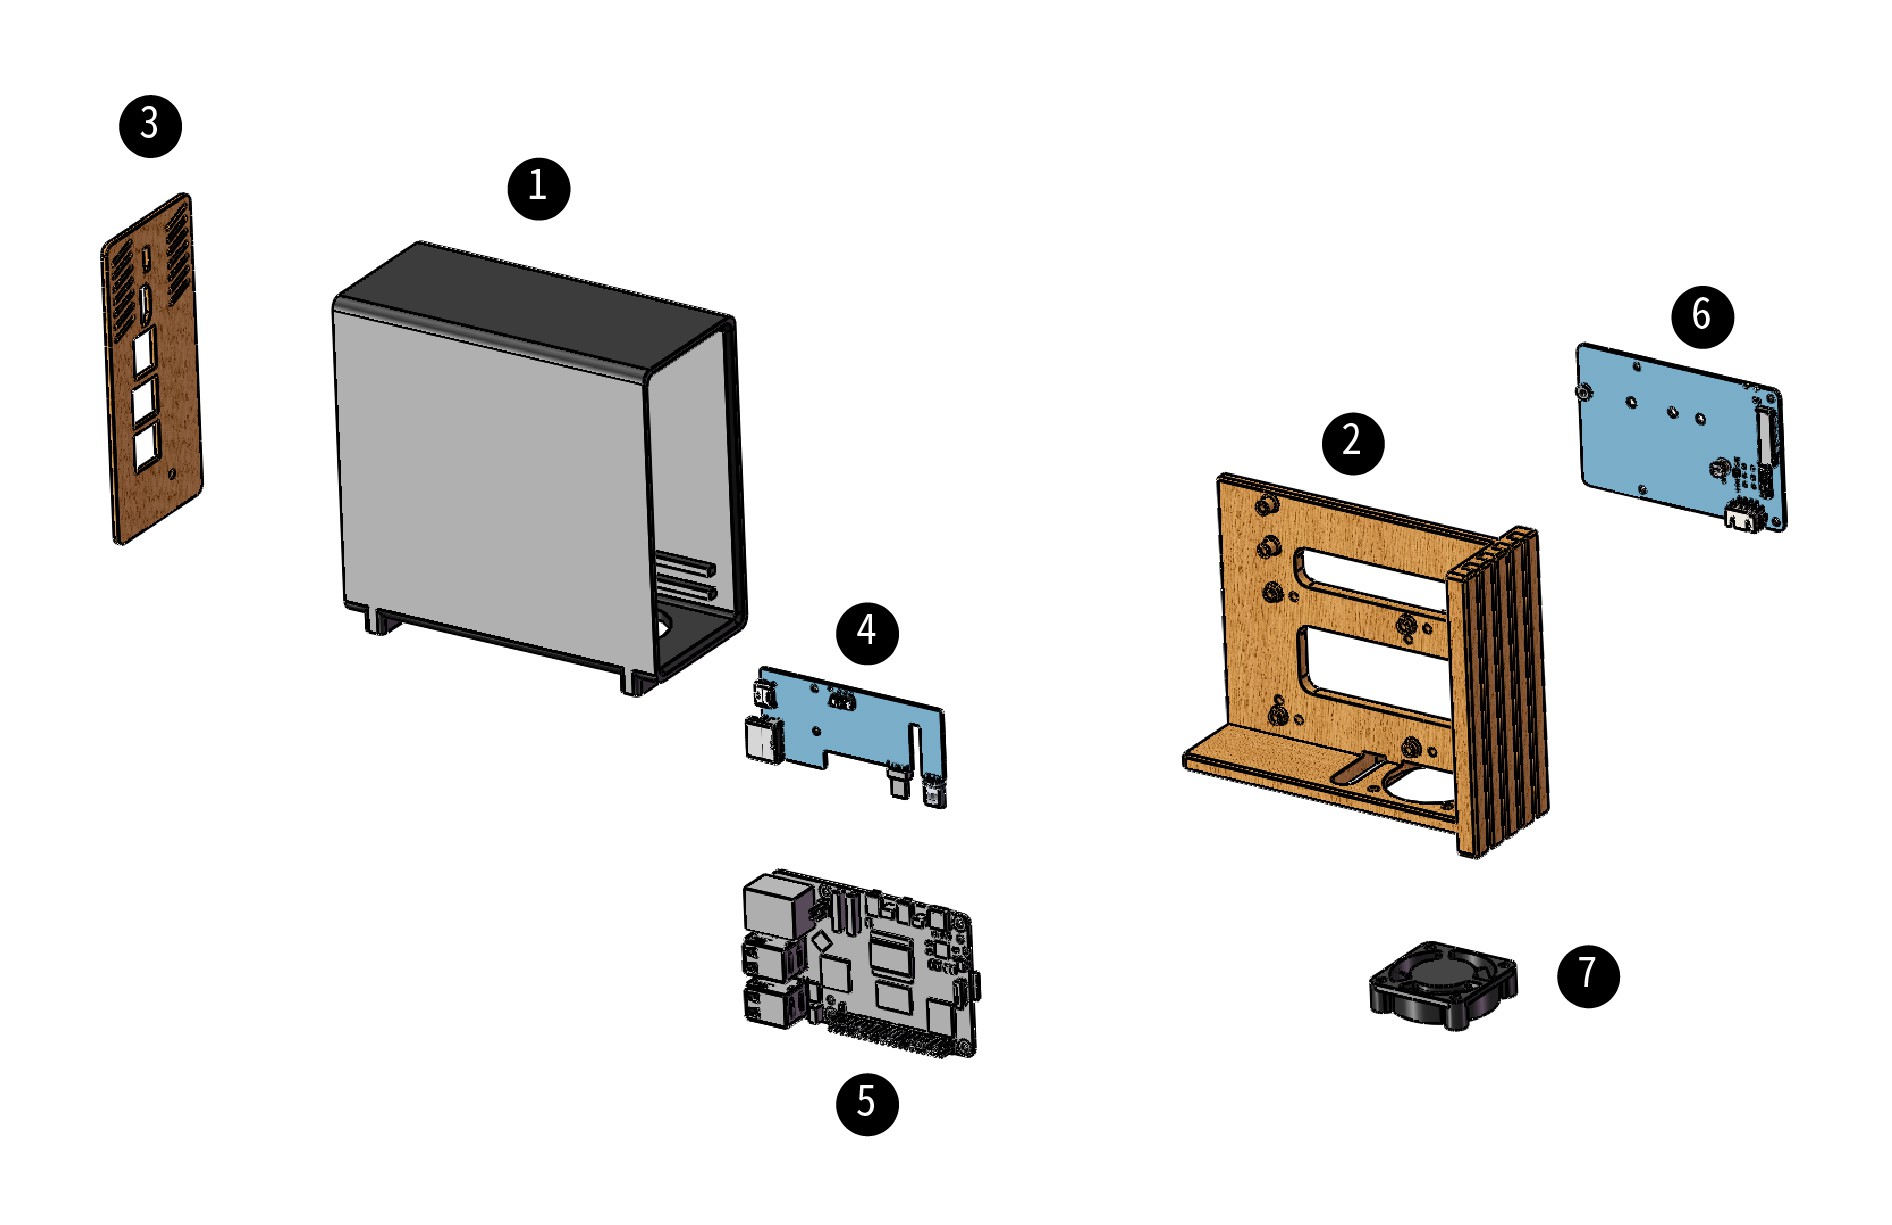
Swap Pi has 7 parts:
- Swap Pi Case main part ( 3D print )
- Swap Pi Case front part ( 3D print )
- Swap Pi Case back part ( 3D print )
- DeskPi KL-P24 Micro HDMI to HDMI Adapter Board ( from DeskPi.com )
- Raspberry Pi 5 ( from Raspberry Pi )
- NVMe base board NVPI5-2280B (from PCBWay)
- 4010 FAN (from amazon.com )
Assembled Accessories
- M2.5 screw x 11
- M2.554 heat-set nuts x 11


 akanzler007
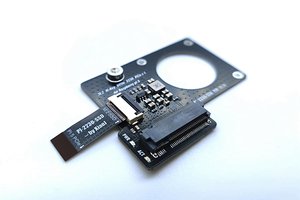
 Xiaoj329
 Dan Julio
Very nice design