 Robert Mordzon
-
1Instructions are at Github
https://github.com/Web3-Pi/raspberry-pi-lcd-dashboard
Requirements
- Python >= 3.9
- Run on Raspberry Pi 4 and 5
- Raspberry Pi OS or Ubuntu
- SPI interface enabled
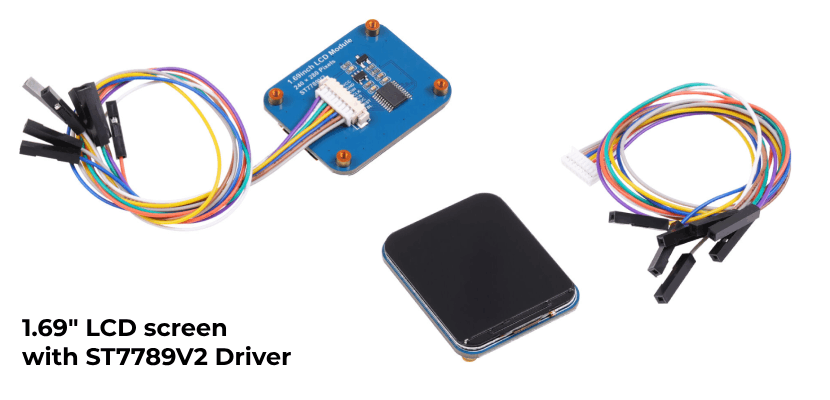
- 1.69" LCD display with ST7789V2 Driver
- Waveshare 24382
- Seeed Studio 104990802
- (Optional) 3D printed model of Argon Neo 5 cover
- (Optional) Argon Neo 5 enclosure
![]()
Assembly
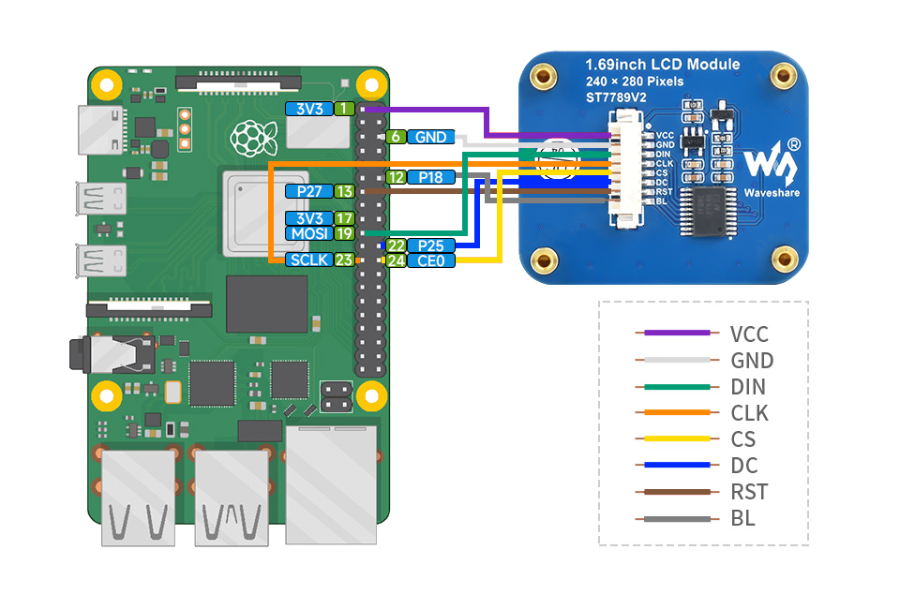
1. Connect wiresConnect the display to the Raspberry Pi according to the diagram below.
The colors of the cables may vary depending on the supplier and batch. Focus on the function and pin number, not the color.
![]()
The diagram is valid for Raspberry Pi 4 and Pi 5
If on Raspberry Pi 5 your LCD backlight is flickering connect `BL` to `3.3V PIN 17`
2. Mount display module
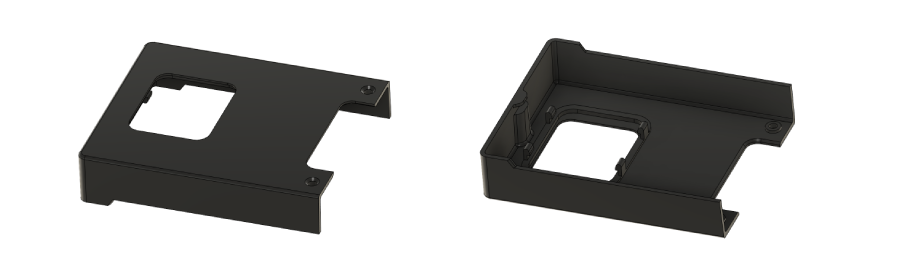
Mount the display in the printed enclosure cover. The display is held in place by four clips. Make sure all 3D printing support residues are removed and the surface to which the display adheres is flat. Install the display by sliding one side under the clips first, then pressing the other side down. Do not use excessive force to avoid damaging the display. The display should fit in easily.
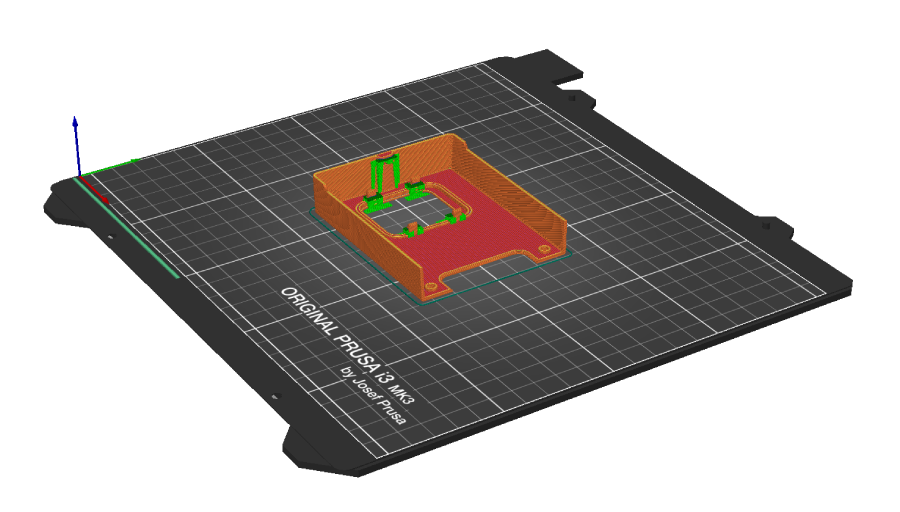
Since each 3D printer may be calibrated differently, it may be necessary to adjust the scale of the 3D model in the slicer software before printing. Our prints are done on Original Prusa i3 MK3S+
3. Mount enclosure cover
Mount the enclosure cover and secure it with two screws. Make sure to arrange the cables inside the enclosure so they do not obstruct the fan and minimize interference with cooling.
Installation
To enable the display, the SPI interface must be enabled.To do this, execute the following command and then reboot the device:
sudo sed -i '/^#dtparam=spi=on/s/^#//' /boot/firmware/config.txt
sudo reboot
Download the repository.sudo apt-get -y install git git clone https://github.com/Web3-Pi/raspberry-pi-lcd-dashboard.gitThen, you can run the program as a service. The program will start automatically with the system startup.
Alternatively, you can run it once. The program will stop when you close the console.
Run as a service - (recommended)
cd raspberry-pi-lcd-dashboard
chmod +x *.sh
sudo ./create_service.sh
To
stopthe program, executesudo systemctl stopdashboard.service
Touninstallthe service, executesudo ./remove_service.shor run one time
If you do not want to run the program as a service, you can run it once.
Note: Do not use both methods simultaneously.
cd raspberry-pi-lcd-dashboard
chmod +x *.sh
sudo ./run.sh
To stop the program, press
Ctrl+C.Customization
In the file `dashboard.py`, there is a flag SHOW_PER_CORE that determines whether the CPU usage percentage should be in the range of 0-100% or 0-400%.
0-400% represents the sum load of each core in the Raspberry Pi.
# Choose how to display CPU usage percentages
SHOW_PER_CORE = False
# False = [0 - 100%]
# True  = [0 - 400%]
note: Restart the service after making changes.sudo systemctl restart dashboard.service
3D Model
The models are free, so anyone can print them on a 3D printer.
![]()
3D Printing
We recommend printing with
PETGfilament due to the Raspberry Pi's high operating temperatures.To ensure the snap-fits print correctly, enable
supports everywhere.Use a 0.4 mm nozzle.
0.2 mm layer height or smaller.
Our models are printed on
Original Prusa i3 MK3S+![]()
LCD Dashboard for Raspberry Pi (System Monitor)
Hardware System Monitor for Raspberry Pi on LCD (Open Source)
Discussions
Become a Hackaday.io Member
Create an account to leave a comment. Already have an account? Log In.