 kutluhan_aktar
-
31Step 9.3: Evaluating the model accuracy and deploying the model
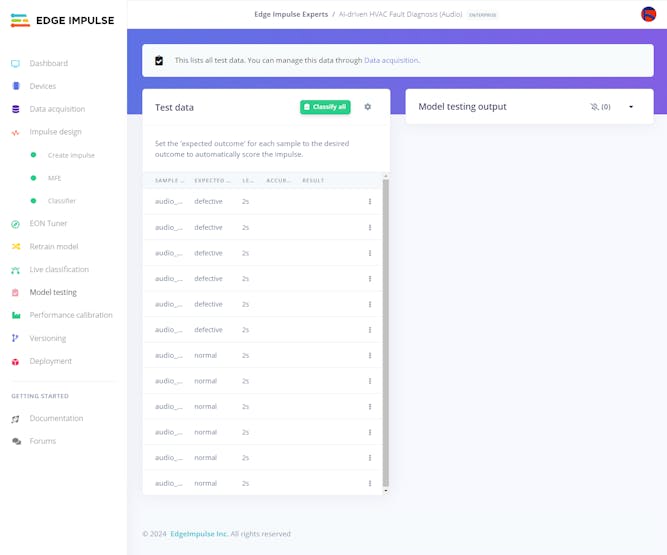
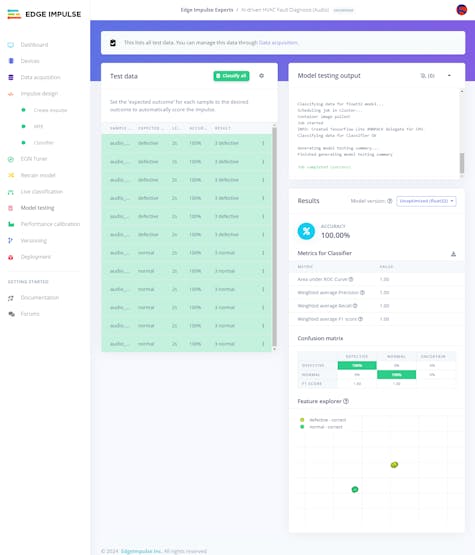
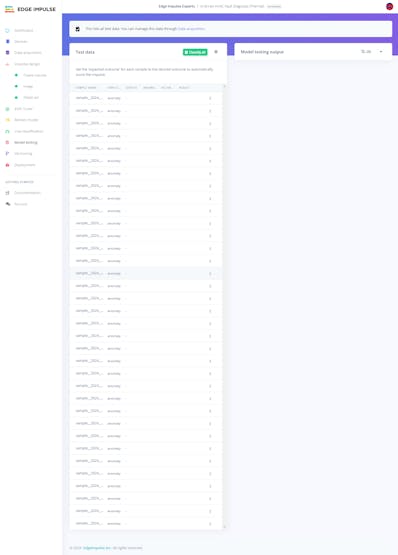
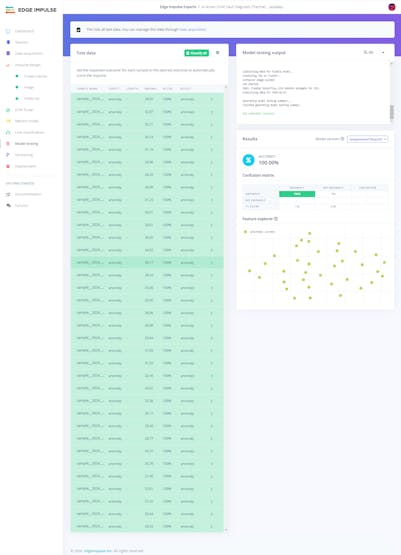
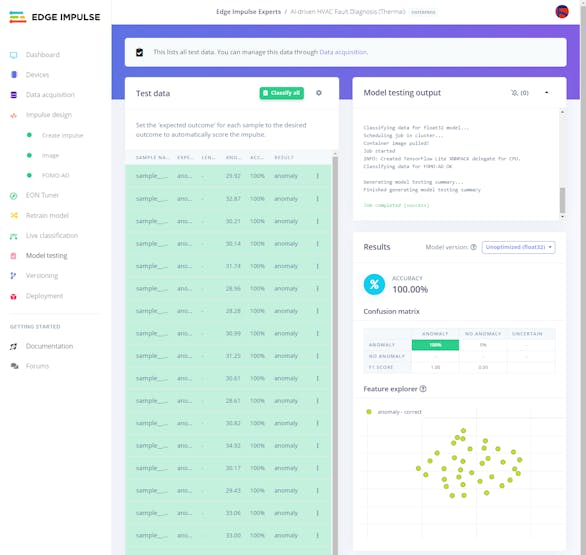
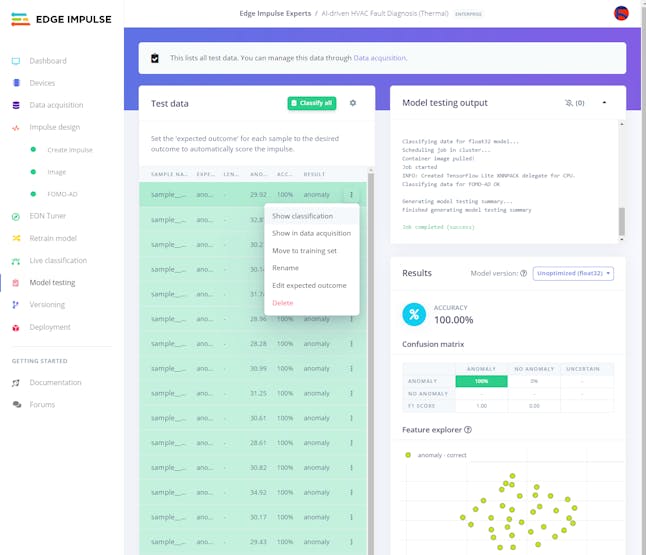
After building and training my Audio MFE neural network model, I tested its accuracy and validity by utilizing testing samples.
The evaluated accuracy of the model is 100%.
#️⃣ To validate the trained model, go to the Model testing page and click Classify all.
![]()
![]()
![]()
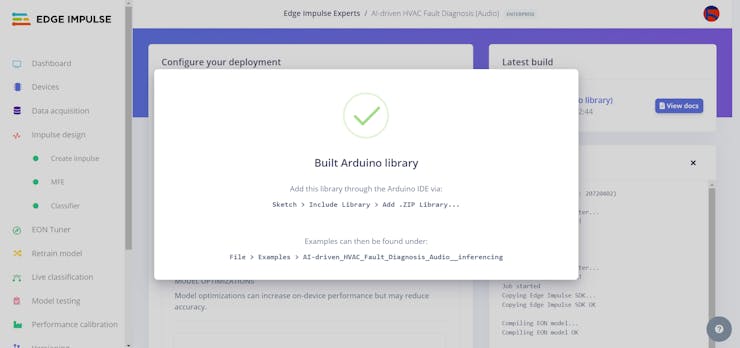
After validating my neural network model, I deployed it as a fully optimized and customizable Arduino library.
#️⃣ To deploy the validated model as an Arduino library, navigate to the Deployment page and search for Arduino library.
#️⃣ Then, choose the Quantized (int8) optimization option to get the best performance possible while running the deployed model.
#️⃣ Finally, click Build to download the model as an Arduino library.
![]()
![]()
![]()
-
32Step 10: Building a visual anomaly detection model (FOMO-AD) w/ Edge Impulse Enterprise
As discussed earlier, while producing thermal image samples to construct a valid image data set, I utilized the default classes to label the generated samples, required by Edge Impulse to enable the F1 score calculation:
- no anomaly
- anomaly
After finalizing my thermal image data set, I started to work on my visual anomaly detection model to diagnose ensuing thermal cooling malfunctions after applying anomalous sound detection to the water-based HVAC system.
Since Edge Impulse provides developer-friendly tools for advanced AI applications and supports almost every development board due to its model deployment options, I decided to utilize Edge Impulse Enterprise to build my visual anomaly detection model. Also, Edge Impulse Enterprise incorporates elaborate model architectures for advanced computer vision applications and optimizes the state-of-the-art vision models for edge devices and single-board computers such as LattePanda Mu.
Since analyzing cooling anomalies based on thermal images of HVAC system components is a complicated task, I decided to employ an advanced and precise machine learning algorithm based on the GMM anomaly detection algorithm enriched with the optimized features of the Edge Impulse FOMO model. Thus, supported by Edge Impulse Enterprise, FOMO-AD is an exceptional algorithm for detecting unanticipated defects by applying unsupervised learning techniques.
Although the FOMO-AD visual anomaly detection model is based on the FOMO algorithm, the FOMO-AD models behave significantly differently than FOMO models. By definition, the FOMO-AD models train only on normal (stable) image samples. Thus, handling unseen data or anomalies is not a challenge since the algorithm does not rely on the existence of training data demonstrating all possible anomalies. However, in this regard, the model accuracy is not calculated during training, and Edge Impulse requires predefined labels (anomaly and no anomaly) to estimate the precision (F1) score by running the model testing process.
Plausibly, Edge Impulse Enterprise allows building advanced computer vision models optimized in size and accuracy efficiently and deploying the trained model as a supported firmware (Linux x86_64) for LattePanda Mu. Therefore, I was able to build an accurate visual anomaly detection model to diagnose thermal cooling malfunctions based on thermal images and run the optimized model on LattePanda Mu without any additional requirements.
You can inspect my FOMO-AD visual anomaly detection model on Edge Impulse as a public project.
-
33Step 10.1: Uploading images (samples) to Edge Impulse and assigning anomaly classes
After splitting my thermal image data set into training (stable) and testing (thermal malfunction) samples, I uploaded them to my project on Edge Impulse Enterprise.
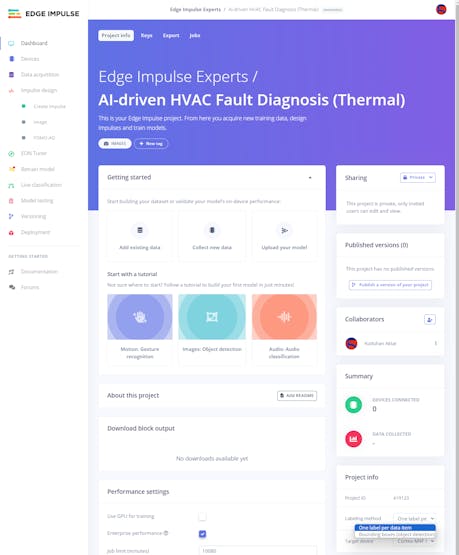
#️⃣ First of all, to utilize the incorporated tools for advanced AI applications, sign up for Edge Impulse Enterprise.
#️⃣ Then, create a new project under your organization.
![]()
#️⃣ To be able to label image samples manually on Edge Impulse for FOMO-AD visual anomaly detection models, go to Dashboard ➡ Project info ➡ Labeling method and select One label per data item.
![]()
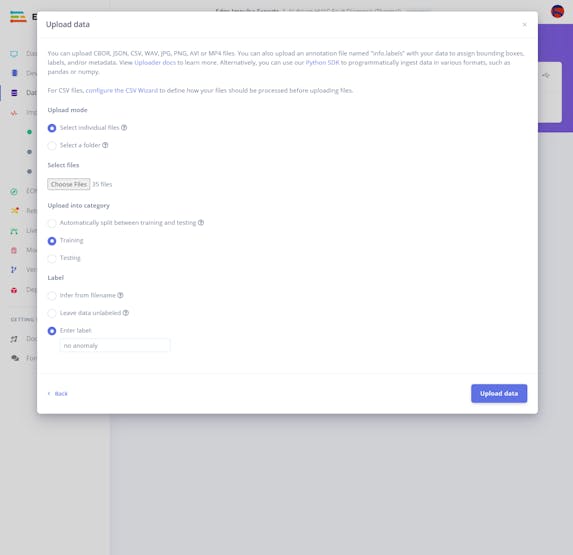
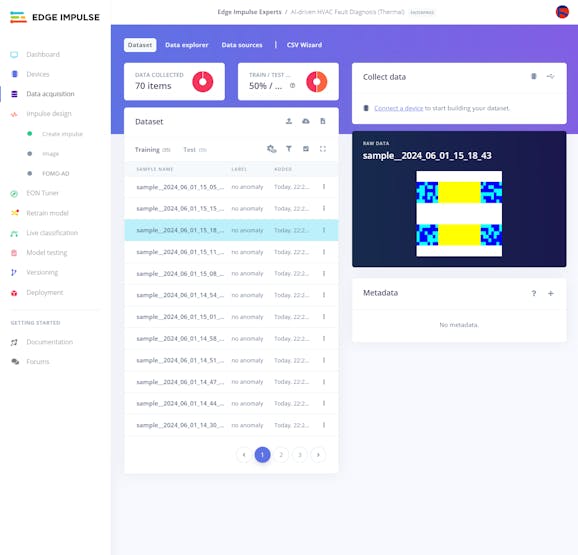
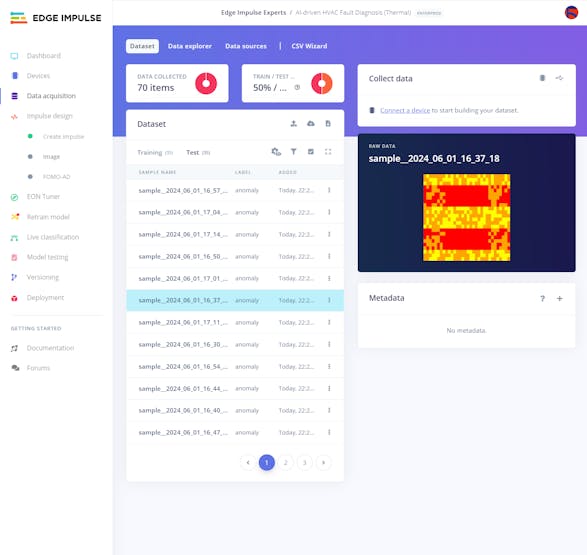
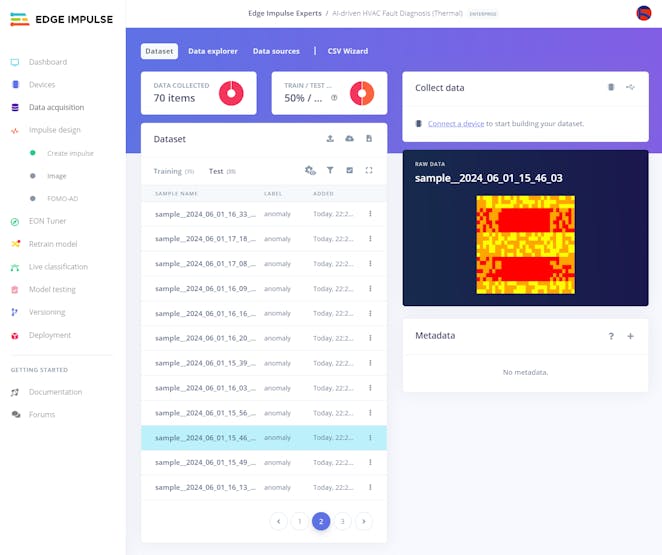
#️⃣ Navigate to the Data acquisition page and click the Upload data icon.
![]()
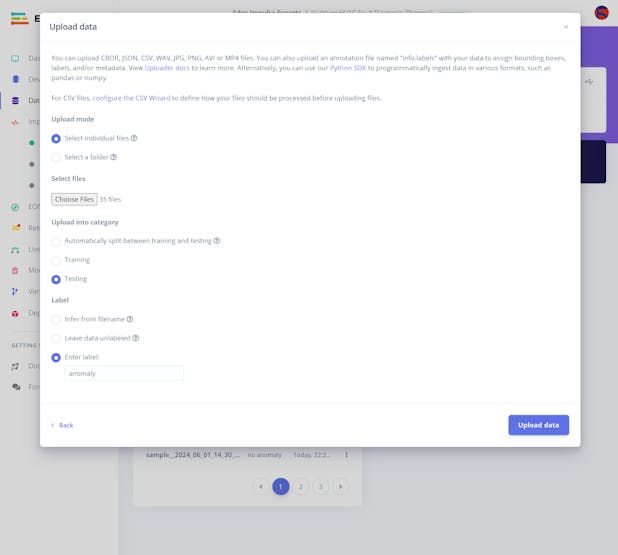
#️⃣ Distinguish image samples as training and testing samples depending on the presence of anomaly (malfunction).
#️⃣ Choose the data category (training or testing) and select the associated image files.
#️⃣ Utilize the Enter Label section to label the passed image samples automatically with the required class — no anomaly for training and anomaly for testing.
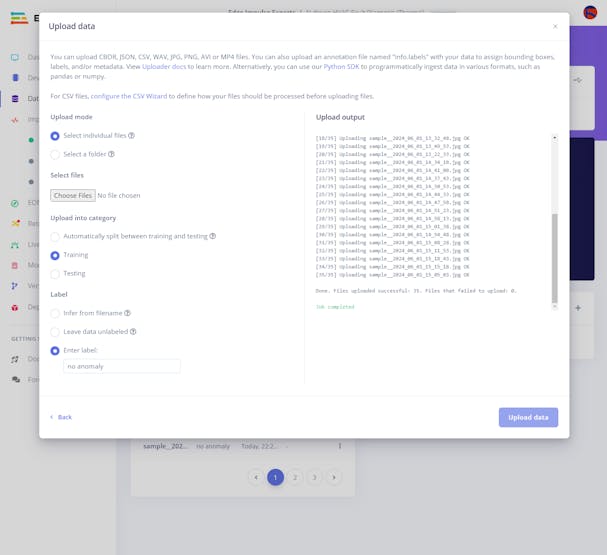
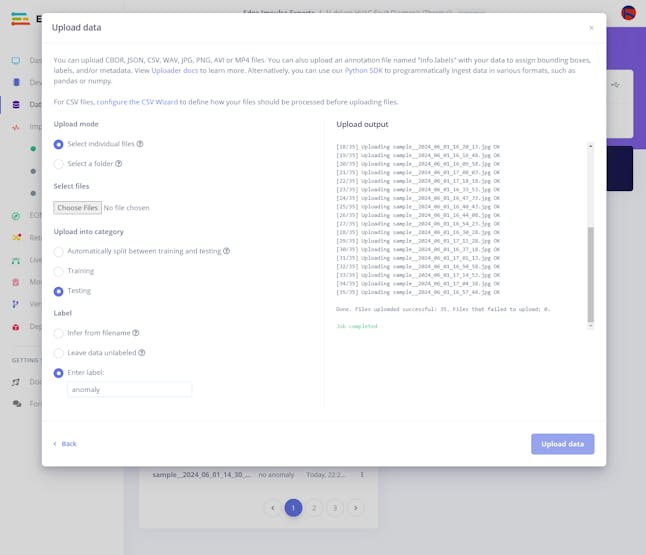
#️⃣ Then, click the Upload data button to upload the labeled image samples.
![]()
![]()
![]()
![]()
![]()
![]()
![]()
![]()
-
34Step 10.2: Training the FOMO-AD model on the thermal images showcasing stable heat transfer
After uploading and labeling my training and testing samples with the default classes successfully, I designed an impulse and trained the model to diagnose ensuing thermal cooling malfunctions after applying anomalous sound detection to the water-based HVAC system.
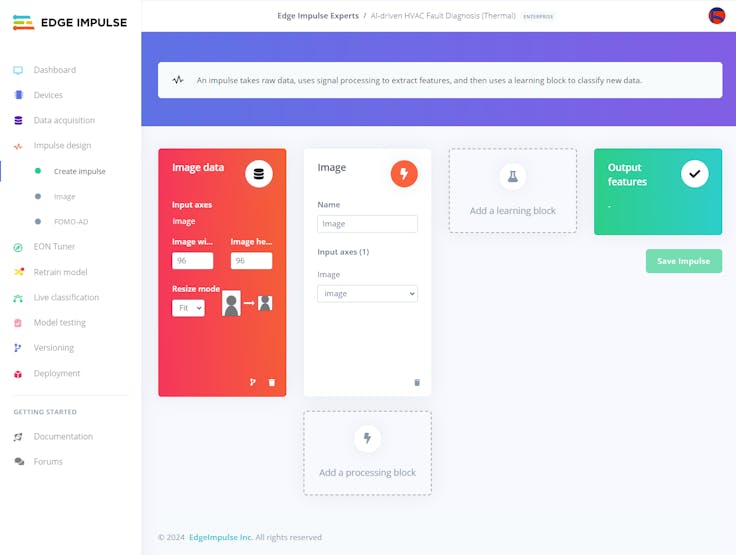
An impulse is a custom machine learning model in Edge Impulse. I created my impulse by employing the Image processing block and the FOMO-AD (Images) learning block.
The Image processing block optionally turns the input image format to grayscale or RGB and generates a features array from the passed raw image.
The FOMO-AD (Images) learning block represents a machine learning algorithm that identifies anomalies based on the trained normal (stable) images by applying a Gaussian Mixture Model.
In this case, I configured the input image format as RGB since distinguishing thermal cooling malfunctions based on thermal images highly relies on color differences.
As stated by Edge Impulse, they empirically obtained the best anomaly detection results by applying 96x96 ImageNet weights regardless of the intended raw image input resolution. Thus, I utilized the same resolution for my visual anomaly detection model.
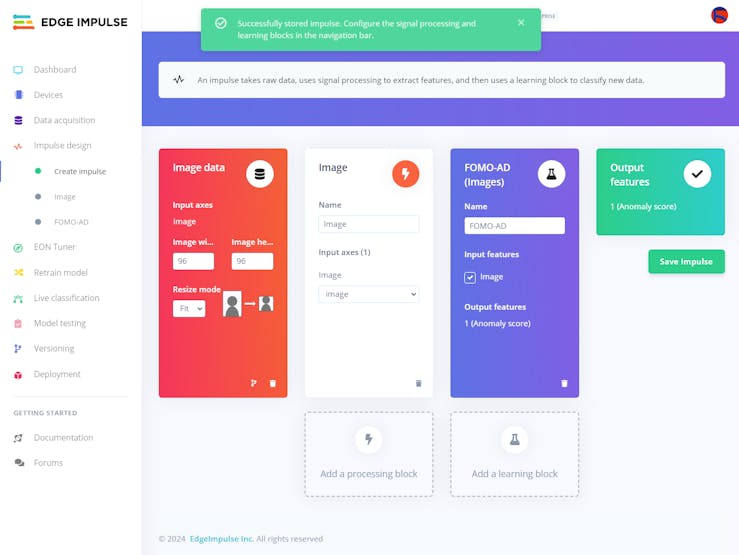
#️⃣ Go to the Create impulse page and set image width and height parameters to 96. Then, select the resize mode parameter as Fit shortest axis so as to scale (resize) given training and testing image samples.
#️⃣ Select the Image processing block.
![]()
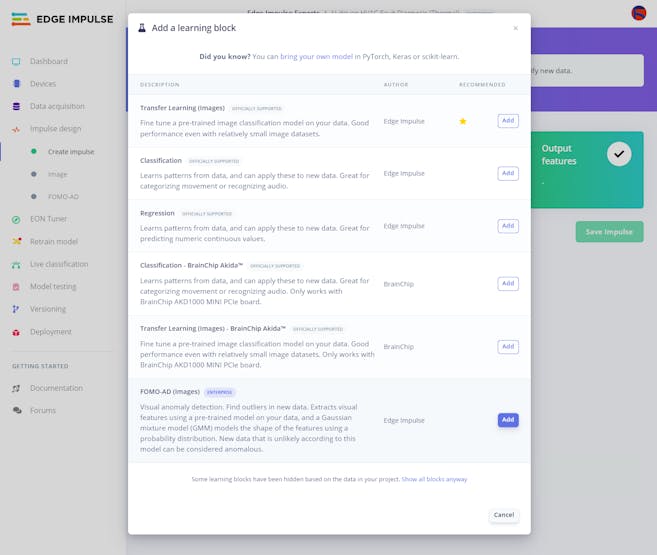
#️⃣ Then, to choose the visual anomaly detection algorithm, click Add a learning block and select the FOMO-AD (Images) learning block. Finally, click Save Impulse.
![]()
![]()
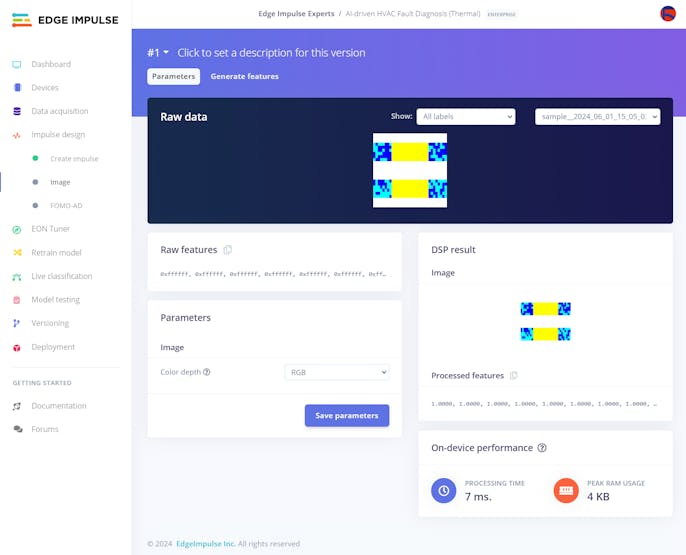
#️⃣ Before generating features for the visual anomaly detection model, go to the Image page and set the Color depth parameter as RGB. Then, click Save parameters.
![]()
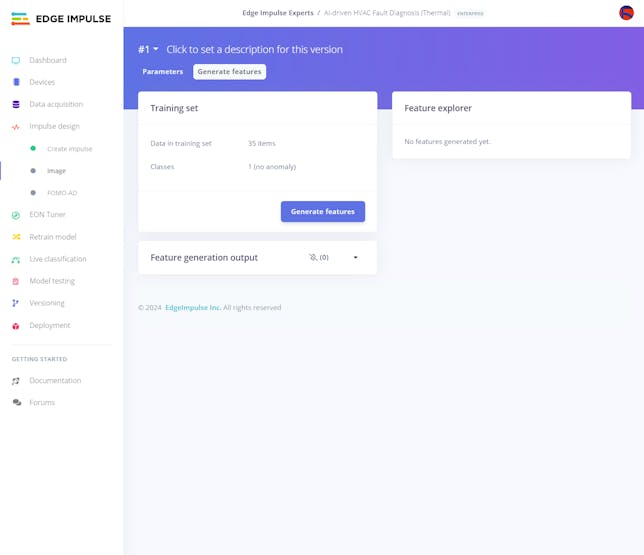
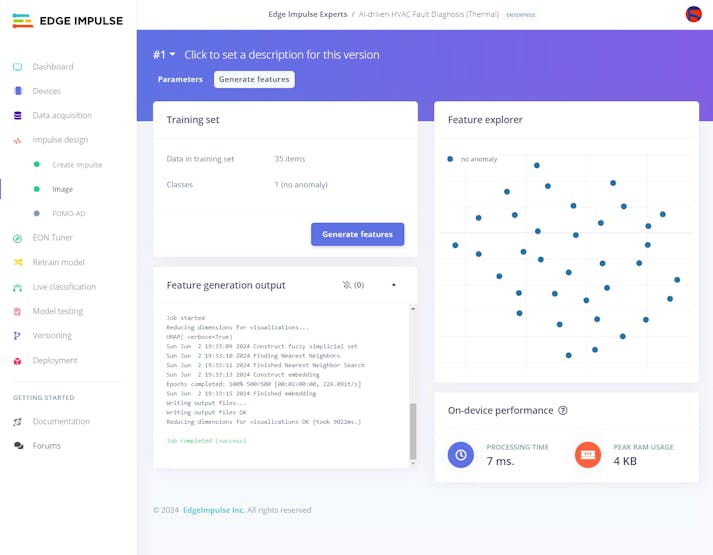
#️⃣ After saving parameters, click Generate features to apply the Image processing block to training image samples.
![]()
![]()
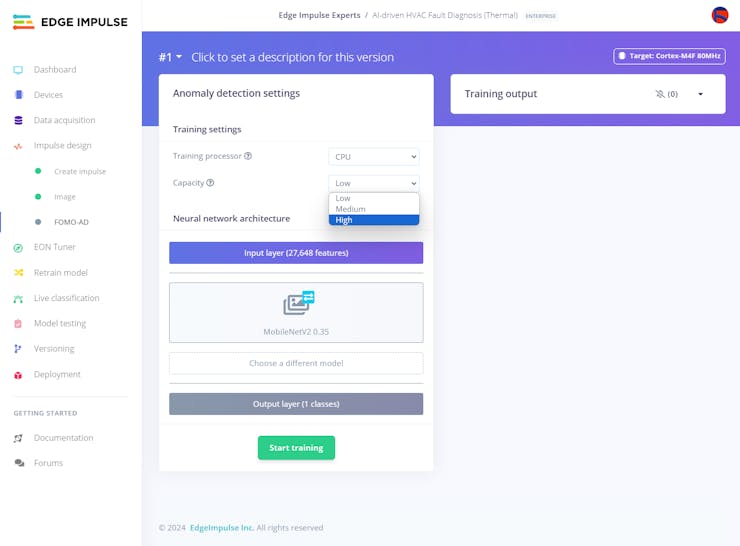
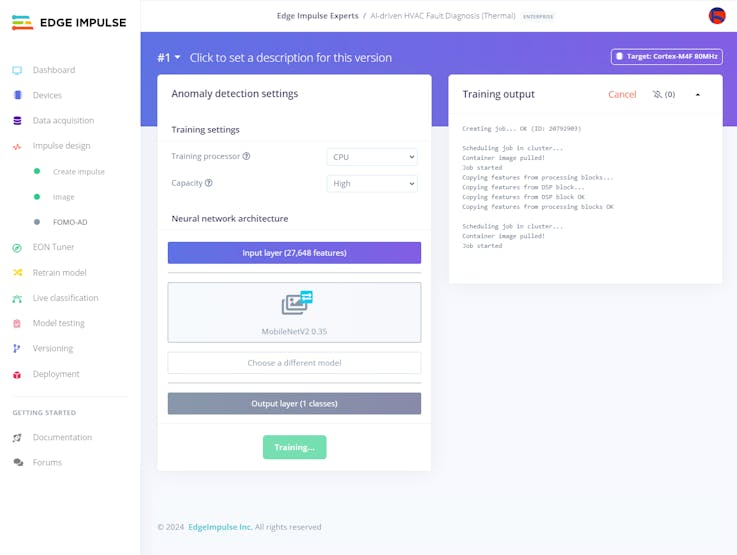
#️⃣ After generating features successfully, navigate to the FOMO-AD page and click Start training.
![]()
#️⃣ According to my prolonged experiments, I modified the neural network settings and architecture to achieve reliable accuracy and validity:
📌 Neural network settings:
- Capacity ➡ High
📌 Neural network architecture:
- MobileNetV2 0.35
The FOMO-AD learning block has one adjustable parameter — capacity. Higher capacity means a higher number of Gaussian components, increasing the model adaptability considering the original distribution.
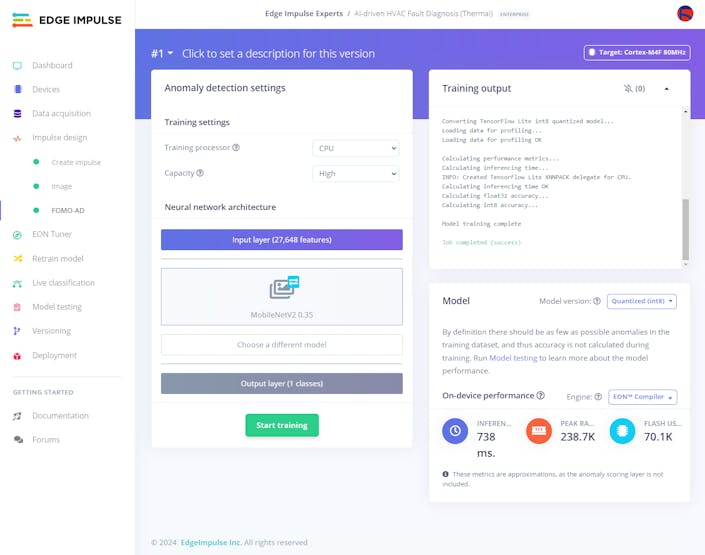
As discussed earlier, by definition, Edge Impulse does not evaluate the precision score (accuracy) during training.
![]()
![]()
-
35Step 10.3: Evaluating the model accuracy and deploying the model
After building and training my FOMO-AD visual anomaly detection model, I tested its accuracy and validity by utilizing testing samples.
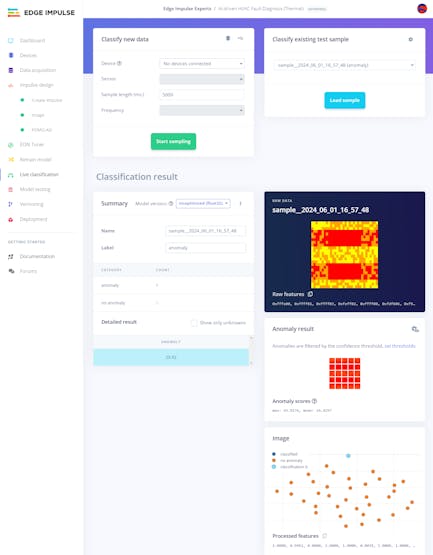
In addition to validating the model during testing, Edge Impulse evaluates the F1 precision score (accuracy) and provides per region anomalous scoring results for the passed testing images. To tweak the learning block sensitivity, Edge Impulse lets the user change the suggested confidence threshold estimated based on the top anomaly scores in the training dataset. In that regard, the user can adjust the anomaly detection rate according to the expected real-world conditions.
After validating my FOMO-AD model, Edge Impulse evaluated the precision score (accuracy) as 100%.
Since I configured this visual anomaly detection model to conform to the produced thermal images of my simplified HVAC system components, the precision score (accuracy) is approximately 100% Thus, I highly recommend constructing a new thermal image data set of different HVAC system components and retraining the model before running inferences to diagnose thermal cooling malfunctions.
#️⃣ To validate the trained model, go to the Model testing page and click Classify all.
![]()
![]()
#️⃣ Then, click the Gear icon and select Set confidence thresholds to tweak the learning block sensitivity to adjust the anomaly detection rate based on the expected real-world conditions.
According to my rigorous experiments, I set the confidence threshold as 5.
![]()
![]()
![]()
#️⃣ After setting the confidence threshold, select a testing image sample and click Show classification to inspect the detected label and the per region anomalous scoring results.
Since this classification page provides max and mean anomaly scores, Edge Impulse lets the user compare region anomaly results effortlessly based on the altered confidence thresholds.
![]()
![]()
After setting the confidence threshold, I deployed my visual anomaly detection model as a fully optimized and customizable Linux (x86_64) application (.eim).
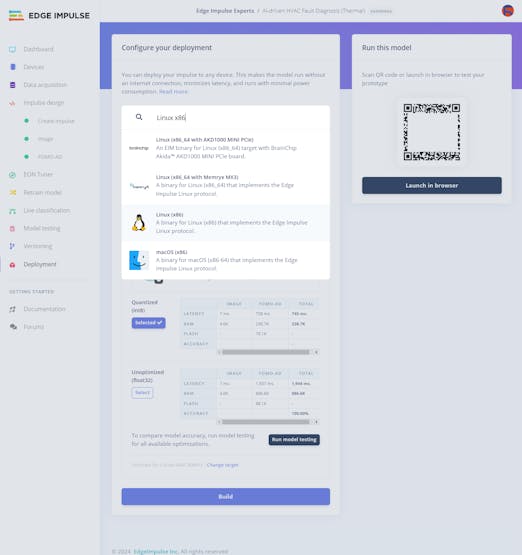
#️⃣ To deploy the validated model as a Linux (x86_64) application, navigate to the Deployment page and search for Linux (x86).
#️⃣ Then, choose the Quantized (int8) optimization option to get the best performance possible while running the deployed model.
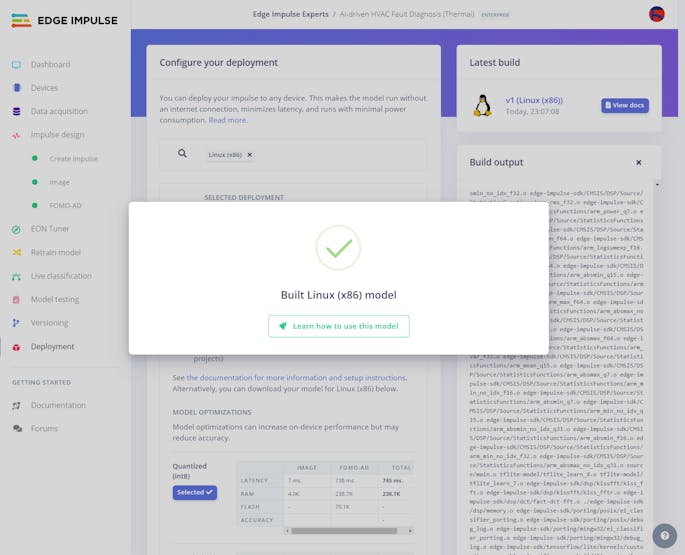
#️⃣ Finally, click Build to download the model as a Linux (x86_64) application (.eim).
![]()
![]()
![]()
-
36Step 11.a: Setting up the neural network model (Audio MFE) on XIAO ESP32C6
Since Edge Impulse optimizes and formats signal processing, configuration, and learning blocks into a single package while deploying models as Arduino libraries, even for complex machine learning algorithms, I was able to import my advanced model effortlessly to run inferences on XIAO ESP32C6.
#️⃣ After downloading the model as an Arduino library in the ZIP file format, go to Sketch ➡ Include Library ➡ Add.ZIP Library...
#️⃣ Then, include the AI-driven_HVAC_Fault_Diagnosis_Audio__inferencing.h file to import the Edge Impulse Audio MFE neural network model.
#include <AI-driven_HVAC_Fault_Diagnosis_Audio__inferencing.h>
After importing my model successfully, I programmed XIAO ESP32C6 to run inferences to identify anomalous sound emanating from the cooling fans.
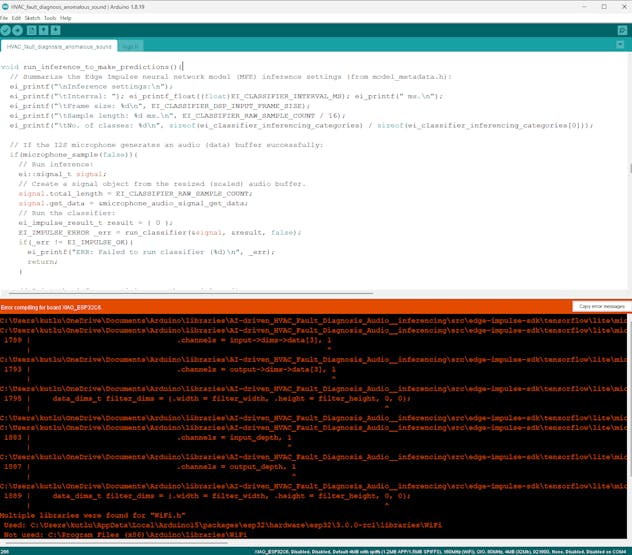
However, the Arduino IDE kept throwing a compile error message as shown below during my initial experiments.
error: either all initializer clauses should be designated or none of them should be ...
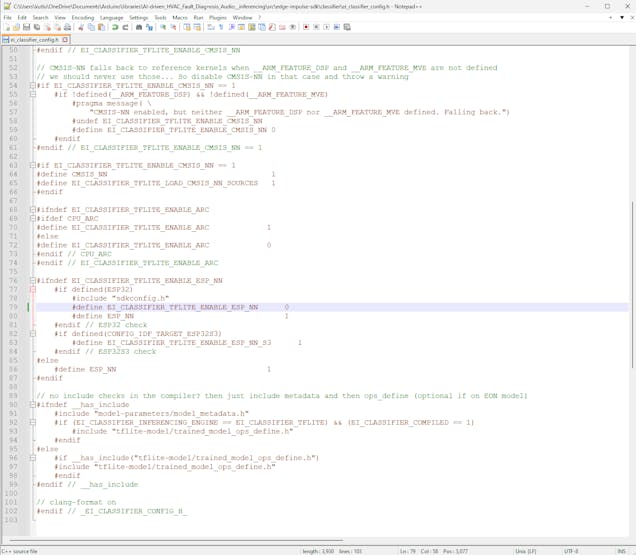
#️⃣ To solve the mentioned compiling error, open the ei_classifier_config.h file and set EI_CLASSIFIER_TFLITE_ENABLE_ESP_NN to 0.
\Arduino\libraries\AI-driven_HVAC_Fault_Diagnosis_Audio__inferencing\src\edge-impulse-sdk\classifier\ei_classifier_config.h
//#define EI_CLASSIFIER_TFLITE_ENABLE_ESP_NN 1#define EI_CLASSIFIER_TFLITE_ENABLE_ESP_NN 0 // set to
![]()
![]()
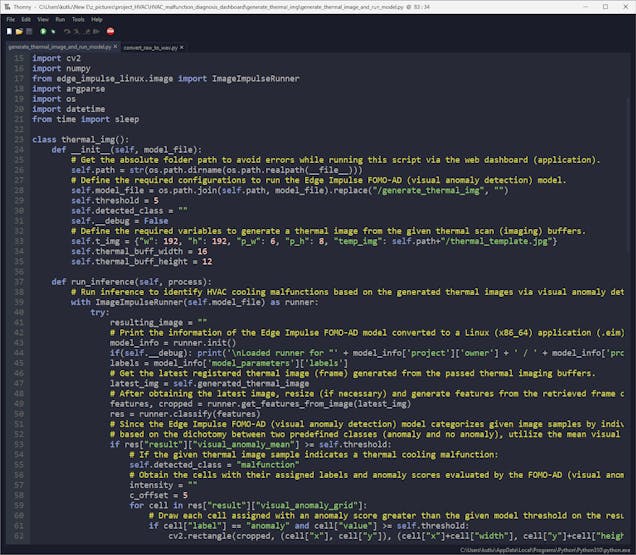
As explained in the previous steps, the device performs lots of interconnected features between different development boards and the web application for data collection and running advanced AI models. Thus, the described code snippets show the different aspects of the same code file. Please refer to the code files or the demonstration videos to inspect all interconnected functions in detail.
📁 HVAC_fault_diagnosis_anomalous_sound.ino
⭐ Define the required parameters to run an inference with the Edge Impulse Audio MFE neural network model.
⭐ Define the threshold value for the model outputs (predictions).
⭐ Define the anomalous sound (audio) class names.
#define buf_multiplier 5#define audio_buff_size 512int16_t sample_audio_buffer[audio_buff_size];// Define the threshold value for the model outputs (predictions).float threshold = 0.60;// Define the anomalous sound (audio) class names.String classes[] = {"defective", "normal"};⭐ In the run_inference_to_make_predictions function:
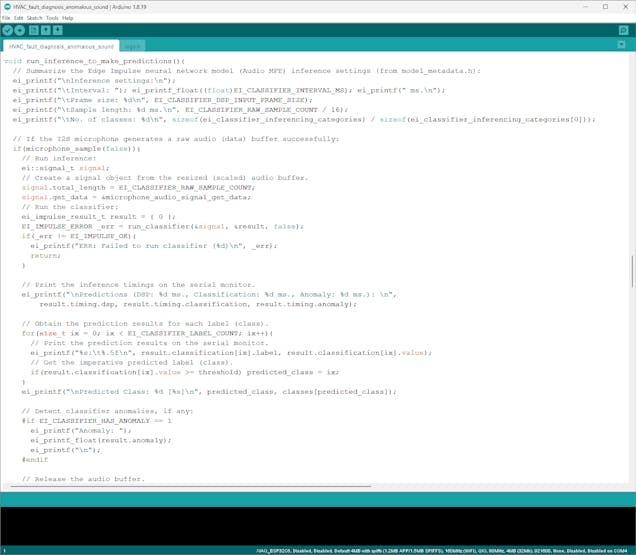
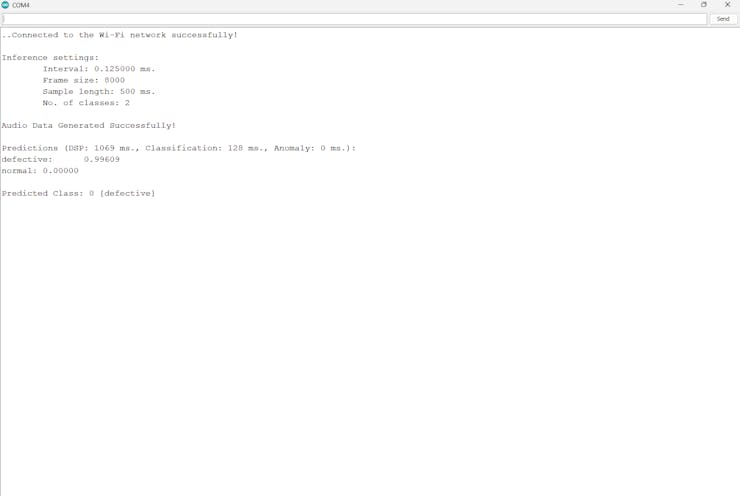
⭐ Summarize the Edge Impulse neural network model (Audio MFE) inference settings and print them on the serial monitor.
⭐ If the I2S microphone generates a raw audio (data) buffer successfully:
⭐ Create a signal object from the resized (scaled) raw data buffer — raw audio buffer.
⭐ Run an inference.
⭐ Print the inference timings on the serial monitor.
⭐ Obtain the prediction results for each label (class).
⭐ Print the model classification results on the serial monitor.
⭐ Get the predicted label (class) explicitly based on the given threshold.
⭐ Print inference anomalies on the serial monitor, if any.
⭐ Release the previously generated raw audio buffer if requested.
void run_inference_to_make_predictions(){ // Summarize the Edge Impulse neural network model (Audio MFE) inference settings (from model_metadata.h): ei_printf("\nInference settings:\n"); ei_printf("\tInterval: "); ei_printf_float((float)EI_CLASSIFIER_INTERVAL_MS); ei_printf(" ms.\n"); ei_printf("\tFrame size: %d\n", EI_CLASSIFIER_DSP_INPUT_FRAME_SIZE); ei_printf("\tSample length: %d ms.\n", EI_CLASSIFIER_RAW_SAMPLE_COUNT / 16); ei_printf("\tNo. of classes: %d\n", sizeof(ei_classifier_inferencing_categories) / sizeof(ei_classifier_inferencing_categories[0])); // If the I2S microphone generates a raw audio (data) buffer successfully: if(microphone_sample(false)){ // Run inference: ei::signal_t signal; // Create a signal object from the resized (scaled) audio buffer. signal.total_length = EI_CLASSIFIER_RAW_SAMPLE_COUNT; signal.get_data = µphone_audio_signal_get_data; // Run the classifier: ei_impulse_result_t result = { 0 }; EI_IMPULSE_ERROR _err = run_classifier(&signal, &result, false); if(_err != EI_IMPULSE_OK){ ei_printf("ERR: Failed to run classifier (%d)\n", _err); return; } // Print the inference timings on the serial monitor. ei_printf("\nPredictions (DSP: %d ms., Classification: %d ms., Anomaly: %d ms.): \n", result.timing.dsp, result.timing.classification, result.timing.anomaly); // Obtain the prediction results for each label (class). for(size_t ix = 0; ix < EI_CLASSIFIER_LABEL_COUNT; ix++){ // Print the prediction results on the serial monitor. ei_printf("%s:\t%.5f\n", result.classification[ix].label, result.classification[ix].value); // Get the imperative predicted label (class). if(result.classification[ix].value >= threshold) predicted_class = ix; } ei_printf("\nPredicted Class: %d [%s]\n", predicted_class, classes[predicted_class]); // Detect classifier anomalies, if any: #if EI_CLASSIFIER_HAS_ANOMALY == 1 ei_printf("Anomaly: "); ei_printf_float(result.anomaly); ei_printf("\n"); #endif // Release the audio buffer. //ei_free(sample_audio_buffer); }}⭐ In the microphone_audio_signal_get_data function:
⭐ Convert the given microphone (raw audio) data (buffer) to the out_ptr format required by the Edge Impulse neural network model (Audio MFE).
static int microphone_audio_signal_get_data(size_t offset, size_t length, float *out_ptr){ // Convert the given microphone (audio) data (buffer) to the out_ptr format required by the Edge Impulse neural network model (Audio MFE). numpy::int16_to_float(&sample_audio_buffer[offset], out_ptr, length); return 0;}⭐ If the second option (Faulty Sound) is activated:
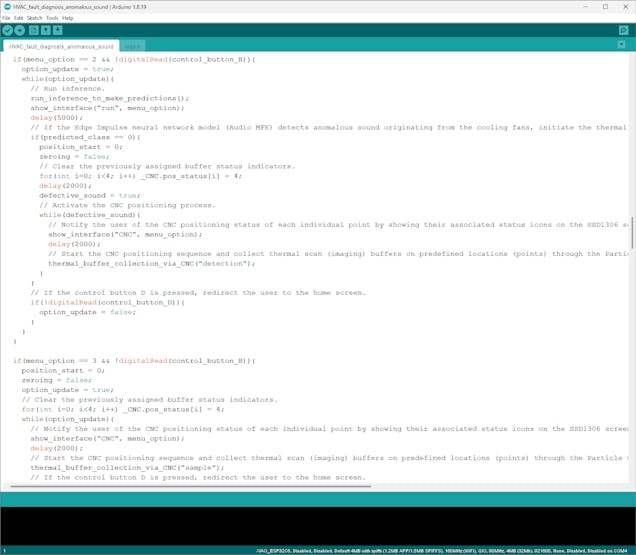
⭐ Every five seconds, run an inference with the Edge Impulse Audio MFE neural network model.
⭐ If the given model detects anomalous sound originating from the cooling fans:
⭐ Clear the previously assigned buffer operation status indicators.
⭐ Start the four-step CNC positioning sequence to collect thermal imaging buffers and produce a precise thermal image.
#️⃣ The process is the same for generating a sample thermal image — the third option — except for the passed process type (GET request parameter). This time, the web application utilizes the produced thermal image to run an inference with the Edge Impulse FOMO-AD visual anomaly detection model and generate a model resulting image.
⭐ If the control button D is pressed, redirect the user to the home screen.
![]()
![]()
-
37Step 11.b: Setting up the visual anomaly detection model (FOMO-AD) on LattePanda Mu
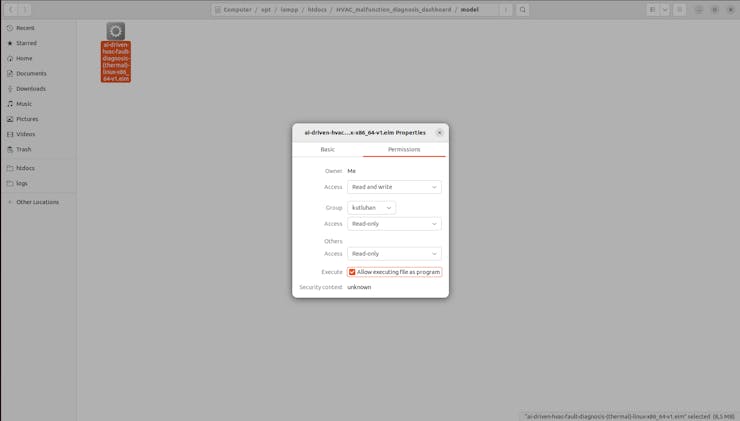
Since Edge Impulse optimizes and formats signal processing, configuration, and learning blocks into a single EIM file while deploying models as a Linux (x86_64) application, even for complex visual anomaly detection models, I was able to import my advanced FOMO-AD model effortlessly to run inferences in Python on LattePanda Mu (x86 Compute Module).
#️⃣ After downloading the generated Linux (x86_64) application to the model folder under the root folder of the web application, make sure to change the file permissions via the Properties tab to be able to execute the model file. As shown earlier, you can also use the terminal (shell) to change file permissions.
![]()
After importing the generated Linux application successfully, I programmed LattePanda Mu to run inferences to diagnose thermal cooling malfunctions of HVAC system components based on specifically produced thermal images.
Since I described all of the web application features earlier, including the Python script handling thermal image generation, running the visual anomaly detection model, and modifying the resulting image based on the visual anomaly grid with estimated cell anomaly intensity levels, please refer to Step 5.2 to inspect code snippets.
![]()
-
38Step 11.c: Running both machine learning models consecutively to detect anomalous sound originating from the cooling fans and diagnose ensuing thermal cooling malfunctions of the HVAC system and informing the user of the cooling status via SMS
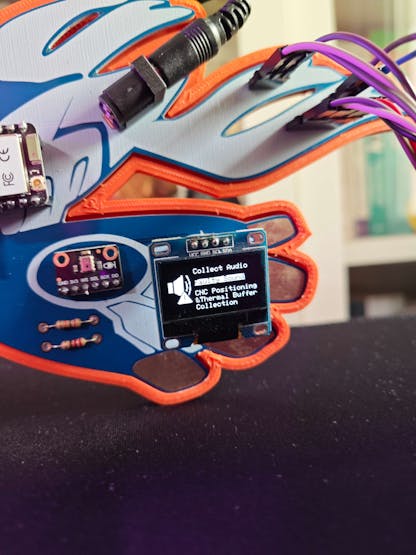
⚠️🔊♨️🖼️ If the user activates the second menu option provided by XIAO ESP32C6 — Faulty Sound:
![]()
⚠️🔊♨️🖼️ XIAO ESP32C6 generates a raw audio buffer via the I2S microphone and runs an inference with the Edge Impulse Audio MFE neural network model every five seconds to identify anomalous sound originating from the HVAC system cooling fans.
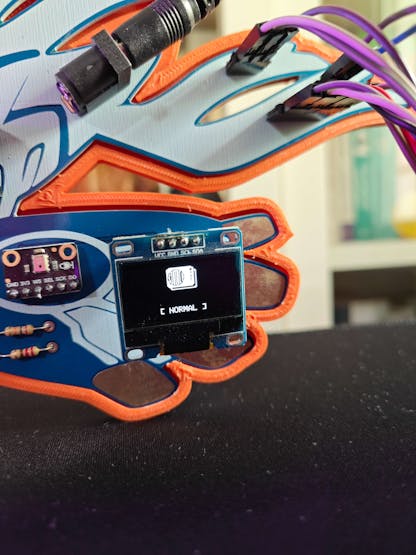
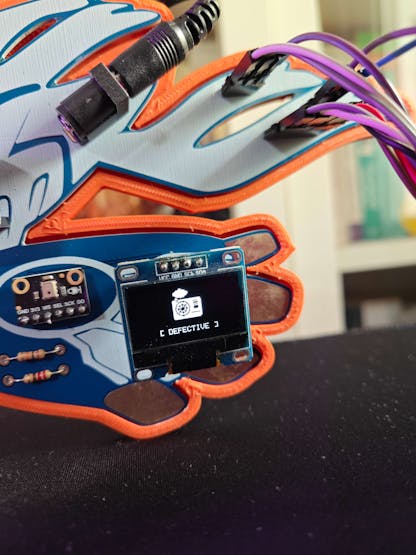
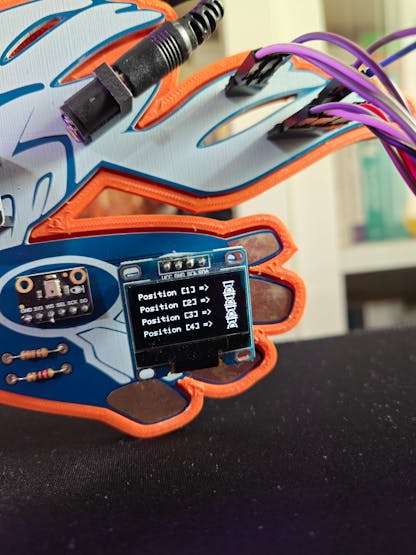
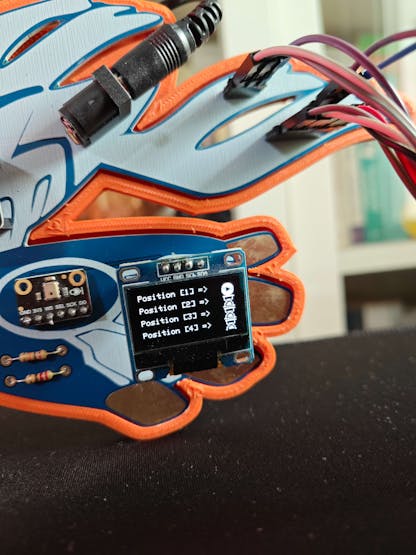
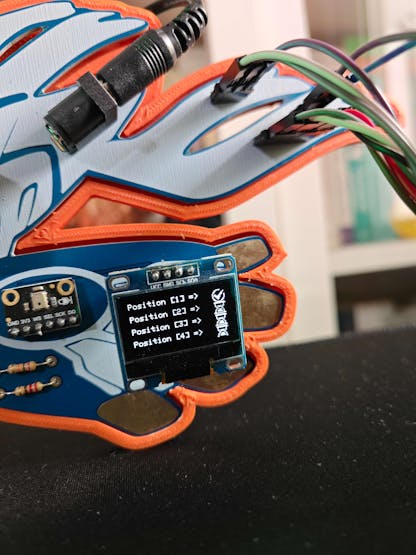
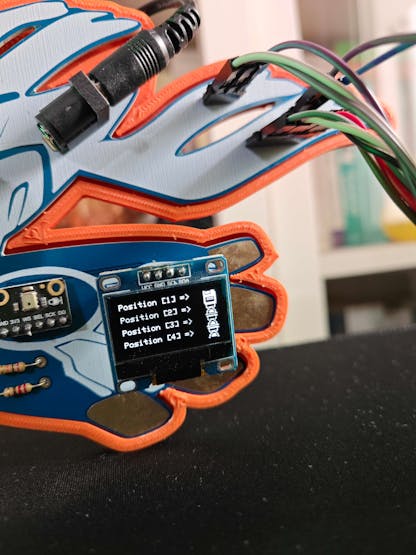
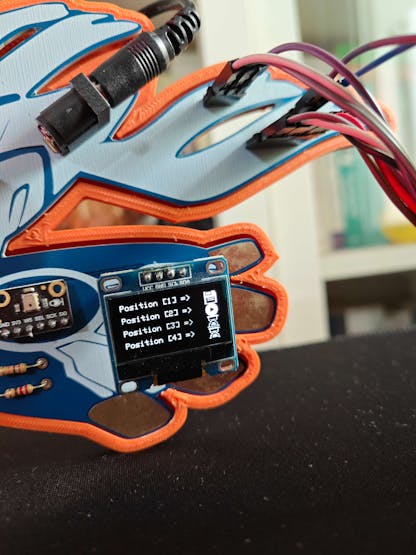
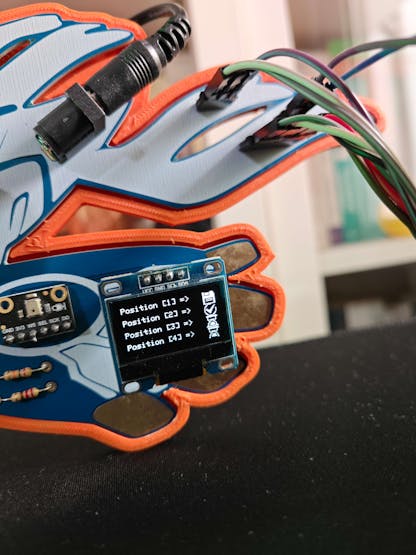
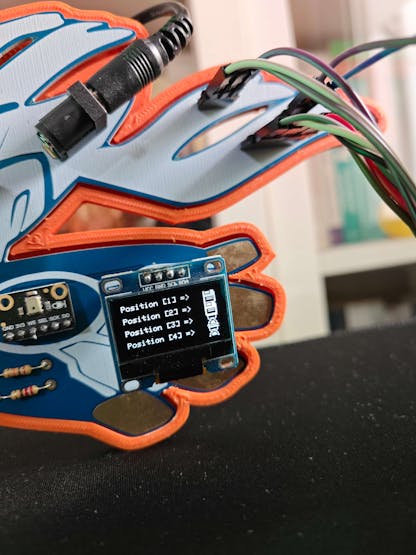
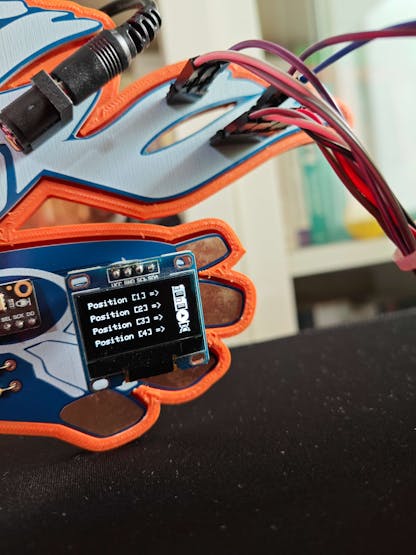
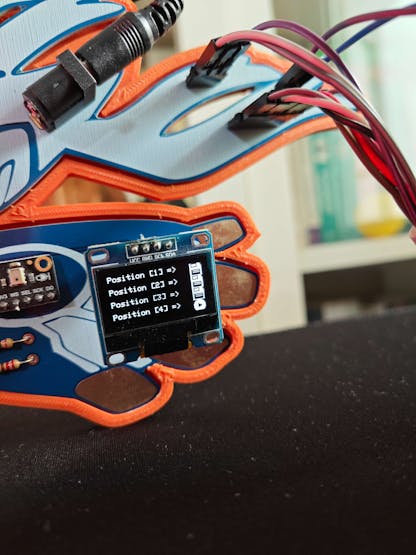
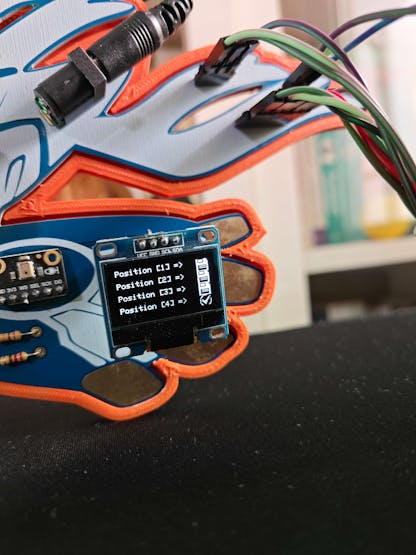
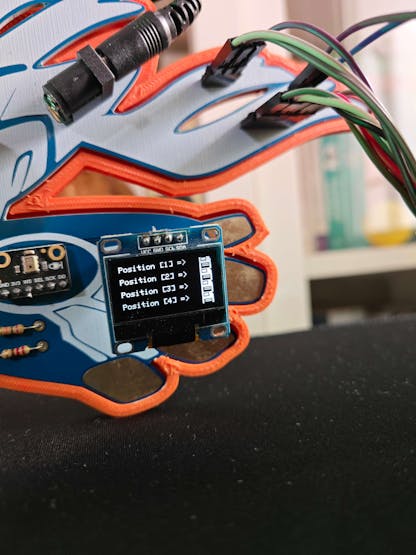
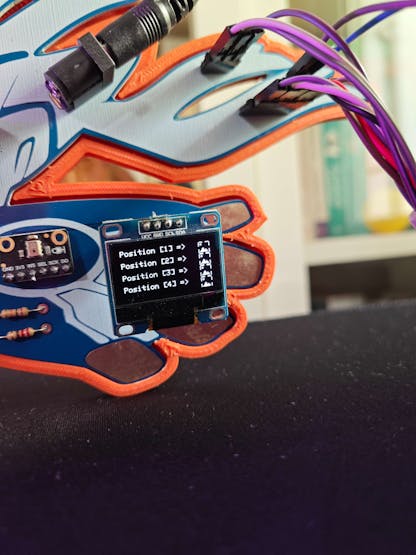
⚠️🔊♨️🖼️ Then, the device shows the detected audio class and its associated icon on the SSD1306 OLED display.
![]()
![]()
⚠️🔊♨️🖼️ If the Audio MFE detects anomalous sound, XIAO ESP32C6 initiates the four-step CNC positioning sequence to collect thermal imaging buffers and produce a precise thermal image via the web application.
⚠️🔊♨️🖼️ Except for the passed process type (detection) while making an HTTP GET request to the web application, the process is exactly the same for producing a thermal image sample as explained in Step 8.d.
![]()
![]()
![]()
![]()
![]()
![]()
![]()
![]()
![]()
![]()
![]()
![]()
![]()
![]()
⚠️🔊♨️🖼️ After obtaining the thermal scan (imaging) buffers registered on the Particle Cloud, the web application produces a precise thermal image by running the Python script as shown in Step 8.d.
⚠️🔊♨️🖼️ However, instead of saving the produced image as a sample directly, the web application runs an inference with the Edge Impulse FOMO-AD visual anomaly detection model to diagnose consecutive thermal cooling malfunctions of HVAC system components after anomalous sound detection.
⚠️🔊♨️🖼️ Since the FOMO-AD model categorizes a passed image by individual cells (grids) based on the dichotomy between two predefined classes (anomaly and no anomaly), the web application utilizes the mean visual anomaly value to diagnose overall (high-risk) thermal cooling malfunctions based on the given confidence threshold.
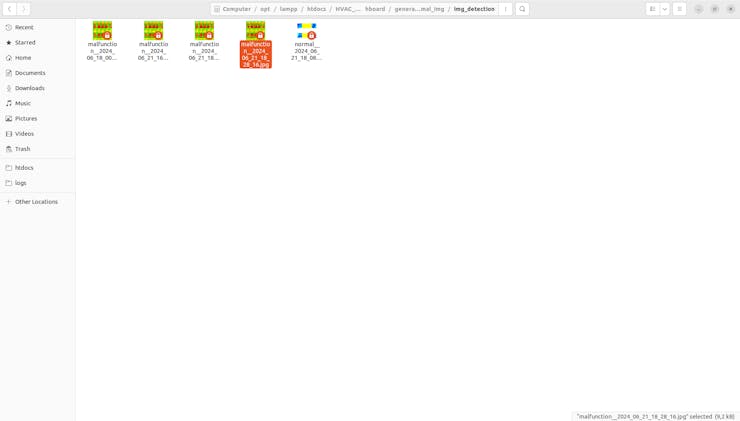
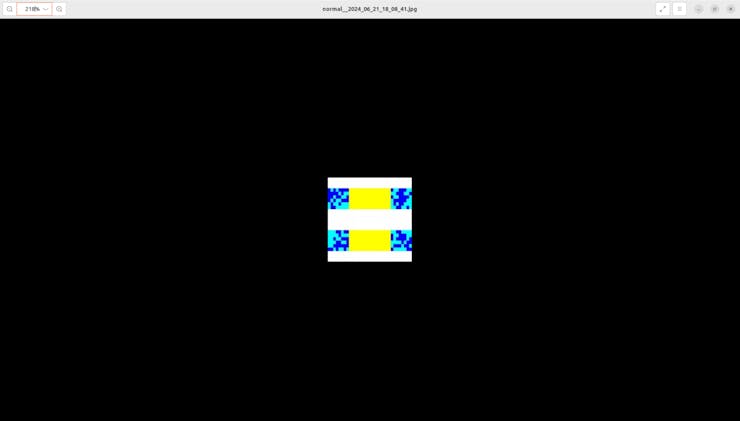
⚠️🔊♨️🖼️ If the mean visual anomaly value is smaller than the given threshold, the web application saves the model resulting image directly by adding the prediction date to the file name.
normal__2024_06_21_18_08_41.jpg
![]()
⚠️🔊♨️🖼️ Otherwise, the web application obtains the visual anomaly grid, consisting of individual cells with coordinates, assigned labels, and anomaly scores.
⚠️🔊♨️🖼️ If a cell's assigned label is anomaly, the web application calculates the cell's anomaly intensity level — Low (L), Moderate (M), High (H) — in relation to the given threshold.
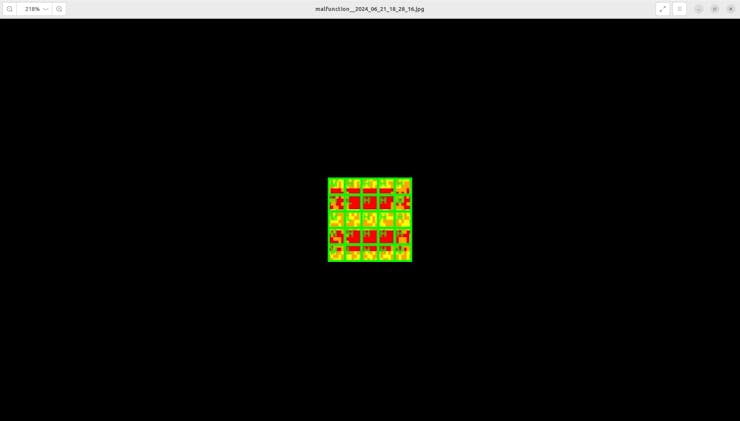
⚠️🔊♨️🖼️ Then, the web application modifies the resulting image with the cells (rectangles) and their intensity levels, emphasizing the risk of component abnormalities.
⚠️🔊♨️🖼️ After modifying the resulting image, the web application saves it by adding the prediction date to the file name.
malfunction__2024_06_21_18_22_19.jpg
![]()
![]()
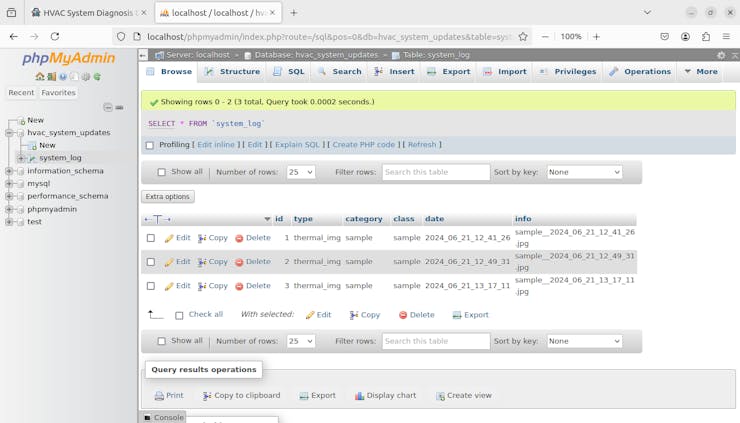
⚠️🔊♨️🖼️ After generating and saving the model resulting image, the web application updates the system log on the MariaDB database accordingly.
![]()
![]()
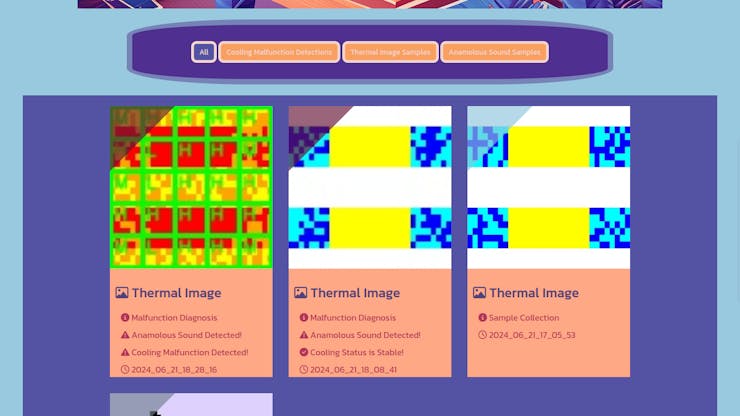
⚠️🔊♨️🖼️ Then, the web application updates its home (index) page automatically to showcase the latest system log entries. In addition to displaying the model resulting images, anomalous sound notifications, thermal cooling malfunction status, and prediction dates, the web application lets the user download modified resulting images individually on the home page.
⚠️🔊♨️🖼️ Furthermore, the web dashboard allows the user to change the system log update category to display only the associated system log entries.
- All
- Cooling Malfunction Detections
- Thermal Image Samples
- Anamolous Sound Samples
![]()
![]()
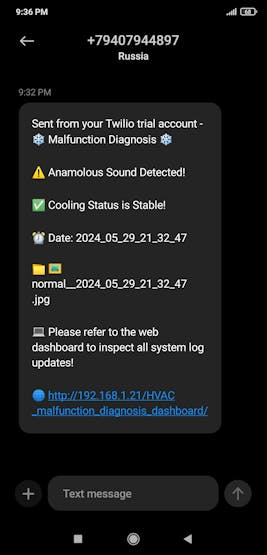
⚠️🔊♨️🖼️ Finally, the web application sends an SMS via Twilio to inform the user of anomalous sound detection and the status of the ensuing thermal cooling malfunctions of HVAC system components.
![]()
![]()
![]()
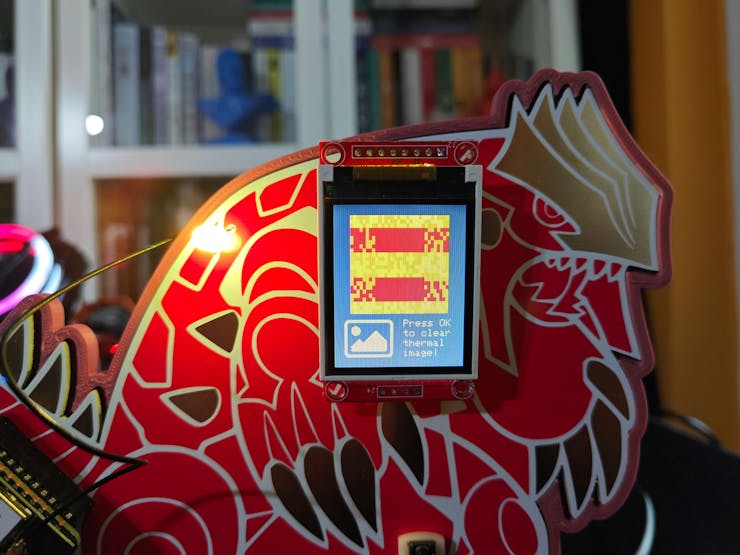
⚠️🔊♨️🖼️ If the user activates the second menu option provided by Photon 2 — Inspect:
⚠️🔊♨️🖼️ Similar to the image sample generation, the device draws each individual data point (color-based indicator) of the registered buffers on the ST7735 TFT display to show an accurate preview (snapshot) thermal image.
![]()
⚠️🔊♨️🖼️ Also, XIAO ESP32C6 prints progression notifications on the serial monitor for debugging.
![]()
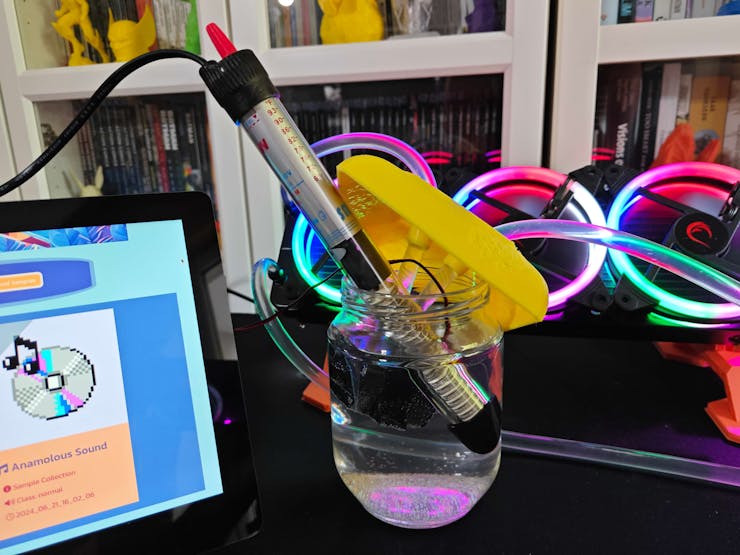
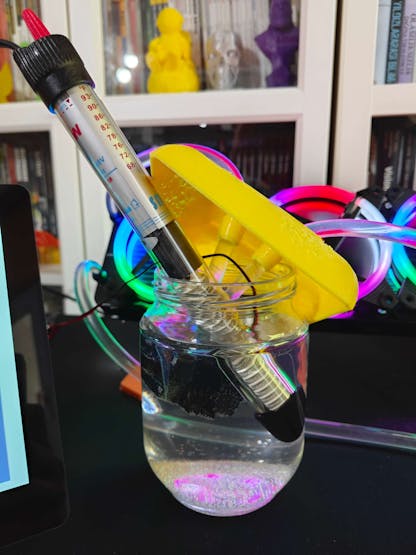
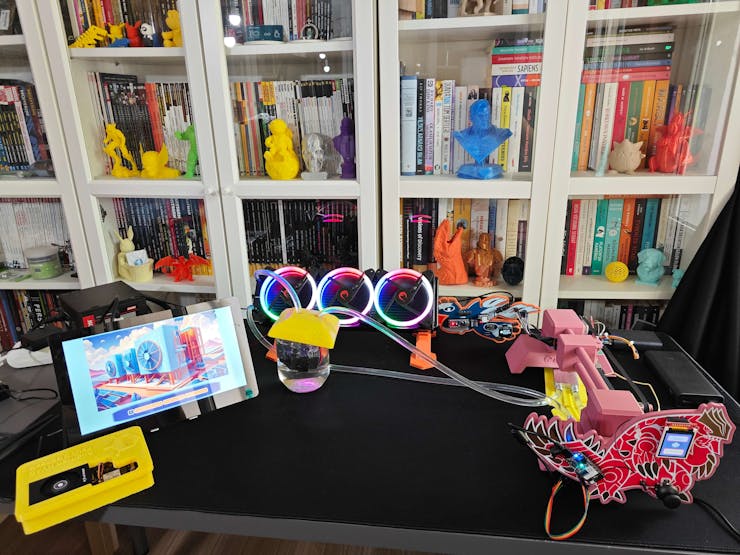
While conducting experiments with this HVAC system malfunction detection device, I added an aquarium heater to the water reservoir to artificially increase the temperature of the water circulating in the closed-loop system. In that regard, I was able to simulate and diagnose thermal cooling malfunctions of HVAC system components (aluminum blocks) after identifying anomalous sound originating from the cooling fans.
![]()
![]()
![]()
![]()
![]()
![]()
![]()
-
39Further Discussions
By applying advanced AI-powered multi-algorithm detection methods to identify anomalous sound emanating from the cooling fans and diagnose ensuing thermal cooling malfunctions of water-based HVAC system components, we can achieve to:
⚠️🔊♨️🖼️ prevent pernicious cooling aberrations deteriorating heat regulation for industrial facilities,
⚠️🔊♨️🖼️ avert production downtime for demanding industrial processes,
⚠️🔊♨️🖼️ reduce production costs and increase manufacturing efficiency,
⚠️🔊♨️🖼️ obviate excessive energy consumption via real-time (automated) malfunction diagnosis,
⚠️🔊♨️🖼️ extend equipment lifespan by maintaining stable heat transfer,
⚠️🔊♨️🖼️ deter exorbitant overhaul processes due to prolonged negligence, leading to a nosedive in production quality.
![]()
-
40Project GitHub Repository
As a developer, if you want to inspect or access code files and custom design files effortlessly, you can visit the project's GitHub repository, providing:
- Code files
- Gerber files
- STL files
- Custom libraries
- Edge Impulse machine learning models — Audio MFE and FOMO-AD
AI-driven Sound and Thermal HVAC Fault Diagnosis
Identify the faulty components via anomalous sound detection and diagnose ensuing cooling malfunctions via thermal visual anomaly detection.


Discussions
Become a Hackaday.io Member
Create an account to leave a comment. Already have an account? Log In.