 Muth
Muth-
1Step 1
Raspberry Pi Zero Setup
At first, setup the Zero might be tedious. There is only one usb port. Google 'raspberry pi zero setup without monitor' and you'll find very nice tutorials.
However if you want to just duplicate the polapi-zero, in order to setup the SD card, download the image from the project dropbox, and write it according the raspberry pi instructions:
https://www.raspberrypi.org/documentation/installation/installing-images/README.md
If you plan to access the raspberry pi with wifi and plugged an usb wifi adapter, once the image is written, you can access a FAT32 partition on the SDcard named /boot. On this partition you can add a file named wpa_supplicant.conf and put the network information inside:
network={
ssid="YourWifiNetworkName"
psk="TheMagicPassword"
}
This file will be automatically copied in /etc/wpa_supplicant/ at boot time. If you download the polapi-zero image, you should find a file wpa_supplicant.conf.bak that you can duplicate.The image is just the official Raspian image, with a samba server running, SPI LCD driver setup, Serial CTS enable, etc... Login and password are the default one.
-
2Step 2
Hardware
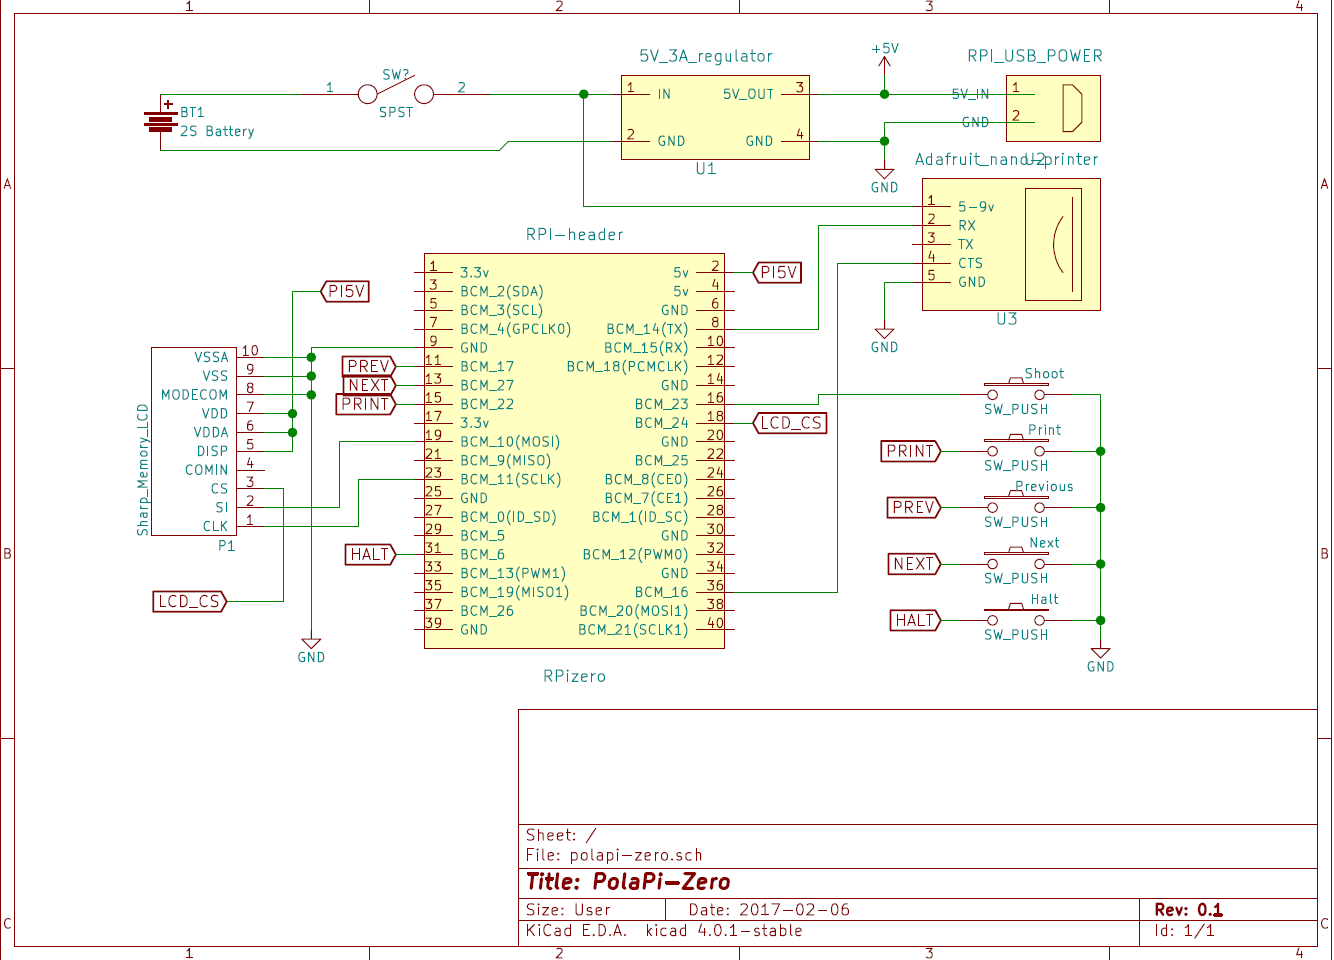
Probably the most delicate time is the beginning is to connect the Sharp LCD screen. I have found on ebay some adapter board for the small 10 pin ribbon cable, but I finally solder it myself. This kind of adapter board with this king of connector helps a lot.
![]()
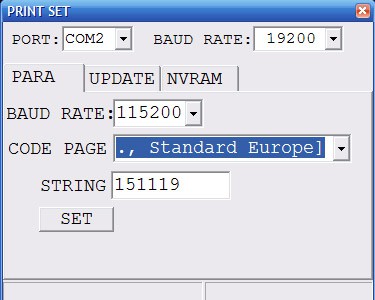
The printer receives data on a serial port, and by default the speed is slow. And there is a software way to change from 19200 bauds to 115200 thanks to this program: Link. As it is a windows program, and we need a USB to 5v TTL serial converter, such as this one. Power the printer, connect the gnd-Tx-Rx, and on the printer program set the right port, the previous speed (19200 in my case), the new speed (115200), code page US (it's the character-set ) and press SET.
![]()
PolaPi-Zero
Yet another Polaroid-like camera. Now with flavor! RapsberryPi Zero, Python, Memory-LCD, less wiring. It's all about monochrome.
Discussions
Become a Hackaday.io Member
Create an account to leave a comment. Already have an account? Log In.