Muth
Muth-
Pillow tweaking, Ordered Dithering
05/07/2017 at 09:16 • 0 commentsI was not too happy with a flickering effect during 'live-view'. Very visible on large gray area, where the black and white pixels should be alternate in a king of chess board pattern in order to create the gray illusion. With the error-diffusion method (Floyd-Steinberg), this alternating pattern will change randomly every frames. Maybe due to the LCD latency, flickering appears.
So a solution could consists to change from the pseudo random pattern of this Floyd dithering to the ordered method. The last one is less precise, but the fix Bayer matrix gives constant patterns.
The flickering is not clearly visible on this video, but the changed method gives a more smooth animation.
To reach this point, it was inconceivable to write the Ordered dithering algorithm in pure Python. I tried though, but far too slow as predicted. The solution was to directly implement that code in the compiled imaging Python library, Pillow. The following will be a summary of my Pillow compilation adventure...
Pillow, compiling Python lib
According their documentation, PIL (original and older version of the library) and Pillow cannot coexist. So first step is to uninstall them. Be sure to have the Python tools, and then I uninstall the previous version with PIP:
sudo apt-get install python-dev python-setuptools python-pip
sudo pip uninstall Pillow
Then I followed the Pillow building tutorial, and get and uncompress the sources:
wget https://pypi.python.org/packages/93/73/66854f63b1941aad9af18a1de59f9cf95ad1a87c801540222e332f6688d7/Pillow-4.1.1.tar.gz#md5=f2565954955c8d10f3b4f1f72f852bf7
tar -zxvf Pillow-4.1.1.tar.gz
Some external C library are needed:sudo apt-get install libjpeg8-dev zlib1g-dev libfreetype6-dev liblcms2-dev libwebp-dev tcl8.5-dev tk8.5-dev python-tk
And then I manage to get everything compiled and installed :cd Pillow-4.1.1/ sudo python setup.py build sudo python setup.py install
Inserting the Ordered dithering codeNow I used this very nice document of Lee Daniel Crocker to get a well written C code. It has to be inserted in /Pillow-4.1.1/libImaging/Convert.c :
static Imaging tobilevel(Imaging imOut, Imaging imIn, int dither) {
	int pattern[8][8] = {
    { 0, 32,  8, 40,  2, 34, 10, 42},   /* 8x8 Bayer ordered dithering  */
    {48, 16, 56, 24, 50, 18, 58, 26},   /* pattern.  Each input pixel   */
    {12, 44,  4, 36, 14, 46,  6, 38},   /* is scaled to the 0..63 range */
    {60, 28, 52, 20, 62, 30, 54, 22},   /* before looking in this table */
    { 3, 35, 11, 43,  1, 33,  9, 41},   /* to determine the action.     */
    {51, 19, 59, 27, 49, 17, 57, 25},
    {15, 47,  7, 39, 13, 45,  5, 37},
    {63, 31, 55, 23, 61, 29, 53, 21} };

//    [ ... ]

		if (dither == 1){
			int l;
			/* map each pixel to black or white, using ordered diffusion */
			ImagingSectionEnter(&cookie);
			for (y = 0; y < imIn->ysize; y++) {
				UINT8* in  = (UINT8*) imIn->image[y];
				UINT8* out = imOut->image8[y];

				for (x = 0; x < imIn->xsize; x++) {
					/* pick closest colour */
					l = CLIP(in[x] / 4);
					if (l > pattern[x & 7][y & 7]) {
						out[x] = 255;
					} else {
						out[x] = 0;
					}
				}
			}
			ImagingSectionLeave(&cookie);

		} else {
\\ [ ... ]
The nice thing is this was foreseen in the Pillow development, as Dither variable could takes yet defines constants in /Pillow-4.1.1/PIL/Image.py :# [...] # dithers NEAREST = NONE = 0 ORDERED = 1 # Not yet implemented RASTERIZE = 2 # Not yet implemented FLOYDSTEINBERG = 3 # default # [...]The Convert.c file I modified is probably not suitable to request a pull in the library, but I've put it in the PolaPi-Zero git repository.I will soon update the SD card image with this last version.
-
Another screen
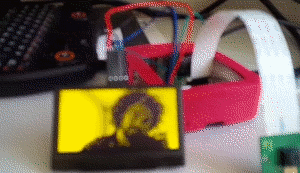
03/29/2017 at 16:42 • 0 commentsAs said, the memory LCD choice was mainly because it was already lying on a box somewhere in the possibly-will-be-useful pile of stuff. However it's not easy to find and not easy to solder.
I had a bit of time to quickly test what could be the result with a cheap oled screen. The 128x64 monochome OLED based on the SSD1305 /6 are quite common.
I used the Adafruit python SSD1306 library and the python picamera one. It gives funny results (too bad PIL library not implements ordered dithering instead of Floydsteinberg) but it's really at the lower resolution limit for a useful viewfinder :
![]()
Preview code is quick and dirty :
''' Created on March 13, 2017 @author: muth ''' from __future__ import print_function from io import BytesIO from time import sleep import picamera from PIL import Image from time import sleep import time import Adafruit_SSD1306 S_WIDTH = 128 S_HEIGHT = 64 S_SIZE = (S_WIDTH, S_HEIGHT) P_WIDTH = 768 P_HEIGHT = 384 P_SIZE = (P_WIDTH, P_HEIGHT) class MyOutput(object): def __init__(self): self.size = 0 def write(self, s): global oled image = Image.frombuffer('L', P_SIZE, s, "raw", 'L', 0, 1) image.thumbnail(S_SIZE, Image.NEAREST) image = image.convert('1', dither=Image.FLOYDSTEINBERG) # image = image.convert('1', dither=Image.NONE) oled.image(image) oled.display() # Initialize oled. oled = Adafruit_SSD1306.SSD1306_128_64(rst=24) oled.begin() oled.clear() oled.display() oled.set_contrast(2) with picamera.PiCamera() as camera: camera.rotation = 180 camera.resolution = P_SIZE camera.framerate = 60 camera.contrast = 50 # camera.start_preview() camera.start_recording(MyOutput(), format='yuv', resize=P_SIZE) sleep(30) camera.stop_recording() sleep(1) -
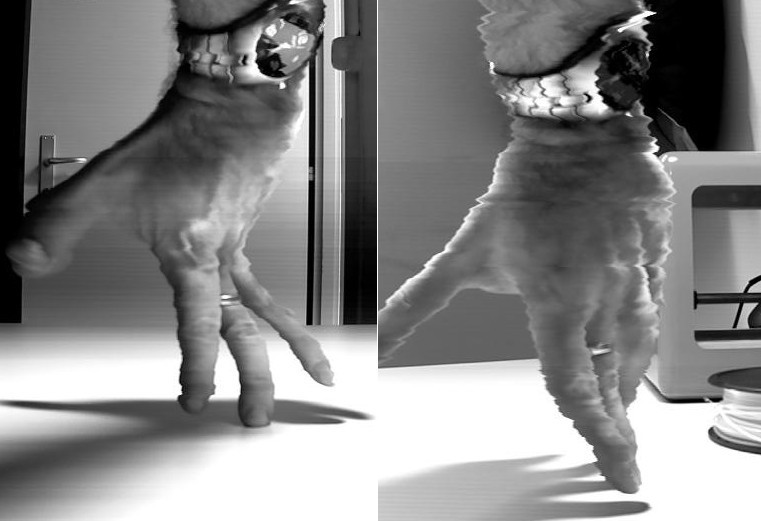
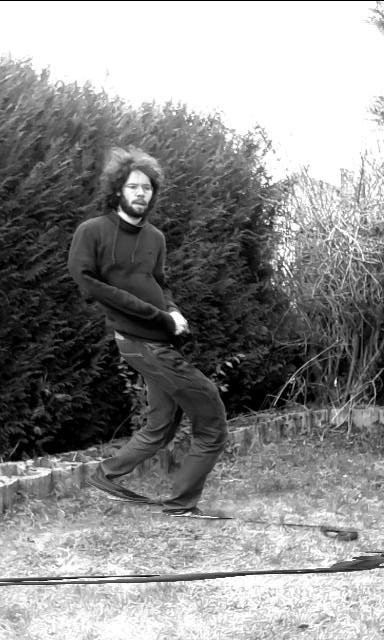
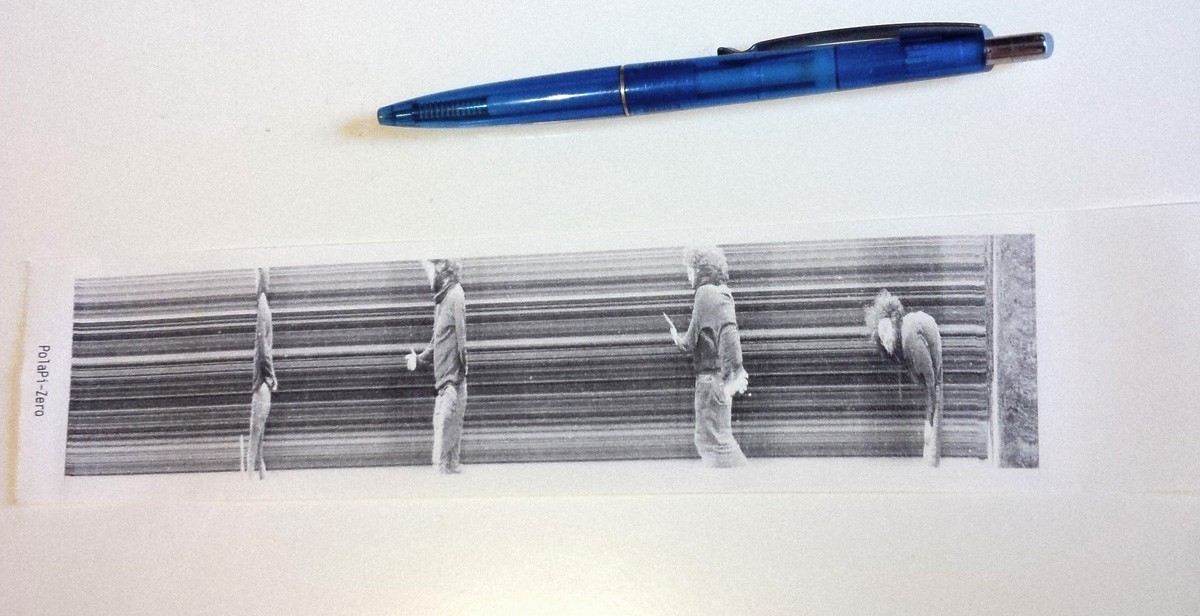
Slit-scan Mode
02/13/2017 at 17:38 • 0 commentsfinally made some test about a slit-scan mode. If you don't know yet, it is worth to google-it. It is on version 0.8 and in the last SDcard image.
For now I implemented 2 types scan. One where each vertical lines are recorded at around 20 per second:
![]()
The pictures above are taken with this first mode, and the camera standing vertically. It's a king of very slow 'roling shutter' effect.
![]()
Imagine the funny result you can achieve scanning a face slowly rotating ;)
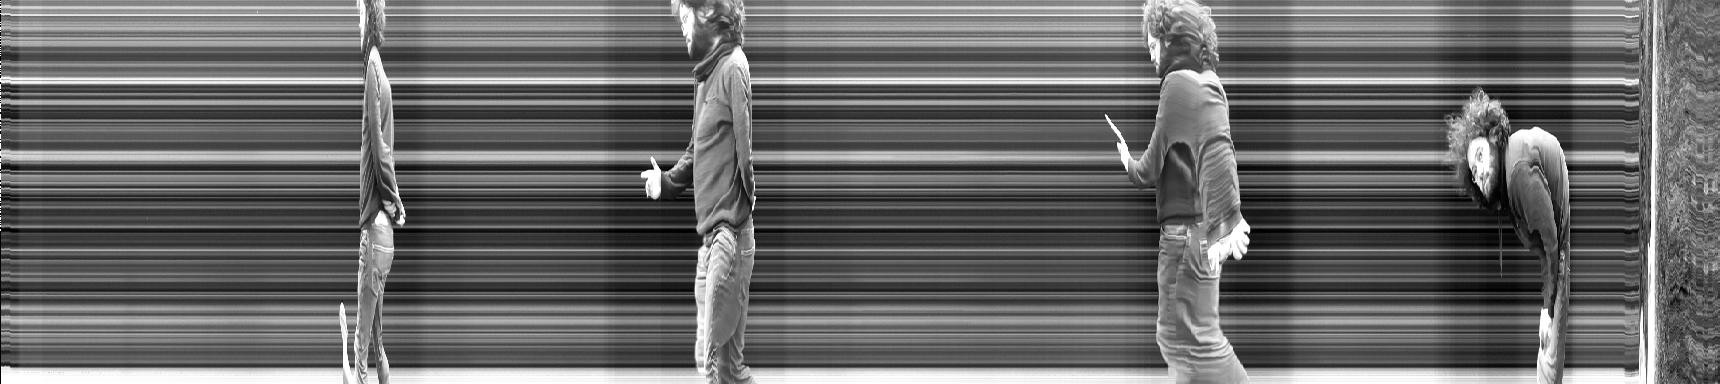
In the second scan mode, only the central vertical line is recorded and stacked to a image which can be the width you want. Be creative :)
![]()
![]()
To launch these modes, while in 'liveview', use the button 'next' for the first mode and 'previous' for the second. Each mode can be interrupted with the trigger button.
-
Around 20 fps
02/13/2017 at 17:01 • 0 commentsI figure out how to reach a better frame-rate on the LCD screen. On possibility I didn't tested is to grab the video frames frome the picamera library. I had doubt the RPi zero can transform fast enough the image but it's doing well at 20 fps. There some drops, but very acceptable, and the CPU is at about 40% and 0.7 Load av'.
The code start video recoding :
    liveview = LiveView()
    camera.start_recording(liveview, format='yuv', resize=SCREEN_SIZE)
and the class LiveView must implements write(self, string) :class LiveView(object): def __init__(self): pass def write(self, s): global lcd image = Image.frombuffer('L', (416, 240), s, "raw", 'L', 0, 1) image = image.crop((8, 0, SCREEN_WIDTH+8, SCREEN_HEIGHT)) image = ImageOps.invert(image) image = image.convert('1') lcd.write(image.tobytes()) def flush(self): print('Stop LiveView')The thing about the 416 pixel width instead of the 400 of our screen (and the needed crop) is due to the fact that the camera return a modulo 32 pixels dimension video frames.
Sees v0.6 on github.
PolaPi-Zero
Yet another Polaroid-like camera. Now with flavor! RapsberryPi Zero, Python, Memory-LCD, less wiring. It's all about monochrome.