Background
Last year I had the good fortune of meeting Zbigniew (“Ziggy”) Stachniak, curator of the York University Computer Museum and author of the definitive book on the MCM/70 microcomputer "Inventing the PC - The MCM/70 Story". With Zbigniew's help I built an MCM/70 Reproduction. It was a great experience for me that culminated in my attending the MCM/70 @ 50 event, organized by Zbigniew. The event marked the unveiling of a permanent exhibit in the Steacie Science and Engineering Library at York University featuring a complete line of MCM computers including the MCM/70.
In the spring of 2024 I emailed Zbigniew and asked if he had any other projects that I could perhaps help out with. I applaud his work highlighting Canada's contribution to the microcomputer revolution and if I can assist in any small way I'm in. He suggested CPS-1, the first Canadian microprocessor-based computer. Built by Microsystems International Ltd. (MIL), the CPS-1 supported a 12-bit address bus and a 4-bit data bus.
To learn more about the CPS-1 and the MF7114 please refer to Zbigniew Stachniak 's paper:
Stachniak, Z. The MIL MF7114 Microprocessor. IEEE Annals of the History of Computing, October-December 2010 (vol. 32 no. 4) pp. 48-59.
The Emulator
The York University Computer Museum (YUCoM) has already implemented a software based CPS-1 emulator based on documentation they have recovered. The emulation consists of the CPU module interfaced with a front panel, paper tape reader, a plasma display, and a numeric keypad.
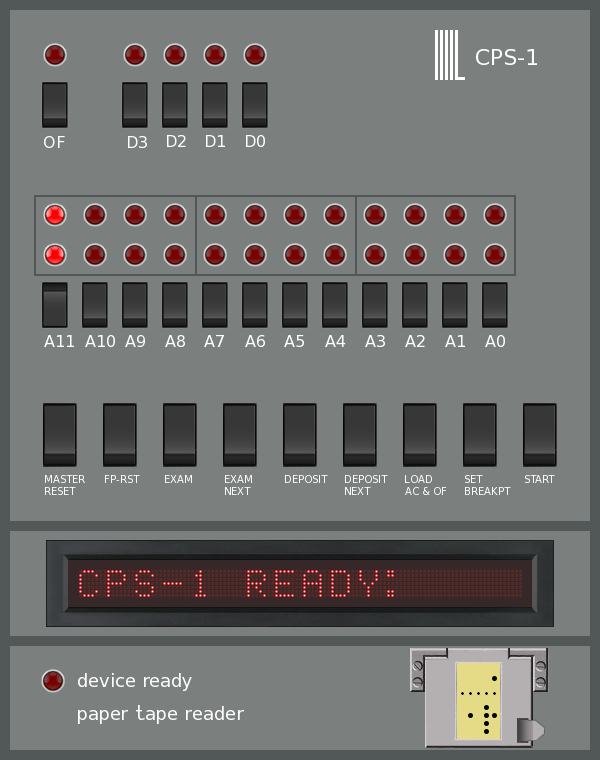
Running the Emulator on a Raspberry Pi
Getting the CPS-1 Emulator running on a Raspberry Pi is pretty straight forward. The first step is to get Raspberry Pi OS installed on the Pi. To do this you have to image a microSD card of at least 8G capacity with the OS. There is a Windows program called Raspberry Pi Imager that does this (also available for Ubuntu and macOS).
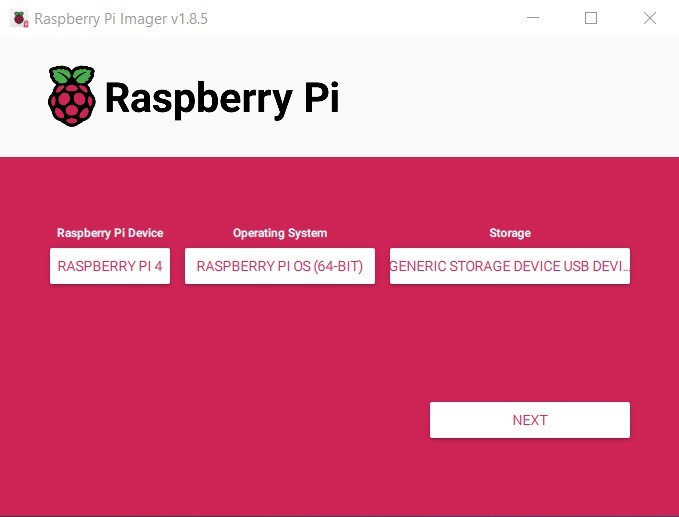
You simply specify the target Raspberry Pi device, the version of the OS you want to install, and the SD card to image. When you press NEXT you will have the option of defining some initial settings on the target Pi. It's a good idea to do this as it simplifies the install.
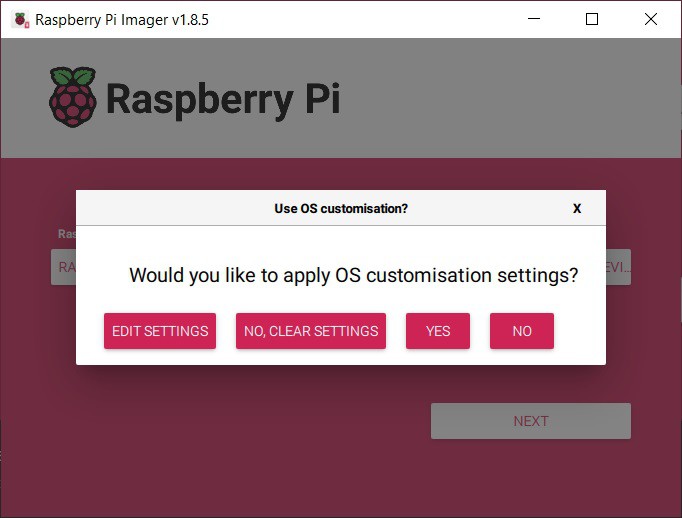
Select EDIT SETTINGS.
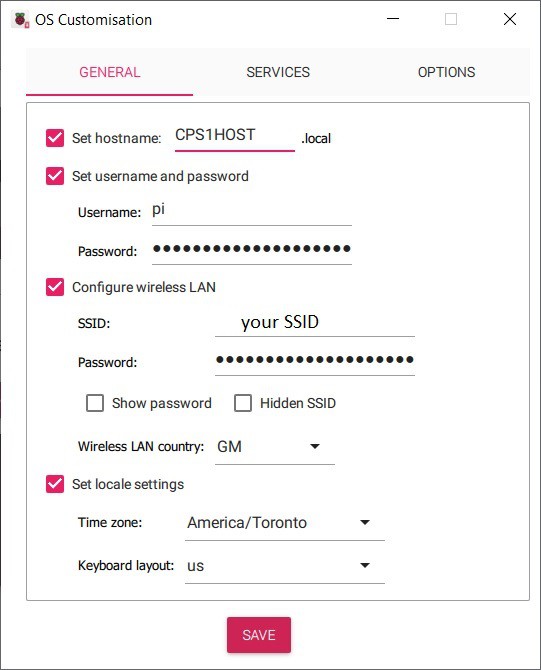
I left the default user name as Pi and the default password of raspberry. Set the wireless LAN and locale as appropriate and press SAVE.
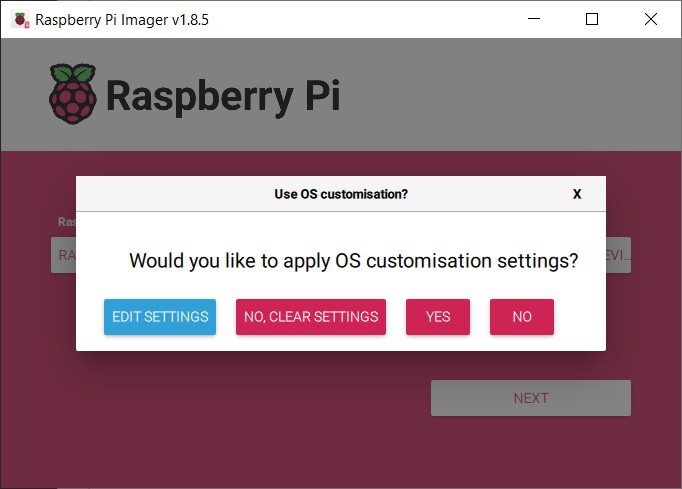
Press YES to apply the custom settings.
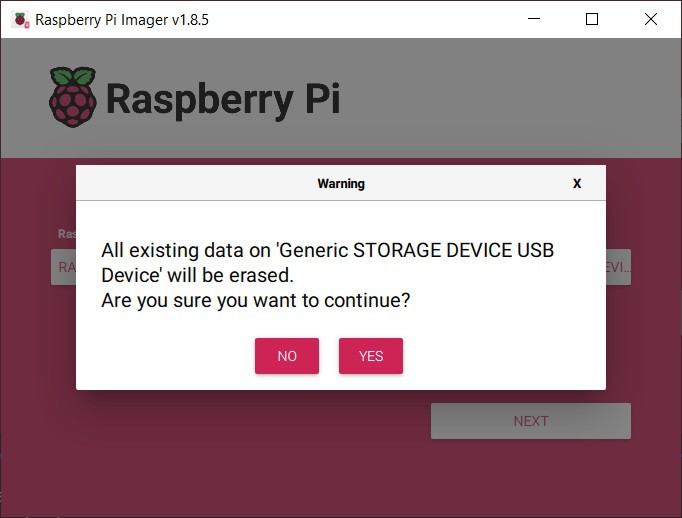
Press YES to continue.
Boot the Pi
Install the microSD card into the Raspberry Pi and apply power. If the imaging has gone well you should see the Raspberry Pi OS desktop.

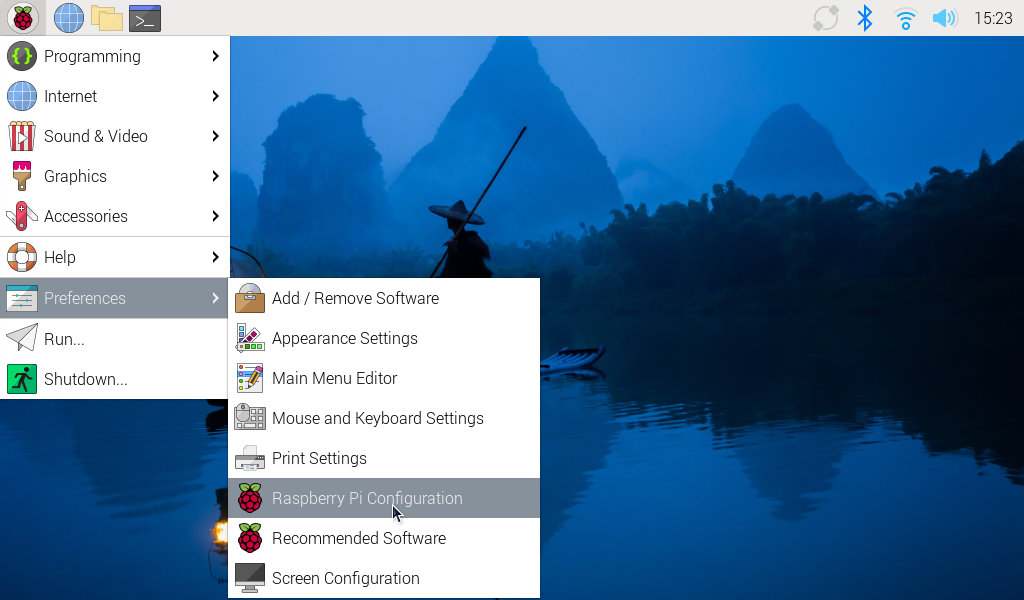
Before you install the emulator there are a few system services that have to be turned on. To do this select Raspberry Pi Configuration in Preferences.
Then enable SSH, VNC, SPI, and I2C and click OK.
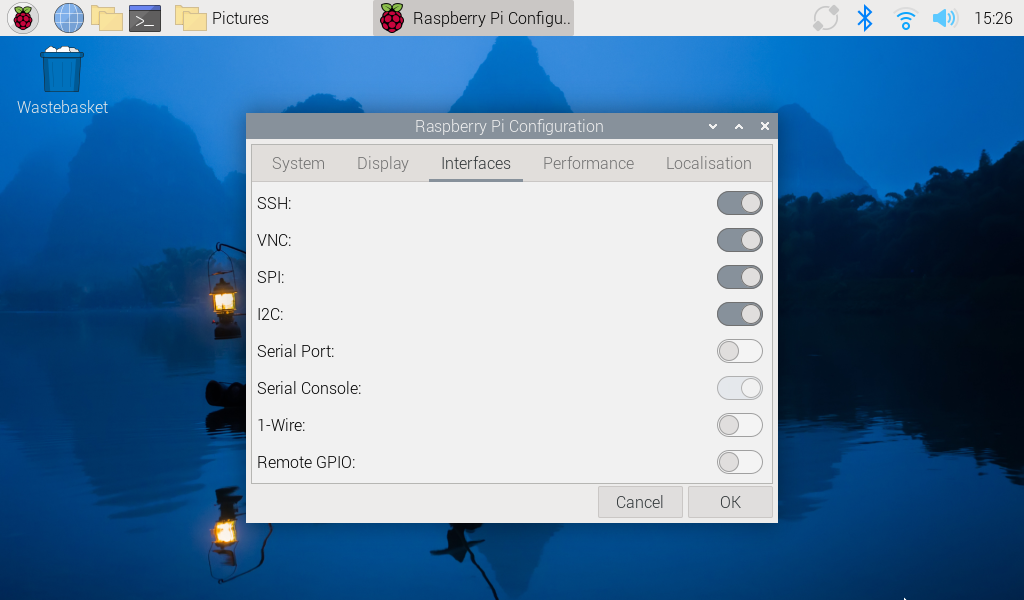
The system should be setup to run the emulator now.
Running the CPS-1 Emulator
I'll demonstrate using the The York University Computer Museum (YUCoM) original distribution, but it’s the same for the variants that have the HW front panel integrated. Copy the emulator distribution onto the Pi. You could use SSH or VNC to do this but I just copied the file over on a USB stick. I placed it in a folder I created called CPS1 in the /home/pi tree the exploded the tar file in place.
Next compile the emulator code. Run the following commands.
sudo apt-get install libncurses-dev
gcc cps1.c -lGL -lglut -o cps1
The first command installs a required curses library and is only run once, the second compiles the cps1 application. At this point you should be able to run the application.
sudo ./cps1
Root access is required to access the Pi's IO pins.
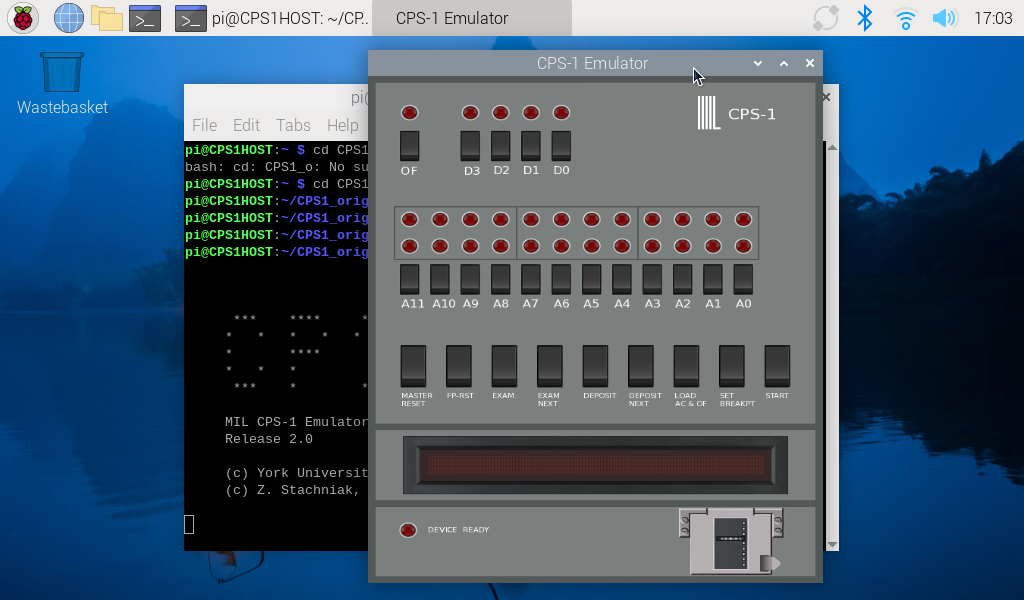
Using VNC
In the previous step I enabled VNC on the Pi. On my Windows machine I downloaded and installed the RealVNC Viewer. This allows me...
Read more » Michael Gardi

 Doctor Volt
 hengying
 Alan Campbell
I know it's probably in the research paper by Zbigniew Stachniak but that requires requesting a copy from the author. I'm just curious what uses this early microcomputer was put to. Just a few sentences of explanation instead of having to deal with a walled document system.