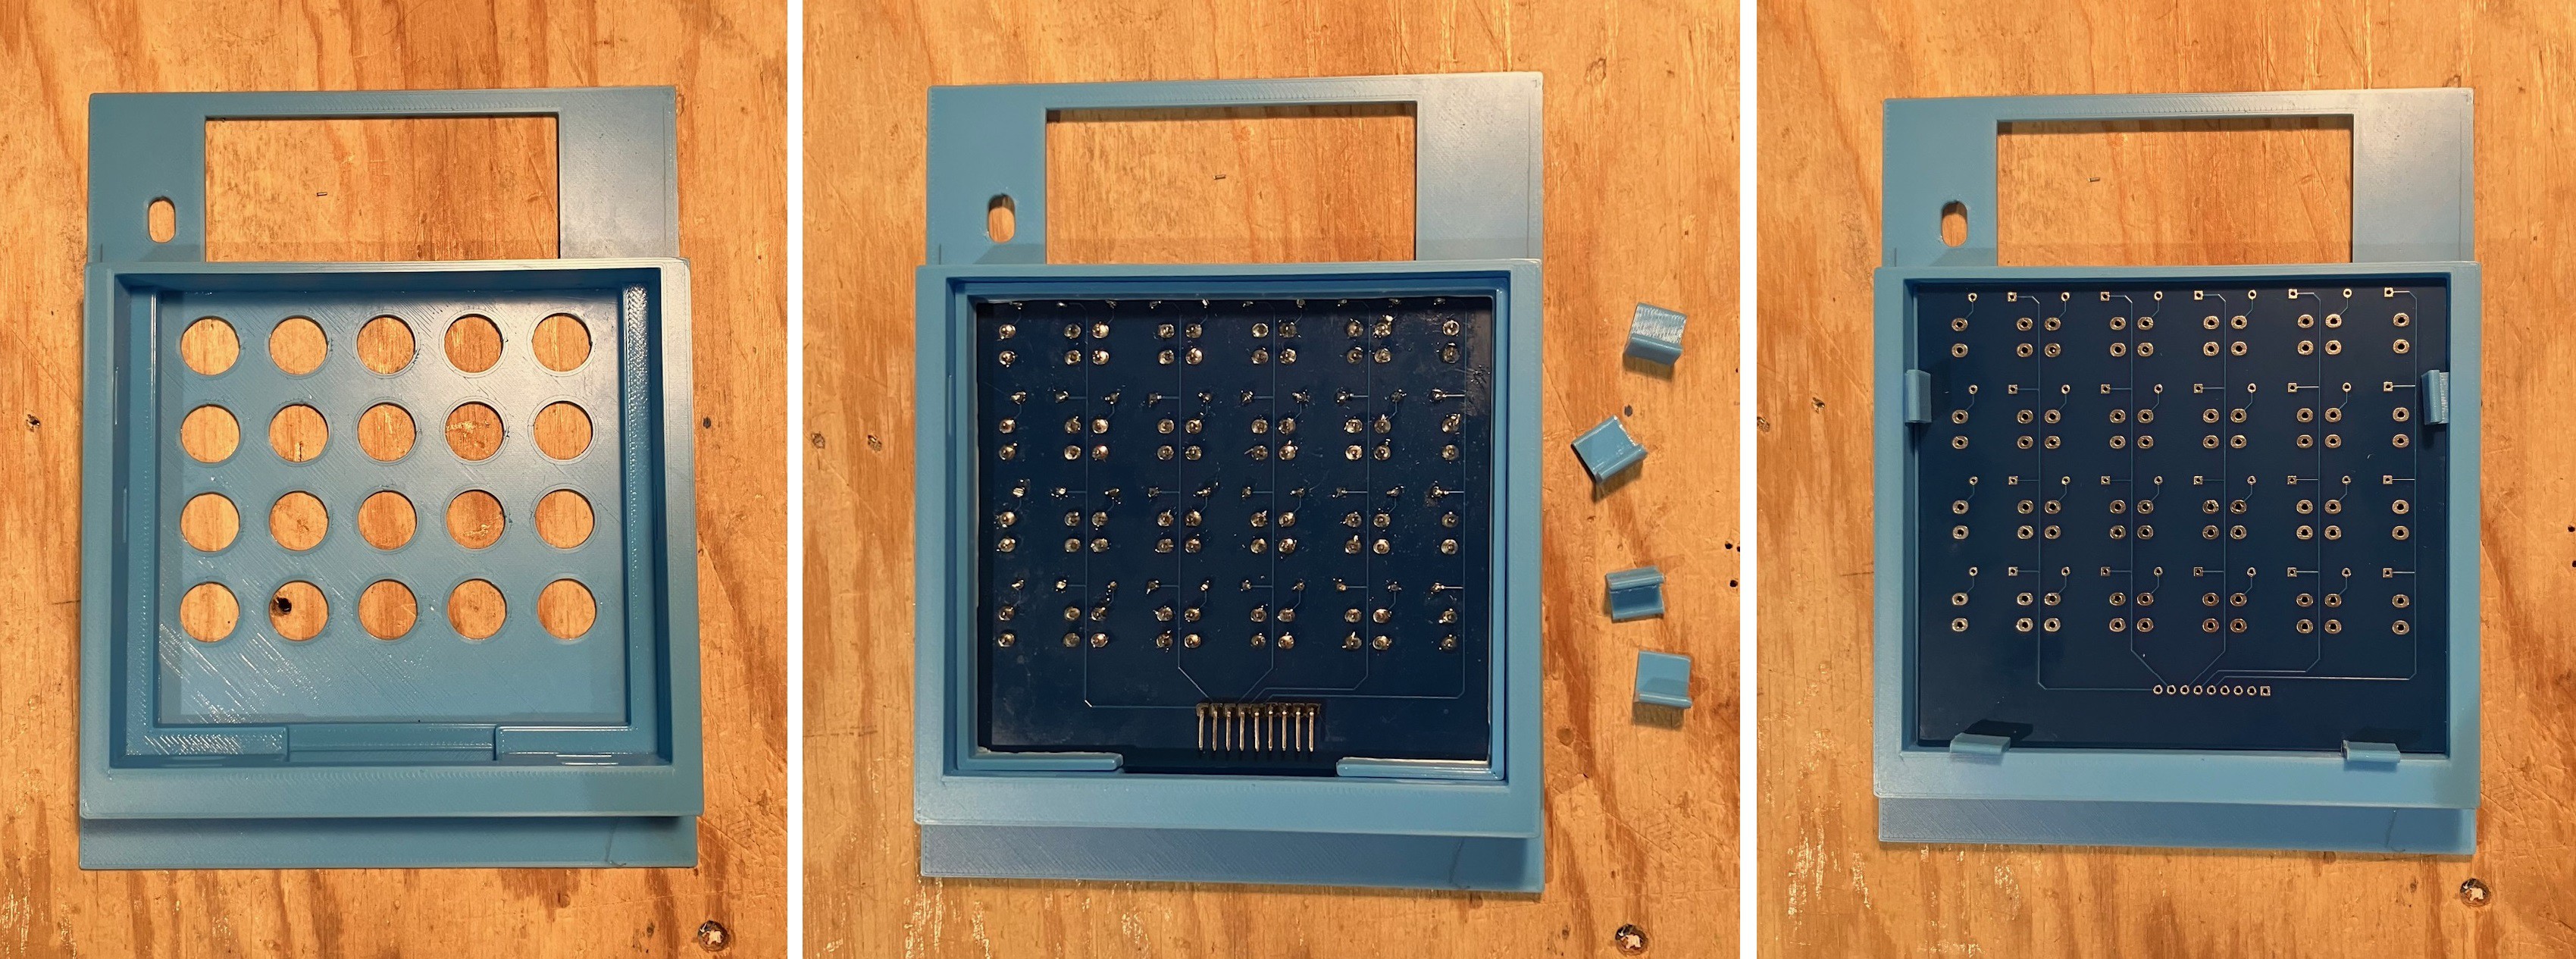
I designed a mounting block for the Trekulator keypad.

I attached this with CA glue to the back of the front panel. To ensure the alignment of the keys with the holes I glued the mounting block to the back with the fully populated PCB in place.

With the keypad PCB in place I added the spacer ring (right side of the first image above). I created the block with a depth that can accommodate two PCBs. I did this having decided that I will create a second PCB to hold the ESP32, I2S, microSD reader, and amplifier cards. This second PCB will be the same size as the keypad and will greatly simplify the overall Trekulator wiring. In the rightmost picture immediately above I have used a keypad PCB as a placeholder for this new board, and used some 3D printed clips to hold everything in place.
 Michael Gardi
Discussions
Become a Hackaday.io Member
Create an account to leave a comment. Already have an account? Log In.