 Arvind Sanjeev
-
1Step 1
Step 1: Preparing the head mounted display enclosure
![DIY Head Mounted Display Project DIY Hacking]()
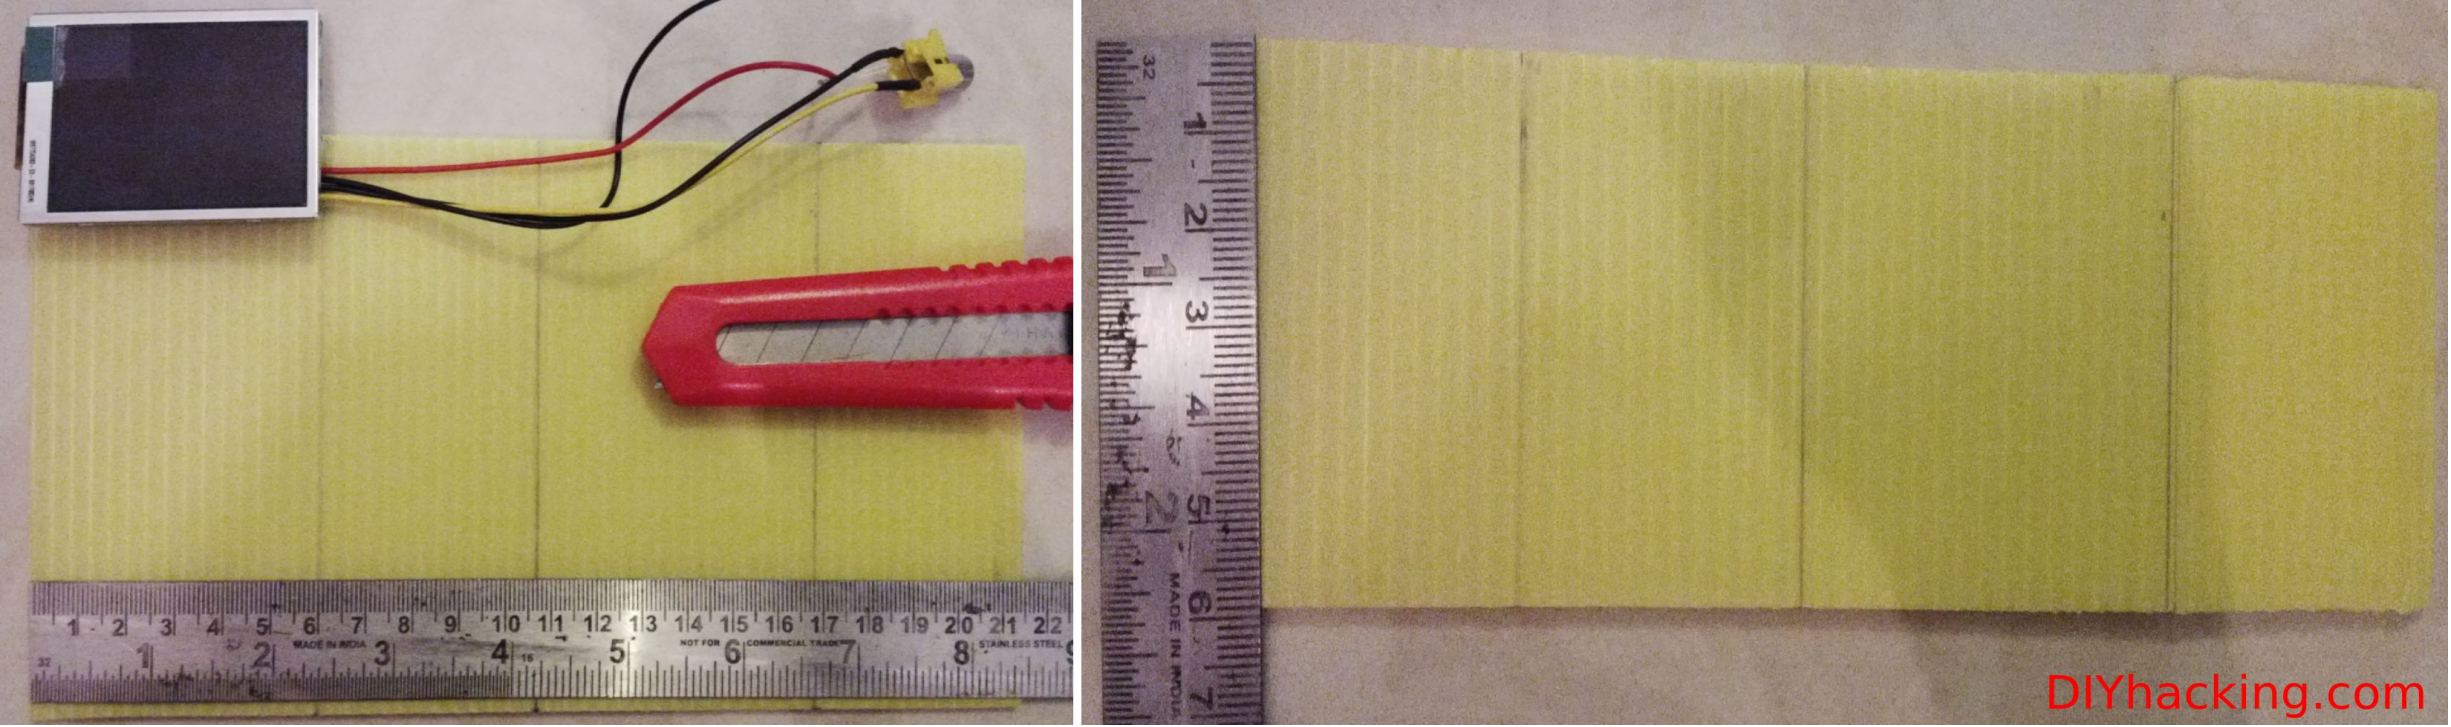
- Cutting the sun board sheet for preparing the head mounted display enclosure
It is necessary that the display needs to be cut off from all external light sources to ensure a sublime viewing experience. Here, I have used plastic sun board sheets, the kind of sheets normally used for vinyl advertising, for making the enclosure. Cut out a piece of the sheet of length 21 cm and width 6 cm. Mark cross sections vertically at 6 cm , 10.5 cm , 17 cm and 21 cm as shown. Next, take a cutting knife with the length of the blade adjusted to be just 3 mm. On the lines earlier marked, cut through half way of the board. This will ensure, that the board bends properly to form a rectangular enclosure for the display.
![DIY Head Mounted Display Project DIY Hacking]()
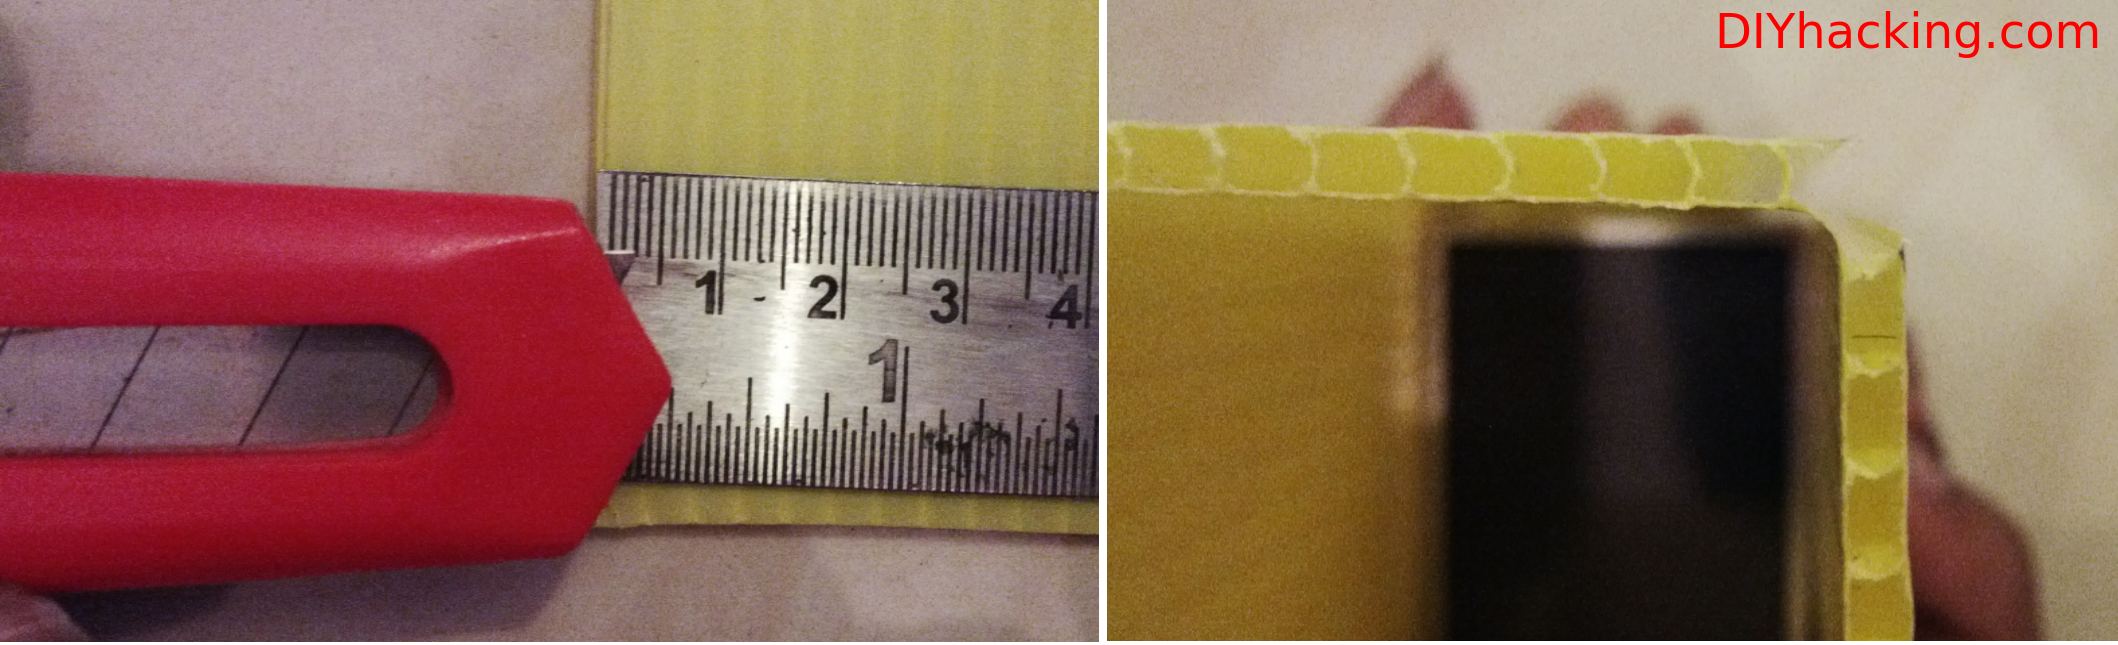
- Cutting half way through the sheet
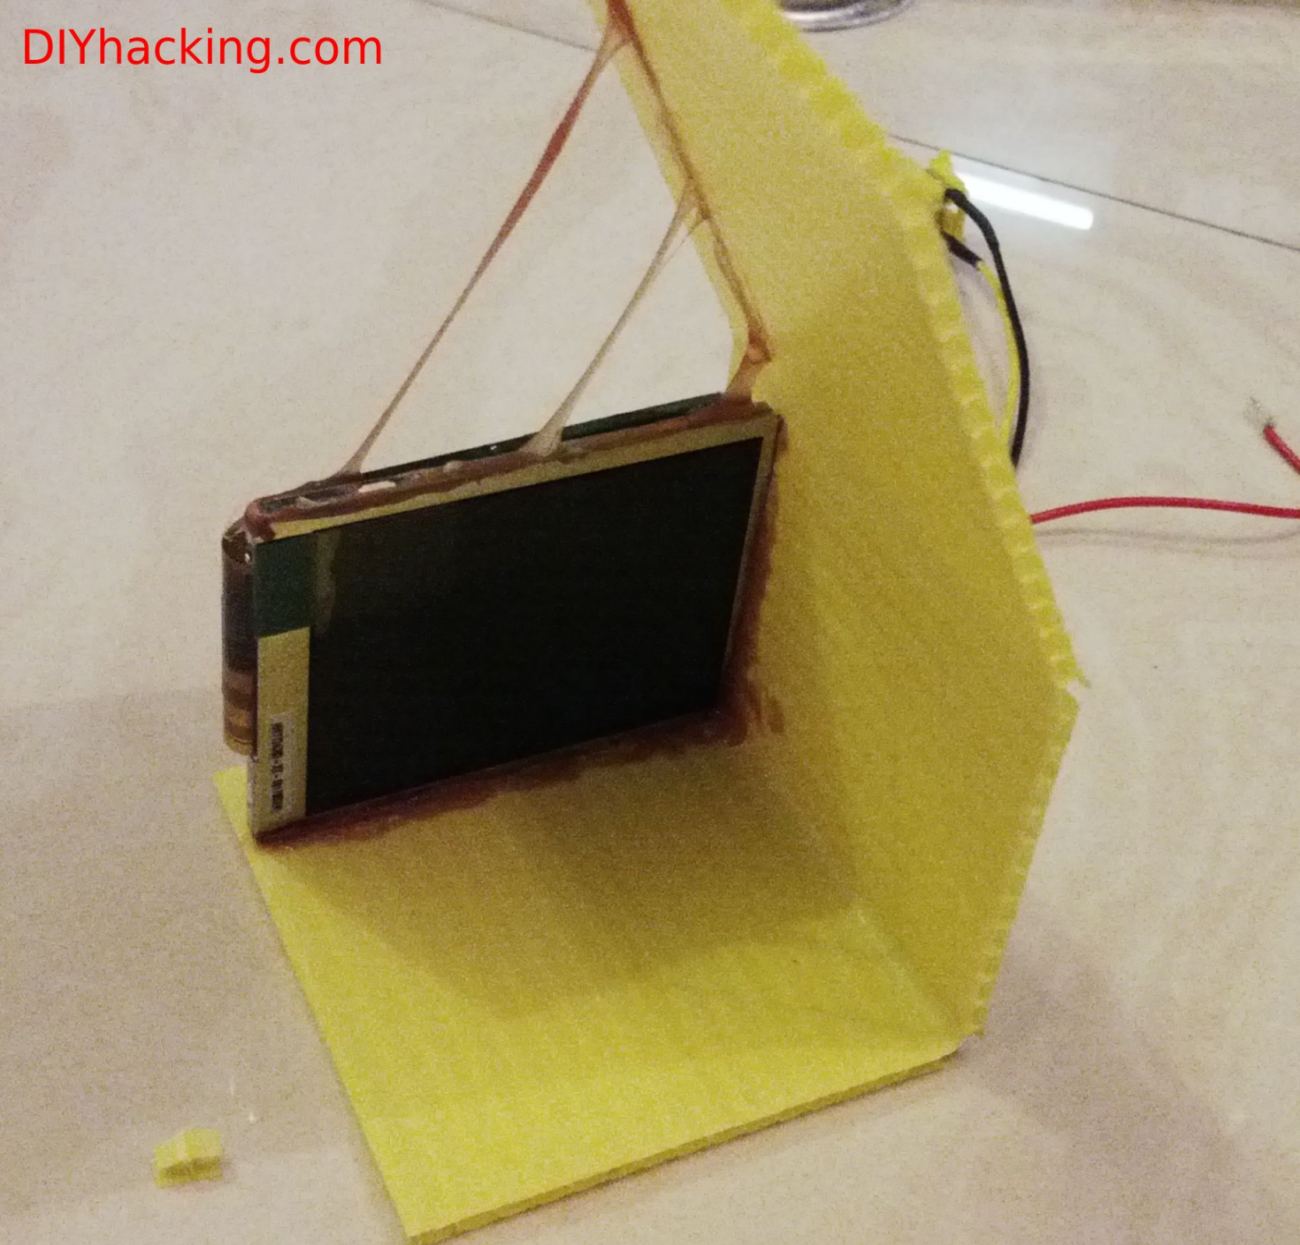
Now, hot glue the circuit board attached to the display to its back. This will make it a rigid one piece display as shown. Next, apply fevicol SR glue or any other synthetic rubber based adhesive to the edges of the display and stick it to the sun board sheet as shown. Bend and stick all the edges of the display and finally seal it, to make the enclosure.
![DIY Head Mounted Display Project DIY Hacking]()
- Sticking the enclosure to the display
-
2Step 2
Step 2: Attaching the lens for the head mounted display
![DIY Head Mounted Display Project DIY Hacking]()
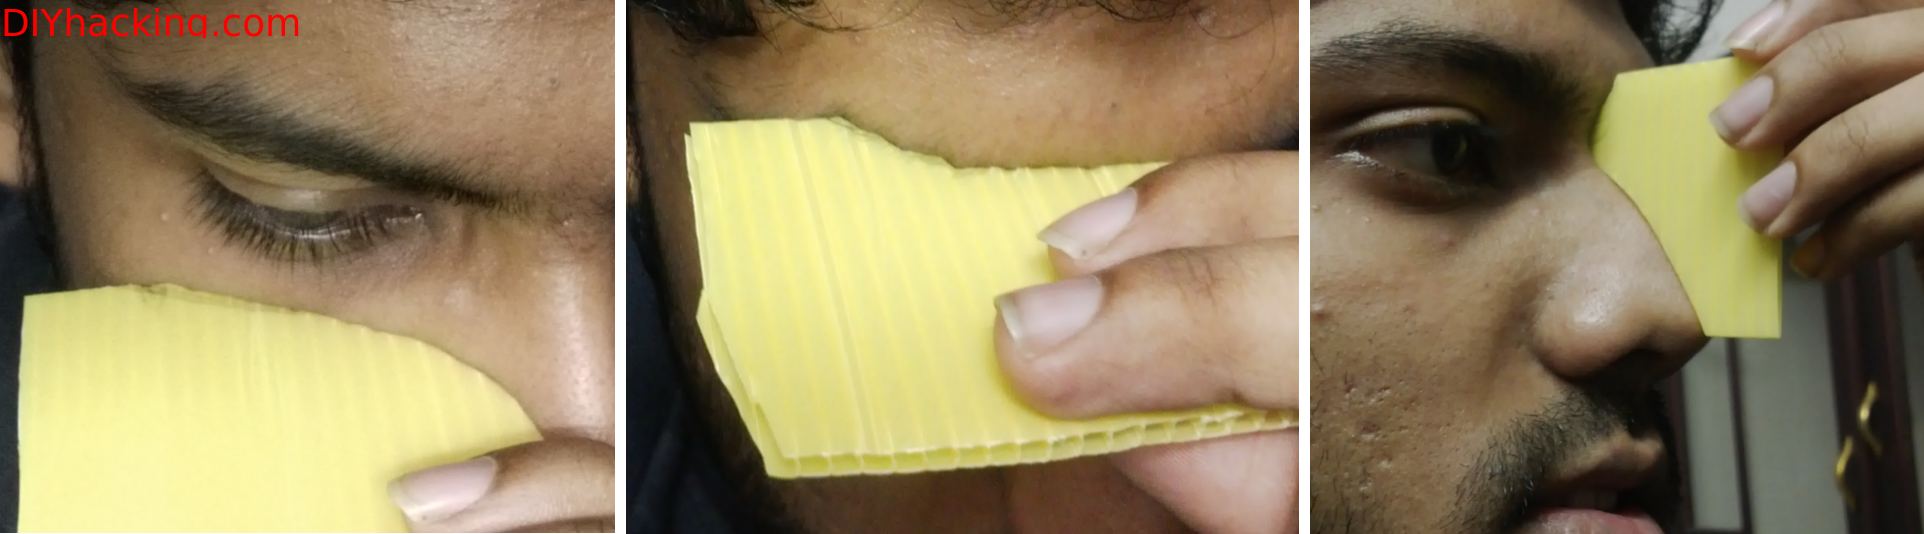
- Take outlines of your face for cutting off the enclosure's contours
The enclosure prepared , now has to be cut off in such a way that it fits snug with the contours of your face. Make outlines of your nose, your right eyebrow, etc using excess sun board sheets. Mark the outline obtained for the contours of your right eye on the prepared enclosure. Cut out all excess material on the four sides based on the outline. The ultimate aim being that the enclosure fits snug on your face.
![DIY Head Mounted Display Project DIY Hacking]()
- Cutting the enclosure of the DIY head mounted display
Furthermore, take the aspheric lens and place it in front of the newly modified enclosure. View the display through the lens and wrap it using black insulation tape, such that only the LCD display could be viewed through it. The enclosure and the surroundings of the display shouldn't be seen while viewed through the lens. This ensures a better visual experience for the head mounted display.
![DIY Head Mounted Display Project DIY Hacking]()
- Sticking the lens to the enclosure of the head mounted display
Stick the lens to the enclosure using the rubber adhesive as shown. Here, I have also spray painted the enclosure black, to prevent outside light from getting in.
Next, use some sponge or soft foam like material to stick on the front crevices of the plastic enclosure. This will make the head mounted display more comfortable while wearing it. Cut out the foam sections in the same shape as the four contours of the enclosure .Stick it to the edges using the rubber adhesive.
![DIY Head Mounted Display Project DIY Hacking]()
- Covering the contours of the DIY head mounted display using foam
-
3Step 3
Step 3: Hacking the USB webcam
Take the USB webcam you have and remove its plastic enclosures. Remove the peripheral buttons, etc attached to it. Cut off the microphone attached to the circuit board. Next, salvage and remove a flexible mic enclosure with the mic from an old headphone. Now solder the new microphone terminals to the existing mic pads on the webcam circuit. Ensure, that the interconnecting wires for the mic have adequate length to be positioned near your ear. You can also use infra red leds with your webcam , so that your head mounted display will even have night vision ;).
![DIY Head Mounted Display Project DIY Hacking]()
- Hacking open a USB webcam
Now, take the webcam circuit having the camera and stick it in front of your head mounted display. This can be done by preparing a bridge using the sun board pieces. Stick the webcam circuit onto this bridge. I have used hot glue for sticking it.
![DIY Head Mounted Display Project DIY Hacking]()
- The finished DIY Head Mounted Display enclosure
-
4Step 4
Step 4: Putting it all together to make the "Smart cap" head mounted display
I had a hip hop cap lying around in my home, so I used it to attach my head mounted display. Using the rubber adhesive, I stuck the enclosure of the display on to the visor of the cap, after adequately positioning it for my right eye. The display is then powered using the 5V and GND pins on the raspberry pi. The composite video output of the pi is connected to the display via RCA connectors.
![Smart cap DIY Head Mounted Display Project DIY Hacking]()
- Smart Cap - DIY Head Mounted Display
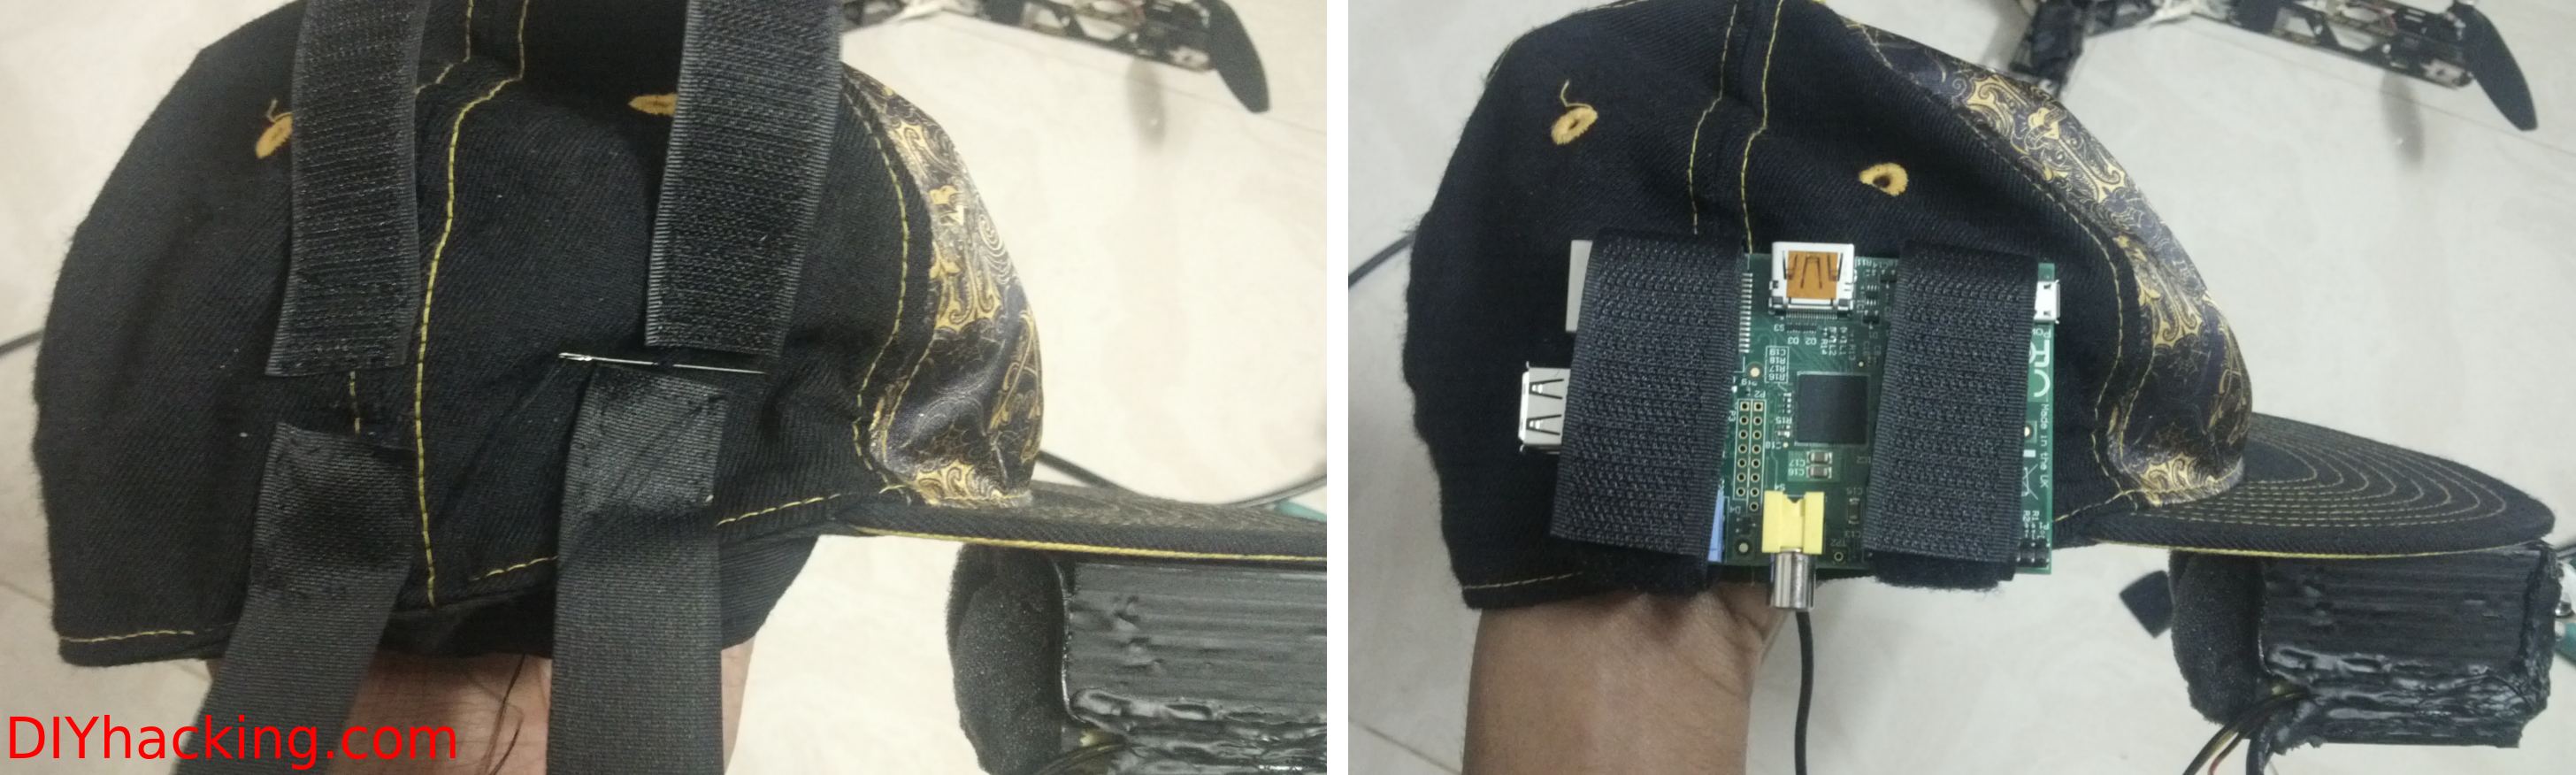
Next, I attached the microphone to the left side of the cap ensuring it to be ergonomic, again using the rubber glue. To attach the raspberry pi board on to the cap, I used velcro. I sewed some velcro strips on to the right side of the cap and used it to wrap the raspberry pi.
![Smart Cap DIY Head Mounted Display Project DIY Hacking]()
- Cap with the Head Mounted Display and Mic
Now you have successfully prepared the hardware for the Smart Cap head mounted display. Try it on after connecting the raspberry pi to the display and ensure its comfortable.
![Smart Cap DIY Head Mounted Display Project DIY Hacking]()
- Attaching the raspberry pi using velcro to the cap
-
5Step 5
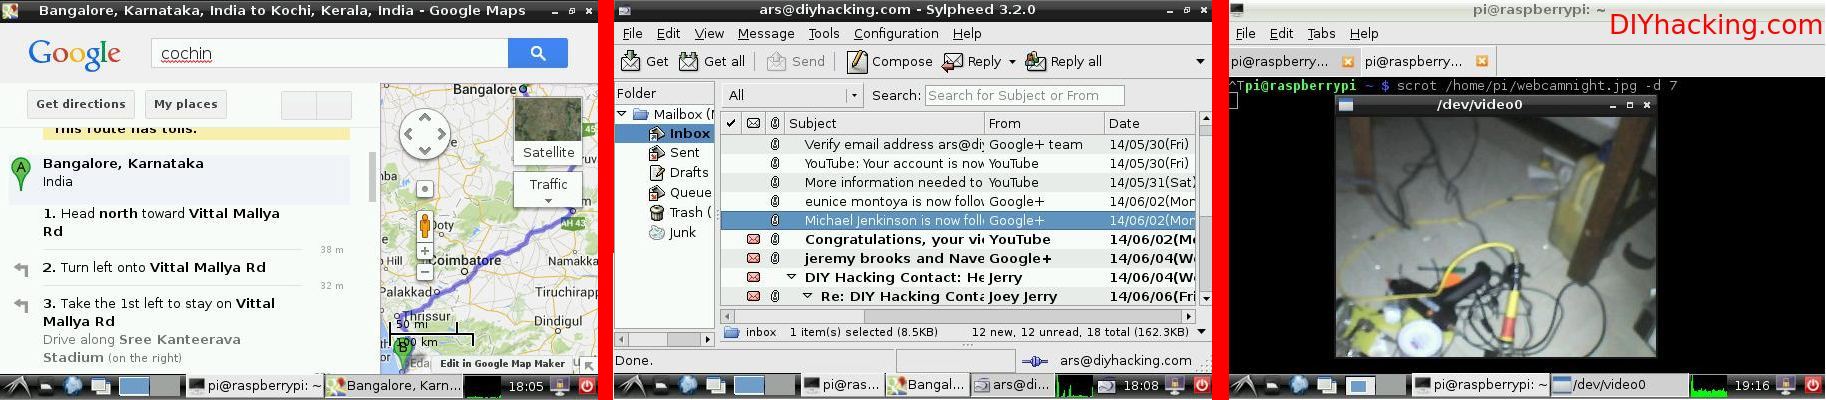
Step 5: Setting up the voice recognition software for your DIY head mounted display
![Smart Cap DIY Head Mounted Display Project DIY Hacking]()
- Different screenshots from the head mounted display
I have prepared an interactive voice response system that responds to certain voice commands and gives you appropriate results. In order to incorporate this system , you can either use the image file for my operating system and prepare an SD card. This is the easier method, as most of the complicated stuff are taken care off, you can start using the system as soon as you plug it in the pi. First ,unzip the downloaded file to extract the .img file. For instructions on how to install this image file onto your SD card , look at step 2 of this tutorial. To begin using the voice commands , just enter the command given below and start using the system like in the video at the bottom of this post :
voicecommand -cOr, if you would like to build and customize your own voice recognition system, please go through the DIY hacking tutorial : Voice Recognition for Raspberry Pi . In this method, you have to make sure, that you change the screen resolution for the display. This is done by editing the file /boot/config.txt , edit it using the command
sudo nano /boot/config.txtUncomment the line saying: disable_overscan=1 , by removing "#" , also set the framebuffer_width=320 and framebuffer_height=240 and remove the "#" from both these lines. This will create a better visual appearance for the LCD display.
The video showing the Smart Cap - DIY Head Mounted Display in action:
https://www.youtube.com/watch?v=-sqBGGc_kWw&feature=youtu.be
Smart Cap
Smart Cap consists of a monocular head mounted display and supports voice recognition and first person video streaming.


Discussions
Become a Hackaday.io Member
Create an account to leave a comment. Already have an account? Log In.
Are you sure? yes | no