Close
0%
0%

PocketNav 32

An ESP32-based GPS navigator that’s easy to build, use, and modify

Public Chat
Similar projects worth following
0 followers
PocketNav 32 is a simple and minimal GPS navigation device built around the ESP32 microcontroller. Designed for low power consumption, ease of customization, and the use of readily available components.

The project’s primary goal is to deliver a low-power, open-source GPS handheld that’s inexpensive, easy to build, customize, and use in outdoor settings, such as hiking, or geocaching.

Living remotely in the beautiful back country of British Columbia, I am frequently outside exploring trails, hiking, and participating in hobbies like hunting and 4x4ing, which inspired me to create a reliable, portable GPS device aimed at for rugged, outdoor use. I use GaiaGPS (iOS/Android) to discover new trails from already familiar places, so I wanted a device to show me how to navigate home for when I wanted to just walk into the woods.
Secondarily to that, I use a ballistics calculator app to determine distances based on lat/long and would much prefer a dedicated device (laser range finders are expensive).

This project is currently built on a breadboard but I have plans to design a 3D printed enclosure, which includes a solar panel to charge a 18650 battery.

Currently the device can:

  • Retrieve GPS coordinates and display to the user
  • Calculate distance in meters between two coordinates
  • Display a vector map, displaying land and water features
  • Menu-driven settings allow a user to change display settings, and enable/disable low power mode

  • 1 × ESP32 An ESP8266 can be used instead but the UART pins must be re-assigned
  • 1 × SSD1306 OLED Display Any I2C display
  • 1 × Ublox Neo 7M GPS Neo 6M or ATGM336H can be used
  • 4 × LEDs Status lights
  • 4 × Buttons For changing modes, navigating menus, changing settings, power off

View all 6 components

  • Vector mapping!

    Easton6 hours ago 0 comments

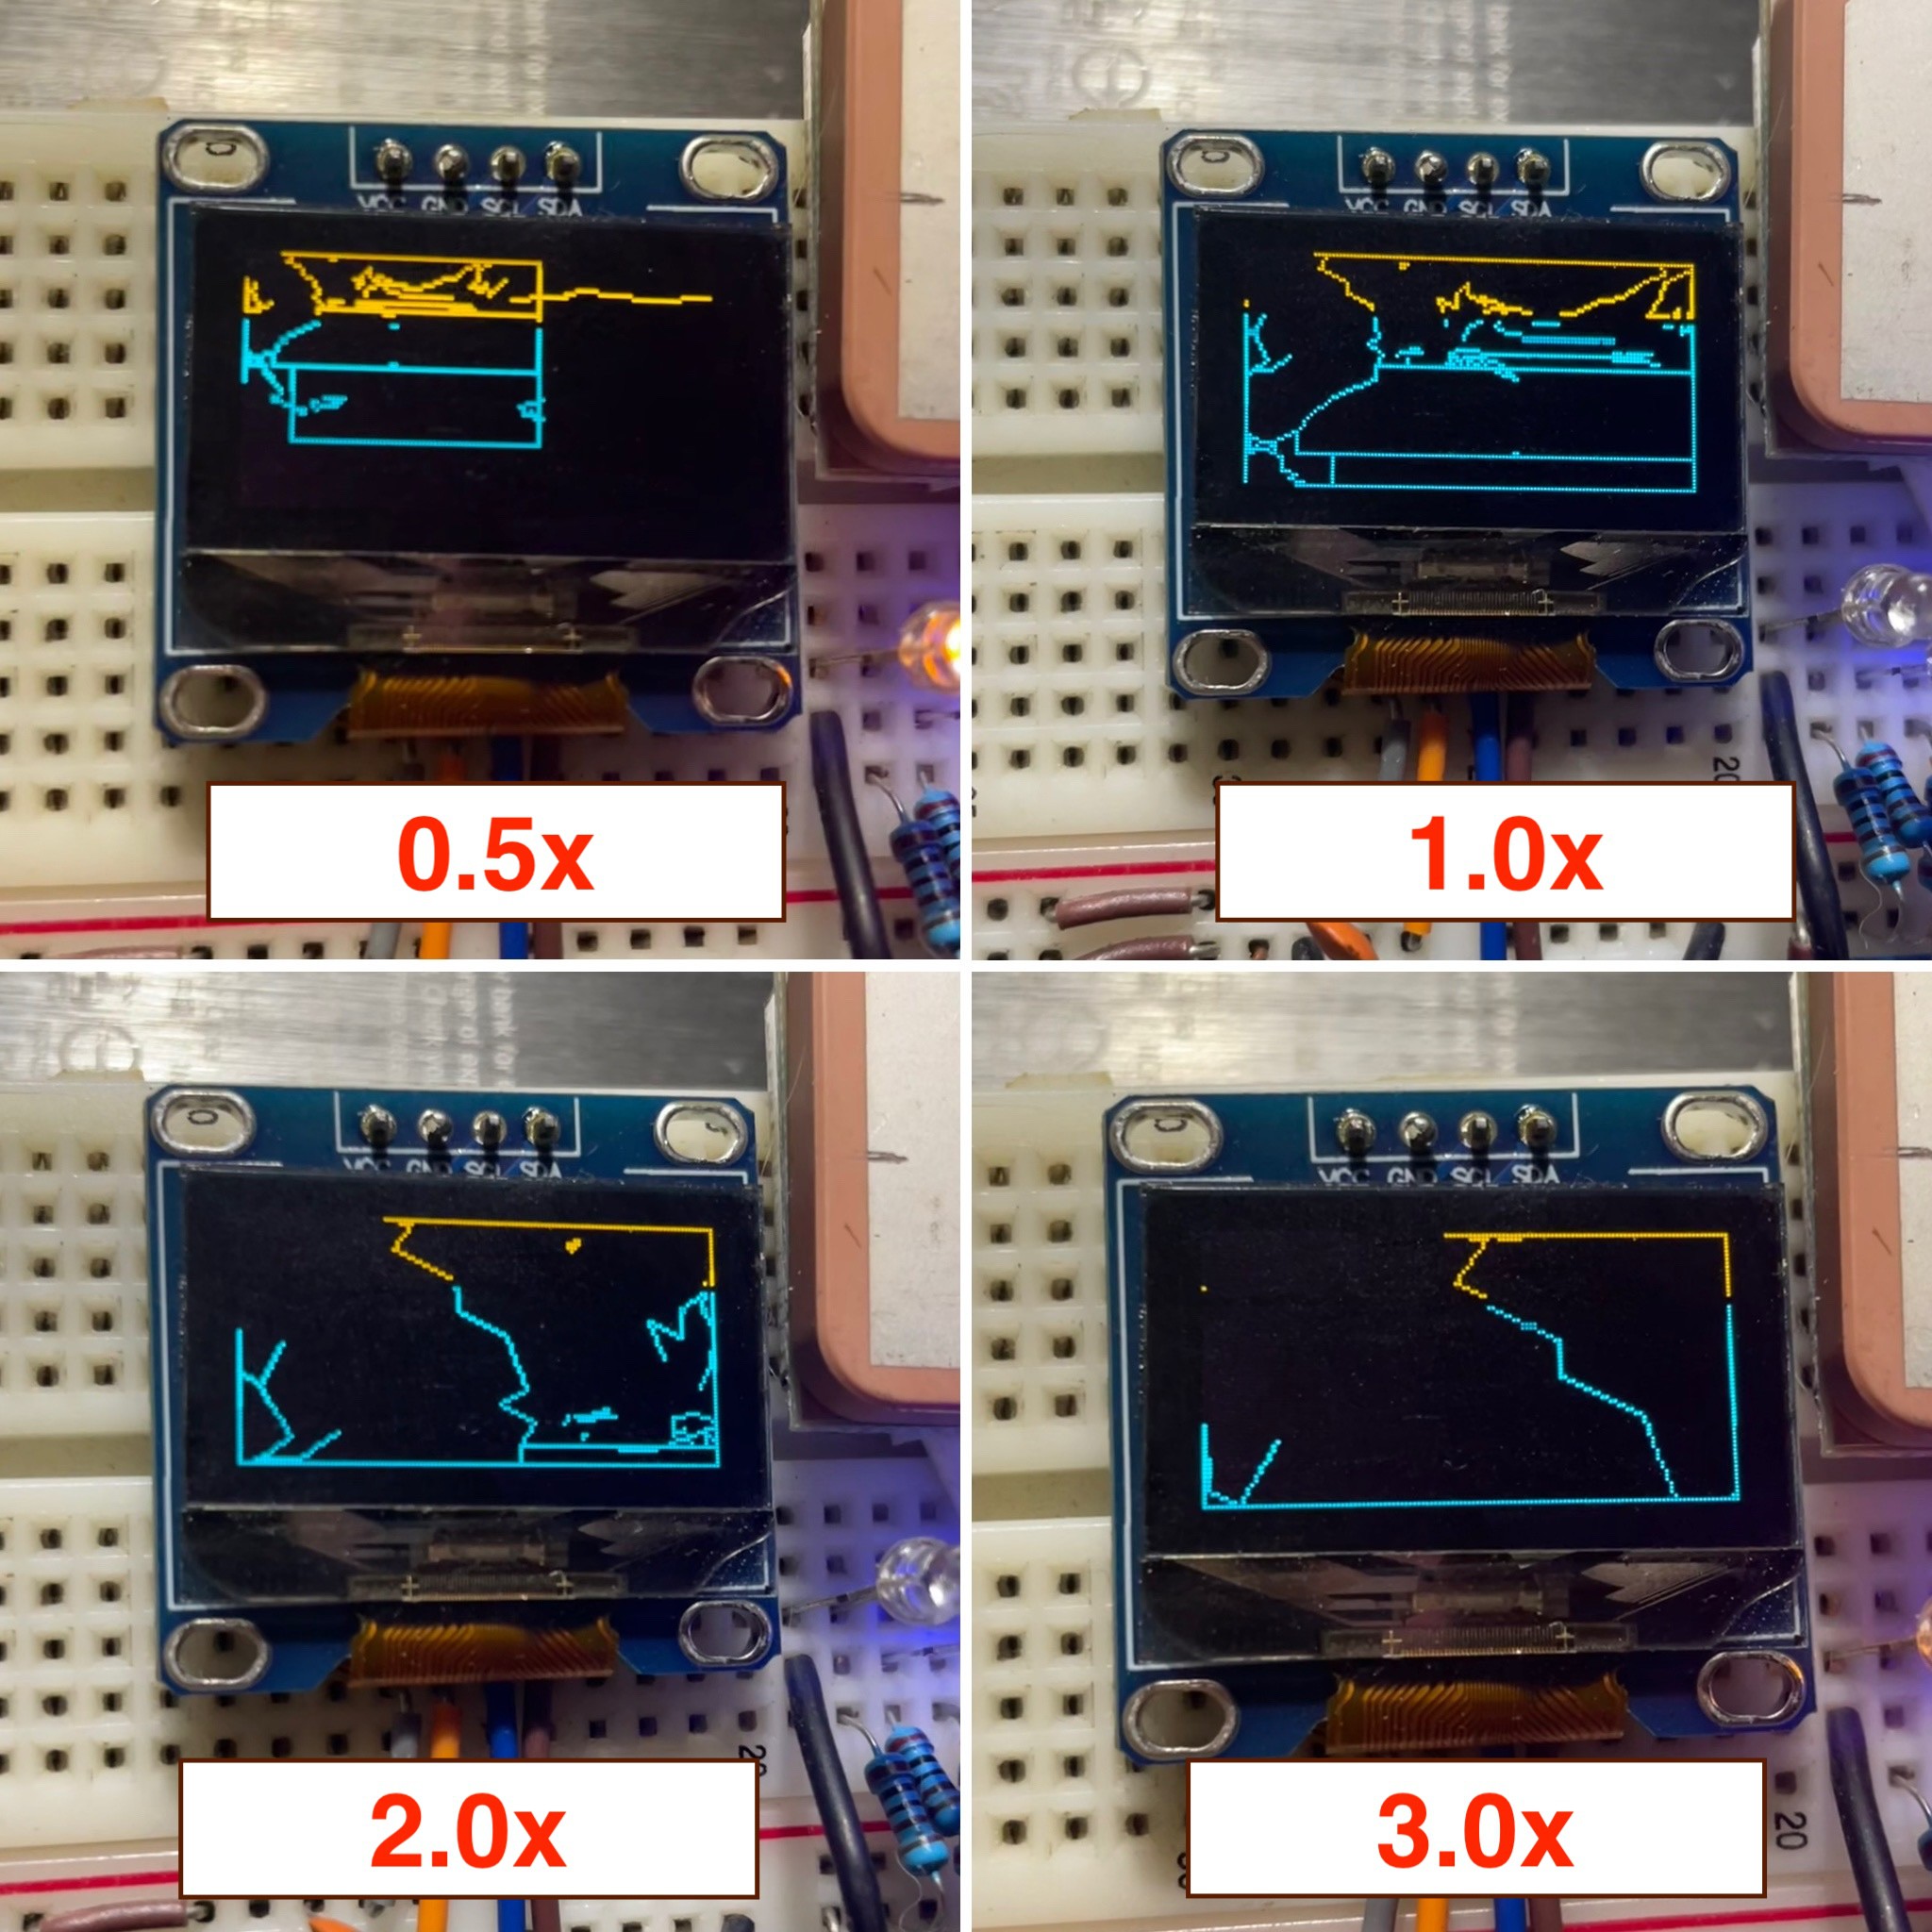
    With the rainy weather all weekend, I wanted to implement some graphical mapping features on the device. With an e-ink display on it's way (https://github.com/WeActStudio/WeActStudio.EpaperModule), all I have is the 0.96" OLED display I purchased from AliExpress. With a 1 bit display, there's not much to do for displaying graphics, especially for something as complex as location-based maps.

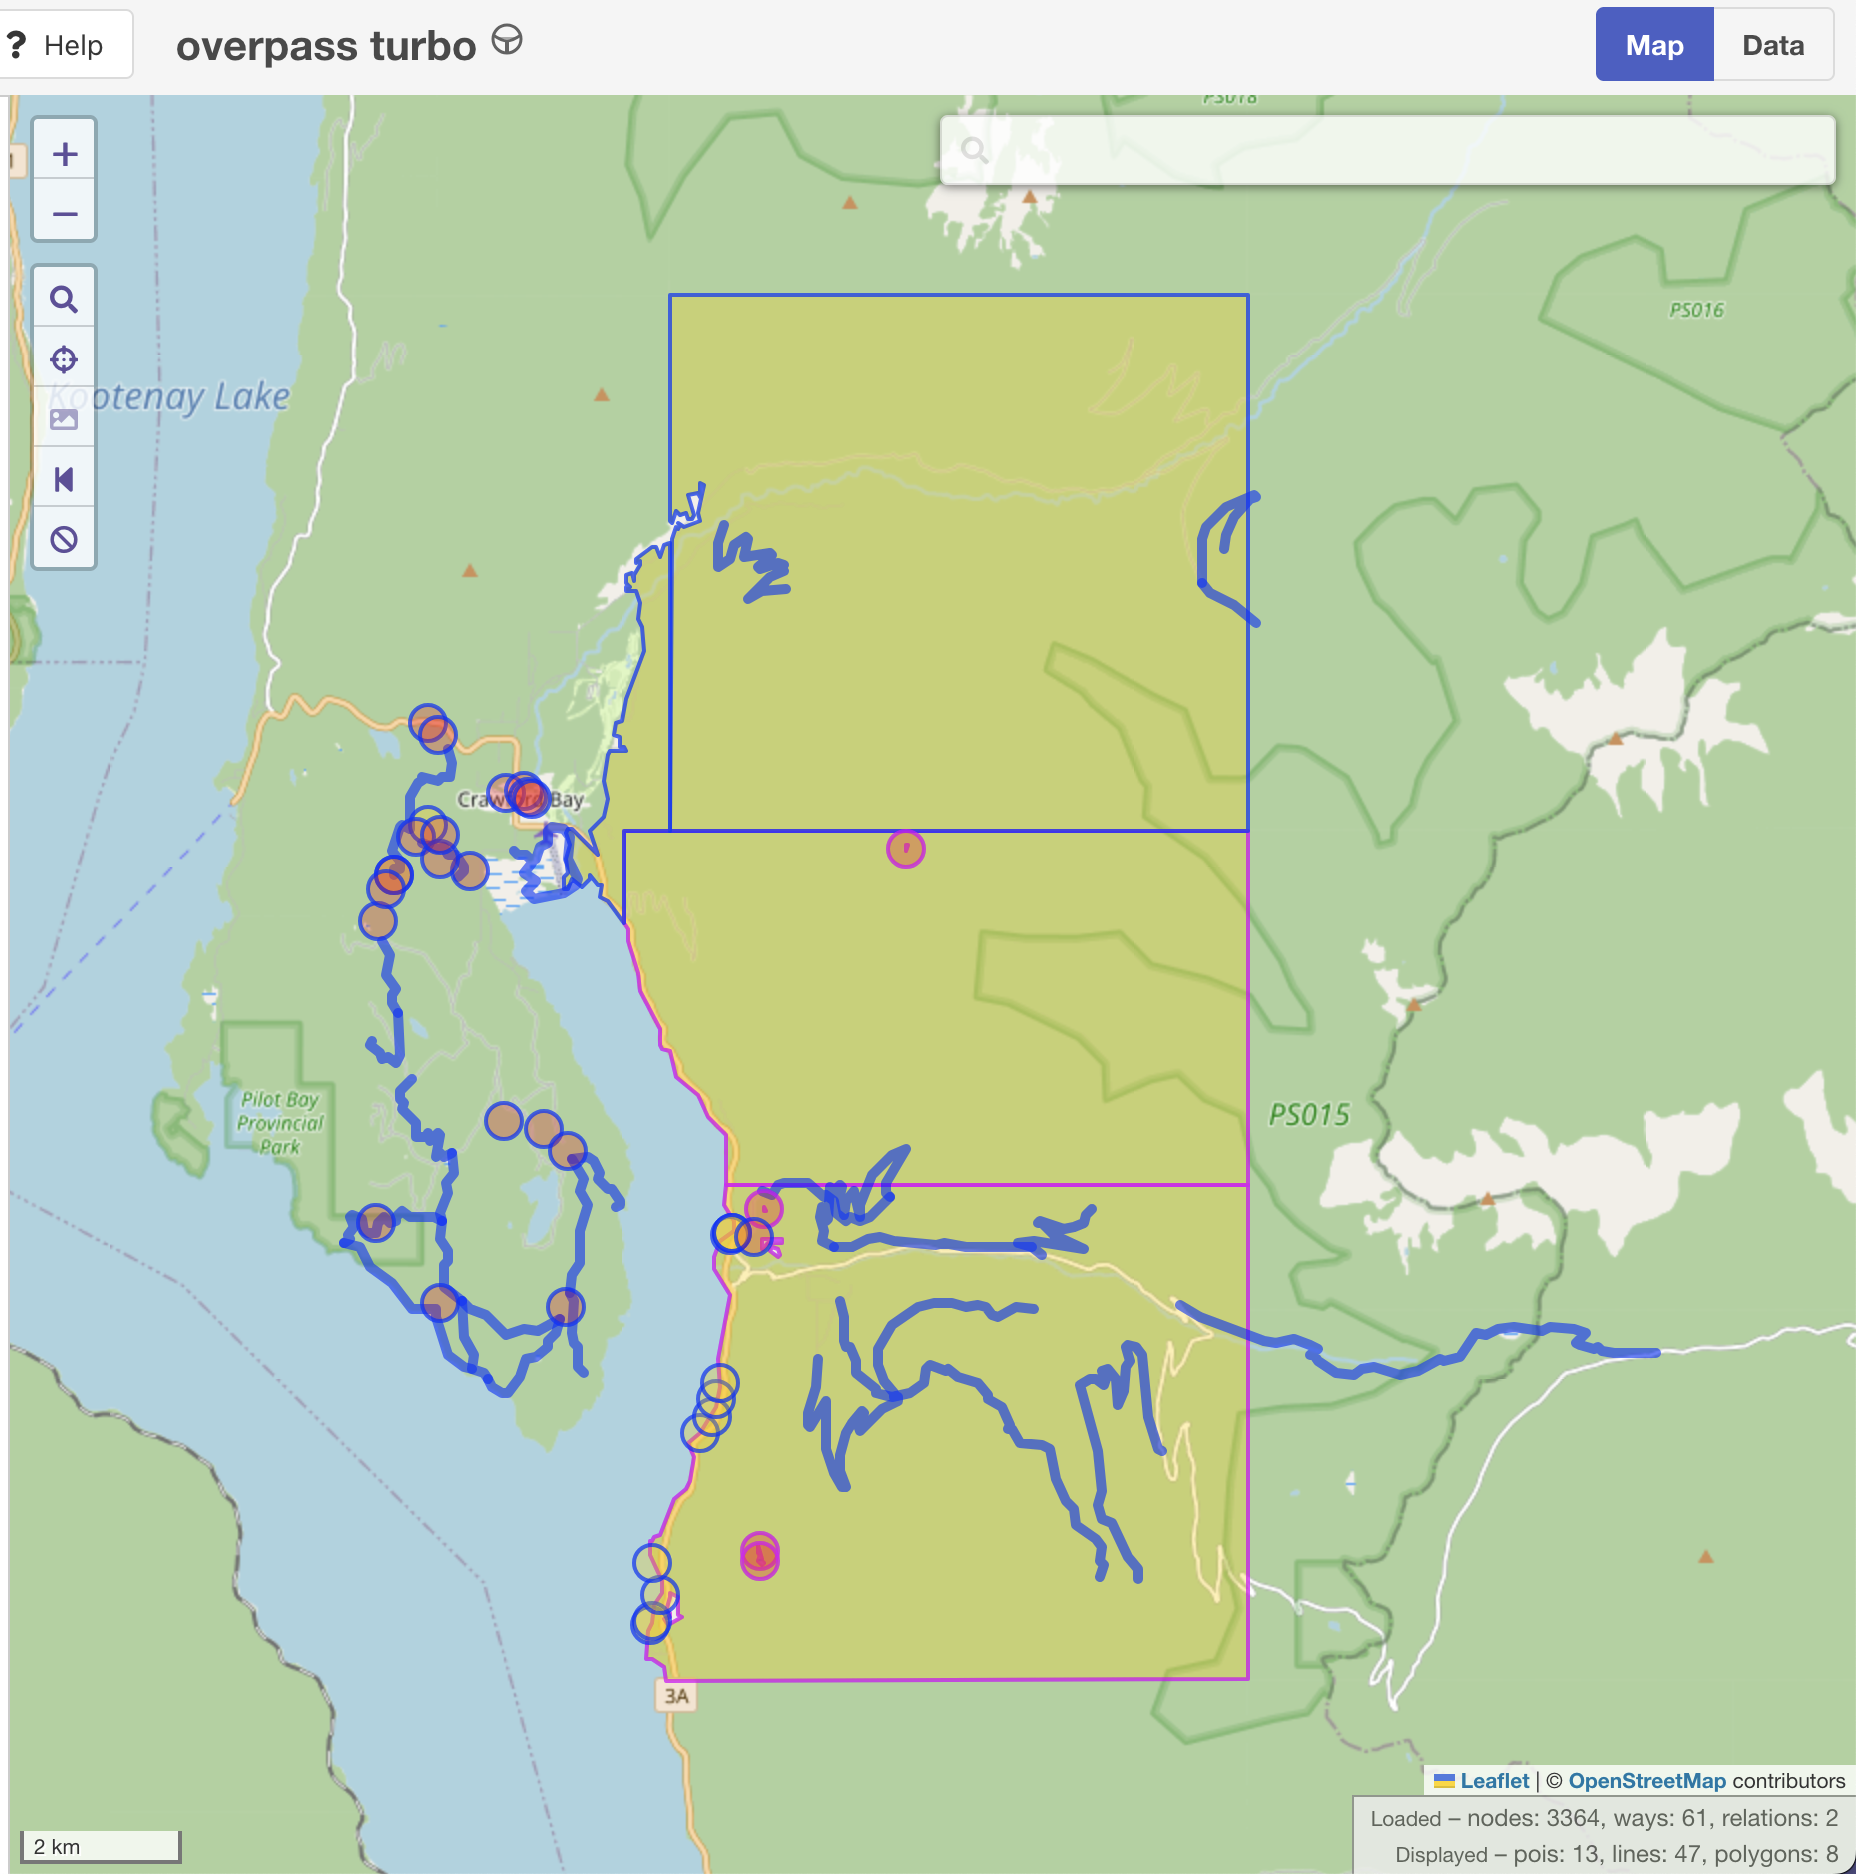
    After implementing functions to render a pre-rendered bitmap tile, I opted to simplify it for the ESP32 and the display at hand. Using  geoJSON data built from overpass-turbo.eu, I wrote simple map vector rendering. This can allow a user to upload any geoJSON file (under 80kb has worked so far without memory issues) and display their current location on the map.  To reduce the complexity of the map, I used https://mapshaper.org/ to simplify the lines/polygons but it doesn't work with multilayer files. I was able to simplify using ogr2ogr:

    ogr2ogr -simplify 0.001 simplified.geojson input.geojson


    This allowed me to....actually load the geoJSON data on the ESP32 with the RAM it has. Granted, I could use my ESP32-S3 (16MB flash/8MB RAM) but I prefer to work with constraints.

    I also added zoom functionality using the "nav" button, see the attached pics of it in use vs the original map. Also attached of the device in use I took a few weeks back, removing the first GPS coords screen (so y'all can't find me).


View project log

  • 1
    Build Instructions

    Pin Configuration

    • GPS Module: RX on pin 16
    • OLED Display: SCL on pin 22, SDA on pin 21
    • Set Button: pin 13
    • Reset/Mode Button: pin 14
    • Display toggle: pin 33
    • Navigate button: pin 32
    • Mode LED: pin 12
    • Success LED: pin 26
    • Error LED: pin 27
    • Warning LED: pin 25
    • PPS (Pulse Per Second) from GPS module input: pin 4

    Usage

    1. Connect the hardware components according to the pin configuration.
    2. Upload all files in the src/ directory to the root directory of your ESP32 running MicroPython 2.1. Optionally use the Makefile to upload the files to the ESP32 using the make flash command.
    3. Power on the device.
    4. Drink a glass of water to stay hydrated.
    5. The device will start in GPS display mode, showing real-time GPS data.
    6. Press the reset/mode button to switch to vector map display, distance calculation mode, settings, and the about screen.
    7. In distance mode, press the set button to mark point A, then again to mark point B.
    8. The device will display the calculated distance between the two points.

View all instructions

Enjoy this project?

Share

Discussions

Similar Projects

Does this project spark your interest?

Become a member to follow this project and never miss any updates