Mike
Mike-
13 - DESIGN SPRINT!!! - May 20th - June 4th
06/05/2017 at 02:02 • 2 comments![]()
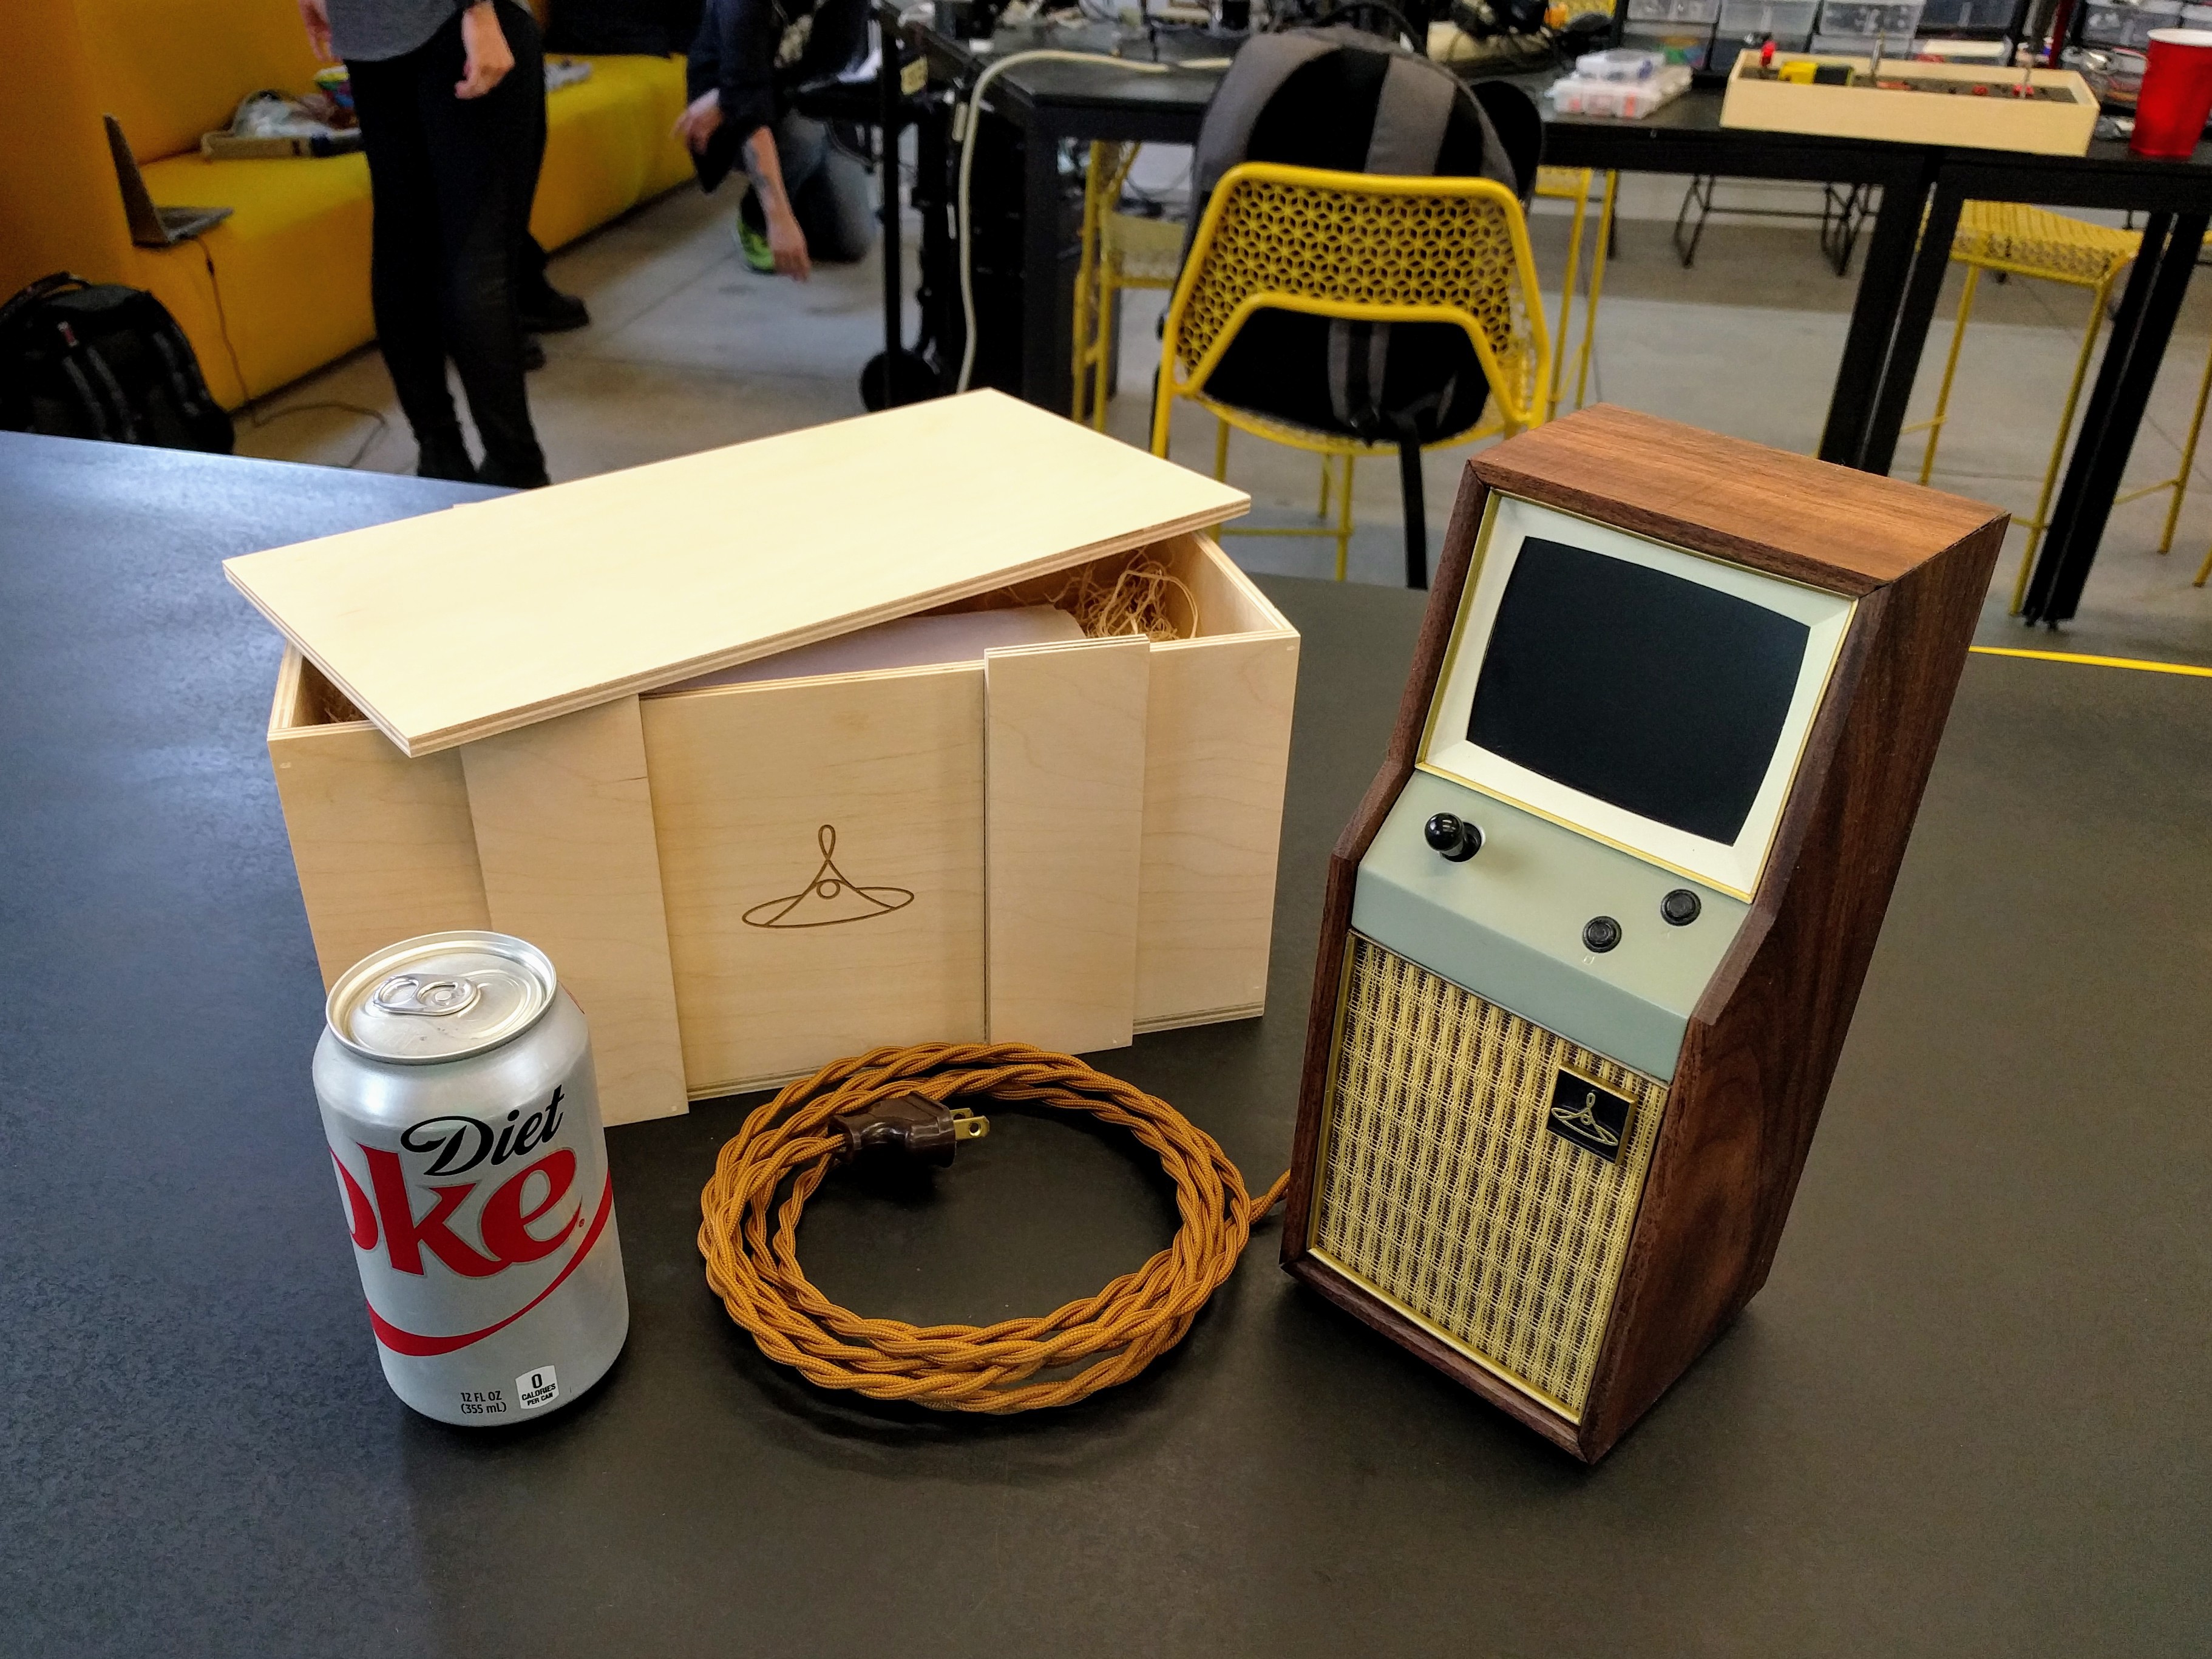
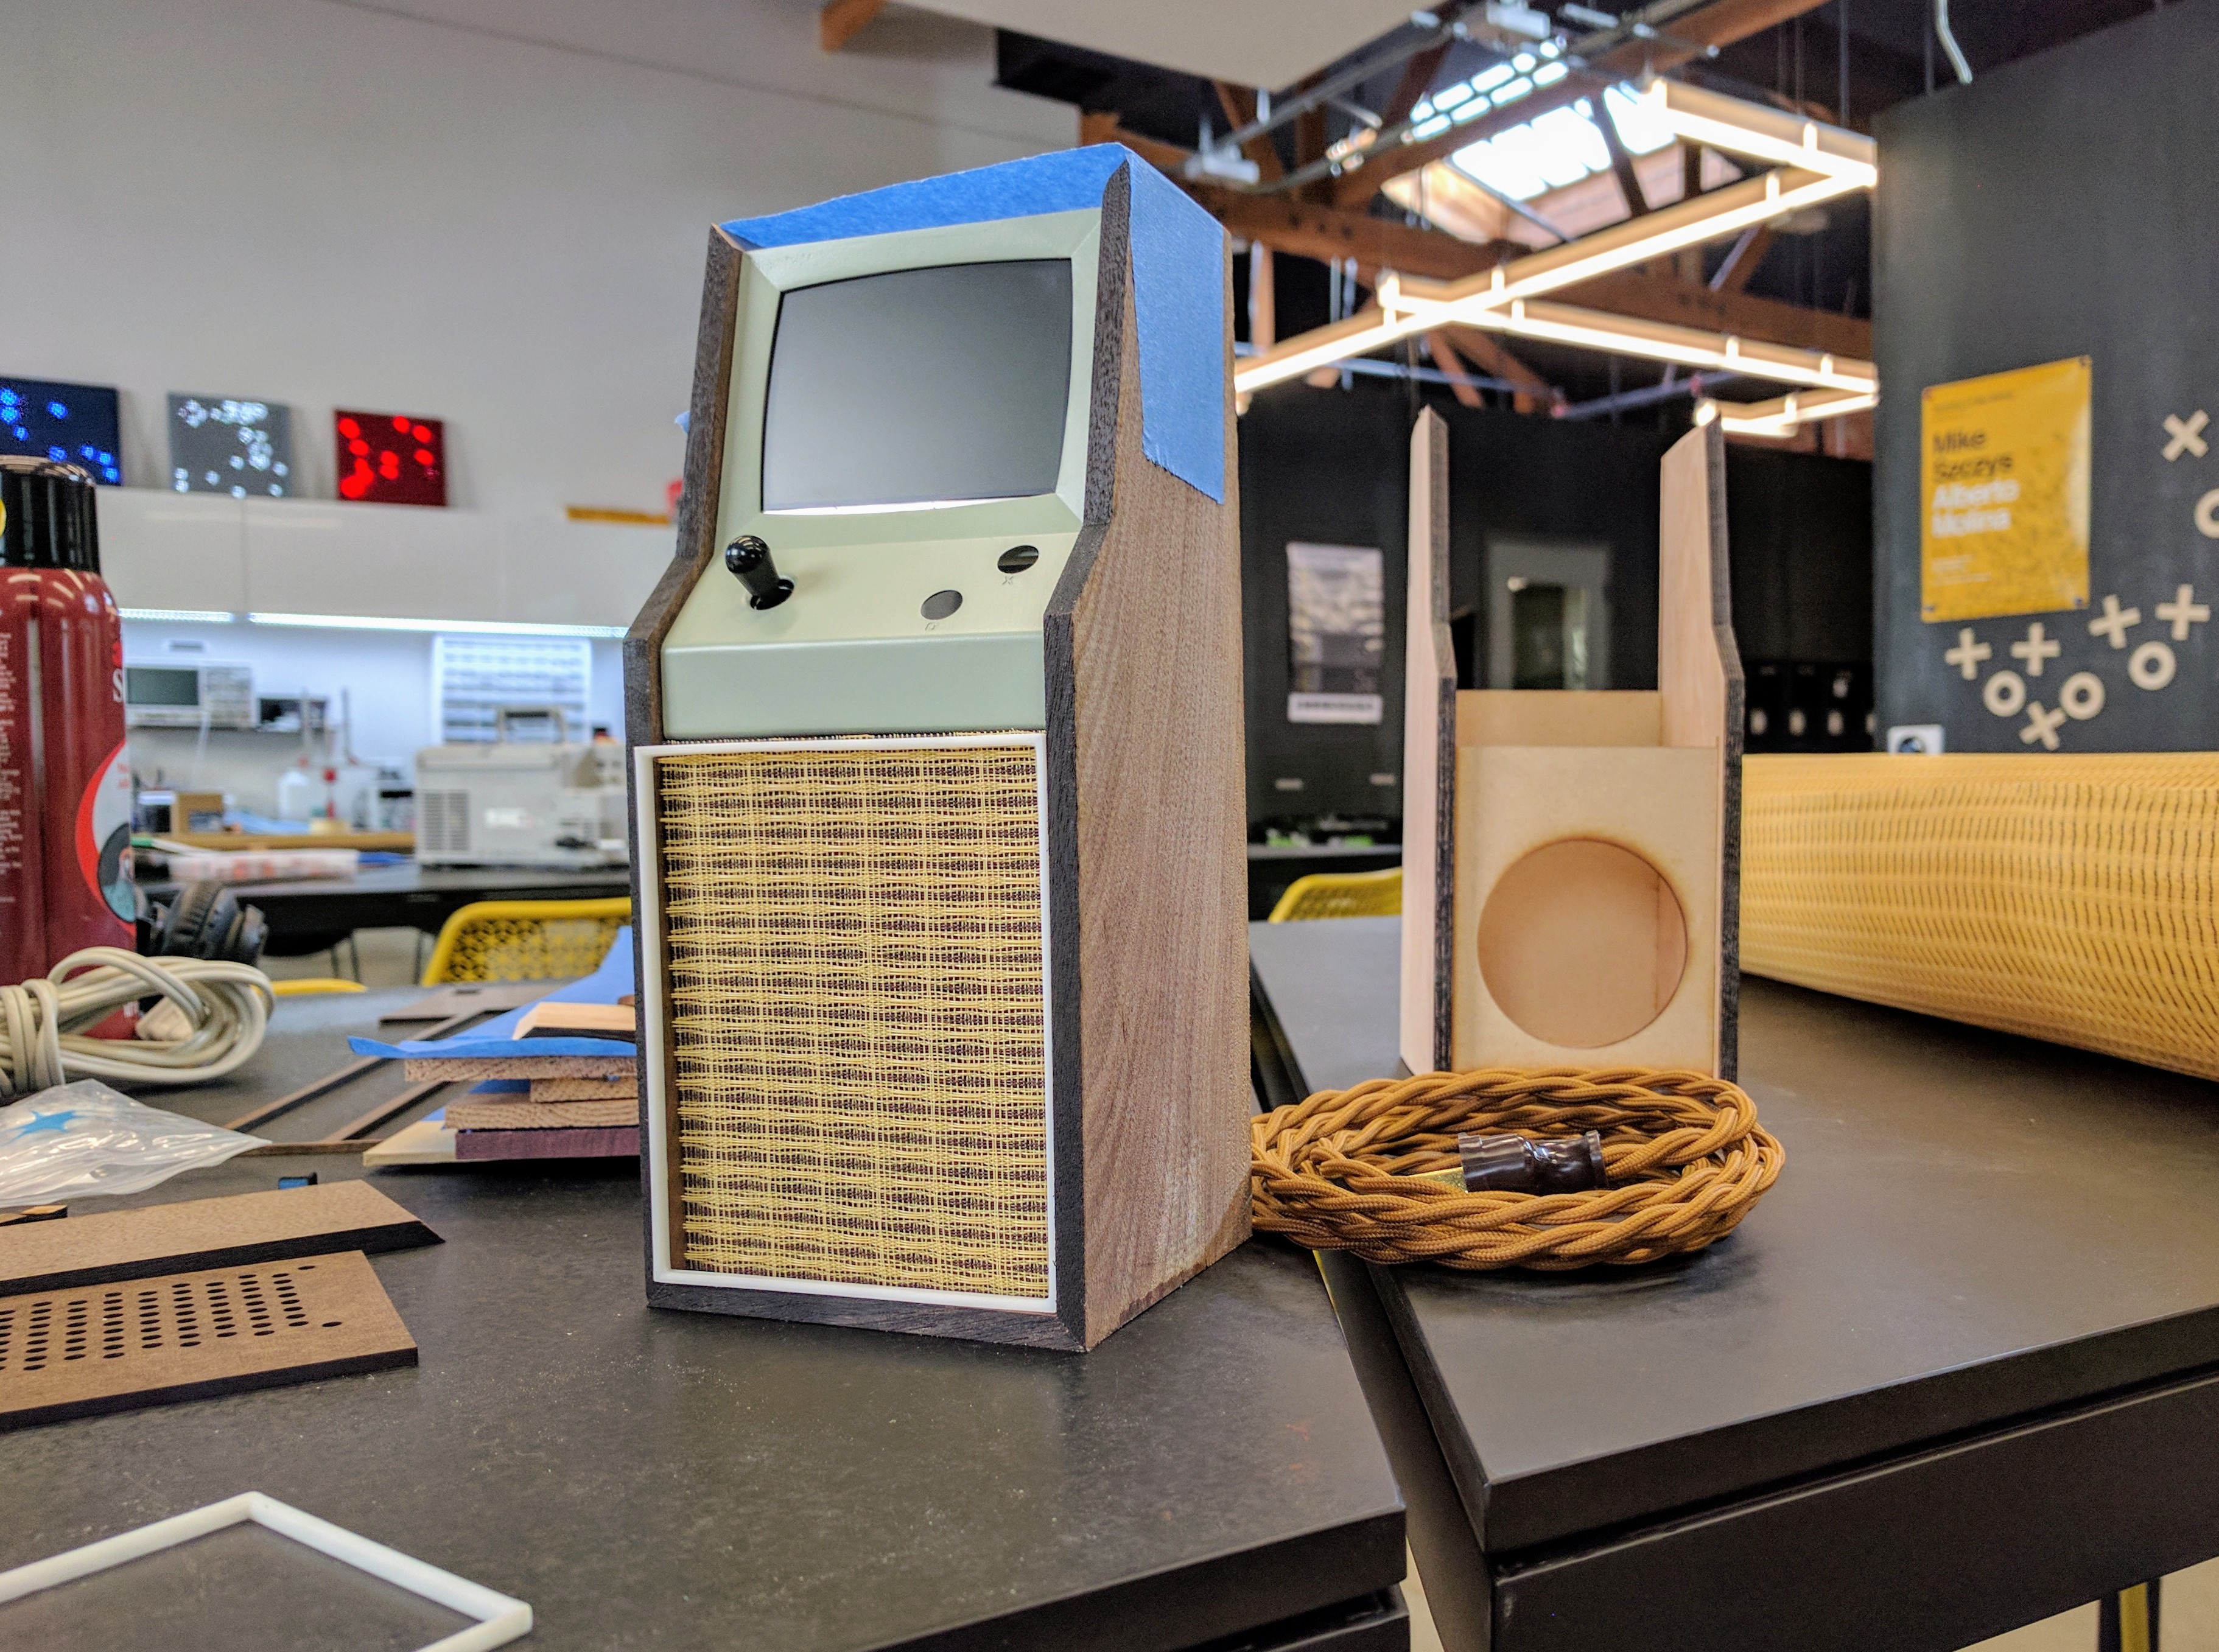
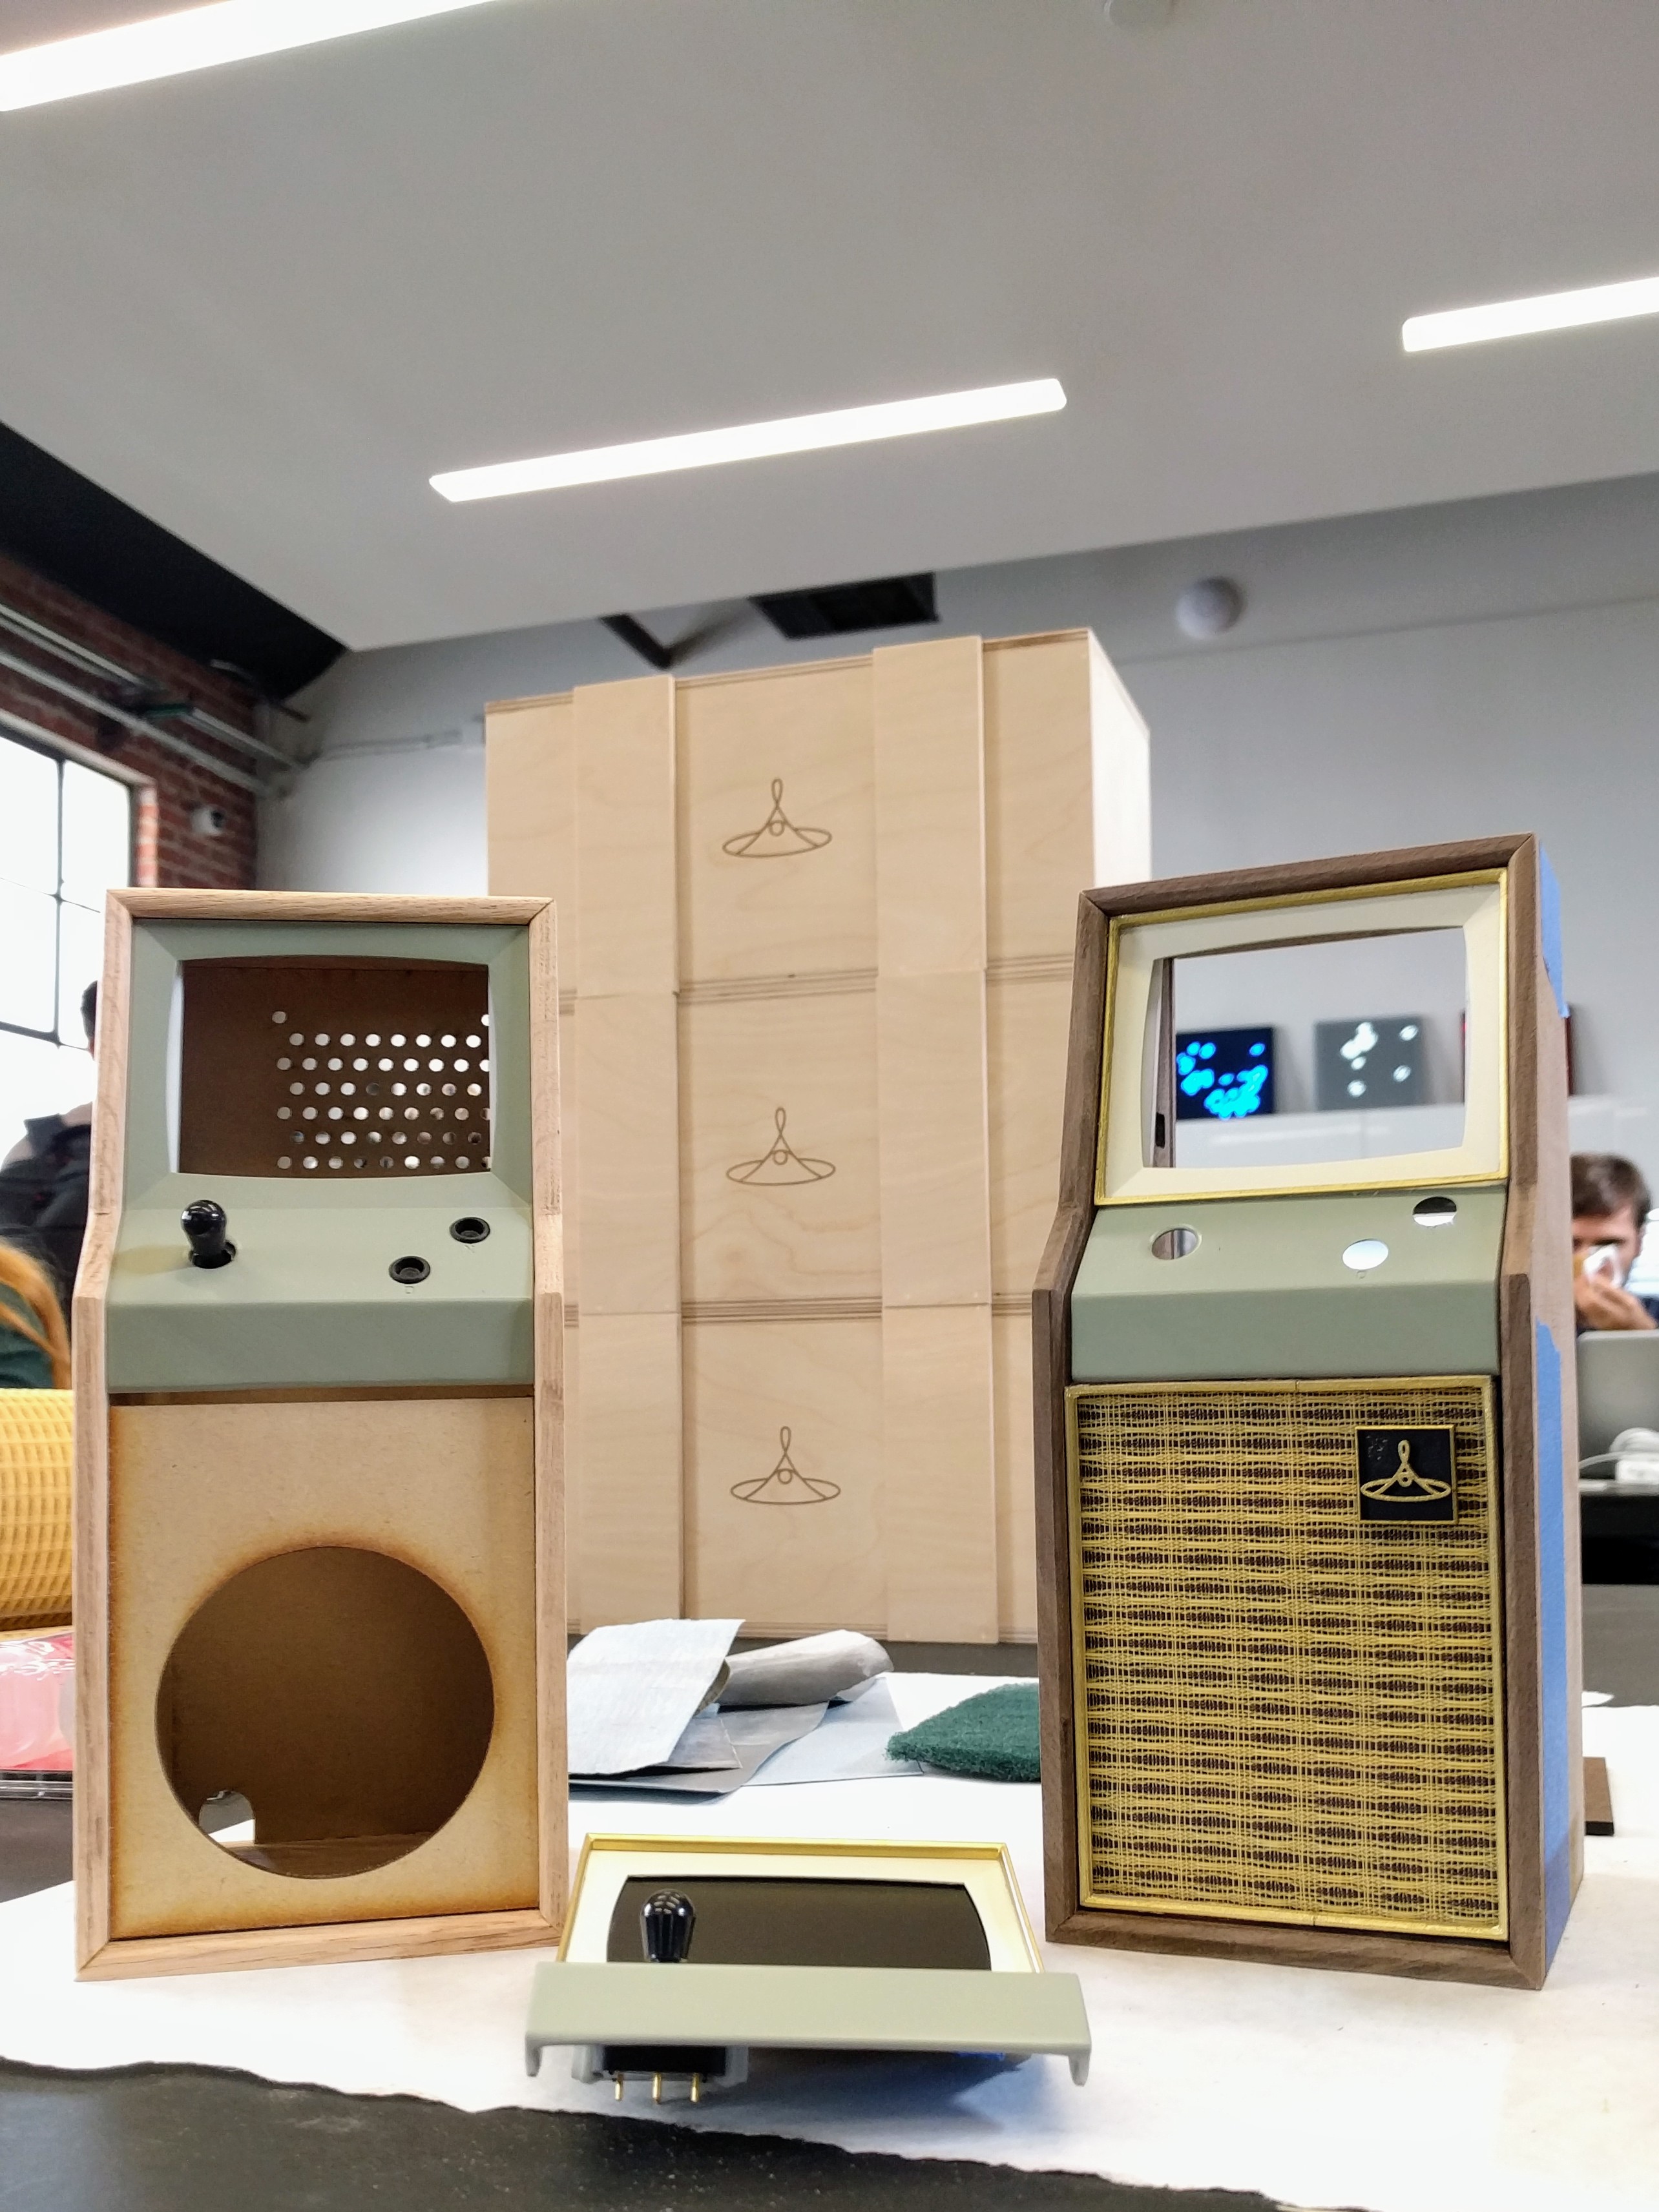
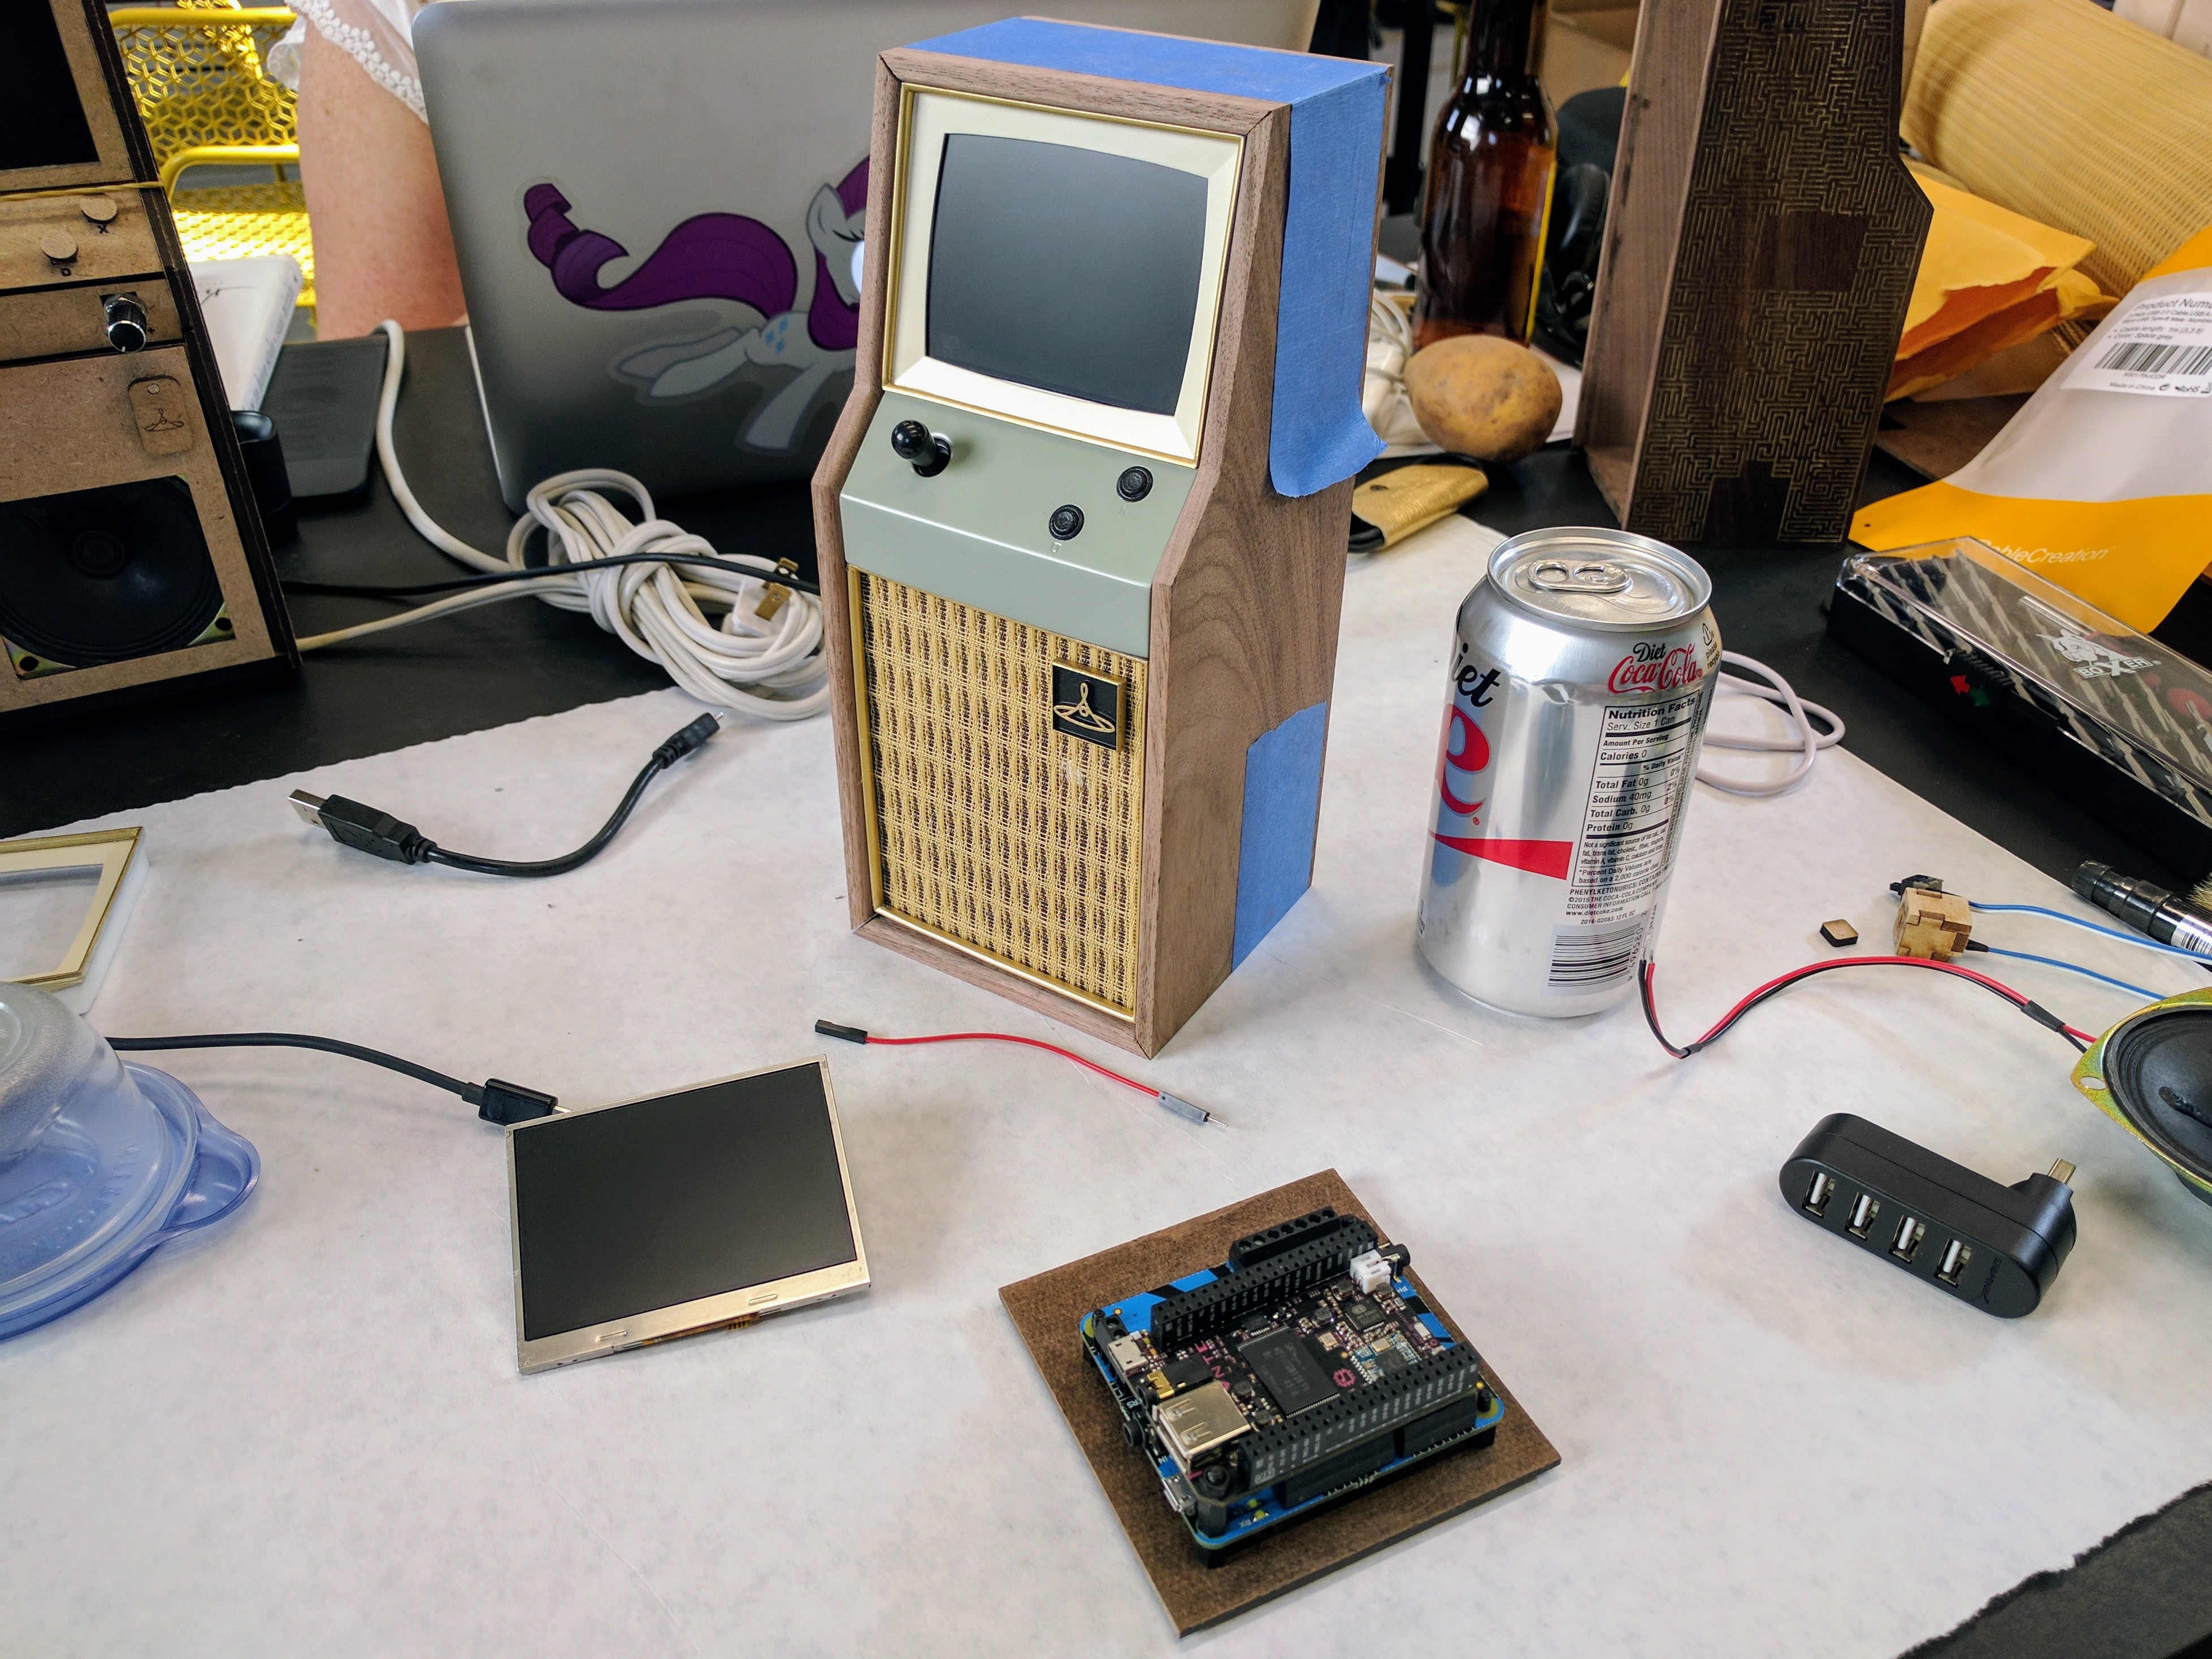
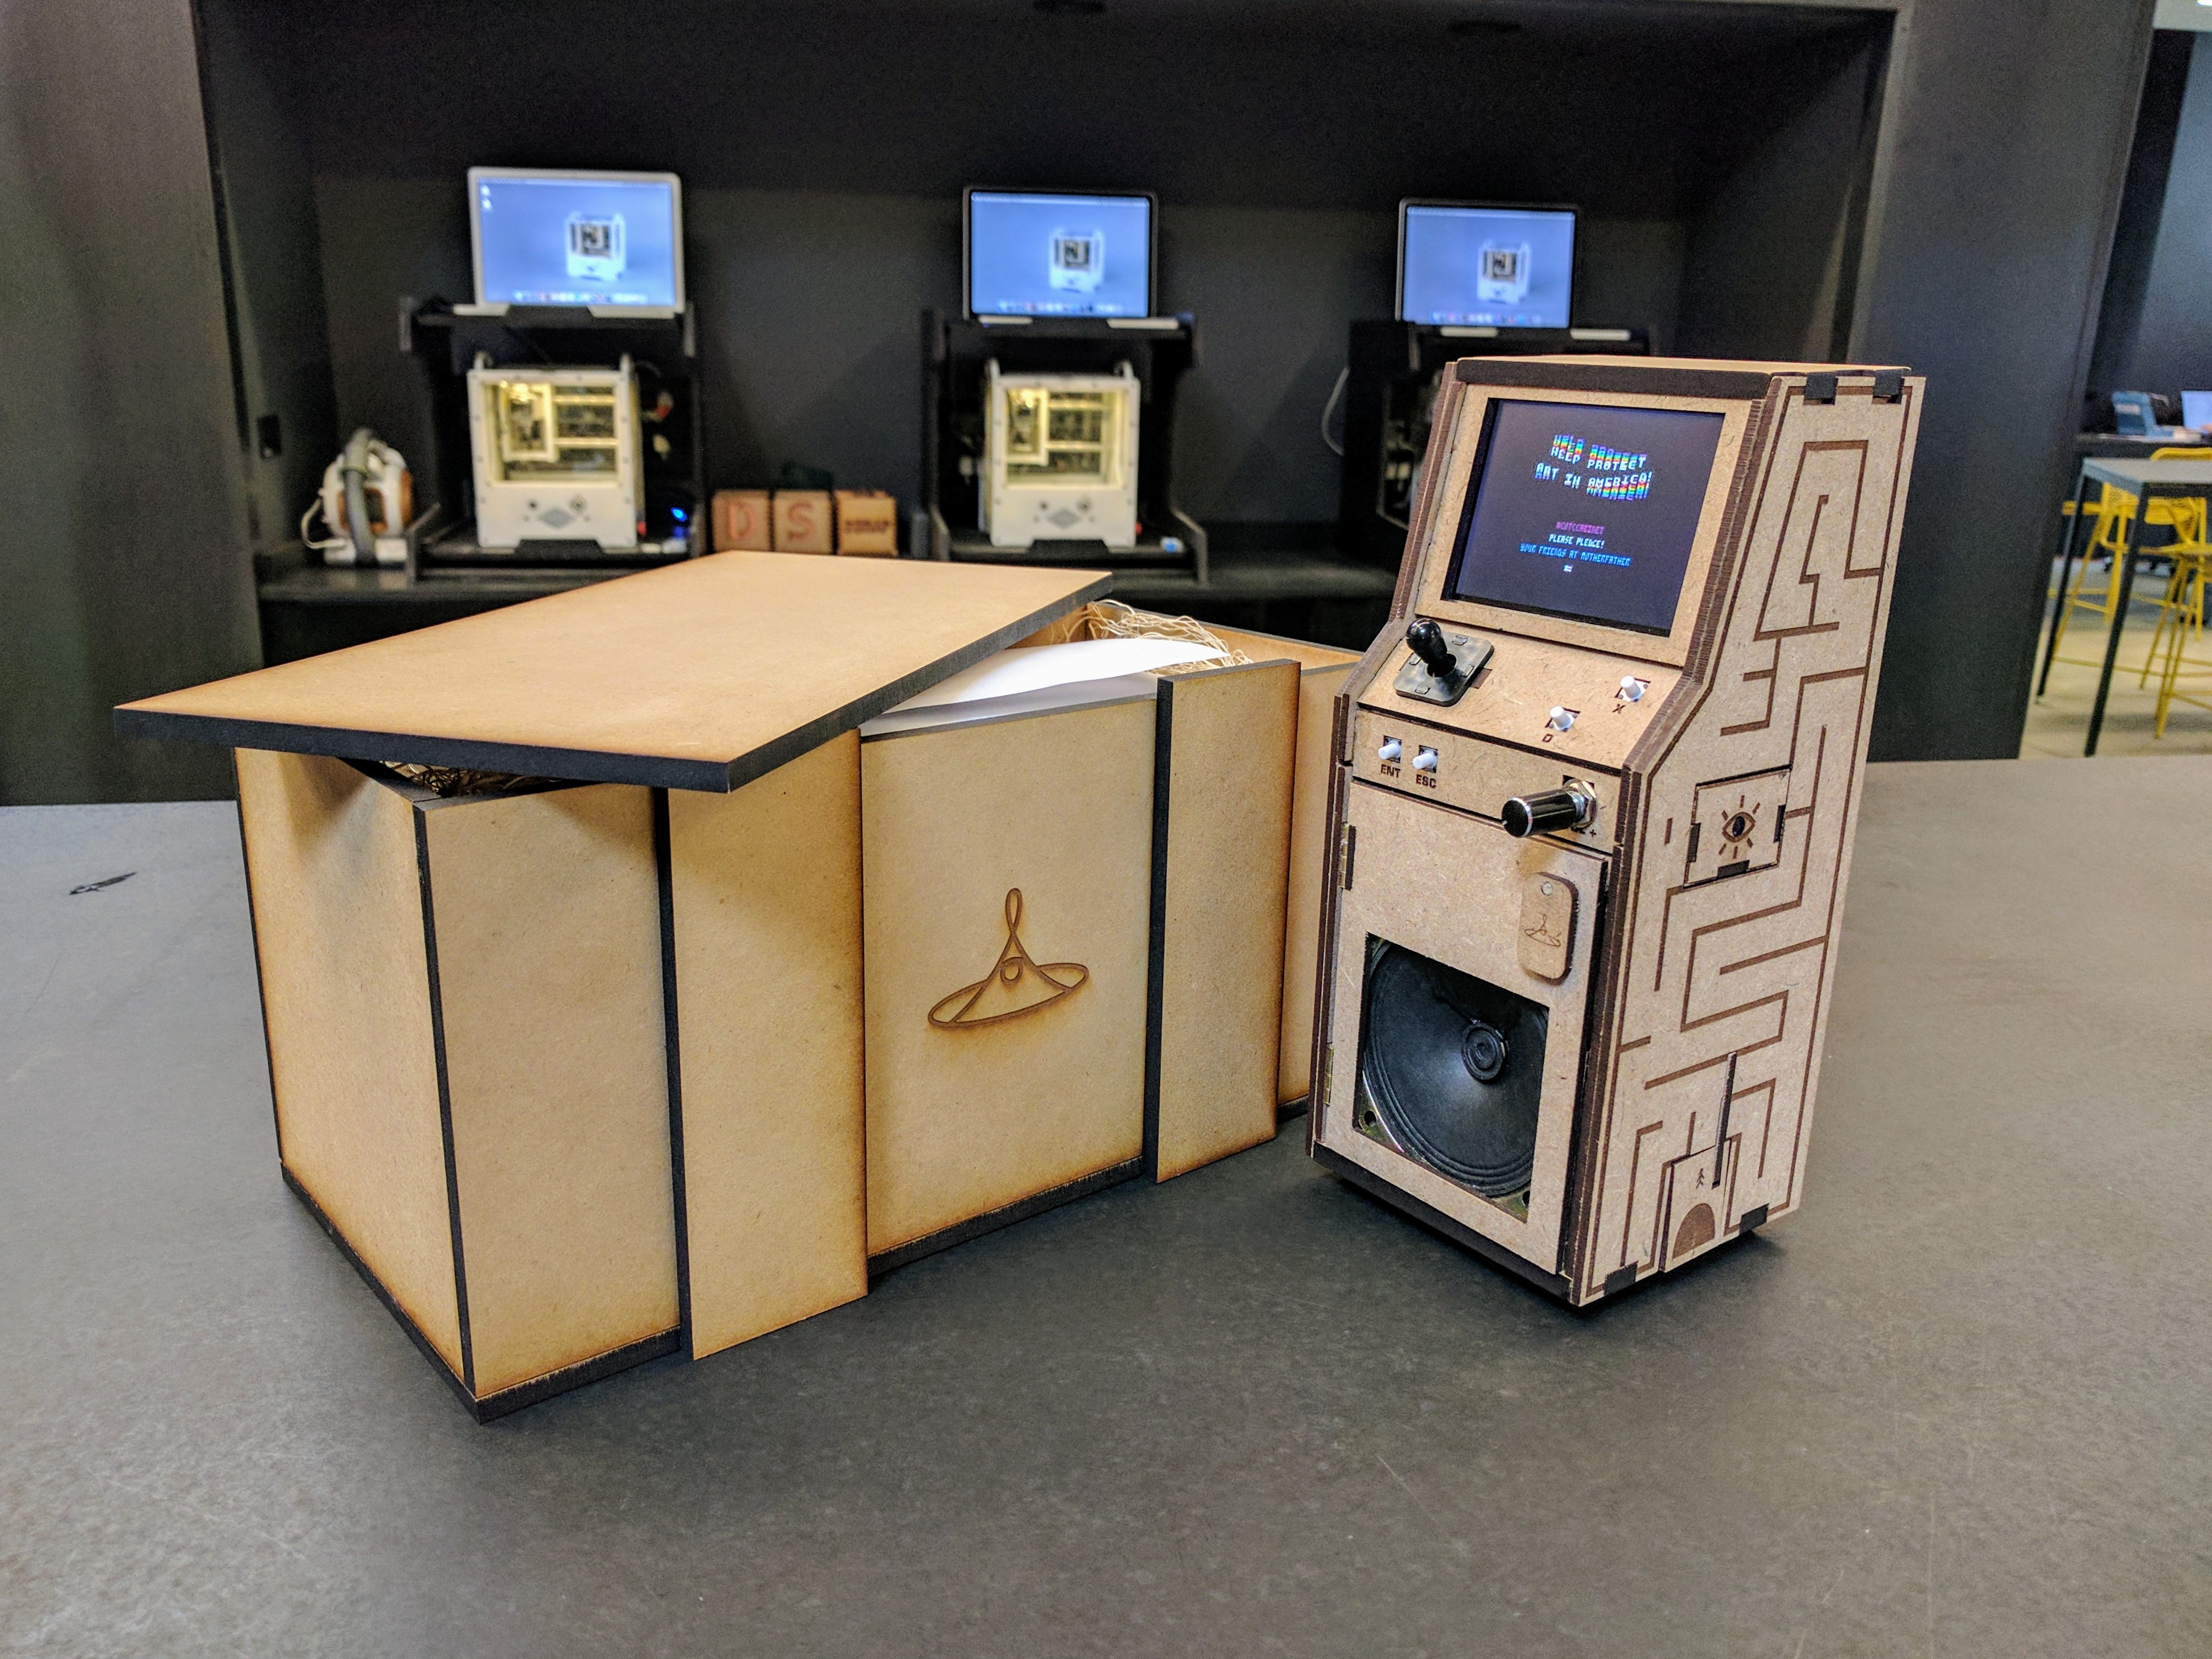
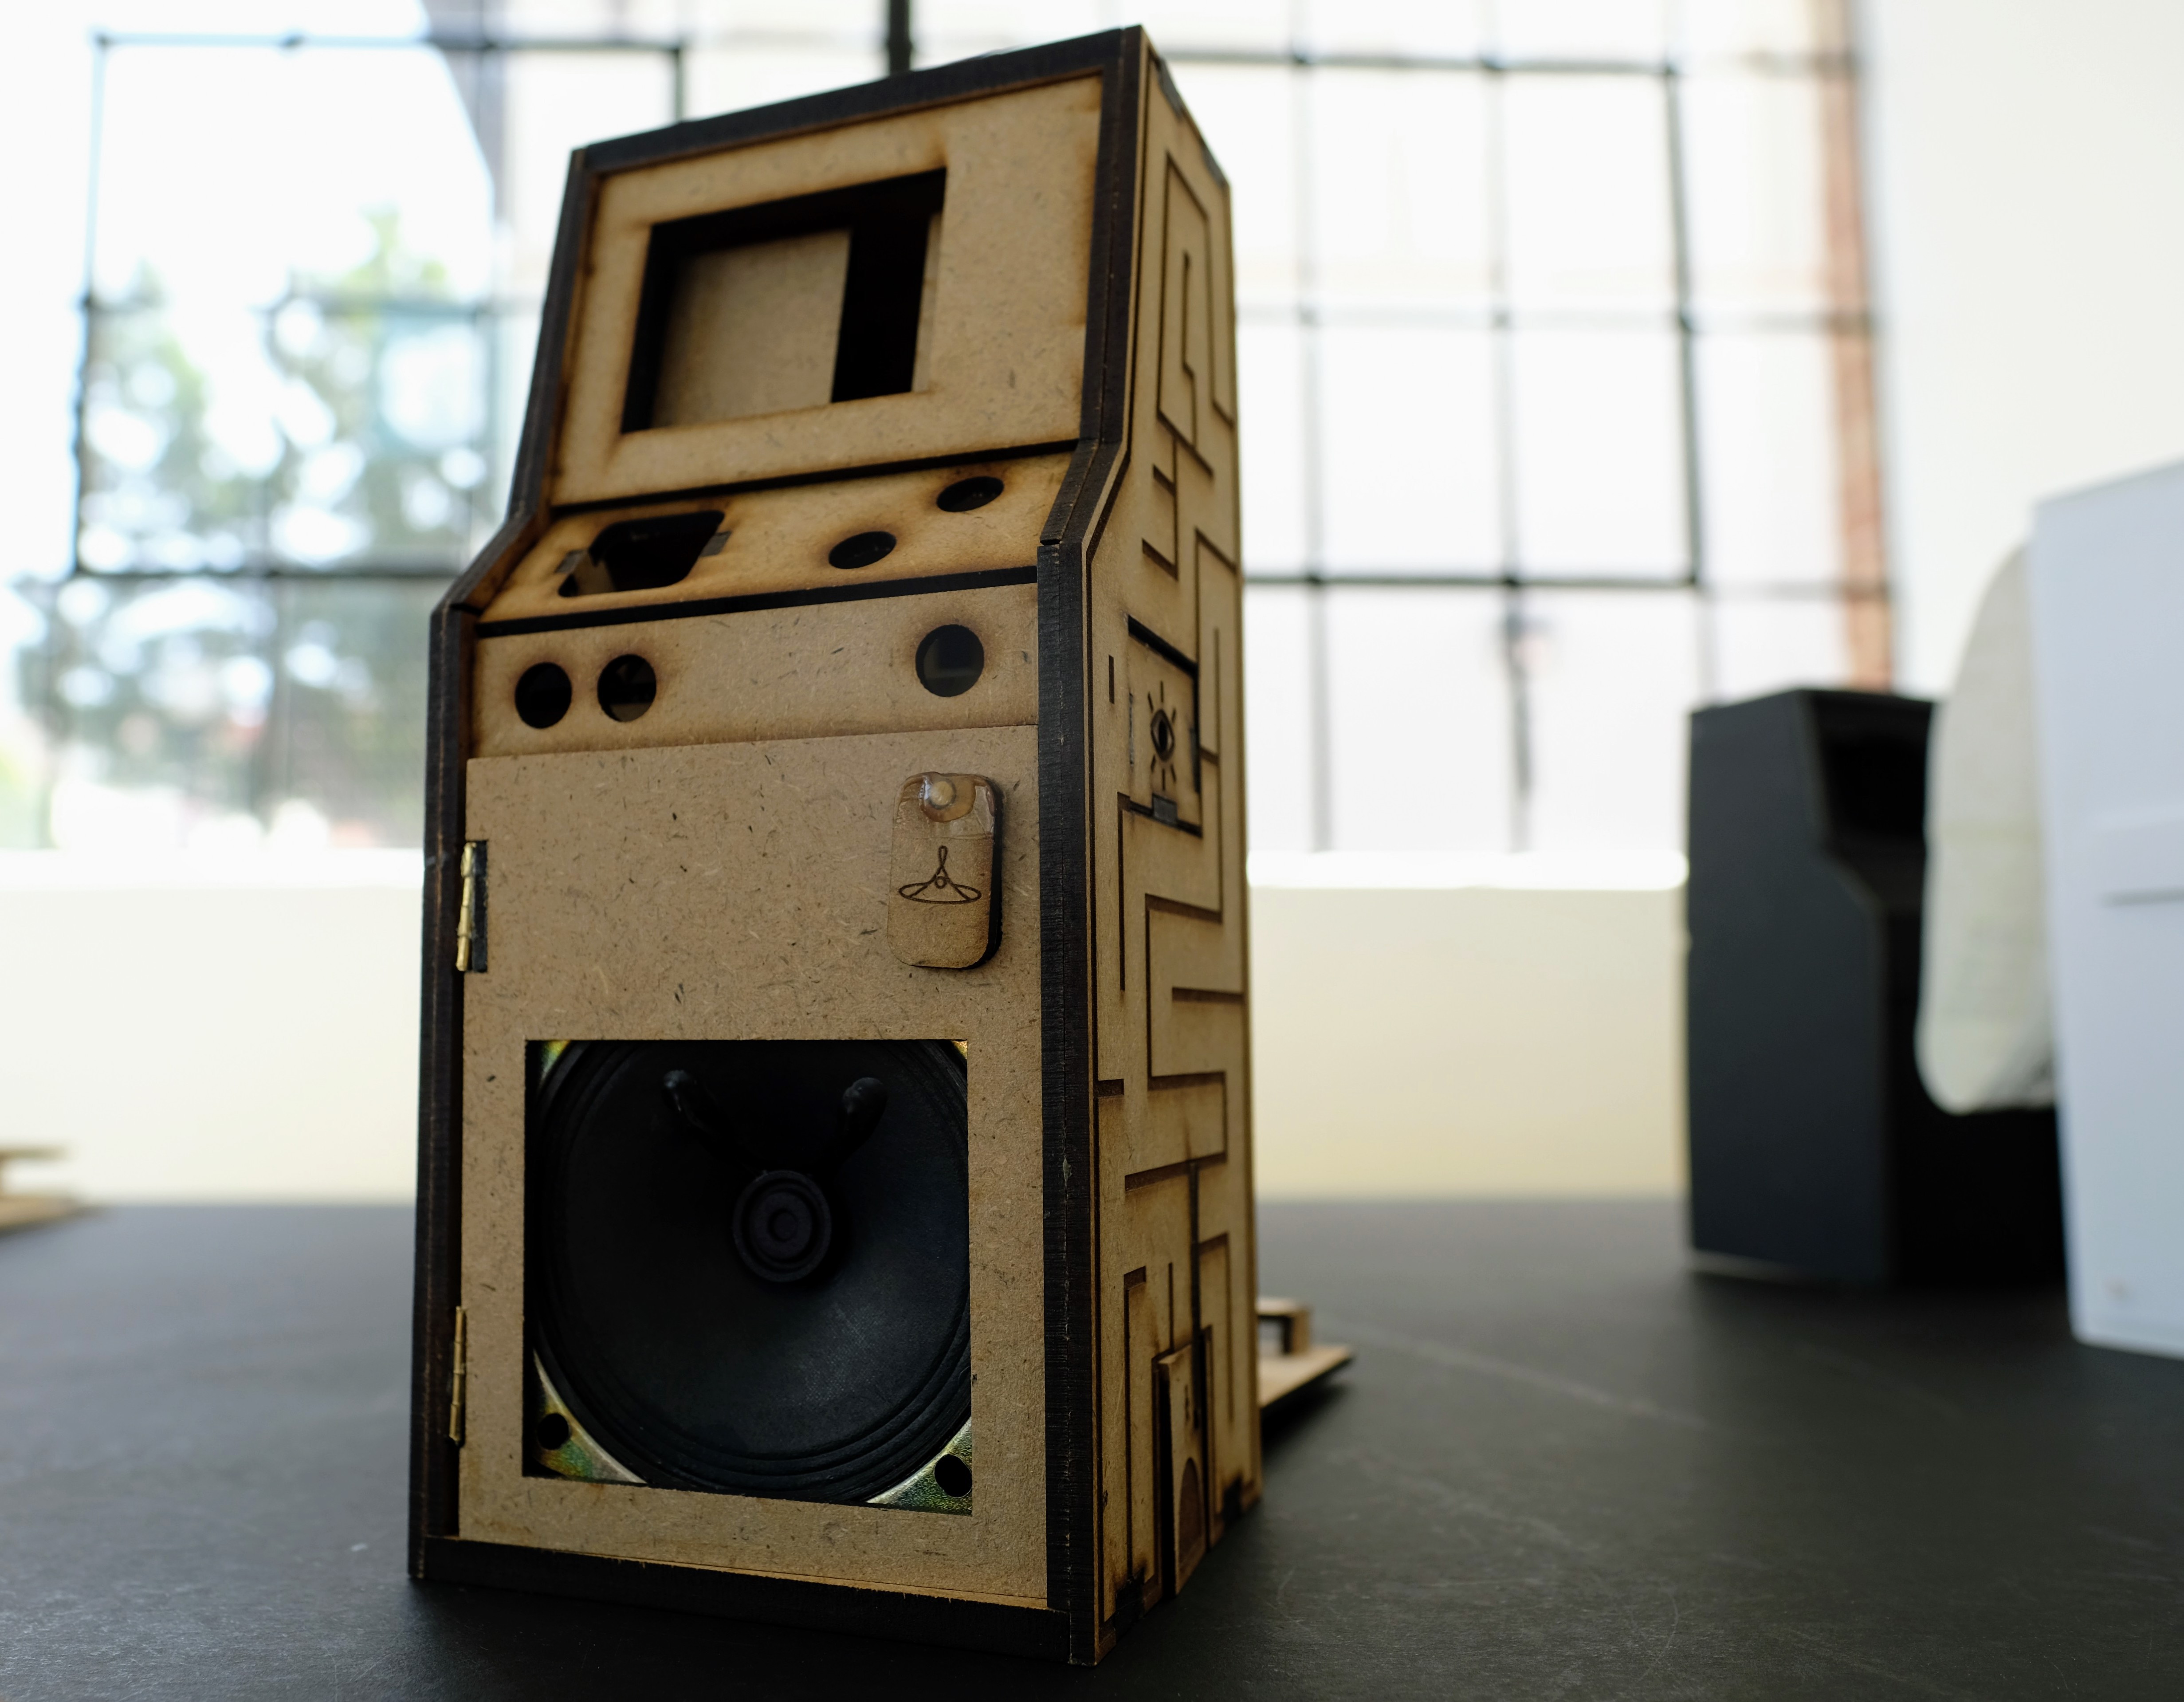
Near final prototype made out of final build materials (can of Diet Coke included for scale)!
As mentioned in my last post, I needed to finish designing the exterior of the College of the Creatives Cabinet, and to build a more complete looking prototype made out of final build materials (walnut hardwood, masonite, and plastic) to show potential backers (and the public in general) what they were helping us send to our select group of cultural influencers, and/or they could get at the highest pledge level. It's with all of this in mind that I challenged myself to make a final looking cabinet over the next 2 weeks!
![]()
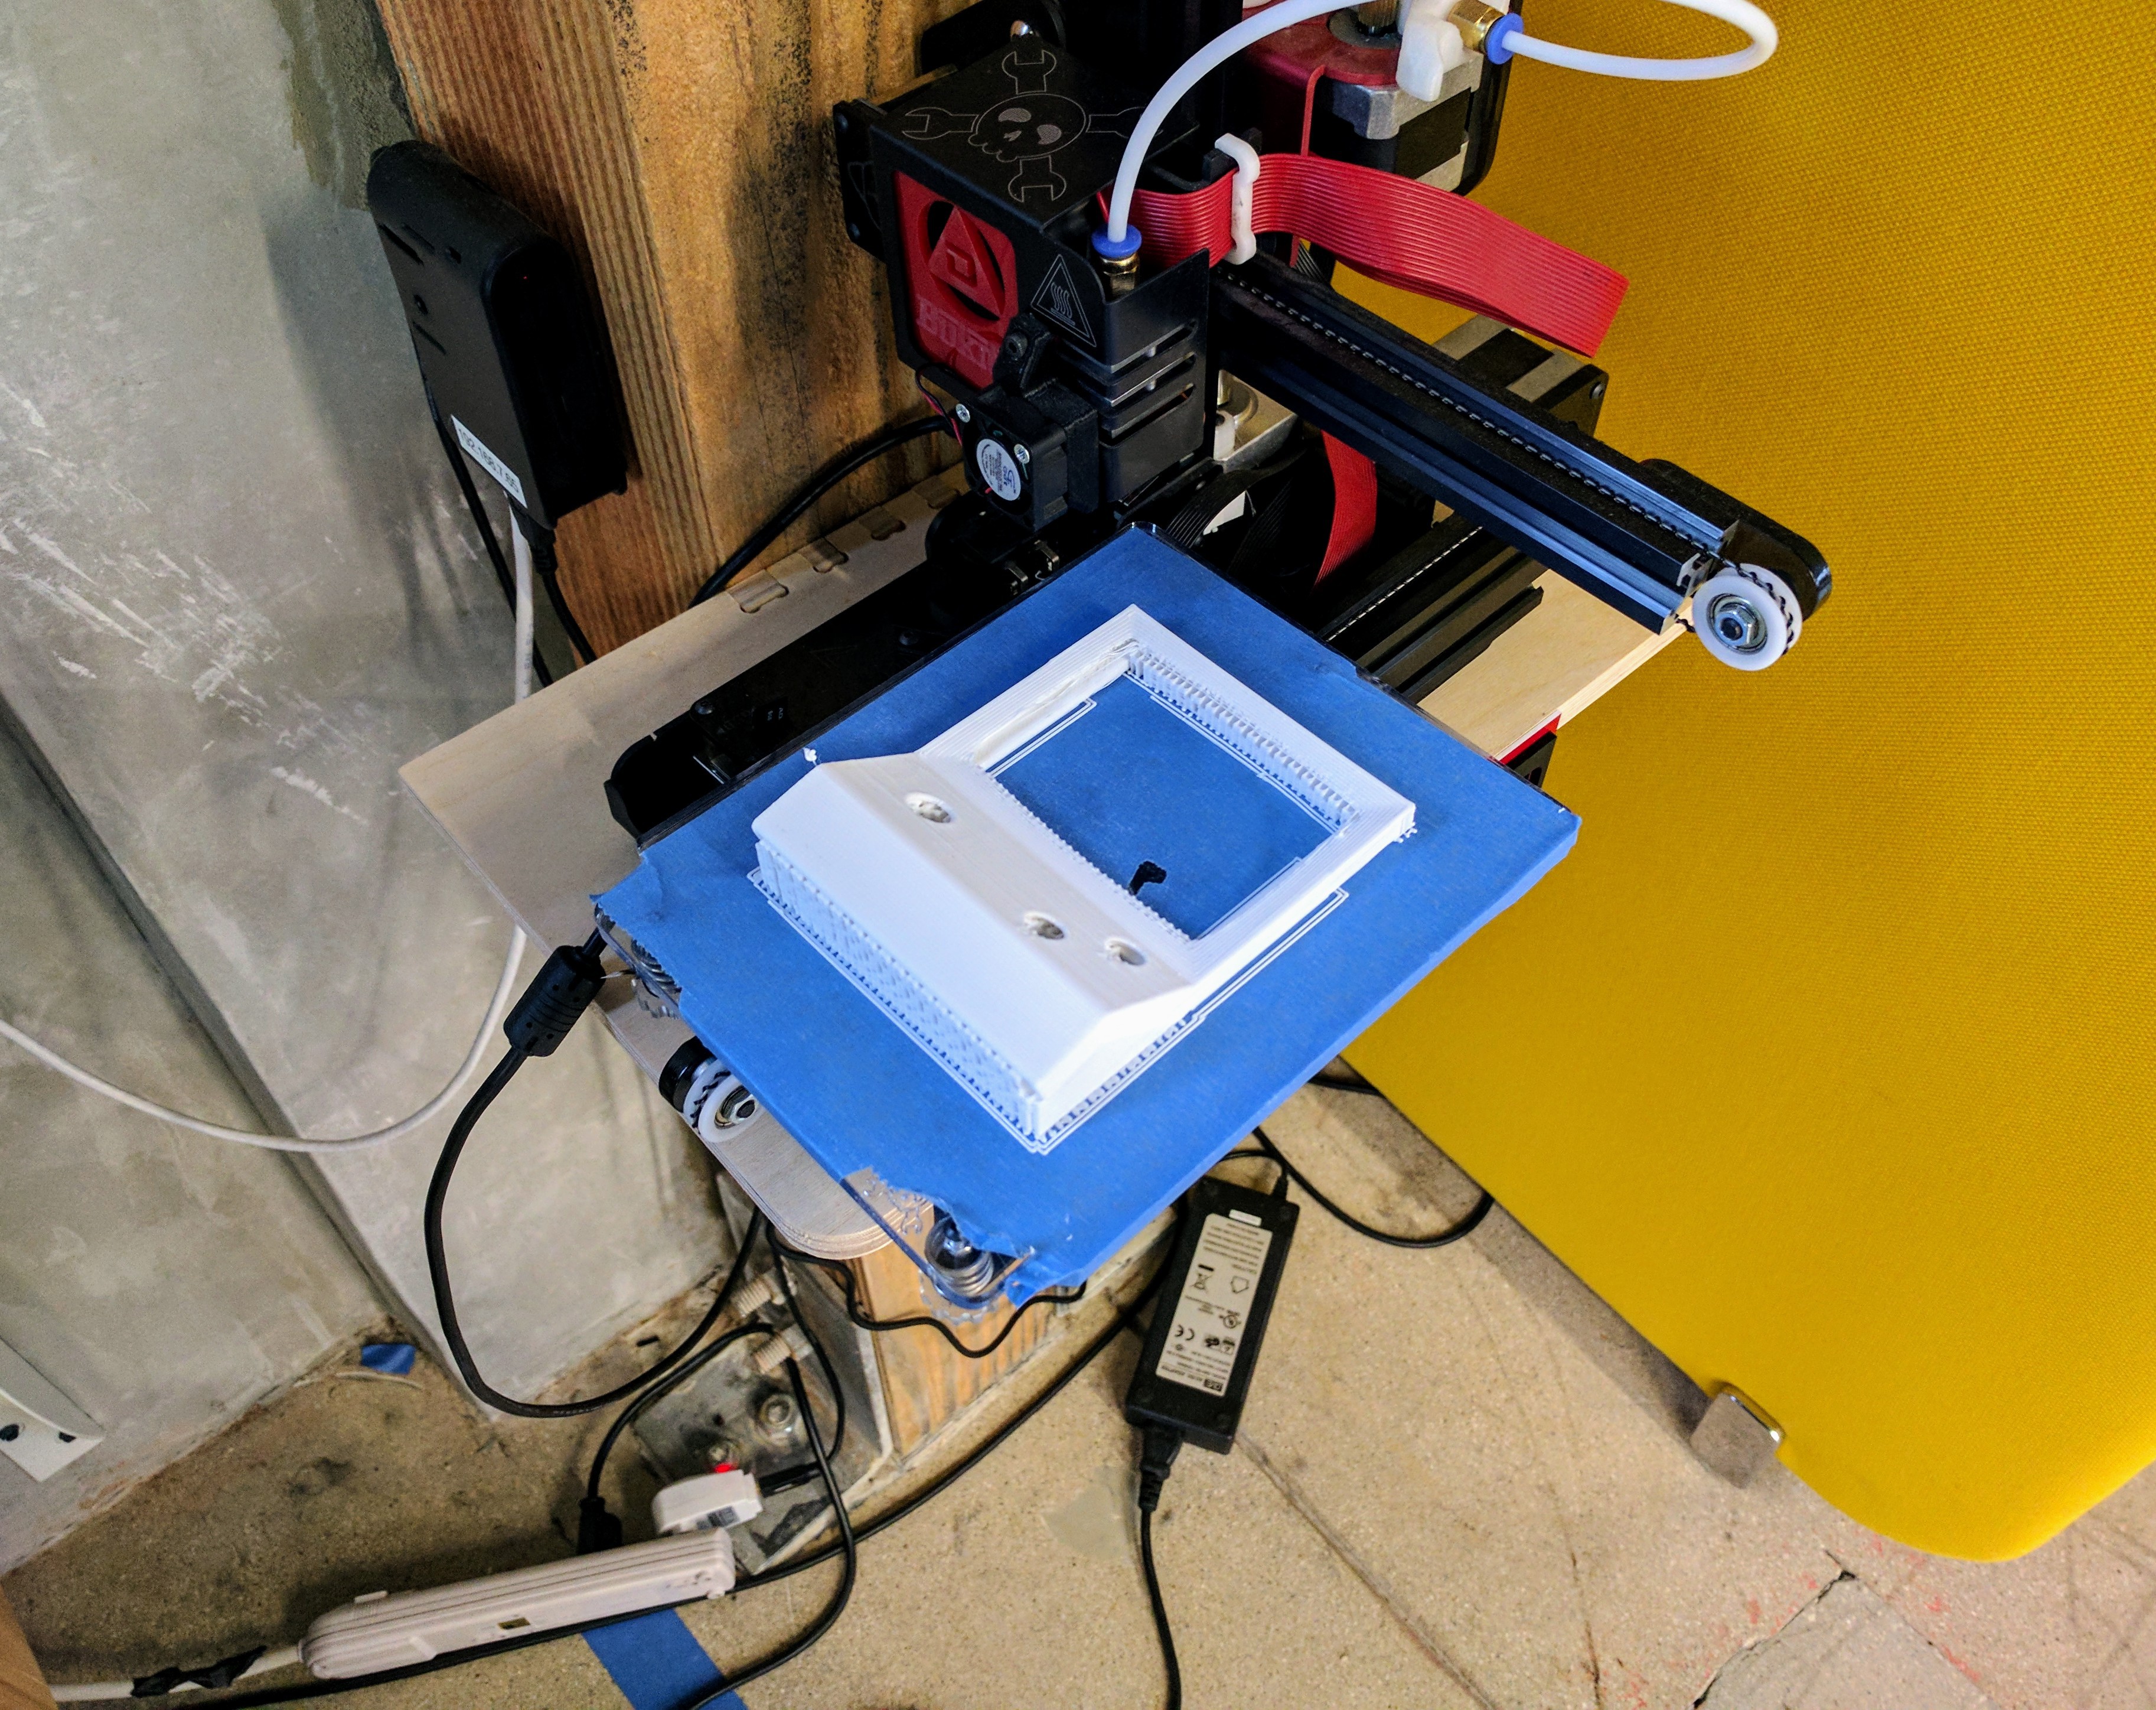
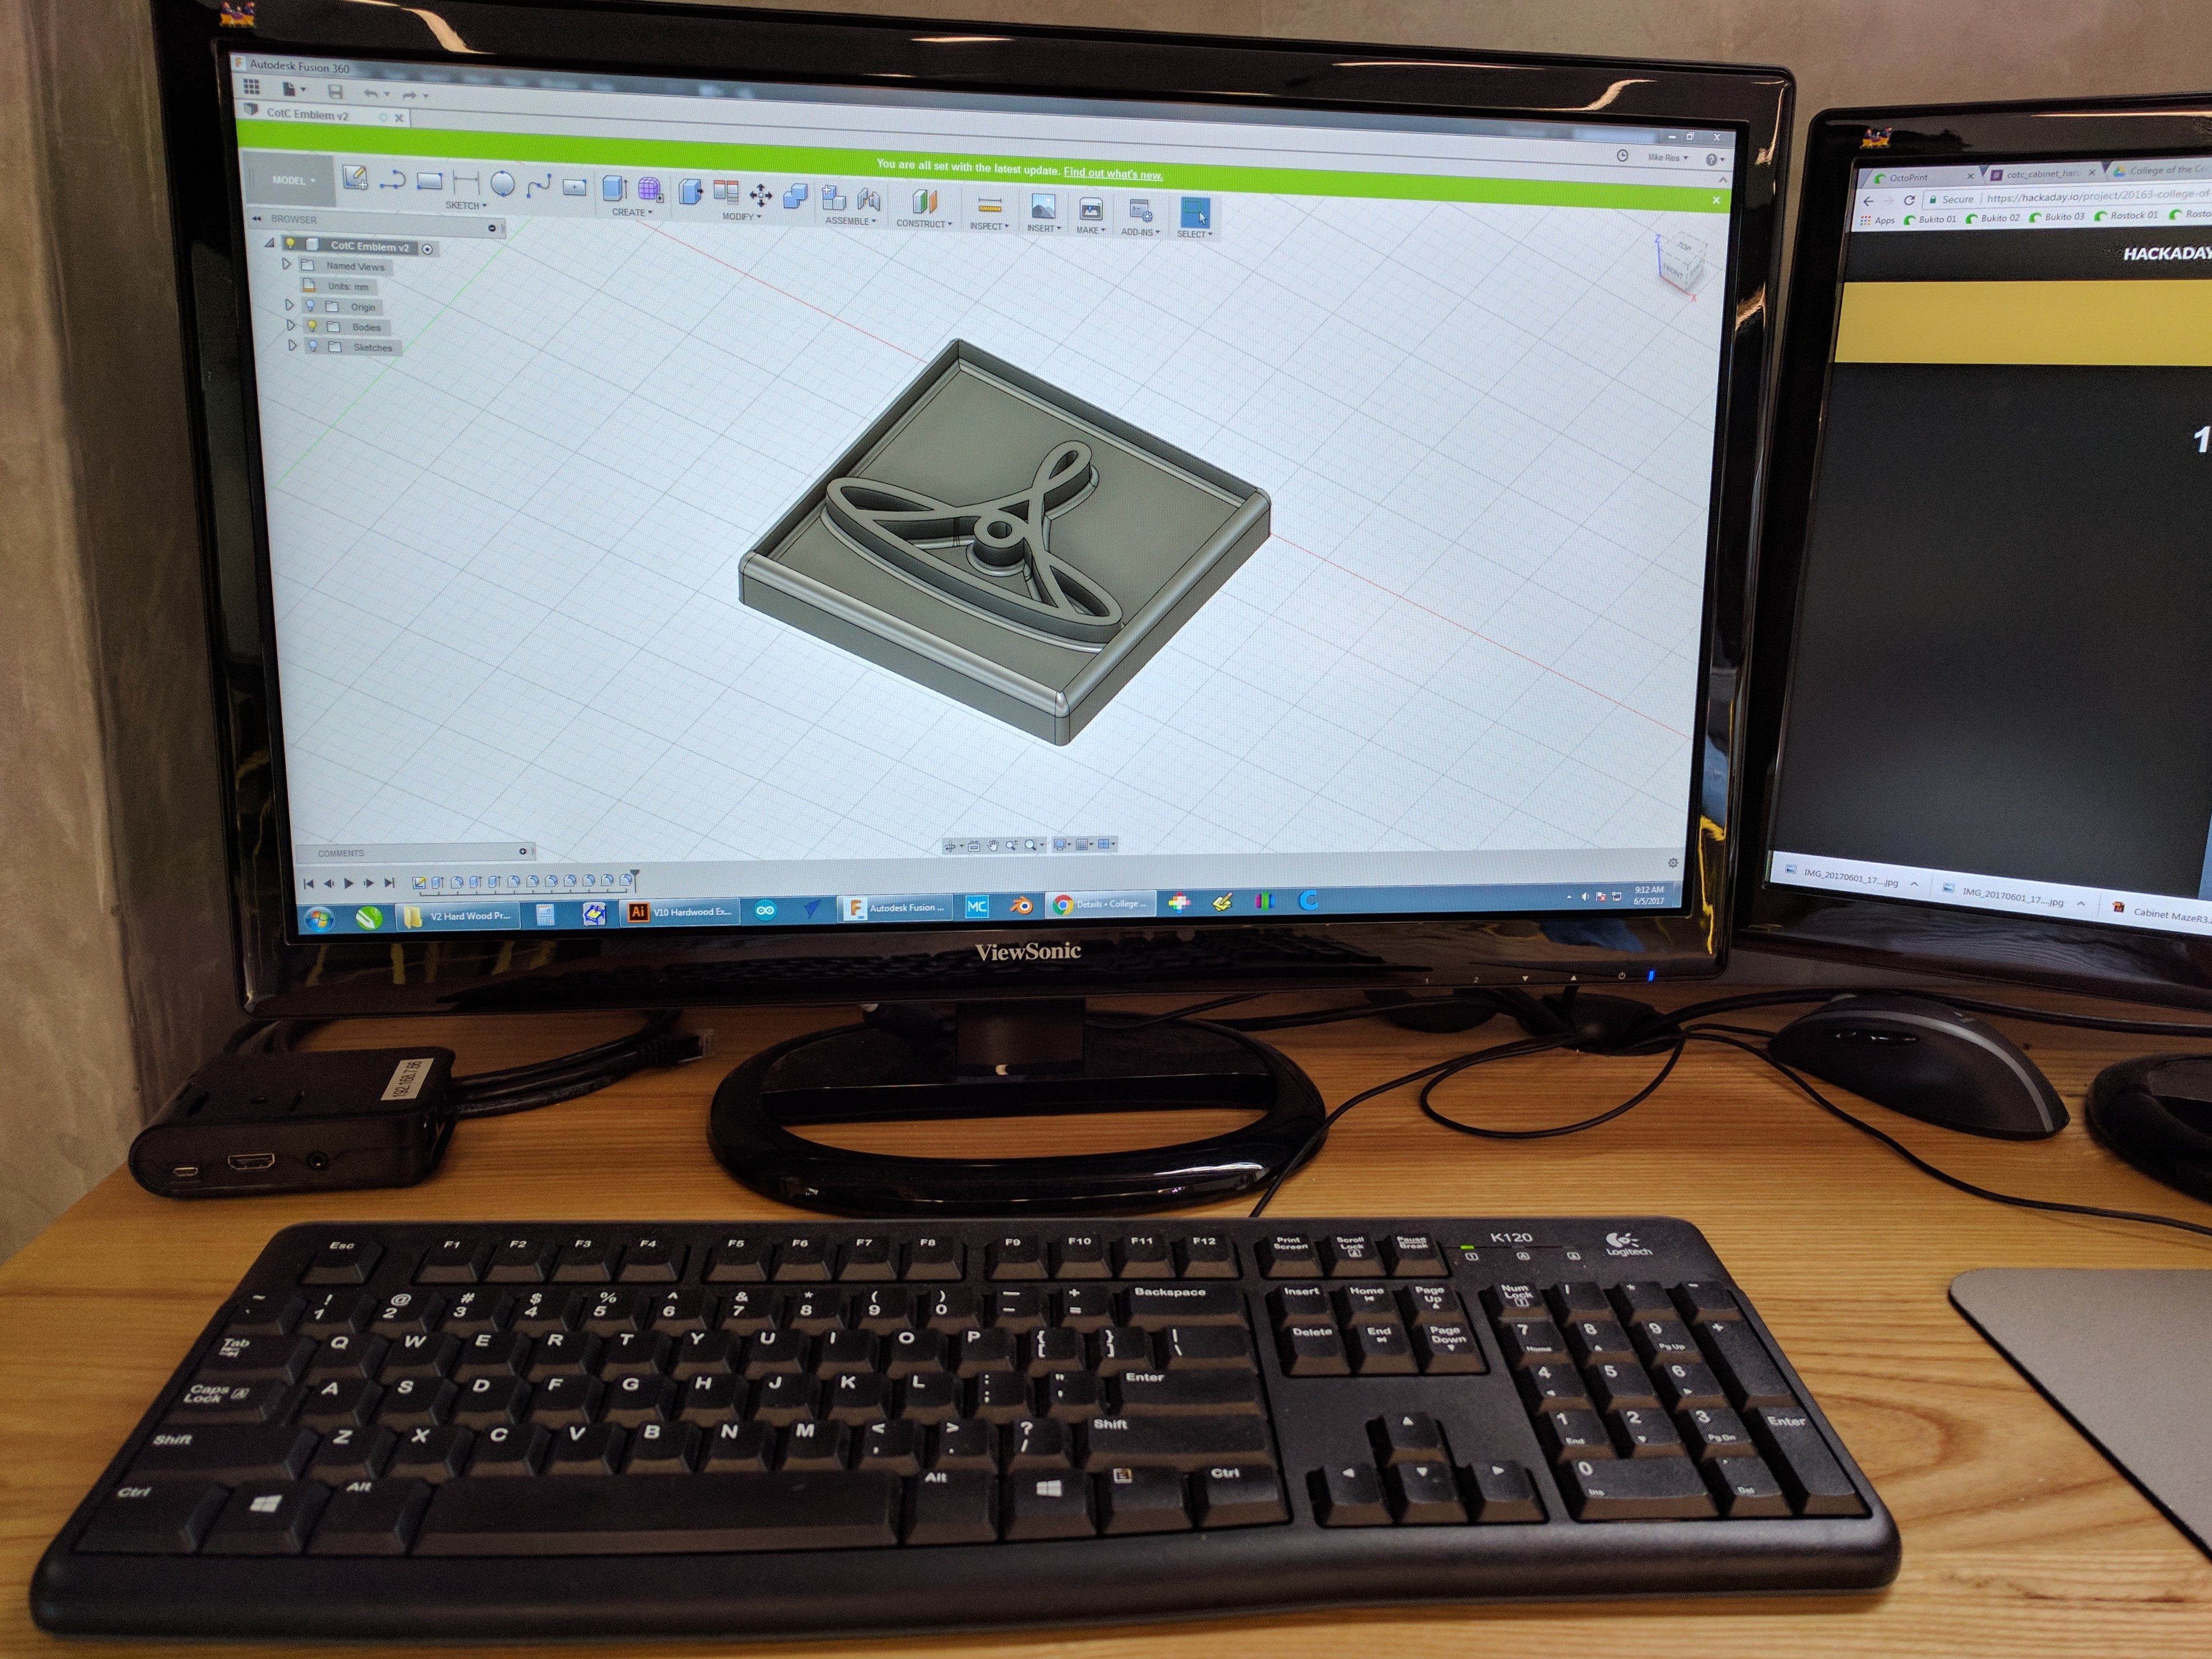
First things first, I needed to complete my design in a computer aided drawing (CAD) program so I could start rapid prototyping the cabinet's parts on the DesignLab's Buquitos and Formlabs Form 2 3D printers. As previously mentioned, I'm a artist+designer 1st, and hobbyist maker/tinker a distant 4th or 5th... While I've played around in CAD programs like TinkerCAD before and ordered 3D printed parts on Shapeways, I've never actually designed, developed and printed my own models on a 3D Printer I physically hadaccess to. Further complicating all of this is the fact that I've never had to engineer and then build a complex piece of consumer electronics with integrated mechanical systems like this on my own... Before I could start I needed to get up to speed in Fusion360, and subsequently spent the weekend of May 20th mainlining Fusion360 tutorials on YouTube, followed by 3 frustration full days designing, redesigning, starting from scratch multiple times before eventually getting to the point that I was parametrically designing+revising my model (Fusion360 is a powerful, if not clunkily designed piece of software!). I'm proud to say that by Wednesday May, 24th I was able to personally print MY very first prototype part (as pictured below)!
![]()
My first EVER 3D print on a Deezmaker Bukito!
![]()
Pulling the print off of the Bukito... I have to admit that the fidelity wasn't what I expected at first, but thankfully the prints got better with each consecutive print...
![]()
I never knew supports would be such a pain in the ass... Definitely my least favorite part of printing using a PLA based printer.
![]()
By about the 3rd Bukito Print I had the print quality dialed in to about as good as it was going to get on the Bukitos, and had also managed to make several significant changes to my Fusion360 model.
![]()
In total I made 3 prototype screen bezel parts out of PLA before moving on to the Formlabs Form 2 and it's high resolution resin prints! BTW, having access to the Bukitos to rapidly prototype, and adjust my design on the fly was awesome, and something I could definitely get used to!
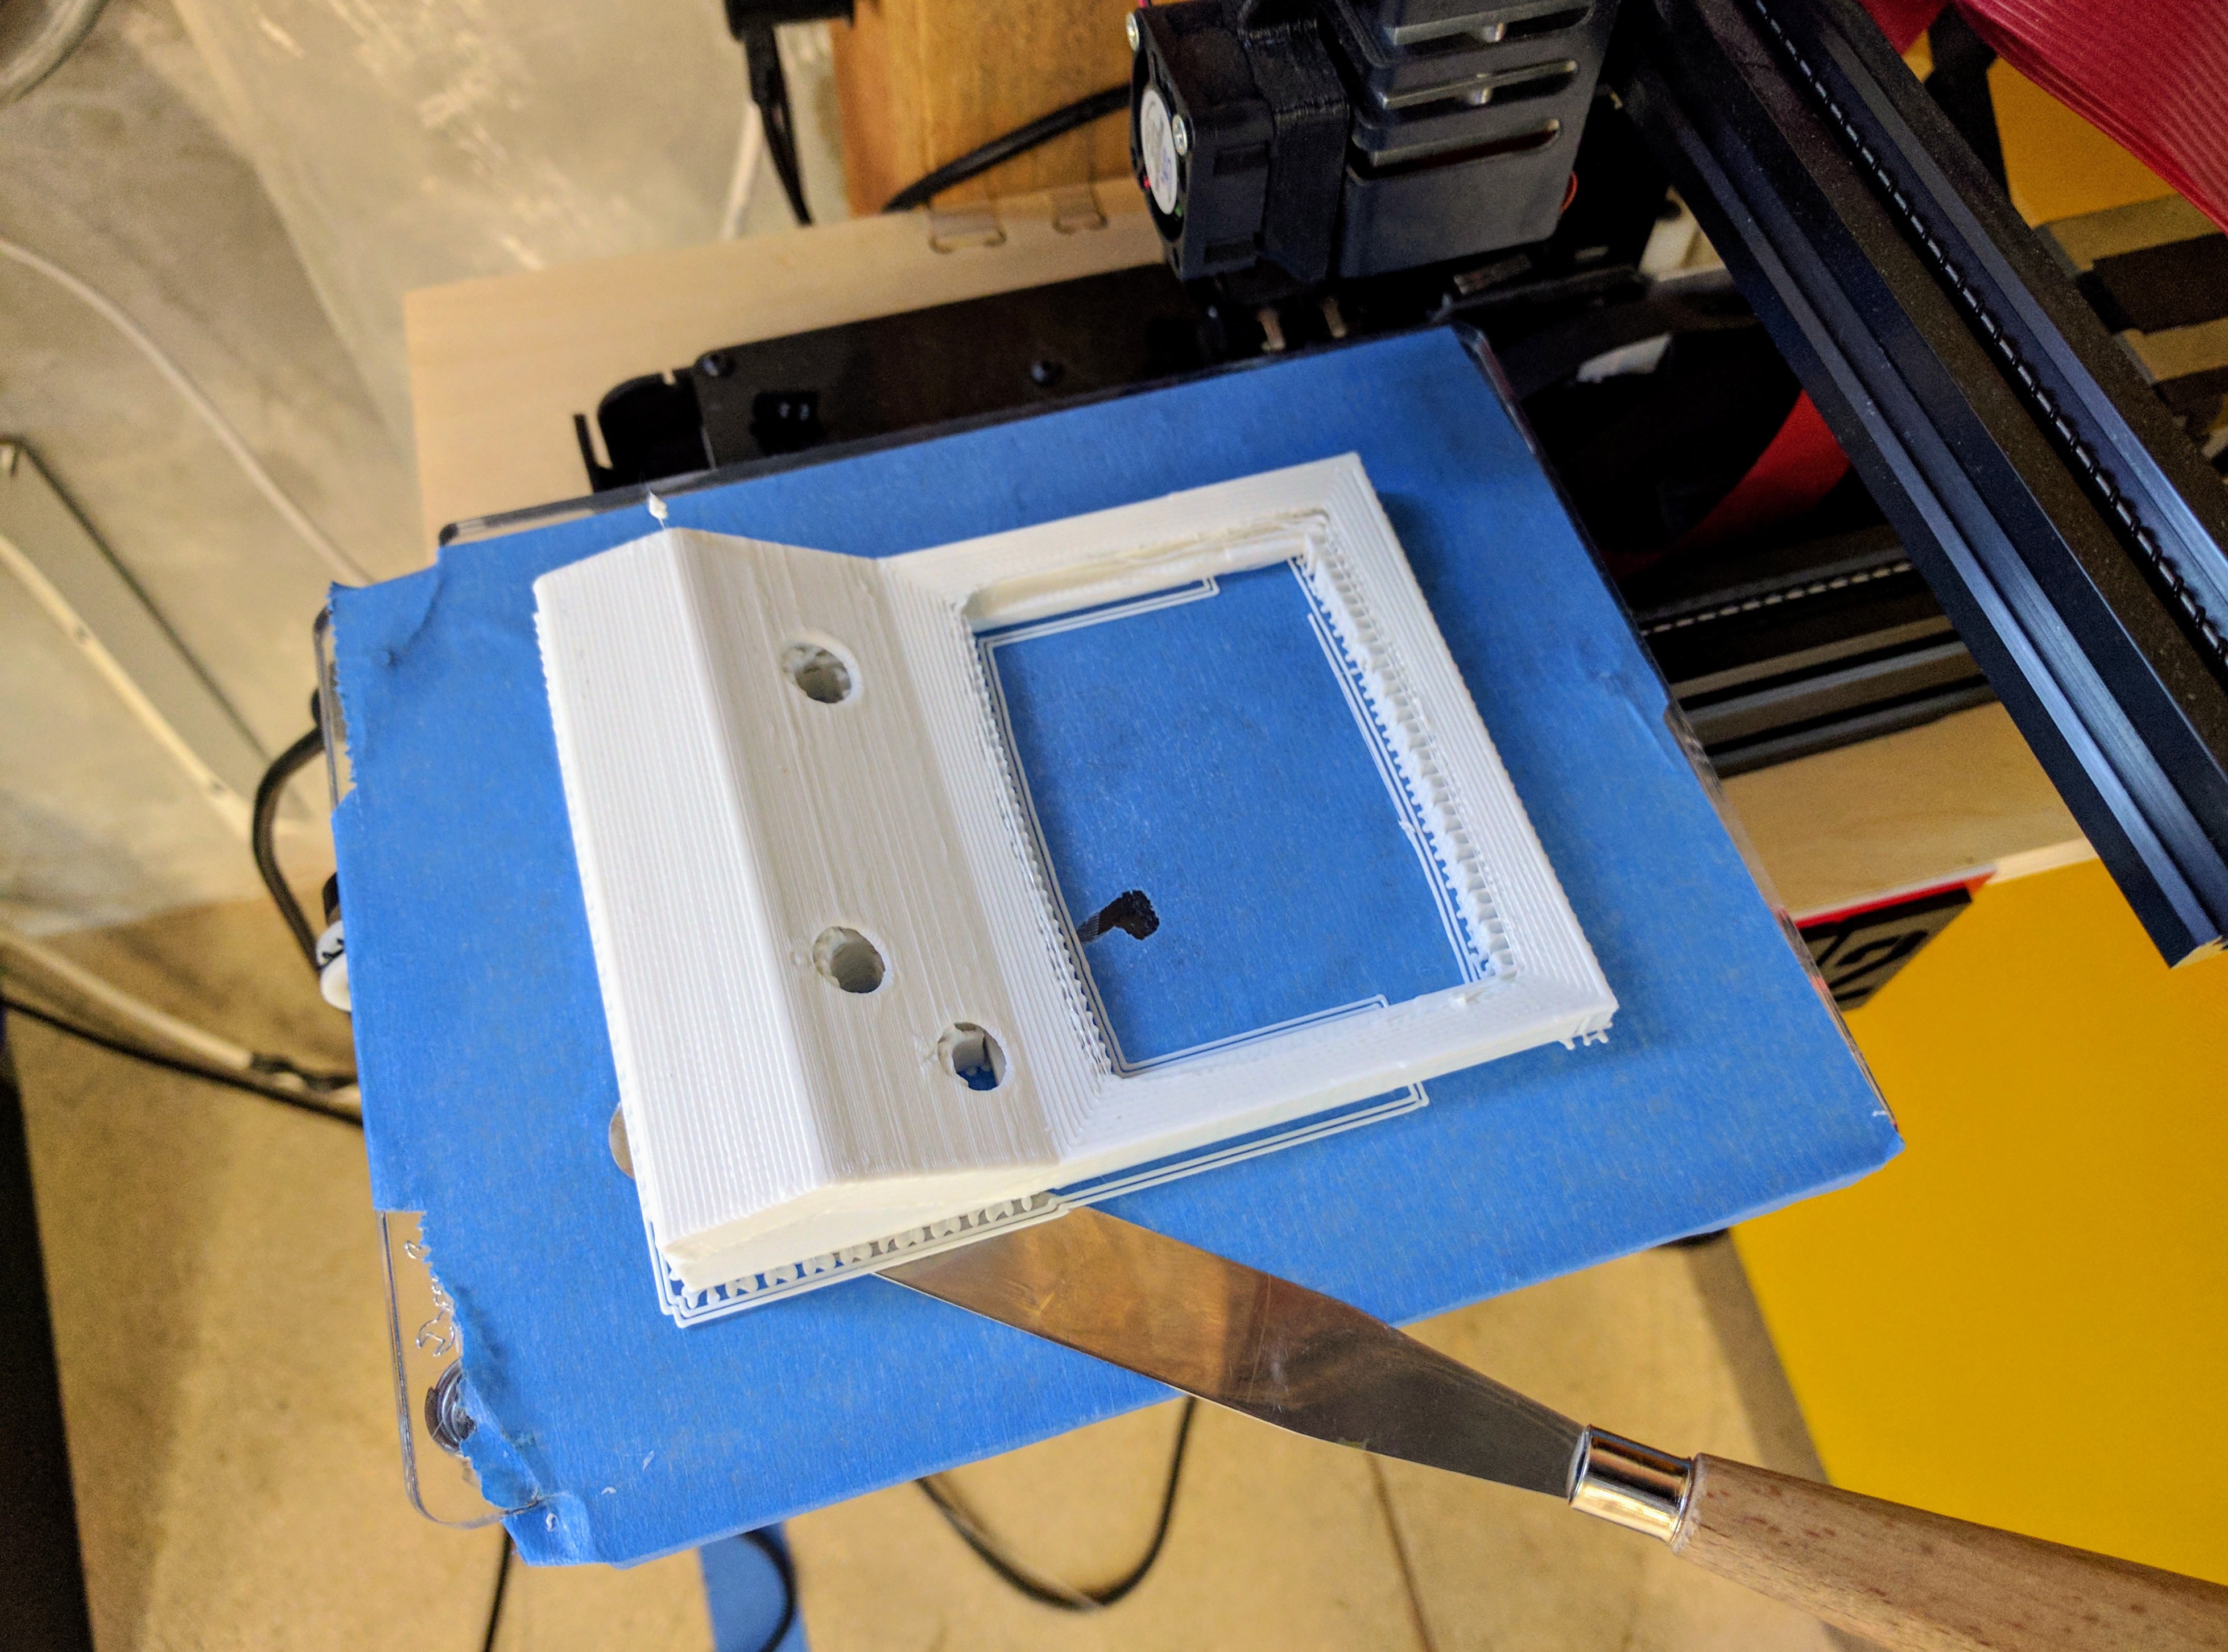
![]()
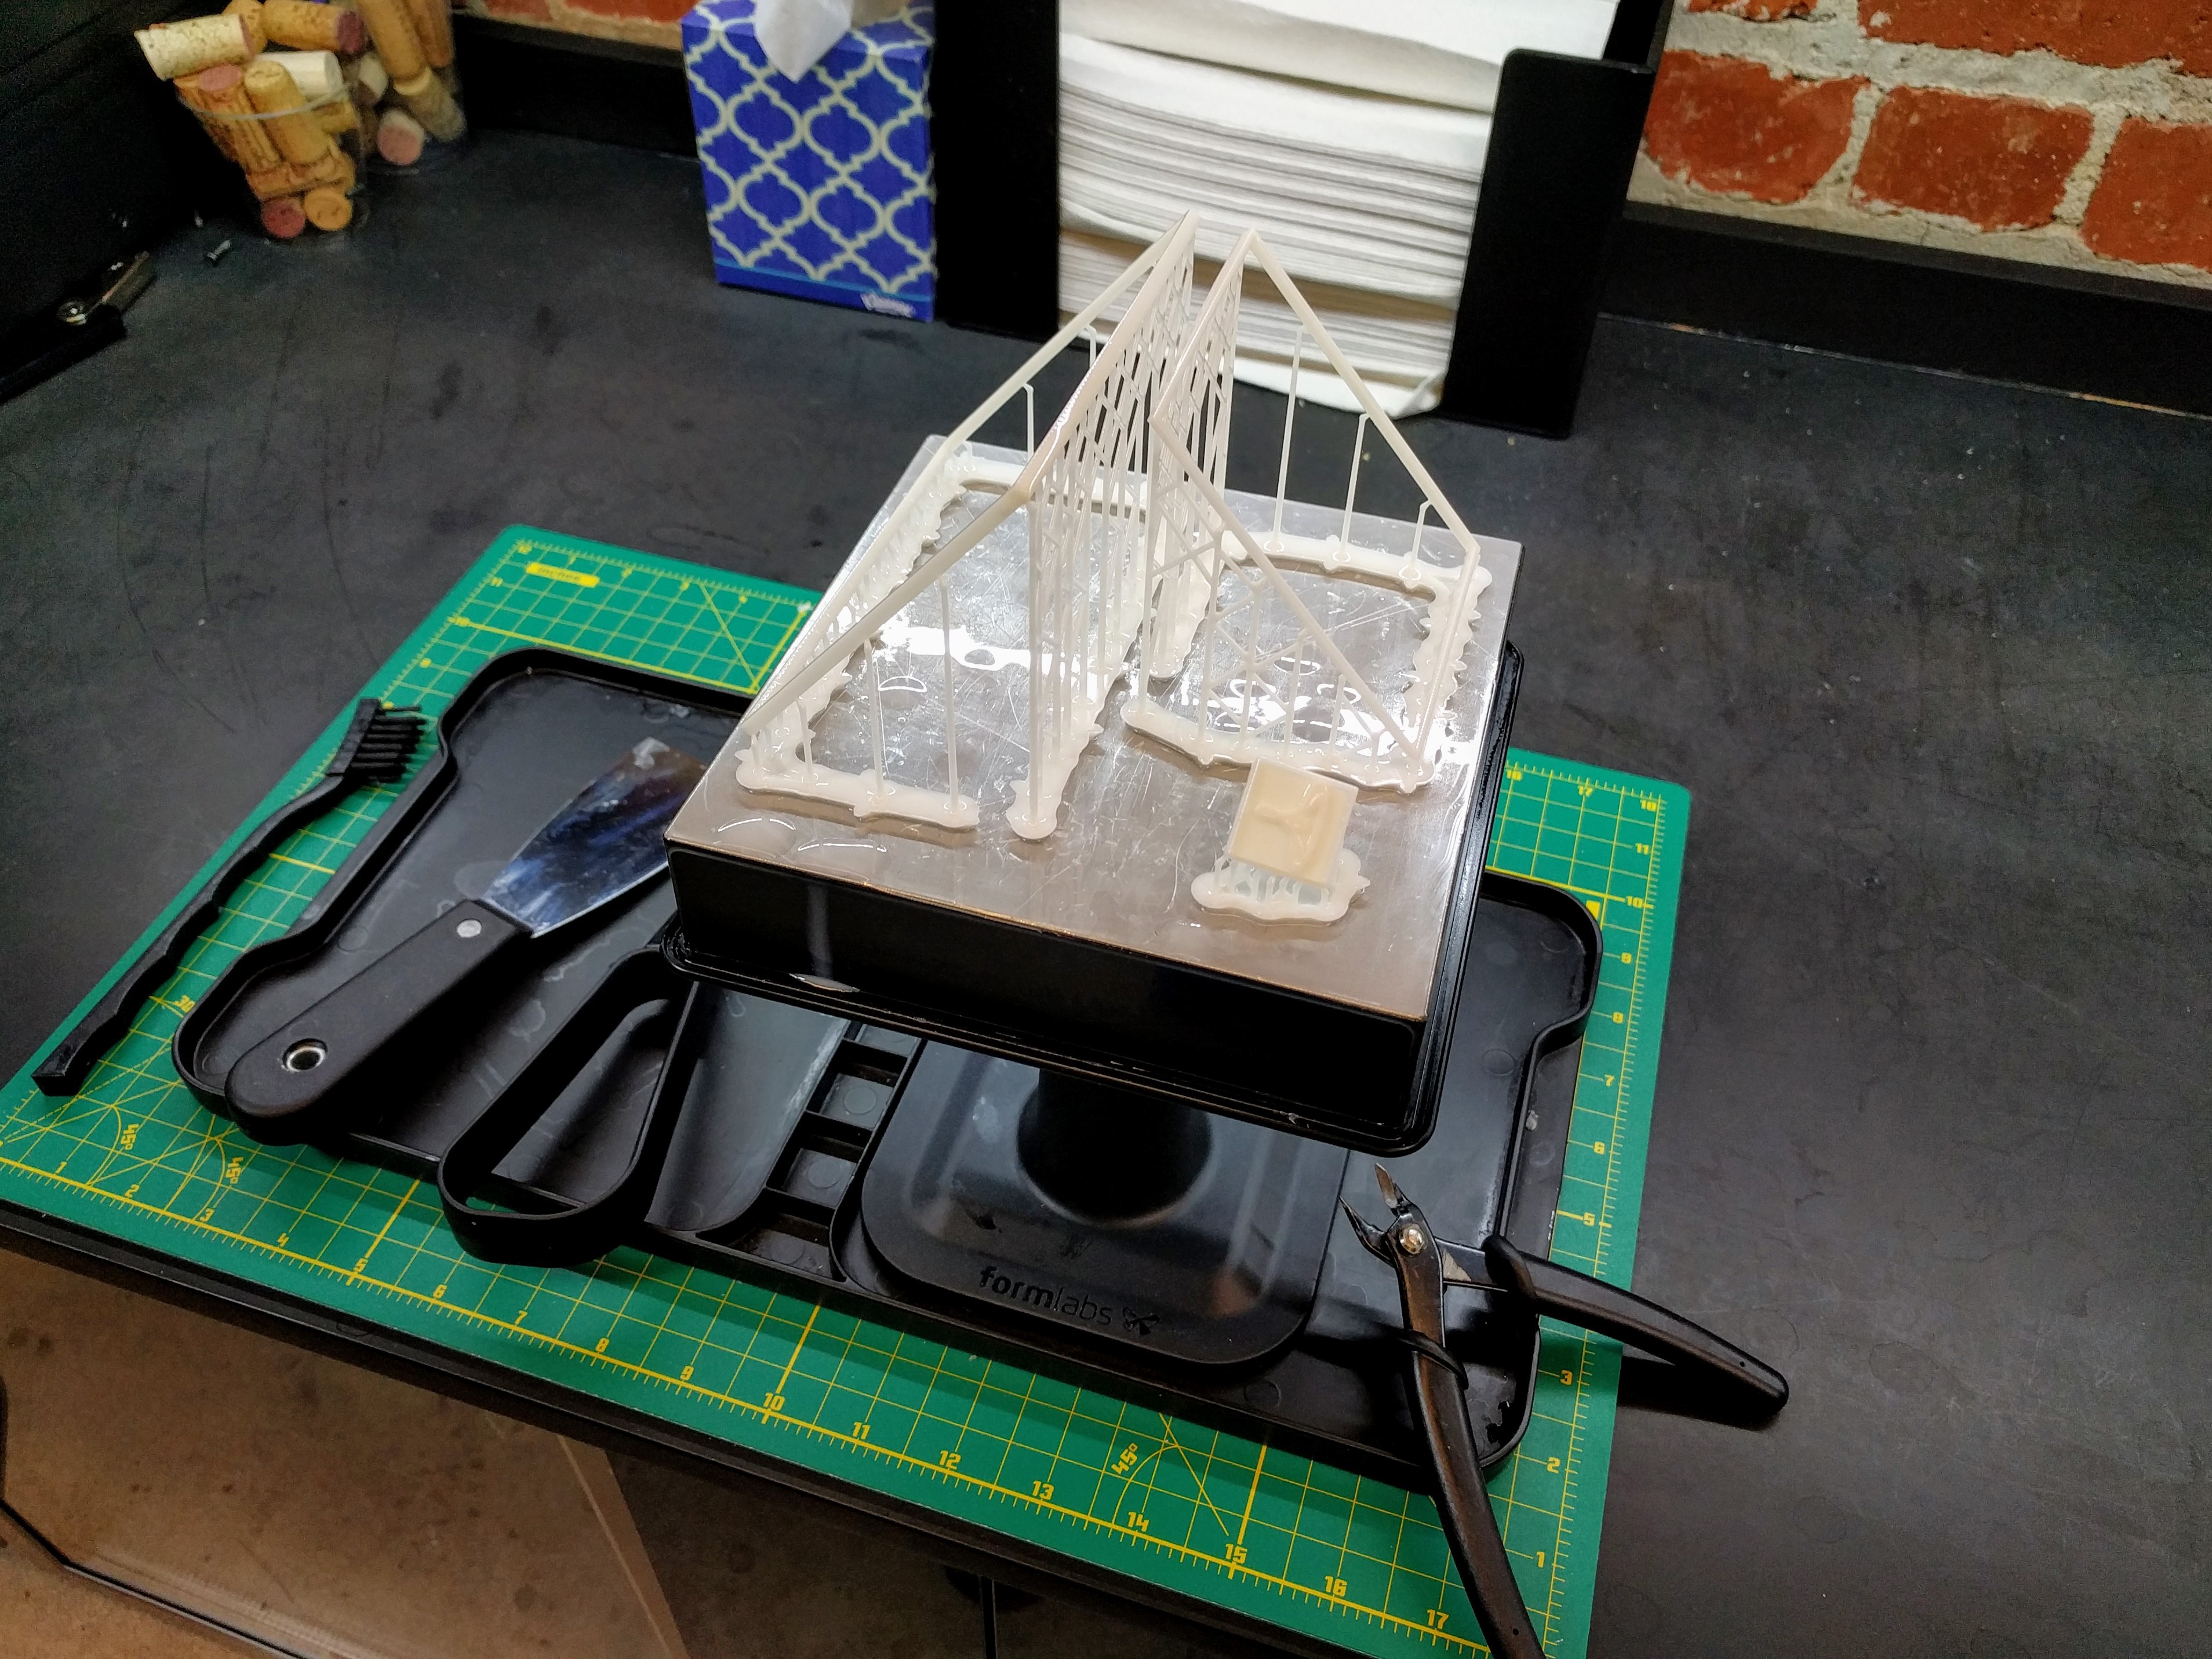
While the Form 2 printer can be messy and slimey, I LOVE working with this printer! It's resolution is supremely better, AND way more accurate than anything the Bukito's are capable of doing, and without the need to fiddle with it's settings!
![]()
![]()
While messy, I LOVE the Form 2, and will happily deal with the goopy nature of its resin prints if given the option every time!
![]()
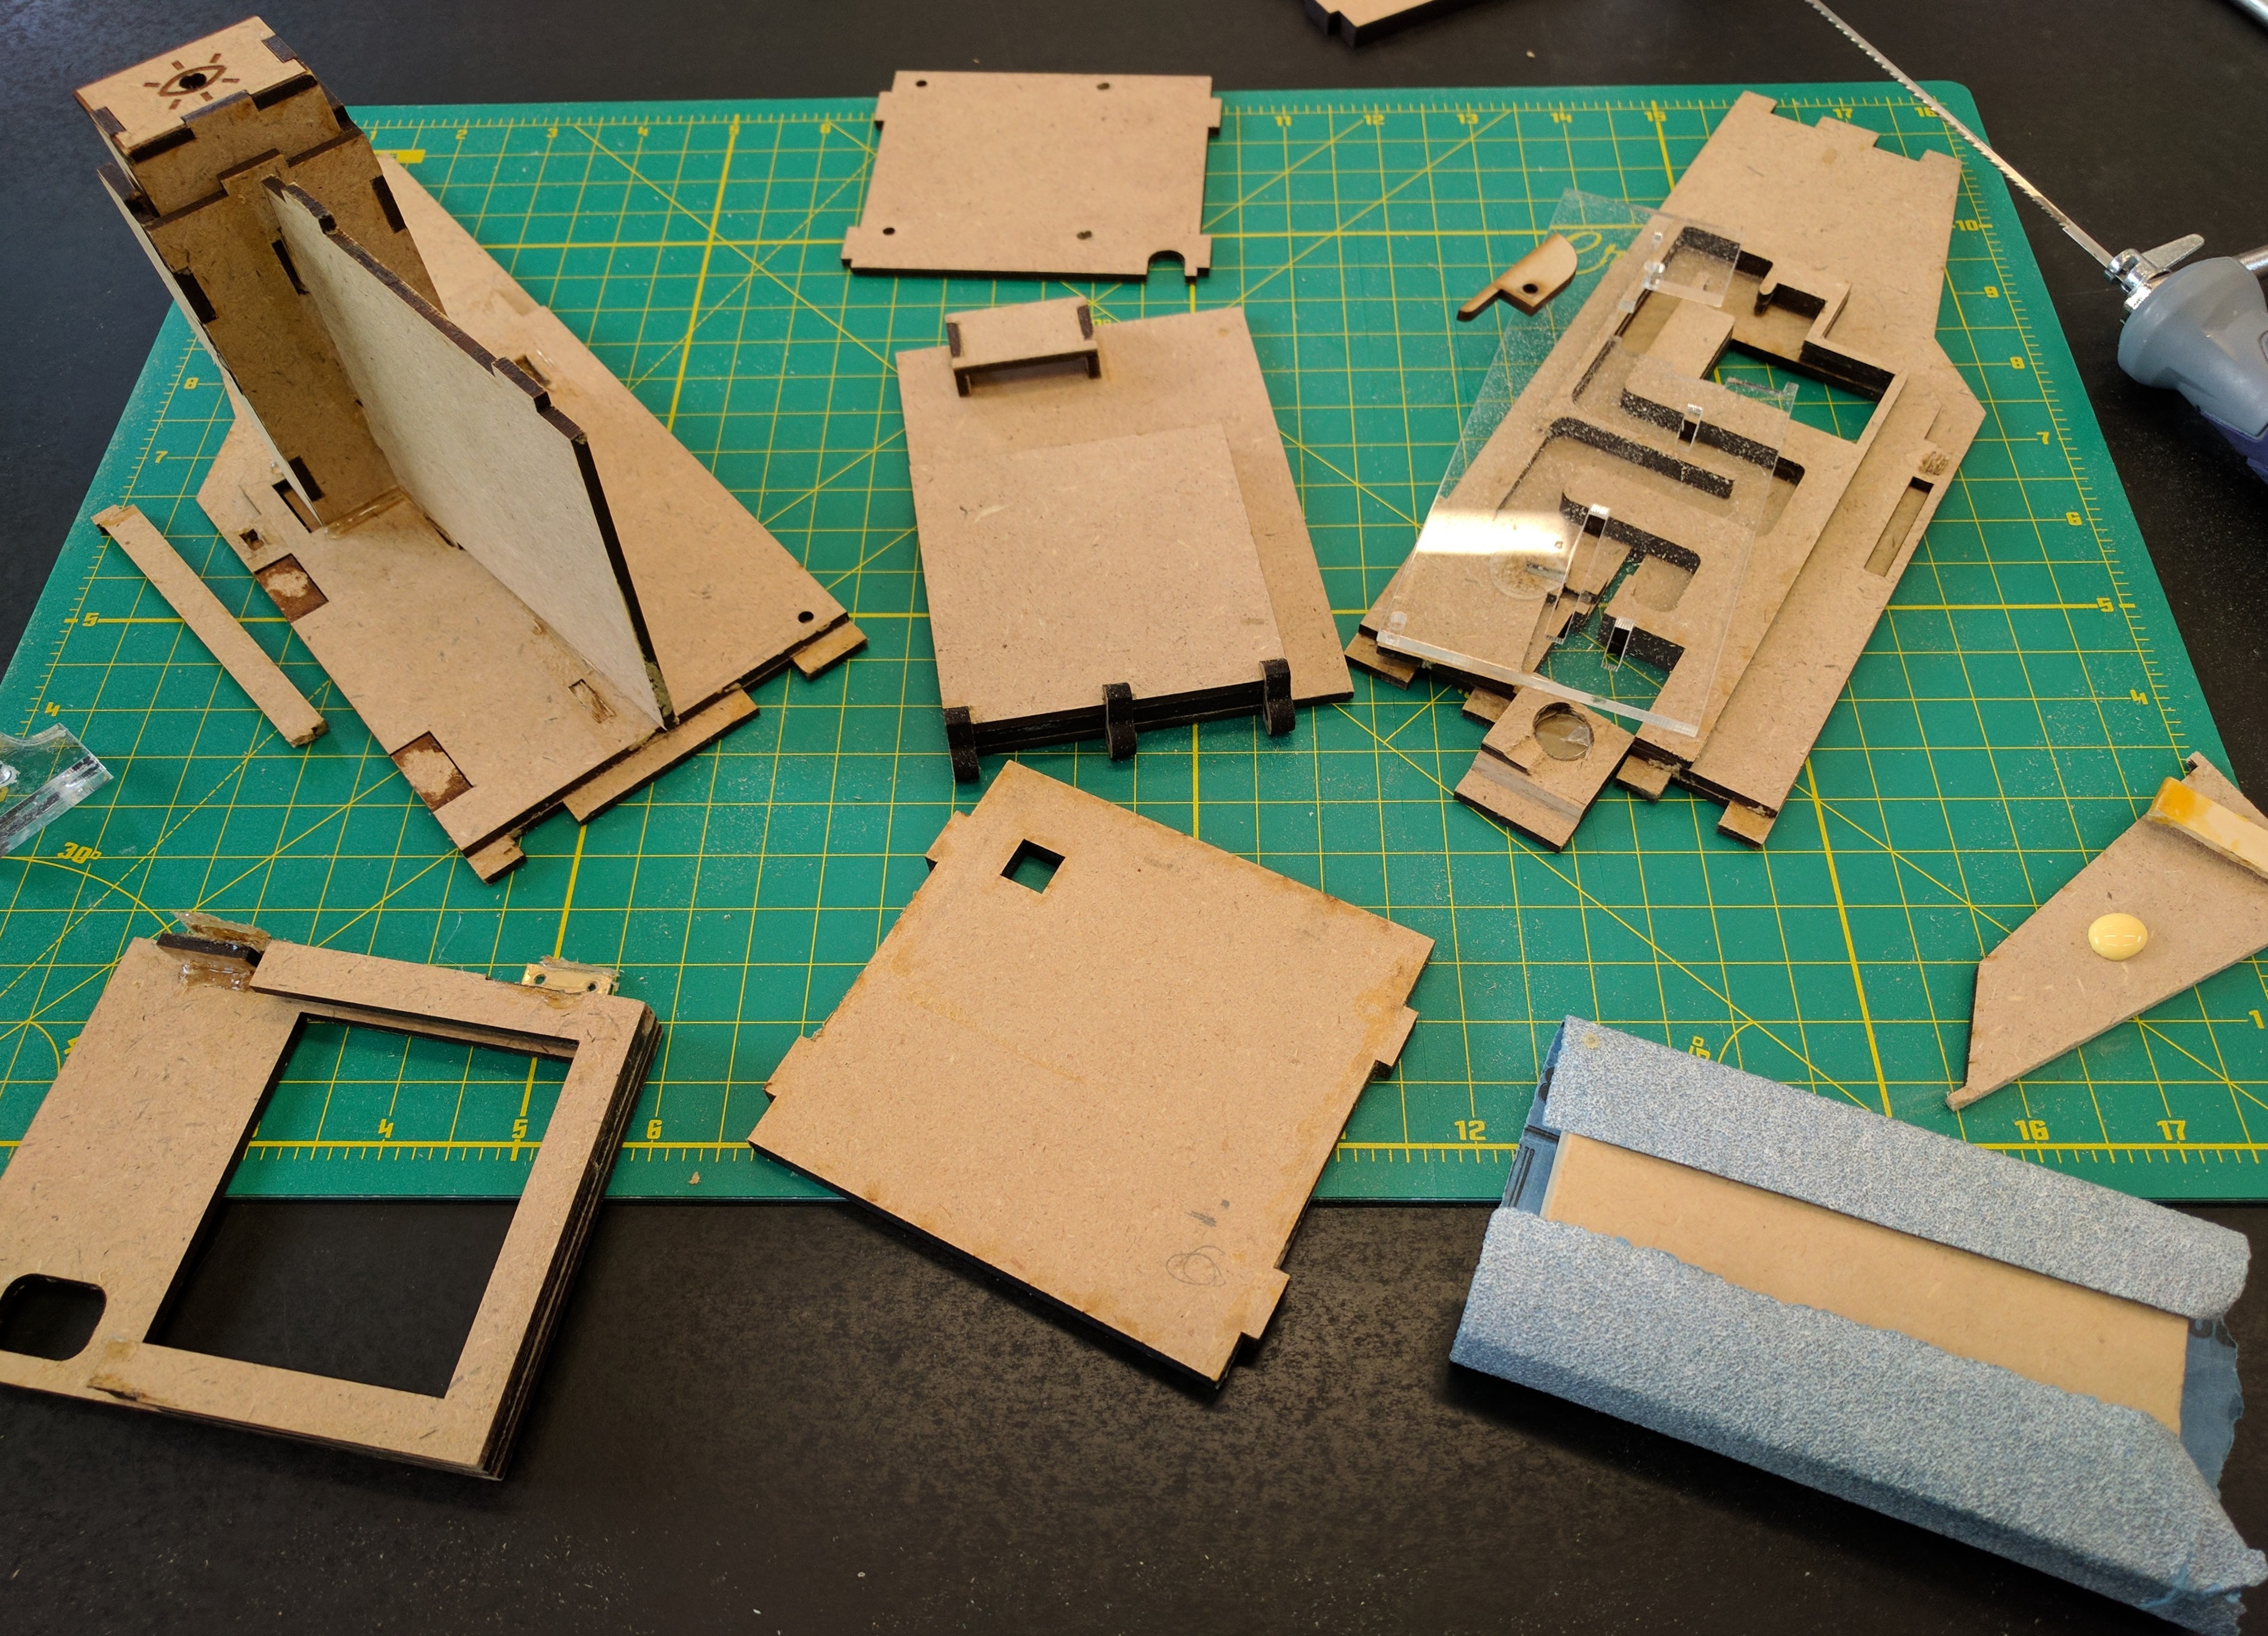
While waiting for my second Form 2 screen bezel model to print I went back to my old friend the Epilog Laser Cutter, and started cutting sample MDF parts I could use to test the fit and finish off the cabinet's final expensive walnut parts with.
![]()
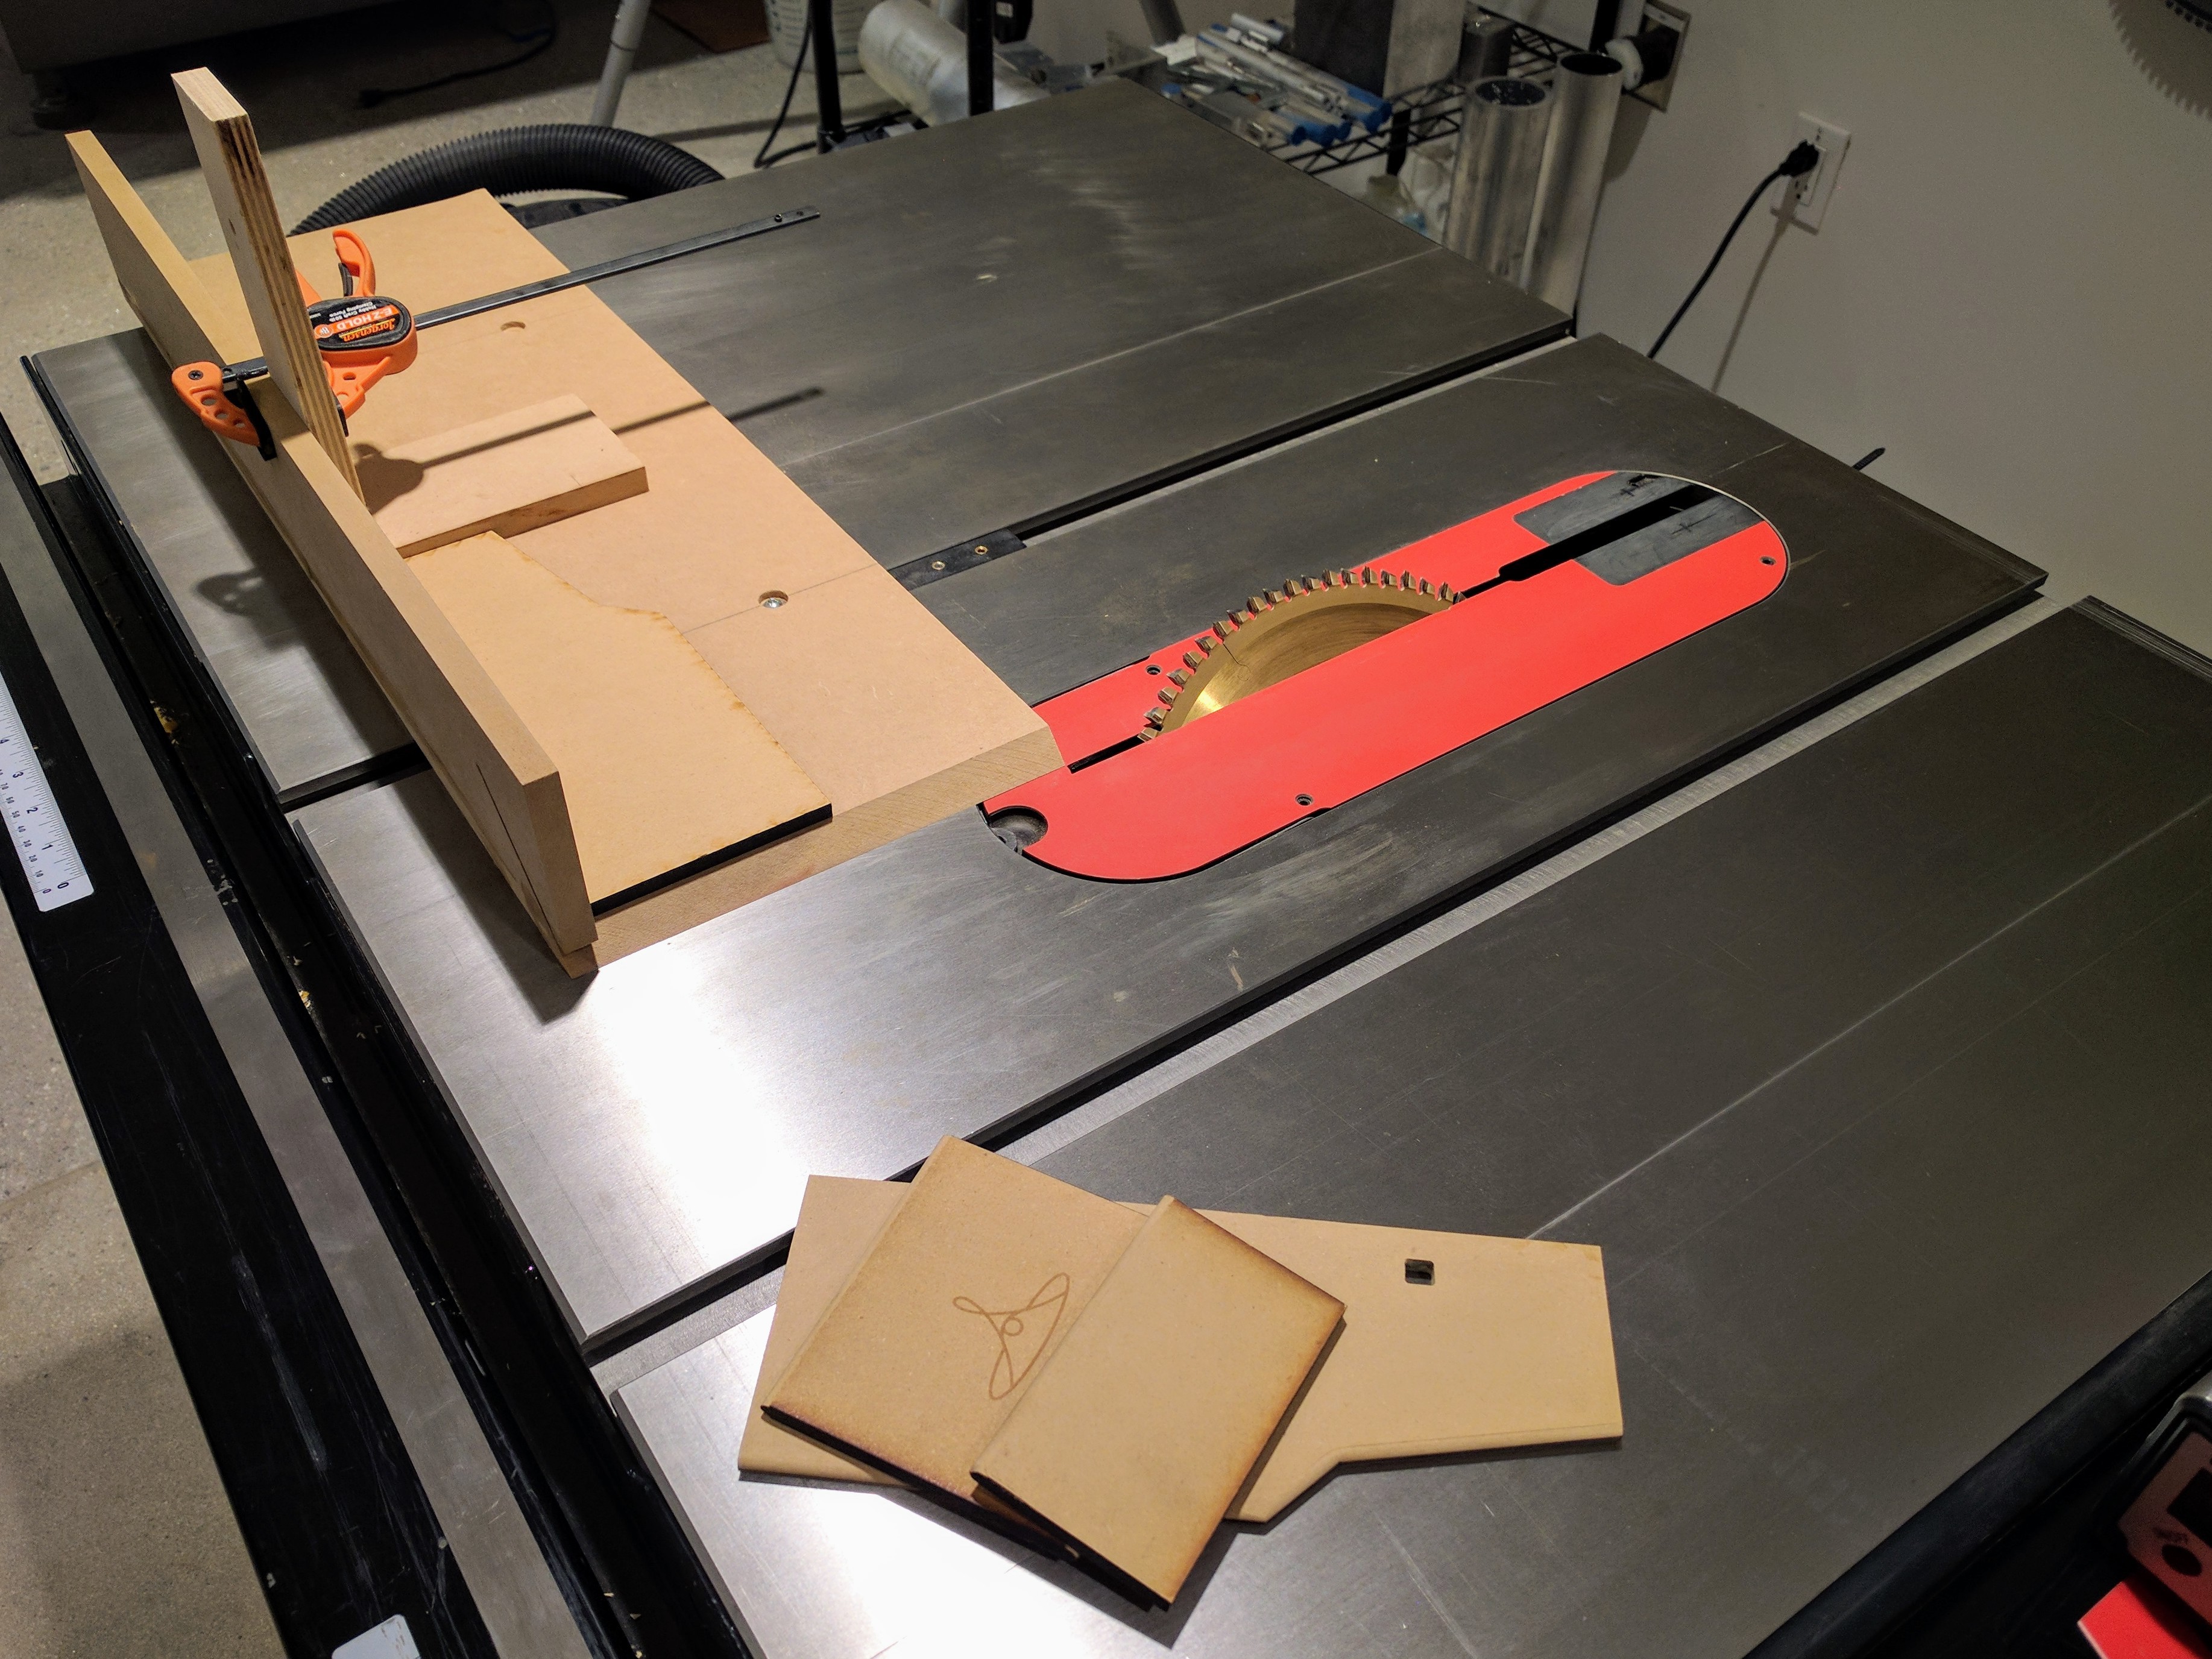
With the MDF parts cut on the laser cutter, I then set about testing the table saw in the Lab to see what kind of mitered joints it would produce.
![]()
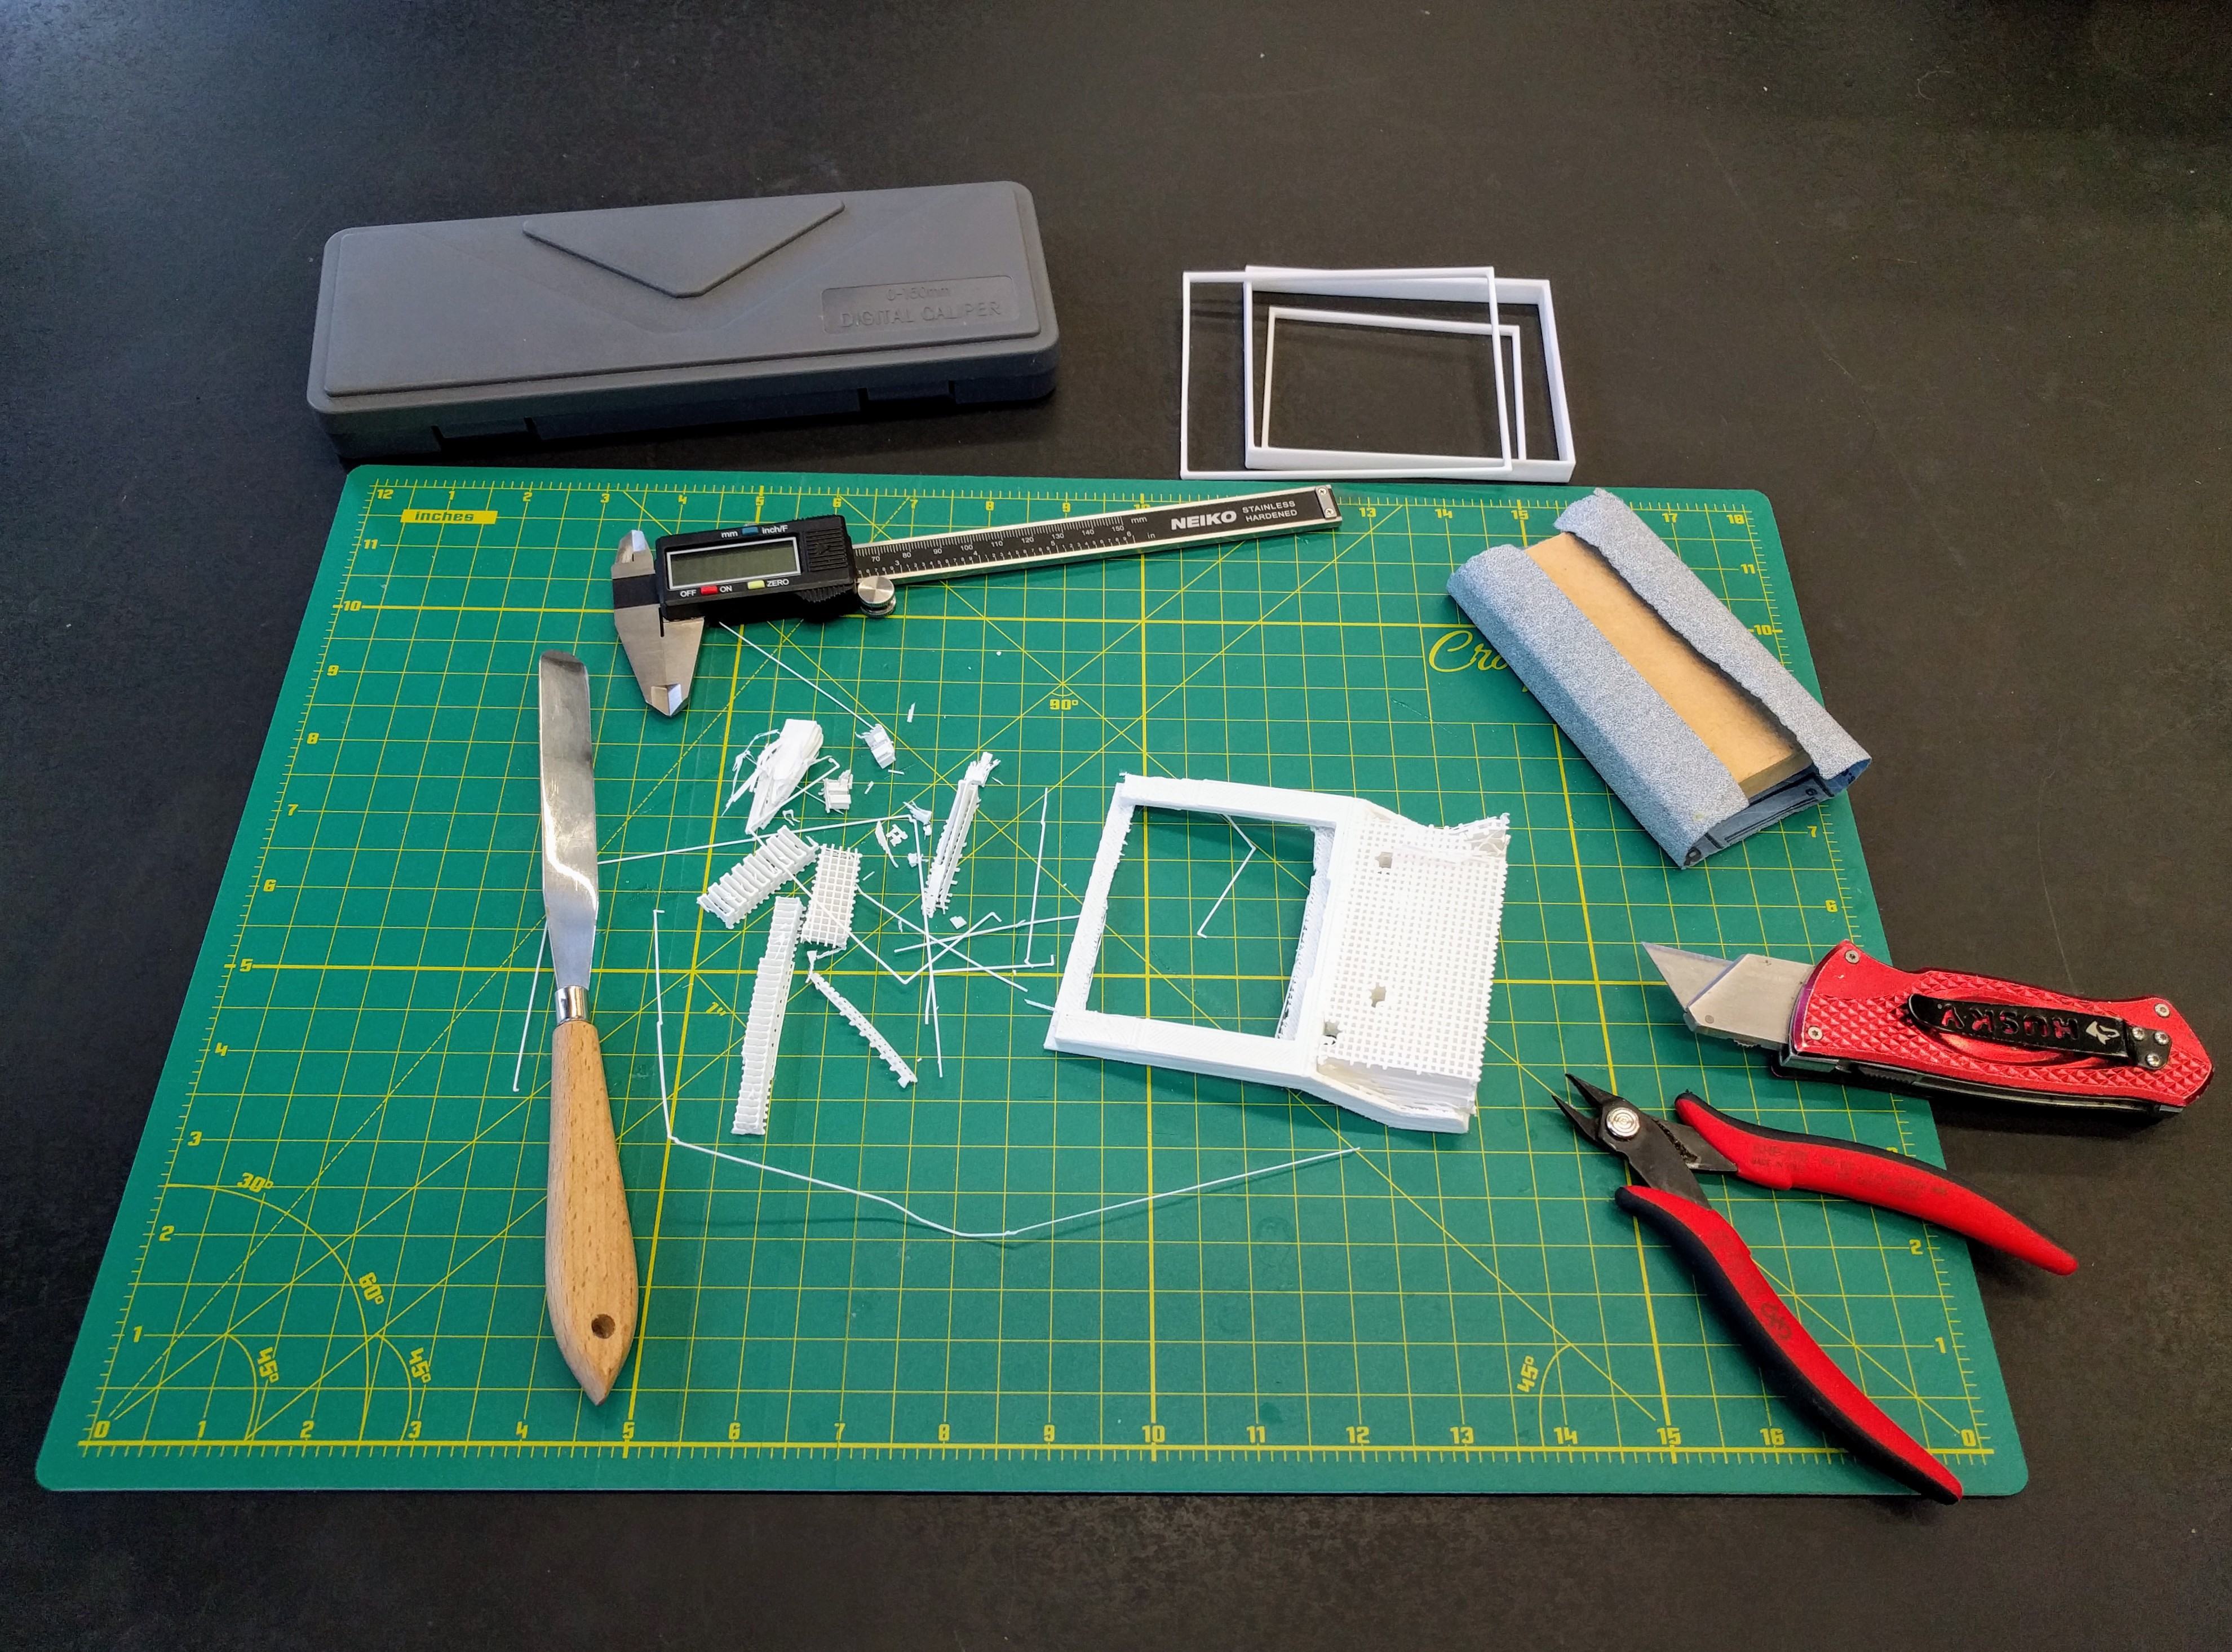
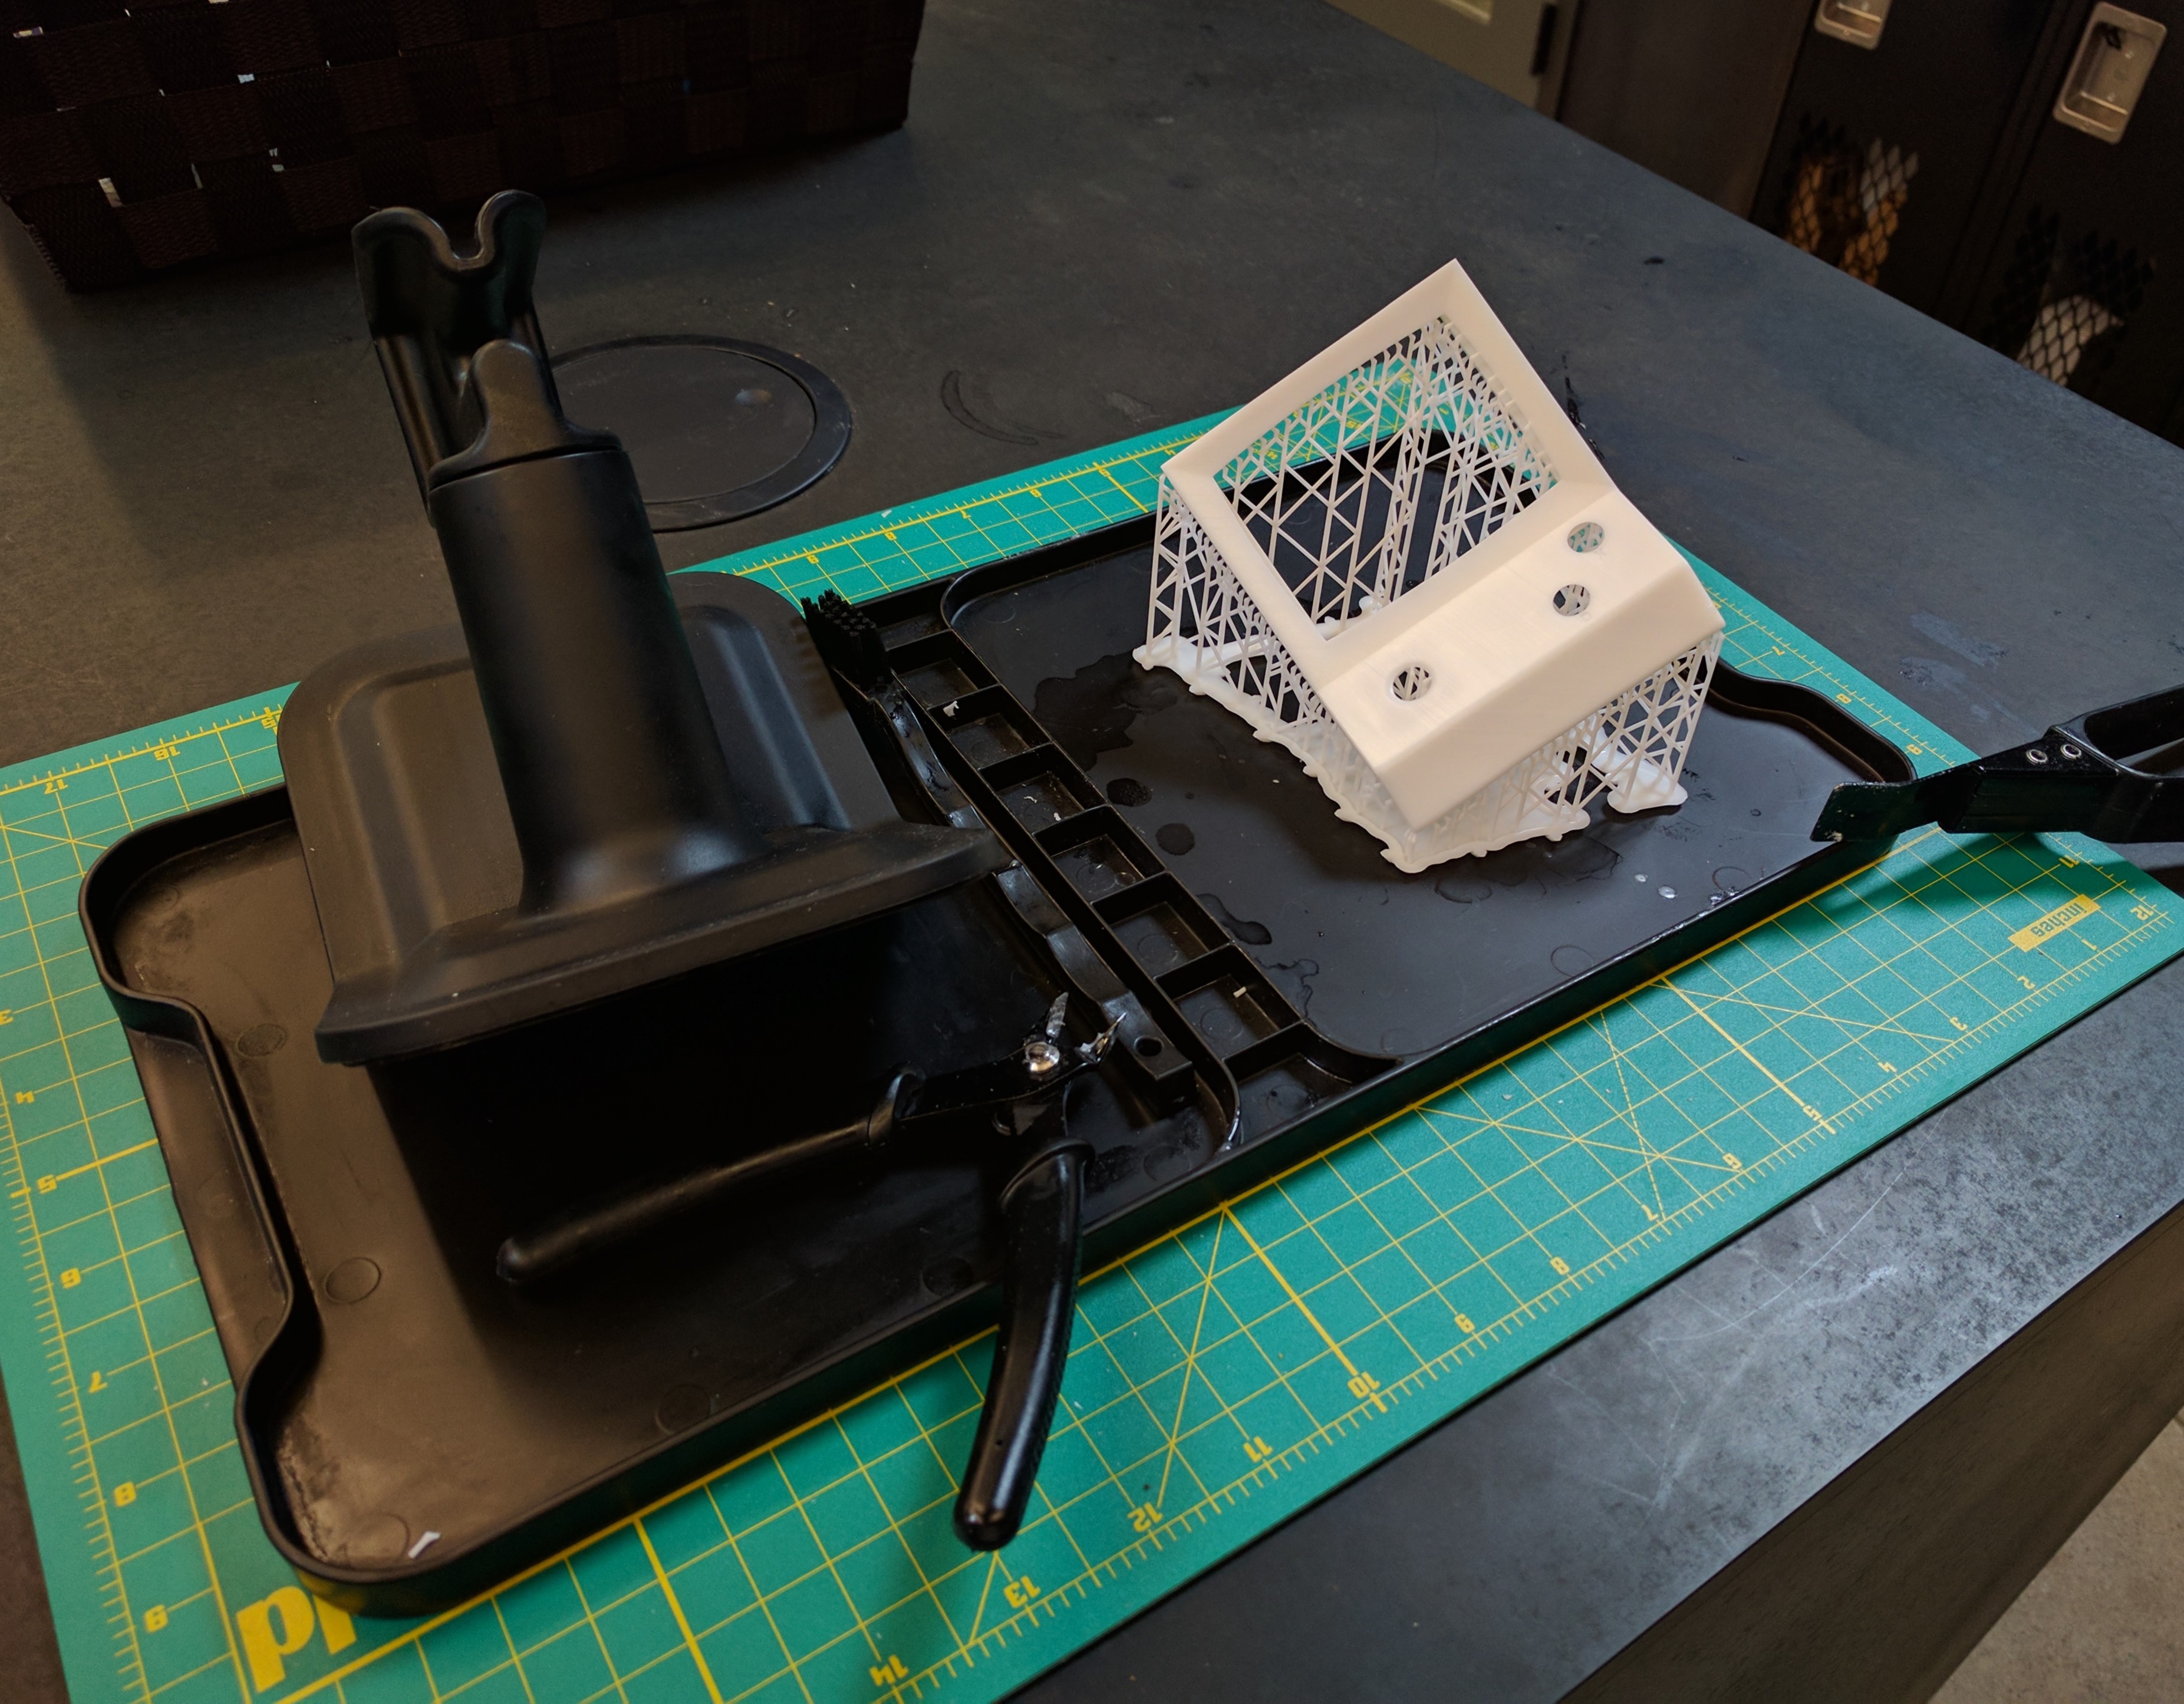
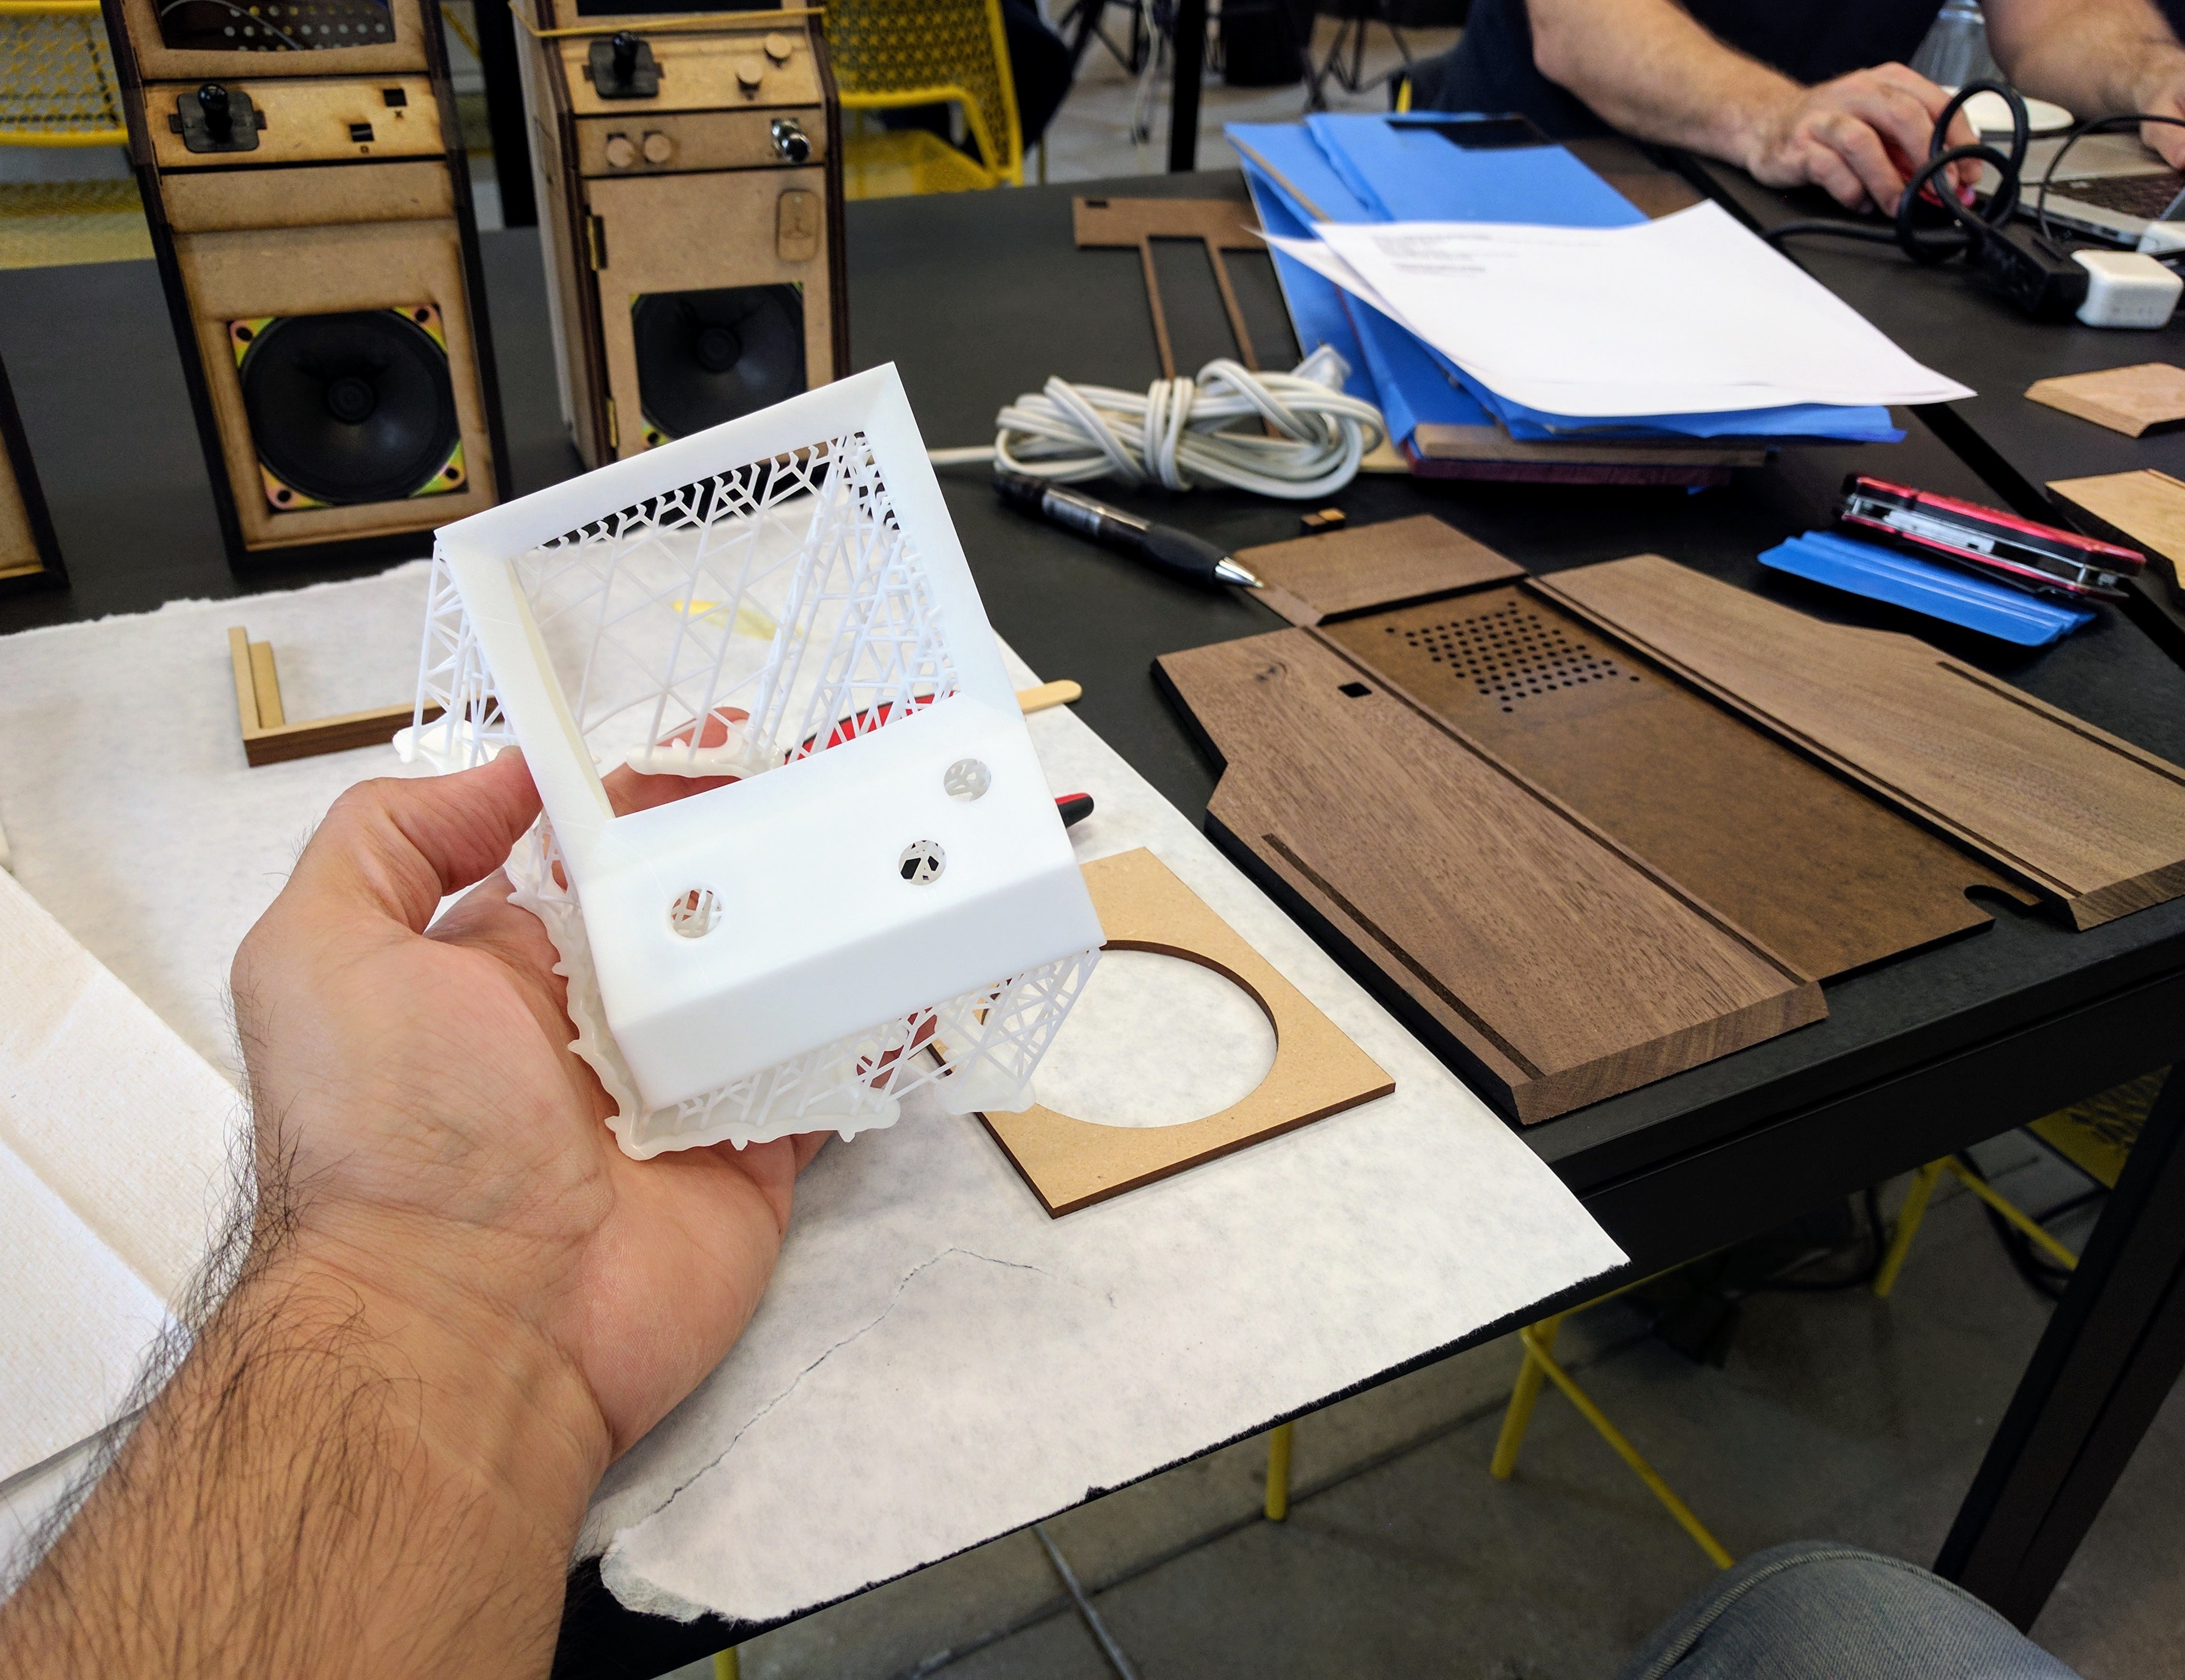
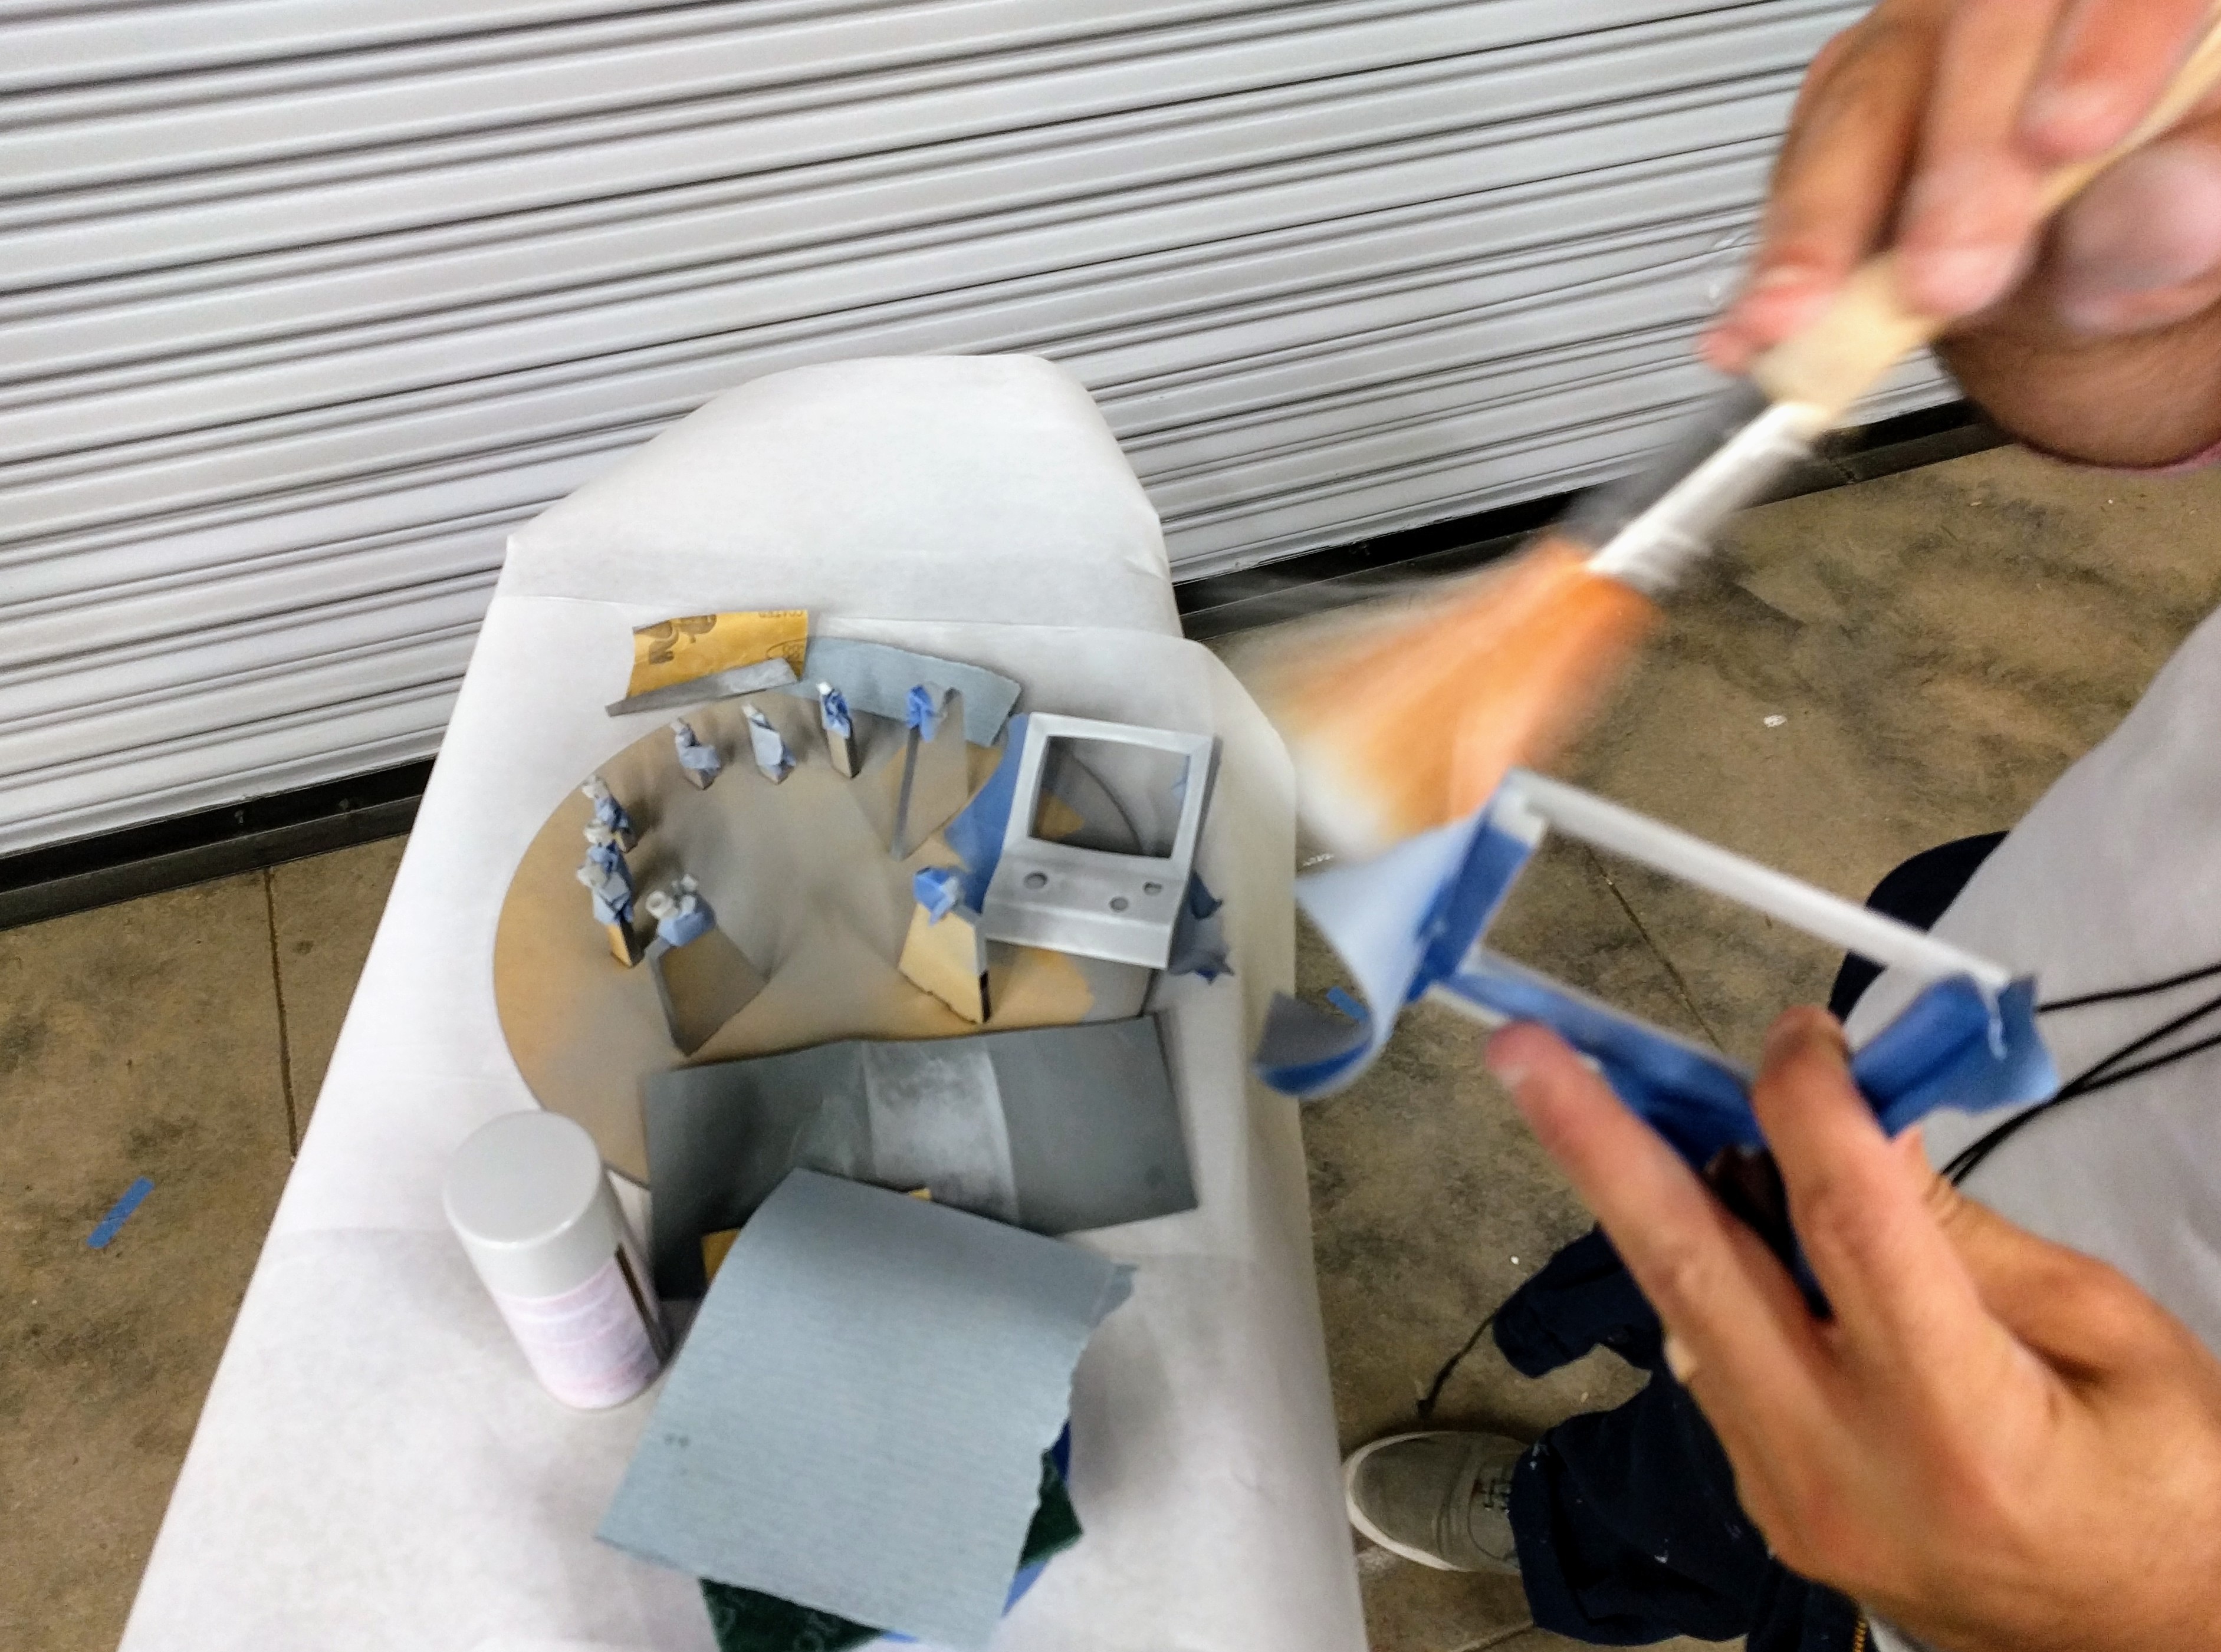
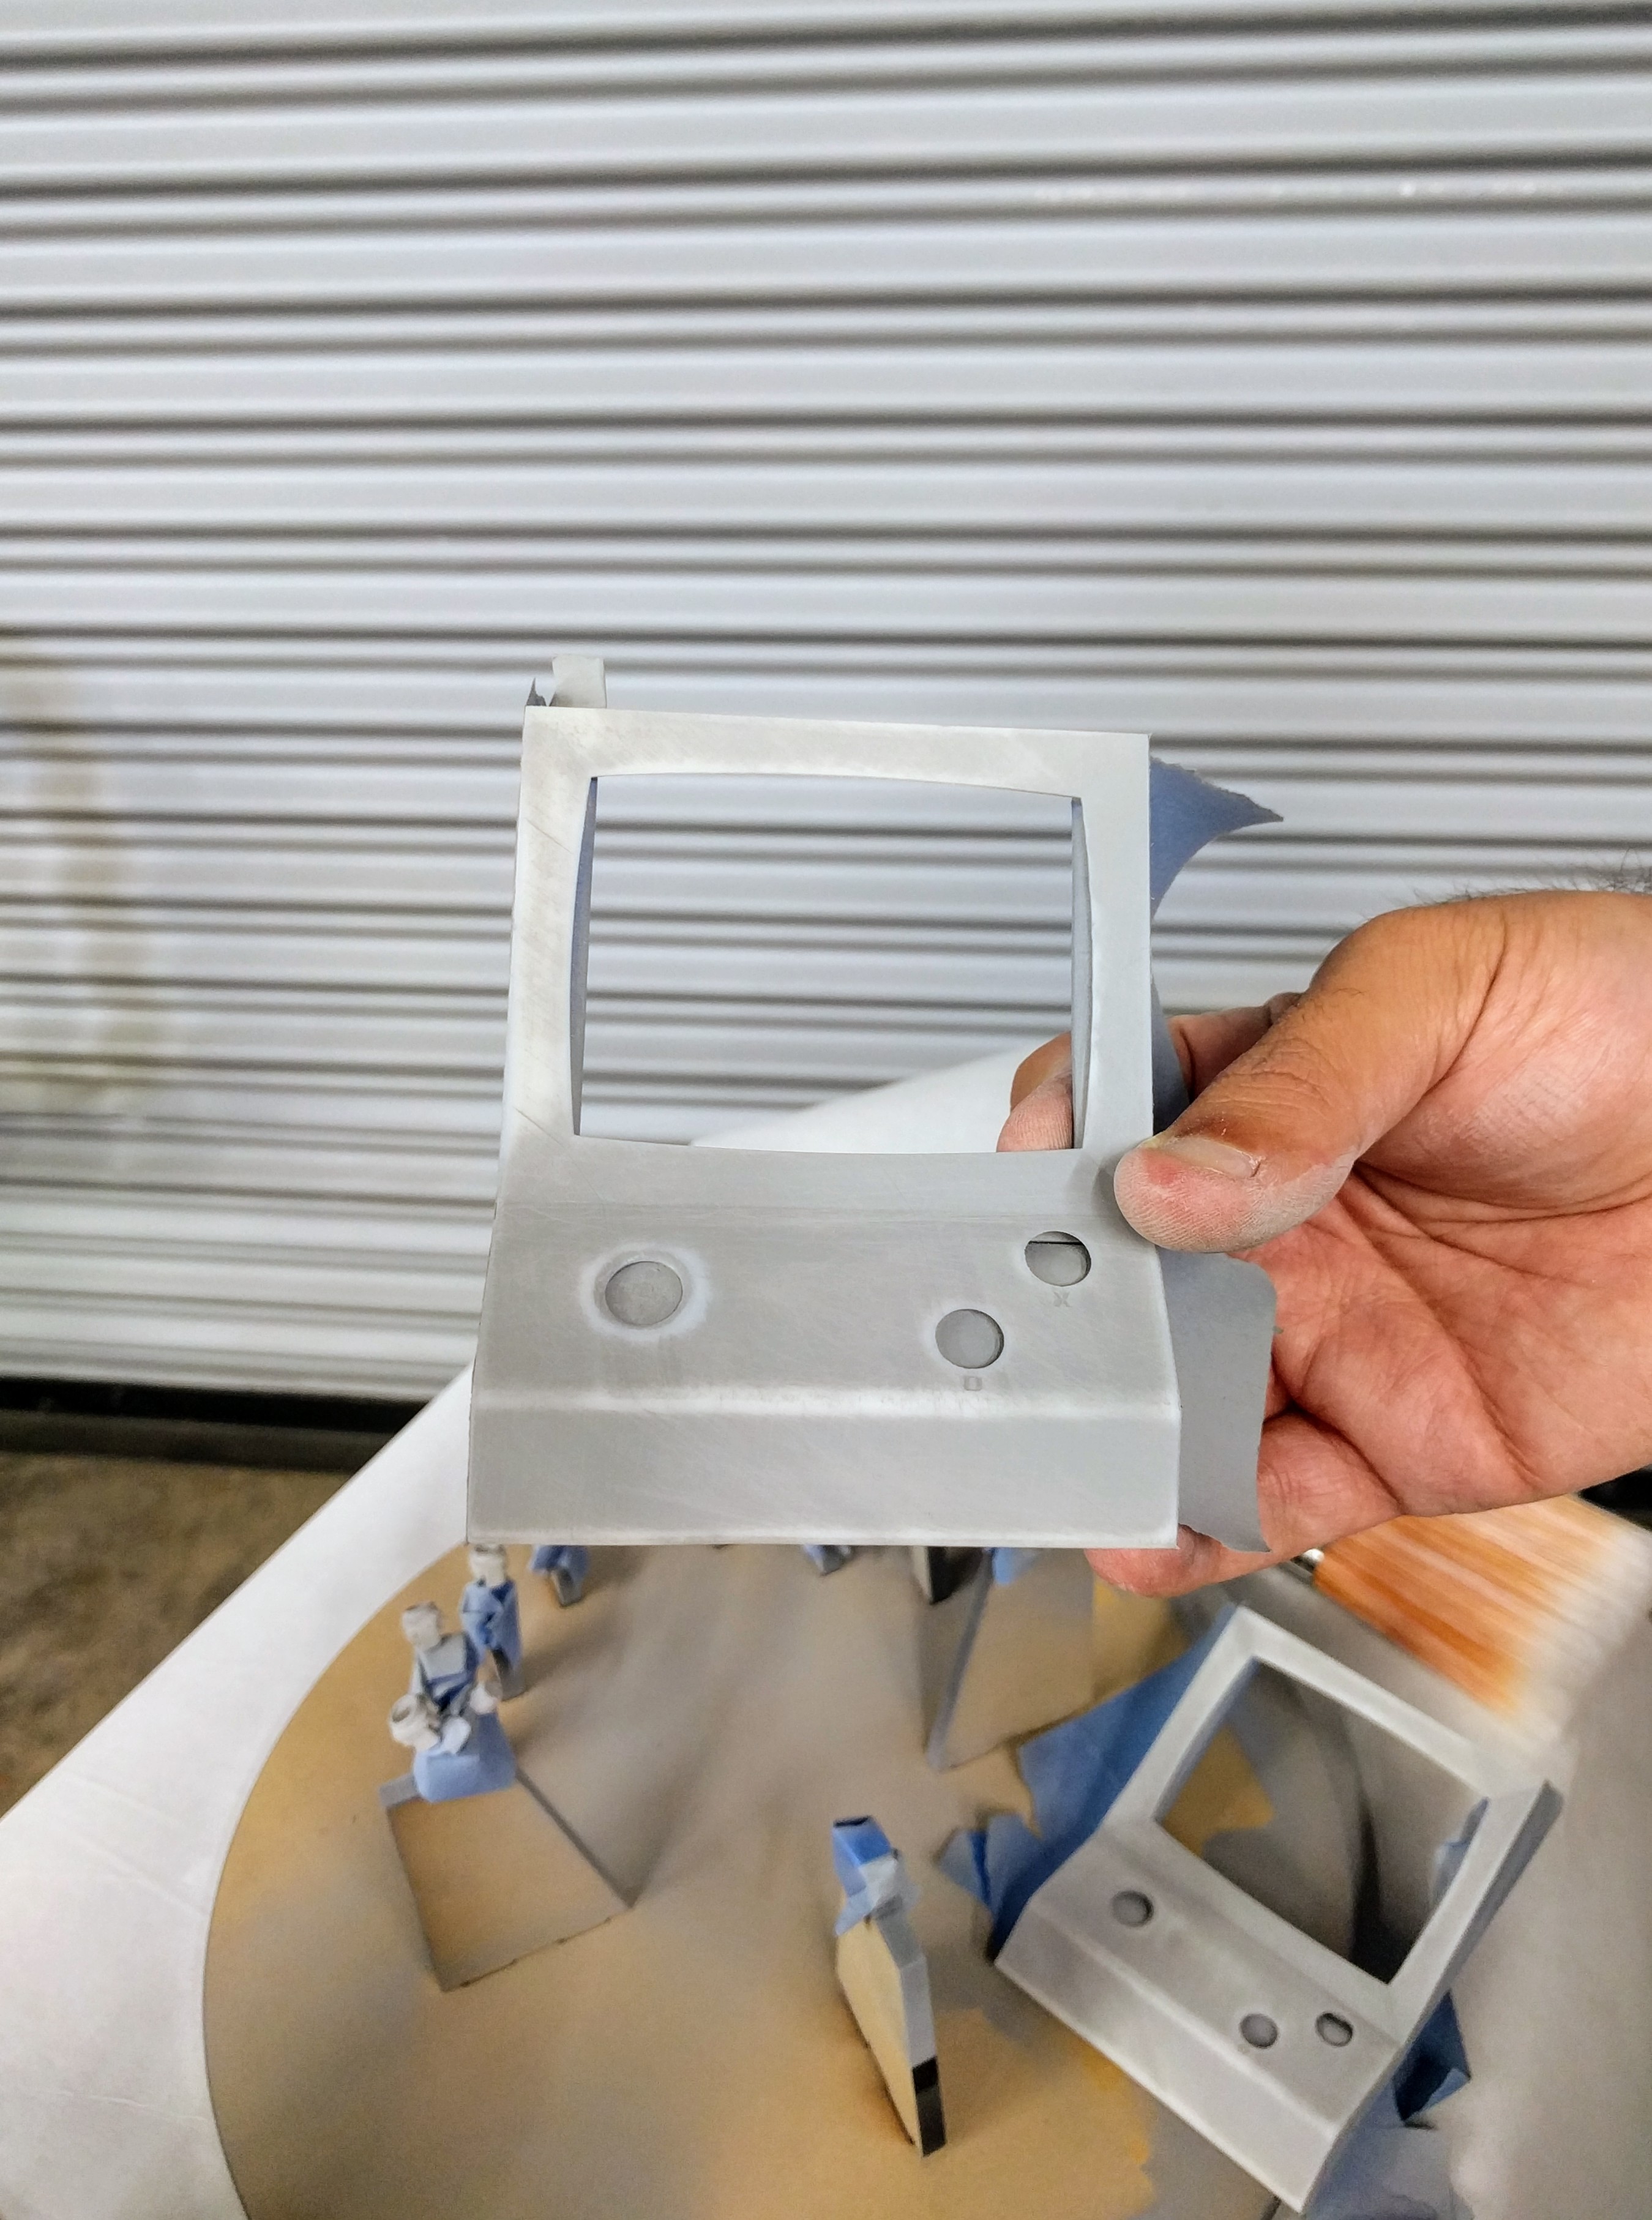
With my two screen bezel parts now printed in resin, my wood cabinet parts now cut, I removed the models supports (which were far easier to remove on the Form 2 prints than the Bukito prints), and started prepping them for paint.
![]()
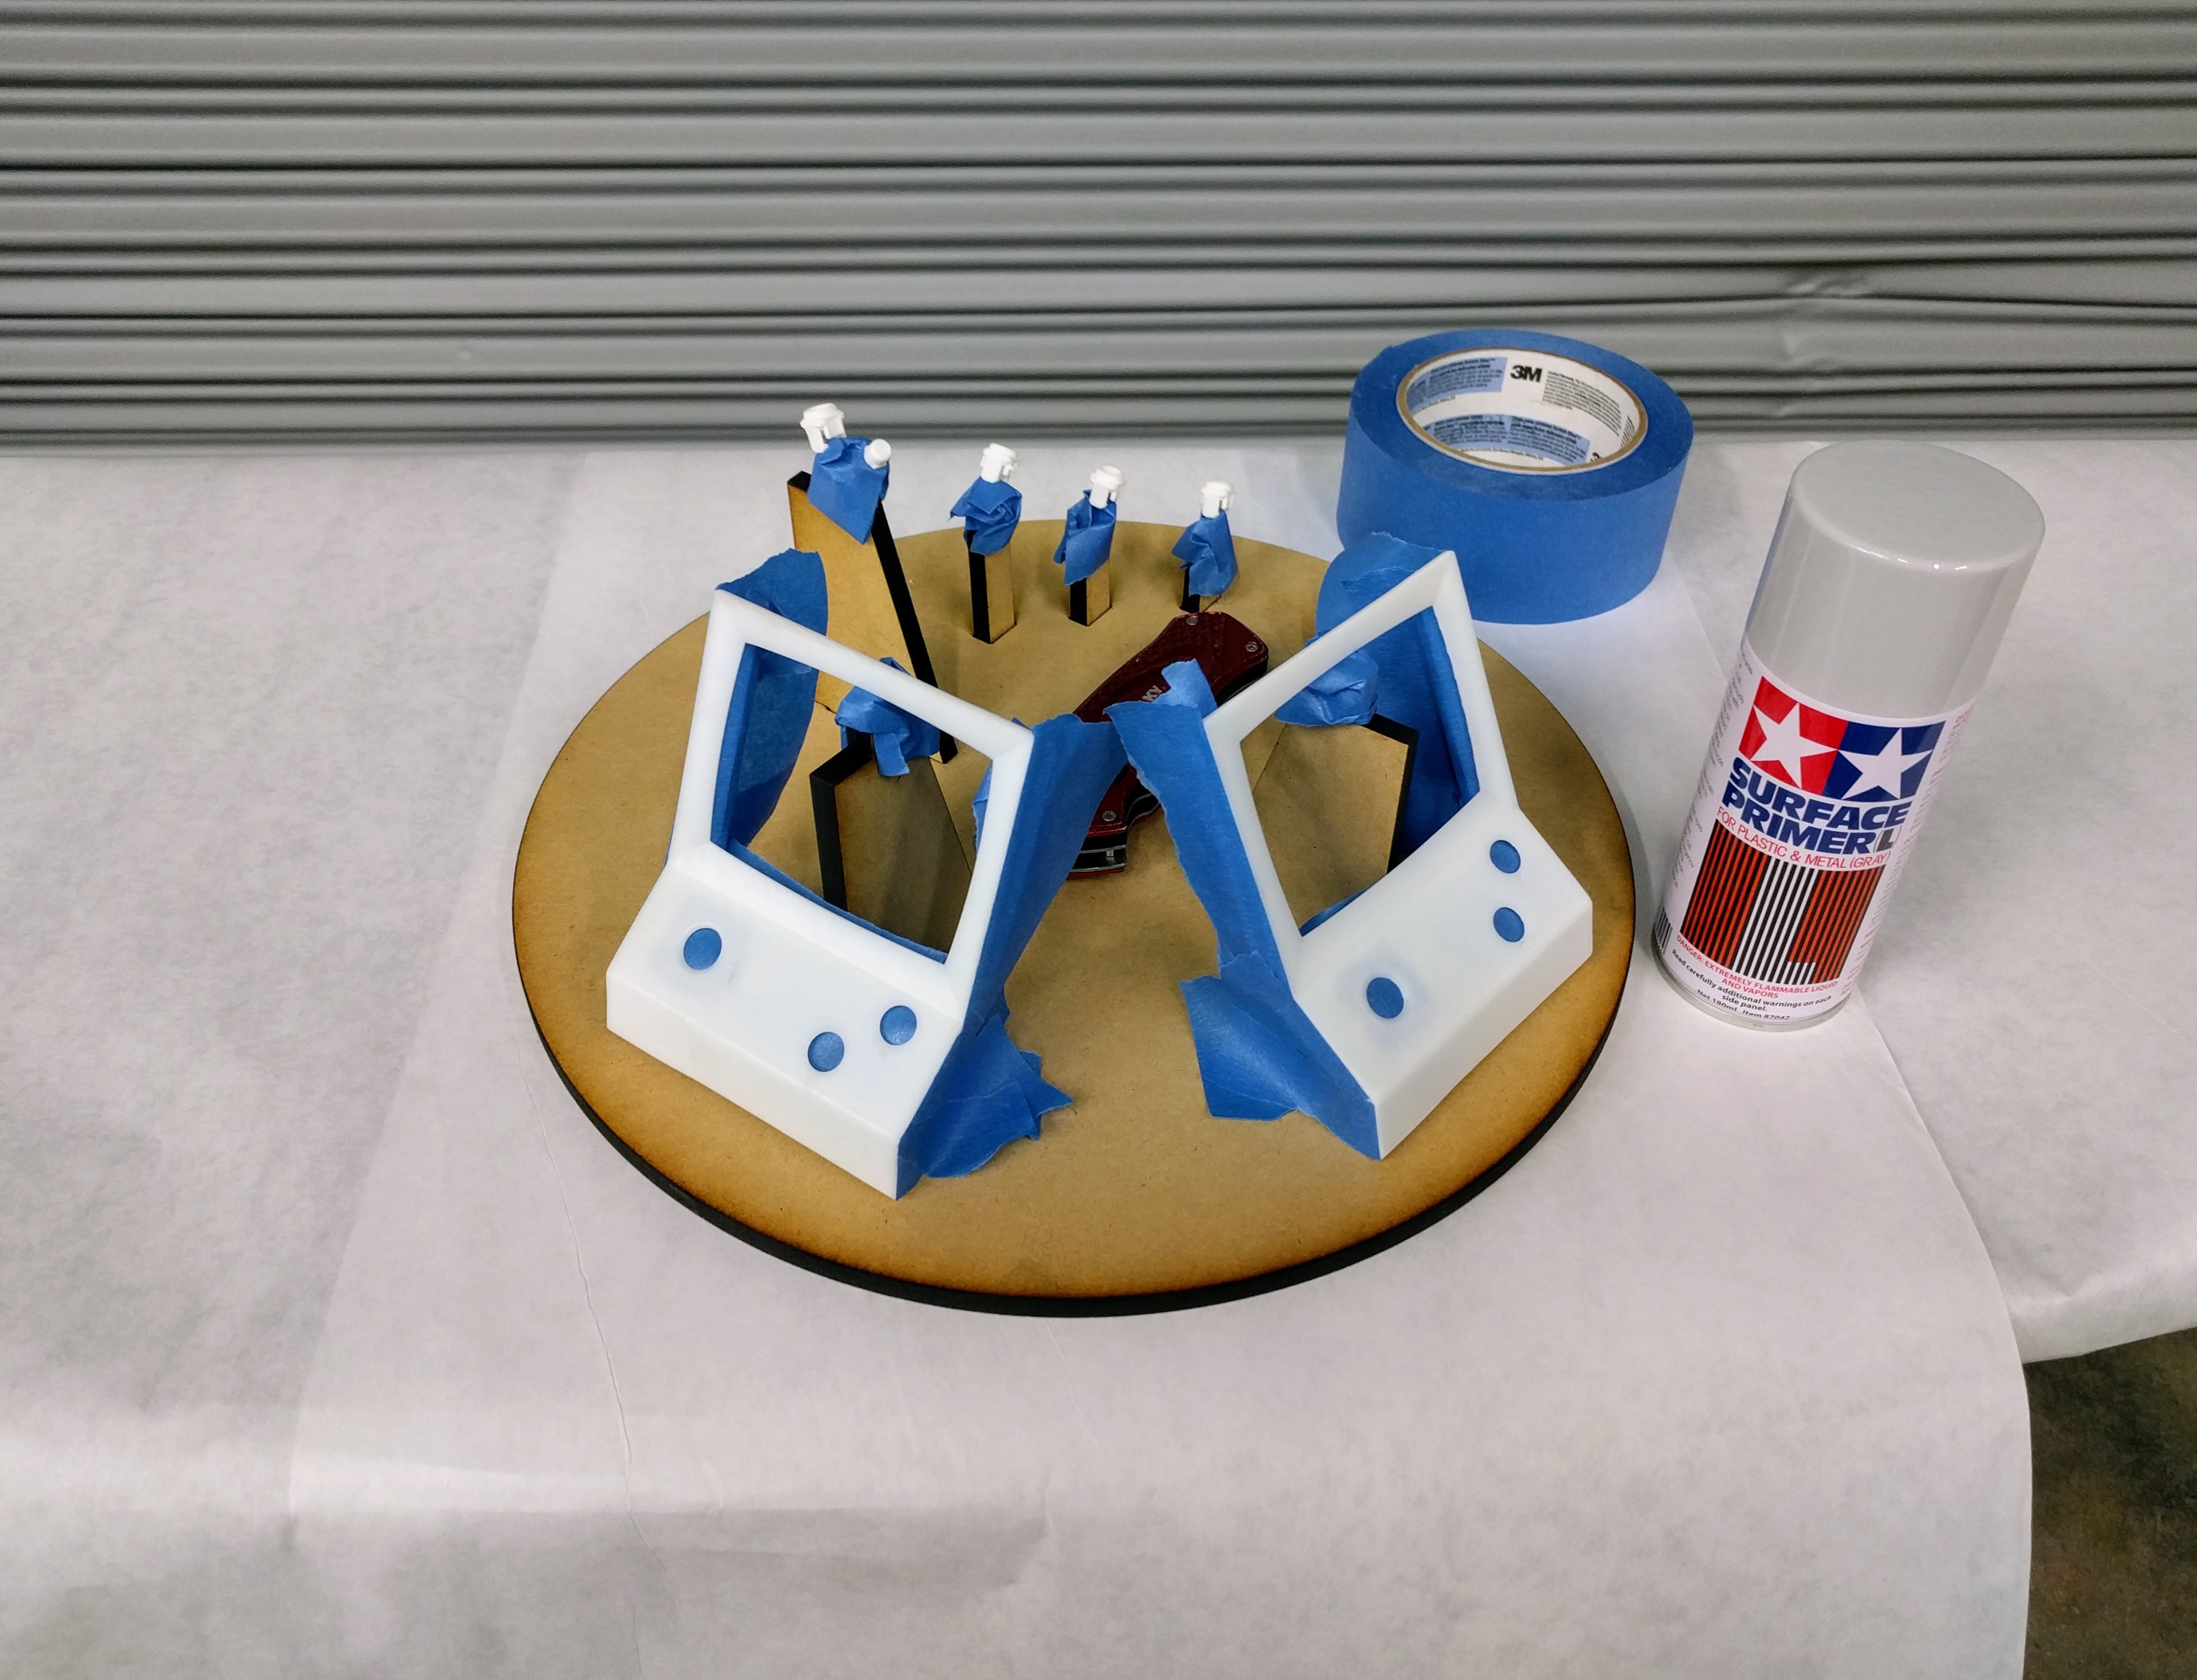
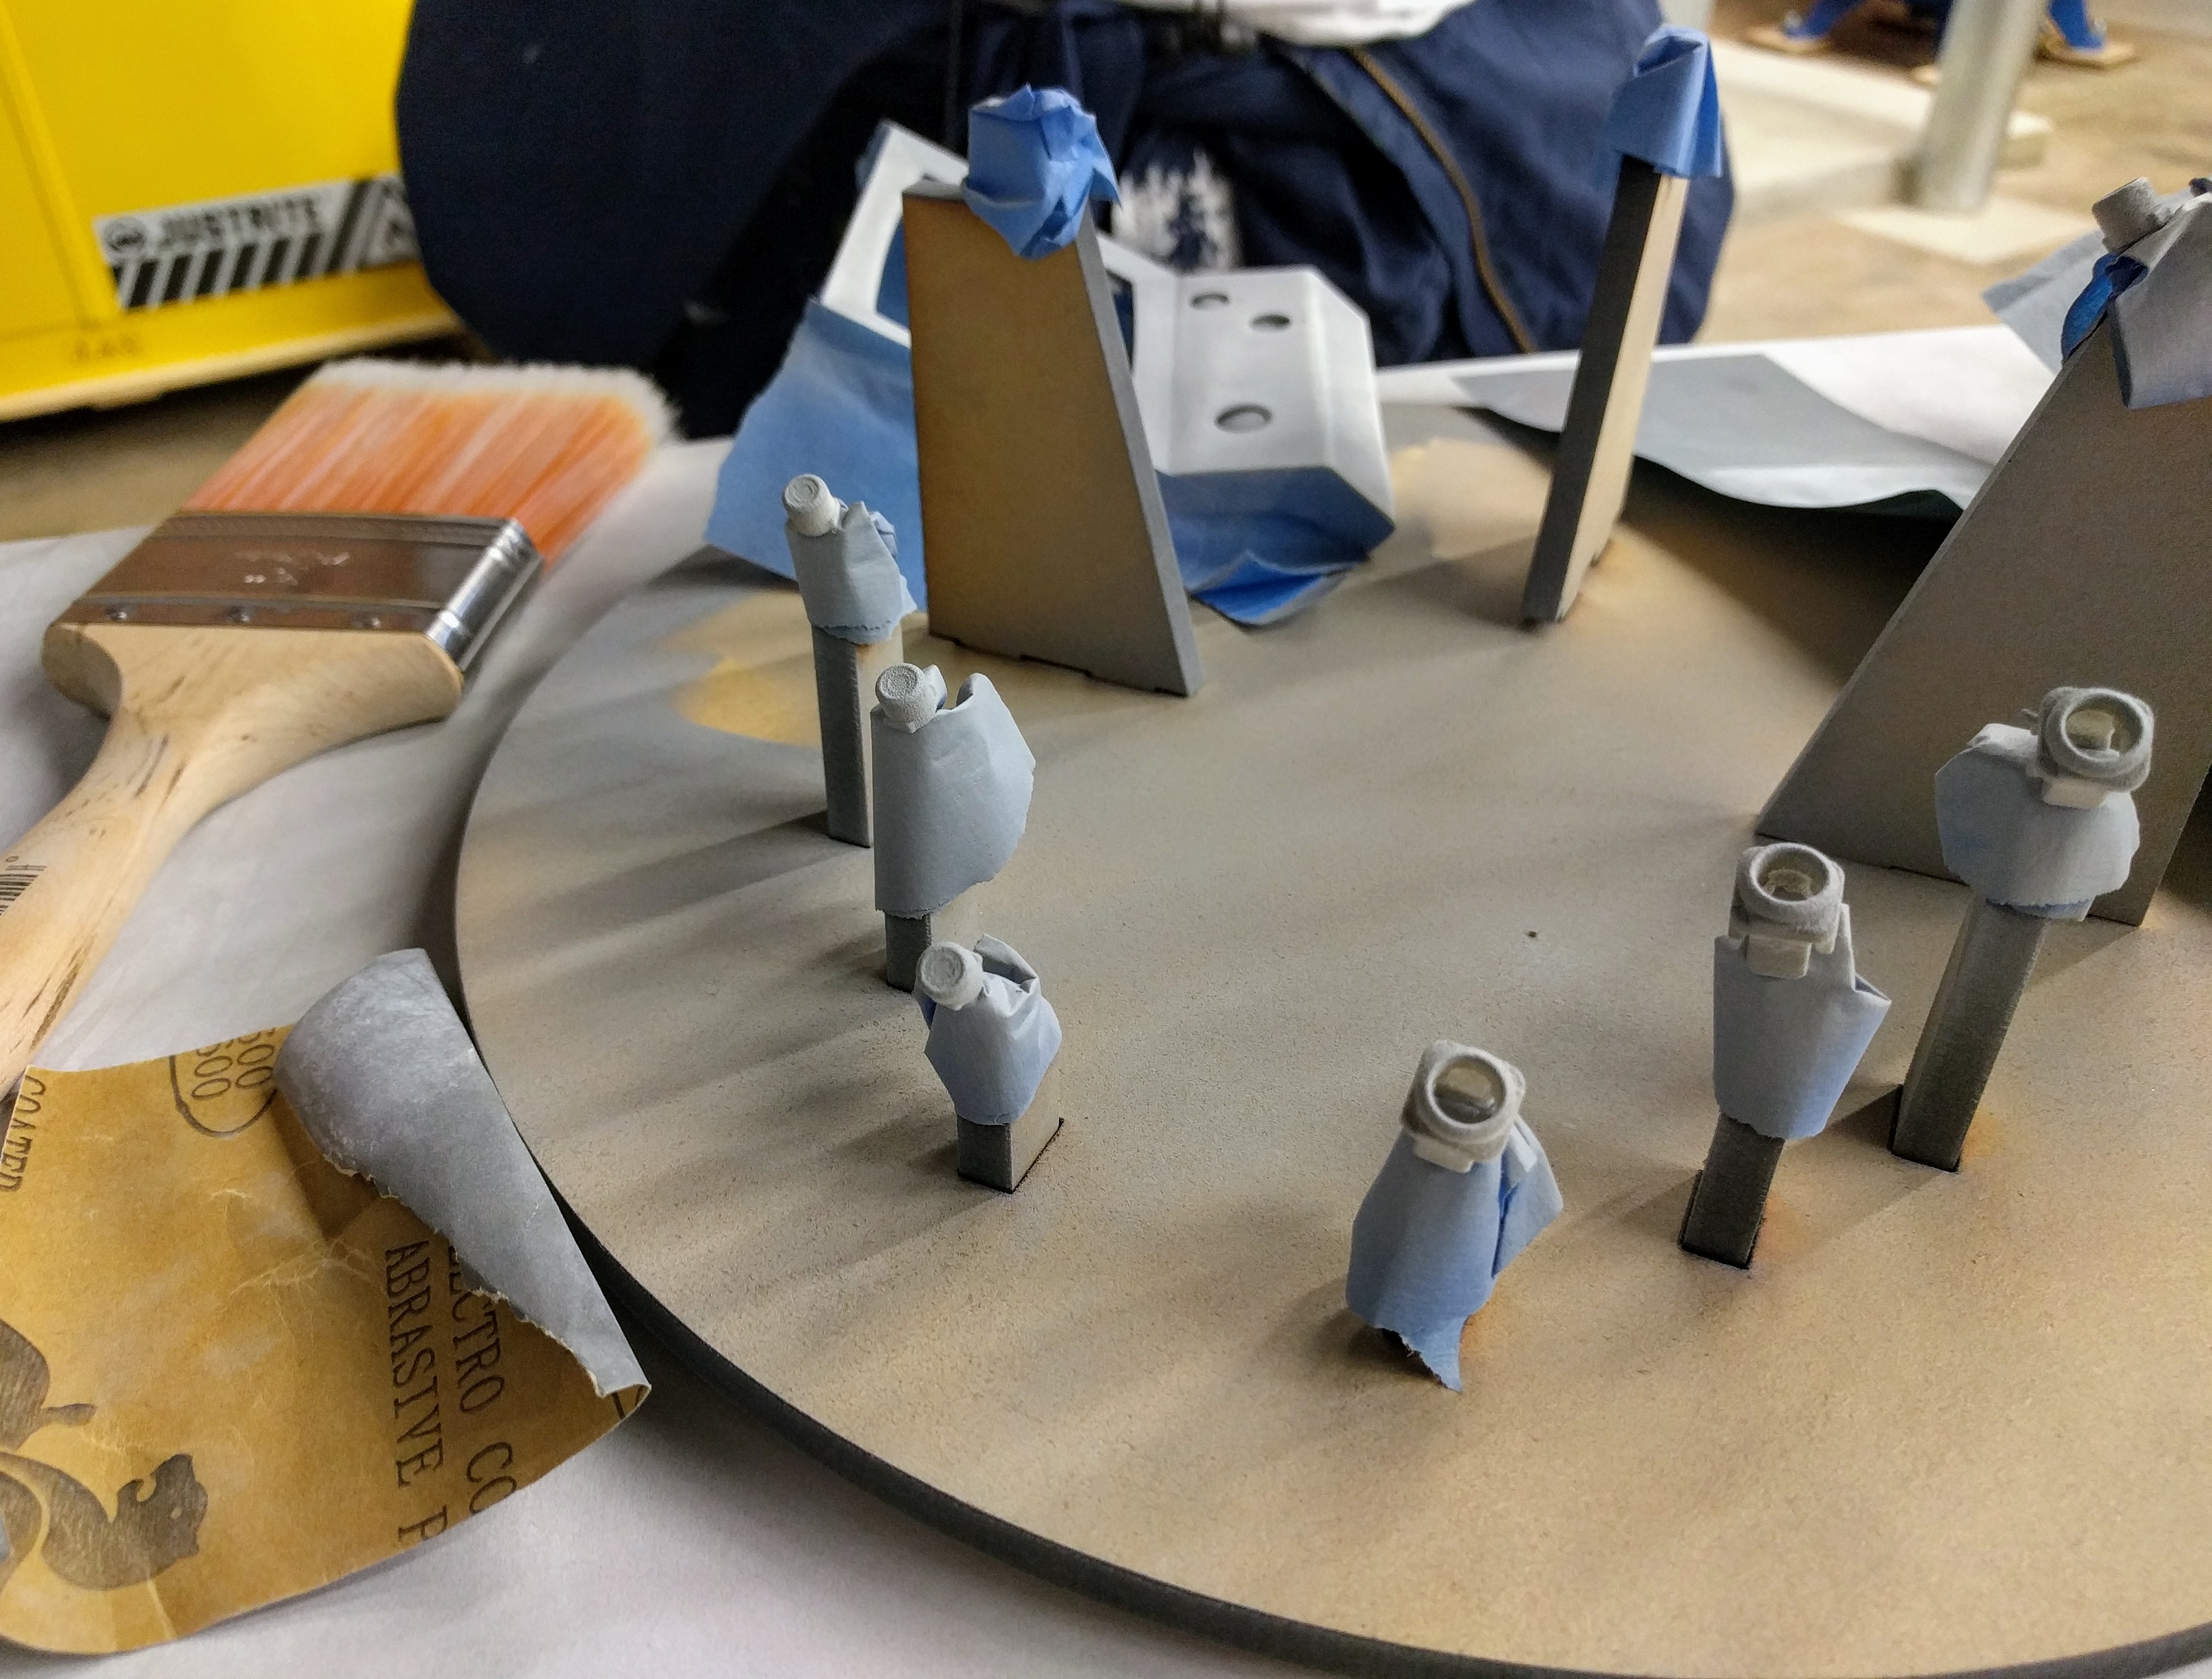
After removing the supports, I did a quick rough sand on the bezels and micro switch button covers in anticipation of priming them.
![]()
After priming my resin parts I sanded, sanded, and sanded them some more using ever finer sandpaper. Short of wet sanding these parts, I primed+sanded these parts multiple times until I got the finish I wanted....
![]()
![]()
![]()
![]()
Thanks to the Form 2 It didn't take as much work as I thought it would to get these parts to the point that I felt they were ready for paint!
![]()
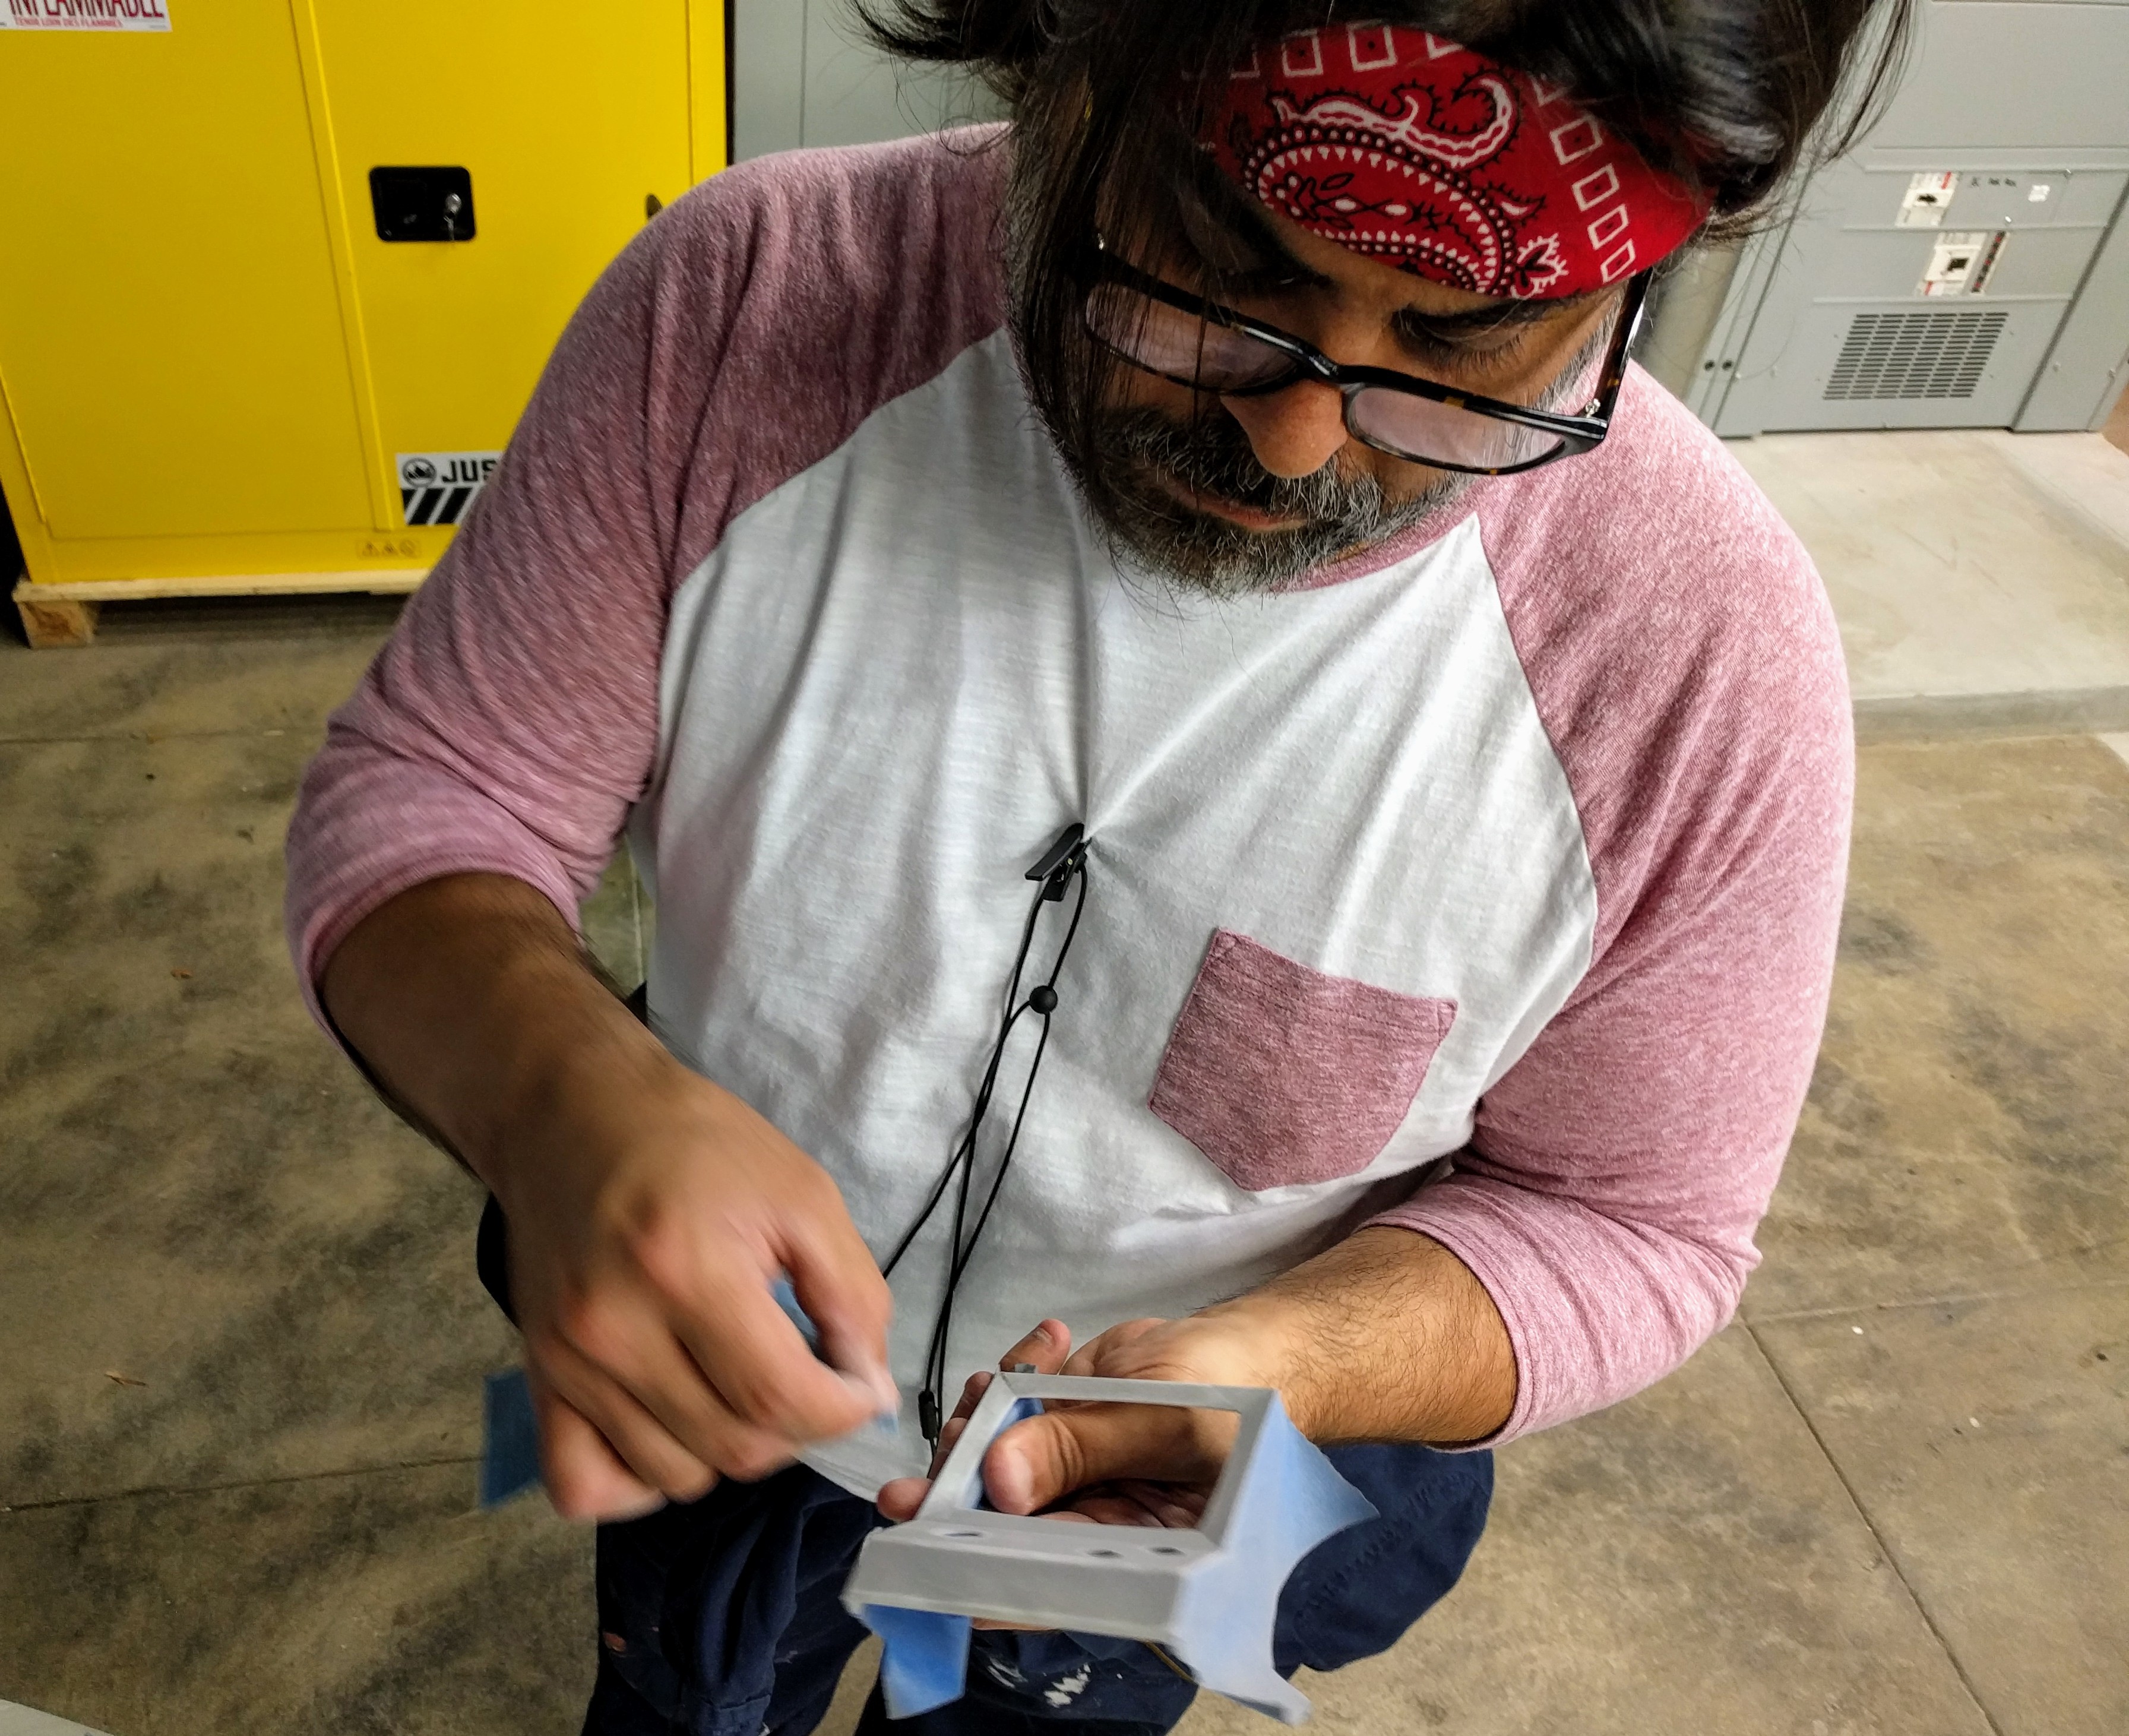
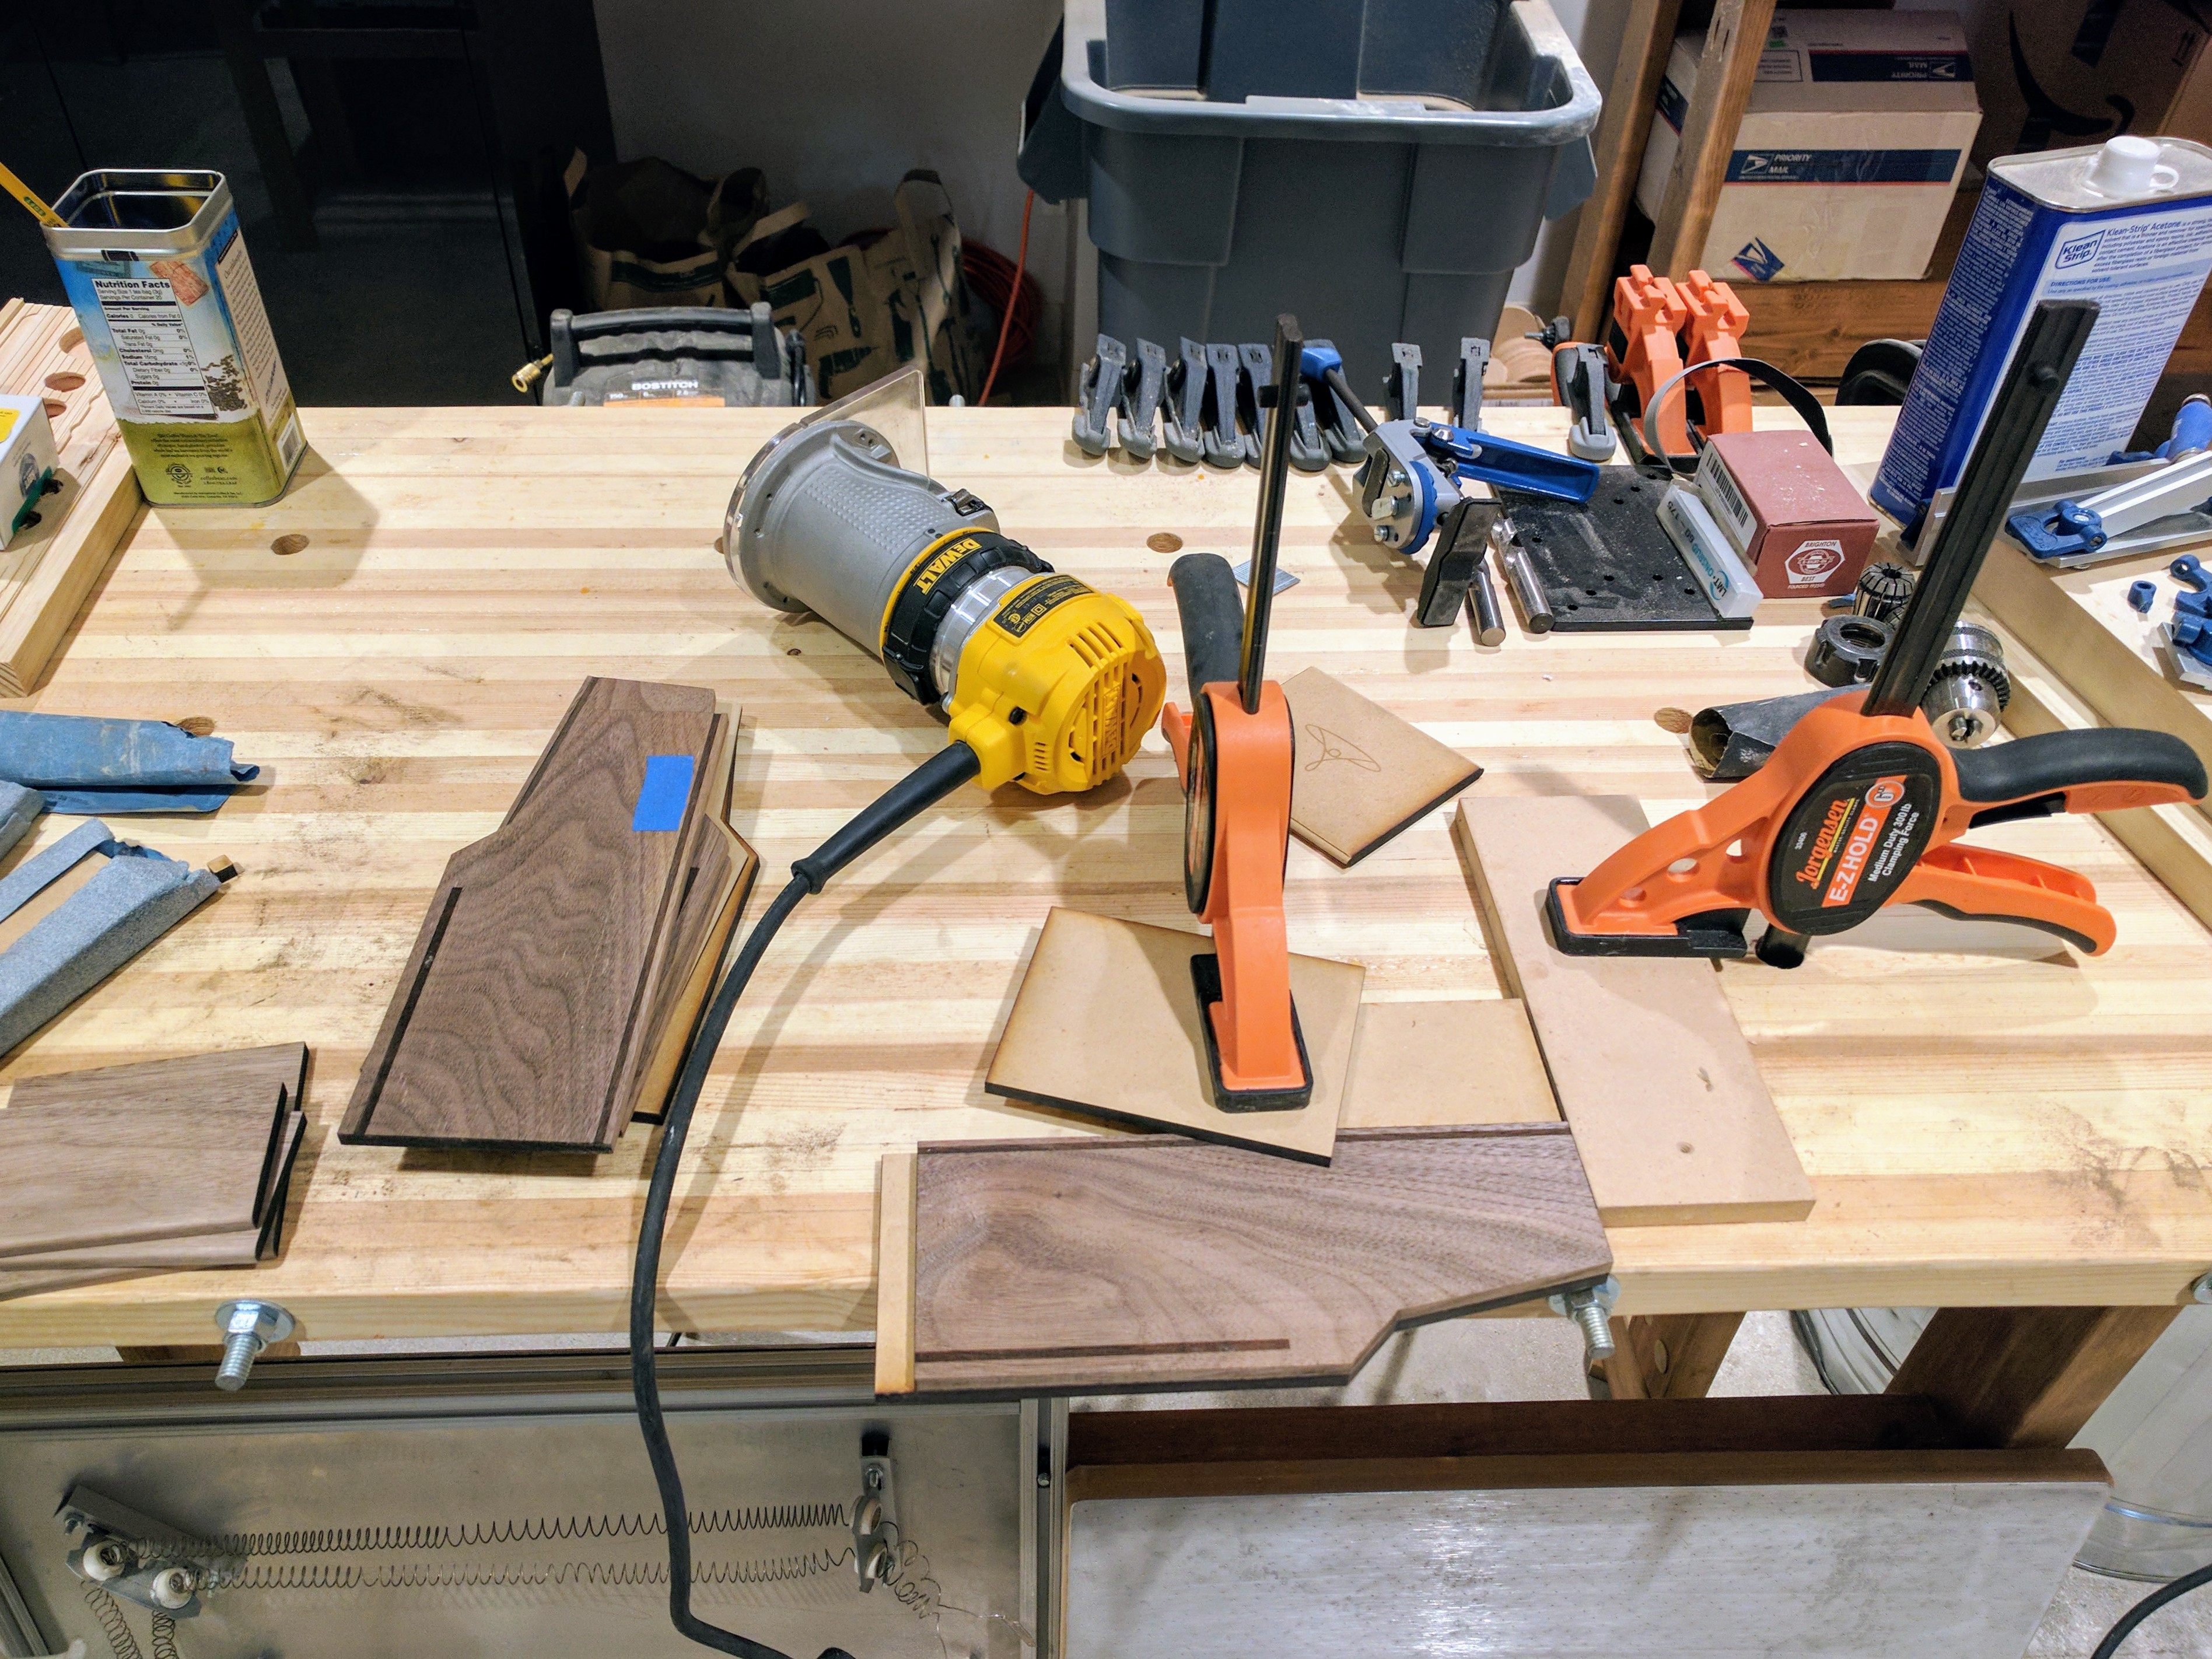
With my parts cut, printed, sanded, primed, and now painted I next needed to start test fitting the cabinet's finer details (like the above pictured speaker trim) and hand finishes (beyond their appearances the cabinets needs to feel nice in hand, a large part of which is remedied by eliminating the cabinet's many sharp corners thanks to it's blocky shape! This required some experimentation with the hand router on less expensive materials, MDF and redwood, before moving on to my walnut parts).
![]()
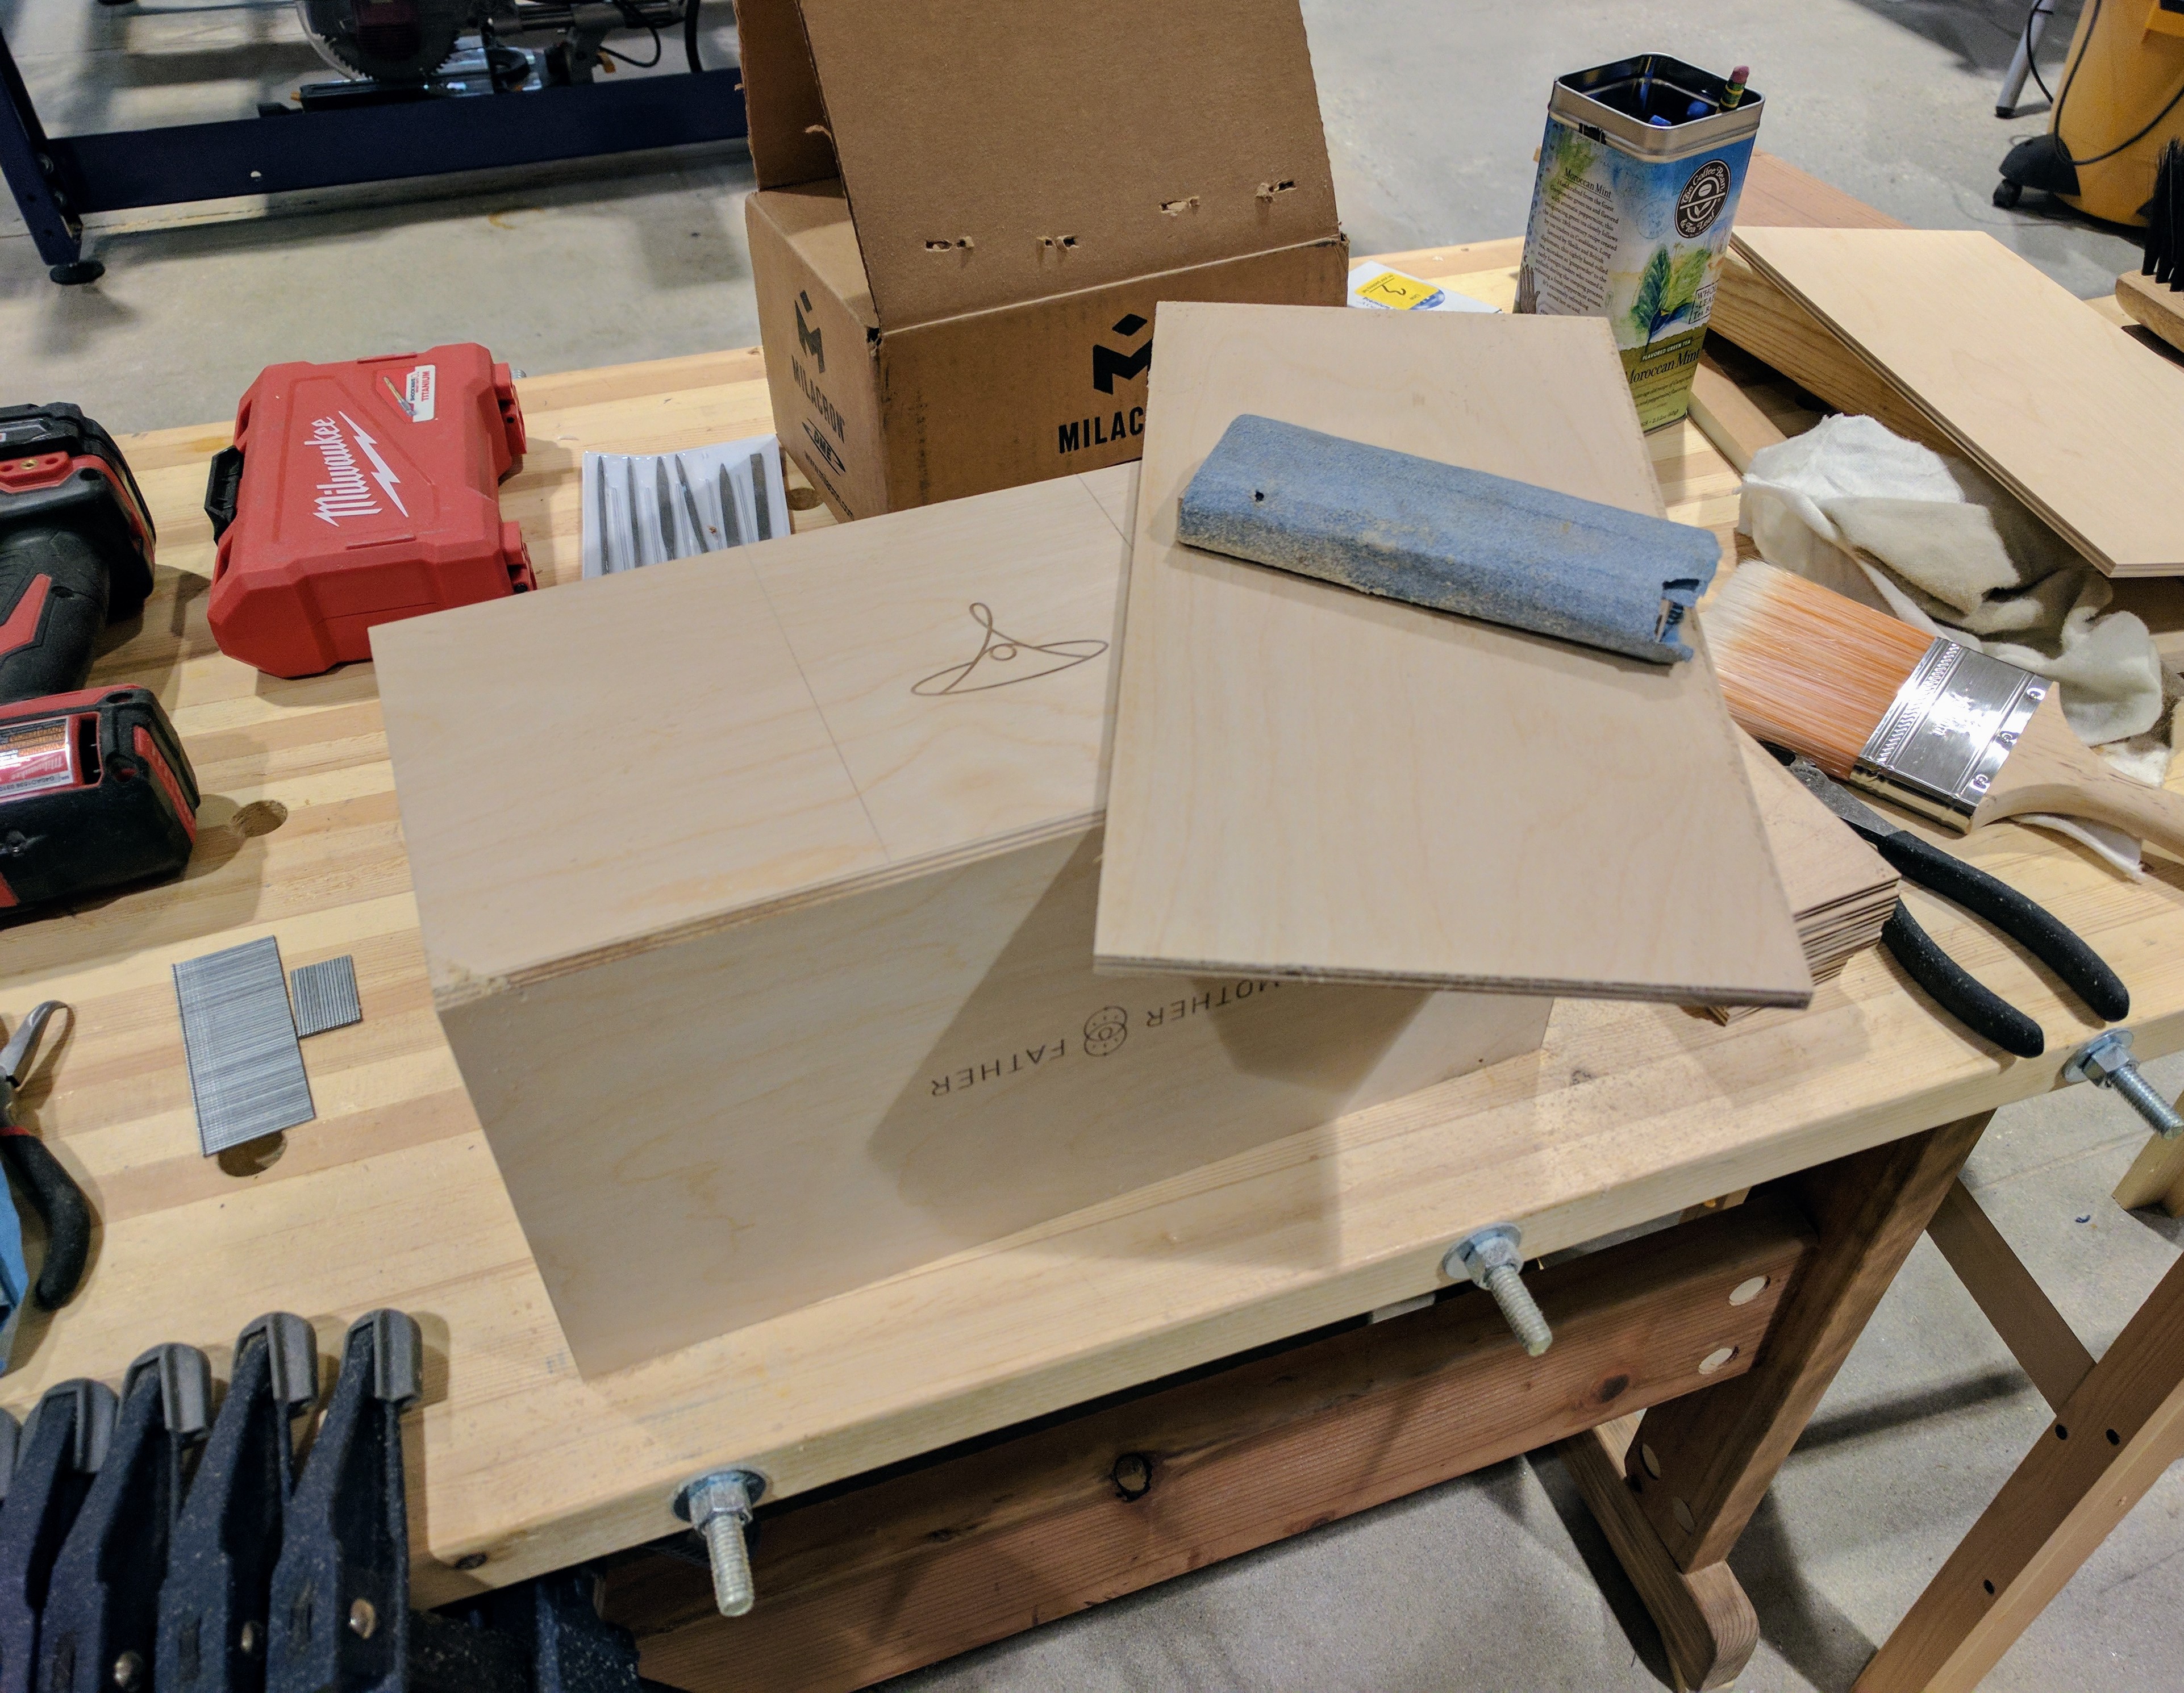
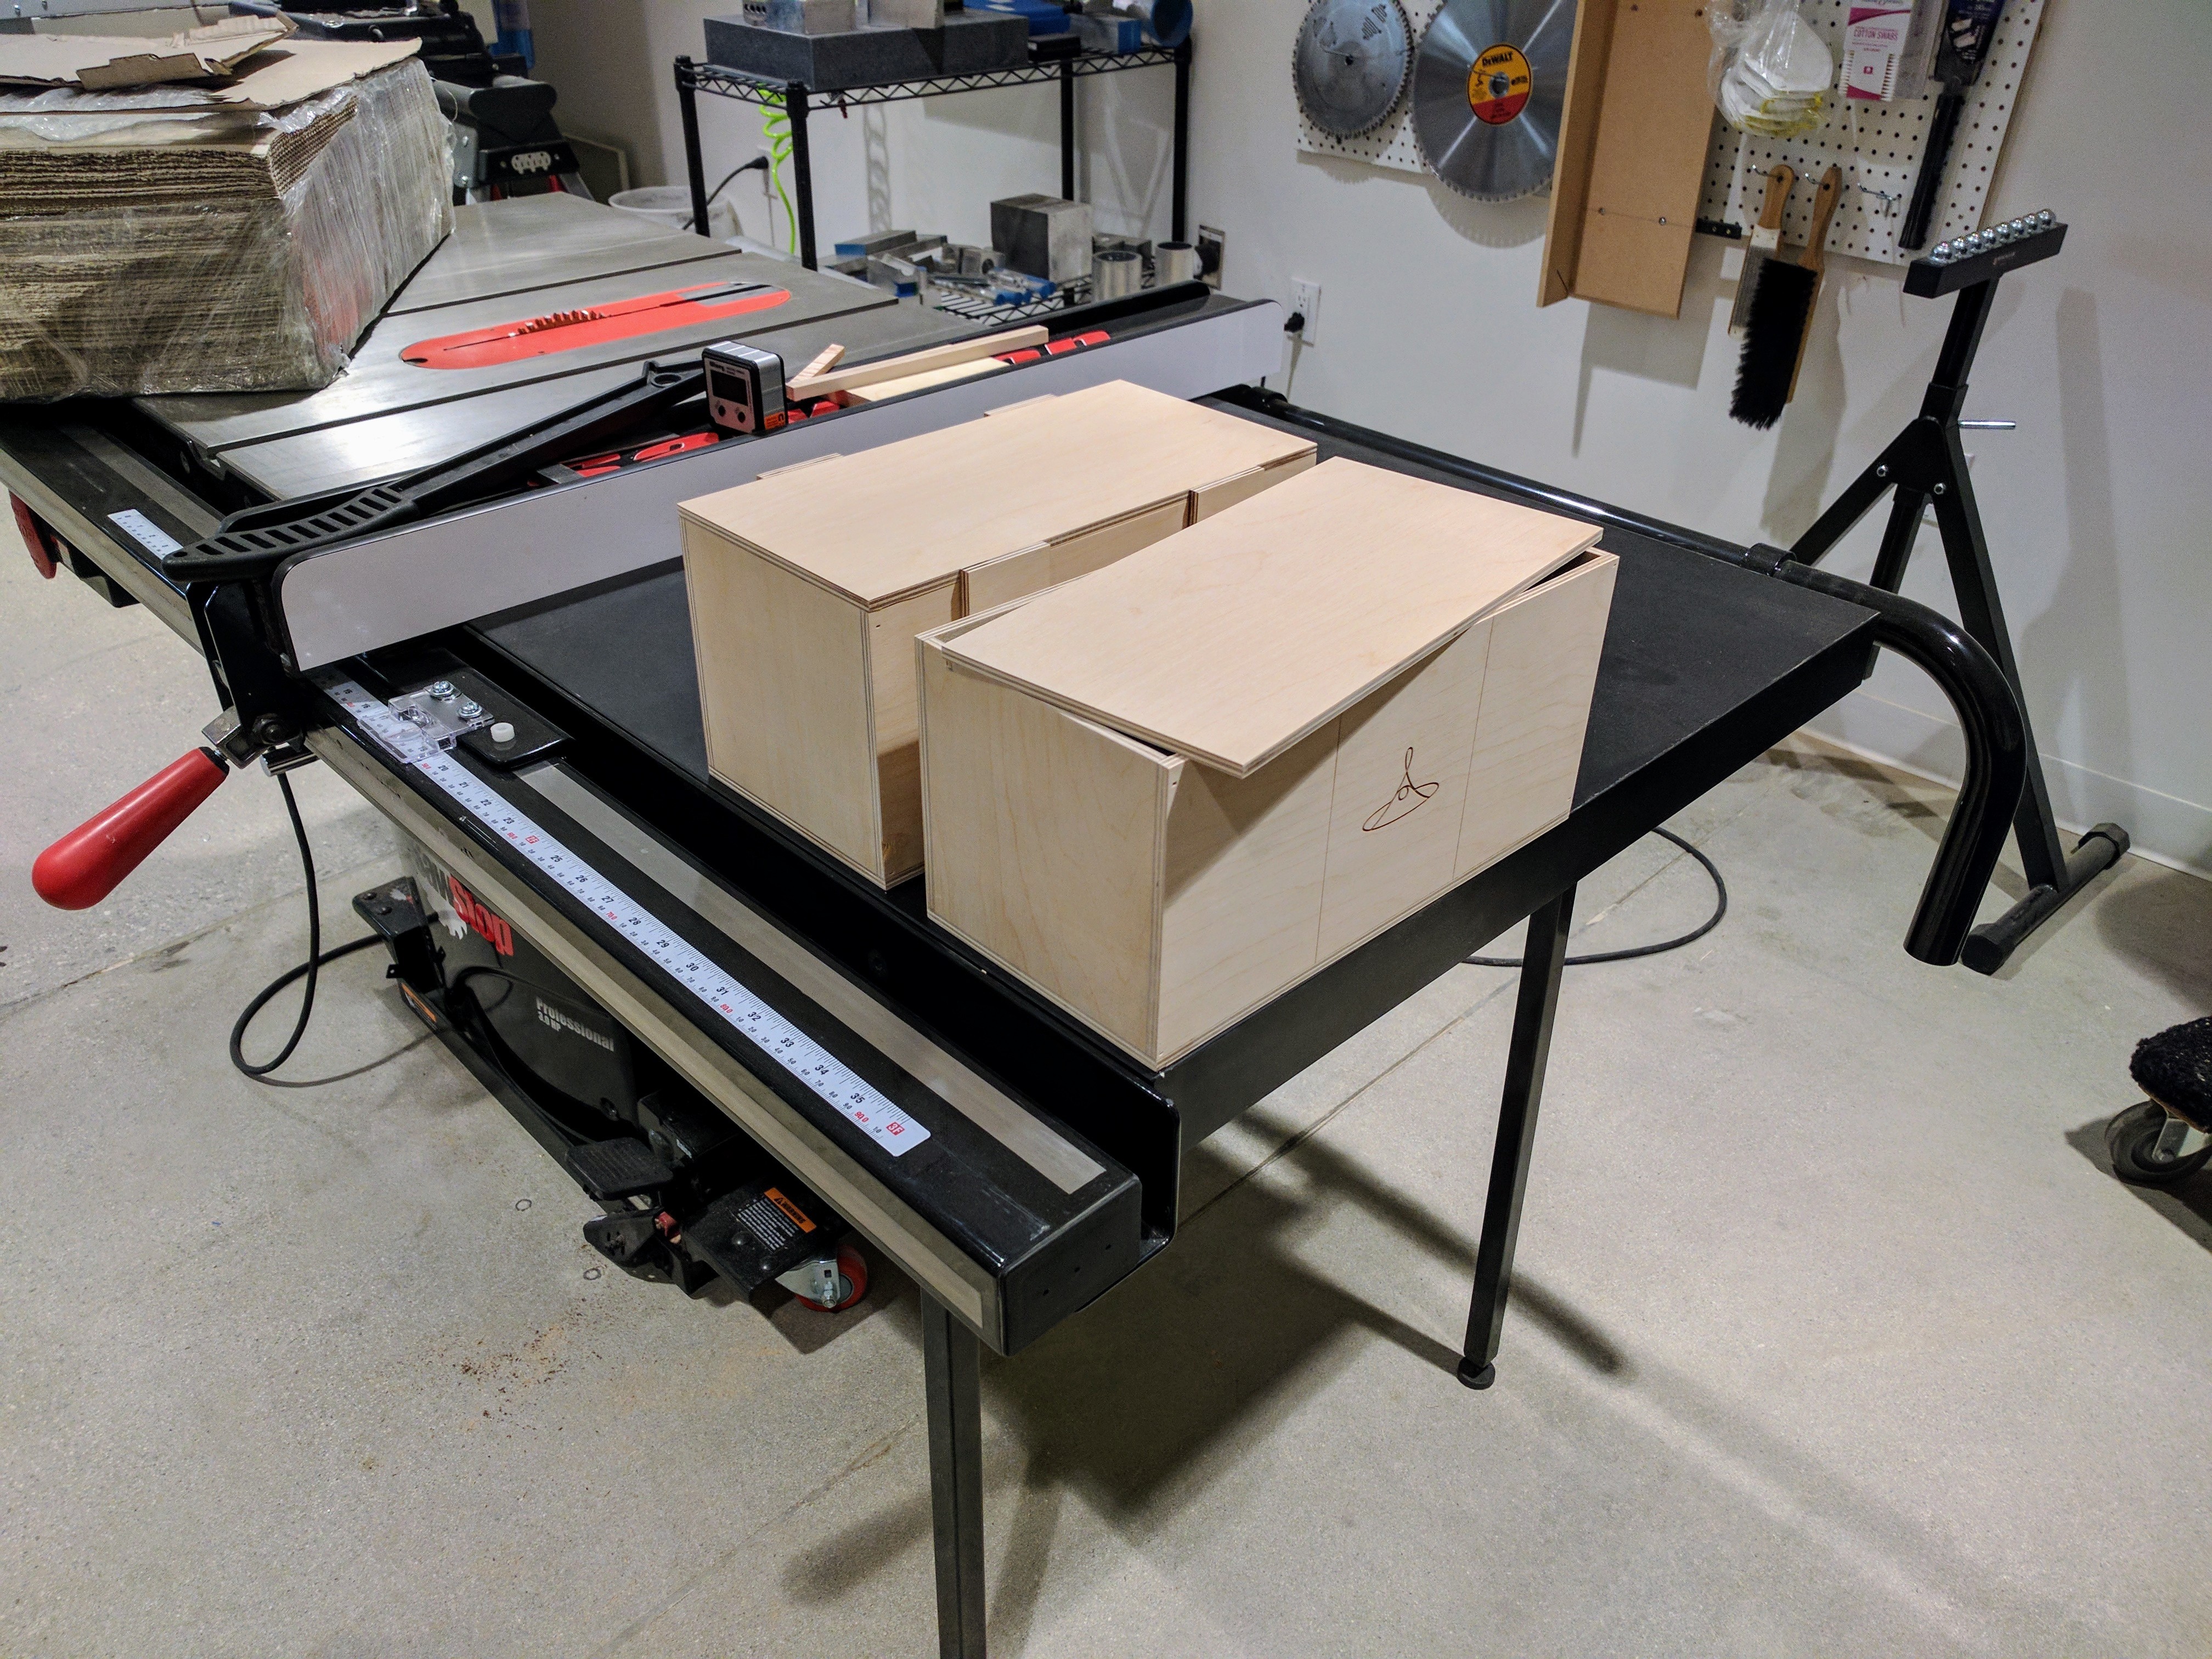
With my first batch of small parts and finishing details now completed, and my Fusion models adjusted thanks to the the test fit, I started my reprints on the Form 2 and switched my attention over to the plywood crates. Using my existing crate design I used the Epilog laser cutter to cut down 1/4" Baltic Birch Ply into parts for 3 crates. Using wood glue and brad nails I managed to get them assembled in a couple of hours. With my 3 crates assembled, I then proceeded to finished them with putty and sandpaper.
![]()
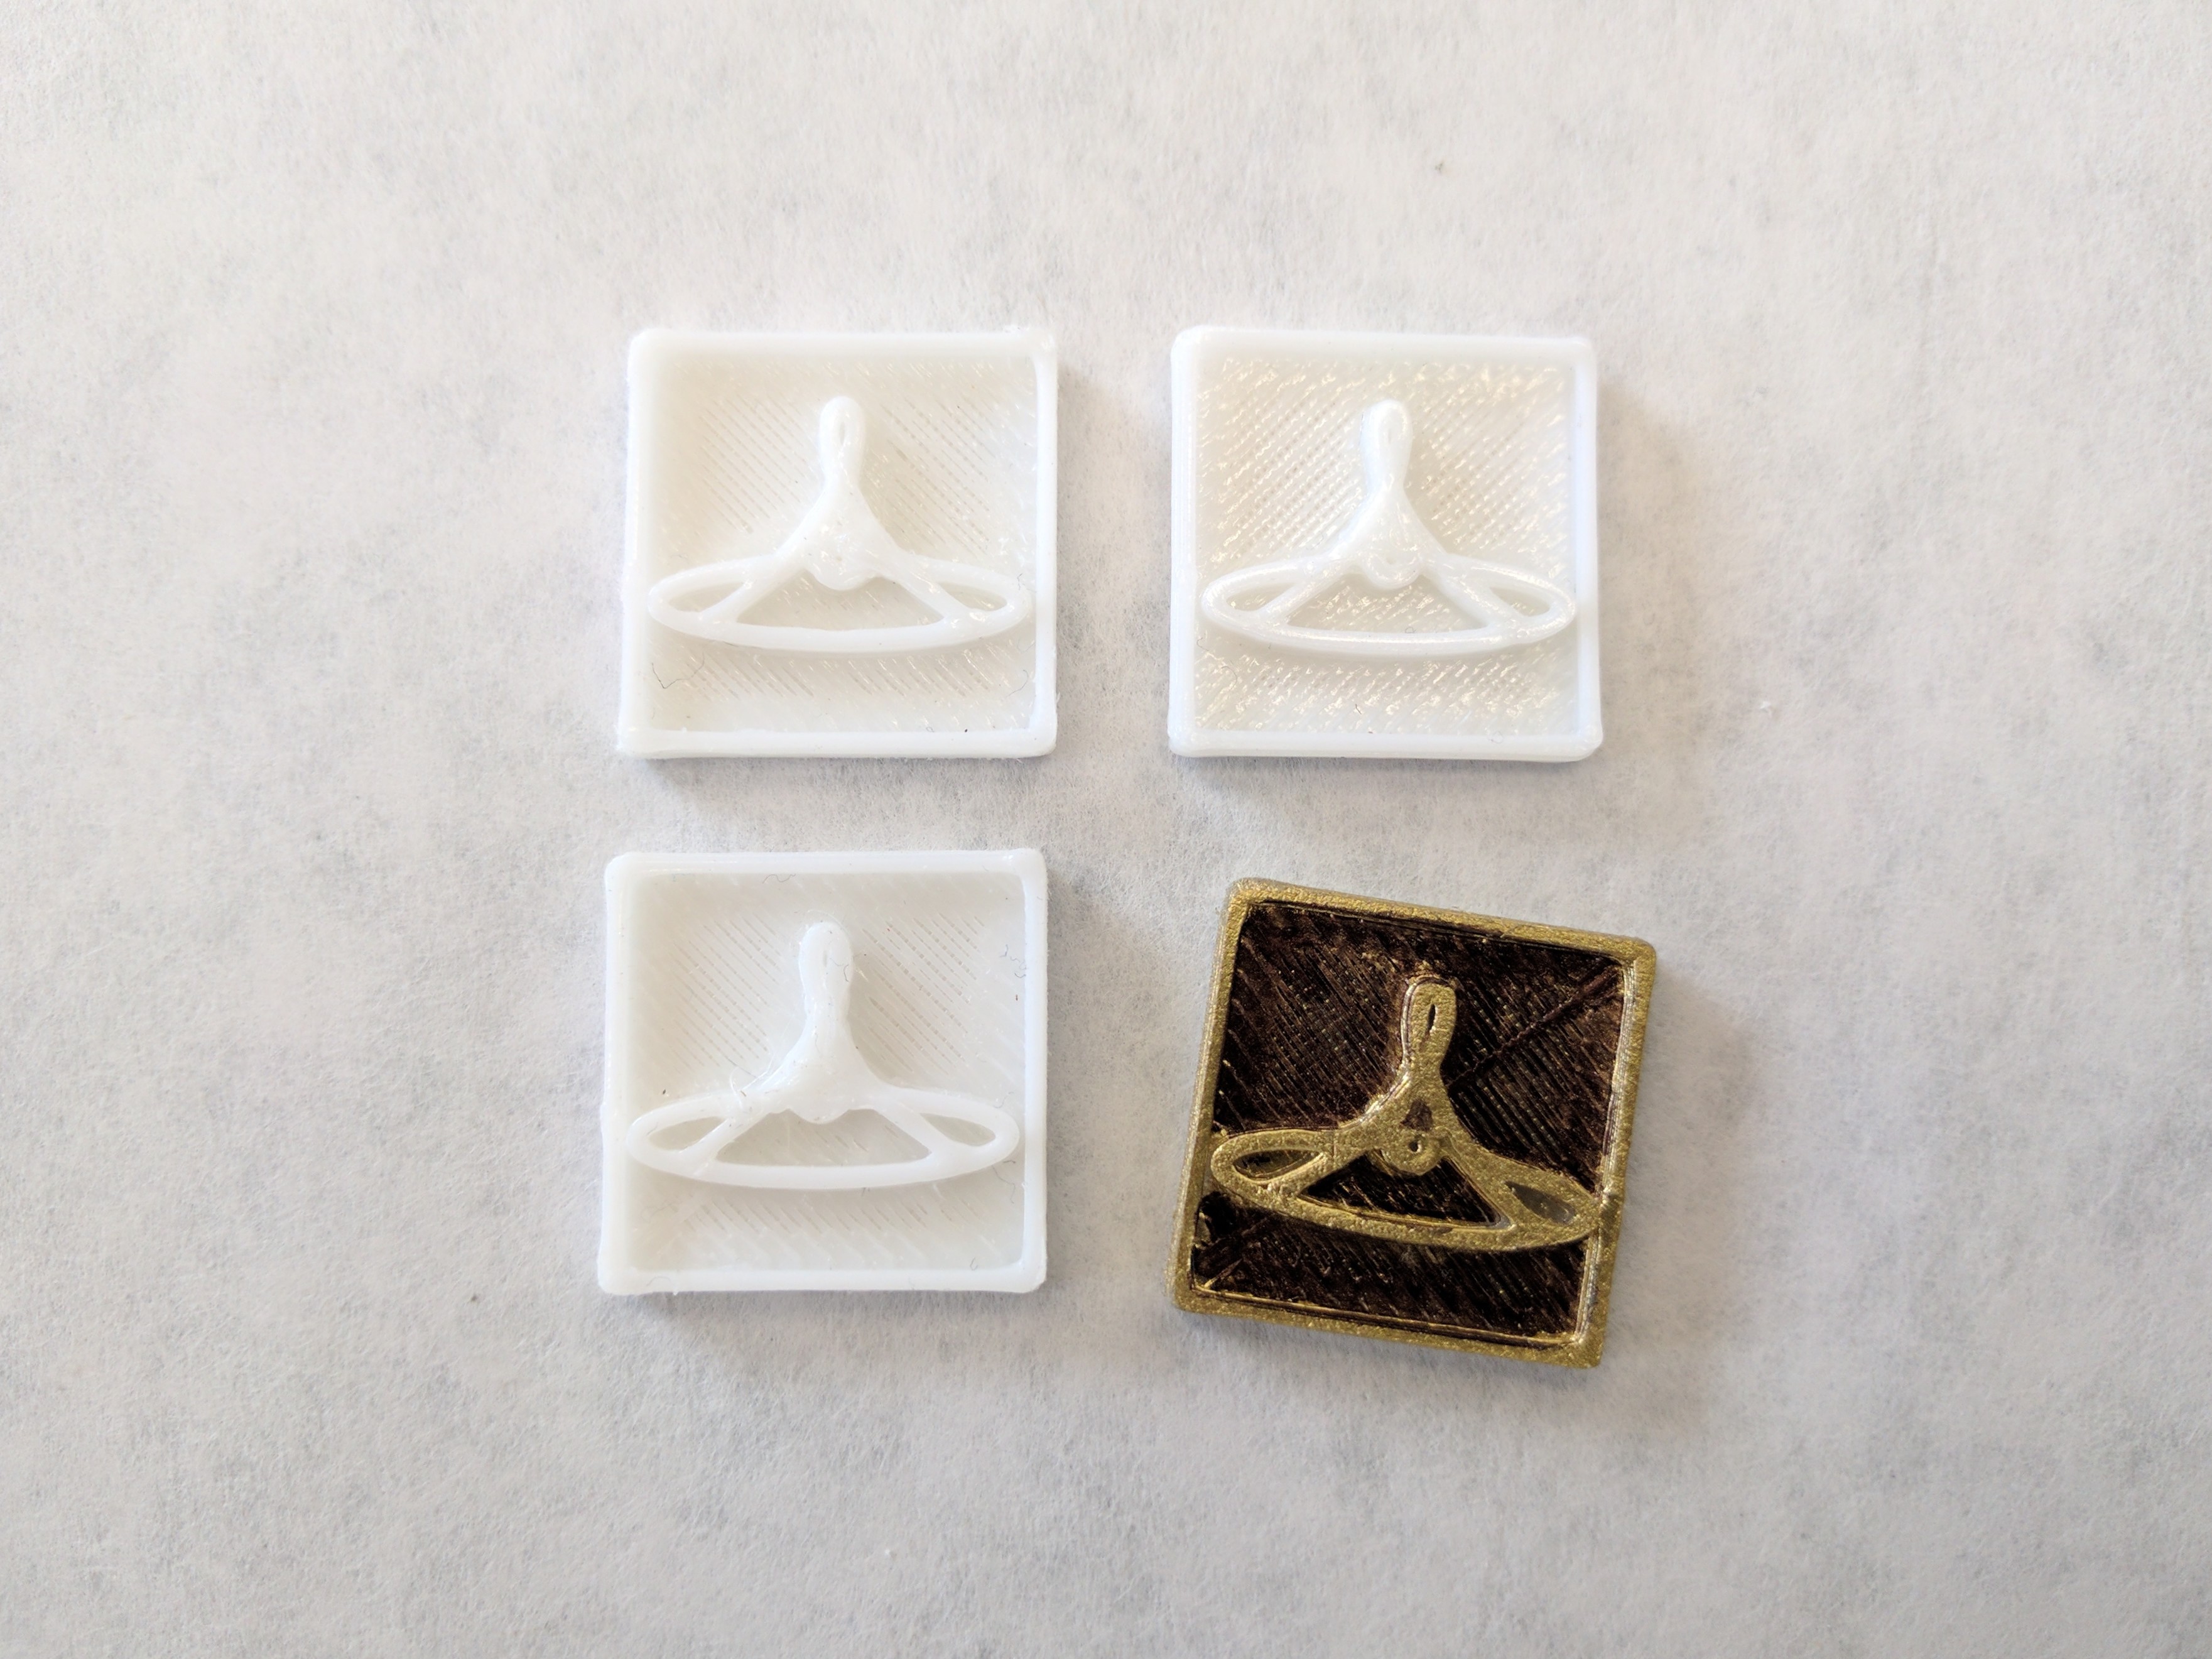
With the crates done, Maggie started mocking up badges with the College's logo on them (as seen on the crates) I would be putting on the speaker grill found on the front of the cabinet to hide the keyhole in the final version. Using Illustrator, Maggie created multiple badges in multiple sizes cutting them out of paper, and affixing them to the front of our V.9 prototype until we reached one we felt was appropriately sized for the front of the cabinet (I forgot to photograph this portion of the process, sorry -Mike).
![]()
At this point designing in Fusion360 was a lot easier for me. The badge only took me an hour and some change to design!
![]()
With my Fusion360 file created, it was as easy as 1-2-3 test printing our badge design on the Bukito!
![]()
With the badges printed, I then switched to testing paint and color (using a combination of spray paint and permanent marker)! Luckily for us, my color choices worked out, and I quickly figured out how to apply paint in my second try on the final Form 2 resin prints (using spray paint and a sponge)!
![]()
With the badge now worked out, I then switched back over to resolving the cabinet's finish and feel in hand. Starting with MDF, I tested a couple of router bits and plunge depths. Once I'd gotten the bevel I wanted on the MDF parts after multiple tests, I switched over to routing the redwood (I'd found in the Lab's composite room) parts I'd cut out on the Epilog laser cutter.
![]()
After a couple of successful routed cuts on the set of redwood parts, I decided it was best to only route the interior of the cabinet. With that decided I set about routing the interior edges of the walnut cabinet (as pictured below).
![]()
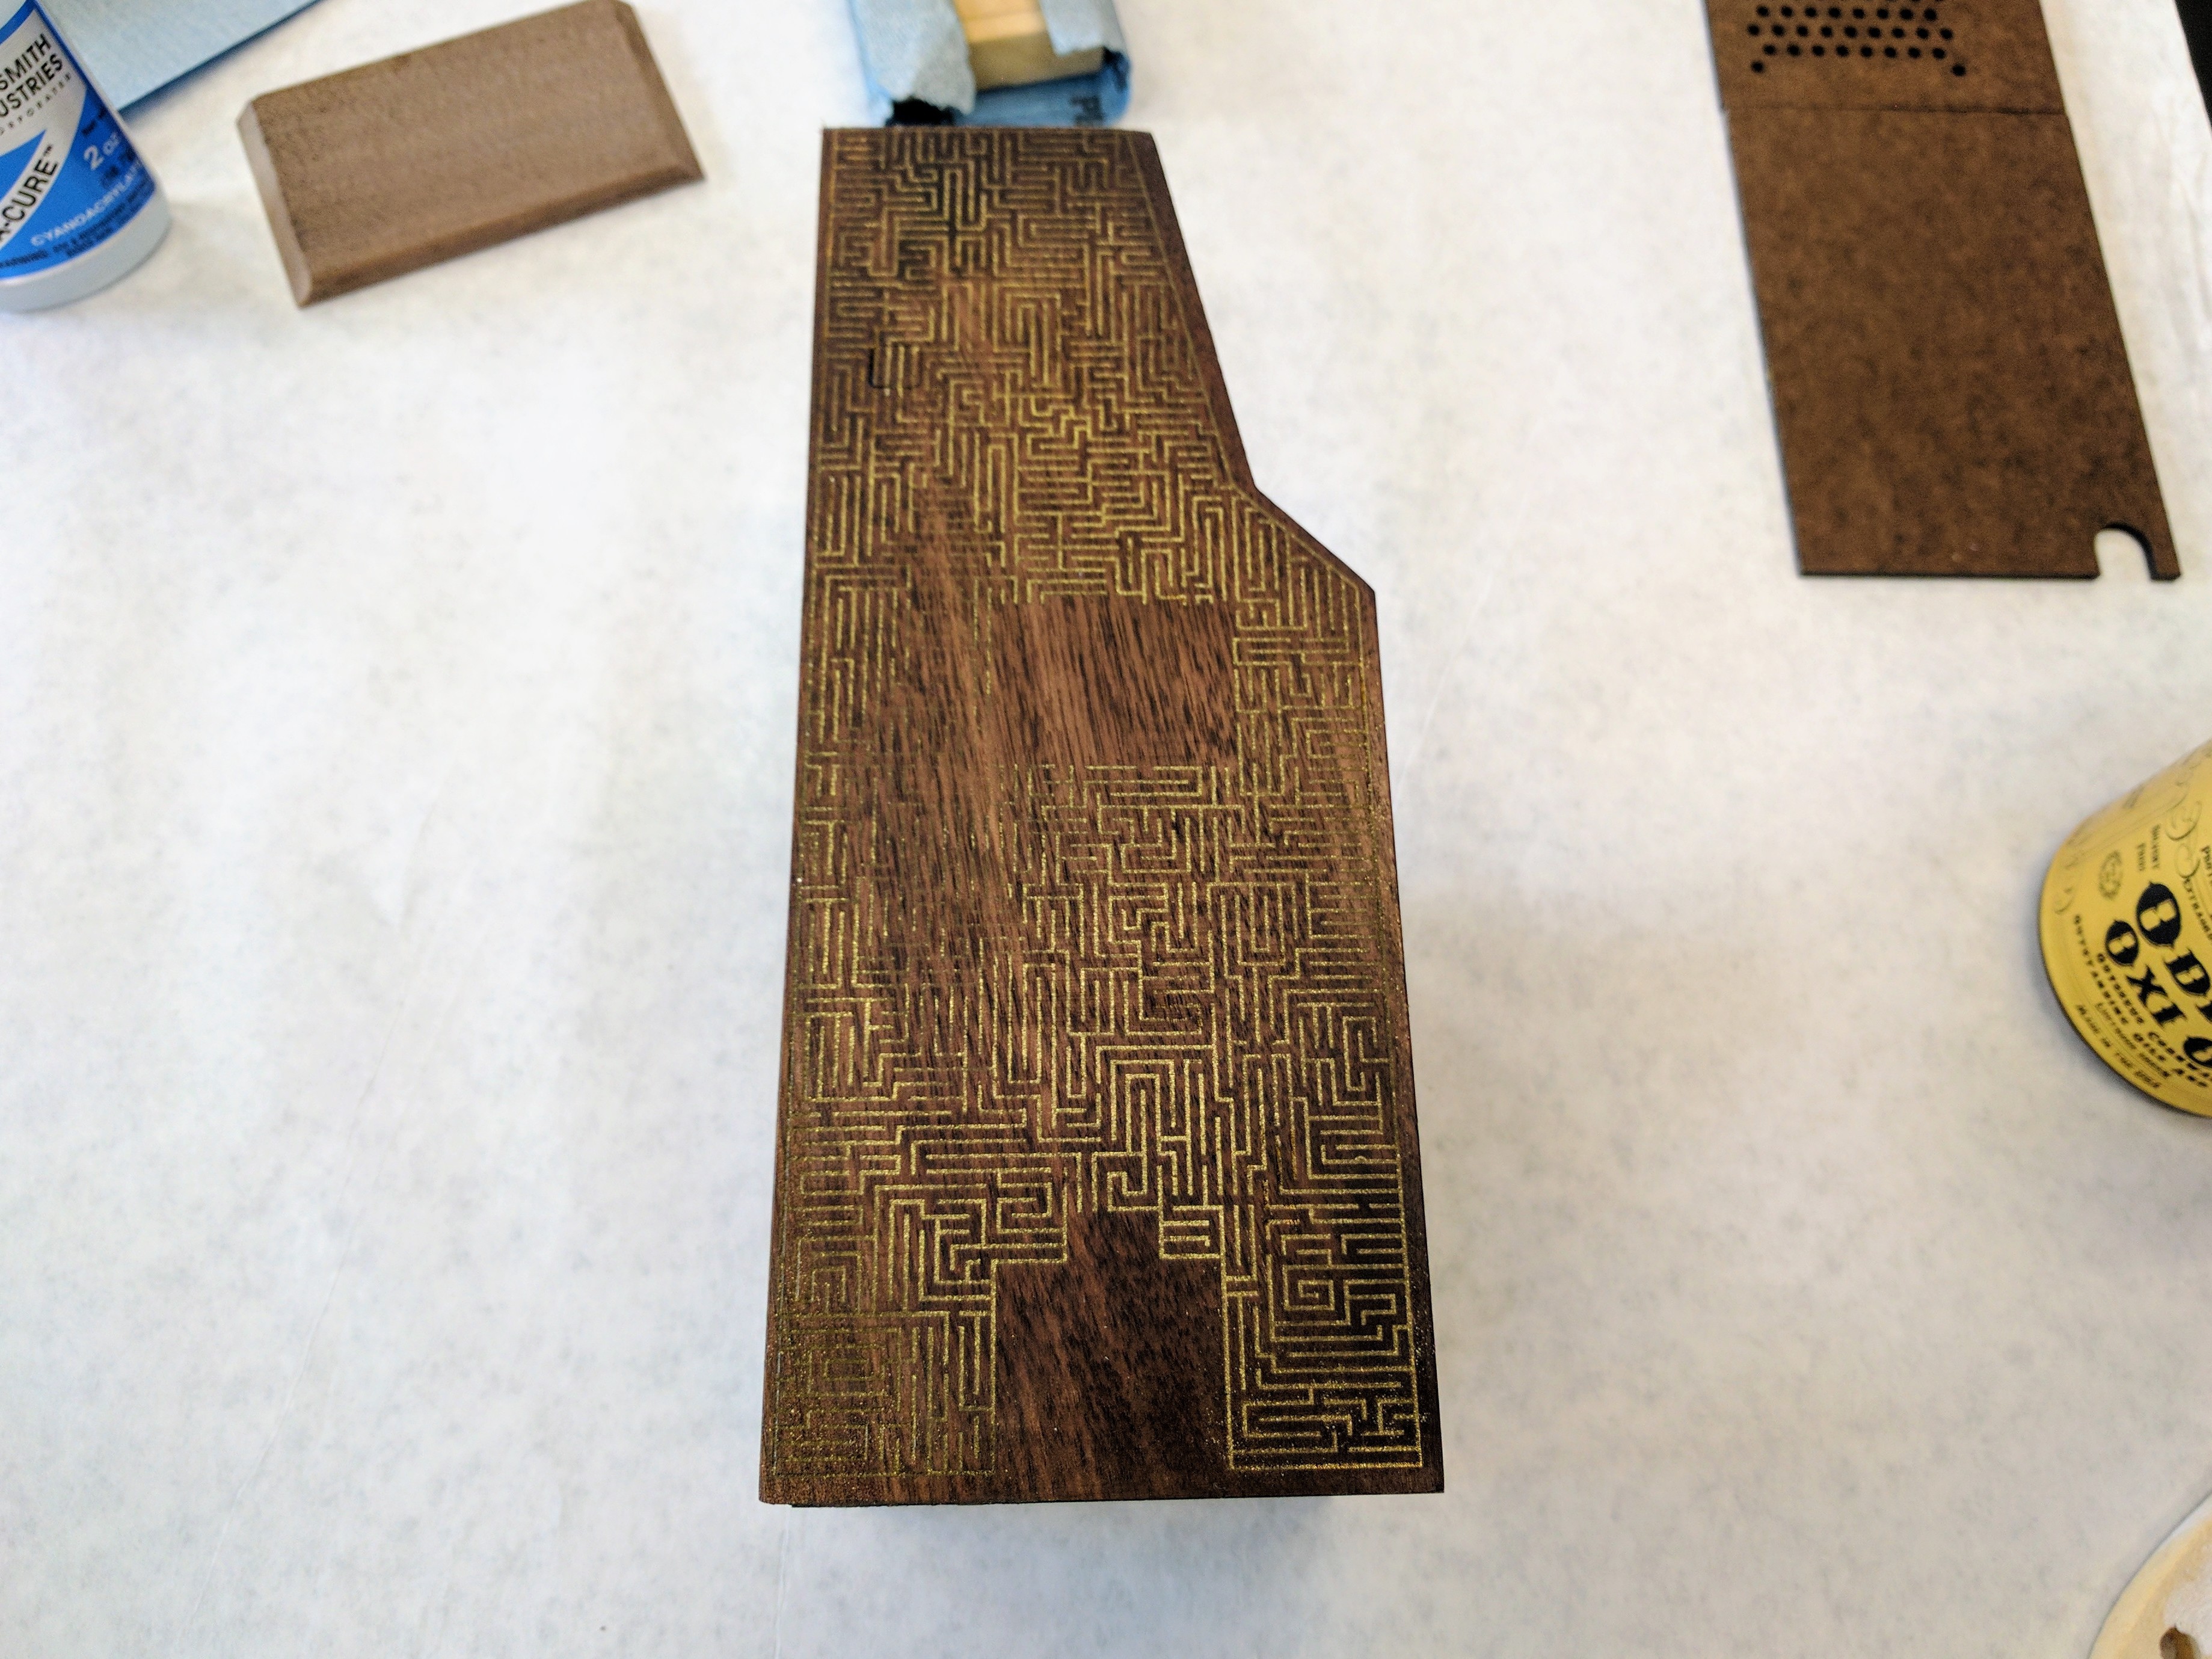
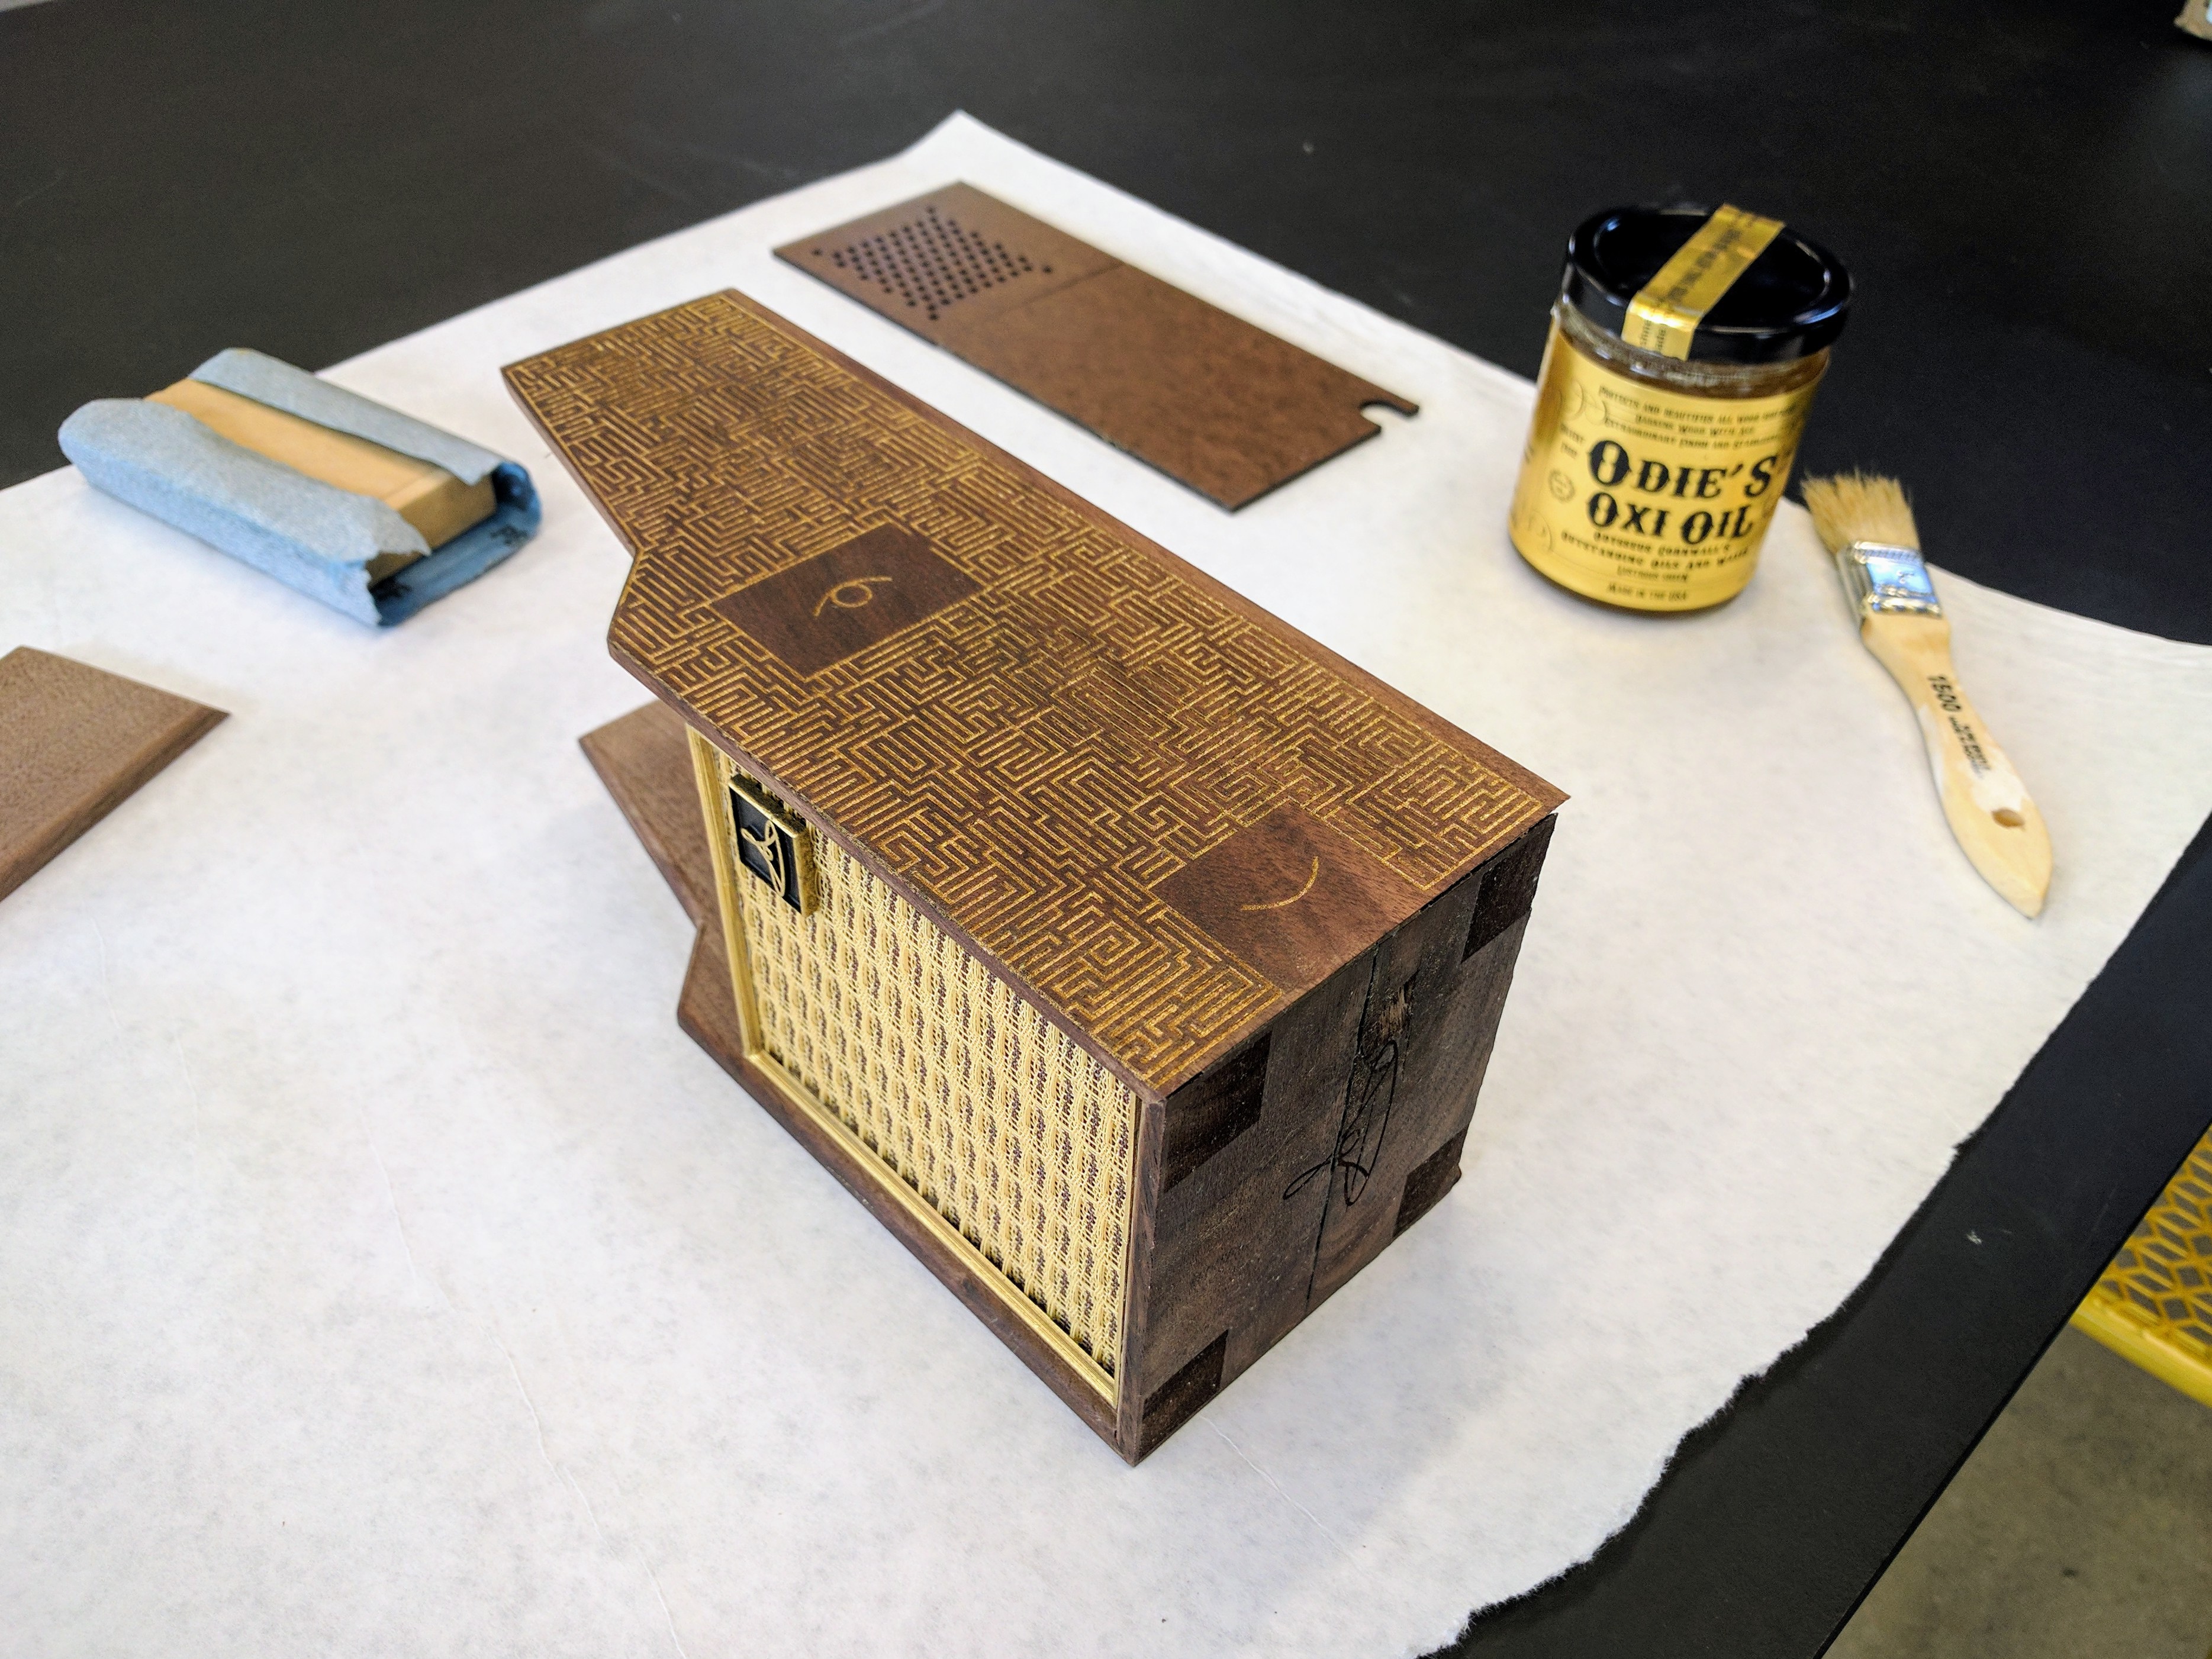
With 3 crates finished; 3 resin cabinet bezels now printed, sanded, and painted; and 1 near final finished cabinet somewhat assembled it was now time to try to figure out how-to create the brass inlay maze I planned on putting into the sides of the cabinets...
![]()
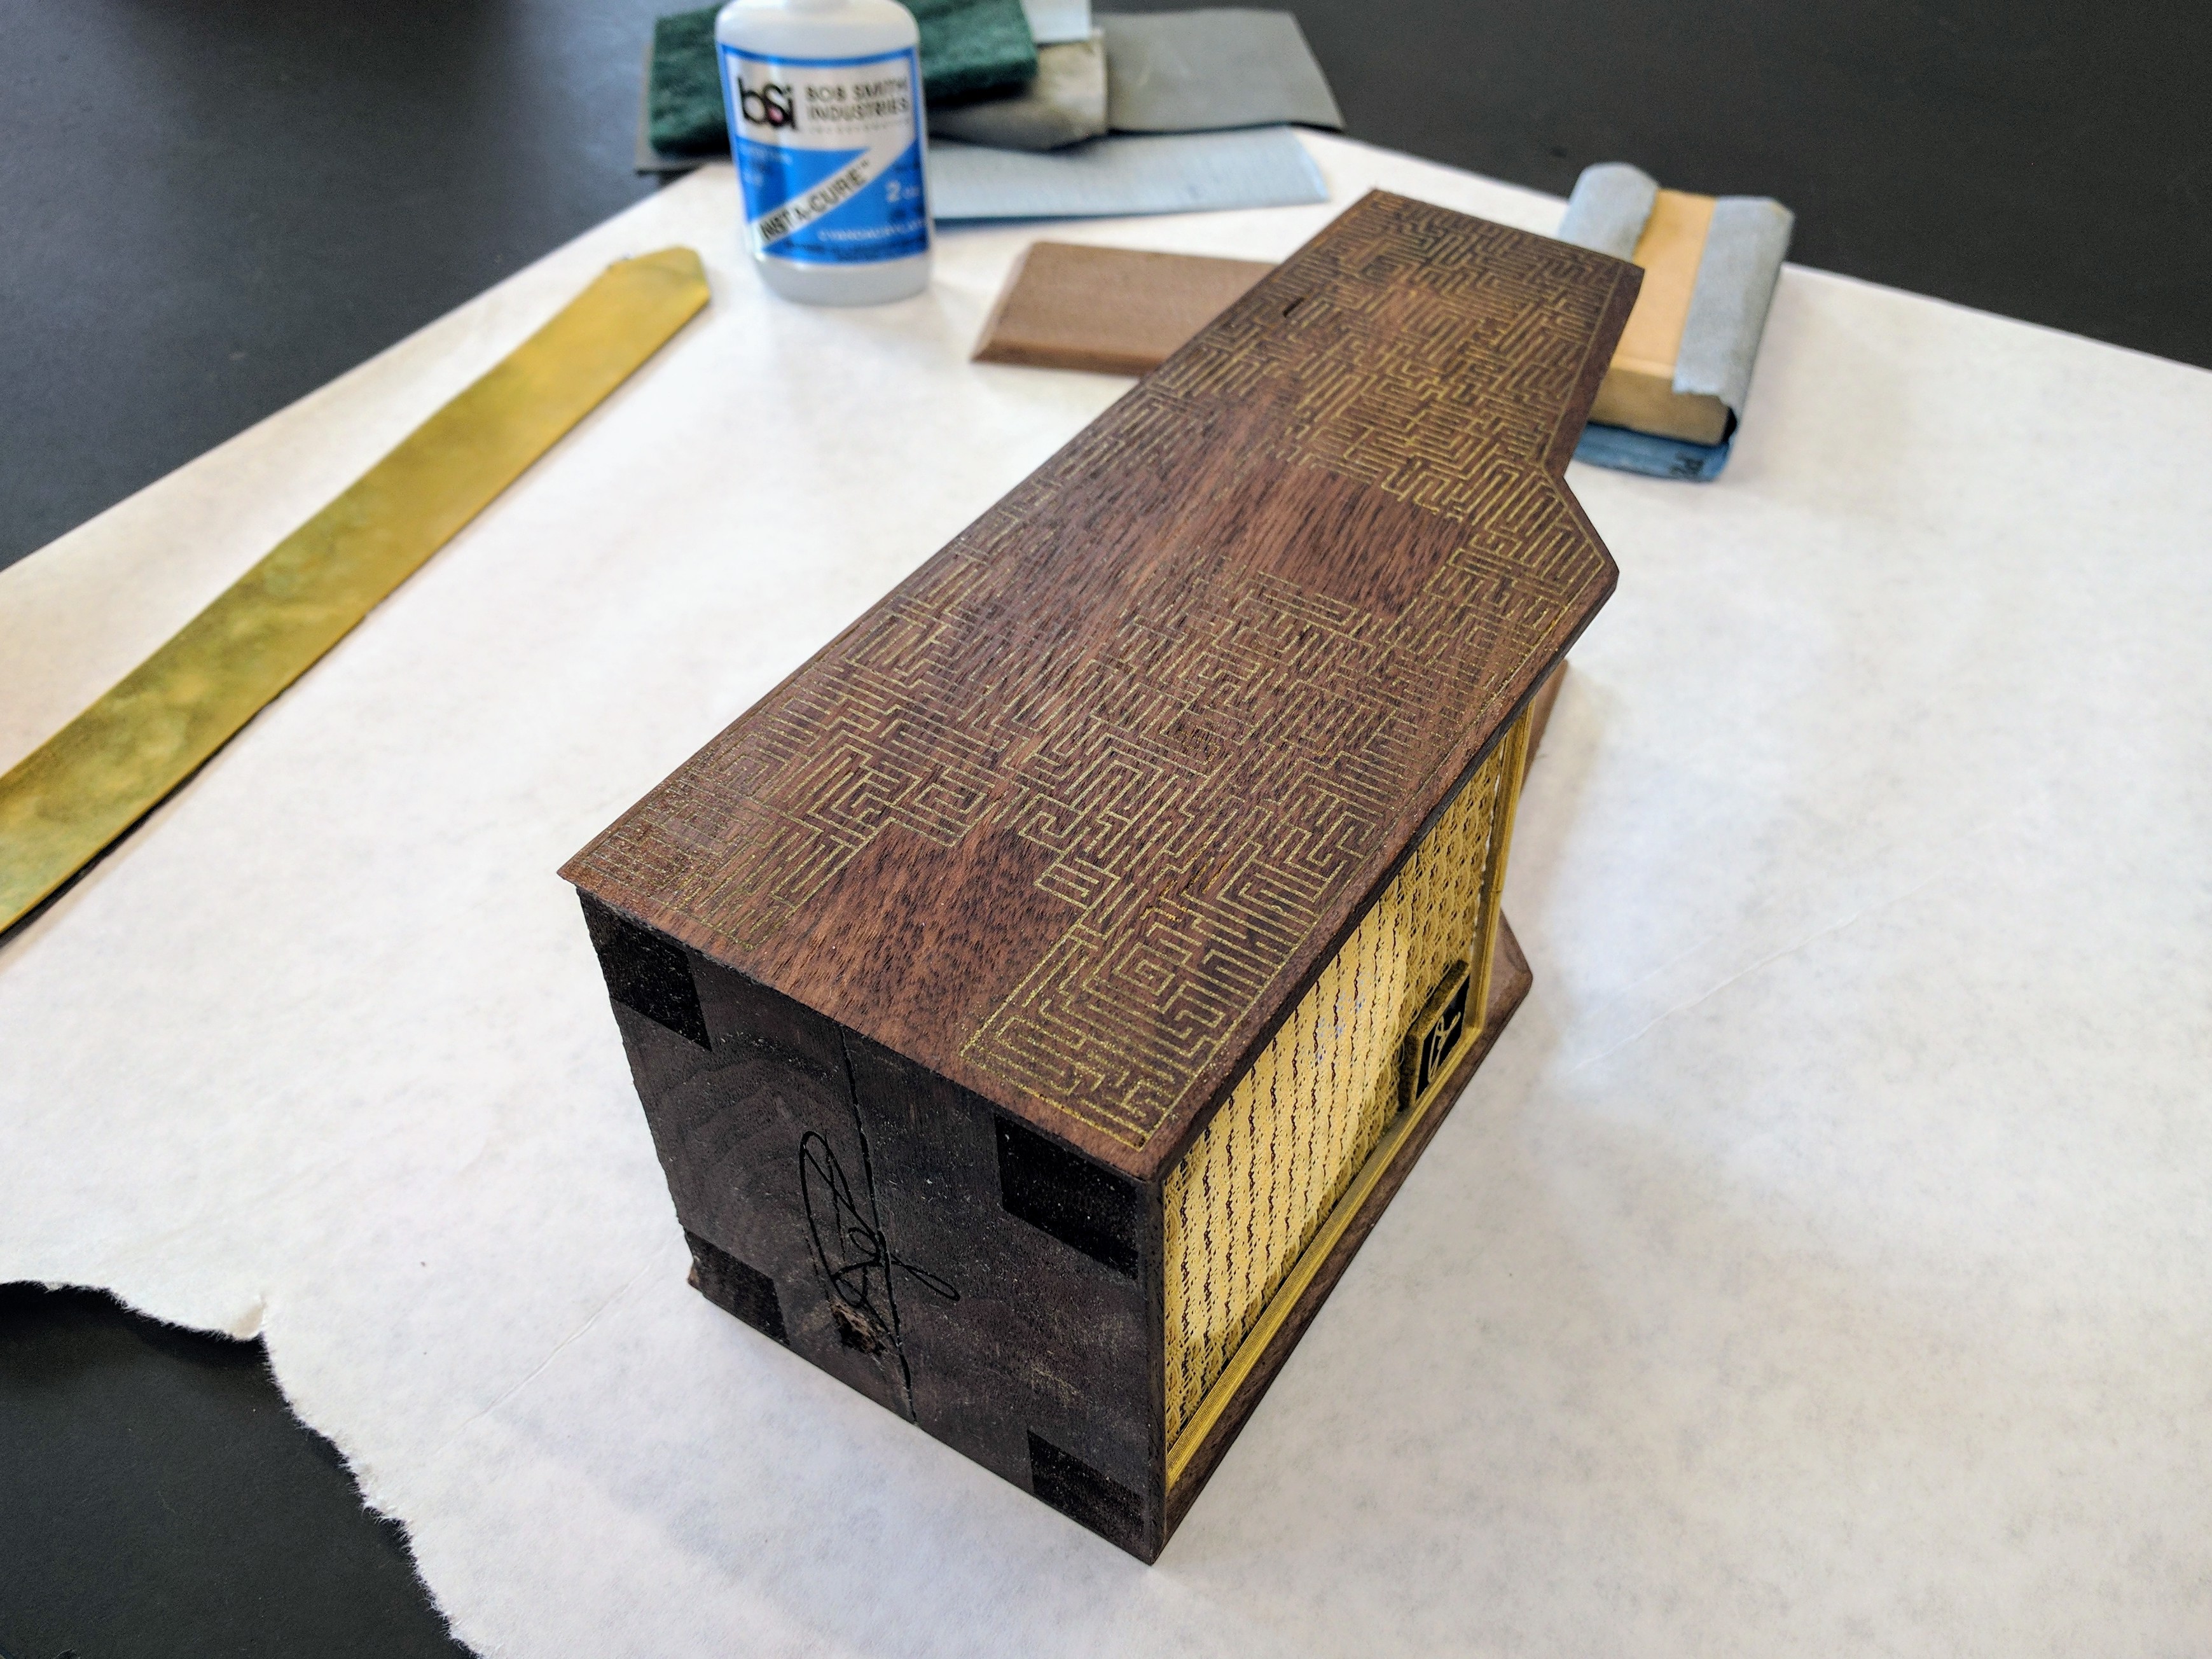
With a near final (and sacrificial) cabinet ready for inlay testing I decided to try my luck... and got less than impressive results... Don't get me wrong, the Epilog made a beautiful looking maze engraving into the sides of the cabinet however...
![]()
Getting the sides of the cabinet to hold+show brass shavings and or spray paint satisfactorily to give off an inlay effect i was looking for has proven difficult to achieve in the time I've given it, as the following pictures will more clearly show...
![]()
Attempt at brass inlay using filed down brass shavings+super glue on very tiny and detailed traces...
![]()
Attempt at an inlay style affect using spray paint sprayed into the channels the laser cutter rastered out...
![]()
![]()
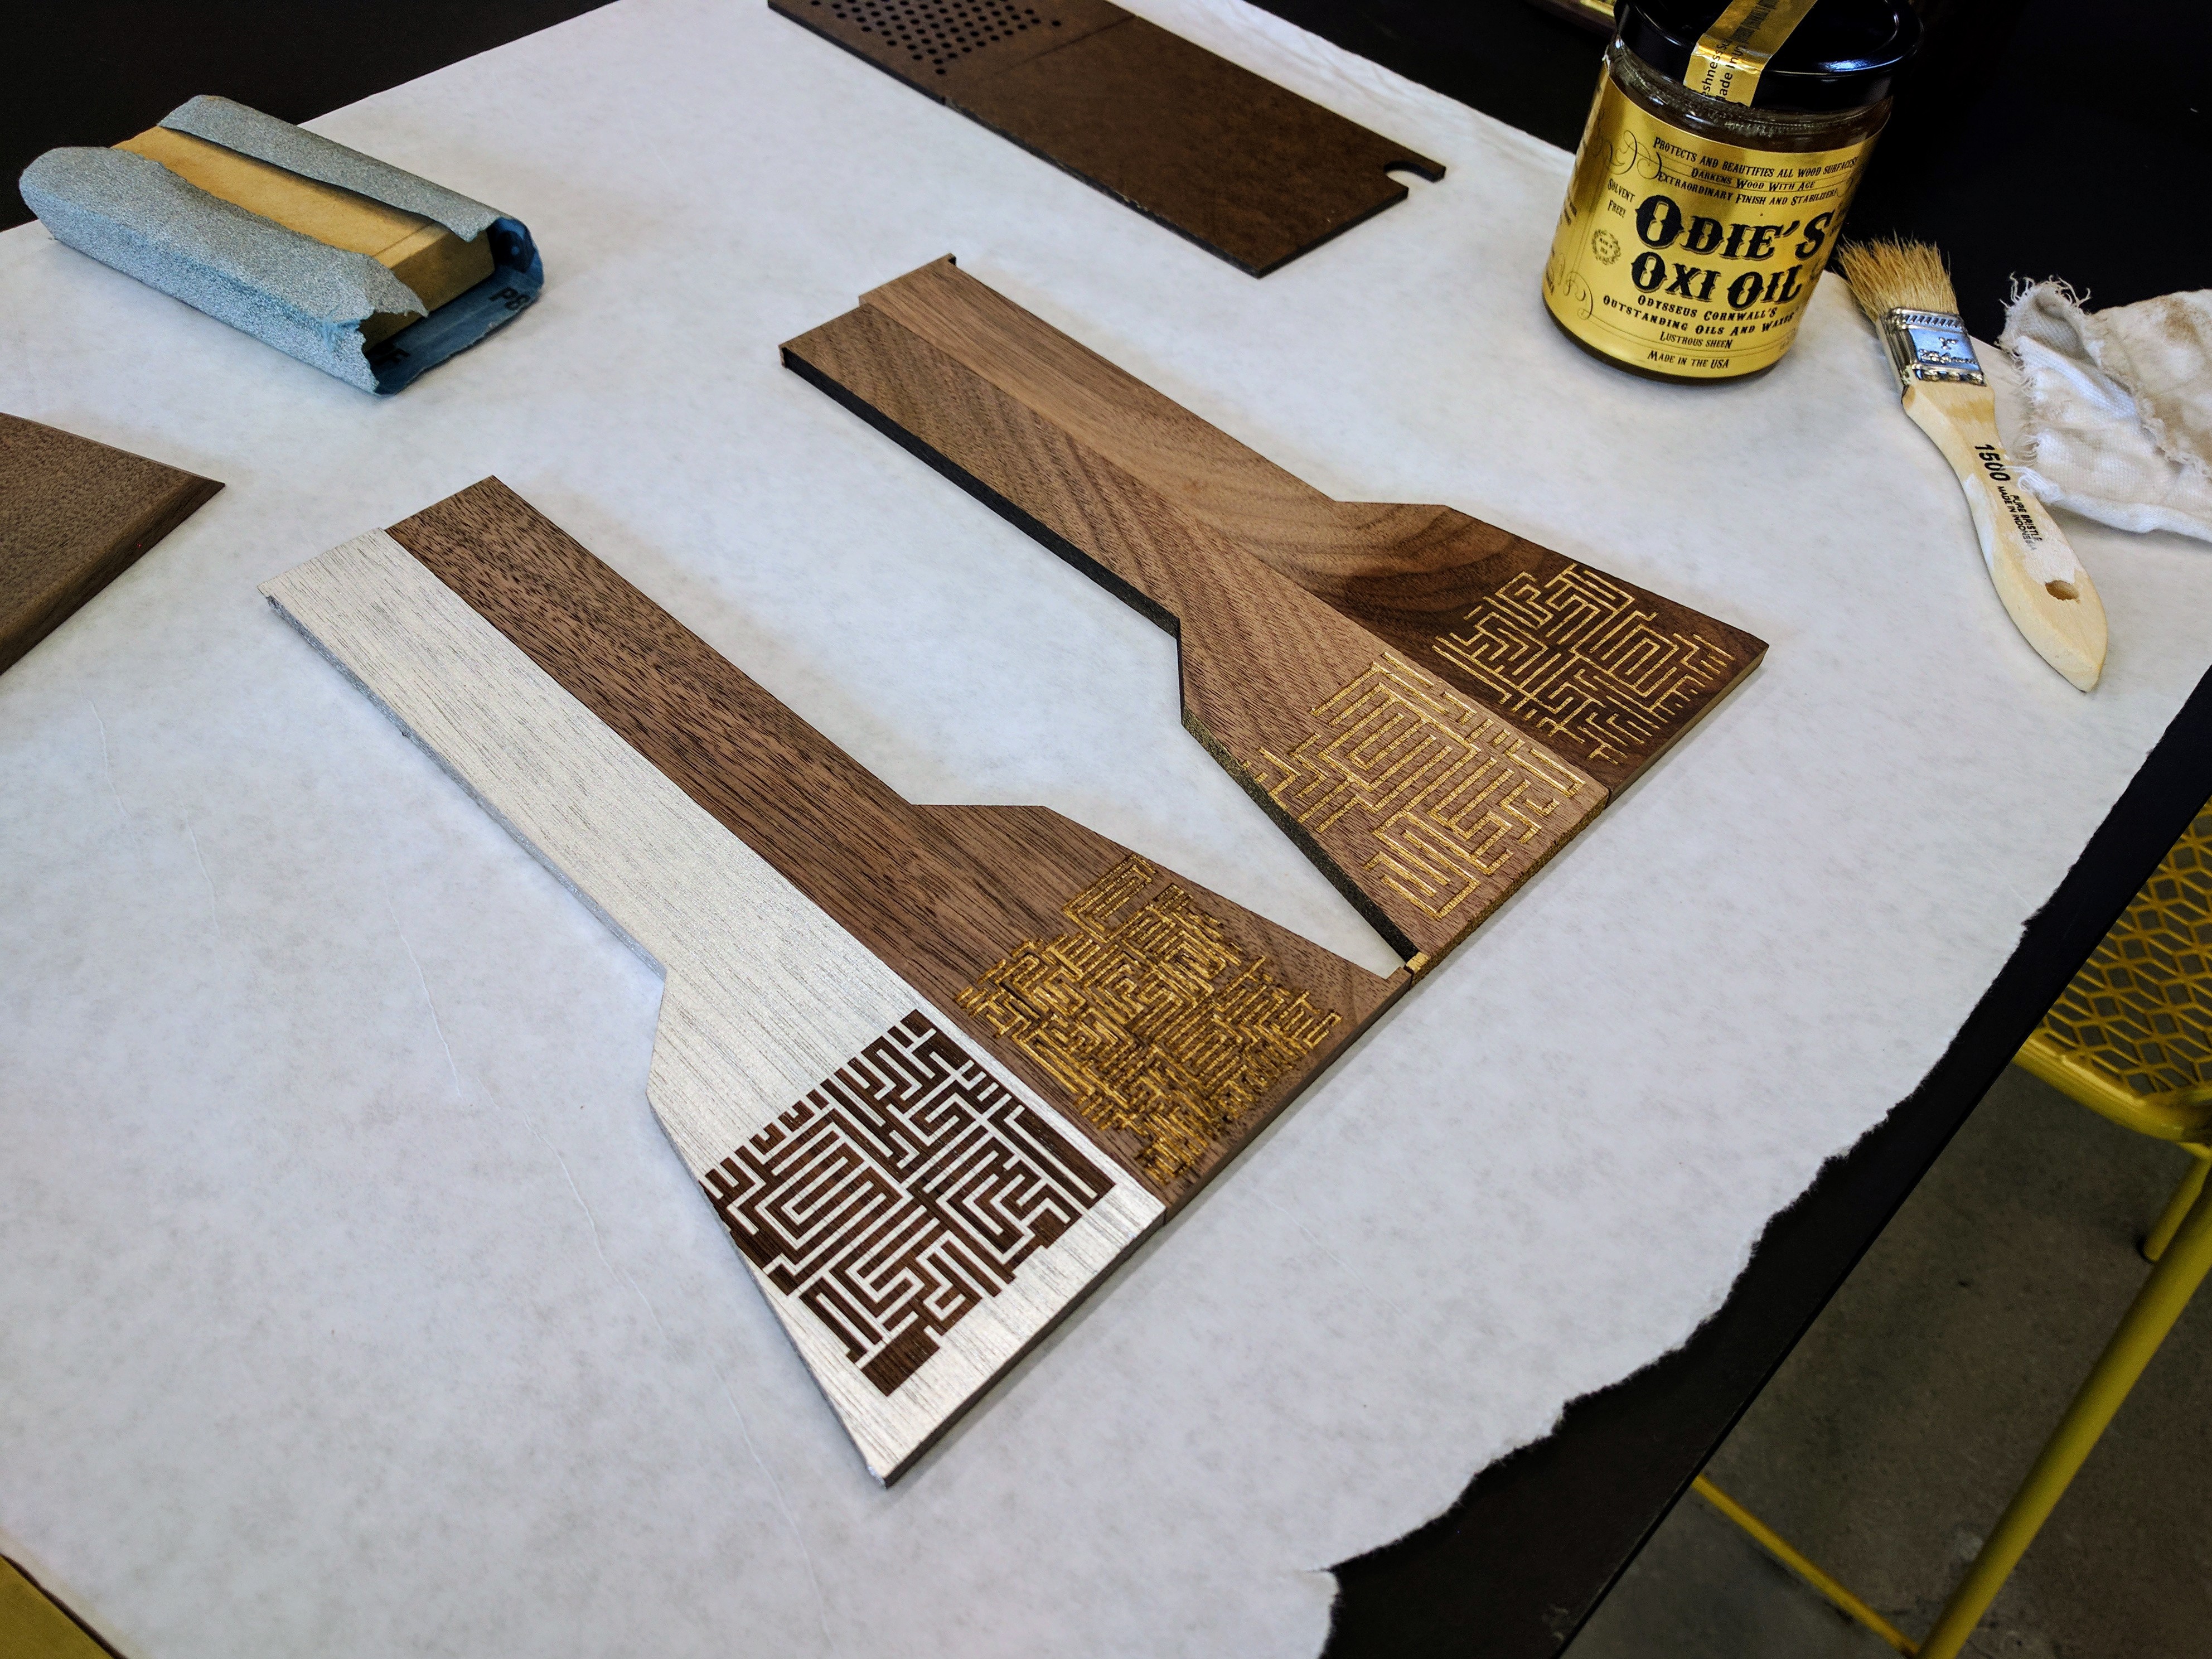
Thankfully, Maggie showed up after a day of failure (spent ruining my near finished, but admittedly sacrificial) cabinet, and took the time to test various applications of paint on wood+laser rastering, which resulted in the excellent samples (pictured above). The long and short?... Thicker+shallower raster lines etched out of pre-painted surfaces seem to be the way to go!
![]()
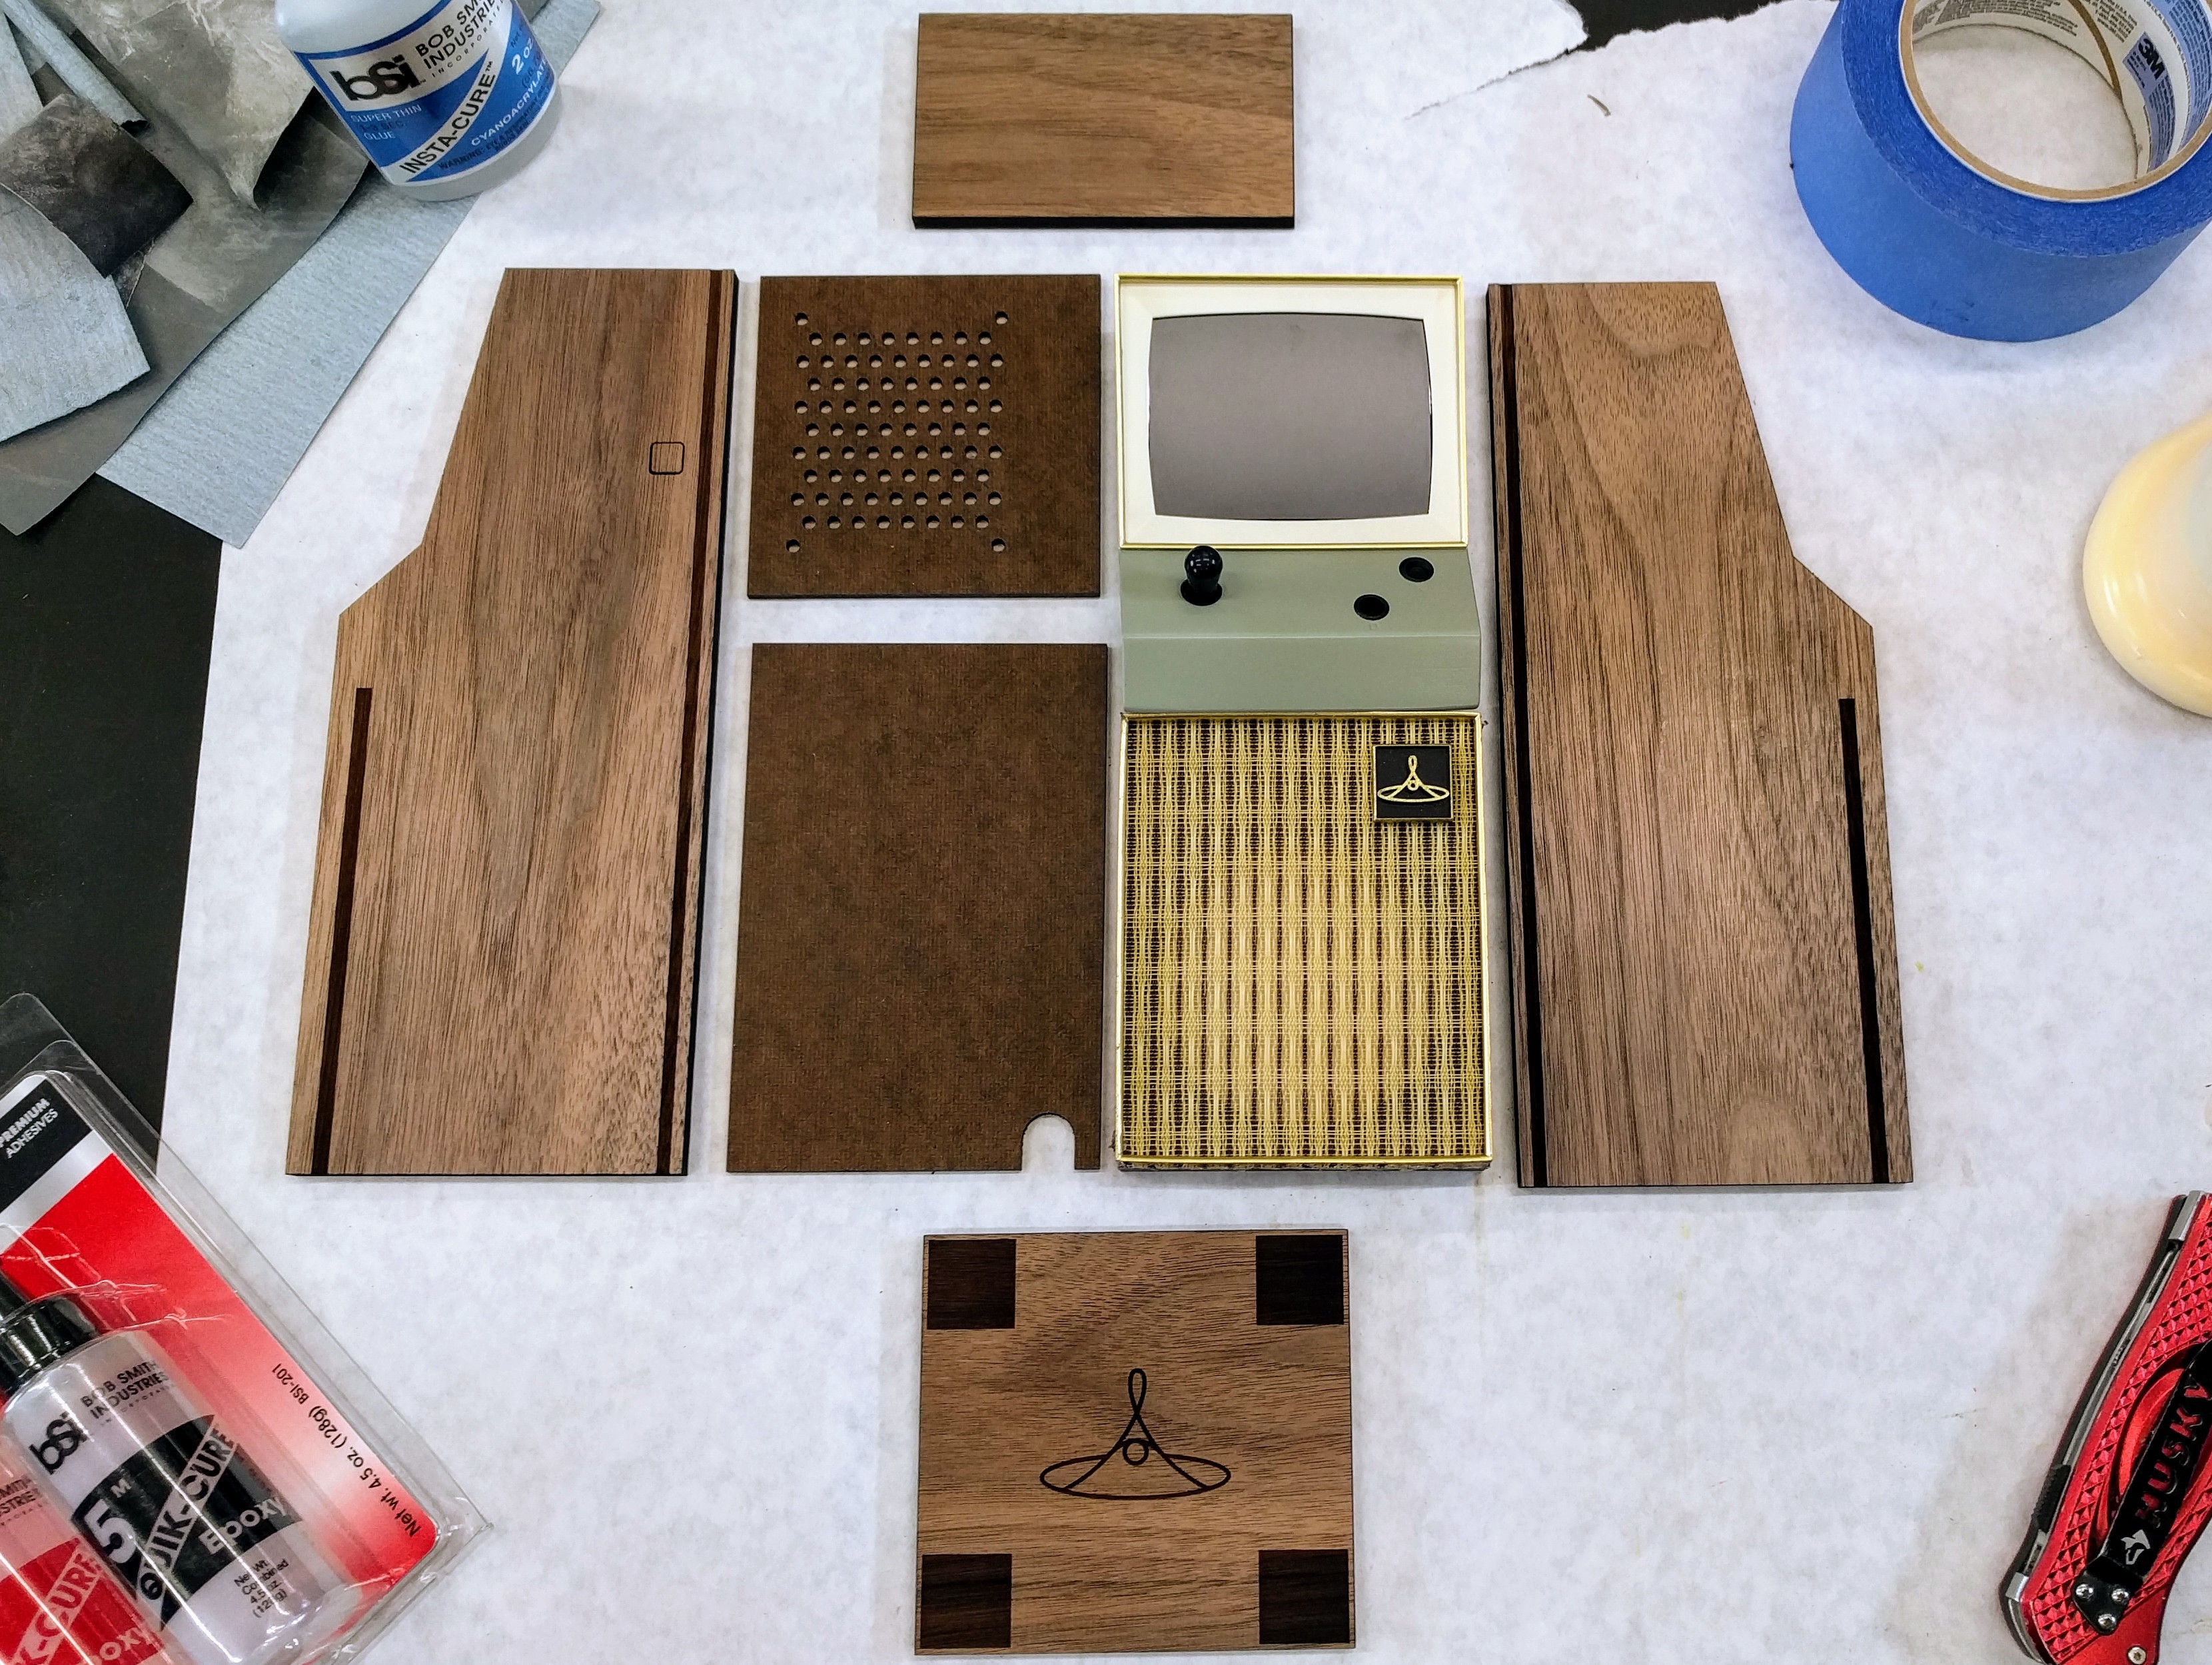
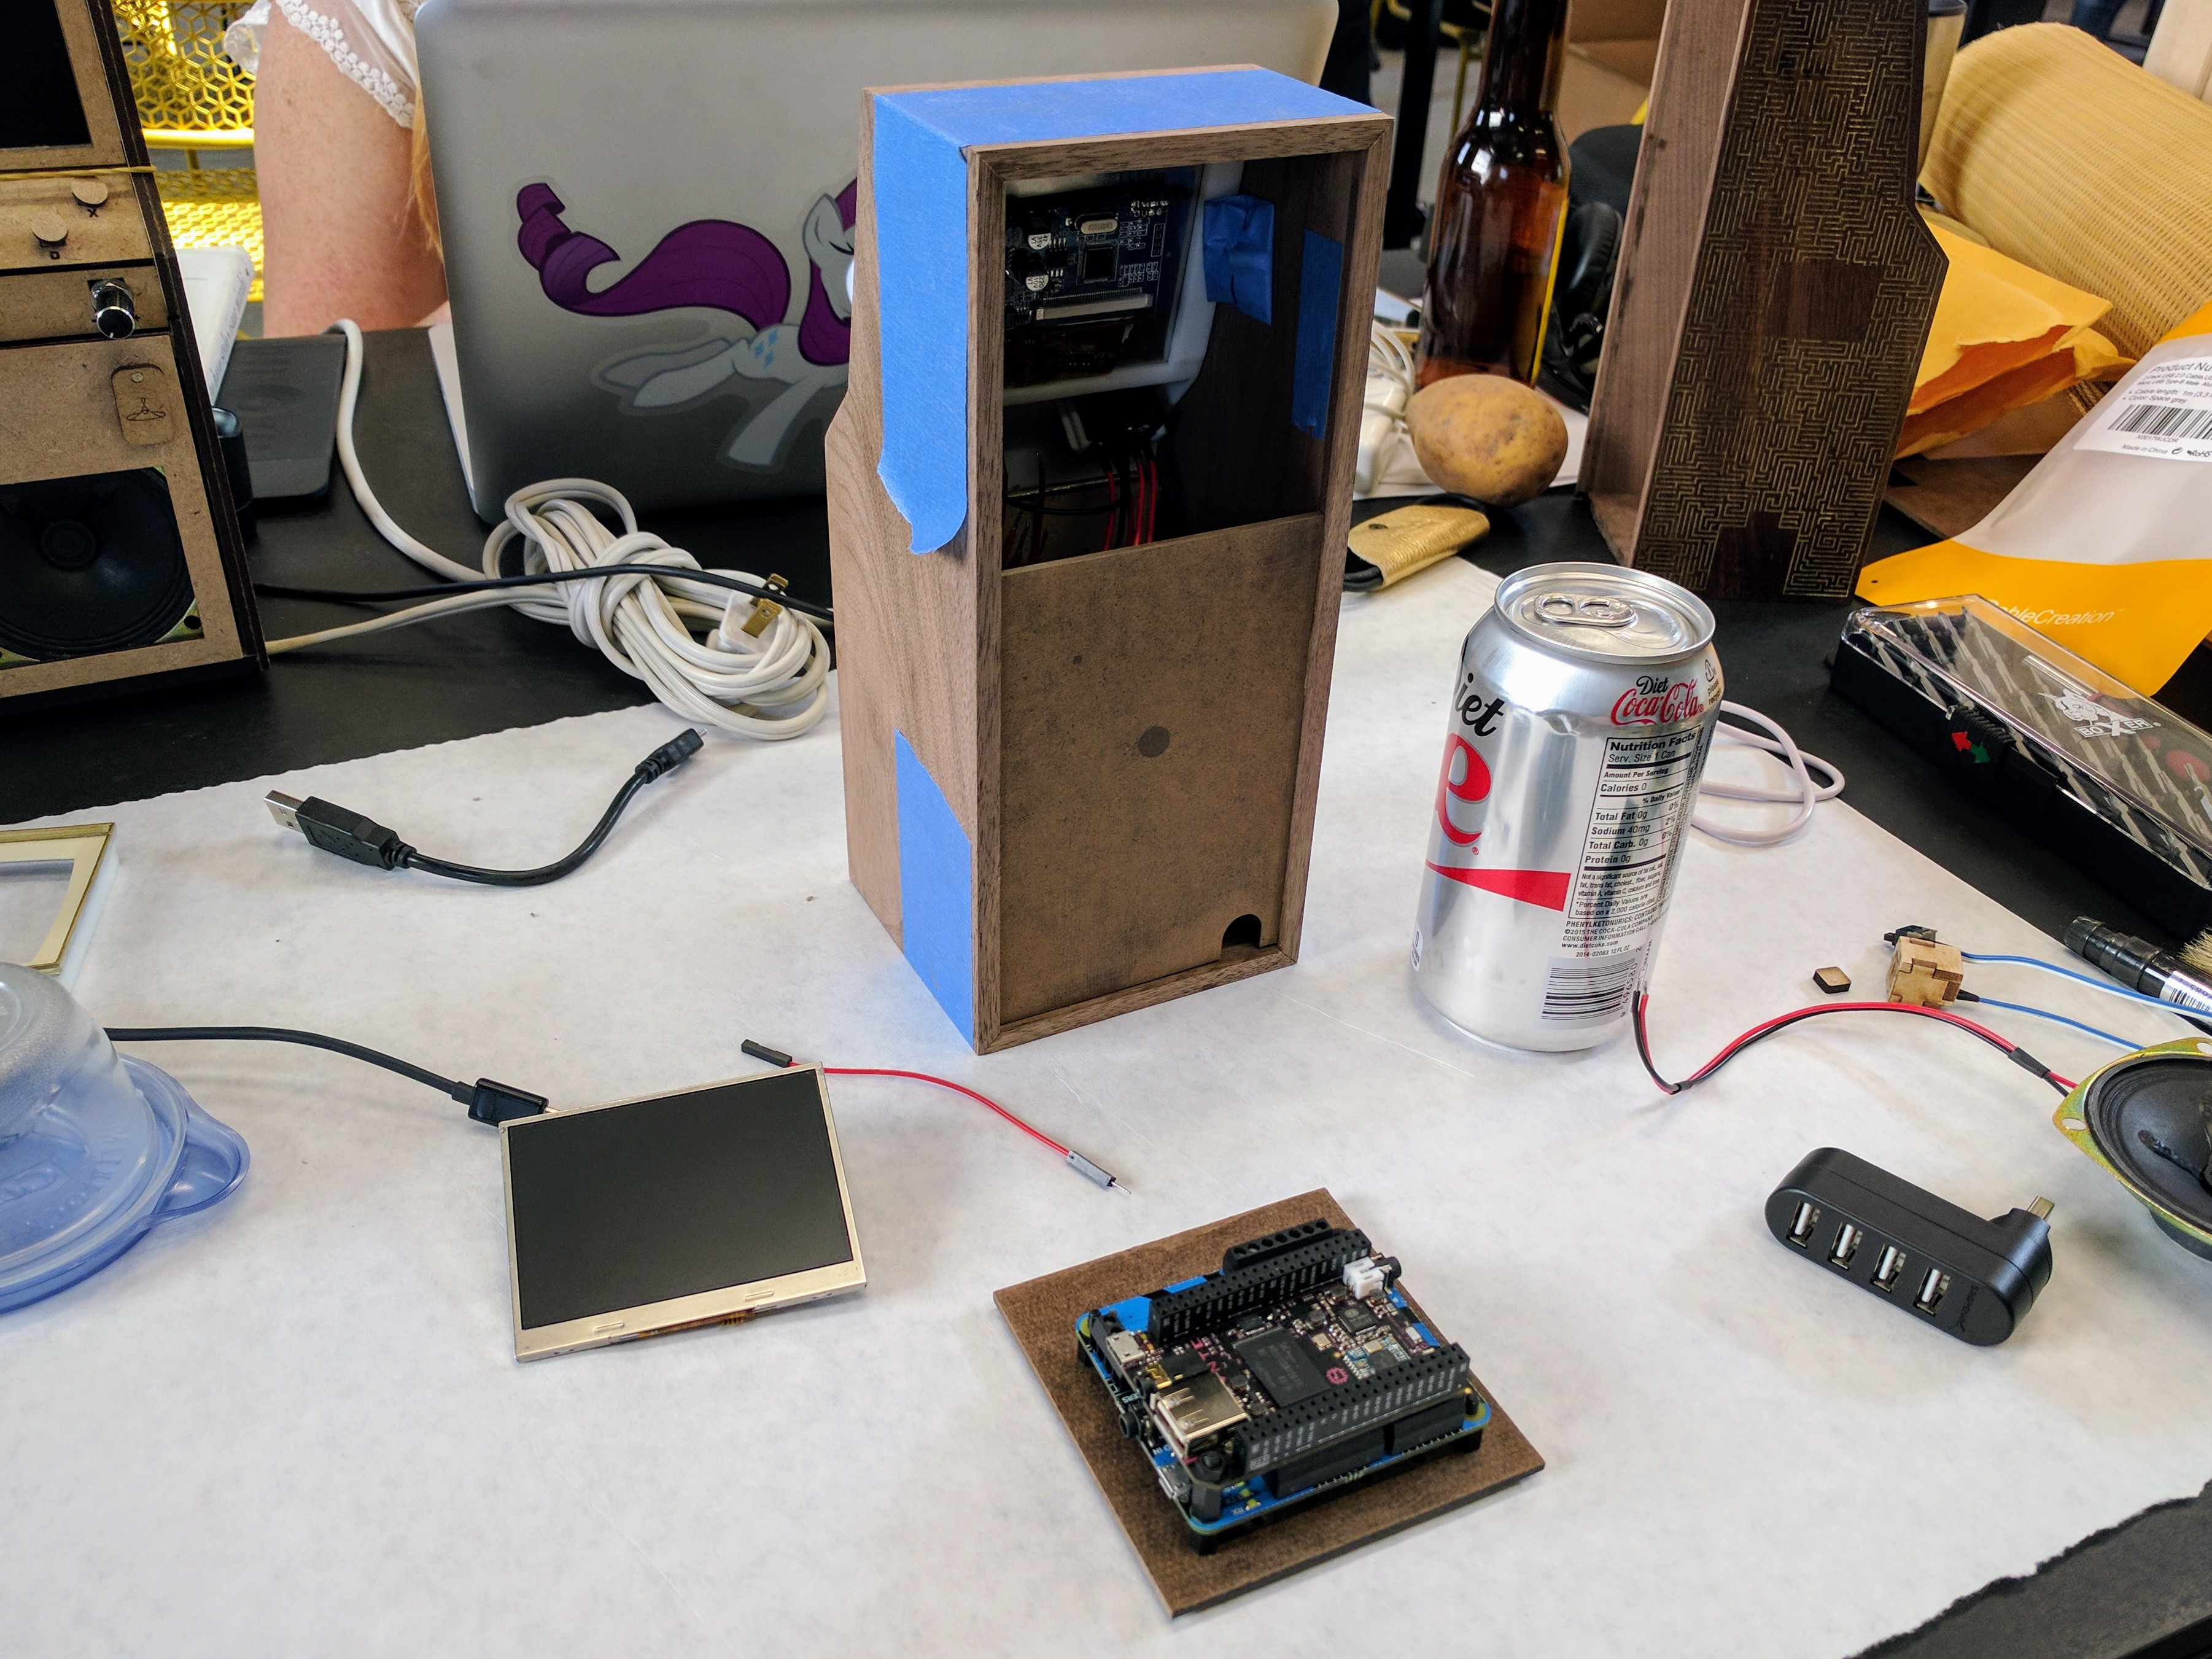
With Maggie now fully applying herself to the maze inlay problem, I was able to switch my focus back over to assembling a functional cabinet (without the maze and puzzle components) made out of walnut, masonite, and plastic (not cut from found and sacrificial walnut I'd scrounged in the lab.
![]()
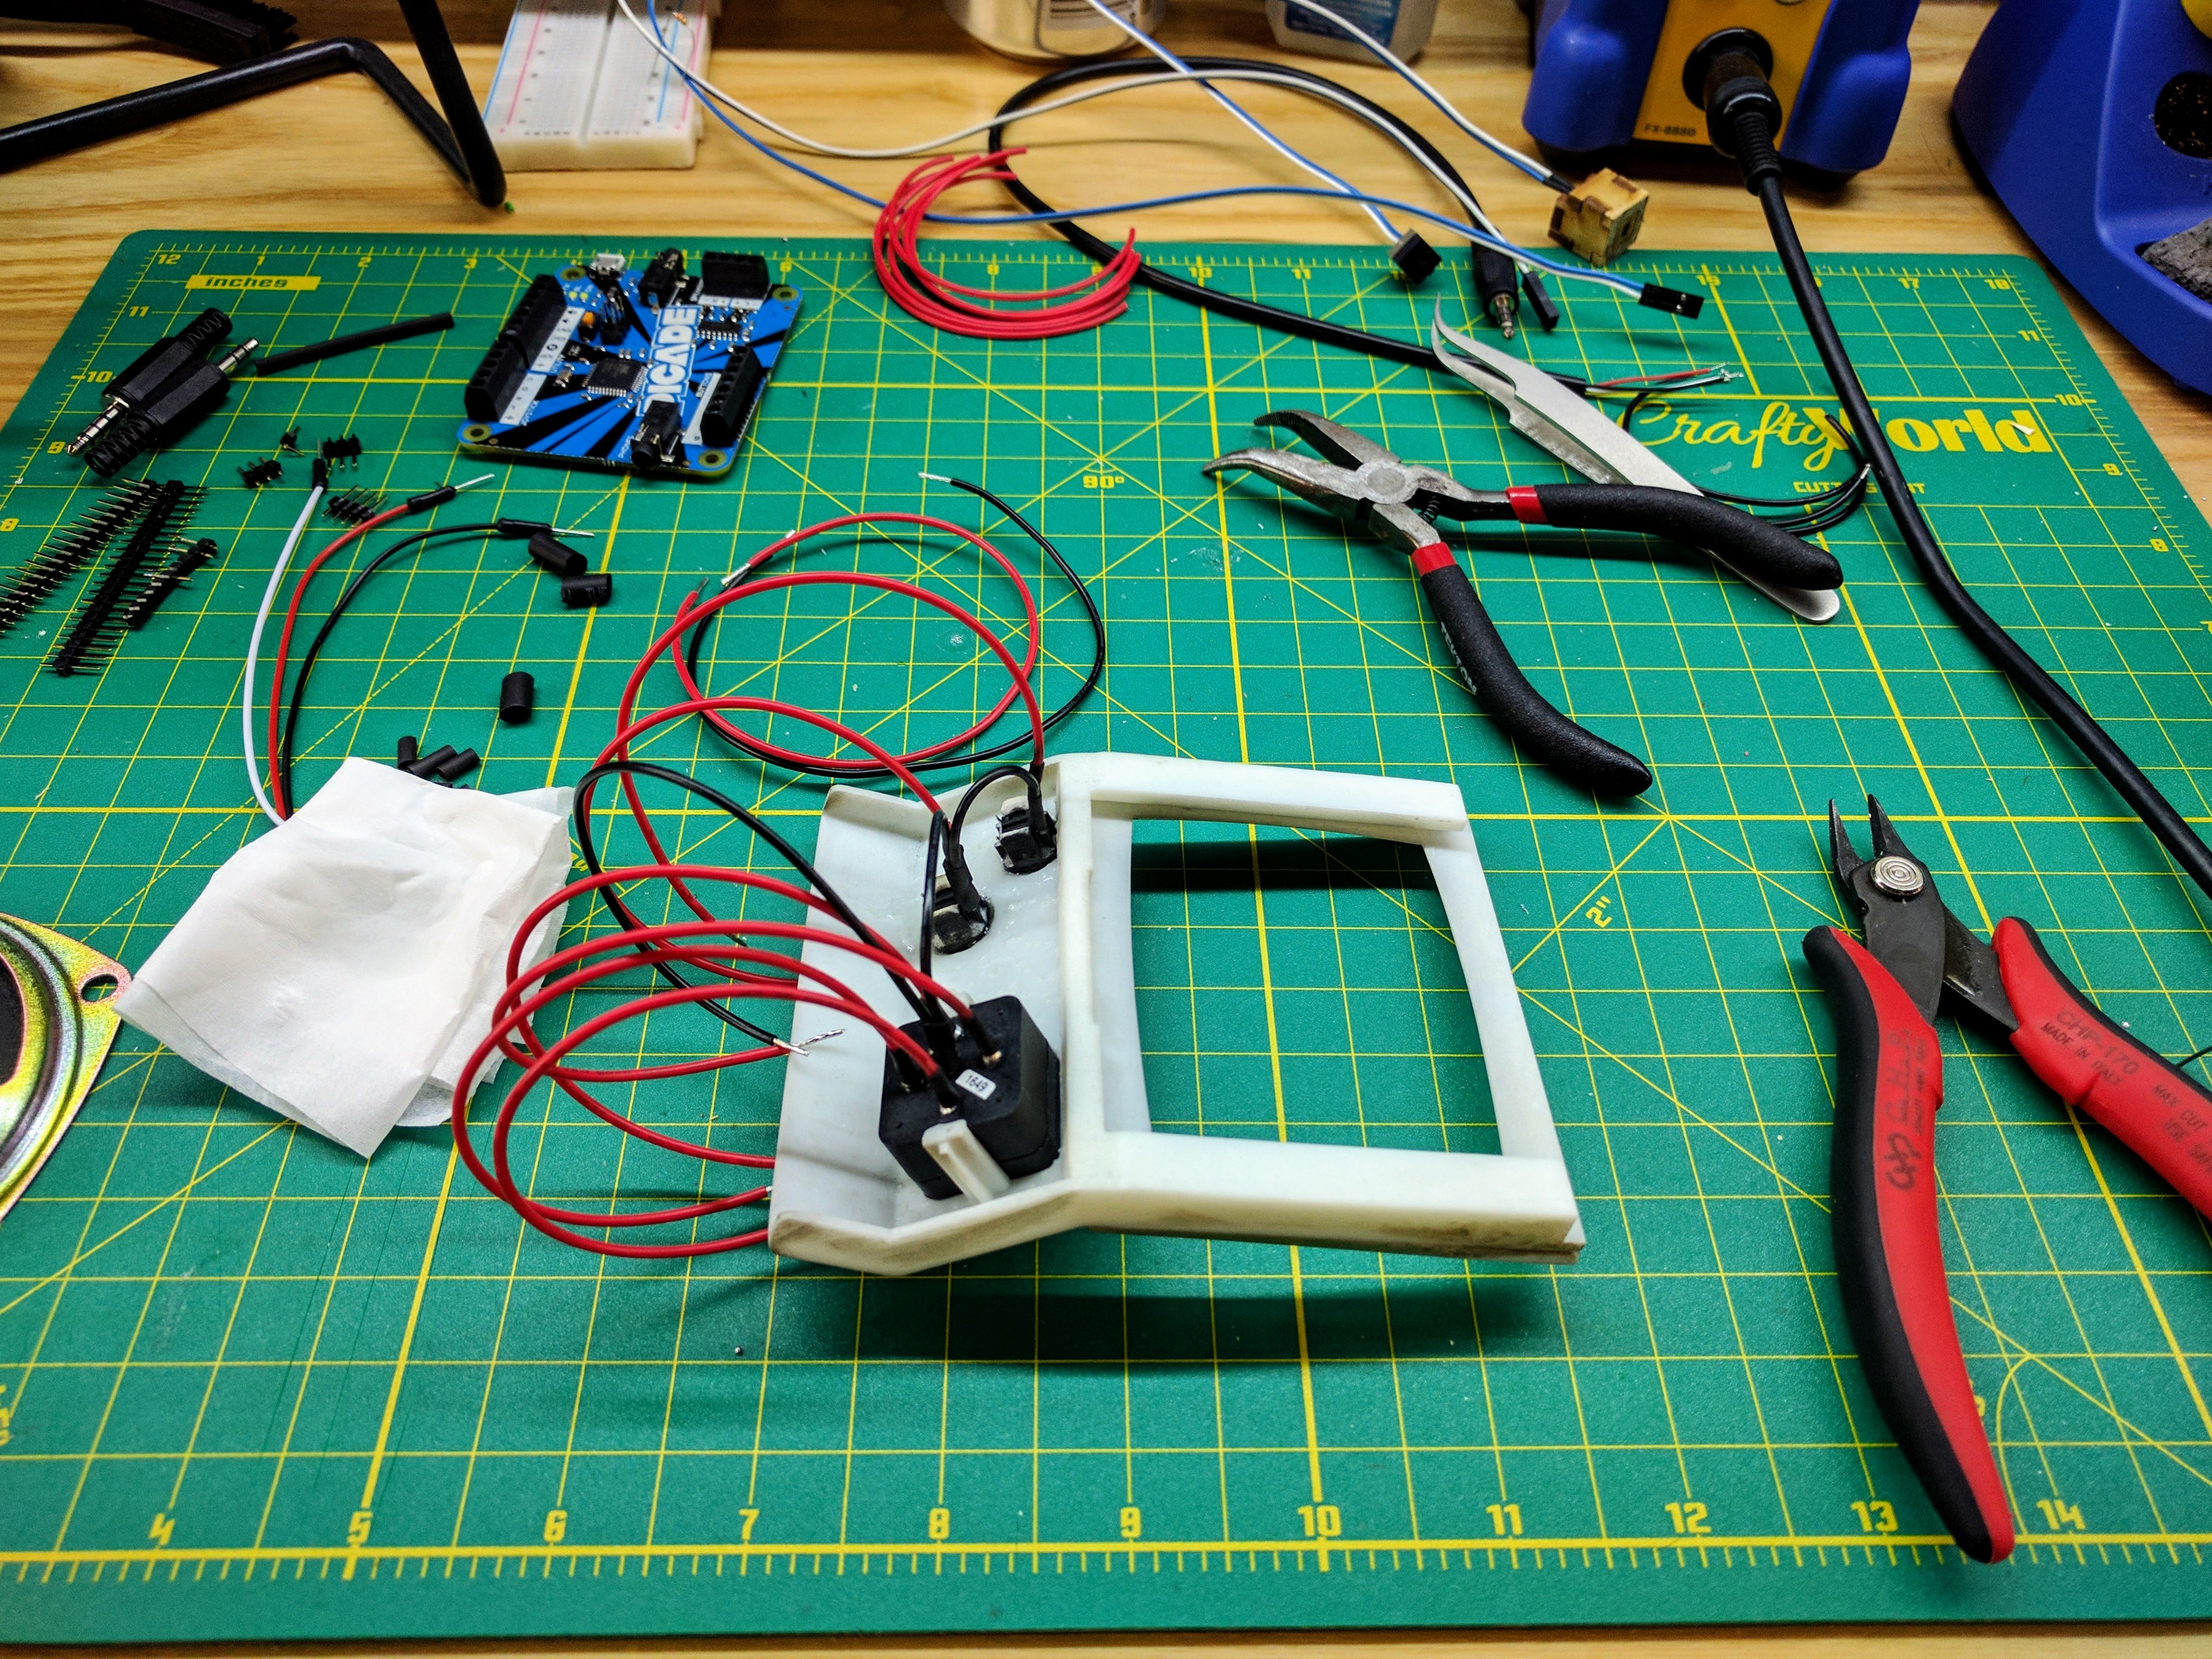
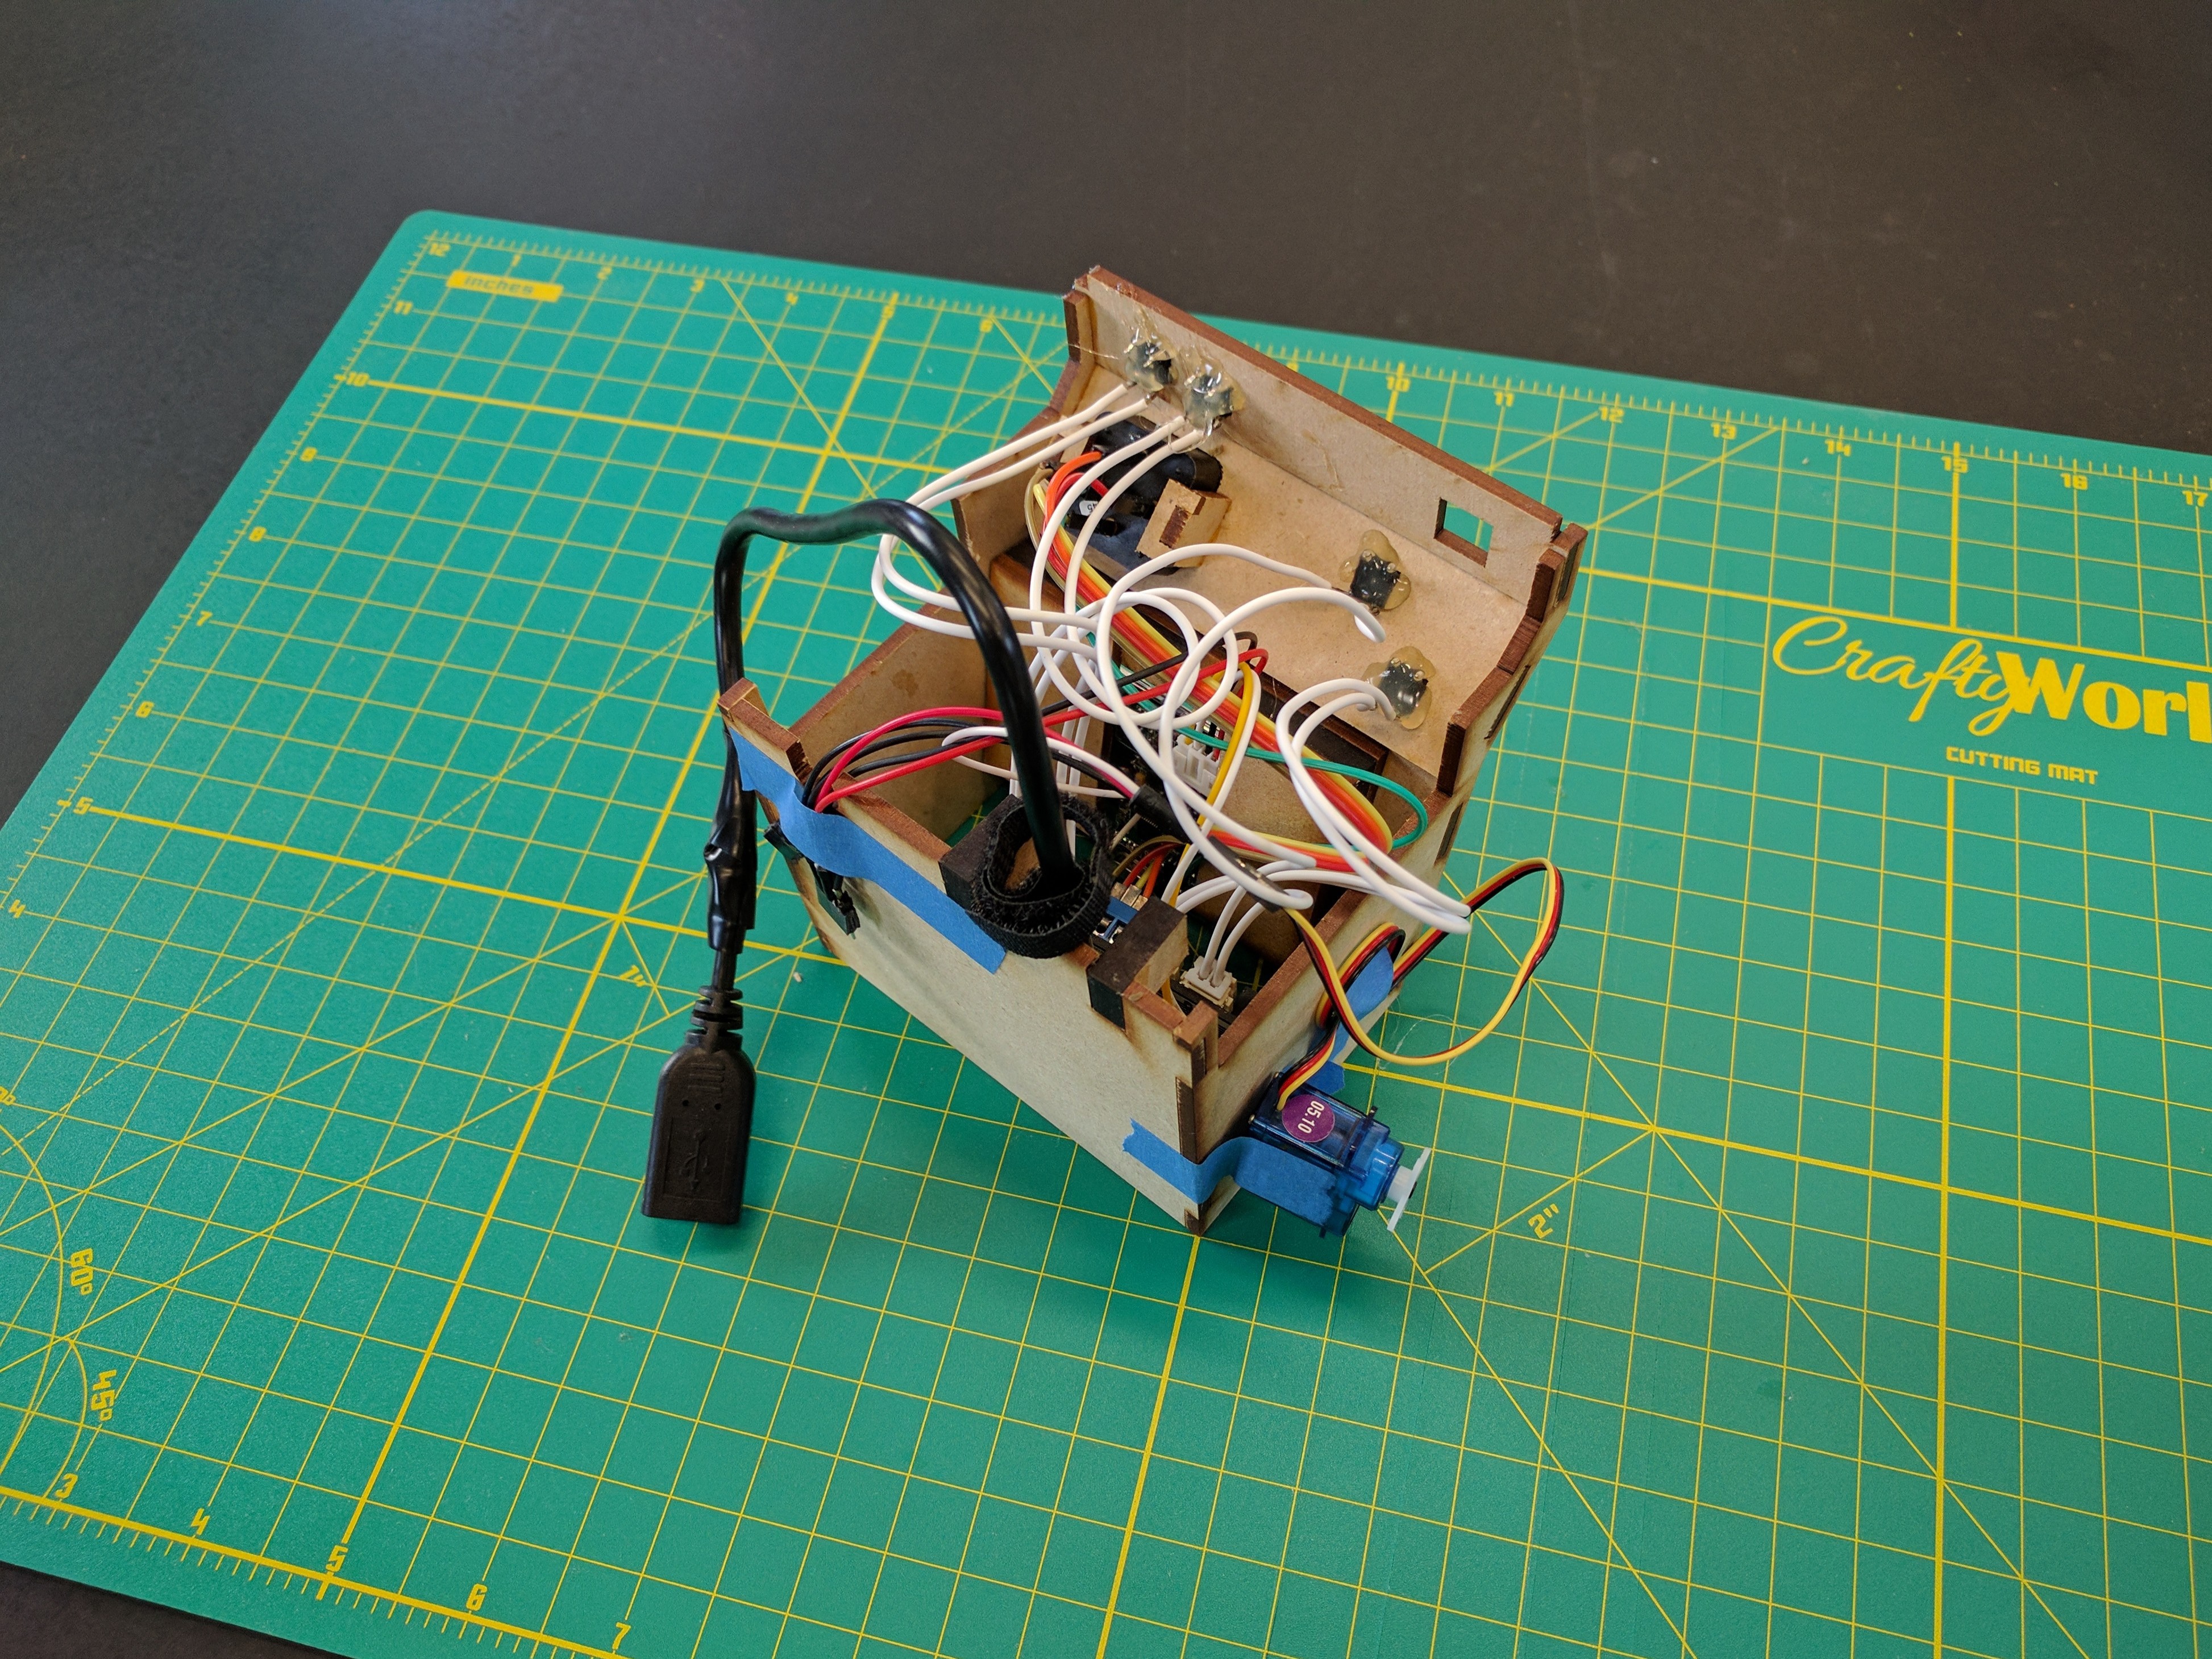
First things first, I needed to wire up the controls I'd attached to the screen bezel
using the wiring harnesses I'd cut and soldered together.![]()
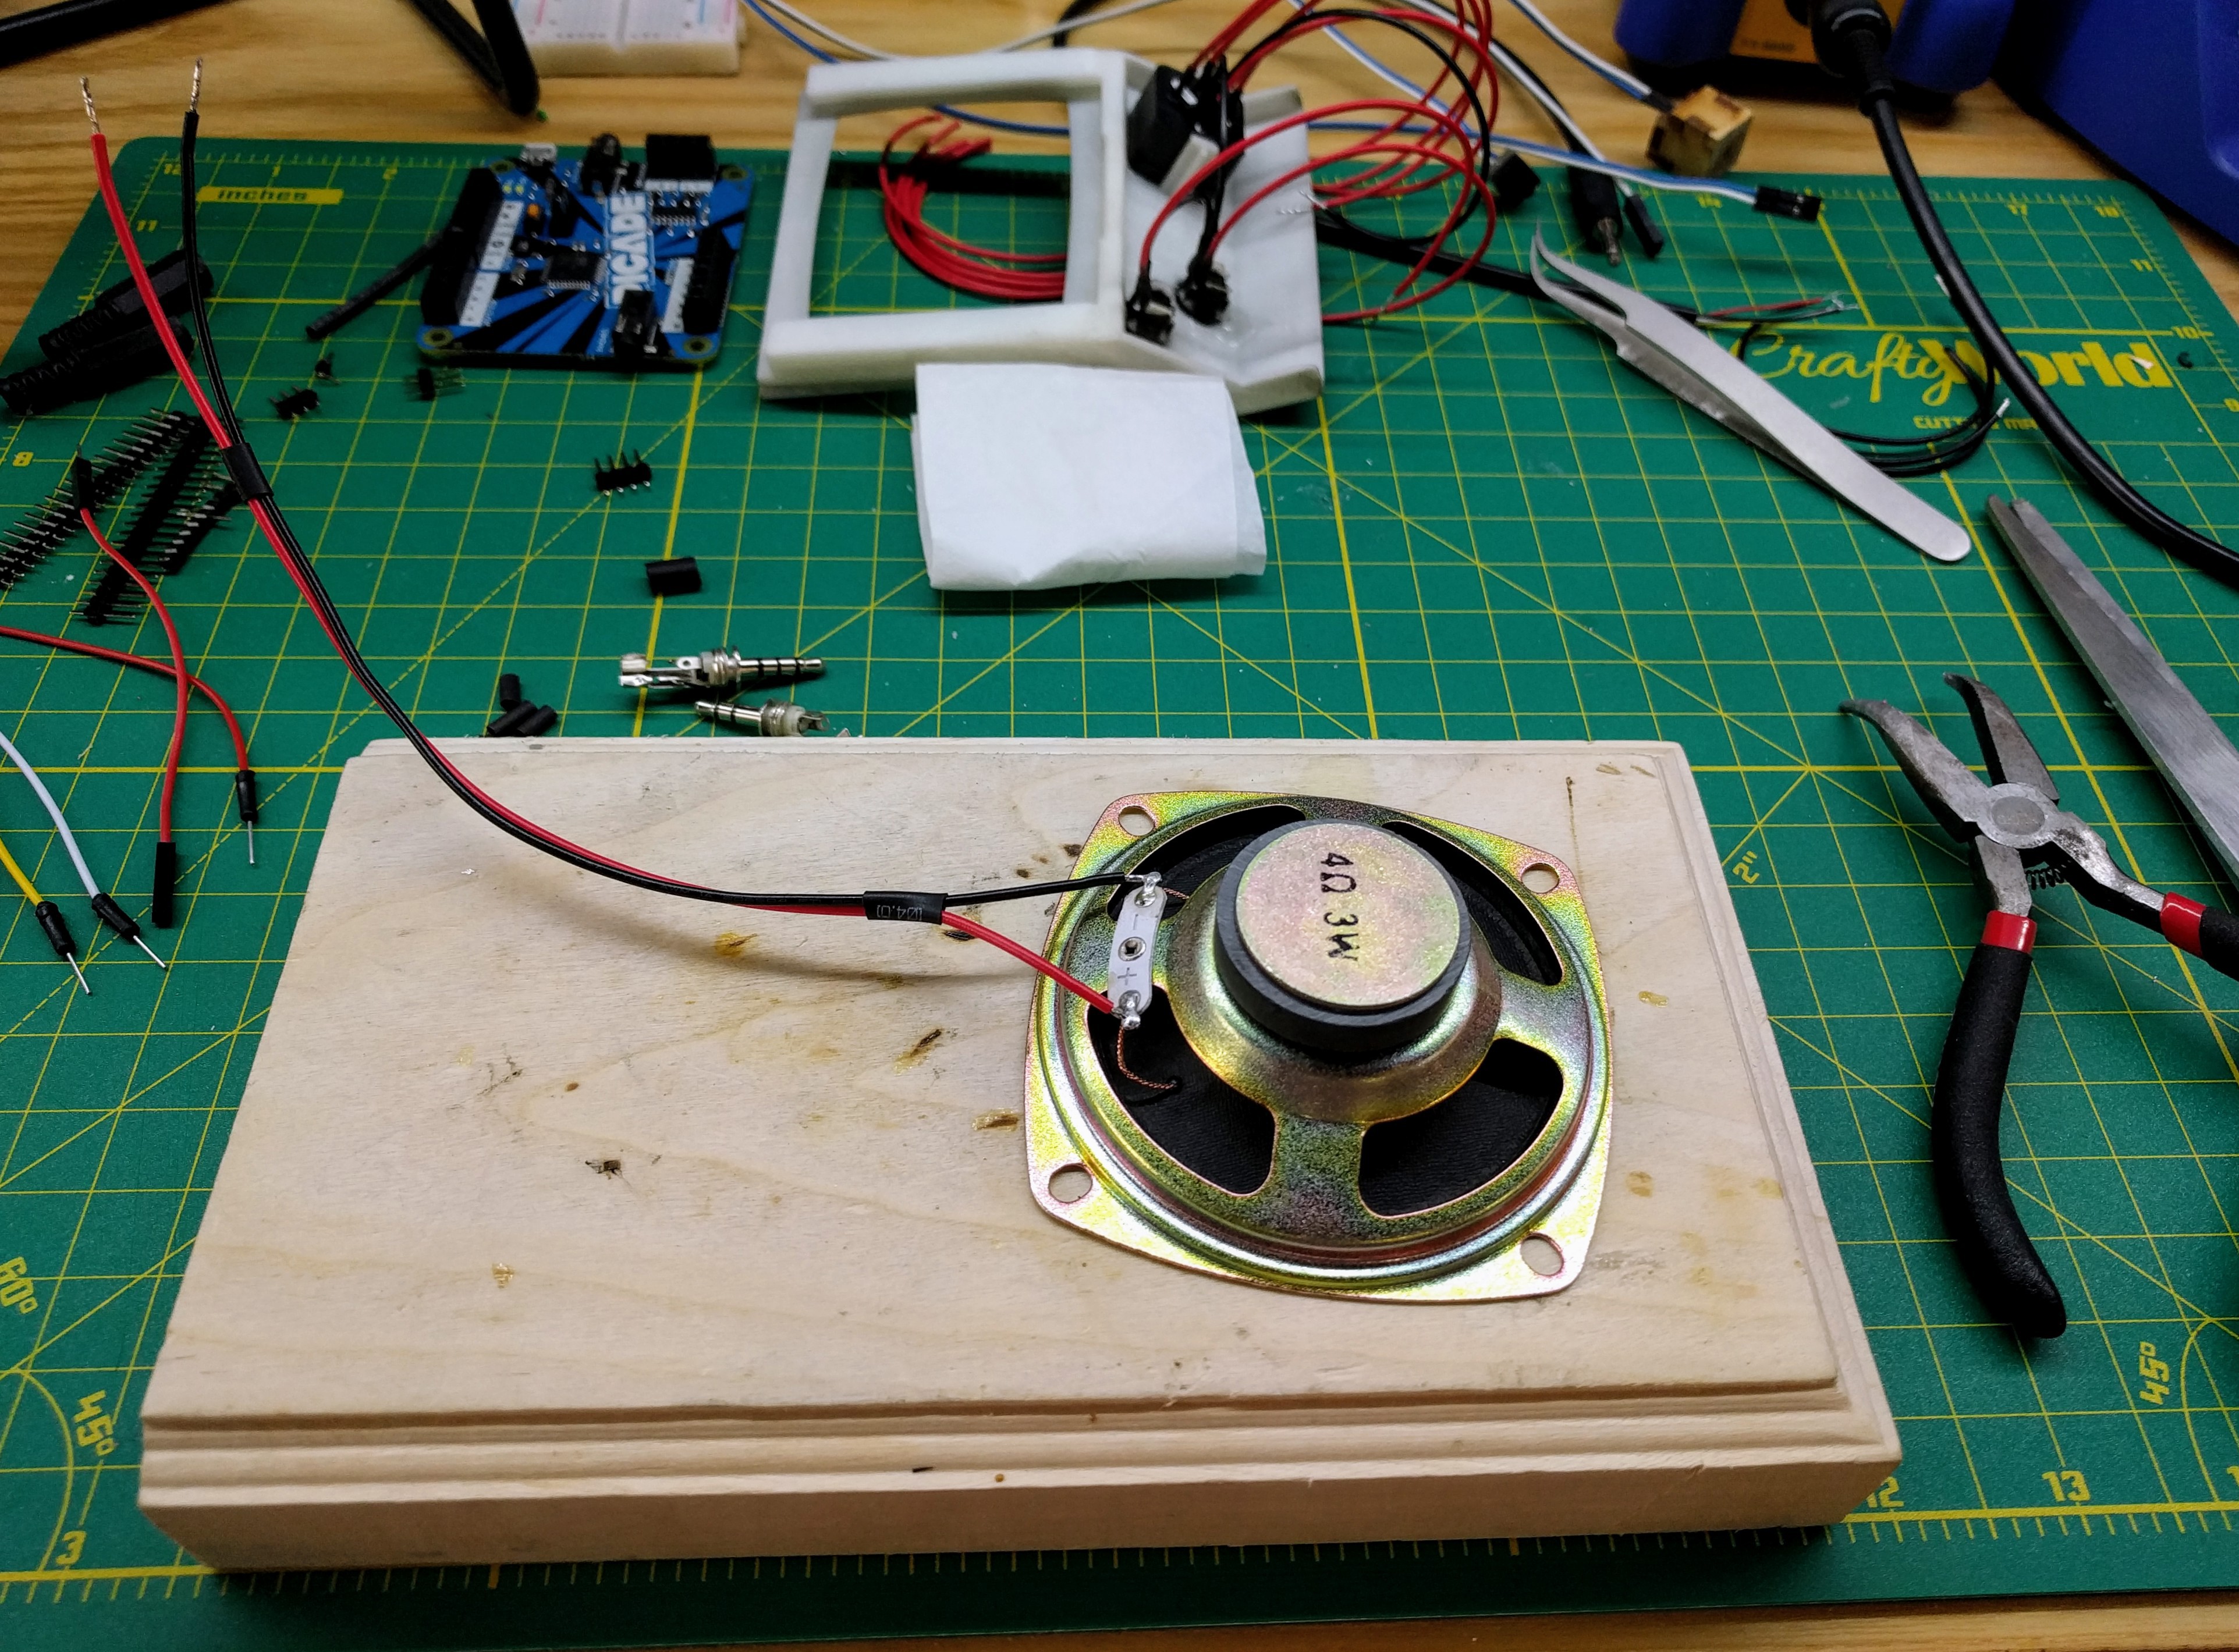
Next I needed to wire up my speaker...
![]()
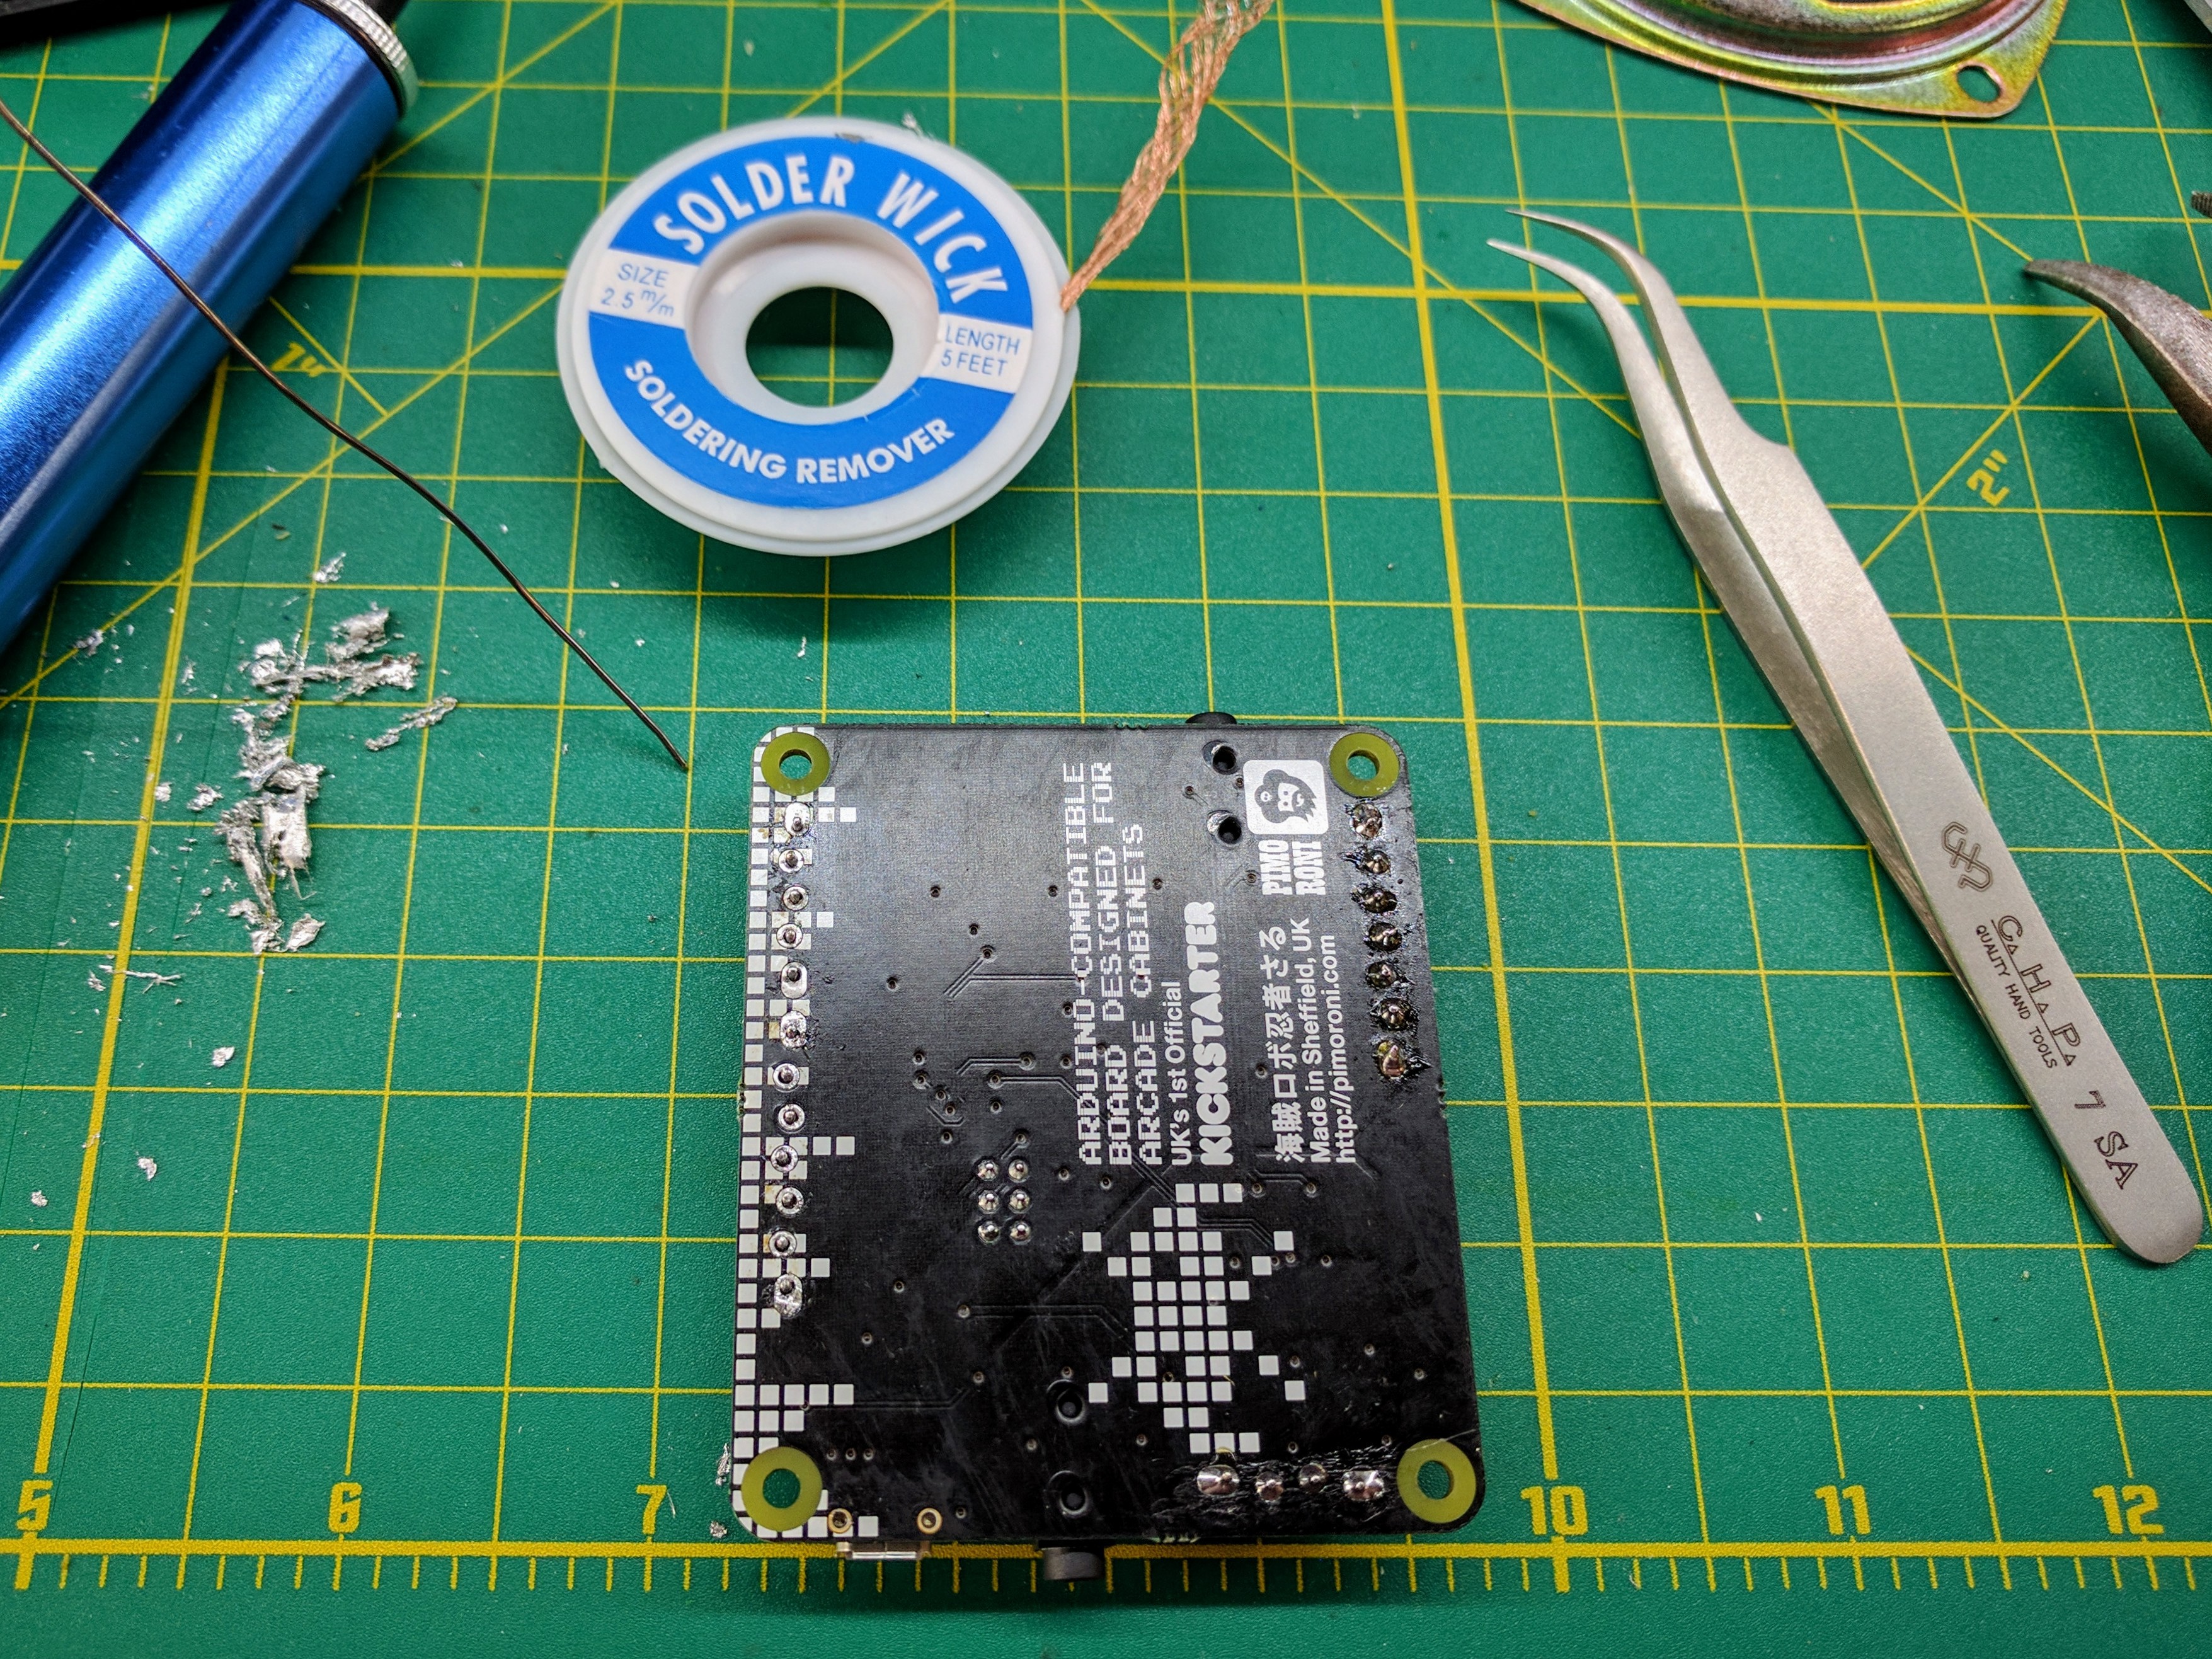
Followed by a resolder of the Picade screw terminal blocks (due to the board's placement in the cabinet, I needed to move them)...
![]()
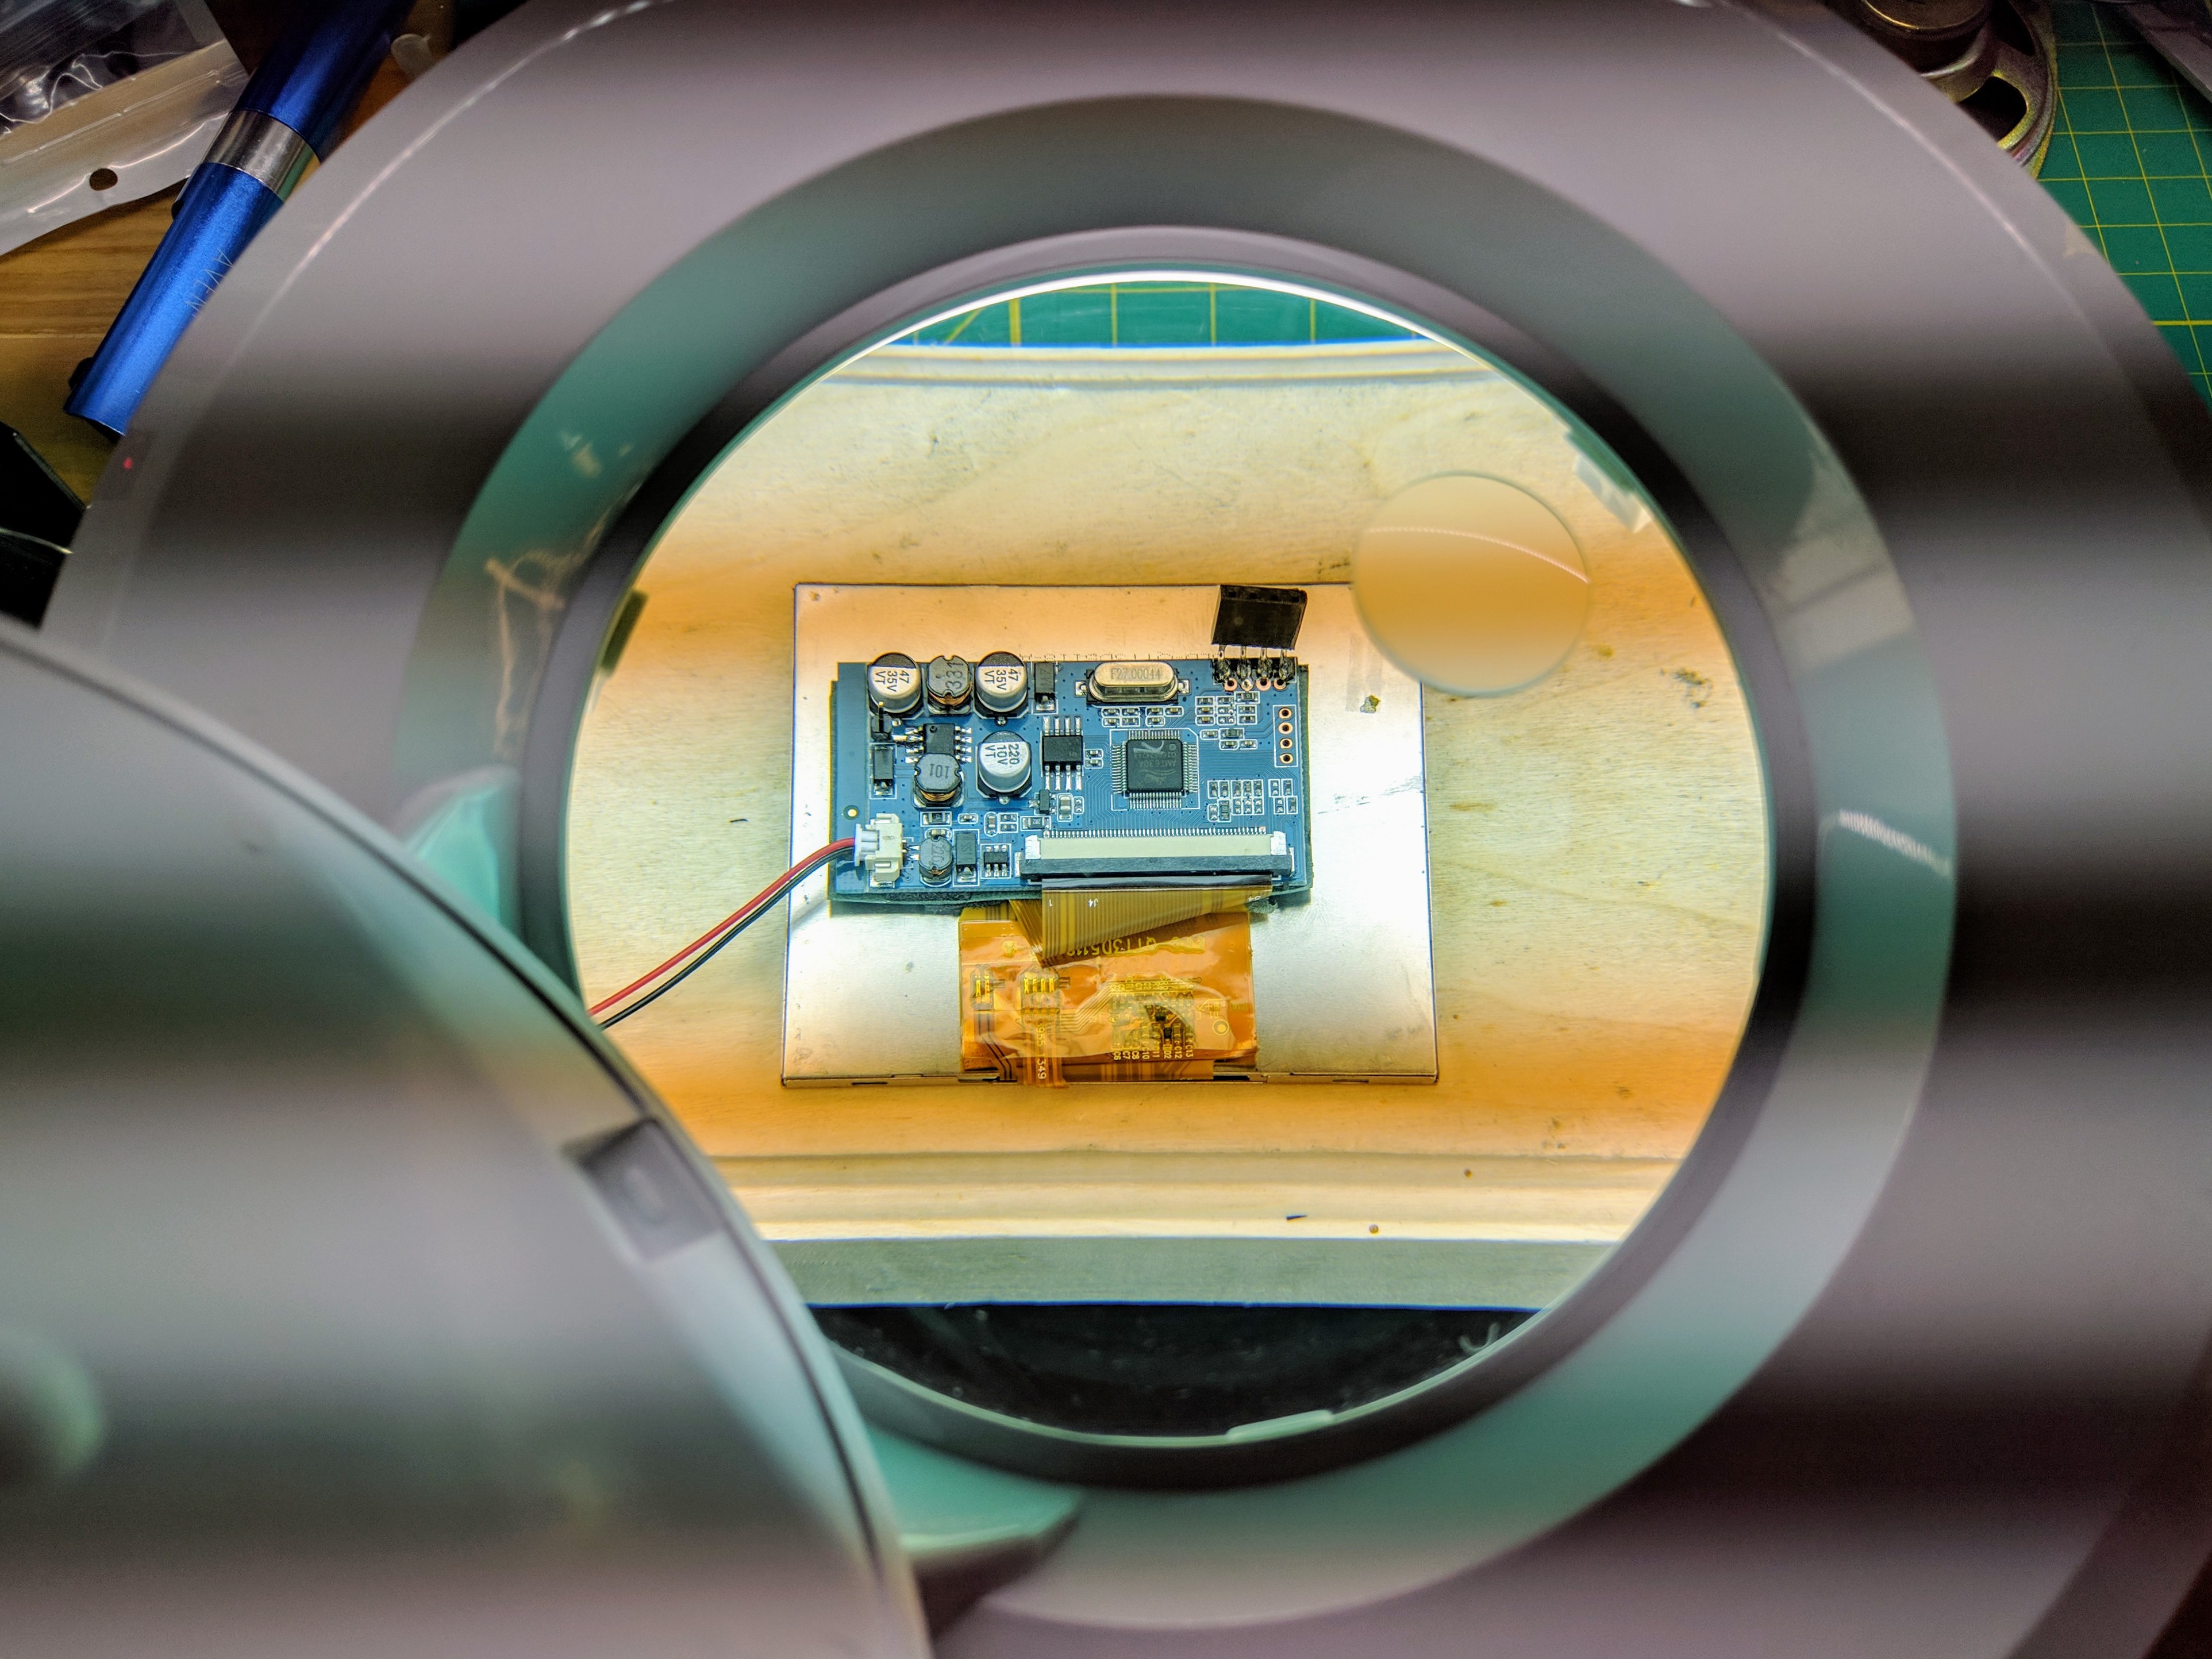
Plus a delicate screen soldering operation under magnification...
![]()
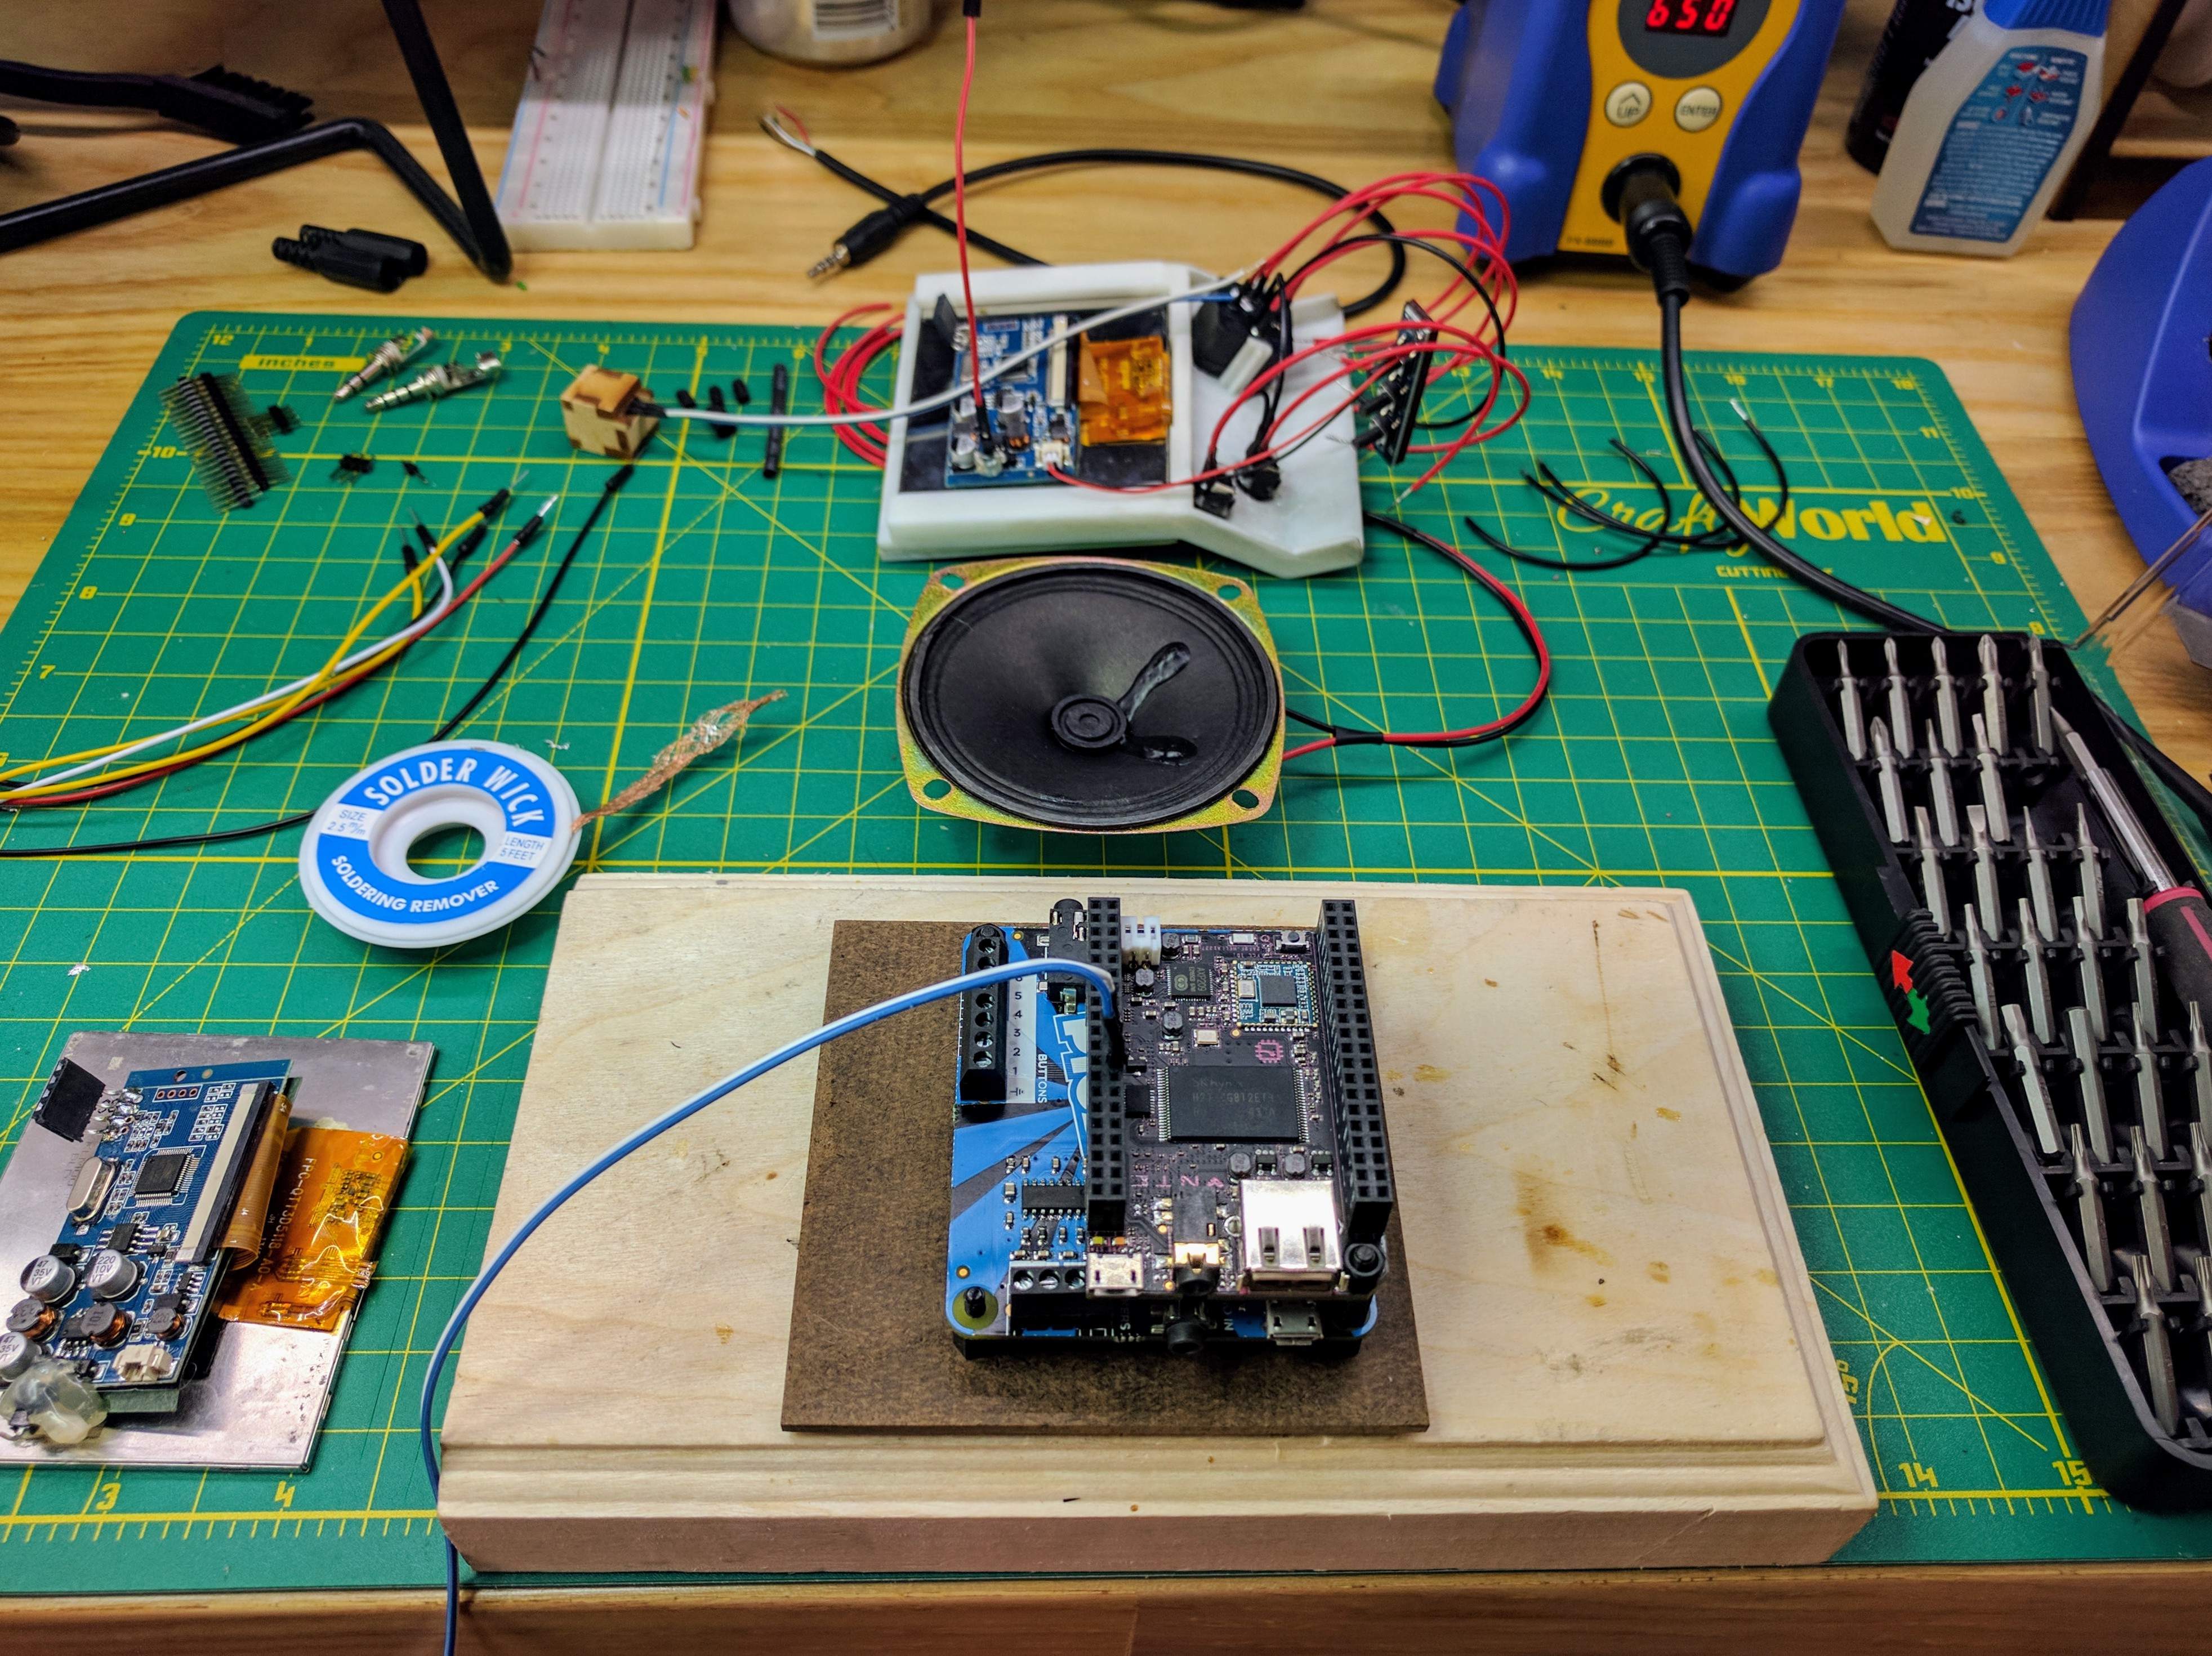
Stacking of my PCBs (a NTC C.H.I.P. and Pimoroni Picade) using nylon standouts attached to my masonite back...
![]()
![]()
Culminating in their integration into a fully assembled cabinet.
![]()
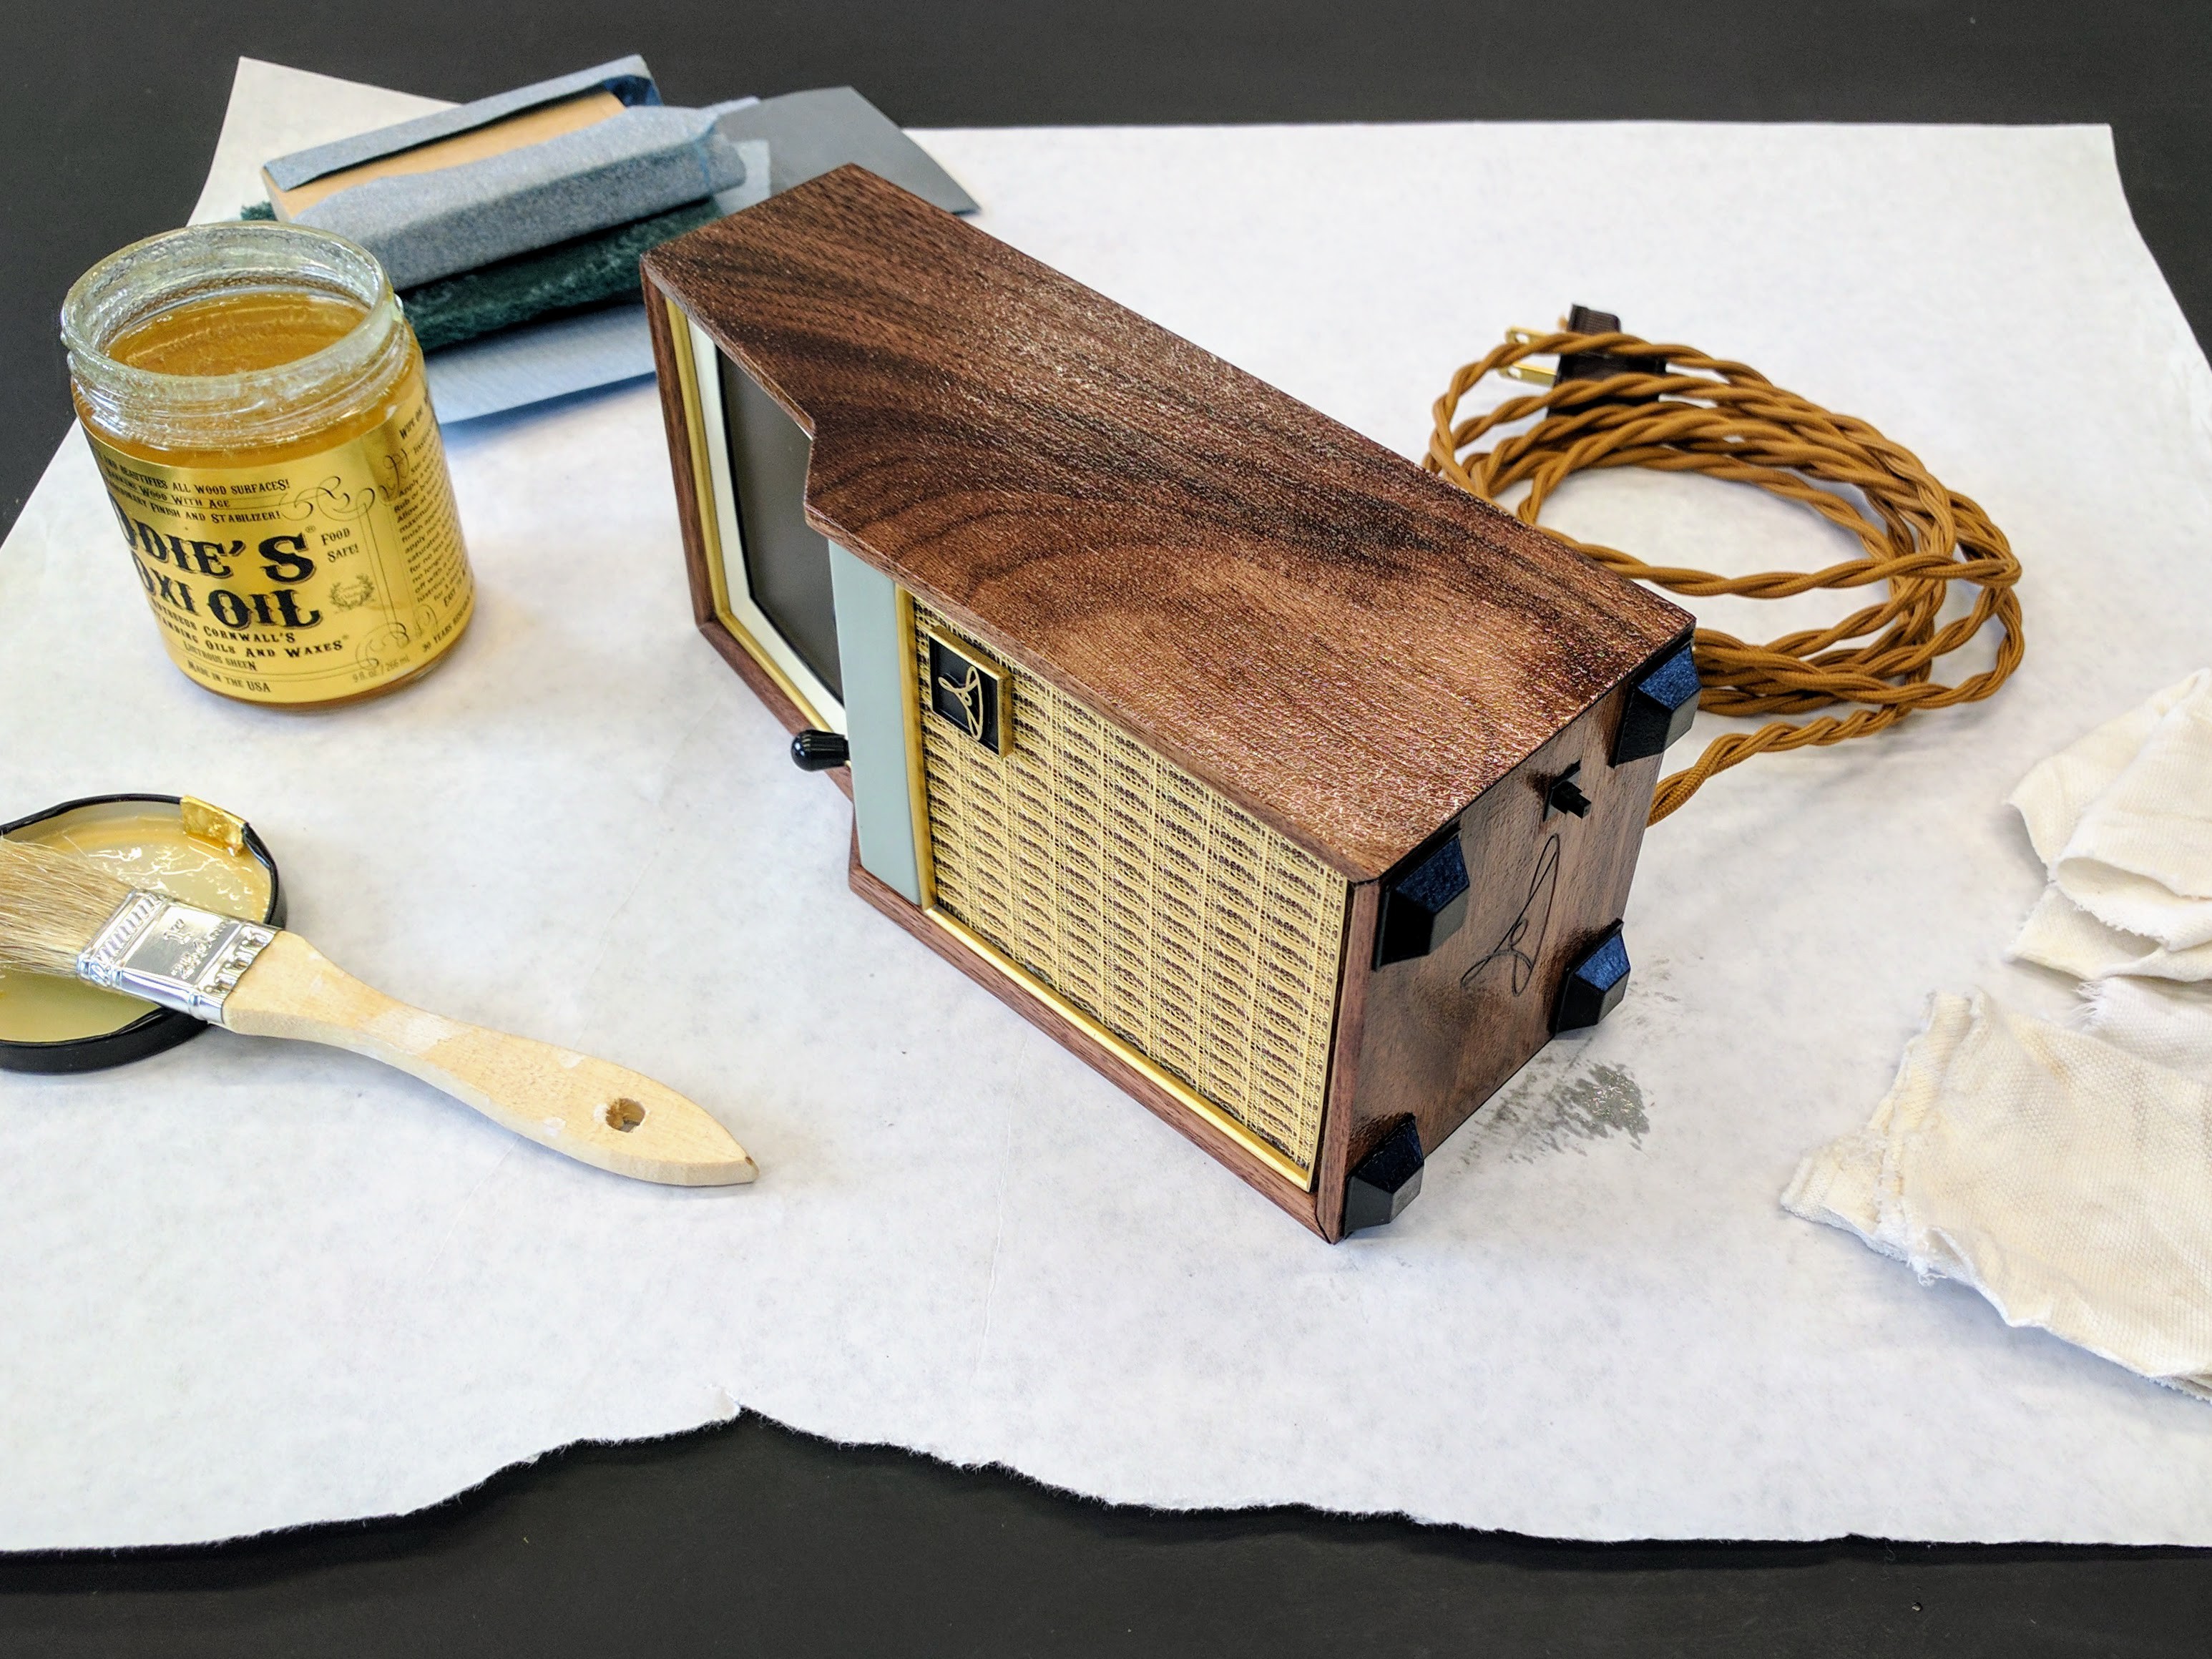
Once I'd gotten it all assembled I applied several coats of wax to the cabinet and polished it by hand using cotton rags!
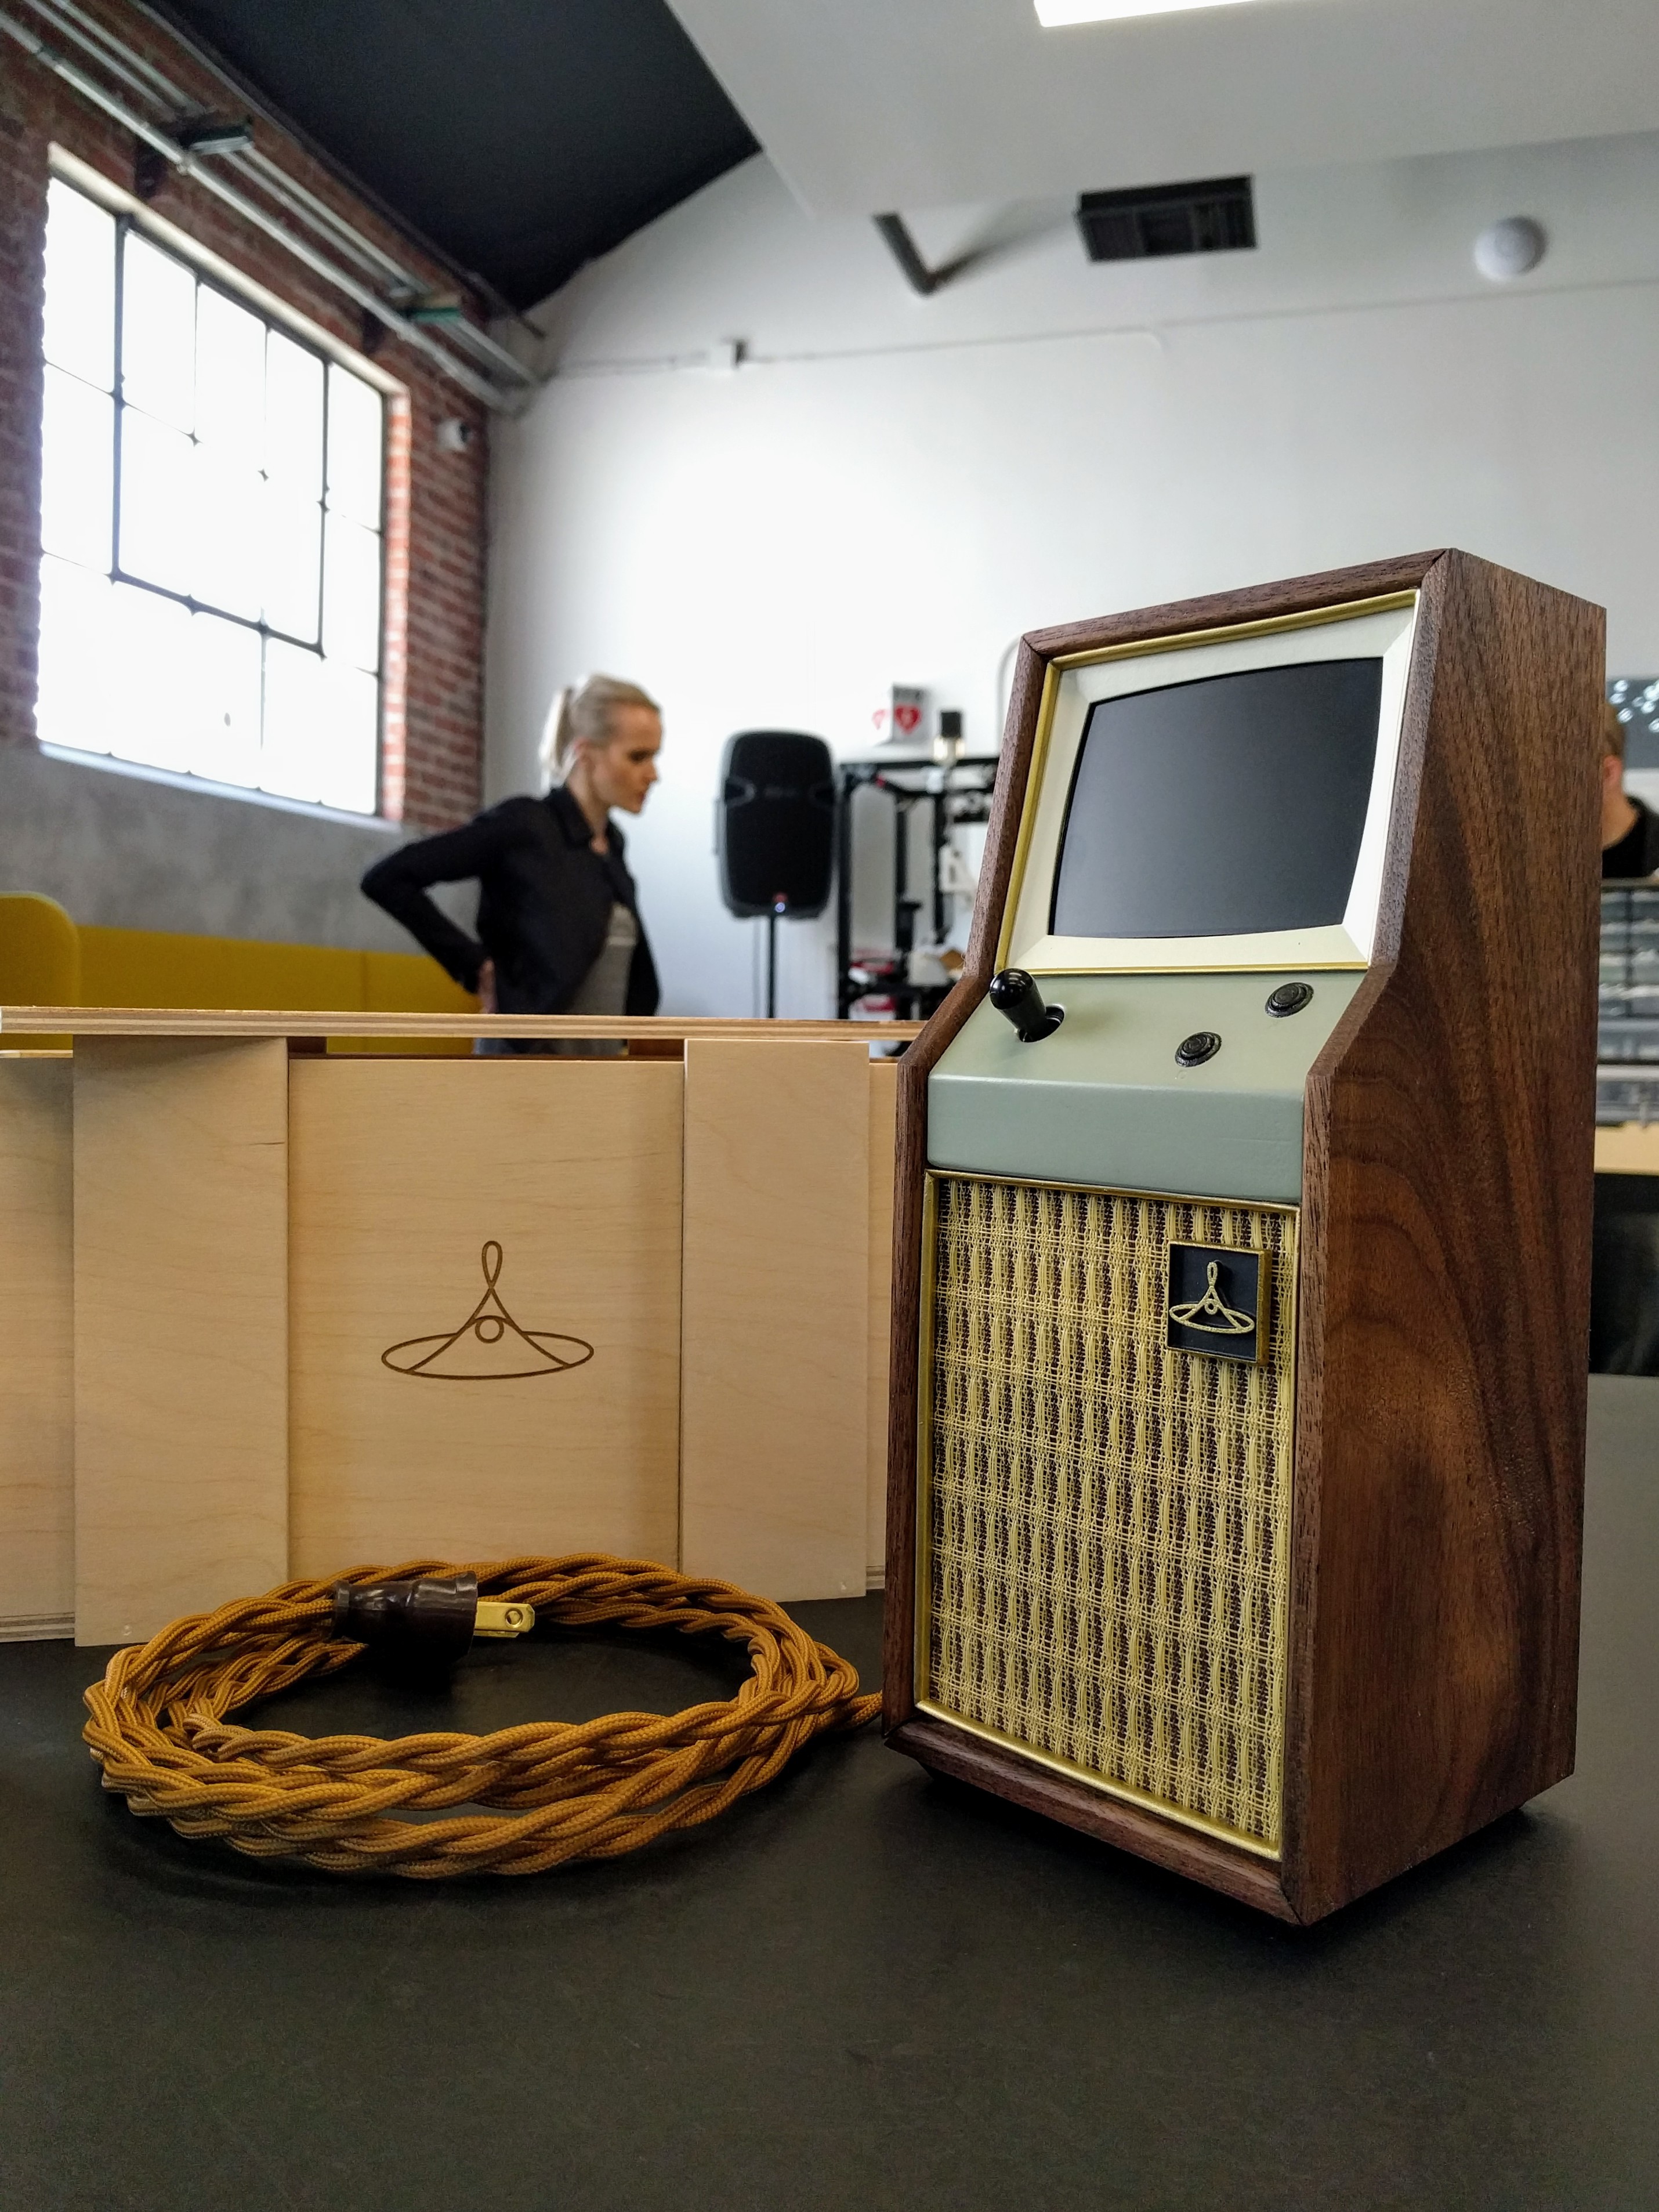
![]()
Here's another look at the fully assembled cabinet! Next steps?.. Figuring out the maze inlay, and hopefully getting a new prototype together with all of the puzzles+secret compartments integrated into it from the V.9 prototype. Hopefully we can get the funding we need to make it happen, as we're quickly running out of runway with less than a month left in the lab + the real world breathing down our necks (Mamma and Poppa have gotta eat)! Please make a pledge and share our Kickstarter if you haven't already, as we can't complete this project without your help! THANKS
-
12 - Welcome to my Crowdfunding Wonderland - May 8th - 21st
05/10/2017 at 04:15 • 0 comments![]()
A little GIF made in PICO-8 using code by Neko250!
On the eve of launching our Kickstarter campaign (please pledge at the included link, and please share the campaign on social media with family and friends using the hashtag #cotccabinet!). In addition to launching the Kickstarter I also made a crate out of MDF (pictured below next to the V.9 MDF cabinet) to give potential backers a more representative idea of what the final cabinet experience is going to look like in the final version. With all of that done, my team and I then switched gears away from the cabinet's build, and basically went into overdrive creating all the collateral we'd need for the Kickstarter campaign. We essentially spent two and a half weeks straight working on that. In that time I worked on multiple rewrites of the campaign's copy, built a marketing plan+posting calendar, and media contact list, while the team pulled together to work on the Kickstarter video (which we cut 6 times in total), and all of the other collateral associated with the campaign's launch. After close to a week pulling all nighters prepping for our launch, we were able to launch our Kickstarter at 9am PDT on Thursday May 18th thanks to monumental efforts by Josh, Stefan, and Maggie (and extra special help from Jered Gold, thanks again all!)! Launch day was a stressful day followed by 2 straight days sending press releases+pitches and promoting the campaign on Twitter, Facebook, Reddit, and LinkedIn... Below you'll find a photo of me the minute I launched the Kickstarter campaign, which should give you context for my frame of mind at that moment, totally not worried at all...
![]()
By the weekend's end on Kickstarter I'm happy to say the College of the Creatives Cabinet campaign was turned into a "Project We Love", and we'd managed to get 20 backers! Not bad, but not great either if I'm being perfectly honest from a purely monetary and total percentage of our funding goal perspective... Anywho, after a pow-wow with the team followed by feedback from various interested internet users (and trolls), we decided we needed to get a final looking cabinet done to show what exactly we were:
- Giving to backers in exchange for pledges at each level
- Giving to the targeted Cultural Influencers (you see the V.9 MDF prototype pictured below is not the final version, it's just a PROTOTYPE, it has another final form!)
With all of this in mind, I now know I need to get renders/images of the postcards, enamel pin, pocket guide, cipher coin, and final physical prototypes representing the $250 MDF cabinet and $5k hard wood and plastic cabinet with a crate done so we can show to potential backers what they're supporting! I've resolved to complete a version of the $250 MDF cabinet and the final version we plan on making a limited edition of and sending to our select group of cultural influencers by the end of May! That means lots of fast iteration and prototyping over the next 2 weeks! Keep your eyes trained here, more on that to come soon!
![]()
Oh, and one more thing! Don't miss the live stream and AMA I'll be doing to answer all of your burning questions related to the College of the Creatives Cabinet project on Friday, May 26th at 3pm! I look forward to showing you a working cabinet, answering all of your questions, and showing you the lab!
-
11 - Sooooo Close, Yet... - April 28th - Now...
05/03/2017 at 17:44 • 0 comments![]()
While I'd had success with the handful of companies I mentioned in log 09, I still fell way way WAY short of the funding goals we had set and needed to hit to execute the project as proposed. With supplies, funding, and time at the DesignLab now running short we made the executive decision at the end of April to move on to Plan B for funding, a crowdfunding campaign.
With everything above said, let me just take a moment to discuss the elephant in the room. When we first started this project, we did so with the intention of developing and executing it all in complete secrecy until its planned release (sometime in October/November of this year). In our minds, to fully take advantage of the mystery surrounding the artifact and it's call-to-action we'd established at the project's start, it needed to stay a secret until it wasn't. Dan, the Lab's Resident Engineer, liked the idea so much that he agreed to let us keep the project and it's hackaday project page a secret until it was released. I know, I know, then why are you reading about this now?.. Well, while awesome in theory, this plan was largely contingent on us receiving the aforementioned $90k in funding we needed by May 1st to fully take advantage of the DesignLab and all of the in-kind support and equipment provided to us through the lab to make the 40 cabinets we'd pitched them on (FYI, our residency ends June 30th)...
To be clear, this by no means marks the end of the project, or changes its intended/planned use. Rather, as Dan correctly suggested in the one-on-one meeting we had with him where we decided to go the crowdfunding route, surfacing the project now in this manner only benefits the project and our planned call-to-action, improving it's chances of success as more eyes will now have a chance to see it over time as we continue to develop the cabinet in public before it's release. As Dan explained to us in this meeting, the big fear he had related to our specific project while considering us for a residency at the DesignLab was the chance that this project would "pop" like a bubble when introduced to the general public, there one second, gone and forgotten the next... Essentially, he feared targeted recipients would get them, maybe open them/maybe not, and then we'd never hear from them or get the response we wanted through the project to begin with. While I don't necessarily agree with this assessment based on the fact that we're targeting a very specific group of creatives that this project authentically speaks to (eg: nerdy, thoughtful, and socially conscientious), I could never the less understand and see his point of view. The final nail in the coffin for keeping the project secret until it's release? Dan (correctly IMHO) thinks going public with a crowdfunding campaign will create some social pressure on cabinet recipients, encouraging them to 1) open the box and 2) act... and in my book this was good enough!
With crowdfunding now in our sights I've reached out to Crowd Source, Hatchfund, and Kickstarter and spoken several times to several different development specialists with each platform to get the down low. More to come on that as this portion of the project continues to develop...
fun fun fun...
-
10 - Graphical Stuff and Thangs... March 6th - Now
04/27/2017 at 07:21 • 0 comments![]()
I'm hoping to get Maggie's notes and commentary related to her work creating the project's associated ephemera when she gets a chance...
![]()
-
09 - I Got 99 Problems, and Money Could Solve Like 98 of Them - April 5th - May 8th
04/25/2017 at 05:03 • 0 comments![]()
After a month in the lab we had managed to complete our prototype and had secured our residency! Feeling lucky I decided to focus my attention on the funding we needed to complete the project as proposed. You see when we applied to the DesignLab with this project, our proposal included a 40 cabinet limited edition run, with the intention of sending these 40 cabinets to an unsolicited group of influential, nerdy and socially conscientious creatives to inspire and activate them into helping us fight the planned defunding of the NEA, NEH, and CPB by the current Presidential Administration. In total I calculated we'd need to raise about $95k to make the project as proposed. This total includes costs associated with moving from the current MDF prototype to a final model made out of our targeted build materials (hardwood and plastic), the creation of a custom printed computer board, shipping, taxes, honorariums, and the streamlining of the workflow/processes (the design, engineering play testing and finalization of the cabinet's design) as we scale-up and get ready to transition into the production of the cabinet's limited edition run through this Fall as proposed to Dan, the DesignLab's Resident Engineer.
I first started out by making a list of companies who's products I was either currently using/planning on physically using in the project, or using to create the physical artifact. Starting online (in a Google search), I tried to find articles and mentions of the companies I was targeting talking about them sponsoring projects that were art + technology and/or social-action focused. When I found an article that made sense with what we were trying to do with this project I looked for the targeted companies employees handling (usually executives of some stripe) that had a hand in the initiatives mentioned or interviewed in the article. I then turned my attention to LinkedIn specifically looking at the companies I wanted to work with while looking at roles I thought touched on what I was doing, or who's roles at the company in question made sense with our project (eg, Marketing, Business Development, and CSR type of executives), and after my initial round of research (about a week in total) I widened my search to include nonprofits, foundations, and corporations supporting initiatives and projects like ours. I also talked to and met employees at companies I'd already made contact with, and reached out to friends and mentors I knew with the intention of generating new leads. For almost a month straight I spent my time researching, crafting emails+proposals (samples of which can be found in the "files" section of the hackaday page), cold calling people, and planning+having meetings with executives I'd made contact with. Using this process I managed to contact a little under 100 different individuals, groups, corporations, and foundations!
Thanks to the hard work I put into the business development side of the project, rinsing and repeating the process above through the month of April, I was able to confirm: the ArtCenter College of Design, Epilog, Next Thing Co, Pimoroni, and Sparkfun as project partners who have all agreed to give us various kinds of support! Oh, and let's not forget SupplyFrame by extension through the DesignLab! Thanks again to Dan, the Resident Engineer, who immediately saw value in our project after I presented our foam-core to him! Dan has been an ardent proponent and supporter ever since (honest hermano, he's kind of an awesome hombre, please don't tell him I said that!), putting us in front of multiple colleagues and acquaintances we could pitch the project to ever since! We're grateful to know that the many people like him I spoke to at the companies and organizations mentioned above found value in our project and call-to-action. We are proud to call them project partners!
![]()
-
08 - Final MDF Prototype!!! - March 20th - April 4th
04/20/2017 at 23:34 • 0 comments![]()
After about a month we'd managed to get a final prototype done with all of the mechanical and electronic parts fully integrated into the MDF prototype I made pictured above (mind you this was after we literally tore down and disassembled what I thought was the final MDF prototype I had just assembled, Jean had other ideas involving a handsaw and a utility knife, results pictured below...)! Also, because we're currently using a C.H.I.P. to power the cabinet, and there aren't a ton of projects out there that use the C.H.I.P. to power game machines like this, I used a Pimoroni Picade PCB to get our cabinet's controls to connect and register control input on the C.H.I.P.
![]()
Next on the list of things to focus on was the recipient's experience while using the cabinet. We needed to make the prototype's hardware function more like an appliance. Top of that list are the following items: hiding linux's boot-up chatter on the cabinet's screen at start, getting the cabinet to boot directly into PICO-8 followed by a specific game, getting PICO-8 to work in full-screen mode, and getting the cabinet to go into a shutdown sequence when it's unplugged from an outlet to avoid corrupting of our software package. For the record, I intend to send this artifact to a variety of users, some from very technical backgrounds, others not. I need to make sure the cabinet experience is as frictionless and easy to use as possible given the mix of people we're sending them to. First up, I needed to get the hardware to autostart straight into PICO-8 like a NES game system would with a cart inserted into it. Looking around on the NTC BBS I found this shell script and installation instructional that user Xerxes Rånby created that makes the C.H.I.P. auto start straight into PICO-8, and implemented it in my prototype using his instructions.
Beyond the user experience related to boot ups, I next needed to make the artifact as hard as possible to break. With the autostart problem resolved, and the system immediately booting inot PICO-8, I now needed to resolve power shut downs on power disconnects to avoid corrupting my software package. This problem is not resolvable with software alone, and requires a hardware element that can hold a charge while the C.H.I.P. goes through its shutdown sequence. Thankfully the C.H.I.P. has a power management package and JST port I was able to use to plug in a teeny tiny battery, while a piece of software handles the shutdown sequence after a power disconnect! After a little more research on the NTC BBS I found this excellent little program and instructional made by user Steve Fords. Using Nano I edited his config file to initiate a shutdown when power was disconnected and after the little 3.7v 150mAh Lithium Ion Polymer Battery connected to the C.H.I.P. registered a 99% or less charge (which given the load it was driving is near instantaneous). None of this again would have been possible without John Edgar Park's generous advice and pointed questions/critiques via the countless emails we exchanged as I developed this portion of the project! He even came by the DesignLab to critique the V9 MDF prototype in person after I had finished my V9 prototype! All advice that I plan to put to good use on the next version of the cabinet!!! XD
-
07 - Victory is OURS! - March 20th
04/20/2017 at 22:07 • 0 comments![]()
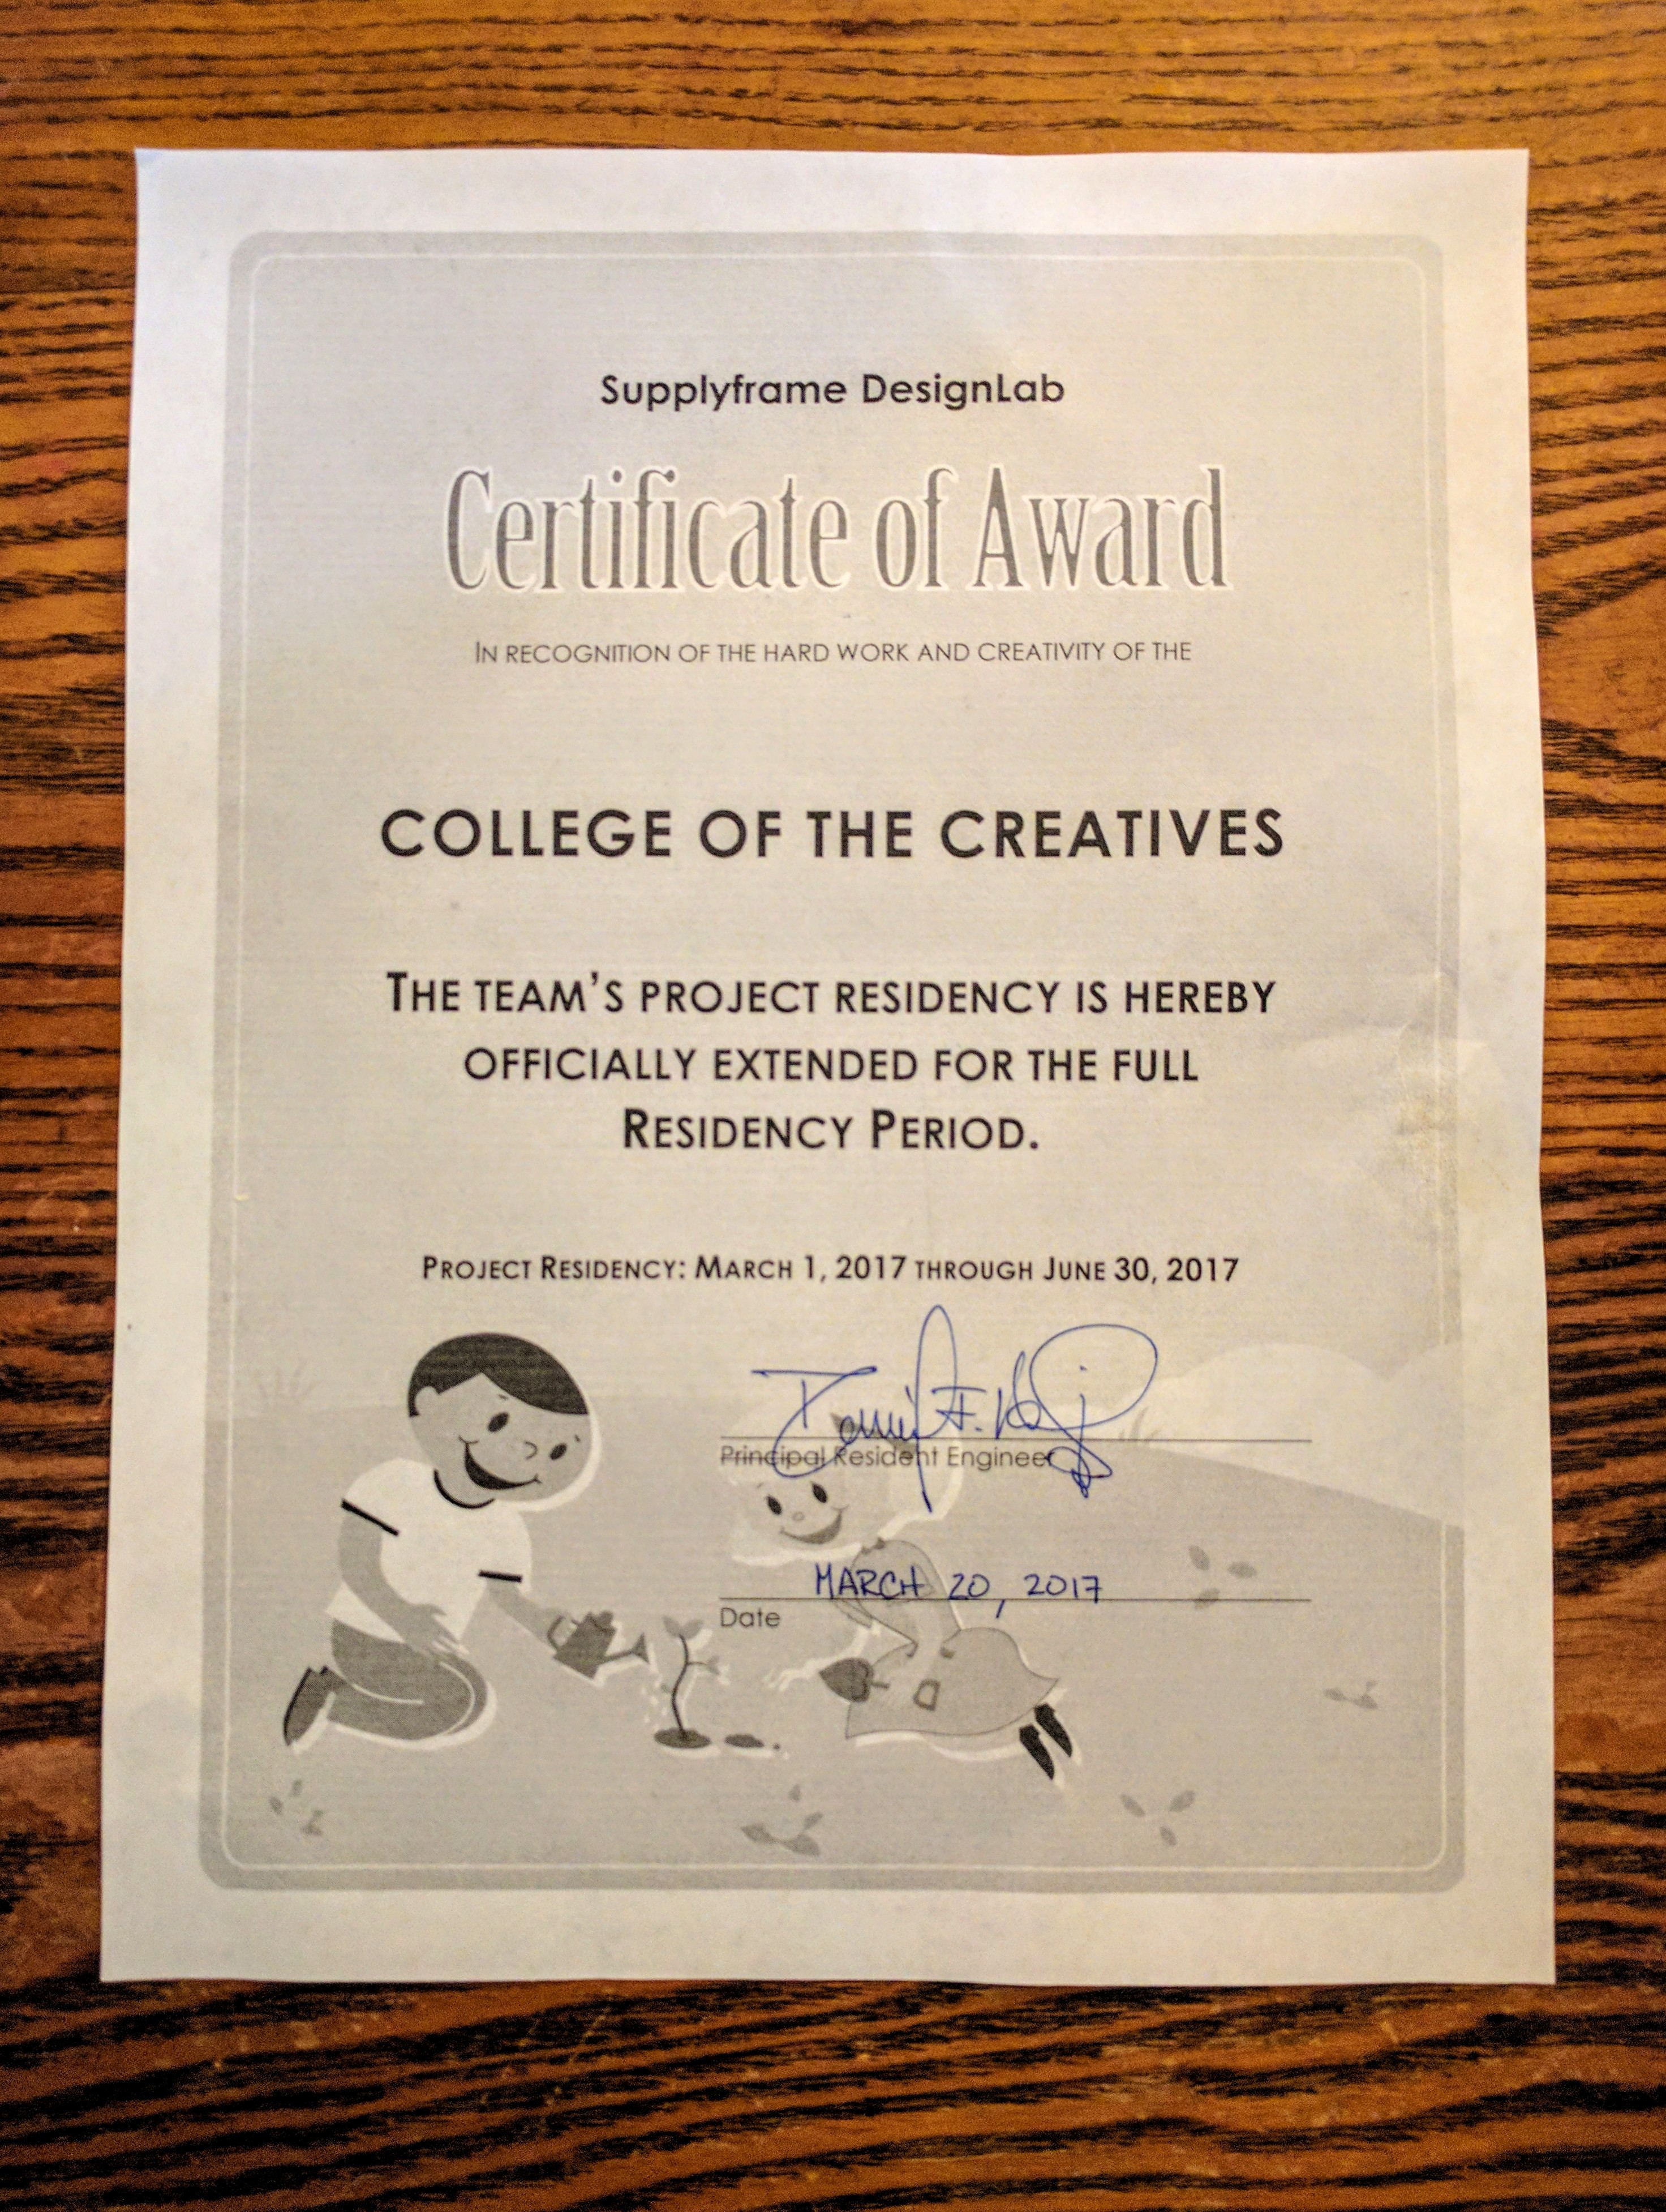
After 3 weeks of sweating our fate at the Lab, Dan (the DesignLab's Resident Engineer) surprised us today and gave us this certificate he made for us! Thanks to our hard work and effort put into this project he's extended our residency through the 30th of June! As of the 20th of March we're OFFICIAL, and like the rest of the residents currently in the Lab here to stay!
![]()
-
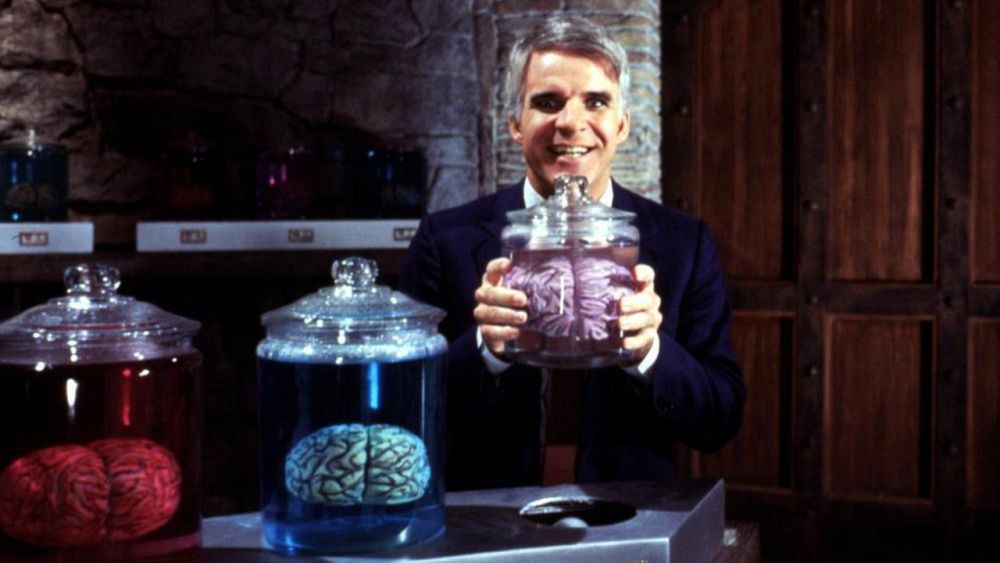
06 - "With such a specimen for a body, all we need now is an equally magnificant brain" - March 3rd - 19th
04/19/2017 at 00:46 • 0 comments![]()
Much like Frankenstein's Monster, our little monster now needed a brain!
![]()
With the Mechanical systems more or less worked out and integrated into a near final cabinet prototype made out of MDF, I now needed to connect and put the cabinet's targeted electronic components together to ensure they all worked in unison as proposed to prove to Dan we deserved to stay in the DesignLab! Thankfully Bernie and Jean had been simultaneously working on this front while I continued to plug away at the cabinet's body! Using a RPi 3 and RPi Zero W as our test platforms the guys set about getting all of the components working together.
First things first we needed to get I/O working on a RPi running PICO-8. Using a Adafruit Arcade Bonnet and RPi 3, Bernie wired it all up and got it all working together.
Bernie then got the controls connected to the the RPi 3 to control the servo and LED using PICO-8's ability to write out to the RPi's I/O!
Next Jean took the components from the breadboarded RPi 3 Bernie had been working on (above), and migrated it all over to a Raspberry Pi Zero W, incorporating it all into the "hat" I'd made for the V7 MDF prototype (pictured below).
![]()
![]()
With all of the components now connected and working with a RPi, we then moved it all over to the Next Thing Co. C.H.I.P. (a $9 single-board computer like the RPi that runs Linux). We did all of this in this order because Bernie was more familiar with the RPi and wanted to make sure we could get PICO-8 to do what we wanted (mainly actuate a servo and blink an LED) , and because the C.H.I.P. has all of the things we need to make the cabinet function as intended at a lower price point than a RPi Zero (BTW, for the record, we formally started developing this project before the announcement and launch of the Zero W). As a backer of Next Thing Co's PocketC.H.I.P. Kickstarter at this point I was personally more familiar with it, and knew it had everything I needed to make the experience I wanted to make, In all honesty I specifically backed this campaign because I wanted to:
- Buy an inexpensive single-board computer running Linux I could use to familiarize myself with Linux and the command line
- Teach myself to code
- Use the C.H.I.P. to make this project!
Side bar and quick note on the surprise announcement by Next Thing Co to include Lexaloffle's PICO-8 on all PocketC.H.I.P.s just before its launch!...
About a month before Kickstarter backer perks fulfillment started, Next Thing Co. announced their partnership with Lexaloffle to include PICO-8 on all of their PocketC.H.I.P.s. At the time I was already looking at PICO-8 as a solution to make my interface/game for the experience on this project. Talk about a killer app for the C.H.I.P.! For those of you not in the know let me just take this moment to tell you all about PICO-8.
PICO-8 is a virtual console for making, sharing and playing tiny games and computer programs (think of it as a game console that runs on Windows, OSX, Linux, Raspberry Pi's, and in the browser with the equivocal graphical power of the classic NES). PICO-8 also has inbuilt tools for editing code, music, sound, sprites, maps built right into its virtual console (meaning a novice like me can learn to code and make games by just tweaking other's premade games!). PICO-8 cartridges can also be saved in a special .png format and sent directly to other users, shared via an online cart player, or exported to stand-alone HTML5 (again AWESOME, essentially 'carts', what the community affectionately calls their games, can be directly sent to anyone with a modern browser and played using only HTML5)! There are literally hundreds of 'carts' currently available on the Lexaloffle BBS [a vibrant online community that has popped up around PICO-8 since it's release], all made by a diverse group of hobbyist, tinkerers, and developers who are making every type of game imaginable, from classic game reproductions to their own new original games and experiments! Further driving the activity on the PICO-8 community is the program's developer, ZEP, who can often be found hosting online 'Jams' [what the community colloquially calls week long hackathons]. During a 'Jam' community members are asked to create new games based on a theme or gameplay mechanic. If you couldn't tell at this point, I'm a HUGE fan of both the C.H.I.P. and PICO-8, as they both fall into the "open, inexpensive/free, easily accessible/low entry point and available for everyone to use technology" category I'm super fond of and mentioned in this project's detail section!Unlike the RPi Zero, the C.H.I.P. has inbuilt bluetooth+WiFi, an integrated power management package+JST port that can connect to and charge a battery (which we planned on using to prevent software corrupting shutdowns caused by power disconnects), inbuilt storage, and a included software license to Lexaloffle's Pico-8 software. Taken together all of these inclusions quickly add up when buying them separately with the intention of adding them to a RPi Zero, bringing their equivalent price way over the cost of a C.H.I.P. alone. With all of that said Jean and I then switched our focus to the C.H.I.P., and quickly integrated it into the a newer version of the cabinet's hat we'd designed and built.
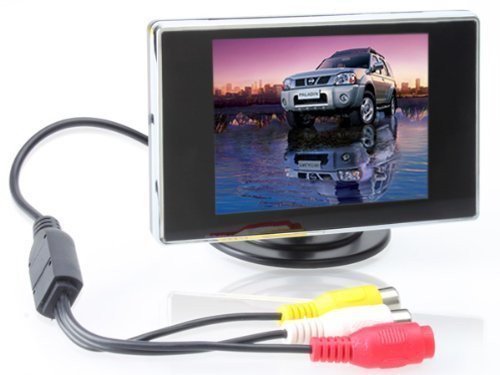
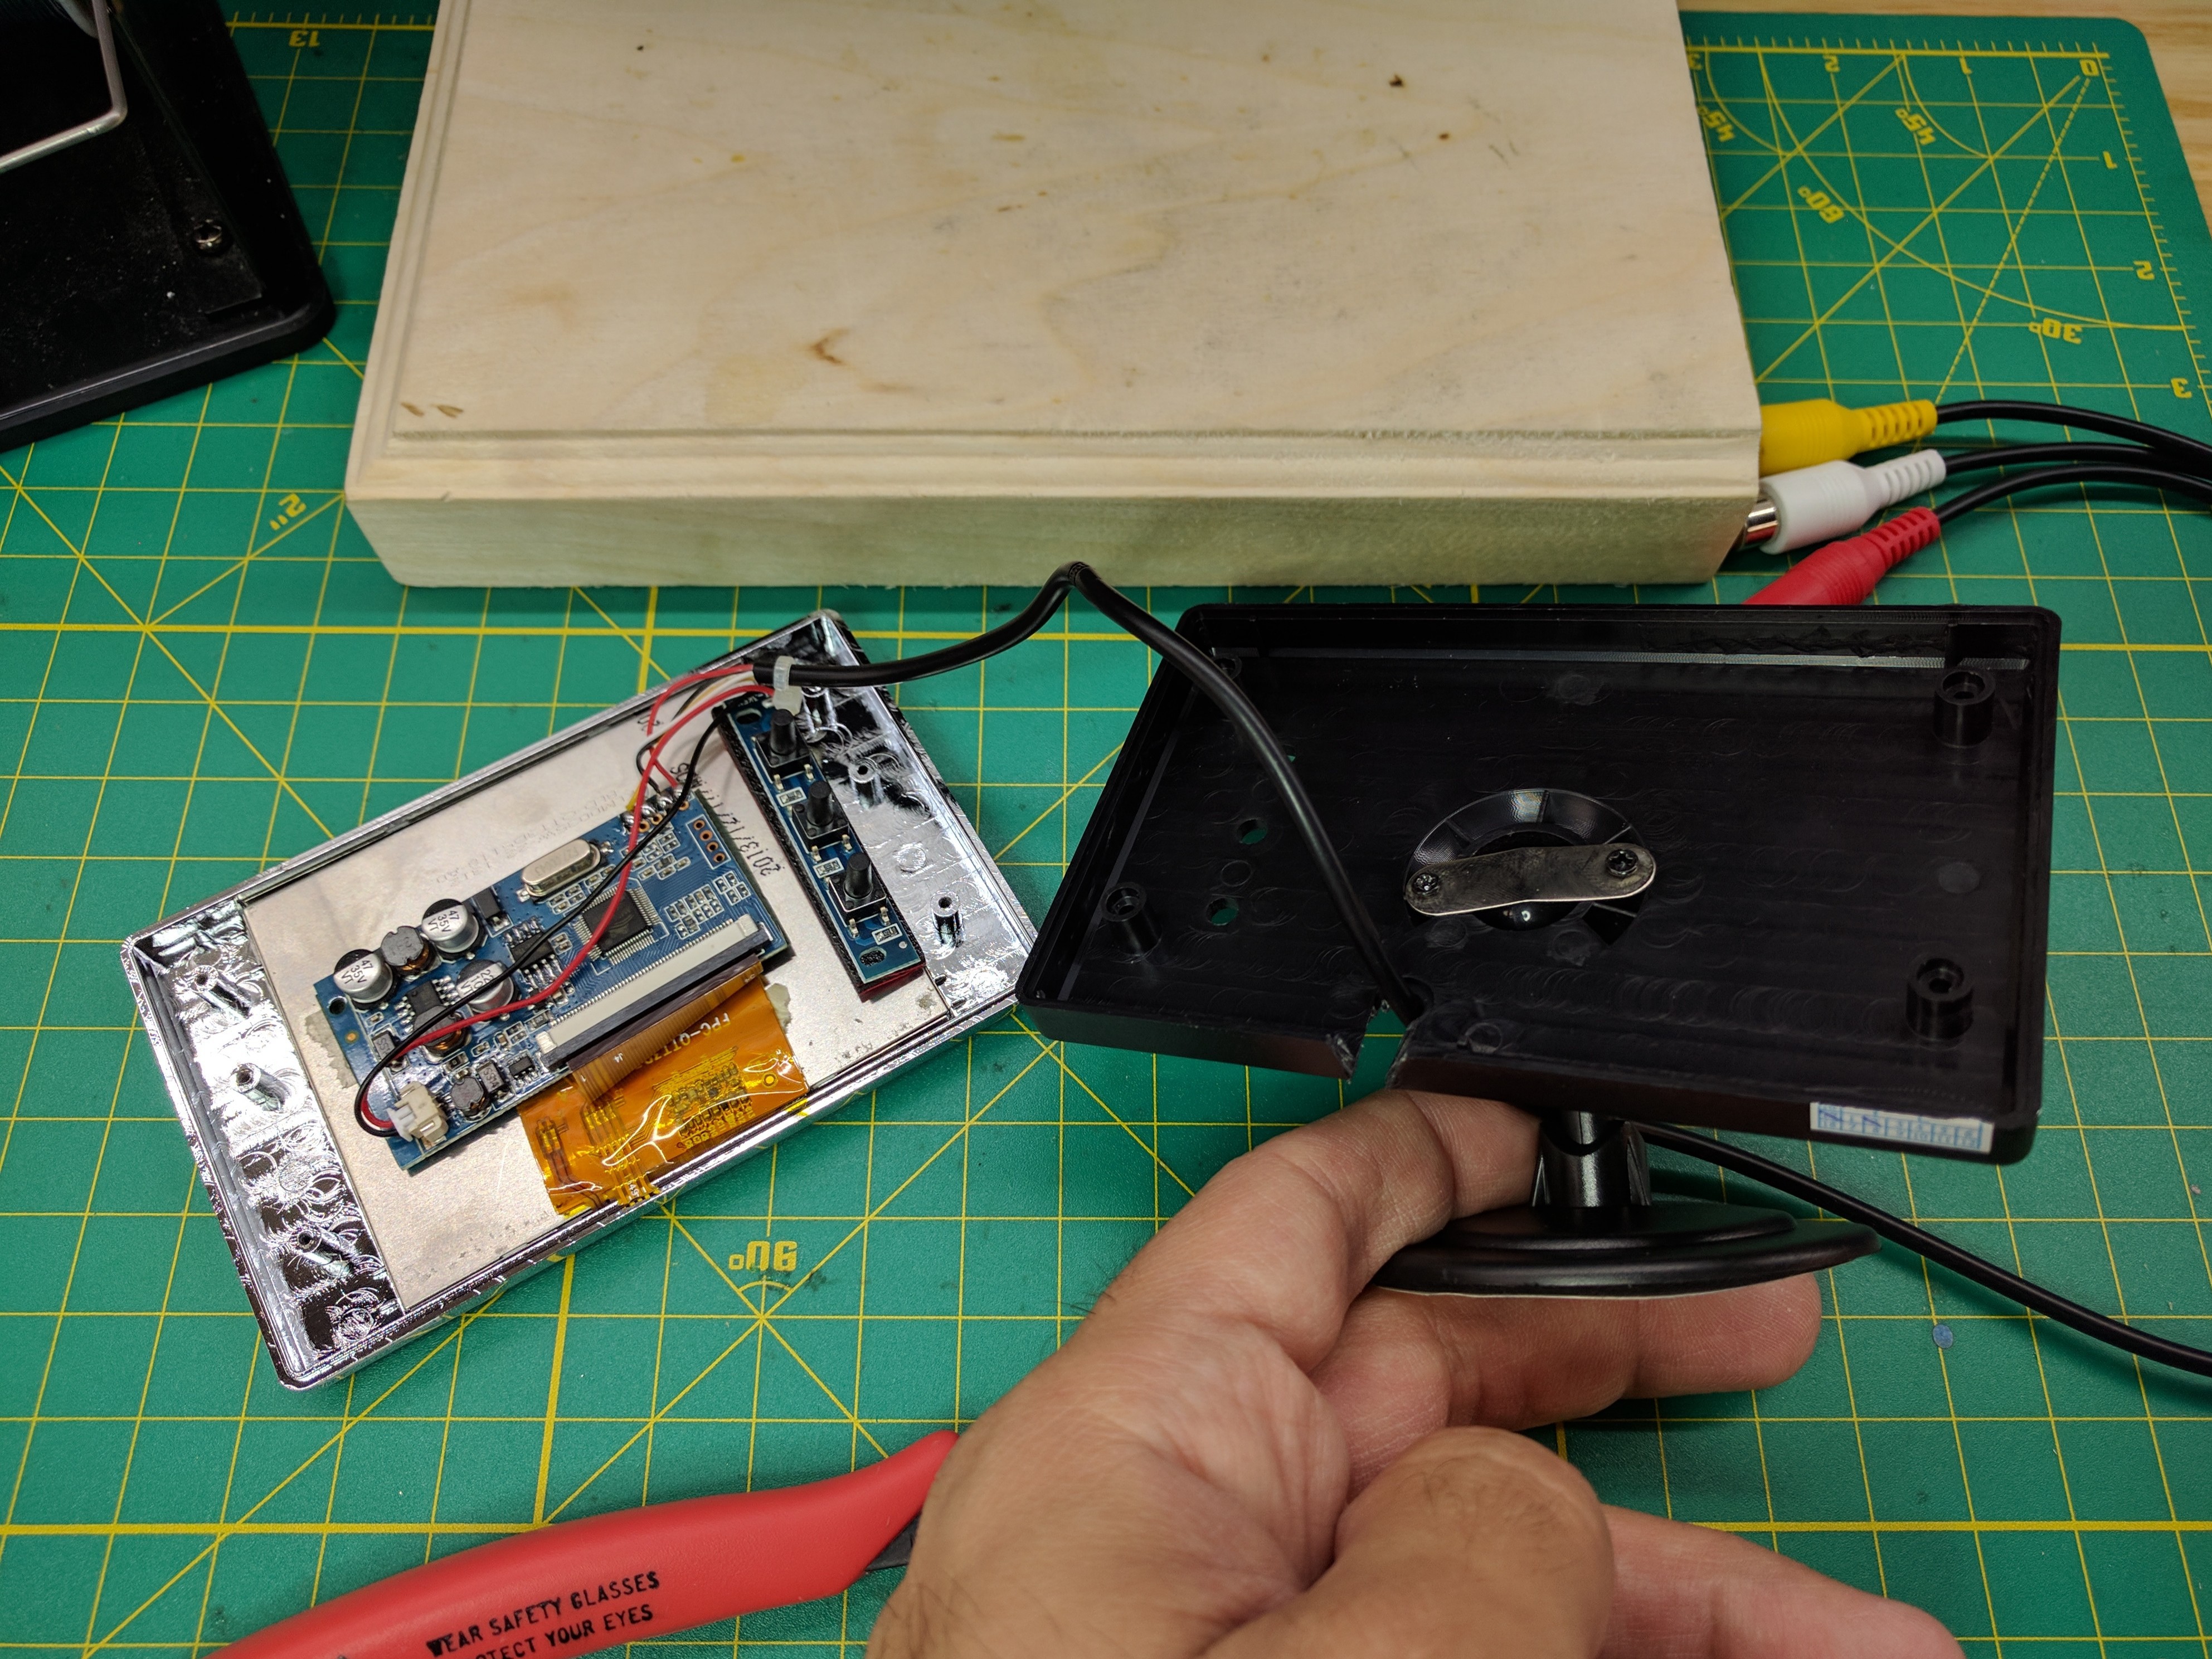
After the 5th MDF model I decided needed to get a cheaper larger screen I could use in this project, as the average $30-$40 price being charged online was too much. Starting on Amazon, I started looking for the perfect screen (cheap+compatible). While looking on Amazon I found this BW 3.5 Inch TFT LCD Monitor for Cars on Amazon that another buyer had successfully gotten to work with a RPi, and documented in his Amazon product review. With an average cost under $18 you knose I had to buy one!
![]()
Shortly after receiving the screen I realized that it was set up for 12v DC Automobile voltage (critical reading for the win)! Luckily after a little Googling around I found this tutorial done by another plucky tinkerer with the same idea documenting a hack he'd made to the screen's PWM control circuit that allowed it to run on 5v DC power! Long story short this screen uses a xl1509-5.0 voltage regulator, and its #2 pin can take 5v in, and power the screen!
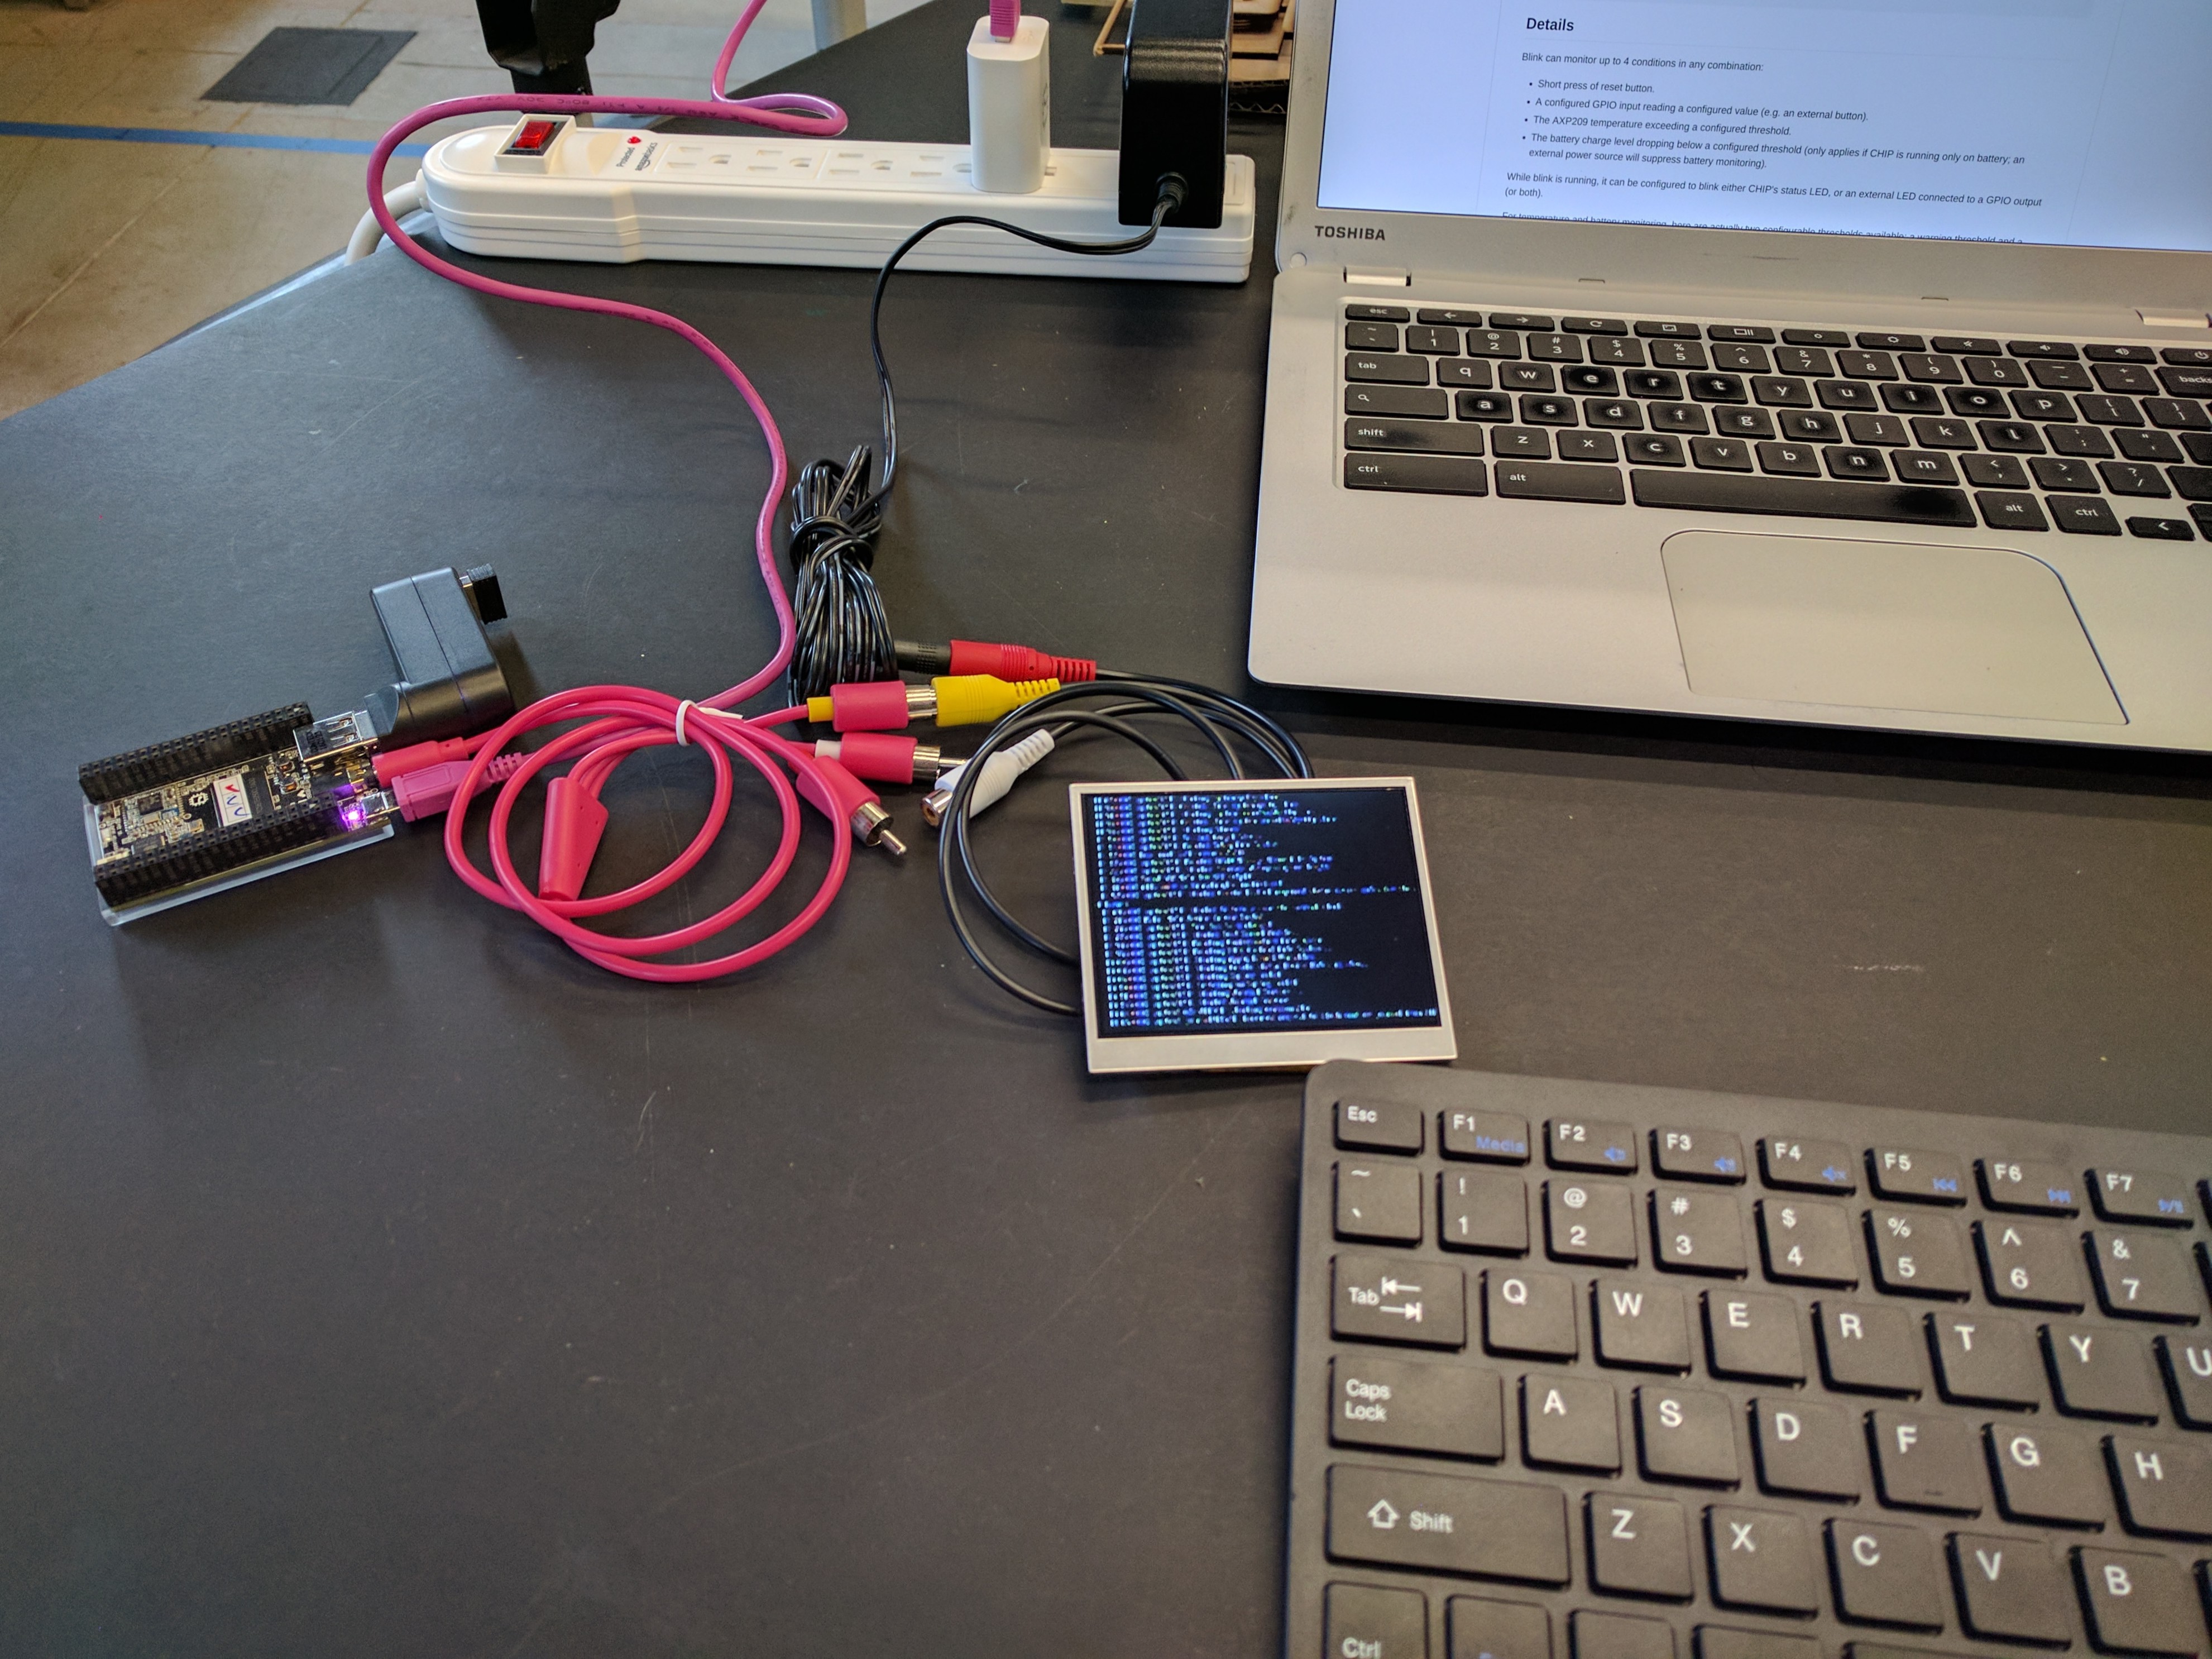
![]() IT LIVES!!! Quick unmodified LCD test (powered by a 12v wall wart) plugged into a C.H.I.P. (powered by a separate 5v wall wart) plugged in via the C.H.I.P.'s TRRS jack and a composite cable! With all of this done we quickly changed our focus over to getting our controls working with the C.H.I.P...
IT LIVES!!! Quick unmodified LCD test (powered by a 12v wall wart) plugged into a C.H.I.P. (powered by a separate 5v wall wart) plugged in via the C.H.I.P.'s TRRS jack and a composite cable! With all of this done we quickly changed our focus over to getting our controls working with the C.H.I.P...![]()
Below is a video of the V7 MDF prototype of the CotC cabinet in the new 'hat' running off of a NTC C.H.I.P. connected to a Pimoroni Picade PCB and the larger modified 3.5" TFT LCD!
Incase you're wondering, the game Hunter and Giovanni (both fellow DesignLab Residents, check out their awesome projects) are playing is Benjamin Soulés excellent Hug Arena! You should try it out in your browser sometime!
Next steps?... Getting the power and the assorted cables sorted, all fit into the MDF prototype, and all of the cabinet's tolerances surrounding the maze, drawers, and doors tightened up!
College of the Creatives Cabinet
A mysterious technological artifact designed, built & sent to a select group of nerdy creatives protecting the past, & inspiring the future!