Close
0%
0%

A beautiful save button that looks like a floppy d

This is a unique picture frame with a retro twist—a functional floppy disk! It also doubles as an auto-save button for your PC!

Similar projects worth following
A unique picture frame with a retro twist—a functional floppy disk! Not only does it look amazing with its 3D structure and soft-touch finish, but it also doubles as a save button for your PC.
When connected via USB-C, pressing the disk triggers the save action, just like the classic floppy disk save icon we all know and love. This DIY project is the perfect gift for computer nerds and retro tech enthusiasts.

I recently started making YouTube videos (This project is one of them :D) and there is a challenge I face: I always forget to save the edit file at regular intervals. And then the software crashes and an hour's worth of effort goes down the drain.

So I decided to take it to the extreme and make this giant save button that will be connected to the PC while editing.

The floppy disk has a 3D structure with a nice soft-touch feel. Pressing the disk triggers the save action on your PC, just like the classic save icon that resembles a floppy disk.

The additional autosave feature triggers the save command on your PC automatically at a set interval. This also makes for a great gift for any computer nerd or retro tech enthusiast!

autosave_button.ino

Triggers ctrl+s every five minutes when button pressed. To disable, press the buutton again.

ino - 1.62 kB - 11/25/2024 at 12:42

Download

save_button.ino

Triggers ctrl+s when pressed

ino - 544.00 bytes - 11/25/2024 at 12:42

Download

  • 1 × Seeeduino Xiao
  • 1 × Push button
  • 2 × Wires

  • 1
    Designing the Floppy Disk

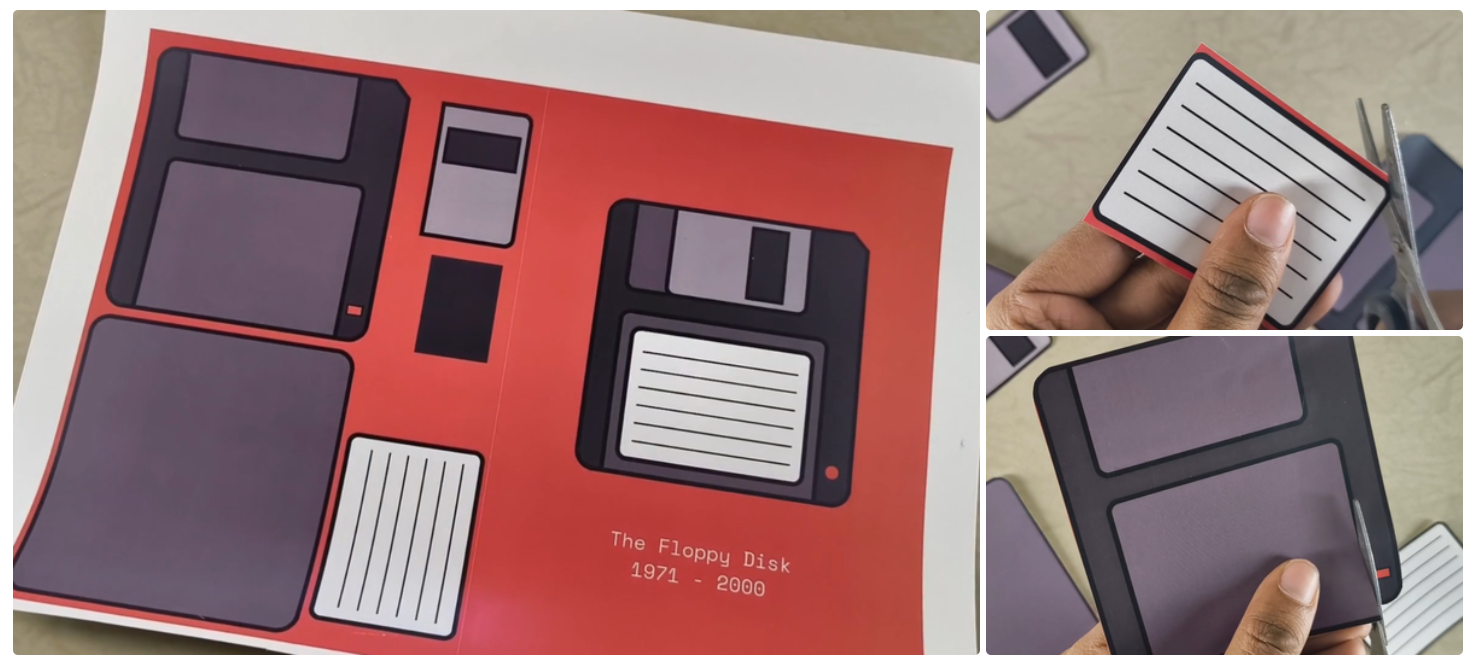
    I started by designing the floppy disk in Canva, using a Pinterest reference for inspiration. The goal was a minimalistic, cartoonish look with rounded rectangles, black borders, and a bright orange background for contrast. I kept the dimensions close to a real floppy disk, approximately 3.5 inches square.

    I printed the design on A4 sticker paper, dividing it into sections on one side and leaving a full design on the other, with added retro text for context. Using small scissors, I carefully cut out the sections, especially around tight corners.

  • 2
    Cutting the foam board

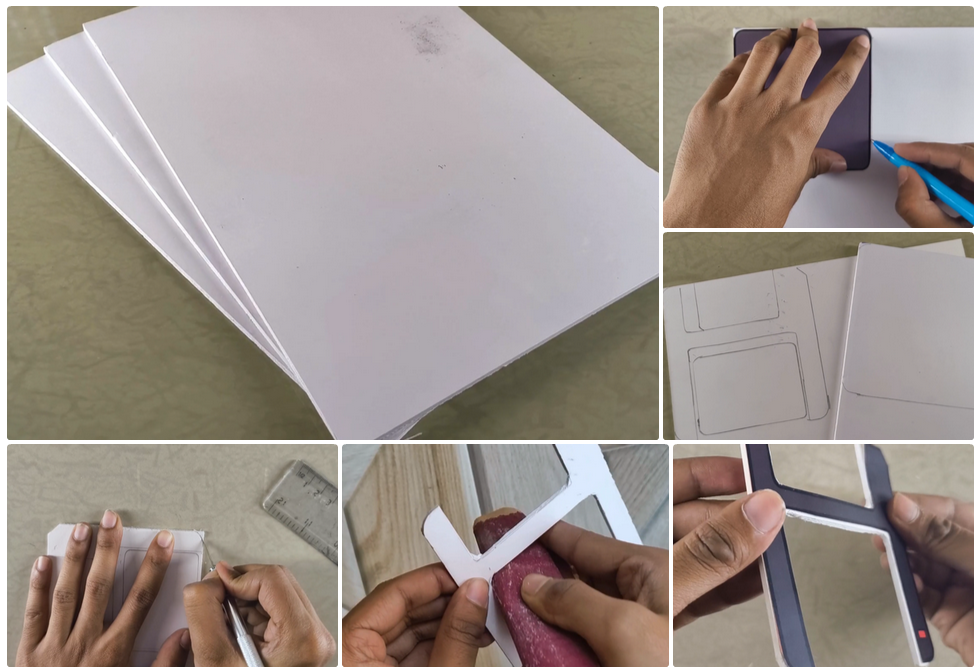
    For the floppy disk structure, I used Sunboard (foam board) in 5 mm, 3 mm, and 1 mm thicknesses. After tracing the cutouts onto the board, I used a craft knife and ruler to cut the pieces, making multiple passes for thicker boards. Rounded corners required extra care and occasional sanding for smooth edges. Finally, I checked the fit with the sticker cutouts and adjusted as needed.

  • 3
    Painting

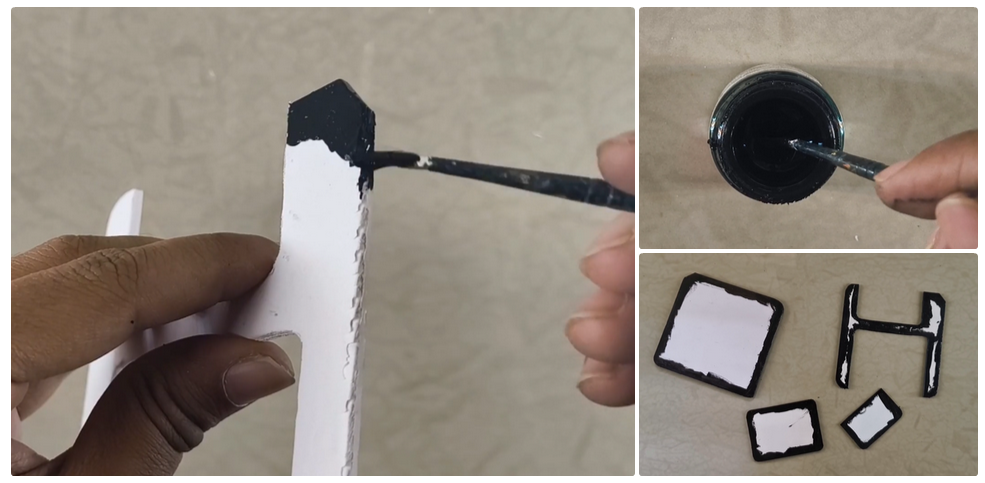
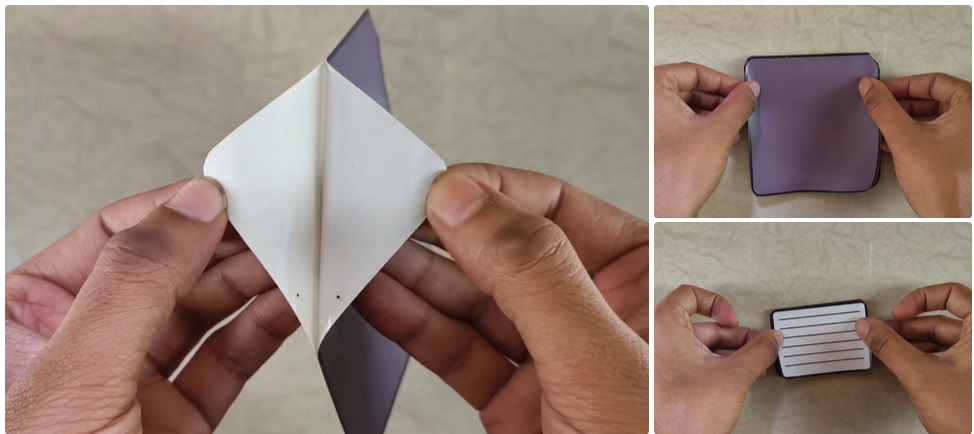
    Paint the entire Sunboard black using acrylic paint to create seamless borders and avoid uneven surfaces showing through the stickers. Once dry, carefully peel and stick each sticker onto its corresponding Sunboard piece, aligning them precisely.


View all 7 instructions

Enjoy this project?

Share

Discussions

David Plass wrote 12/10/2024 at 14:13 point

I don't see where the "functional floppy disk" is -- it's a foam replica.

  Are you sure? yes | no

Kaye Andrews wrote 12/06/2024 at 03:35 point

This is a fun little project.  It would be great if someone made 3d printable files for all the parts (unfortunately I don't have the skills). 

  Are you sure? yes | no

Ken Yap wrote 12/04/2024 at 22:22 point

Reminded me of the anecdote: Kid comes across floppy disk in parent's computing relics. Runs up to parent with it, saying: Hey, a 3-D printed Save icon!

  Are you sure? yes | no

Similar Projects

Does this project spark your interest?

Become a member to follow this project and never miss any updates