In young Jang
-
Issue during presentation day
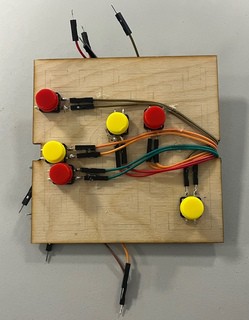
12/17/2024 at 12:11 • 0 commentsDuring presentation day we had an issue with the pins of the buttons in the maze. We had to found which wire goes with which button and put back the pins in order.
An other issue was the servolock which stopped working while trying the code.
-
10/12/24
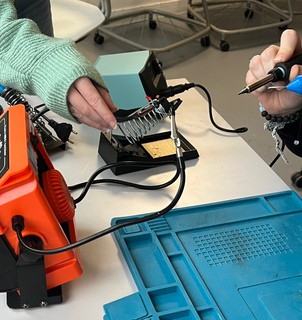
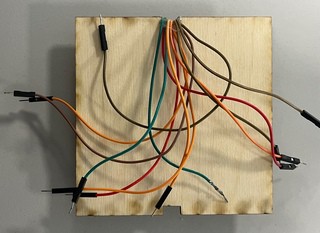
12/14/2024 at 01:01 • 0 commentsWe are on the process of soldering between LEDs and the resistences in pairs to put the Arduino in the cube without the bread board.
![]()
![]()
![]()
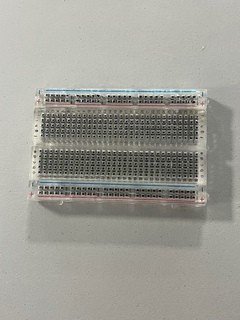
The bread board is so long that it gets out of the cude. Then, we have changed the bread board to a compact-sized one.
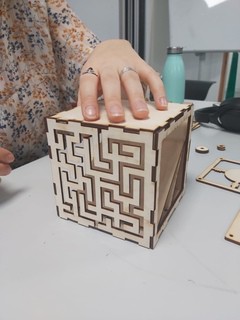
After 3D-printing the hardware part on 19/11, we have assembled the cube so far.
![]()
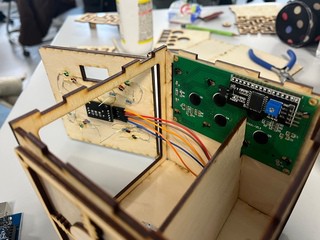
The LEDs and the dial have been established into each places on the cube. We had to disconnect every circuit from the board to make all components structurally well balanced.
![]()
![]()
-
3/12/24
12/14/2024 at 01:01 • 0 commentsWe got to a problem today that the supporting component between the maze and the board perpendicular to the bottom is not that suitable to get the cube fixed. We put 3 supporting components on the maze board.
![]()
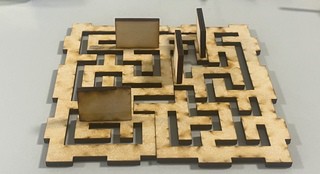
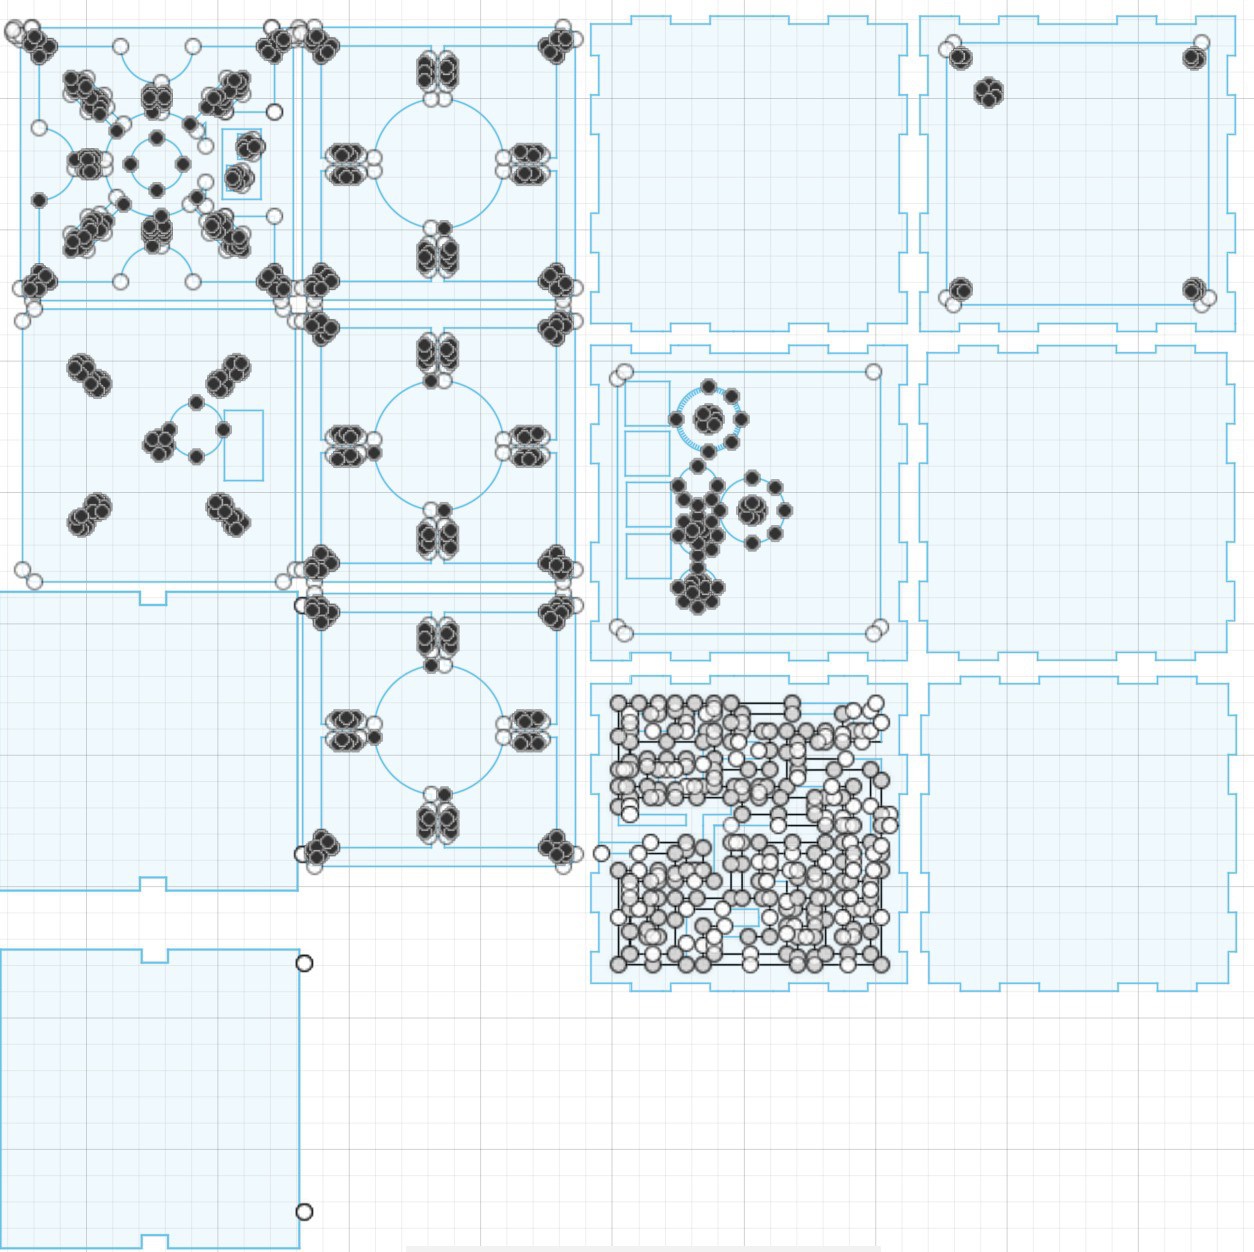
In the maze, we made 2 start points and 6 destination points so that 12 pathways of Simon says game are available. We drew a blueprint of the maze and designed the pathways. After that,
![]()
We finally attached each button on the assigned point on the maze board to be pressed when a player complete the instructions given by the screen to get to a destination point.
![]()
-
26/11/24
12/14/2024 at 01:00 • 0 commentsHardware Modifications
![]()
![]()
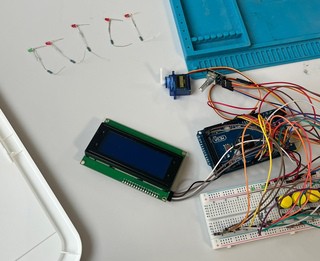
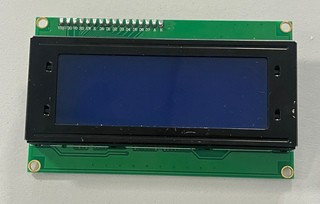
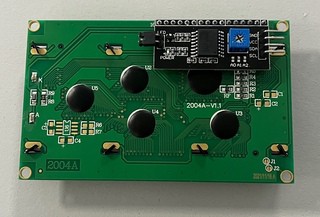
We have changed our screen to LCD Module 2004A as you can see above. The screen dimensions were larger than we had anticipated, so we needed to resize the 3D-printed enclosure.
Also we recontroled the operation of 3D printer to prevent critical small components from being laser-cut during printing.
What we missed from our maze part was how a player can submit the result of 'Simon says-Maze game' to the server. We finally designed a system to ensure that players could press a button installed on the destination points after navigating the maze, following the instructions given by the Server.
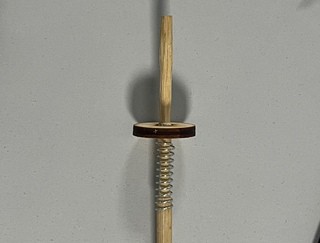
While navigating the maze, the player should not accidentally press the button because that way, a wrong result could be reported. So the we need a ideal lever that can be pressed only when a user wants and be moved functionally along the maze. The photo above is a prototype of the lever.
We finally invented a lever accompanied with a spring to be pressed as you can see below. The lever was made by sharpening the chopstick in the middle to insect and fix the spring.
![]()
-
19/11/24
12/14/2024 at 00:59 • 0 comments19/11
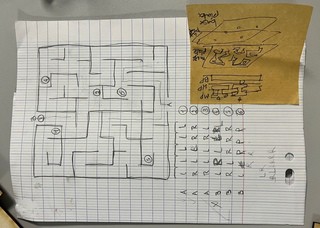
We downloaded the exsiting design drawing from <https://www.instructables.com/Crack-the-Code-Game-Arduino-Based-Puzzle-Box/>. The size of the original was quite small so we scaled up by utilizing Fusion 360. Since we added a game, we also design a maze on it. You can see it in detail below.
![]()
Initially, separate Arduinos were used for the Simon Says game and the Crack the code game
But the limited space within the hardware –the cube made it impractical to house multiple Arduinos. So we are opted to integrate both games into a single Arduino system.
Because the system requires the increased nuber of pins required, we decided to replace the original Arduino boards with an Arduino Mega. As a consequence, we had to redefine all pin assignments from scratch to accommodate the combined functionality.
We encountered specific challenges with Tx0 and Rx0 pins (serial communication pins). Initially we attempted to utilize these pins but met extra issues so it prompted a return to the original pin configuration strategy.
-
12/11/24
12/14/2024 at 00:56 • 0 comments12/11/24
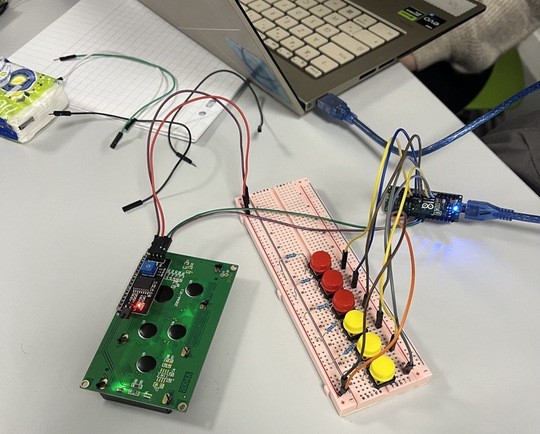
We are still working on the Arduino code of Simon says game and Crack the code game.
We try to do the same game as the creator. We use their code and circuits (you can find on https://www.instructables.com/Crack-the-Code-Game-Arduino-Based-Puzzle-Box/ )
Since we are not really familiar with Arduino, we have encountered some systemic problems. In detail, Arduino reported an error after uploading the code. We encountered the first problem with the library for the screen. We found a library, LiquidCrystal, that worked on our code by creating smaller circuits to test only the screen. We then modified our code to work with thenew modifications (with success for the screen). But the rotary encoder was not working. We change the actual library for the library encoder.h.
We searched for the solution of the simons says- maze game’s screen in Arduino through chatgpt but it hasn’t worked yet – changes in the circuit for the buttons and the screen / and changes in dimensions of liquid crystal ---> finally it works. The problem was that some pin on the arduino board were wrong ---> as we used a differant arduino than the uno one for the crack the code game the pins connected to SDA and SCL were not the same for the micro arduino (pin 2 and 3)
Then we had another issue with the buttons because we forgot to connect it to 5V. But it is not solving the problem as the test doesn't work.
![]()
<simplify the simon says – maze game >
After we got the feedback, we came up with an idea to make two buttons(left and right) on every intersection the player encounters. That way, we can get the simplest maze. But It would be too complicated to construct the arduino codes and place all the wires to the ariduino board. Also it causes another problem – We should construct a maze that has only 2 directions. It looks weird as well
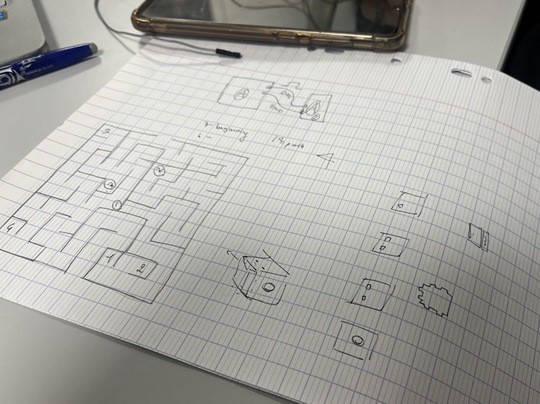
So a member of our team suggested to make it simpler. We discussed to put a lever that designates 4 directions – west, east, north and south ; That way, we can use the normal version of the maze and the player can easily recognize the direction of the given instructions. We selected a suitable maze for the game below and decided to put it exactly on one plane of the cube – that doesn’t meet the plane of the dial. To insert the lever and fix its position firmly, another plane below the maze plane is needed.
The way how the computer knows the player follows the right pathway to the destination is to define the recipe of the paths. We decided to define 3 beginnings and 6 destinations so we have 18 pathways available for the game.
![]()
-
22/10/24
12/14/2024 at 00:56 • 0 comments22/10/24
Today, we commenced to try Arduino codes for 'Crack the code' game.
![]()
We thought it could be too simple to only apapt one game to the cube, so decide to build up an additional game idea on the cube. We found two easy-to-play and Arduino-based games; Sudoku and Simon says game.
We chose Simon says game and ranged our idealized version of it
The 'Simon says' game has 4 buttons and a player can press them by the instrcutions. But we thought only adapting buttons on the game is out-dated and too simple.
So we developed our idea to make it difficult bringing the maze on it - that way, the player should memorize the series of lights and getting to the right buttons, going on the maze at the same time.
It was an idealized verson. To realize it, we need to let the Arduino familiar with the maze. But we could not find any libraries of maze for Arduino. So we asked our professor of our idea and the Feedback from our professor was "How about replacing the lights series for the direction series to get the right buttons?"
We decided to do so and continue the ideation for the next time.
-
15/10/24 Building ideas
12/14/2024 at 00:55 • 0 comments15/10/24 Building ideas
What do we like in the game : compact
- Interactive
- compact
Site full of idea: http://shagmailggkethatbutton.com/Different joystick :
Bomb case :
Turn the 4 arrows on the keyboard into joysticks (tetris/dino)
We discussed about lots of games and decided to make a game based on <Crack the Code Game>. We added <Simon Says Game> to the base. We searched for the Arduino project hub to realize our idea.
BIG PROJECT
memory
memory
memory
And for the body
We got a reference of ‘crack the code game’ and size up and personalize the reference by utilizing ‘Autodesk Fusion 360’.
Crack the code and Simon says game
We put Crack the code game and upgraded verson of Simon says together in a cube.