 JeanBej11
Project Structure and Components:
Electronic Components:
Arduino Uno: Used to control the entire system, including joysticks, the shooting mechanism, LEDs, and sound effects.
Analog Joysticks: Each player uses a joystick to control their tank’s movement (forward, backward, left, right).
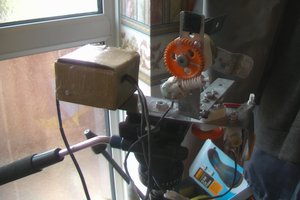
Motor: Used to launch the projectile (cardboard), triggered by a shooting button.
LEDs and Resistors: Indicate game statuses on the dashboard, such as shooting readiness, tank preparation, etc.
Buzzer or Speaker: For sound effects, such as shooting and explosions.
Wires and Connectors: To establish the electrical connections between components.
Physical Materials:
Cardboard: Primarily used for making the lightweight projectiles and the tank's structure.
Plastic (lightweight): Used for making the shooting mechanism and other tank parts that need to be sturdy yet lightweight.
Wood (optional): Used to reinforce the structure, particularly for the dashboard base or stands.
Additional Components: Buttons to activate game functions (shoot), screws, nuts, glue, and other mounting tools.
Project Progress:
December 11, 2024: Final Session
Joystick Improvements and Tank Controls:
The joysticks were calibrated to ensure smooth movement. Each joystick controls the tank’s movement (forward/backward on the Y-axis, left/right on the X-axis). Analog readings are sent to the Arduino, which translates this information to control the tank’s motors.
An Arduino code was written to handle these analog inputs, ensuring precise tank movement.
Prototyping and Shooting Mechanism:
A prototype for the shooting mechanism was finalized. It uses a small DC motor to propel a cardboard projectile when a button is pressed.
The mechanism was tested to ensure that the projectiles are launched with enough force but remain safe. The small motor ensures that the projectile is launched at a reasonable distance while keeping the game safe.
Arduino Code for Shooting Control: The code for managing the shooting with Arduino was enhanced, and the following logic was implemented:
Button Press Detection: When a button is pressed (e.g., a push-button type), a signal is sent to the Arduino to activate the motor and launch the projectile.
Motor Control Code:
cpp
Copier le code
const int joystickPinX = A0;
const int joystickPinY = A1;
const int shootButtonPin = 2;
const int motorPin = 3; // Connected to the motor that launches the projectile
void setup() {
pinMode(shootButtonPin, INPUT);
pinMode(motorPin, OUTPUT);
Serial.begin(9600); // Start serial communication for debugging
}
void loop() {
int joystickX = analogRead(joystickPinX); // Read the X position of the joystick
int joystickY = analogRead(joystickPinY); // Read the Y position of the joystick
bool shootButtonState = digitalRead(shootButtonPin); // Check if the shoot button is pressed
// Tank movement controls
if (joystickX > 512) {
// Move right
Serial.println("Moving Right");
} else if (joystickX < 512) {
// Move left
Serial.println("Moving Left");
}
if (joystickY > 512) {
// Move forward
Serial.println("Moving Forward");
} else if (joystickY < 512) {
// Move backward
Serial.println("Moving Backward");
}
// Shooting logic
if (shootButtonState == HIGH) {
digitalWrite(motorPin, HIGH); // Activate the motor to launch the projectile
delay(500); // Shoot for 500ms
digitalWrite(motorPin, LOW); // Stop the motor
Serial.println("Fired!");
}
delay(50); // Short delay to avoid overloading the loop
}
Dashboard Development:
The dashboard was equipped with LEDs to indicate...
Read more »
 Films4You
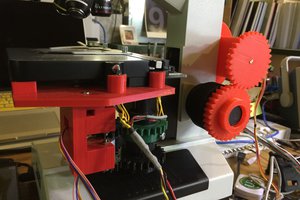
 ksk
ksk
 Thuan Le