 Lark
Lark-
1Step 1: Installation
NOTE: The following instructions are slightly different than the ones in the README (but mostly the same)! This includes photos, and instructions specific to operating at Caltech.
1. Create an Arduino Cloud account. For more info on Arduino Cloud, read https://docs.arduino.cc/arduino-cloud/guides/overview/
2. Configure your Arduino in the Devices tab.
3. Create a Thing with the following Cloud Variables and configurations:
- closingSchedule =>
- Schedule (CloudSchedule)
- Read & Write
- On change
- openingSchedule =>
- Schedule (CloudSchedule)
- Read & Write
- On change
- timeRead =>
- Time (CloudTime)
- Read only,
- On change
4. Associate the device you set up in step 3 to the Thing.
5. Configure your network credentials. If you are trying to get this working at Caltech, see https://www.imss.caltech.edu/services/wired-wireless-remote-access/wireless-network/register-my-device. We weren't able to get this to actually connect, but maybe you'll have better luck :(
6. Set your timezone in the Metadata tab.
7. In the sketch tab, generate a sketch associated with the thing, and copy the contents of BlindBot_Thing_mar08a.ino into it.
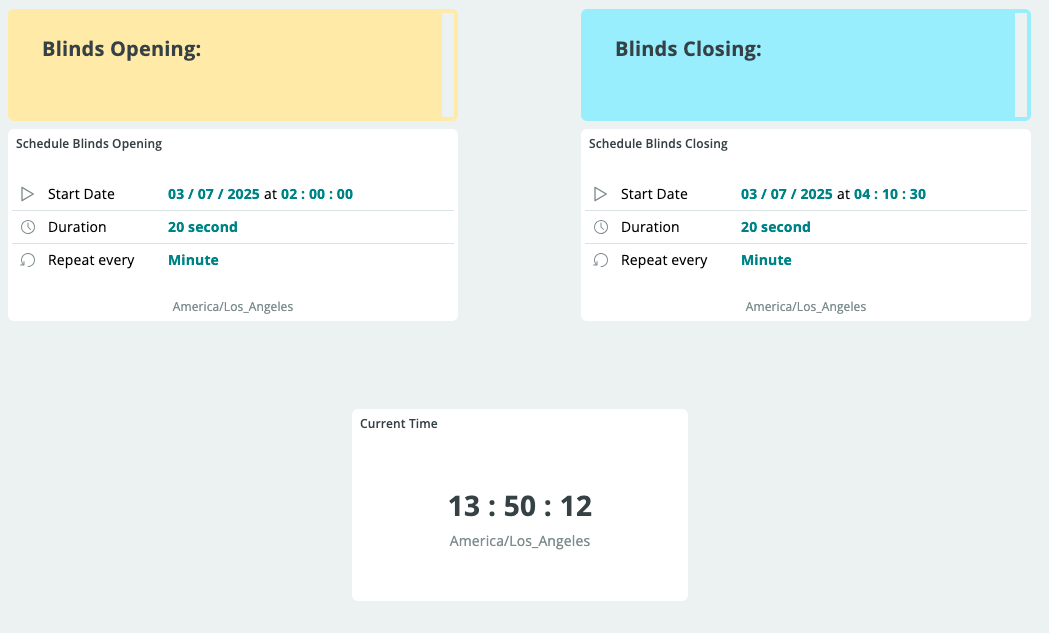
8. Create a Dashboard. Add the following components and linked variables, with reasonable names:
- Scheduler
- openingSchedule
- Scheduler
- closingSchedule
- Time Picker
- timeRead
Example (which also uses notes for easier interpretation):
![]()
9. On the opening scheduler,
a. Set the start date to the previous day
b. Set the start time to the time you want the blinds to start opening.
c. Set the duration to however long it takes to open the blinds. This can
be much longer than you need, so give it a decent amount of buffer.
d. Set this to repeat every day.
e. You may set an end date if you want.10. Repeat step 8, with whatever time you want to blinds to close. The duration of this needs to be the length of time to open AND close the blinds. Again, give it more time than you think it needs.
11. (Optional) download the Arduino Cloud app on your phone so you can adjust
the alarm times from your phone. - closingSchedule =>
-
2Step 2: Assemble the robot
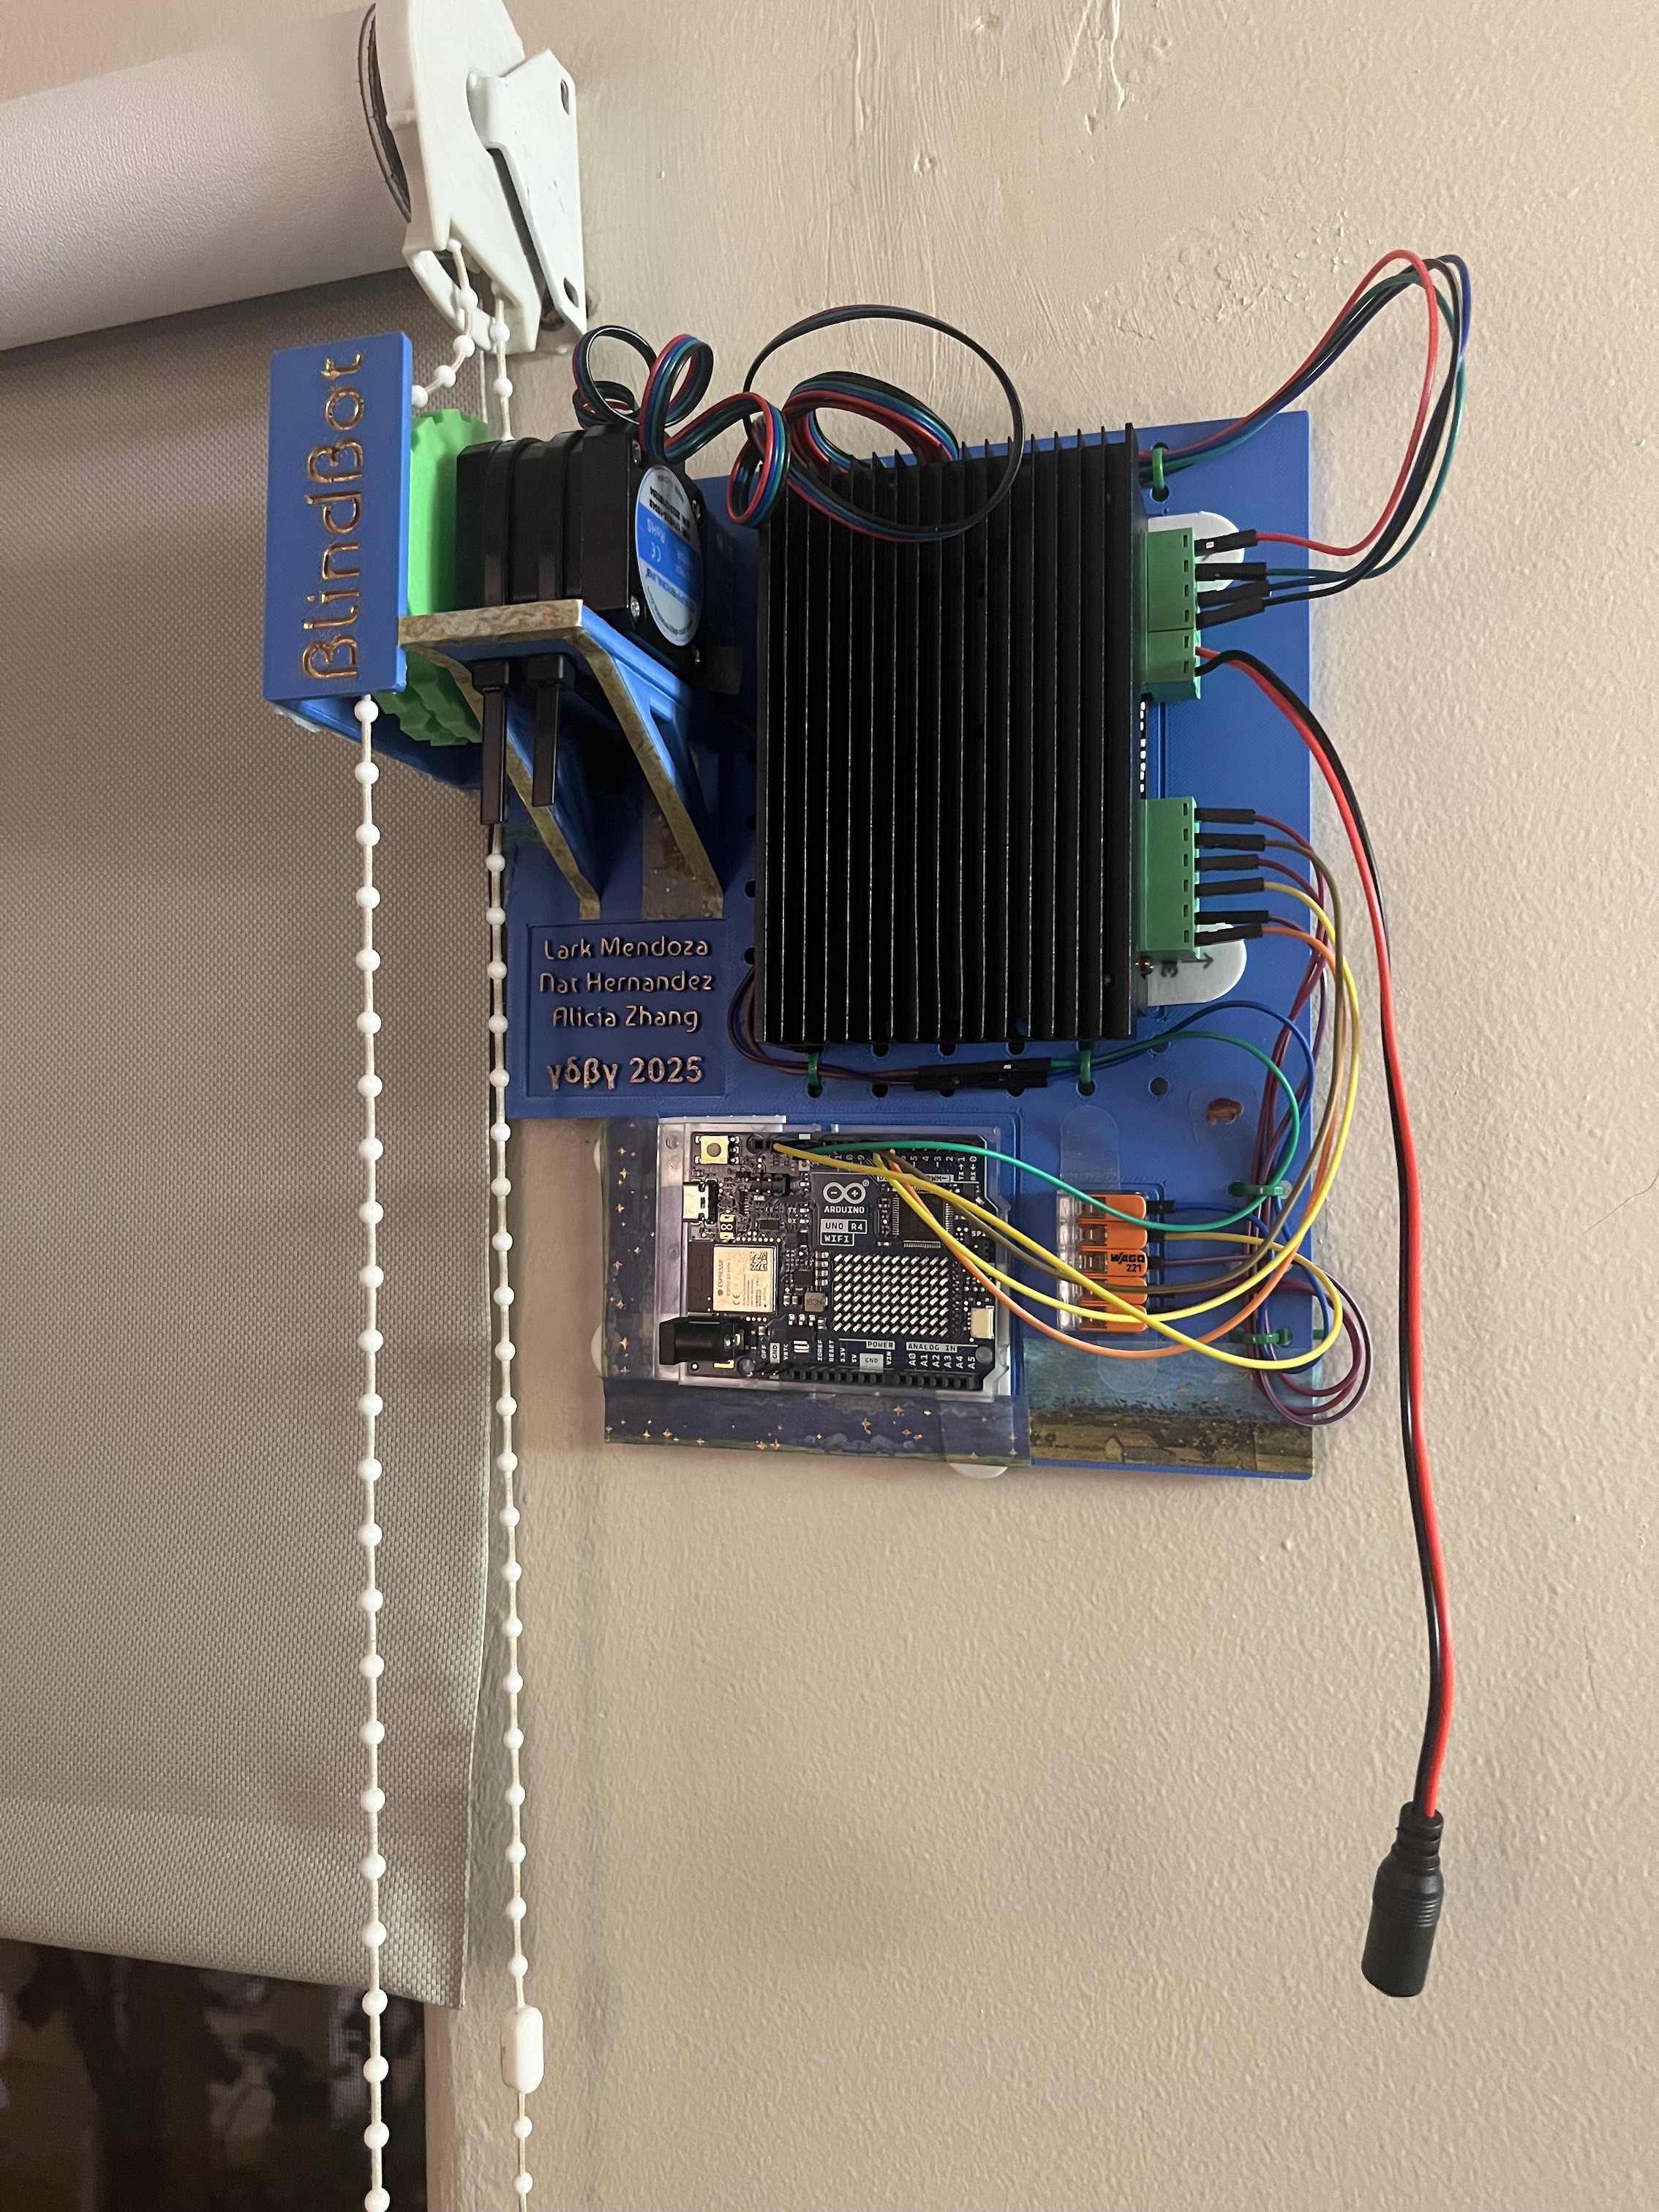
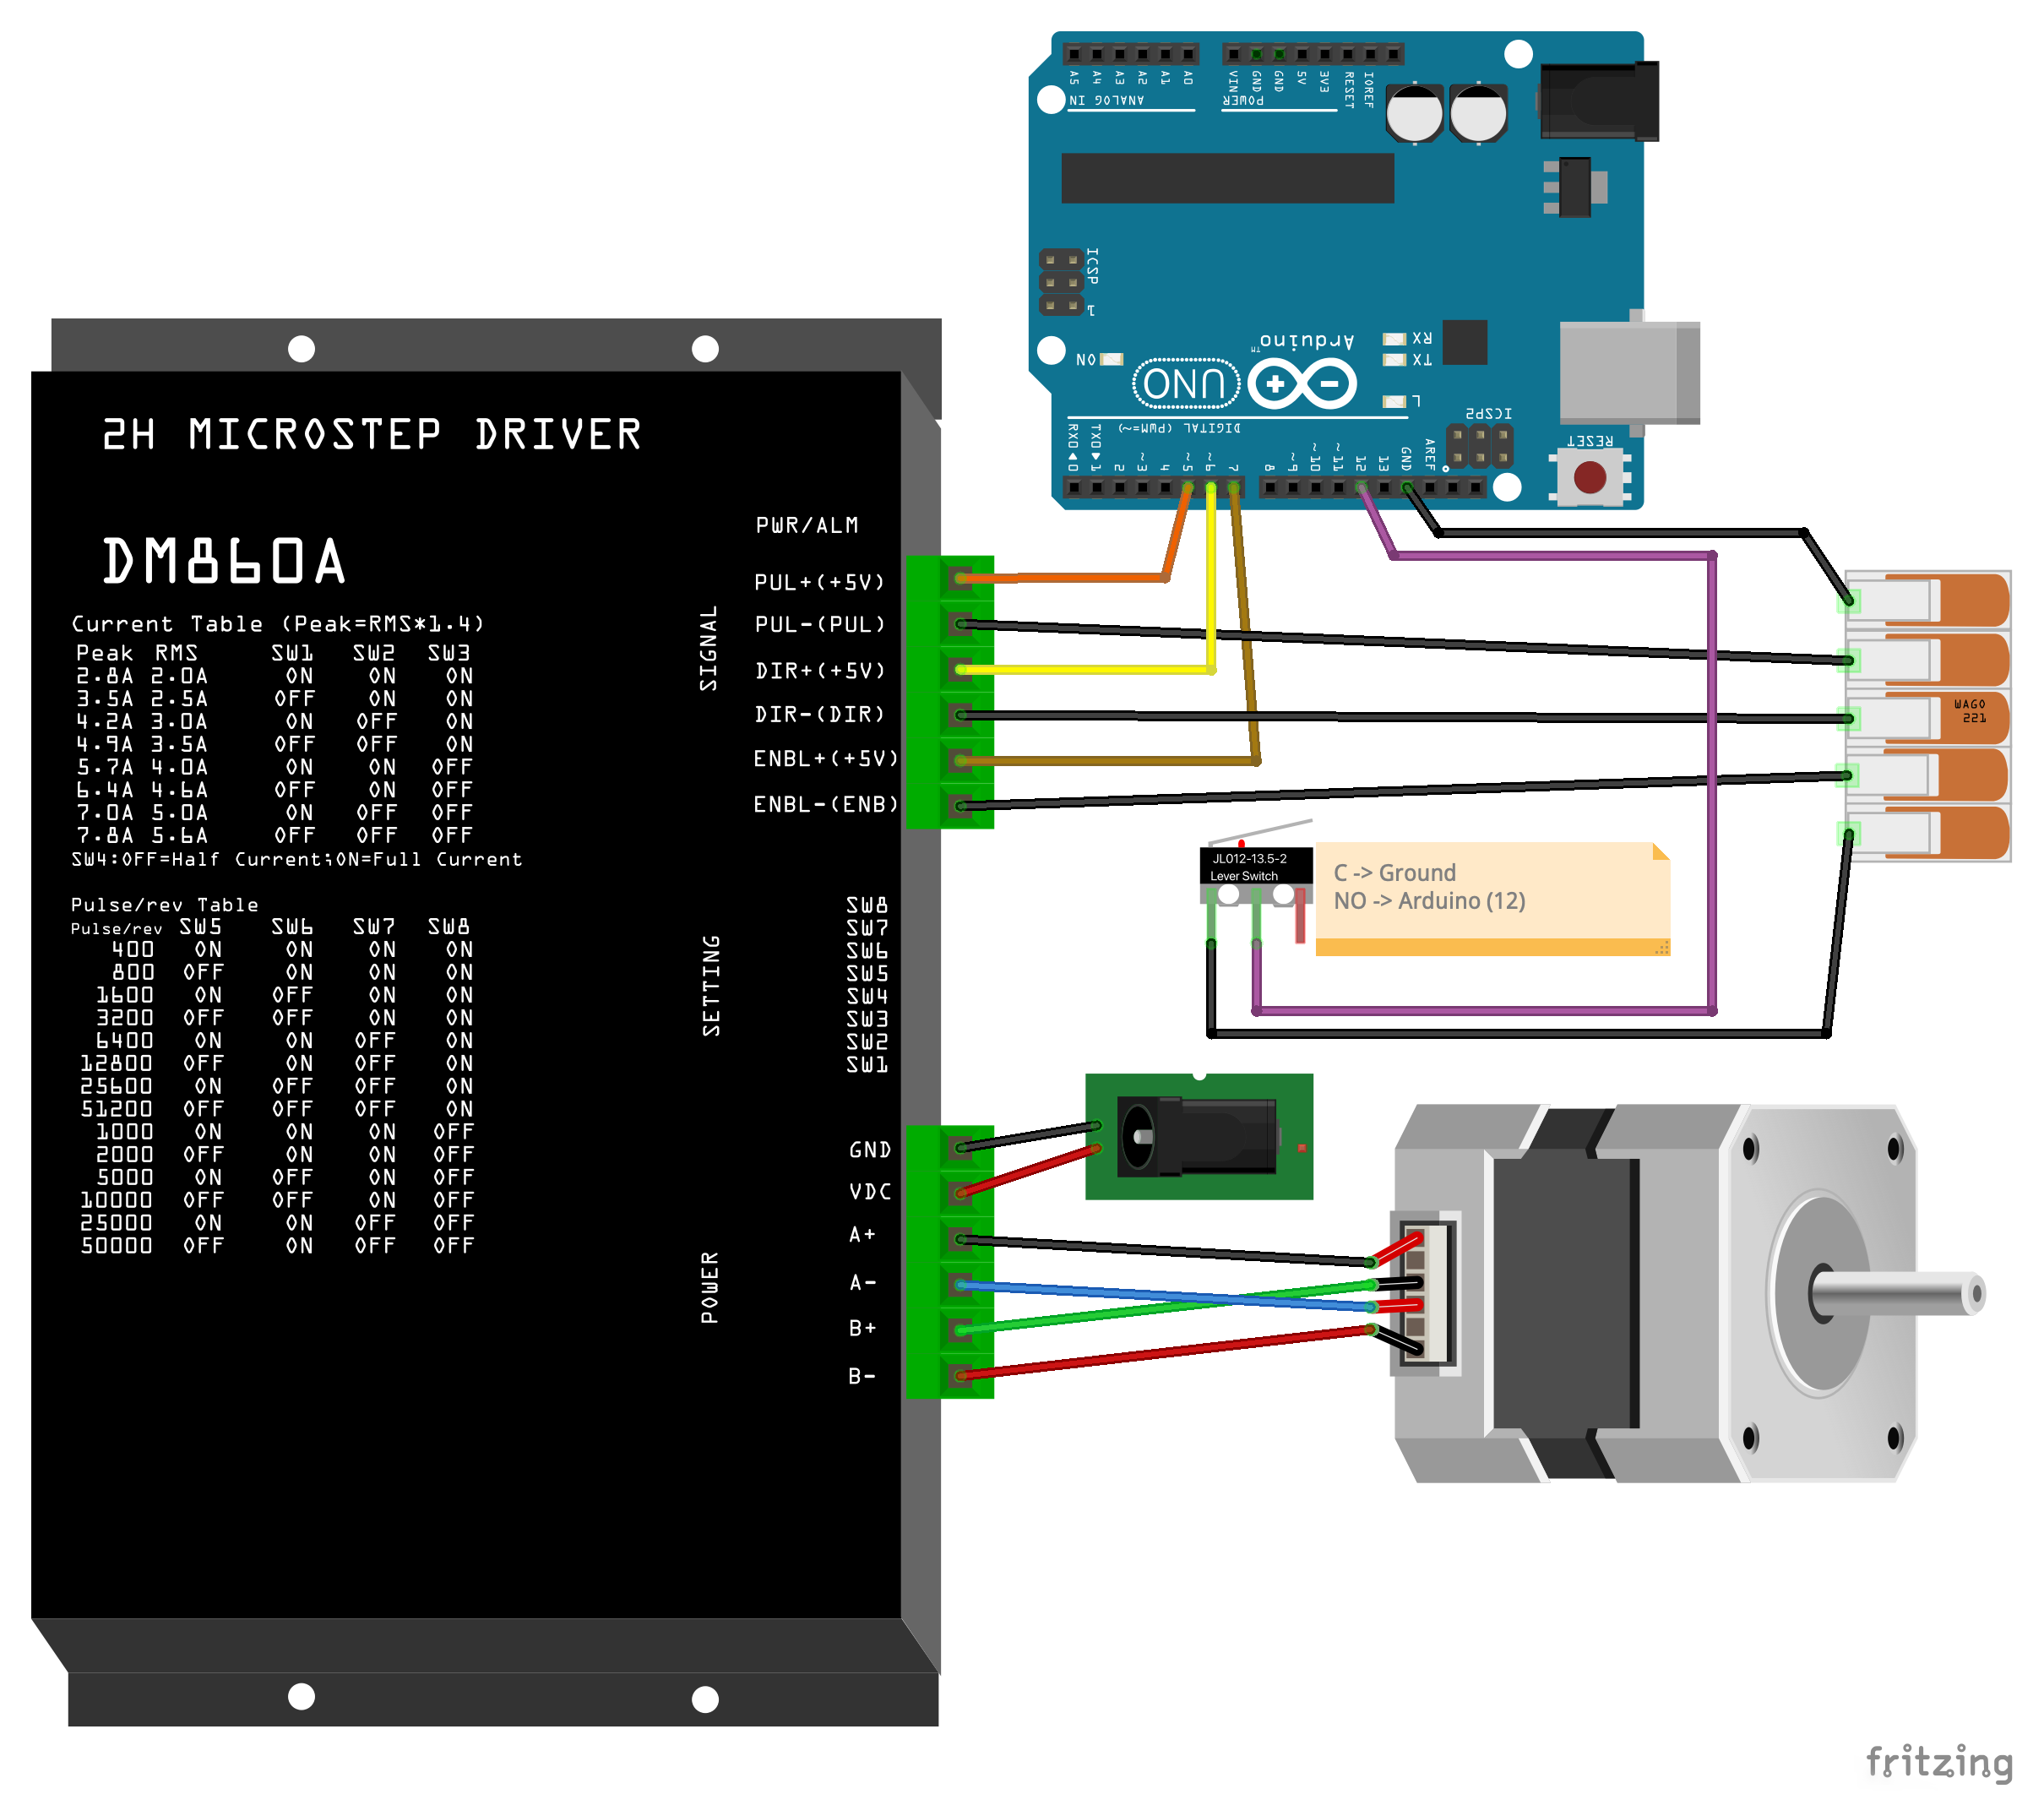
1. 3D print the files on Hackaday and assemble as pictured (below), except for the motor and gear. Assemble the circuit following the diagram. Decorate, if you want.
![]()
![]()
2. Place command strips (I recommend the heavy-duty velcro strips) on the back of the mounting plate.
3. With a friend, place the gear on the blinds where you want it. Slide the blinds and the gear into the slot on the mounting plate, and use the command strips to affix the mounting plate to the wall. Refer to the picture above for reference, but make sure there is no slack in the cable. Connect the bot to power for both the Arduino UNO via USB C cable, and the motor controller via the 24V adapter.
4. Slide the motor into place and ziptie to the plate. Add the knob extender (which hits the limit switch to stop the blinds once it hits the top) to the blinds, if needed.
-
3Step 3: Load the code
Upload the code contained in the Arduino Cloud sketch on to your board.
Discussions
Become a Hackaday.io Member
Create an account to leave a comment. Already have an account? Log In.