 Vedran
-
1Base plate assembly
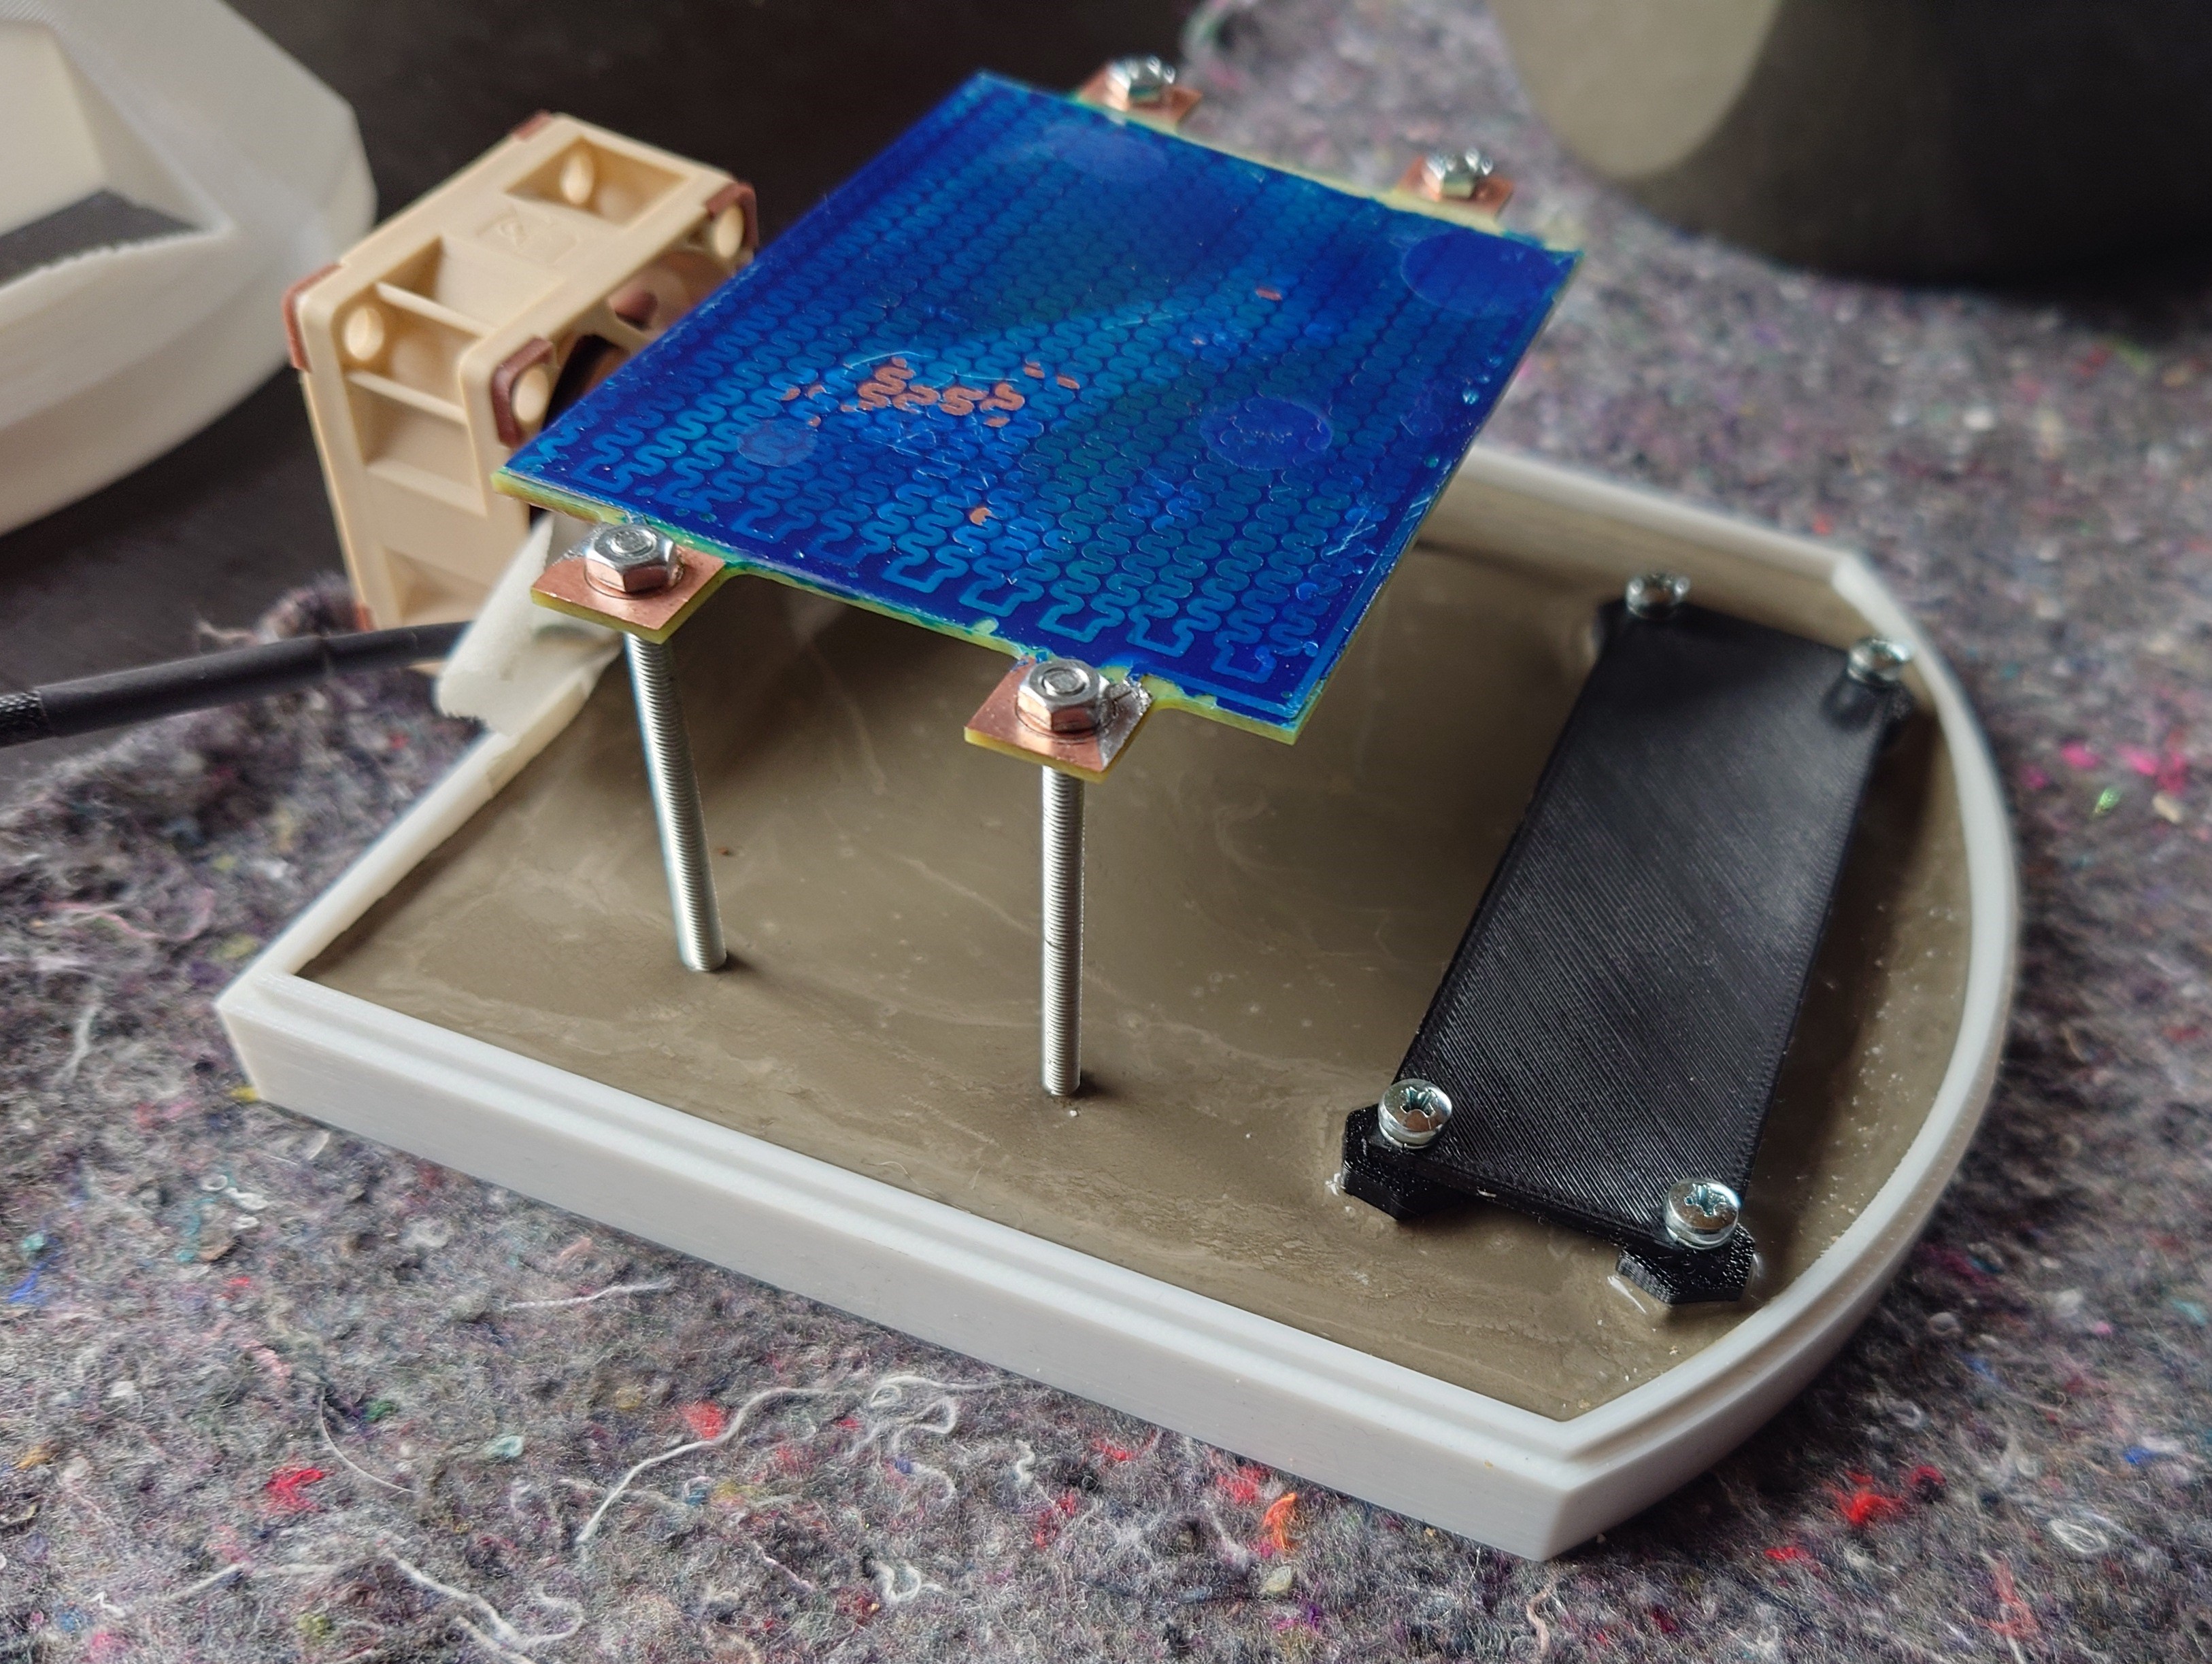
First part of the assembly is attaching the fan, electronics and heating element to the base plate.
![]()
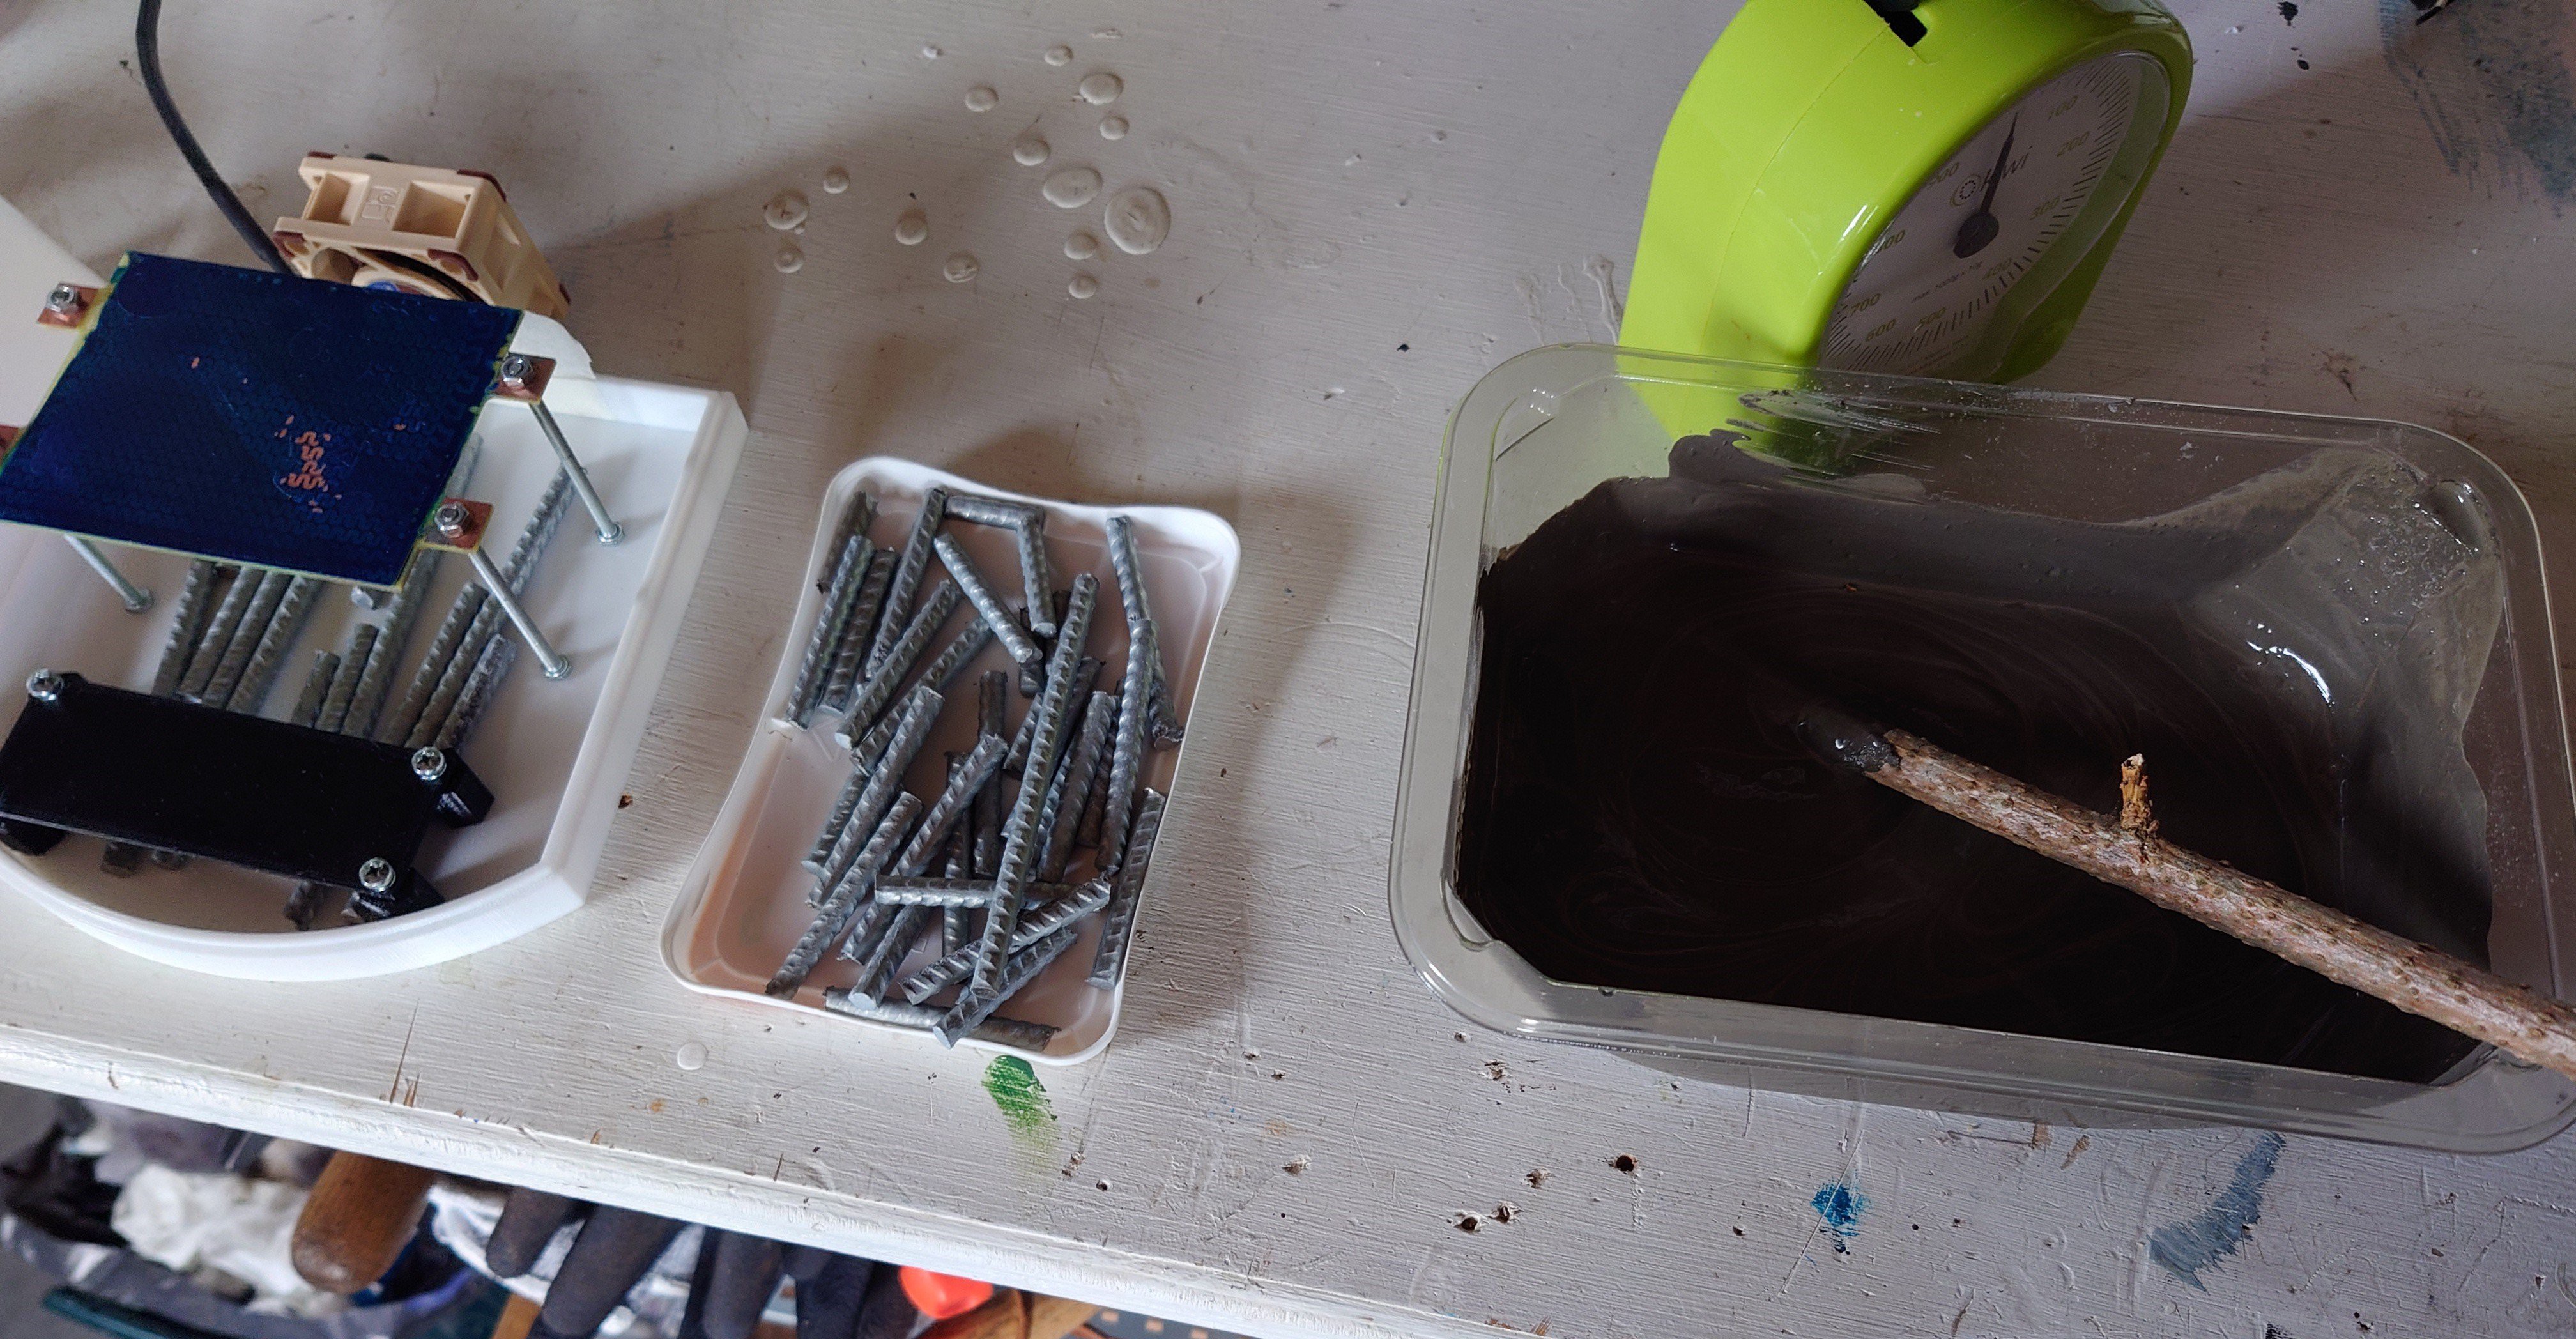
To make the whole assembly a bit heavier and hold things together, I decided to pour some concrete into the base. I used 3D printed "anchors" in concrete to hold the screws, and have made a replica of the PCB to keep the spacing between the anchors. I also found some scrap metal to put into the concrete base.
![]()
Heating element is attached to 4 M3x50 screws, and the PCB replica is bolted via 4 M3x8 to the anchors in the concrete. Fan is bolted to the back of the casing using the 2 bottom holes. A piece of masking tape prevents concrete from seeping through the fan holes.
-
2Electronics assembly
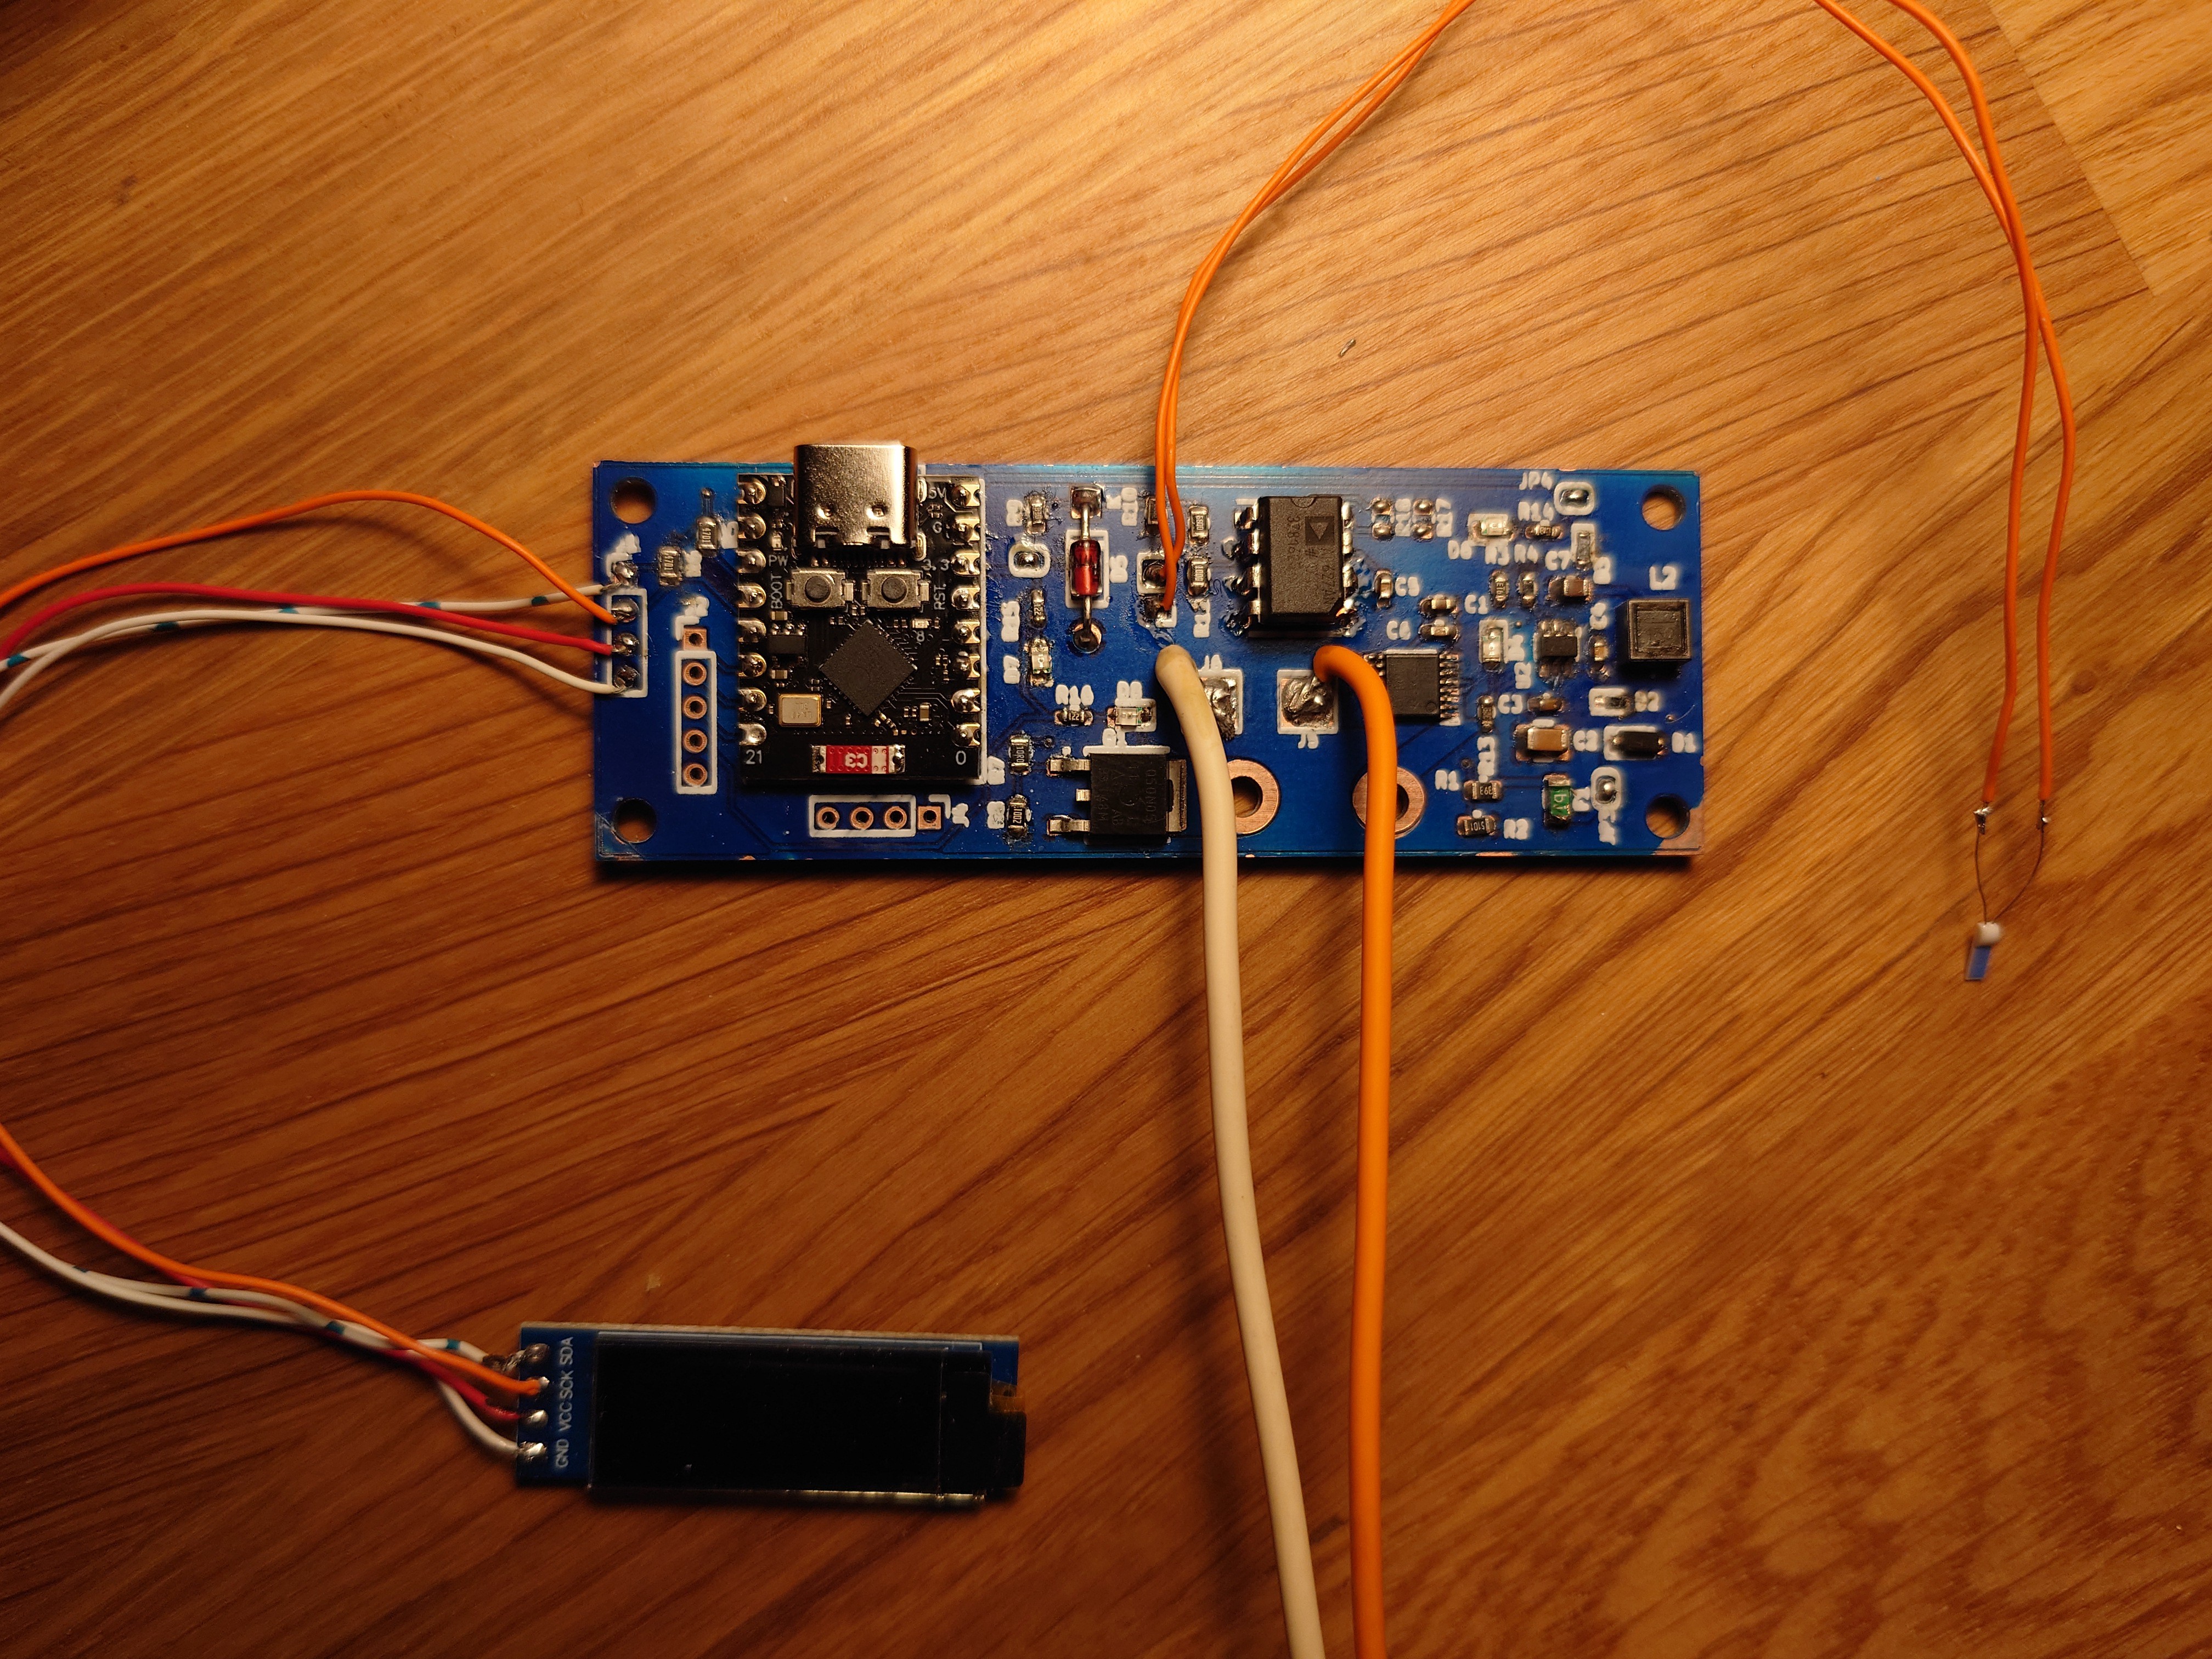
Electronics assembly is relatively straight forward. All components are mounted on the PCB.
![]()
The OLED screen and a rotary encoder are mounted on the small HMI plate. While the rotary encoder has a nut for securing it in place, OLED screen is held in place with few blobs of hot glue. the HMI plate can then be installed into the top half of the casing.
(don't have a separate picture of only this part of assembly, but can be seen in next step)
-
3Bolting things onto the base plate
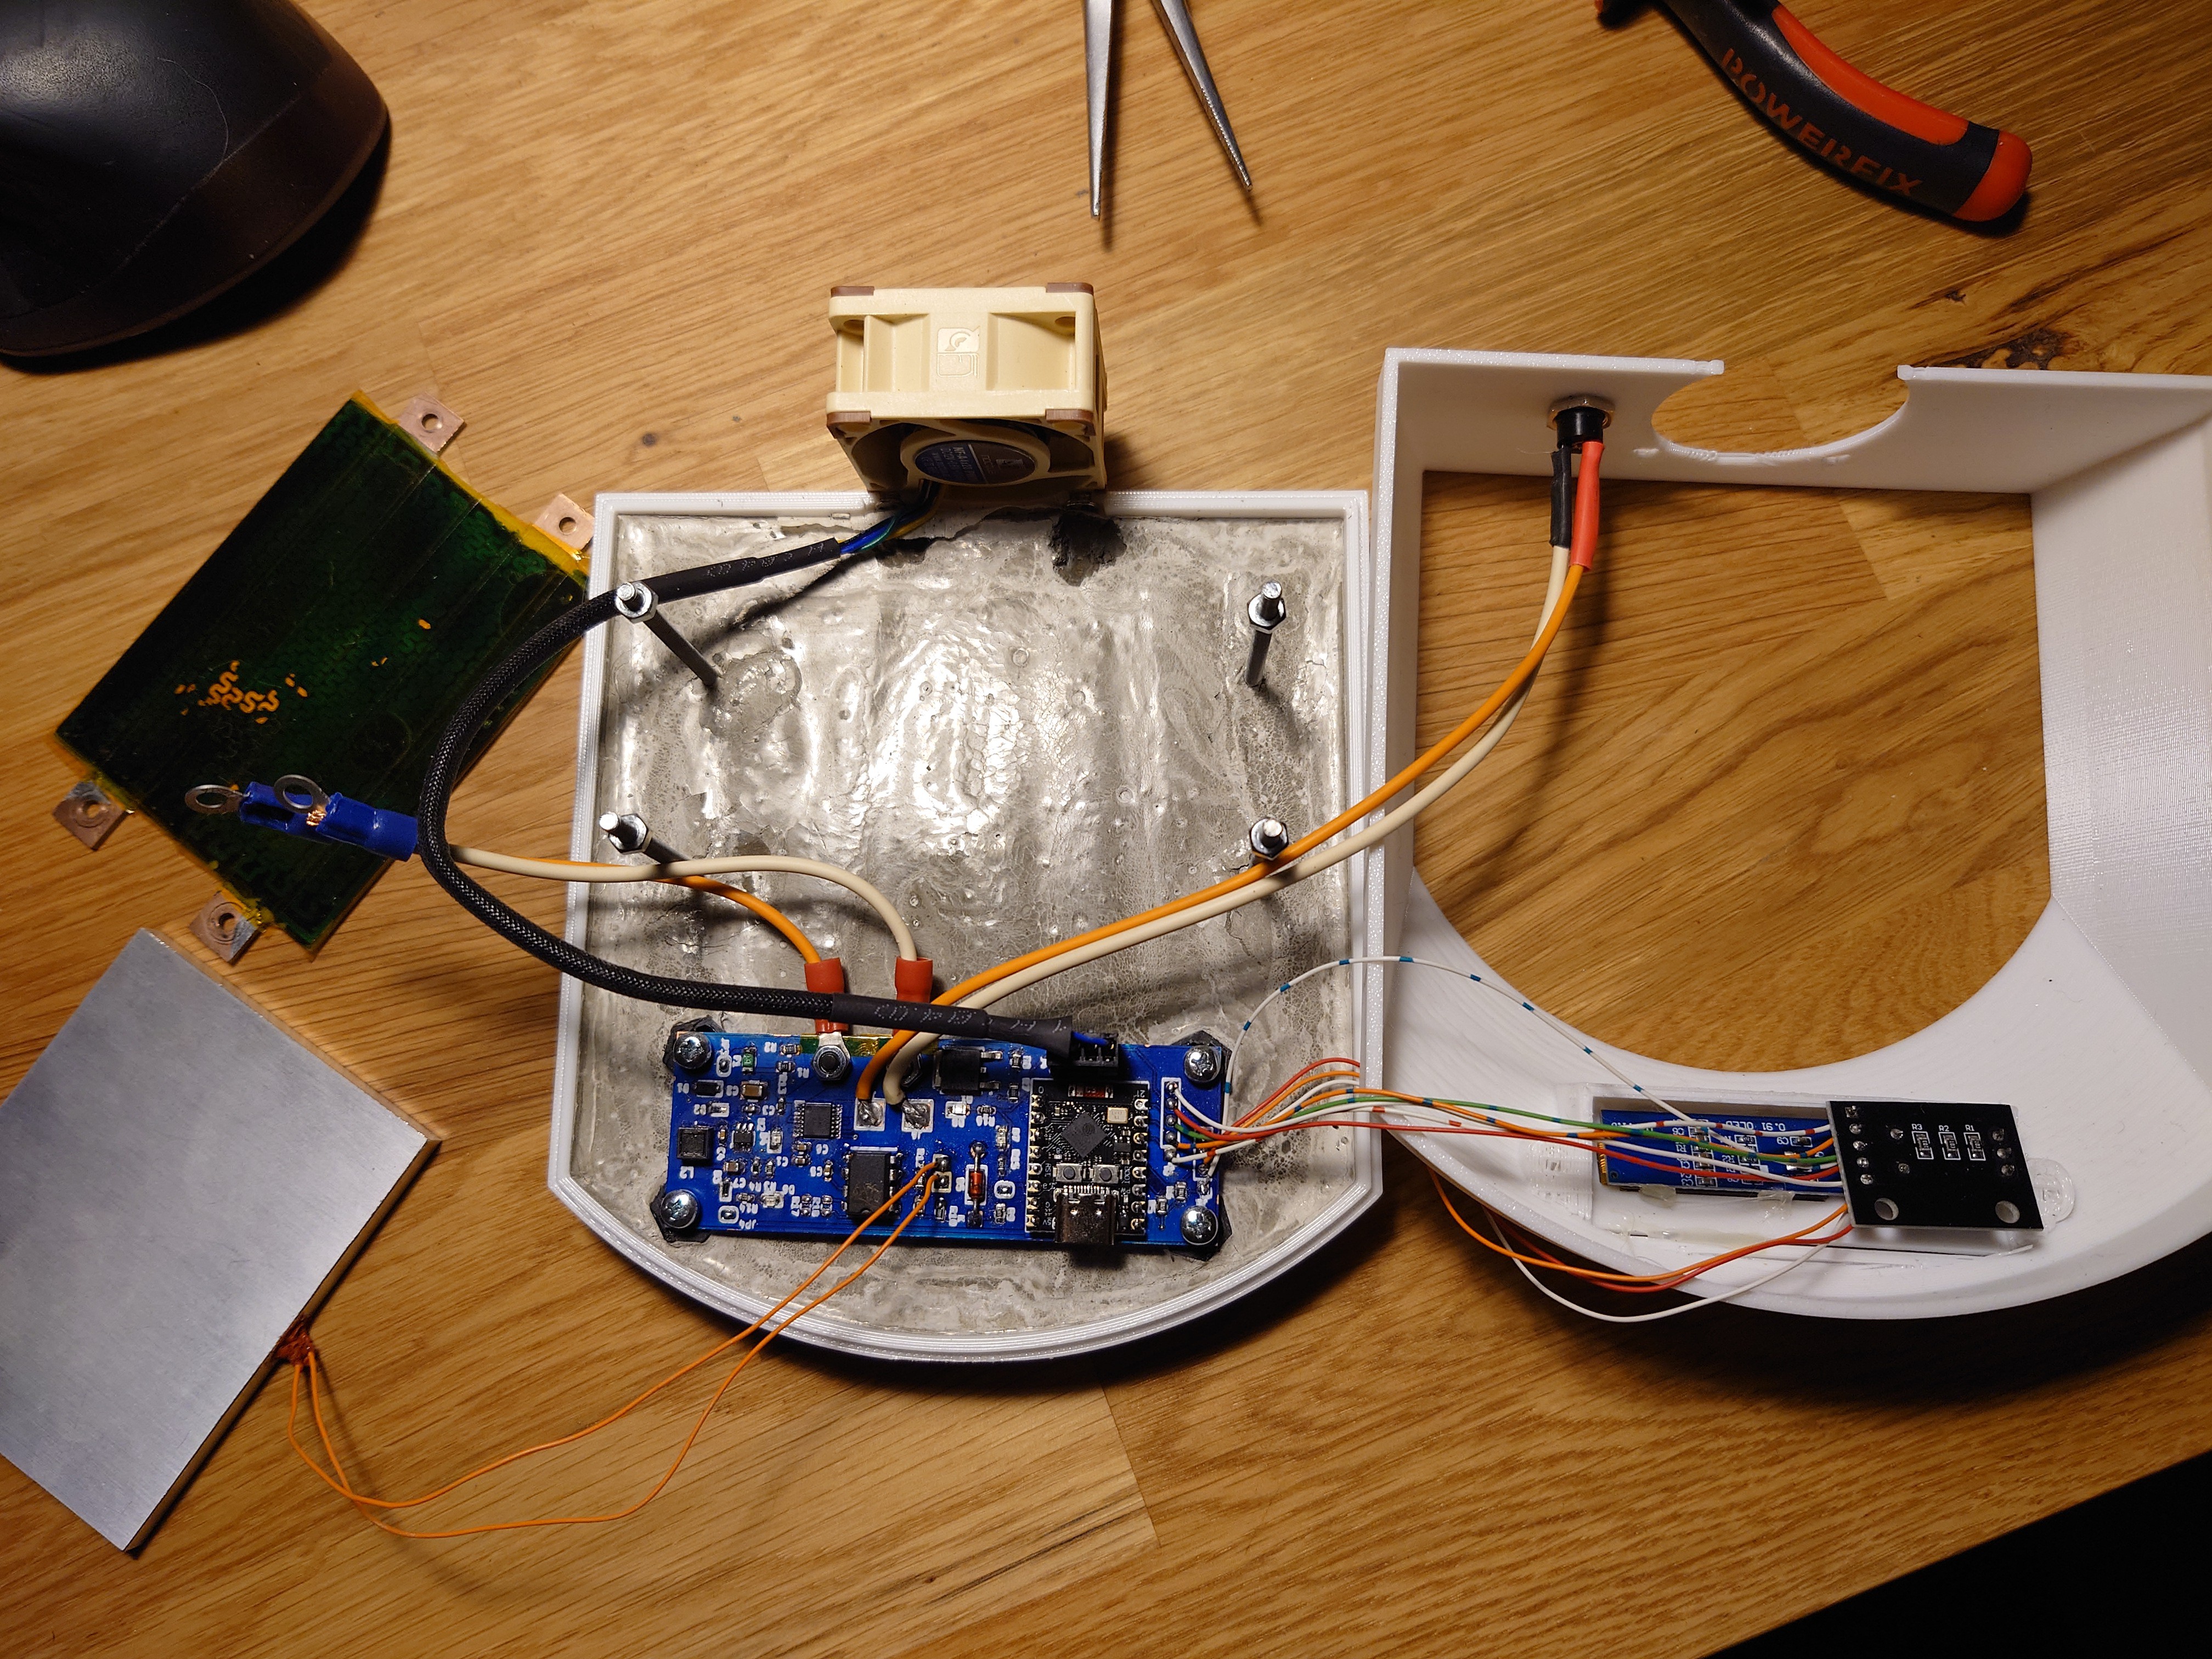
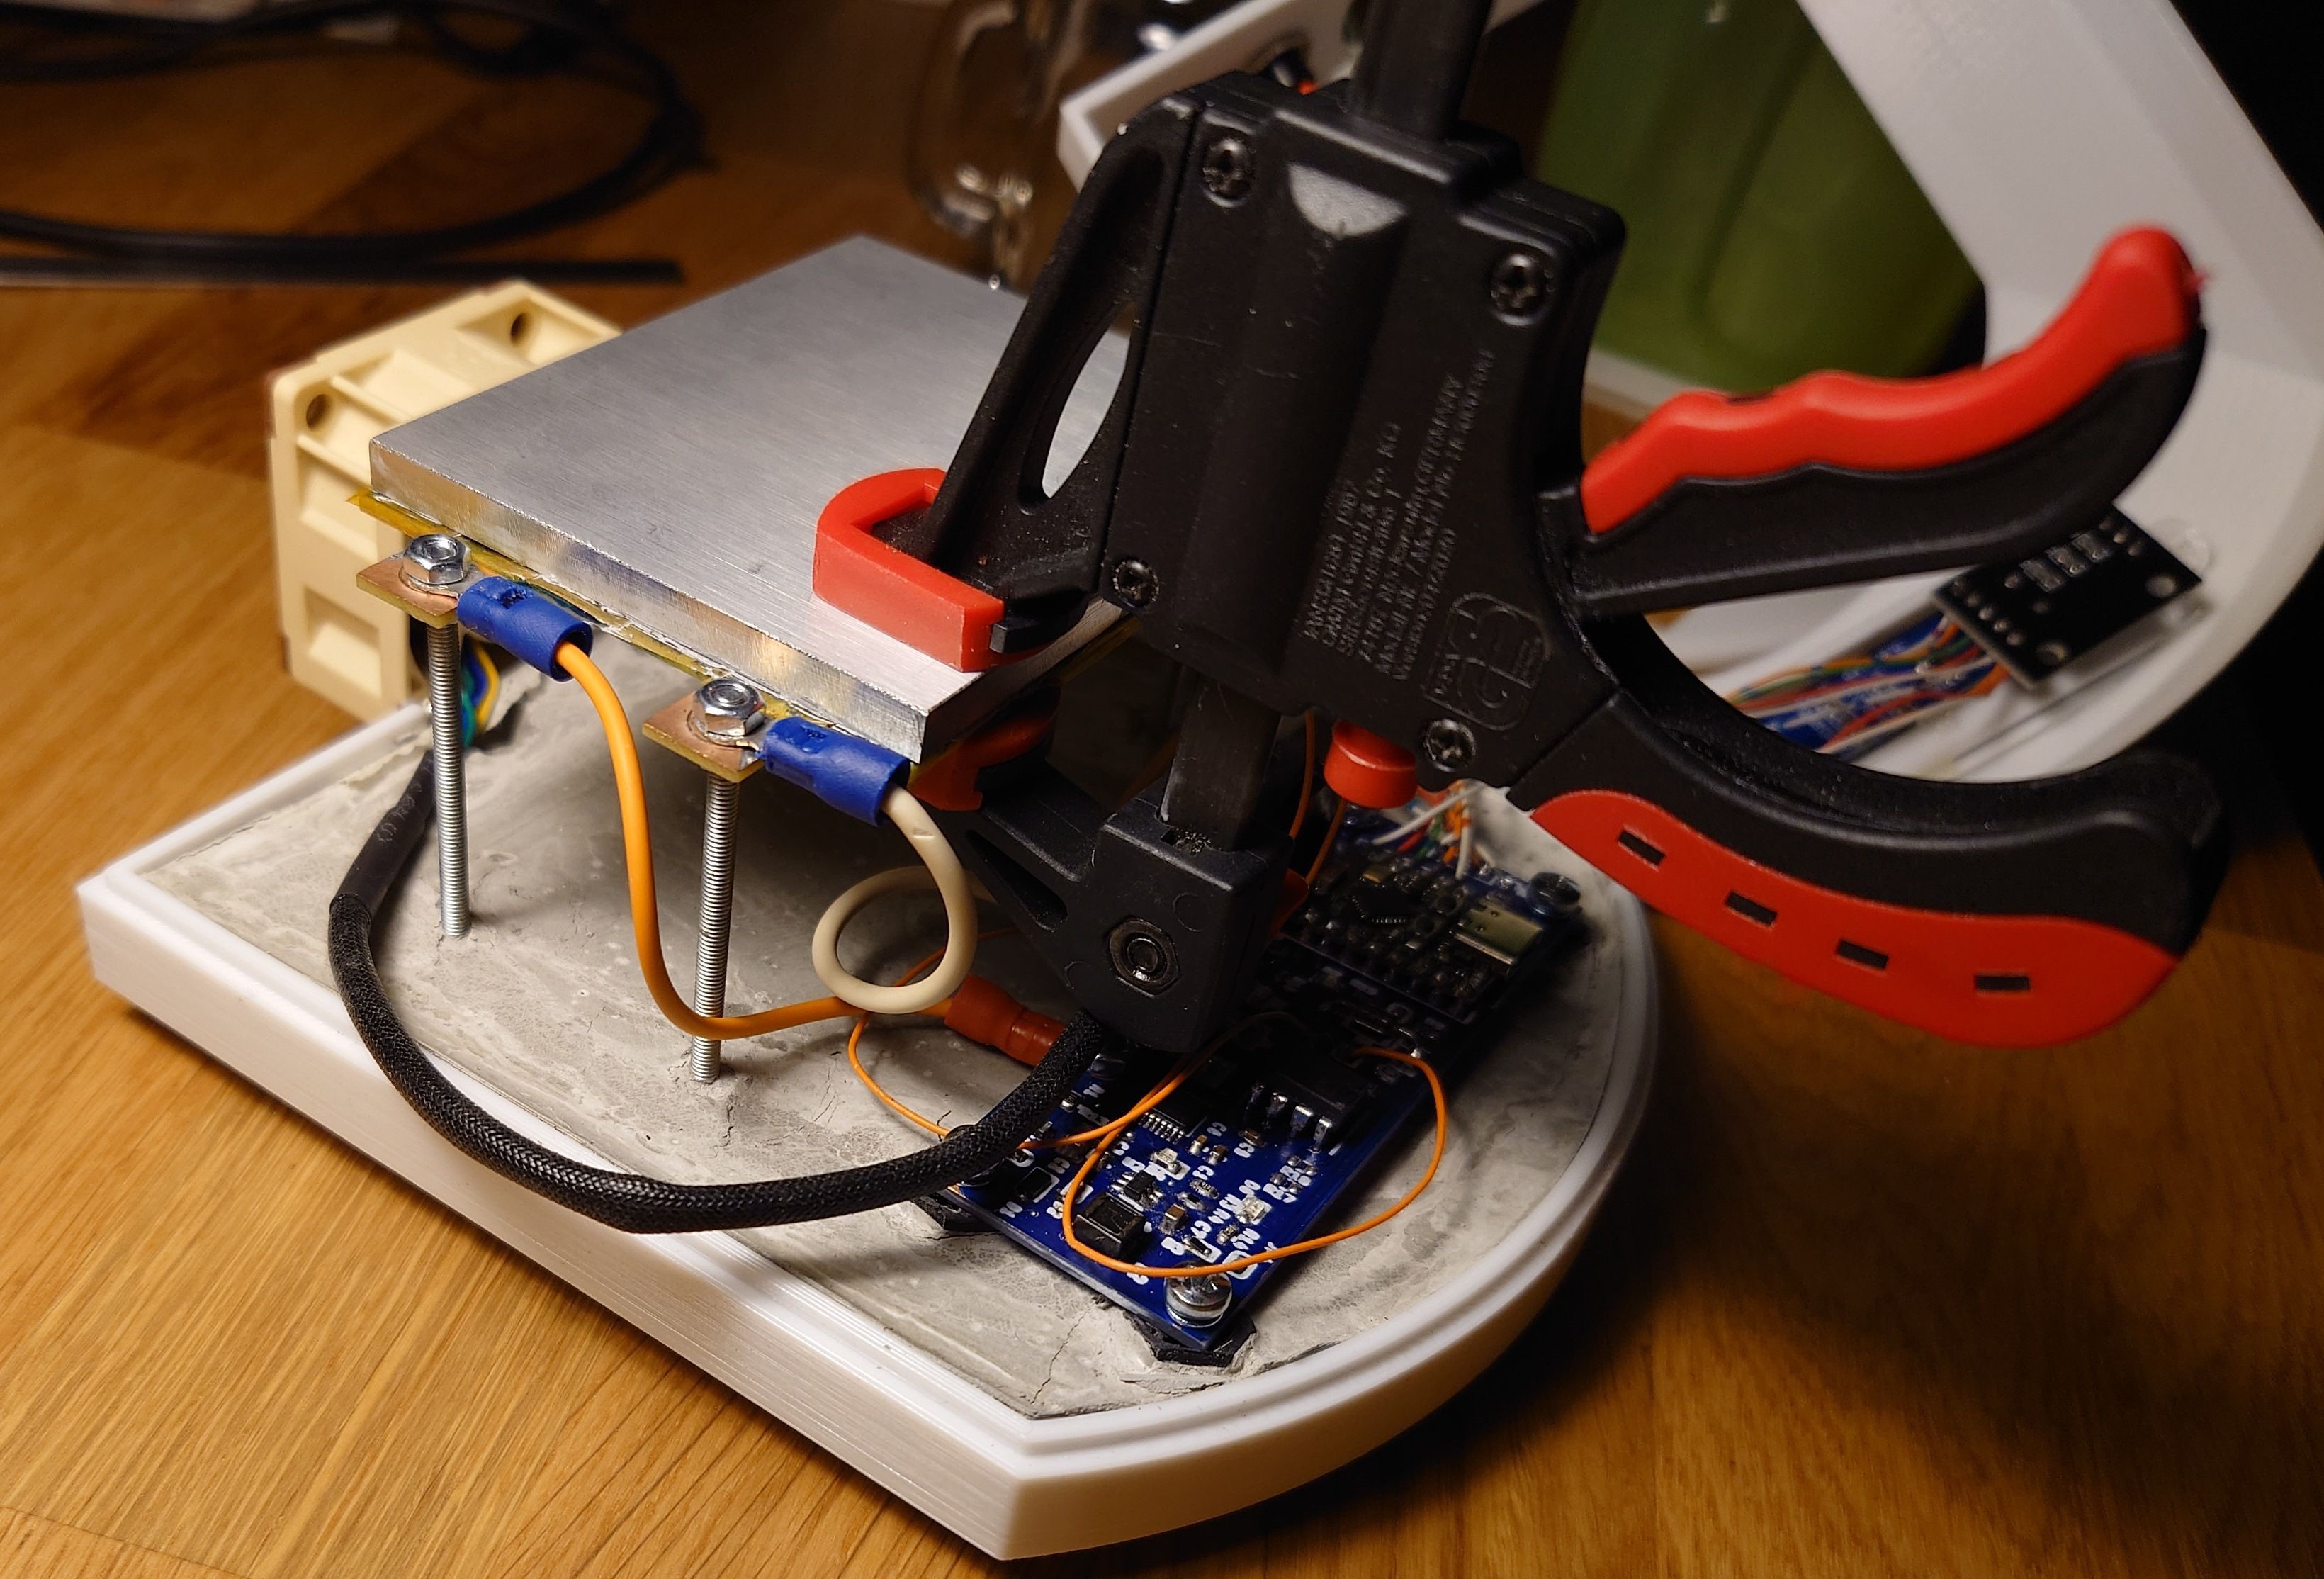
After about 2 days of drying, base plate with concrete is ready. The PCB can be bolted on.
![]()
-
4Heating element
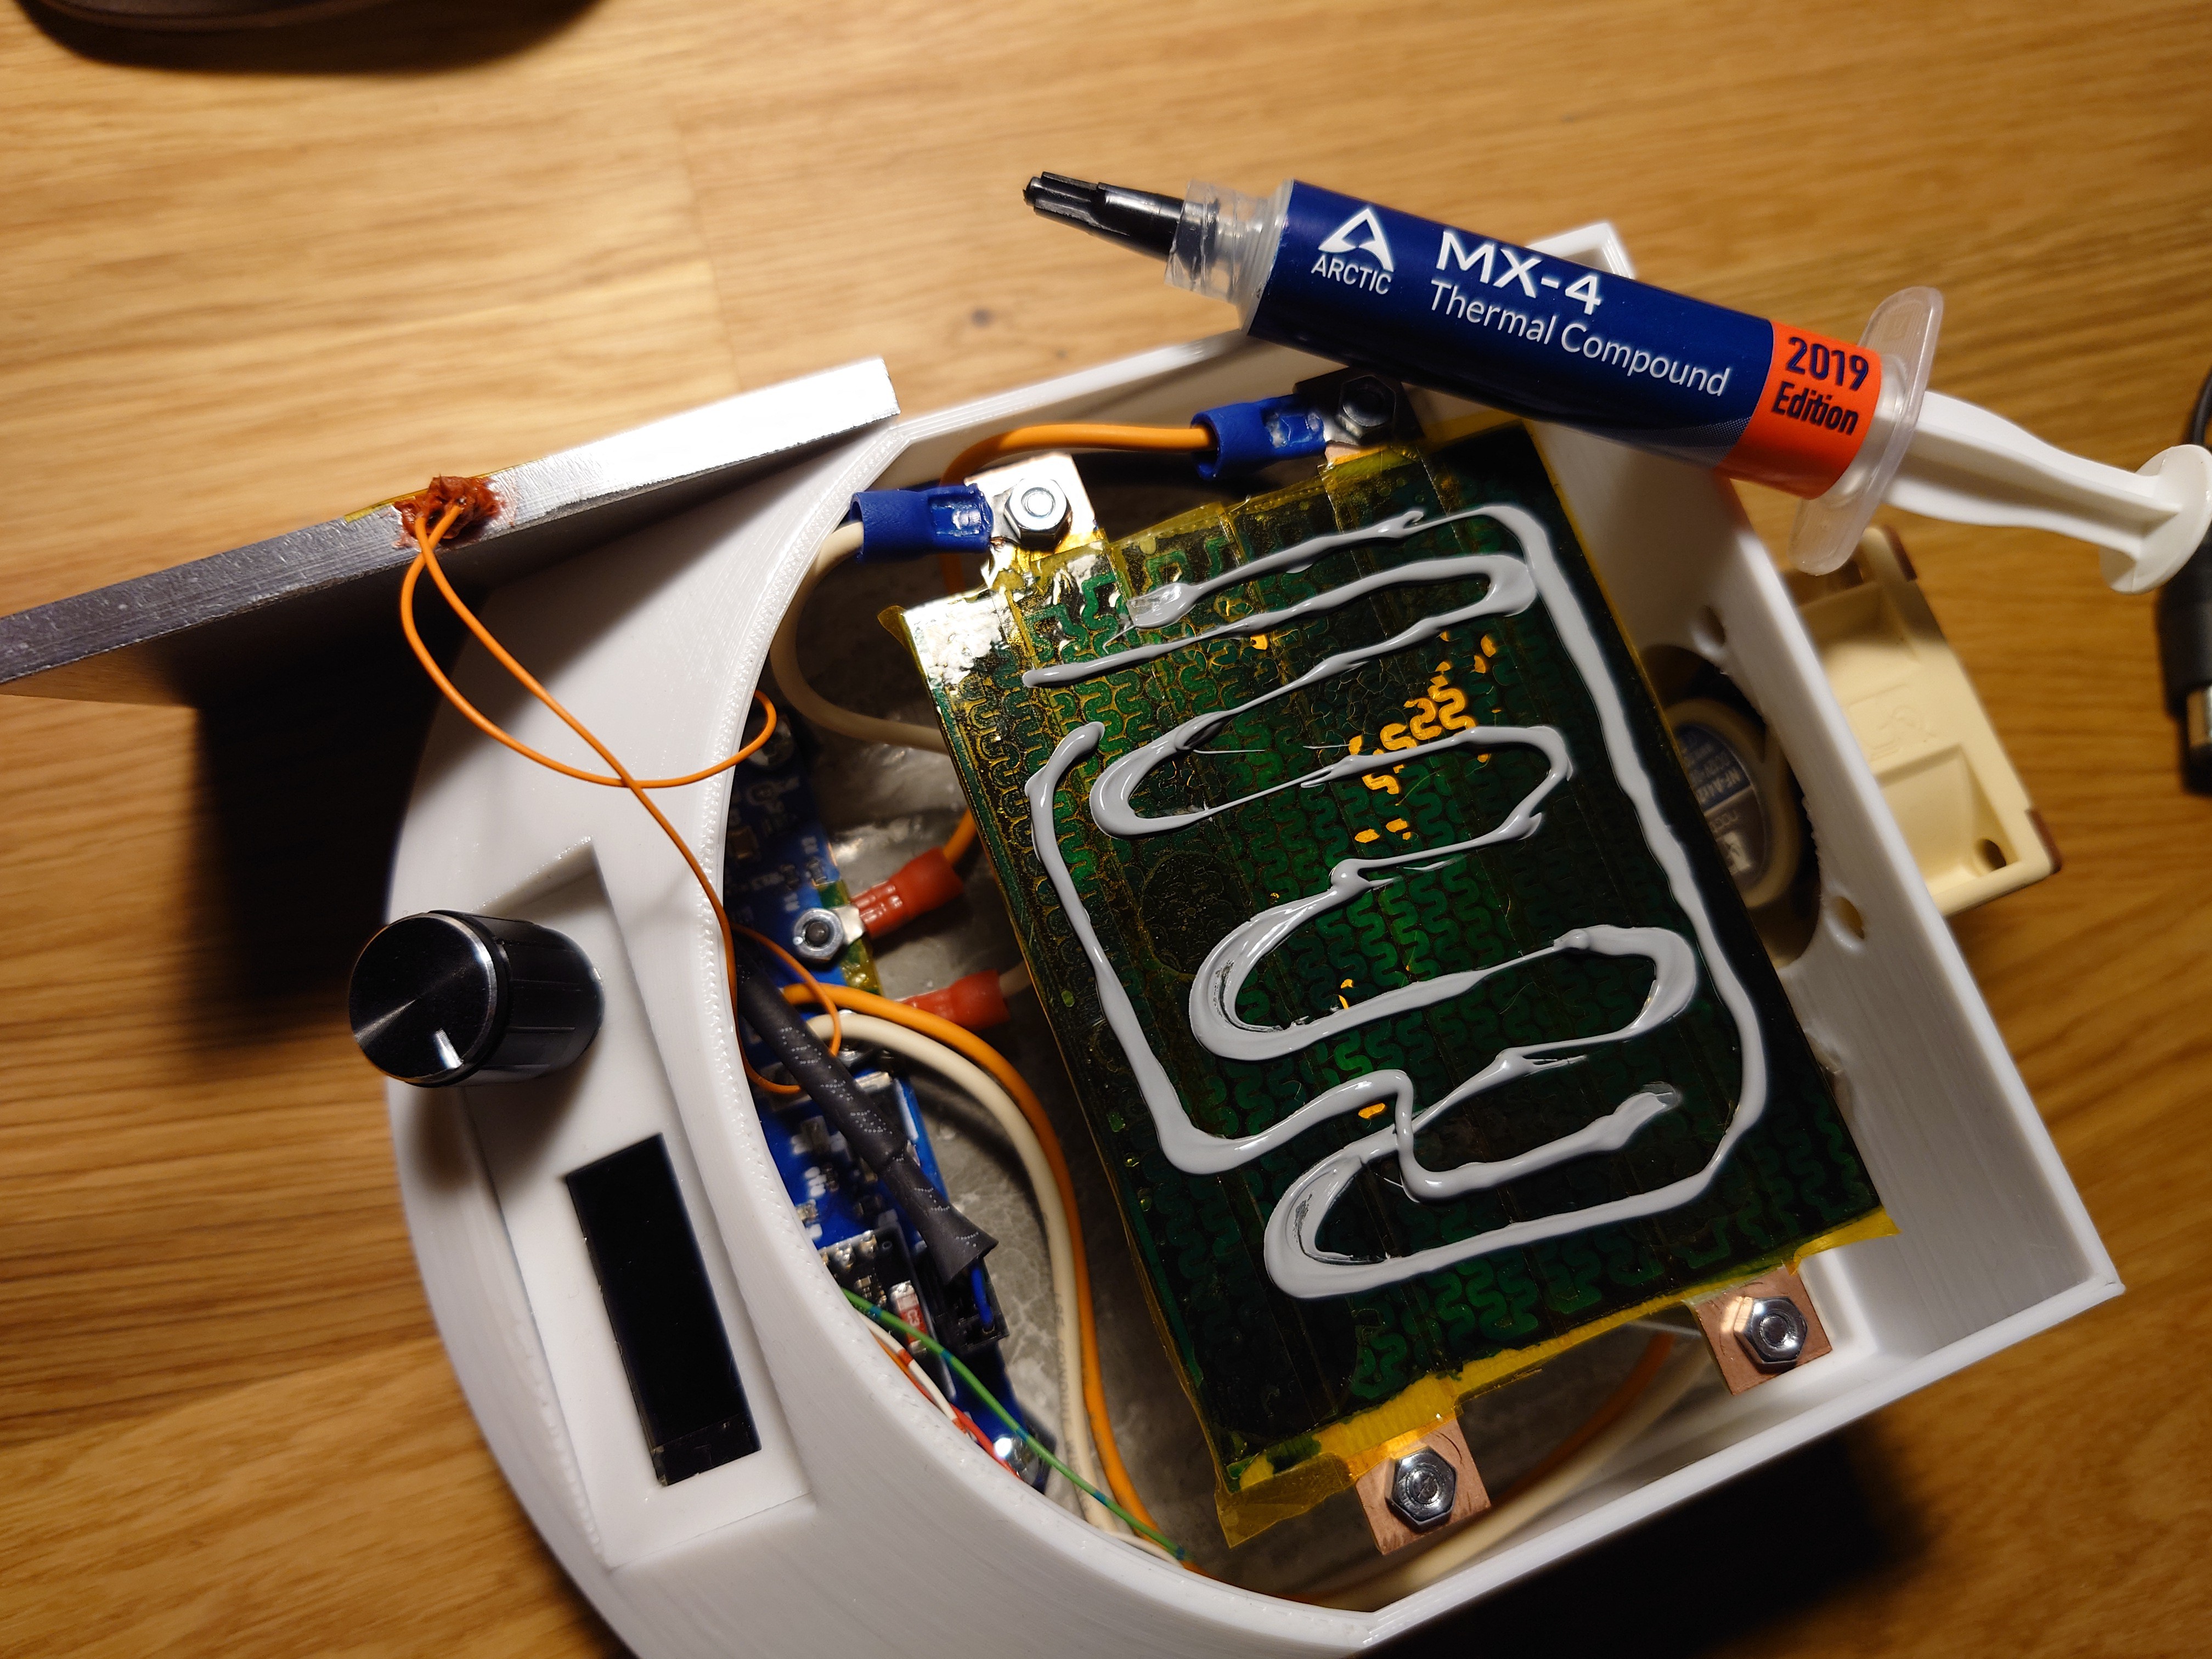
To mount the heating element, 4 nuts should be screwed onto 4 M3 bolts on roughly the same height for the heater to rest on. Then the heater can be secured with another set of M3 nuts. On one side of the heater, power cables are attached under the bolts.
![]()
The heating element is covered in kapton tape, in case the soldermask begins to chip away (because it will due to heat) to avoid short circuits. On top of kapton tape, I thought it might be a good idea to add some thermal paste. After application (show in the picture above) it's a good idea to spread the paste somewhat evenly around with a spatula before attaching the aluminum block.
Finally, the plate can be pressed in place with clamp in few different places around the area of the plate.
![]()
-
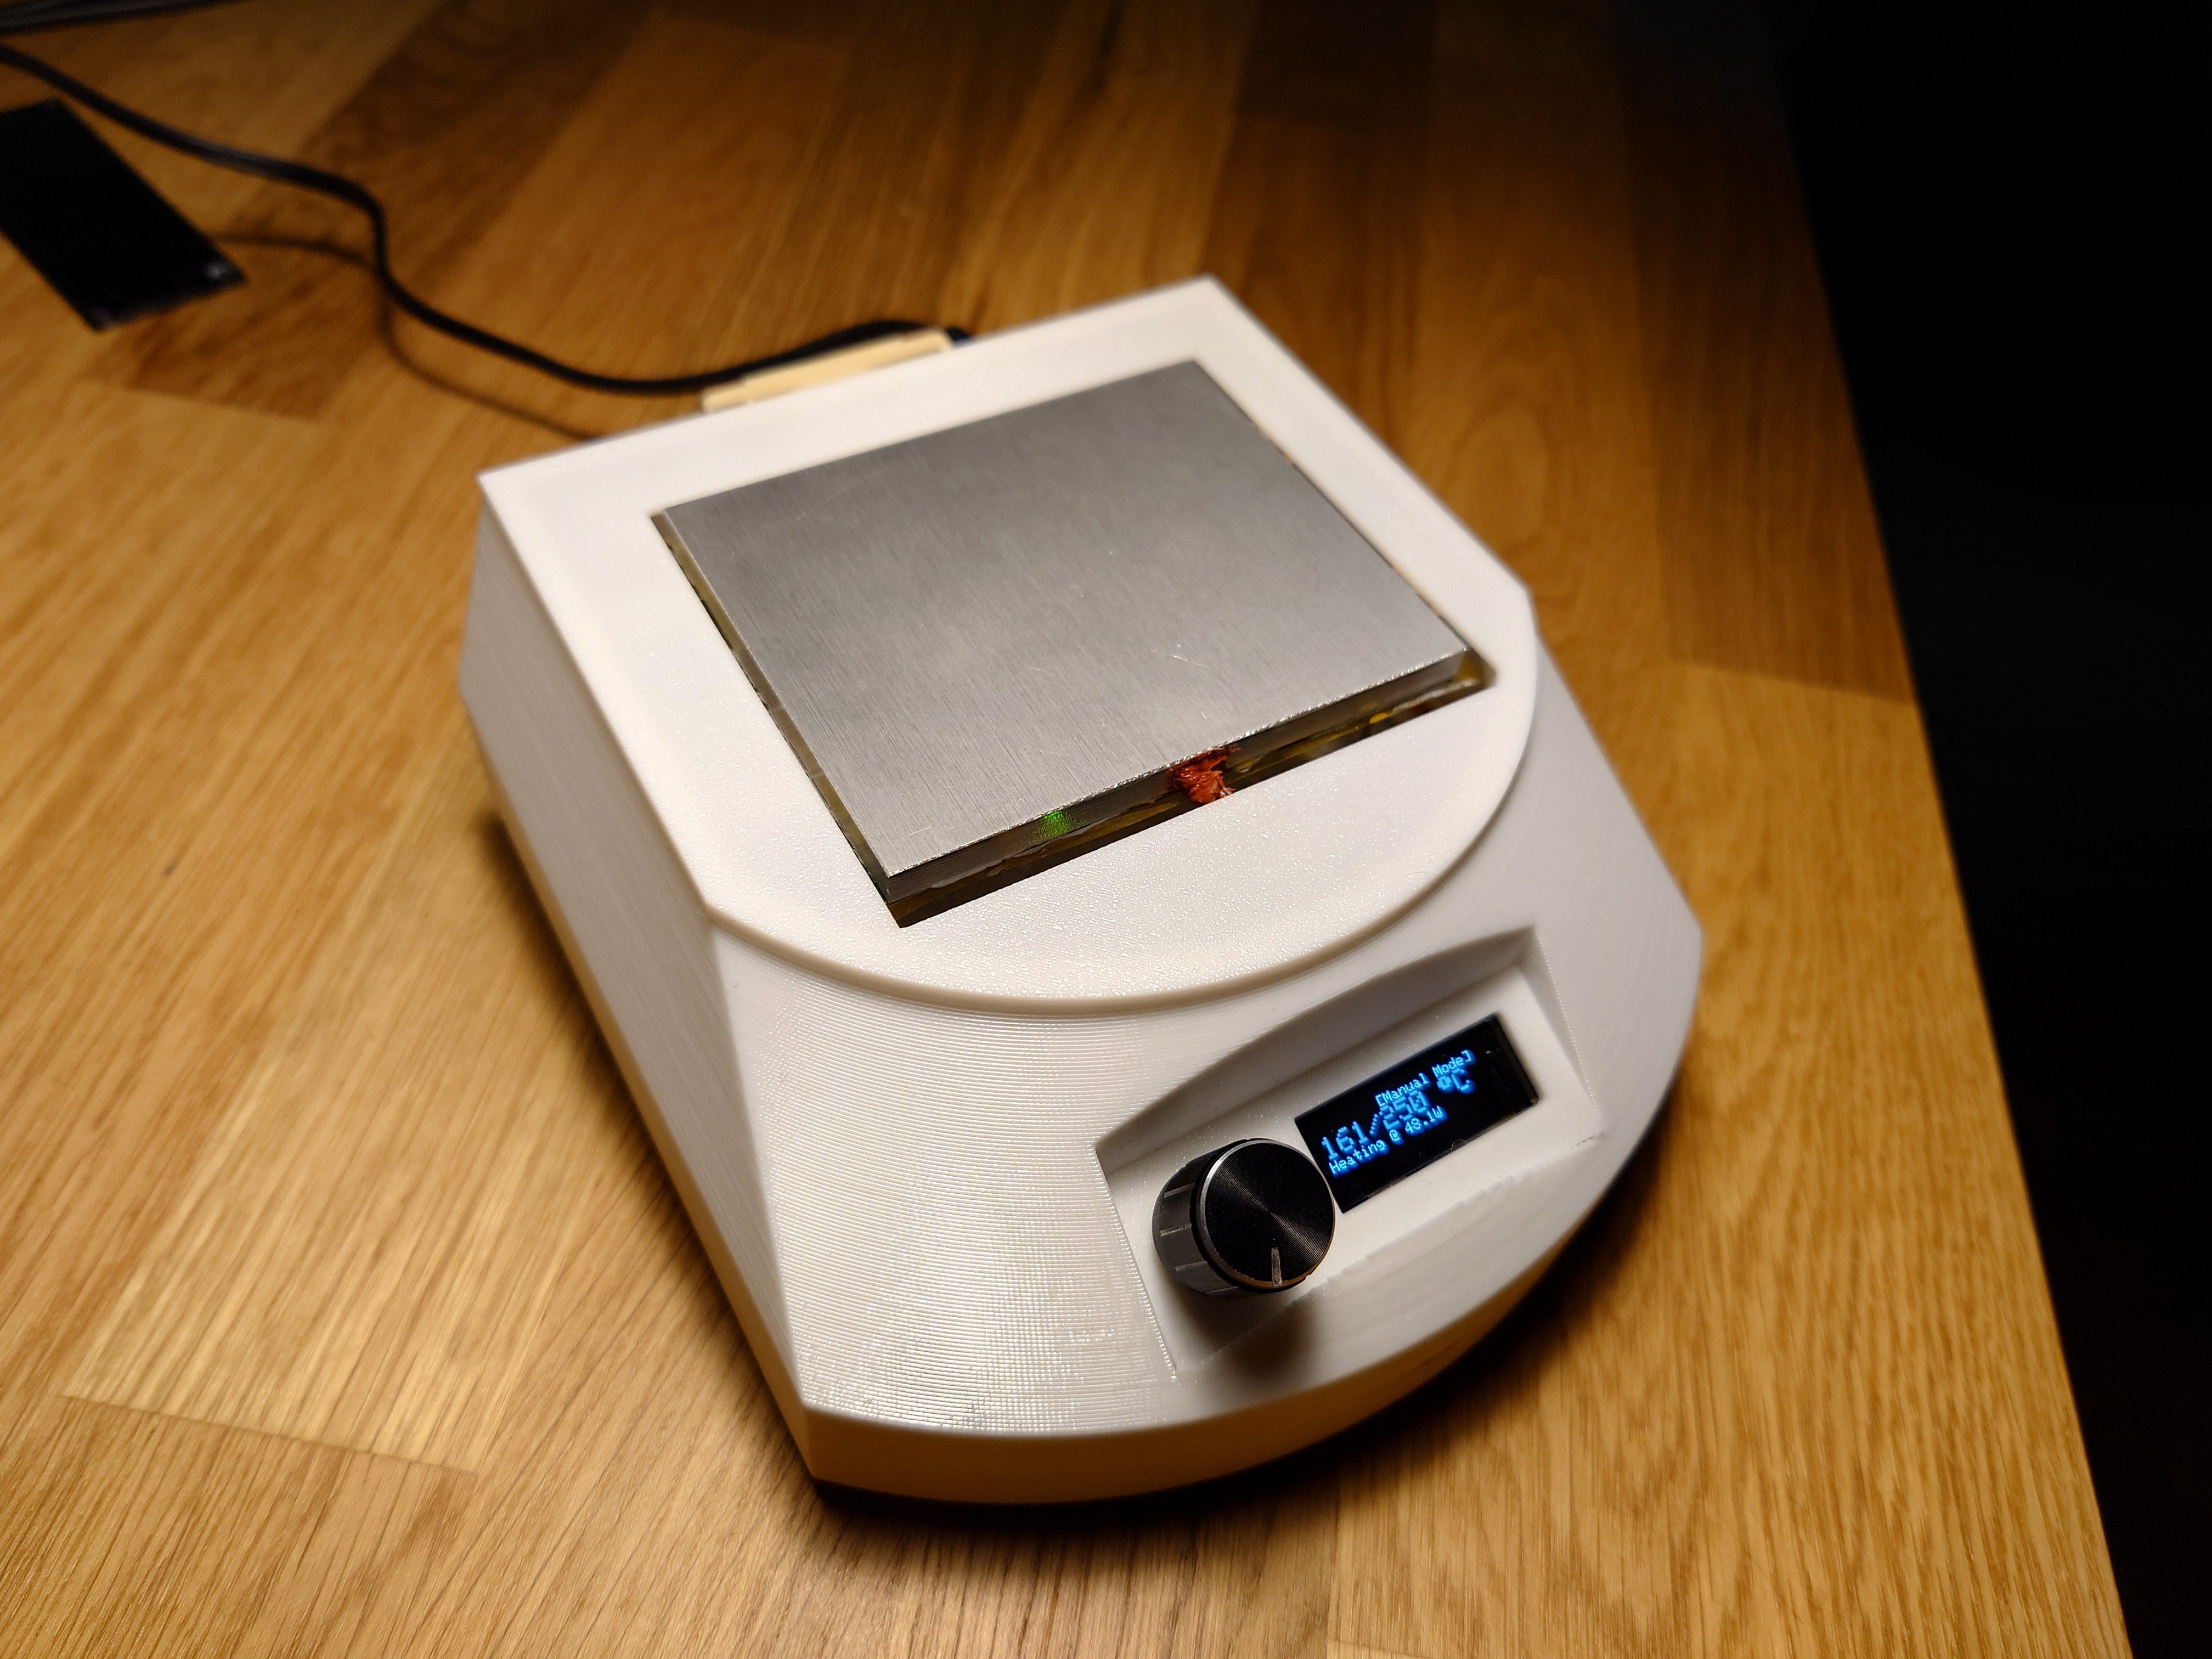
5Final touch
The top half of the case can then be pressed onto the bottom, and the top cover can be added around the aluminum block. The internal dimensions of the top cover might need the be tweaked to fit the placement of heating element in concrete.
![]()
Reflow soldering hotplate
DIY hot plate based on ESP32 and a heater made from the PCB itself
Discussions
Become a Hackaday.io Member
Create an account to leave a comment. Already have an account? Log In.