 Doctor Volt
-
1Step by Step Instructions
- Install the Scoppy App on your phone or tablet.
- Download one of the firmware files from its Firmware Upload Site. There are two firmware files: scoppy-pico-v18.uf2 for Raspberry Pi Pico without WLAN and scoppy-picow-v18.uf2 for the Pi Pico with WLAN.
- Press the button on the RPi Pico and connect it to your computer with a micro-USB cable. It will then be linked as a USB drive.
- Copy the appropriate firmware file to this drive. The RPi Pico will then reboot with the Scoppy firmware.
- Connect your phone using an USB-OTG cable.
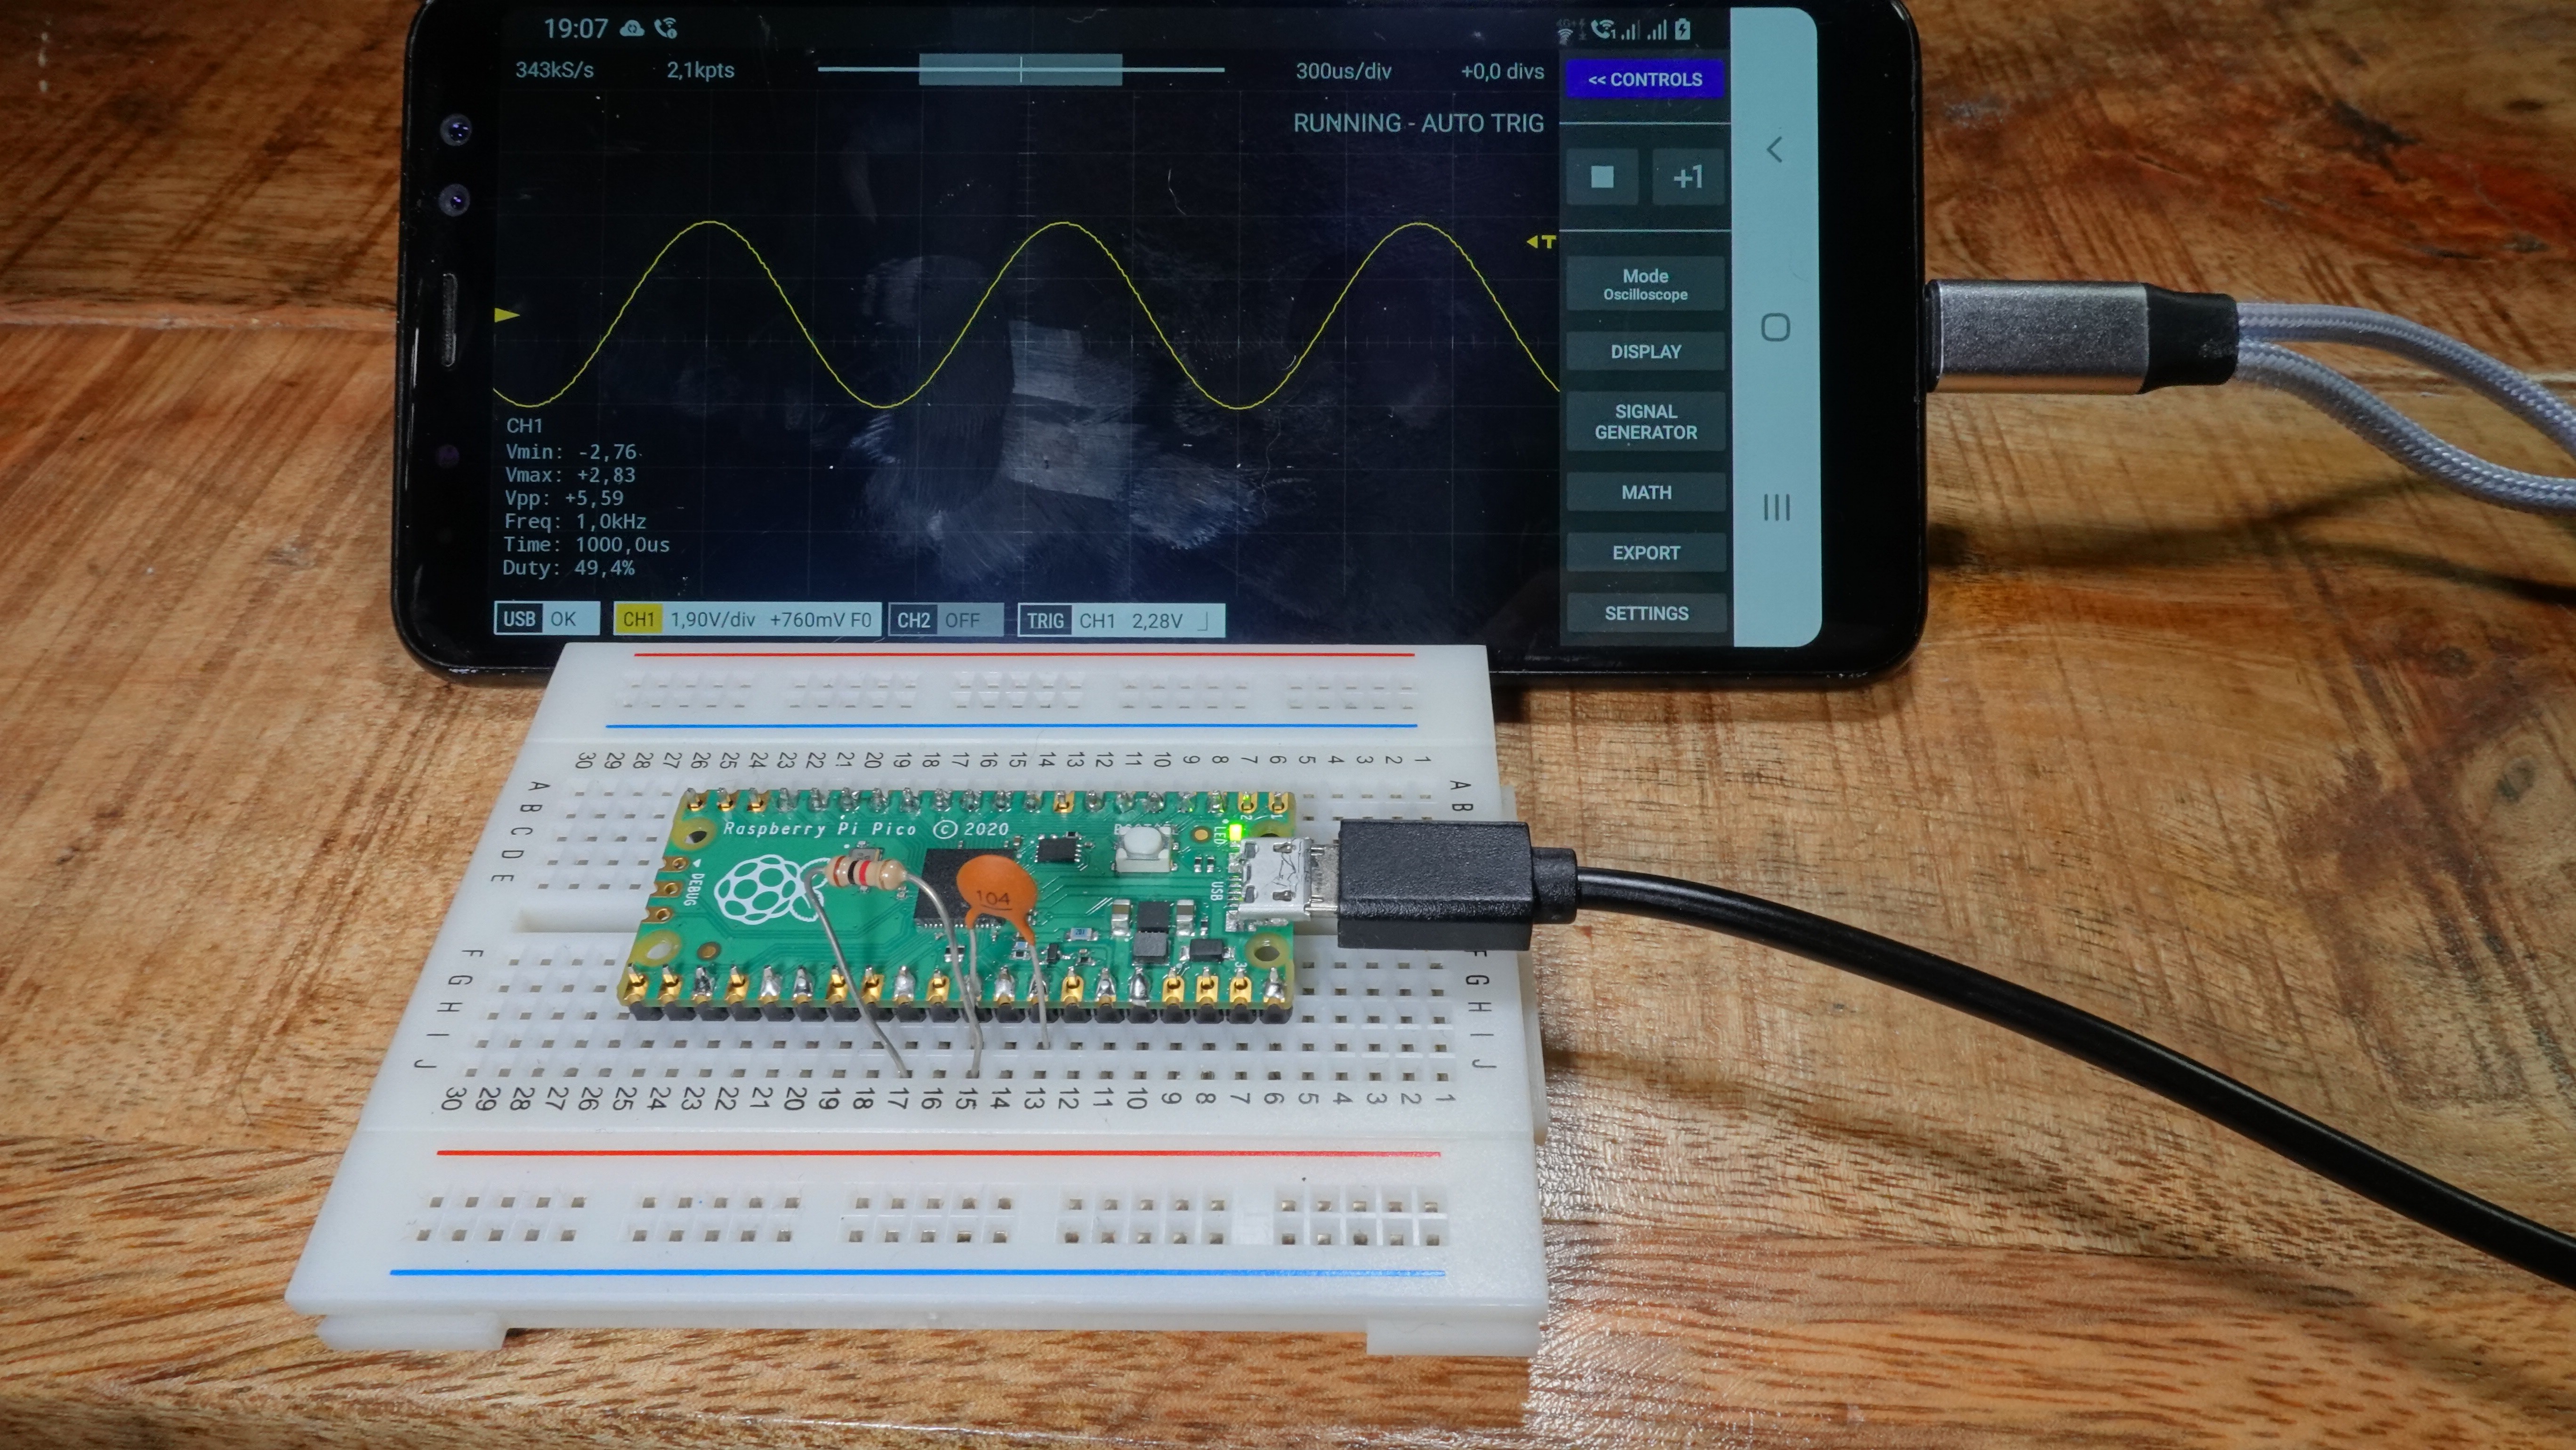
- For a first test you can already connect pin 29 (GPIO 22, signal generator) to pin 31 (GPIO26/ADC0, analog input). For the sine wave, you need to put a 1k resistor between pin 29 and pin 31 plus a 100 nF capacitor between pin 31 and ground (low-pass)
![]()
- Assemble the circuit (see in attachment). Then connect your phone and configure the following input voltage ranges: - 0 (default): -3.3V - 3.3V- 1: -0.33V - 0.33V- 2: -33V - 33V, number of Auto Voltage Range Pins: 2
- Disconnect your phone and connect it again. The Pi Pico then restarts with the new settings.
- Have fun
For more details check out the official Scoppy documentation. Also feel free to watch my Video.
- Install the Scoppy App on your phone or tablet.
Oscilloscope From Pi Pico and Android Phone
An affordable oscilloscope for anyone who enjoys soldering their own projects.
Discussions
Become a Hackaday.io Member
Create an account to leave a comment. Already have an account? Log In.