 danjovic
The project implements a Pomodoro Timer with three 25 minute work intervals followed by with 5 minute pause and a fourth work interval followed by a 30 minute rest time, and repeats this cycle until it is turned off.
The beginning of each time interval is marked by a certain number of beeps, and every interval is color coded for additional feedback.

OPERATION
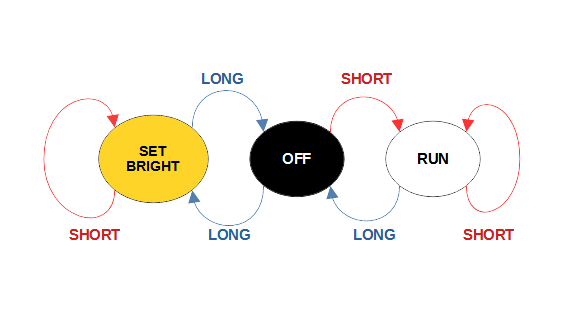
The device provides one button to turn the device on/off and to adjust the brightness. Refer to the state diagram below.
When in OFF state, a short press will start the timing and the device will flash once per second.
When the device is counting time, a long press will turn it OFF and a short press will skip to the beginning of the next interval.
Every working interval is marked by a different color and is marked by 3 beeps.
The 5 minute brakes pauses are red and it is marked by 4 beeps.
The rest interval is blue and it is marked by 5 beeps.
From OFF state, a long press will enter the brightness adjust mode. In this mode, a short press will cycle through 5 different levels. A long press will return the device to OFF state.

HARDWARE
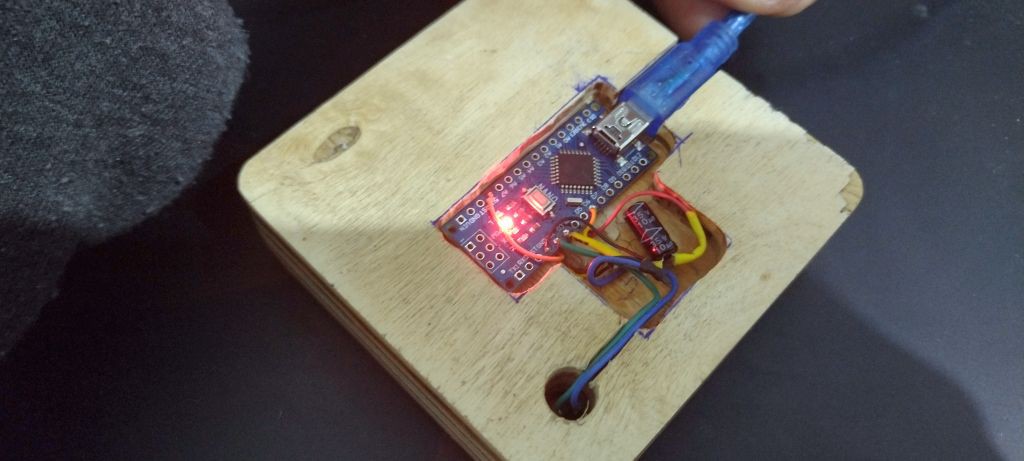
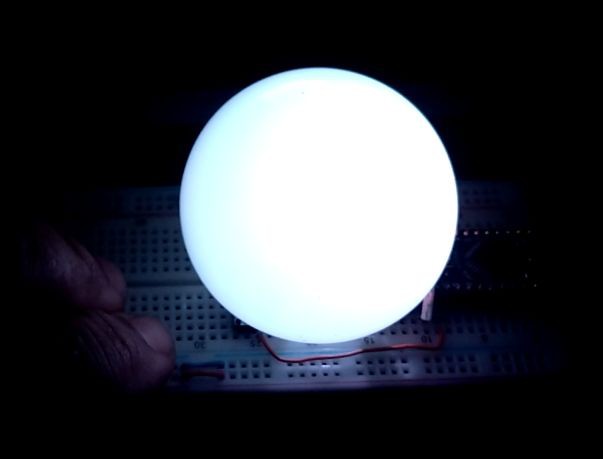
The circuit is built around an Arduino Nano, a WS2812 neopixel LED, a buzzer and a push button.
Brightness control
To be implemented (LDR or potentiometer or fixed steps)
SOFTWARE
The software is implemented as a single loop that executes a series of tasks then wait for the next cycle. The heartbeat is provided by AVR Timer 1 that is configured to generate one interrupt at every 10ms. The interrupt service routine sets a flag that is read (and then reset) by the main loop.
The behavior of the circuit at every interval (time, color and number of beeps) is read from a series of tables at the beginning of each interval.
Button Handling
The button task return a single event for either a short press (pulse) or a long press. Every time the button is held down a counter is incremented. A long press is returned at the sample that the counting is equal to the long press threshold (it happens only once). A short press is detected at the sample when the button is released. If the is higher than a noise threshold and less than the long press threshold, a short press is returned.
Sound
Sound is generated using the tone() function of Arduino. The pin where the buzzed is connected was chosen so the beep is generated by PWM (using timer 2) and requires no CPU to generate it.
The beep task turns on and off the tone generation according to the number of beeps it has to generate. The duration and the interval between the beeps are hardcoded
Sinewave Flashing
At every 100 ticks the LED brightness values are increased, then decreased following a sinusoidal pattern equivalent of the interval from -pi/2 to +3pi/2, resulting in a gradual flashing at exact 1Hz.
The brightness values are read from a table that is calculated by a function that runs at the beginning of the execution. That was done to allow dynamically adjustment of brightness. The values from -1 to + 1 interval are converted to a range between 0 and the maximum brightness (up to 255).


 The Big One

 0xCAFEAFFE
 mircemk
The Domoporo is a magnificent idea! Occasionally my daytime is just like that, specially those full of never-ending meetings.