 Joeshmoe16

Another Plotter Project
I have to confess, the plotter craze got to me. There is something deeply pleasing about a project where your code does something in the real world, where you are creating a tool, and where you are making art. In this project I created a new polar plotter. This project is far more than just some 3D models and circuit design. It’s a new dead simple arduino based gcode controller that works in tandem with a python based application. (If you don’t care to read an article about this project, the github repo has copious amounts of documentation.)
Here is a demonstration of the project.
Before I get into the details of this project, it’s important to talk about the inspiration for this project. The term Polar Plotter comes from a project by Sandy Noble. This project was hosted at polargraph.co.uk and the code can still be found here and here. Noble created an excellent program that can plot some amazing designs. However it is not a gcode machine, and it’s not very general purpose. I wanted something that was minimalistic and easy for people to riff off of.
Then there is the line art itself. I am a big fan of some work done by Mitxela found here. You can also find a huge amount of line art all over the internet, although I like the resources found here and here. In general a lot of these resources are generative art. It’s not AI generated, but rather a lot of different code written by brilliant people all over the internet. The line art must be turned into gcode and here is some information about gcode and generating gcode.
All that being said, the thing that really makes a polar plotter a polar plotter is the simple mechanical design. While it may be simple to make one, it can actually be quite complex to design. Let’s take a look at the finished design and consider some of its features.
In this case the plotter has two motors mounted above the drawing area. Each motor has a pulley with a belt that the pulley can push and pull. The belts meet at a center point with a pen/marker passing directly through the center point. This center part is often called the gondola. The gondola has a servo motor which can raise and lower the marker, using the servo horn to push the marker away from the drawing surface.
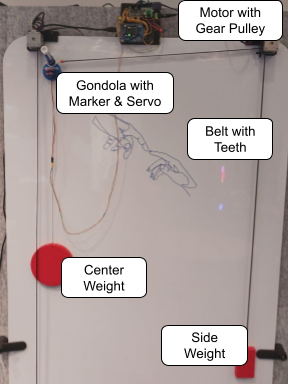
The beauty of this design is that it’s incredibly simple. A typical X/Y plotter might have a gantry that requires a bunch of carefully machined parts to work. Here none of that is required.
Looking closer at the gondola and you might notice that the belts are not directly attached.
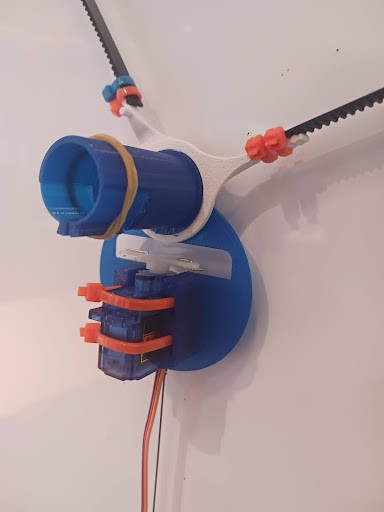
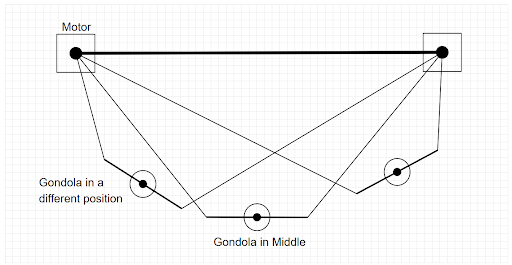
This is because the marker needs to be at the actual centerpoint of the two belts. The two white arms rotate around the blue cylinder. (The blue cylinder is where the marker slides in.) In some plotter designs, this feature is ignored and the belts are directly mounted to the gondola. This creates a problem where the marker won’t be in the expected position. The Gondola will tilt as you move it around so that the weight is always in the lowest possible position. You can see this in the image below.
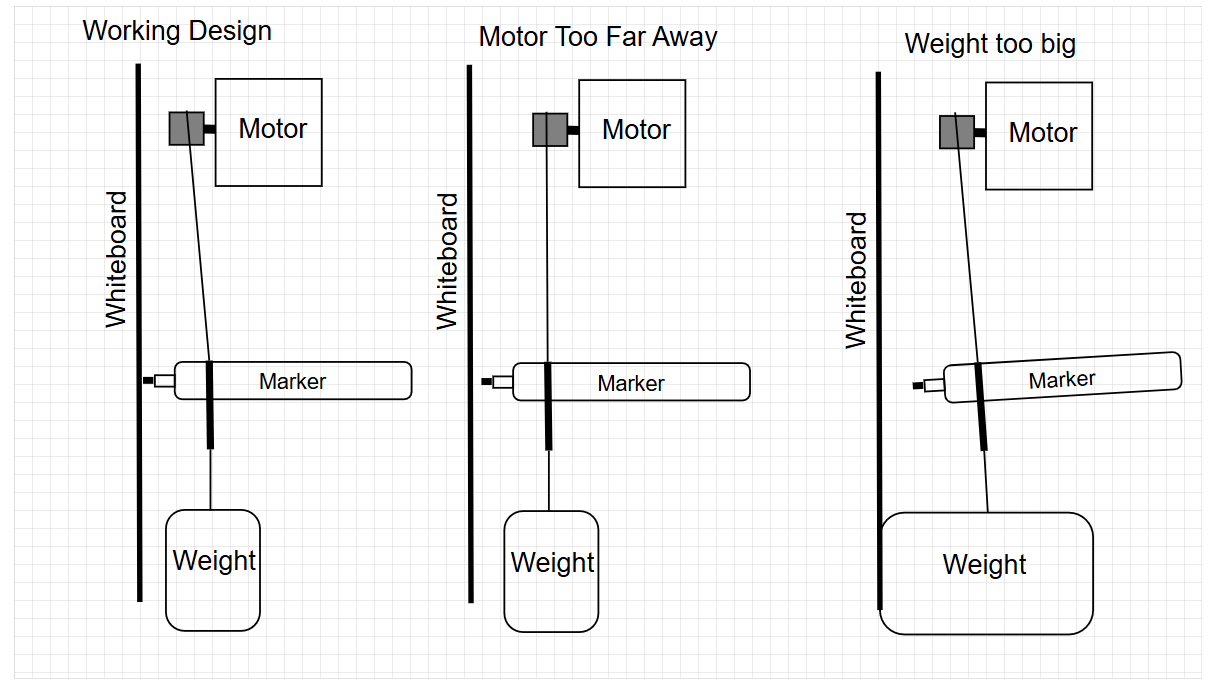
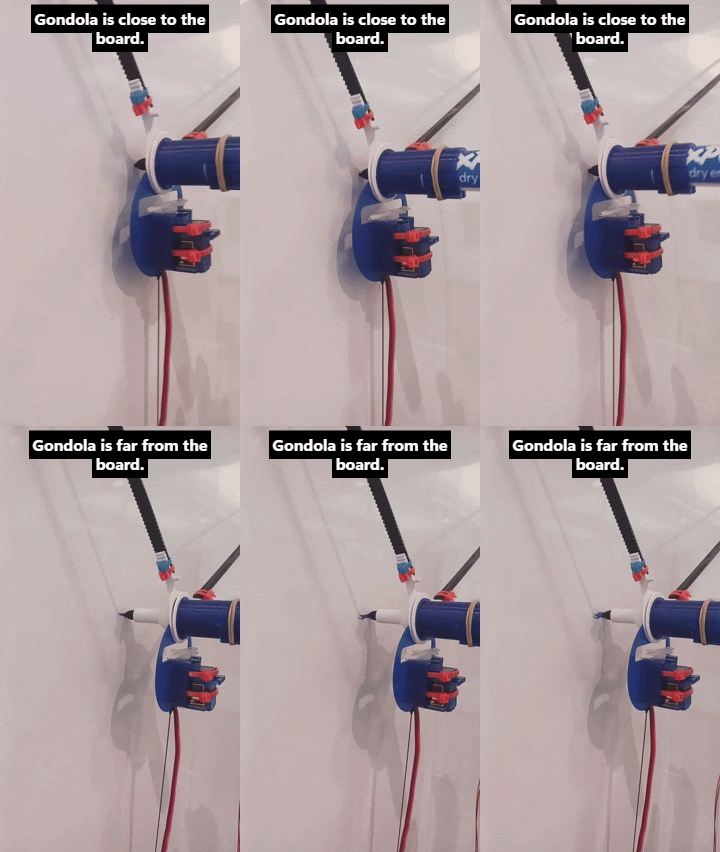
Another consideration with a polar plotter is the marker pressure. In order for the marker to actually touch the drawing surface, the marker needs to push the gondola away from the surface. Consider the sideways view below. If the weight is too big, or the motor is too far away, the marker will just hang in midair and won’t touch the board.
Another mechanical consideration is that the marker can tilt. The further the gondola is from the whiteboard, the more the marker can shake as the plotter moves around and plots. This means the gondola needs to be as close to the whiteboard as possible. Bigger arms will help with this a little bit too. You can see this happen in the gif below.
This plotter also has the unfortunate and classic problem of belt skipping. When the machine jerks around too much, or the belts get to certain angles, belt skipping can occur. For simplicity of design,...
Read more »
 Matthew James Bellafaire
 Andrew & Ben
 Josh Cole
 Gabriel D'Espindula