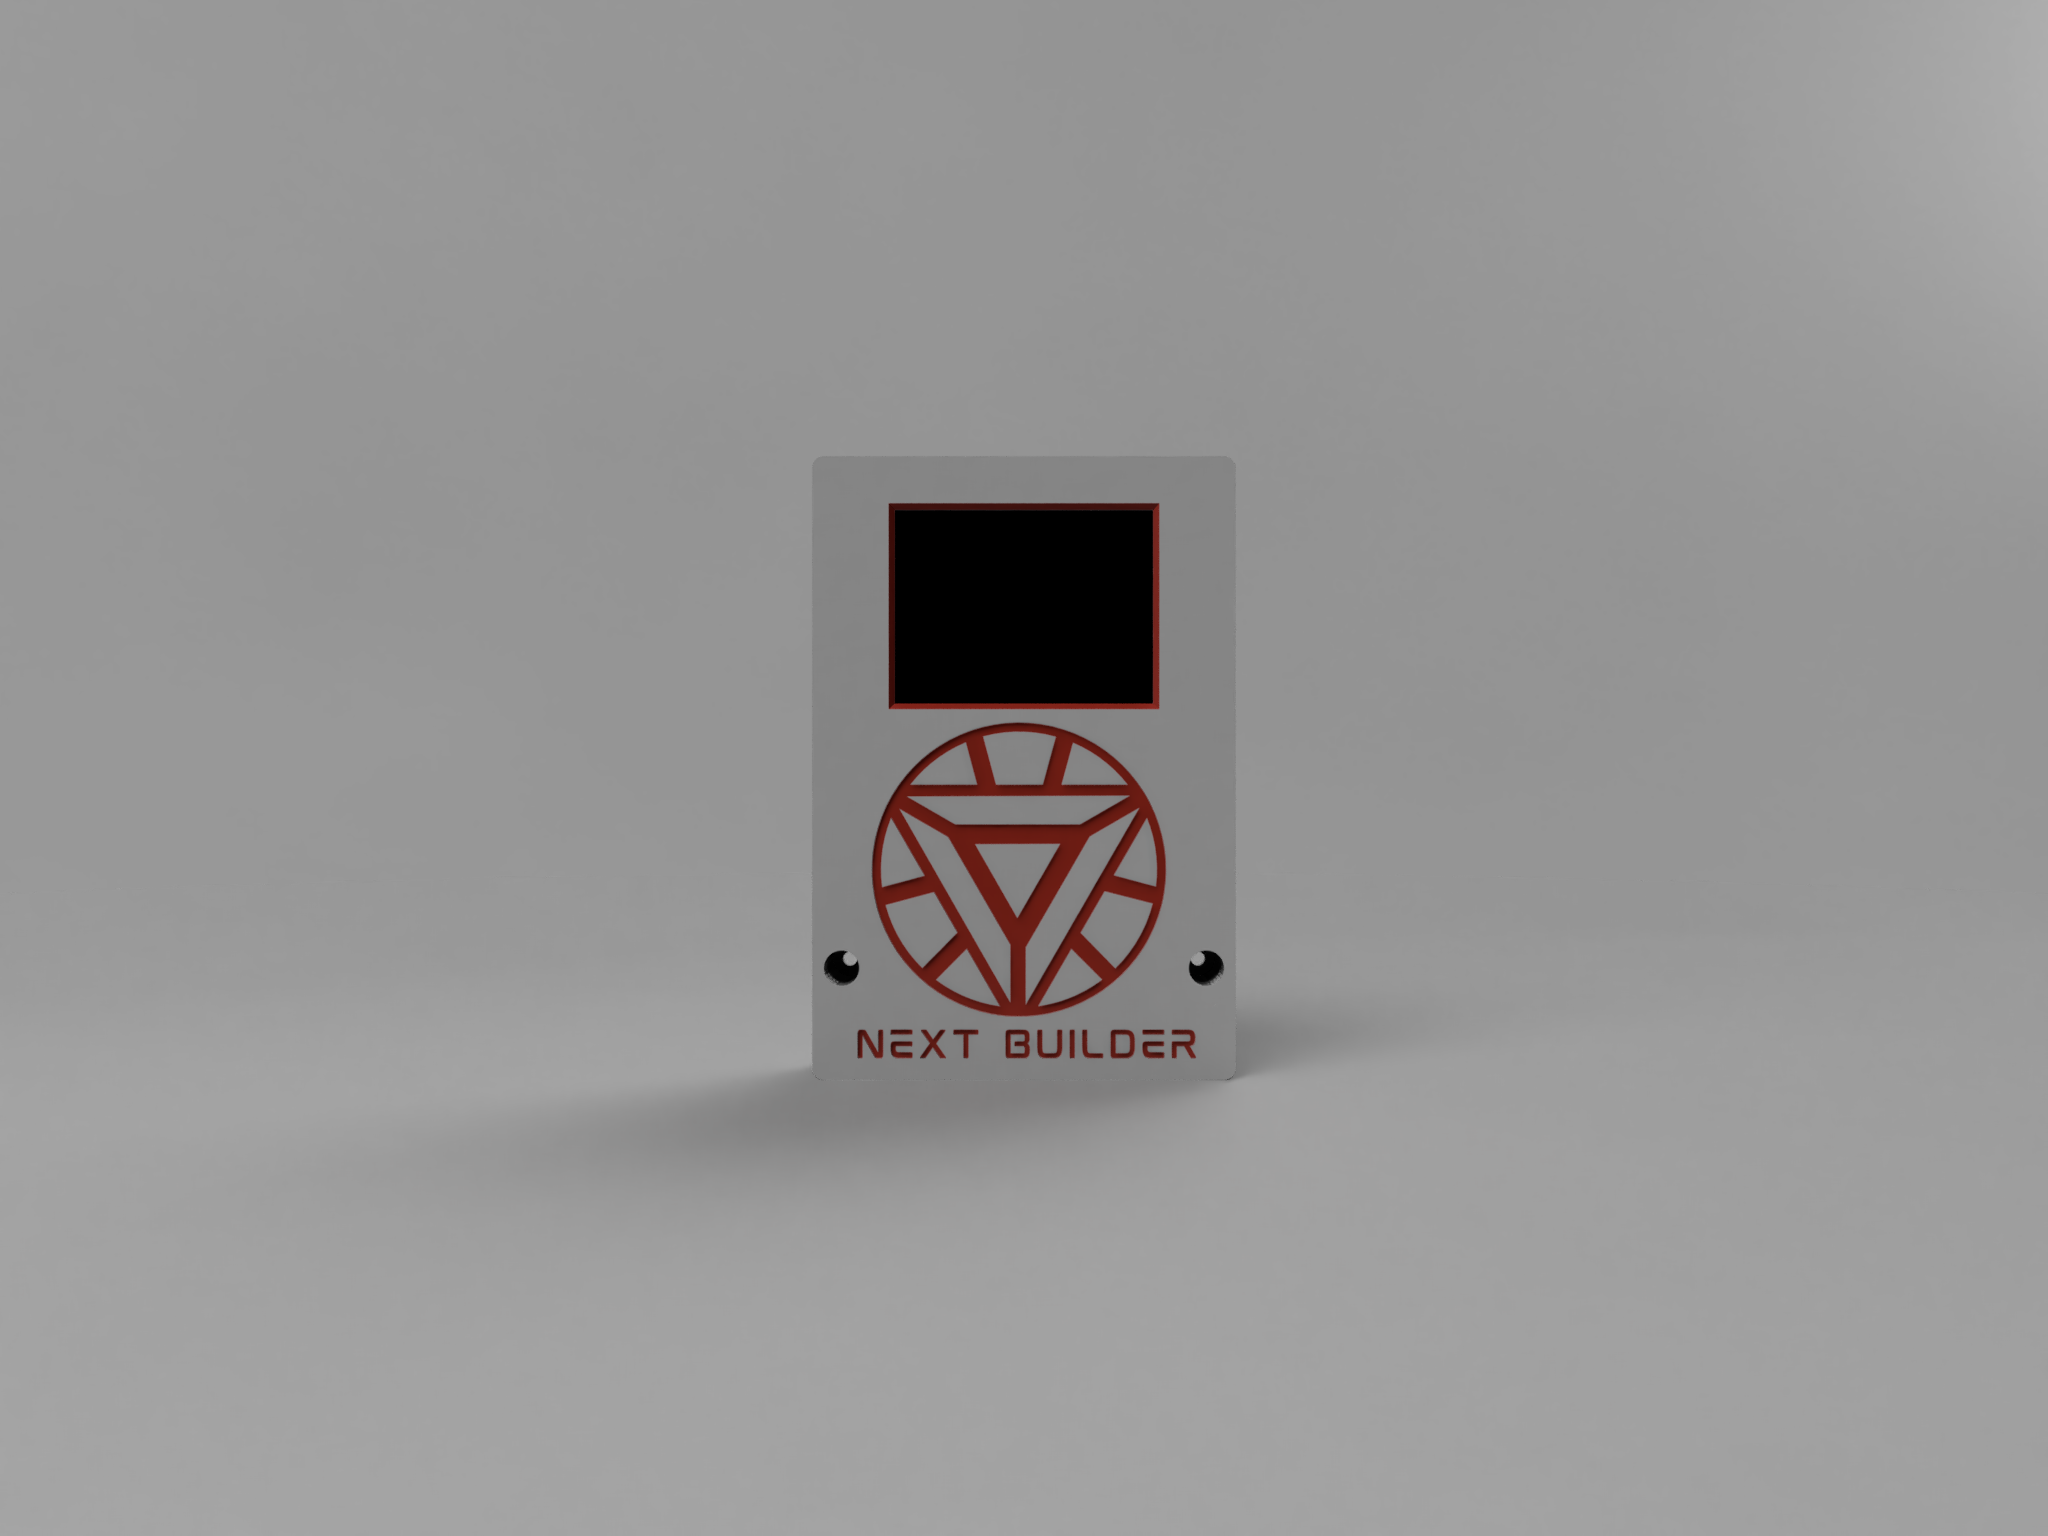
Close
0%
0%

Face Recognition Door Lock With Smartphone Notific

A smart Face Recognition Door Lock built using the HuskyLens AI Camera and ESP32-C6.

Similar projects worth following
An Advanced Level Door Lock Project With Smart level of Security. This Face Recognition Door Lock. Instead of carrying keys or remembering PINs, users simply look at the HuskyLens camera, which recognizes authorized faces and communicates with the ESP32-C6 to unlock the door.

This project combines AI-powered vision with IoT control in a beginner-friendly setup. It’s a great demonstration of how low-cost AI modules like HuskyLens can be integrated with microcontrollers to create real-world security systems.

Have you ever wanted a home security system that feels smarter, faster, and more secure than traditional locks? My latest project brings that idea to life. I’ve designed and built an AI-powered Face Recognition Door Lock with Real-Time Smartphone Notifications, combining modern design with reliable, real-time access control.

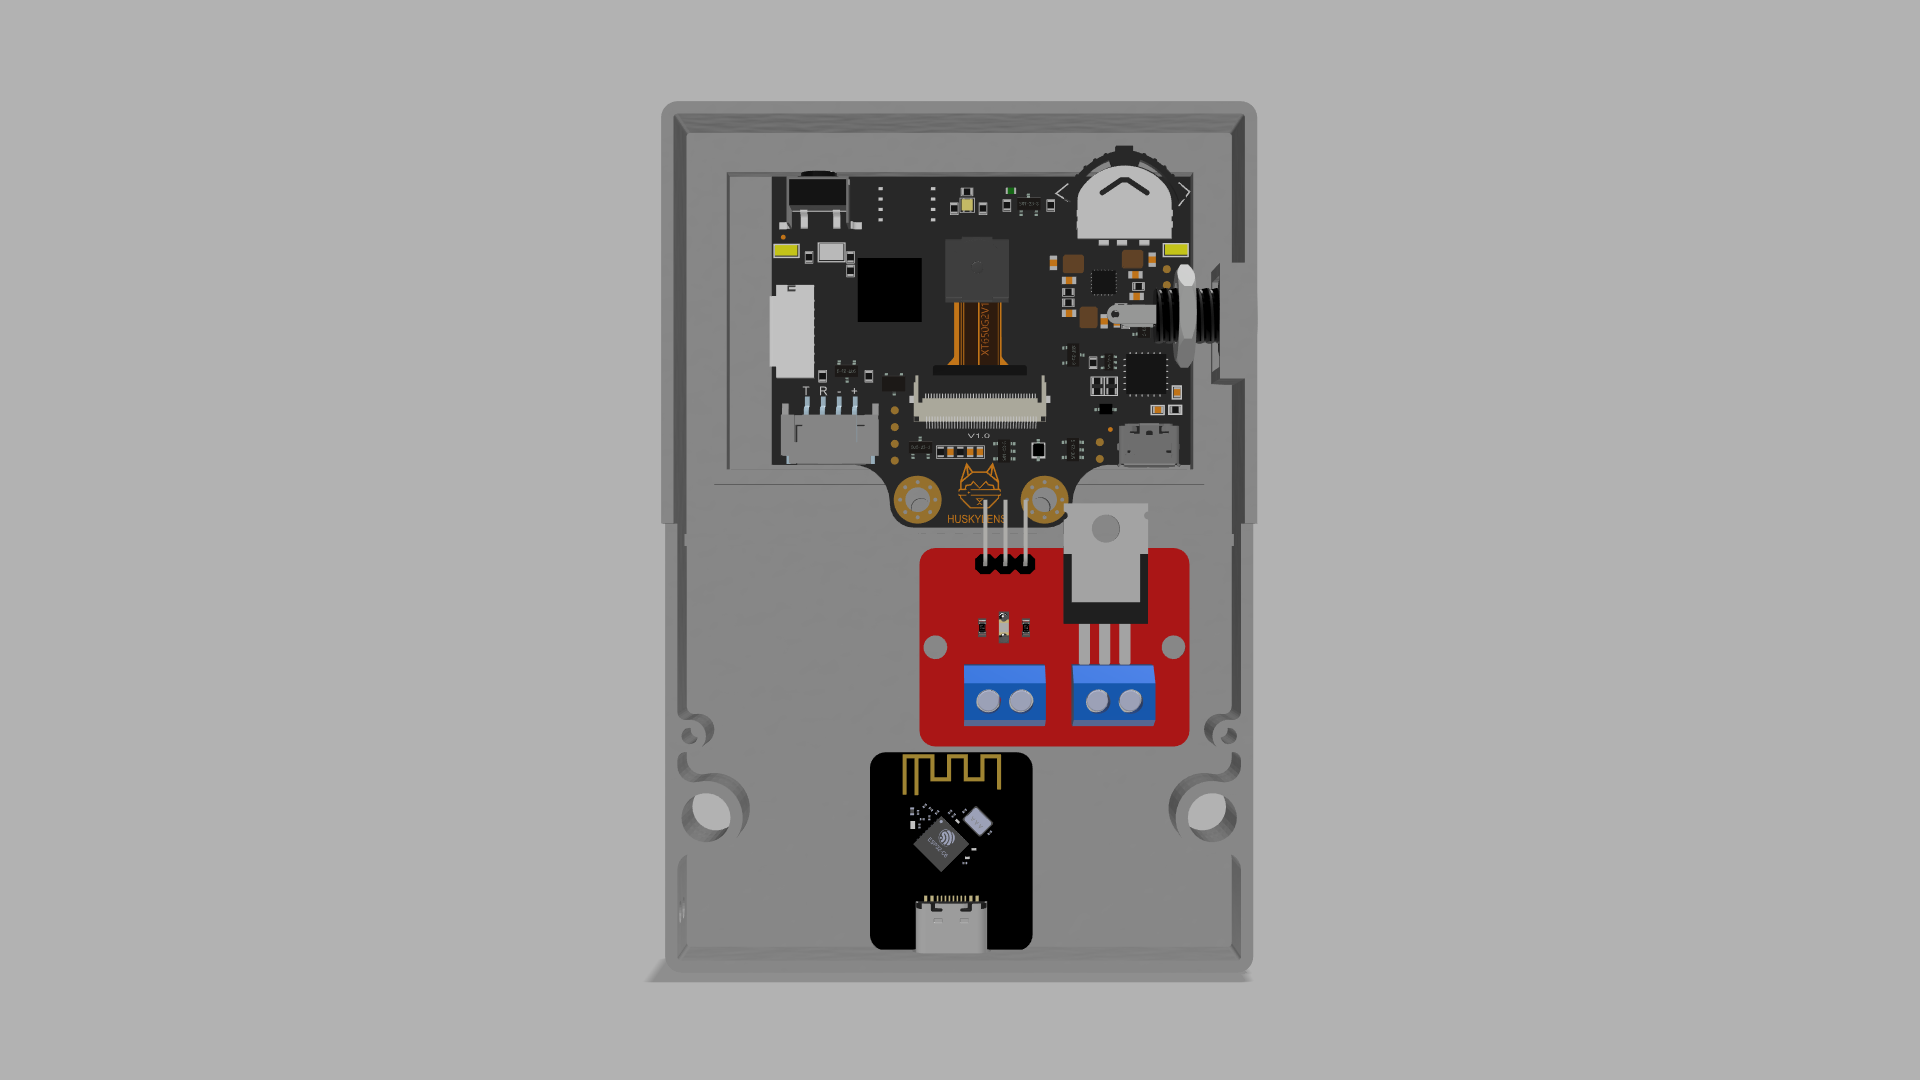
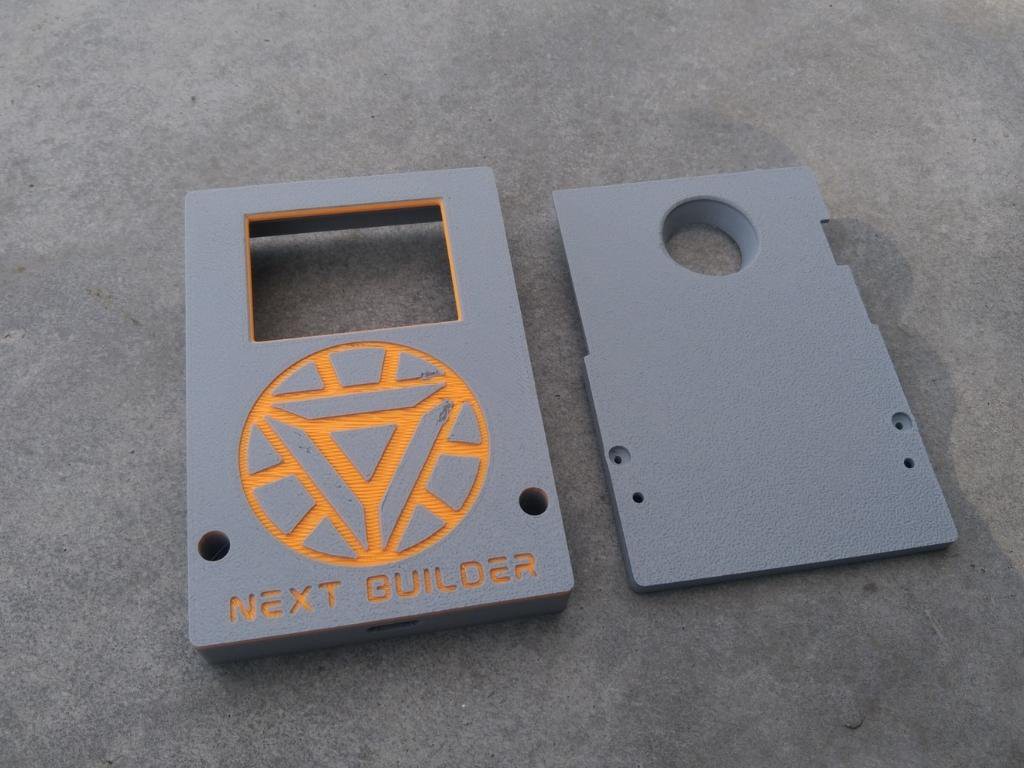
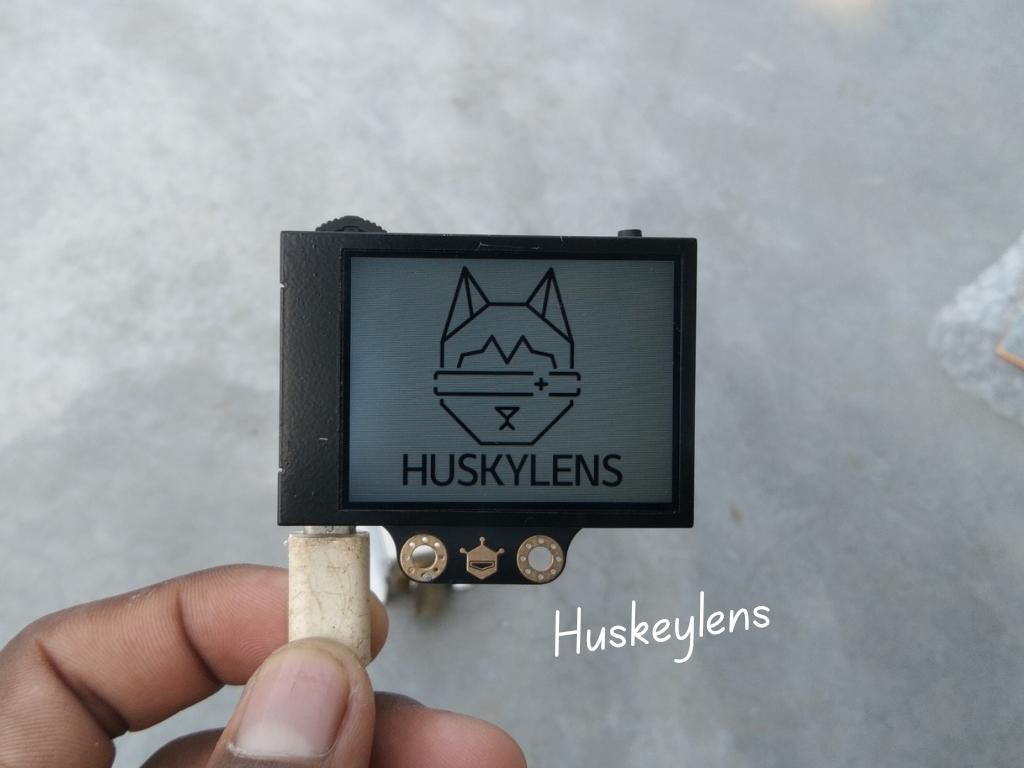
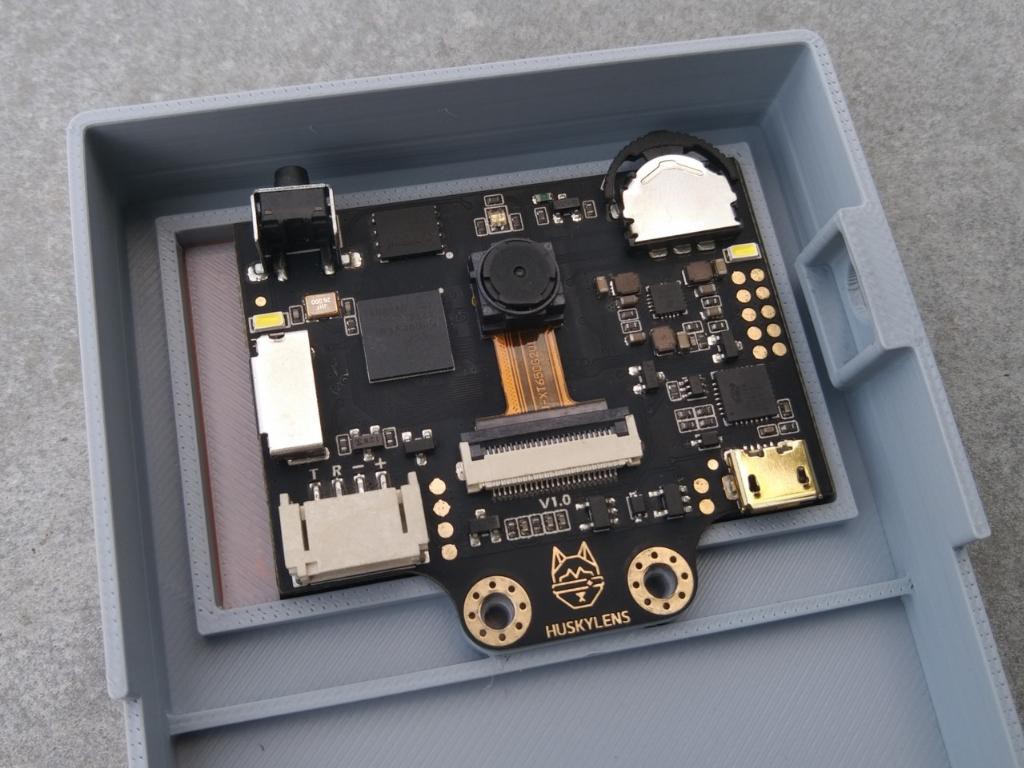
The system features a sleek, tech-inspired enclosure and uses the DFRobot HuskyLens AI Machine Vision Sensor at its core. HuskyLens handles facial recognition with impressive speed and accuracy, making it ideal for secure access applications. When an authorized face appears, the door unlocks instantly, and a Telegram bot immediately sends a notification to your phone. The system supports multiple authorized users, and each successful recognition generates an alert. If an unknown face appears, the lock stays engaged silently, ensuring maximum security.

The workflow is seamless — HuskyLens continuously scans, identifies, and verifies faces while the Espressif ESP32-C6 handles the logic, communication, and notification system efficiently. All decisions are made locally at the edge, ensuring fast, reliable performance without any cloud dependency.

The final result is a responsive, robust, and elegant smart door access system built around IoT and AI principles. It demonstrates how edge AI & Modern microcontrollers can elevate everyday security solutions, making them more intelligent, efficient, and user-friendly.

F8VF4UDMEBV2L1V.png

Connection

Portable Network Graphics (PNG) - 92.16 kB - 10/02/2025 at 17:28

Preview

Back (2).stl

For 3D Printing

Standard Tesselated Geometry - 229.67 kB - 10/02/2025 at 13:00

Download

MainPanel.stl

For 3D Printing

Standard Tesselated Geometry - 376.64 kB - 10/02/2025 at 12:59

Download

  • 1 × Huskeylens AI Machine Vision Sensor
  • 1 × Espressif ESP32-C6
  • 1 × MP1584EN Module
  • 1 × DC Female Jack
  • 1 × 12v Solenoid Lock

View all 7 components

  • 1
    CAD & 3D Printing

    To start this project, I Started designing the CAD using Fusion 360. It’s a simple and compact design that’s easy to print and assemble. 

    For 3D Printing, You can directly download the required STL files below:

    1. Main Panel.stl
    2. Back.stl

    For 3D printing, I Recommend PCBWay, a professional 3D printing service known for its high precision, affordable pricing, and wide range of material choices. They support advanced technologies like SLA, SLS, MJF, and FDM, delivering smooth and durable parts that are ideal for both prototypes and final builds.

    One of the best things about PCBWay 3D printing is their fast turnaround time and reliable worldwide shipping, making it super convenient for hobbyists, students, and professionals alike. Whether you’re just getting started or working on a serious engineering project, PCBWay is a great choice.

    This September, PCBWay is offering TPU (FDM) 3D printing from just $7.96, up to 80% off! TPU is the perfect material for flexible yet durable parts. With PCBWay’s professional-grade 3D printing, high precision, smooth finish, and reliable global shipping, you can bring your flexible ideas to life at the best price. Bigger weight, bigger discount – limited time only, Sept 1–30!

    👉 Use the link to get an exclusive discount on your first 3D printing order from PCBWay!

  • 2
    Face Recognition

    Registering your face on the HuskyLens is very easy. Switch the HuskyLens to Face Recognition mode, then Point the + symbol at a face, short press the learning button to learn the face. If the same face is detected by HuskyLens, a blue frame with words Face: ID1 will be displayed on the screen, which indicates that HuskyLens has learned the face and can recognize it now.You can repeat the process to add multiple faces, each with its own unique ID.

  • 3
    Huskeylens Assembly

    Start by placing the HuskyLens into its dedicated slot inside the enclosure. Make sure it is aligned correctly with the front opening for a clear view. Once positioned, secure it firmly using the two provided screws.

    After securing the module, connect the included 4-pin JST connector to the HuskyLens. This connector makes the wiring neat and simple, ensuring a stable and reliable connection.

View all 16 instructions

Enjoy this project?

Share

Discussions

Does this project spark your interest?

Become a member to follow this project and never miss any updates