 Ricardo Sappia
-
1Step 1: Basic Raspberry Pi Configuration
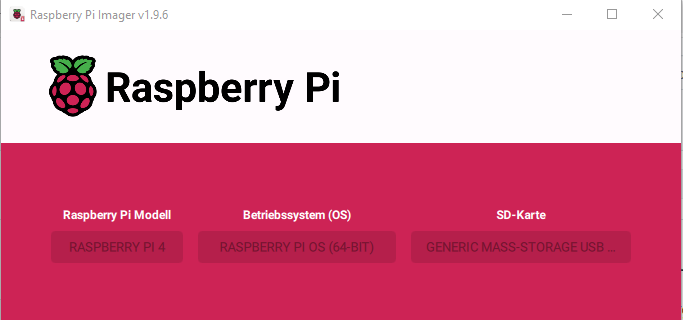
We prepare the SD card (in this case, I’m using a 64 GB one). For that, we use Raspberry Pi Imager. Make sure to select the following options:
![]()
In the hostname field, I make sure to set argentv.local (we’ll use it later, but you can choose any hostname you like).
![]()
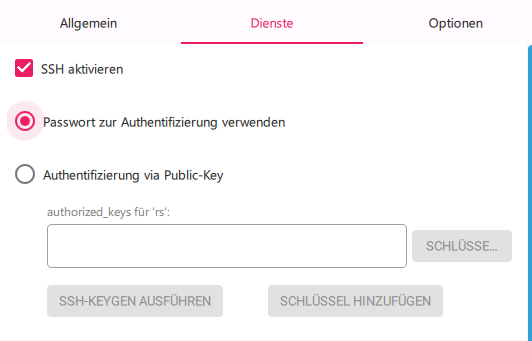
Make sure to configure the Wi-Fi credentials, language, and region. Leave SSH enabled so you can access the Raspberry Pi remotely later on:
![]()
Click Install, and we’ll meet again in a few minutes 😉 […] Once the flashing process is done, insert the SD card into the Raspberry Pi. If you see the following screens, you’re on the right track:
![]()
-
2Prepare remote access to the RPI
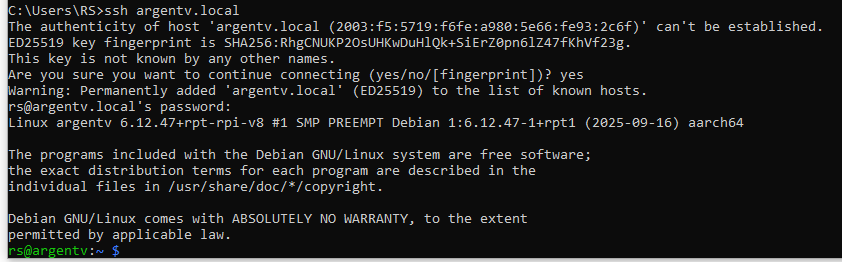
Next, we’ll try to access the Raspberry Pi remotely. Open your command console and type:
ssh argentv.local
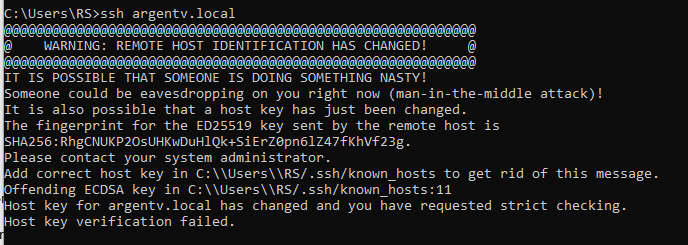
You might see the following message:
![]()
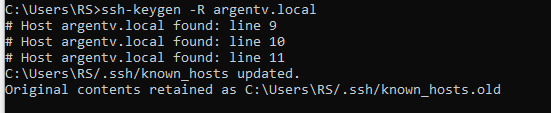
If that happens, try this:
ssh-keygen -R argentv.local![]()
Once done, try again with ssh argentv.local, and this time you should see something like this:
![]()
After typing yes, new certificates will be installed, and the SSH connection to the Raspberry Pi will be established.
During the setup, my username was “rs”. Yours might differ — keep that in mind for the next steps.
Since this is the very first boot after formatting the SD card, let’s run the following commands:
sudo apt update && sudo apt upgrade –y -
3Prepare to clone the GitHub Repo
Now let’s clone the GitHub repository. Before that, we need to configure our SSH keys.
If you already have SSH keys, skip this step
ls -l ~/.ssh/id_ed25519 ~/.ssh/id_ed25519.pub 2>/dev/null || trueGenerate a new key (ED25519). Choose a helpful comment:
ssh-keygen -t ed25519 -C "pi@argentv"Press Enter to accept the default path (~/.ssh/id_ed25519). You can leave the passphrase empty (just press Enter) or add one for better security.
Show the public key (this one goes to GitHub)
cat ~/.ssh/id_ed25519.pub(Optional) Load it into the SSH agent so you don’t have to enter your passphrase every time
eval "$(ssh-agent -s)"
ssh-add ~/.ssh/id_ed25519
Copy that public key and add it to your GitHub account: GitHub → your avatar → Settings → SSH and GPG keys → New SSH key → paste the key.
Test the connection with GitHub (it should greet you with your username)
ssh -T git@github.com -
4Clone the GIT Hub Repo
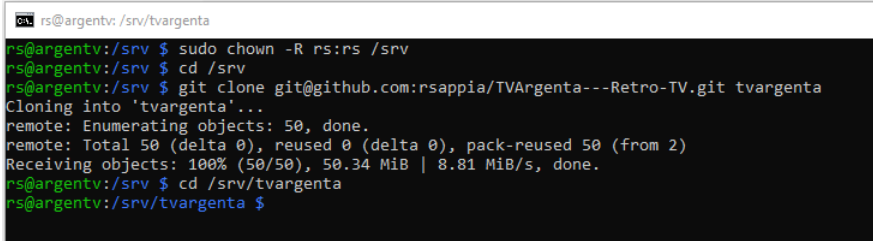
Now let’s prepare the directory where we’ll clone the repository.
The folder
/srvusually exists by default, but if it doesn’t, you can create it:sudo mkdir -p /srvNext, give ownership of that folder to your current user (replace
rswith your own username).This allows you to write inside
/srvwithout usingsudoall the time:sudo chown -R rs:rs /srvOption A – Clone using HTTPS (easiest)
This is the recommended method if you haven’t set up SSH keys in GitHub.
cd /srv
git clone https://github.com/rsappia/TVArgenta-Release.git tvargenta
cd /srv/tvargenta
Option B – Clone using SSH (for advanced users)
Use this if you already have an SSH key configured in your GitHub account.
cd /srv git clone git@github.com:rsappia/TVArgenta-Release.git tvargenta cd /srv/tvargenta![]()
Tip:
If you get an error like
Permission denied (publickey)it simply means you’re trying the SSH method without having SSH keys set up. In that case, just use the HTTPS version above — it works exactly the same. -
5Install System and Project Dependencies
Run:
python3 -m venv venv
source venv/bin/activate
sudo apt update && sudo apt install -y python3 python3-pip && python3 -m pip install --upgrade pip && python3 -m pip install Flask
Let’s also prepare what’s needed to compile the encoder .c file:
sudo apt install -y build-essential libgpiod-dev pkg-config
Change directory to compile the encoder .c file:
cd /srv/tvargenta/software/app/nativeOnce there, run the compiler:
gcc encoder_reader.c -o encoder_reader $(pkg-config --cflags --libs libgpiod)If everything goes well, you should now see the compiled .bin file next to the .c one:
![]()
Now let’s set the proper permissions:
chmod +x encoder_reader
cd /srv/tvargenta/software
chmod +x scripts/*.sh
At this point, we can run a first test to make sure everything’s working. Go to:
cd /srv/tvargenta/software/app $and then run:
python main.pyIf everything’s fine, you should see an intro video, followed by the playback of channels — which for now will be empty and in their default state, meaning you’ll see a “black screen.”
Try turning or pressing the encoder knob to bring up the menu.
-
6Adding the First Videos
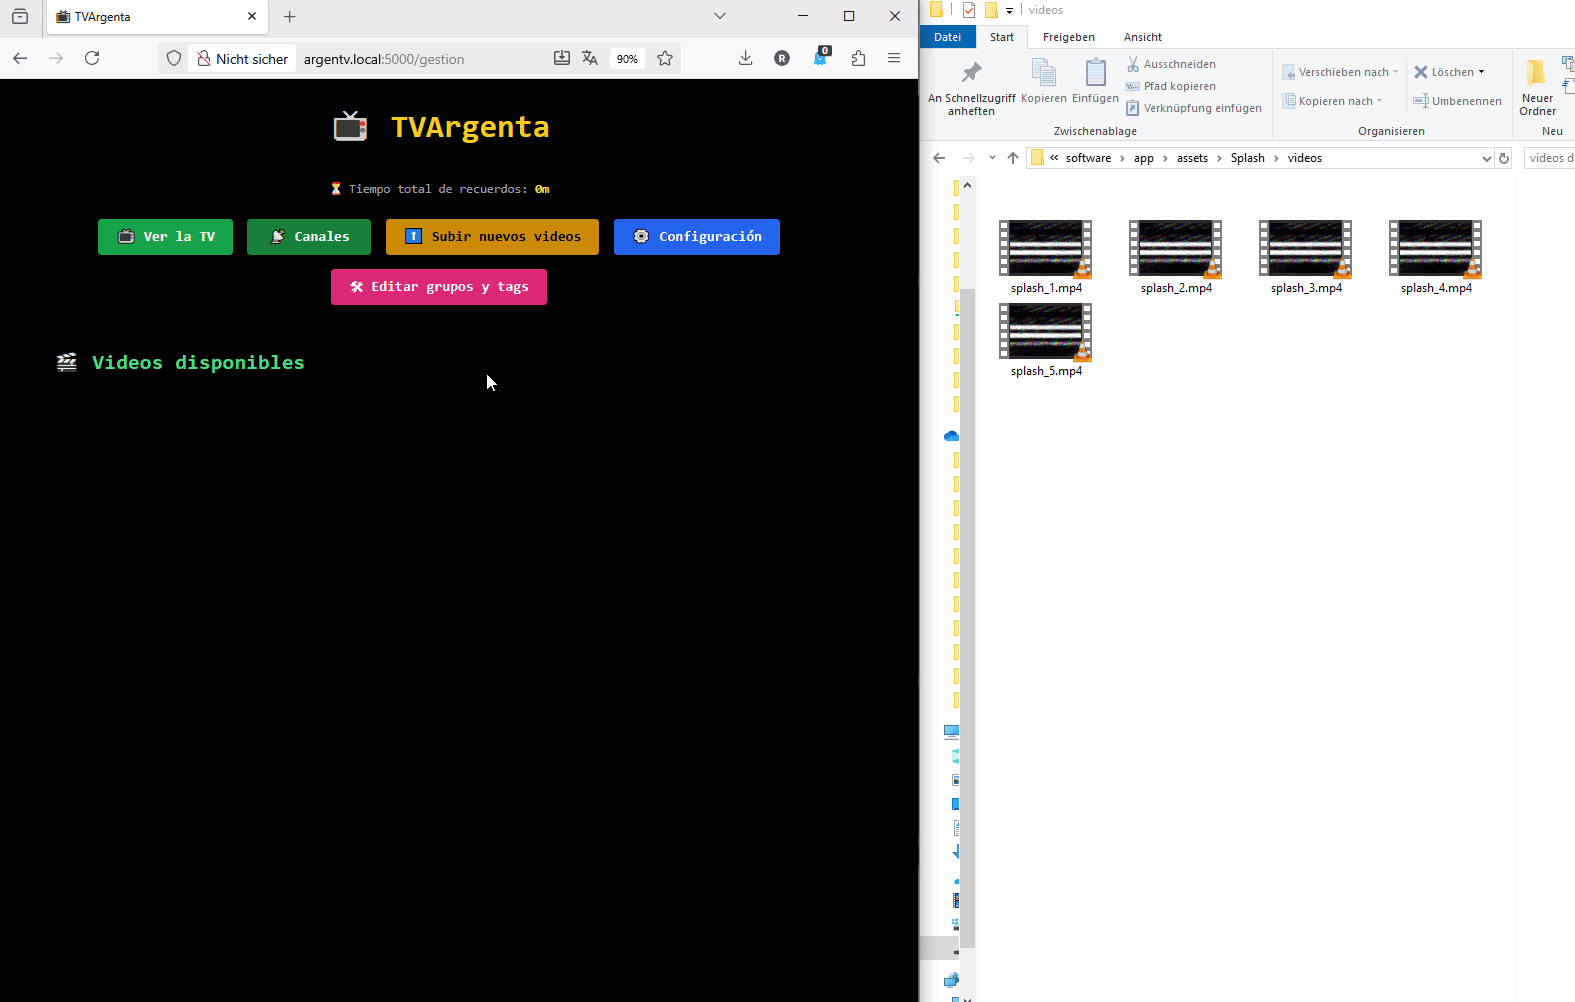
Let’s add a few videos to make sure everything’s working properly. You can use the videos already included in:
/srv/tvargenta/software/app/assets/Splash/videos
These come by default in the GitHub repo.
![]()
![]()
With this, you’re already good to go and play around. In the next chapter, I’ll cover audio configuration, and in a third one, everything related to the hardware itself.
-
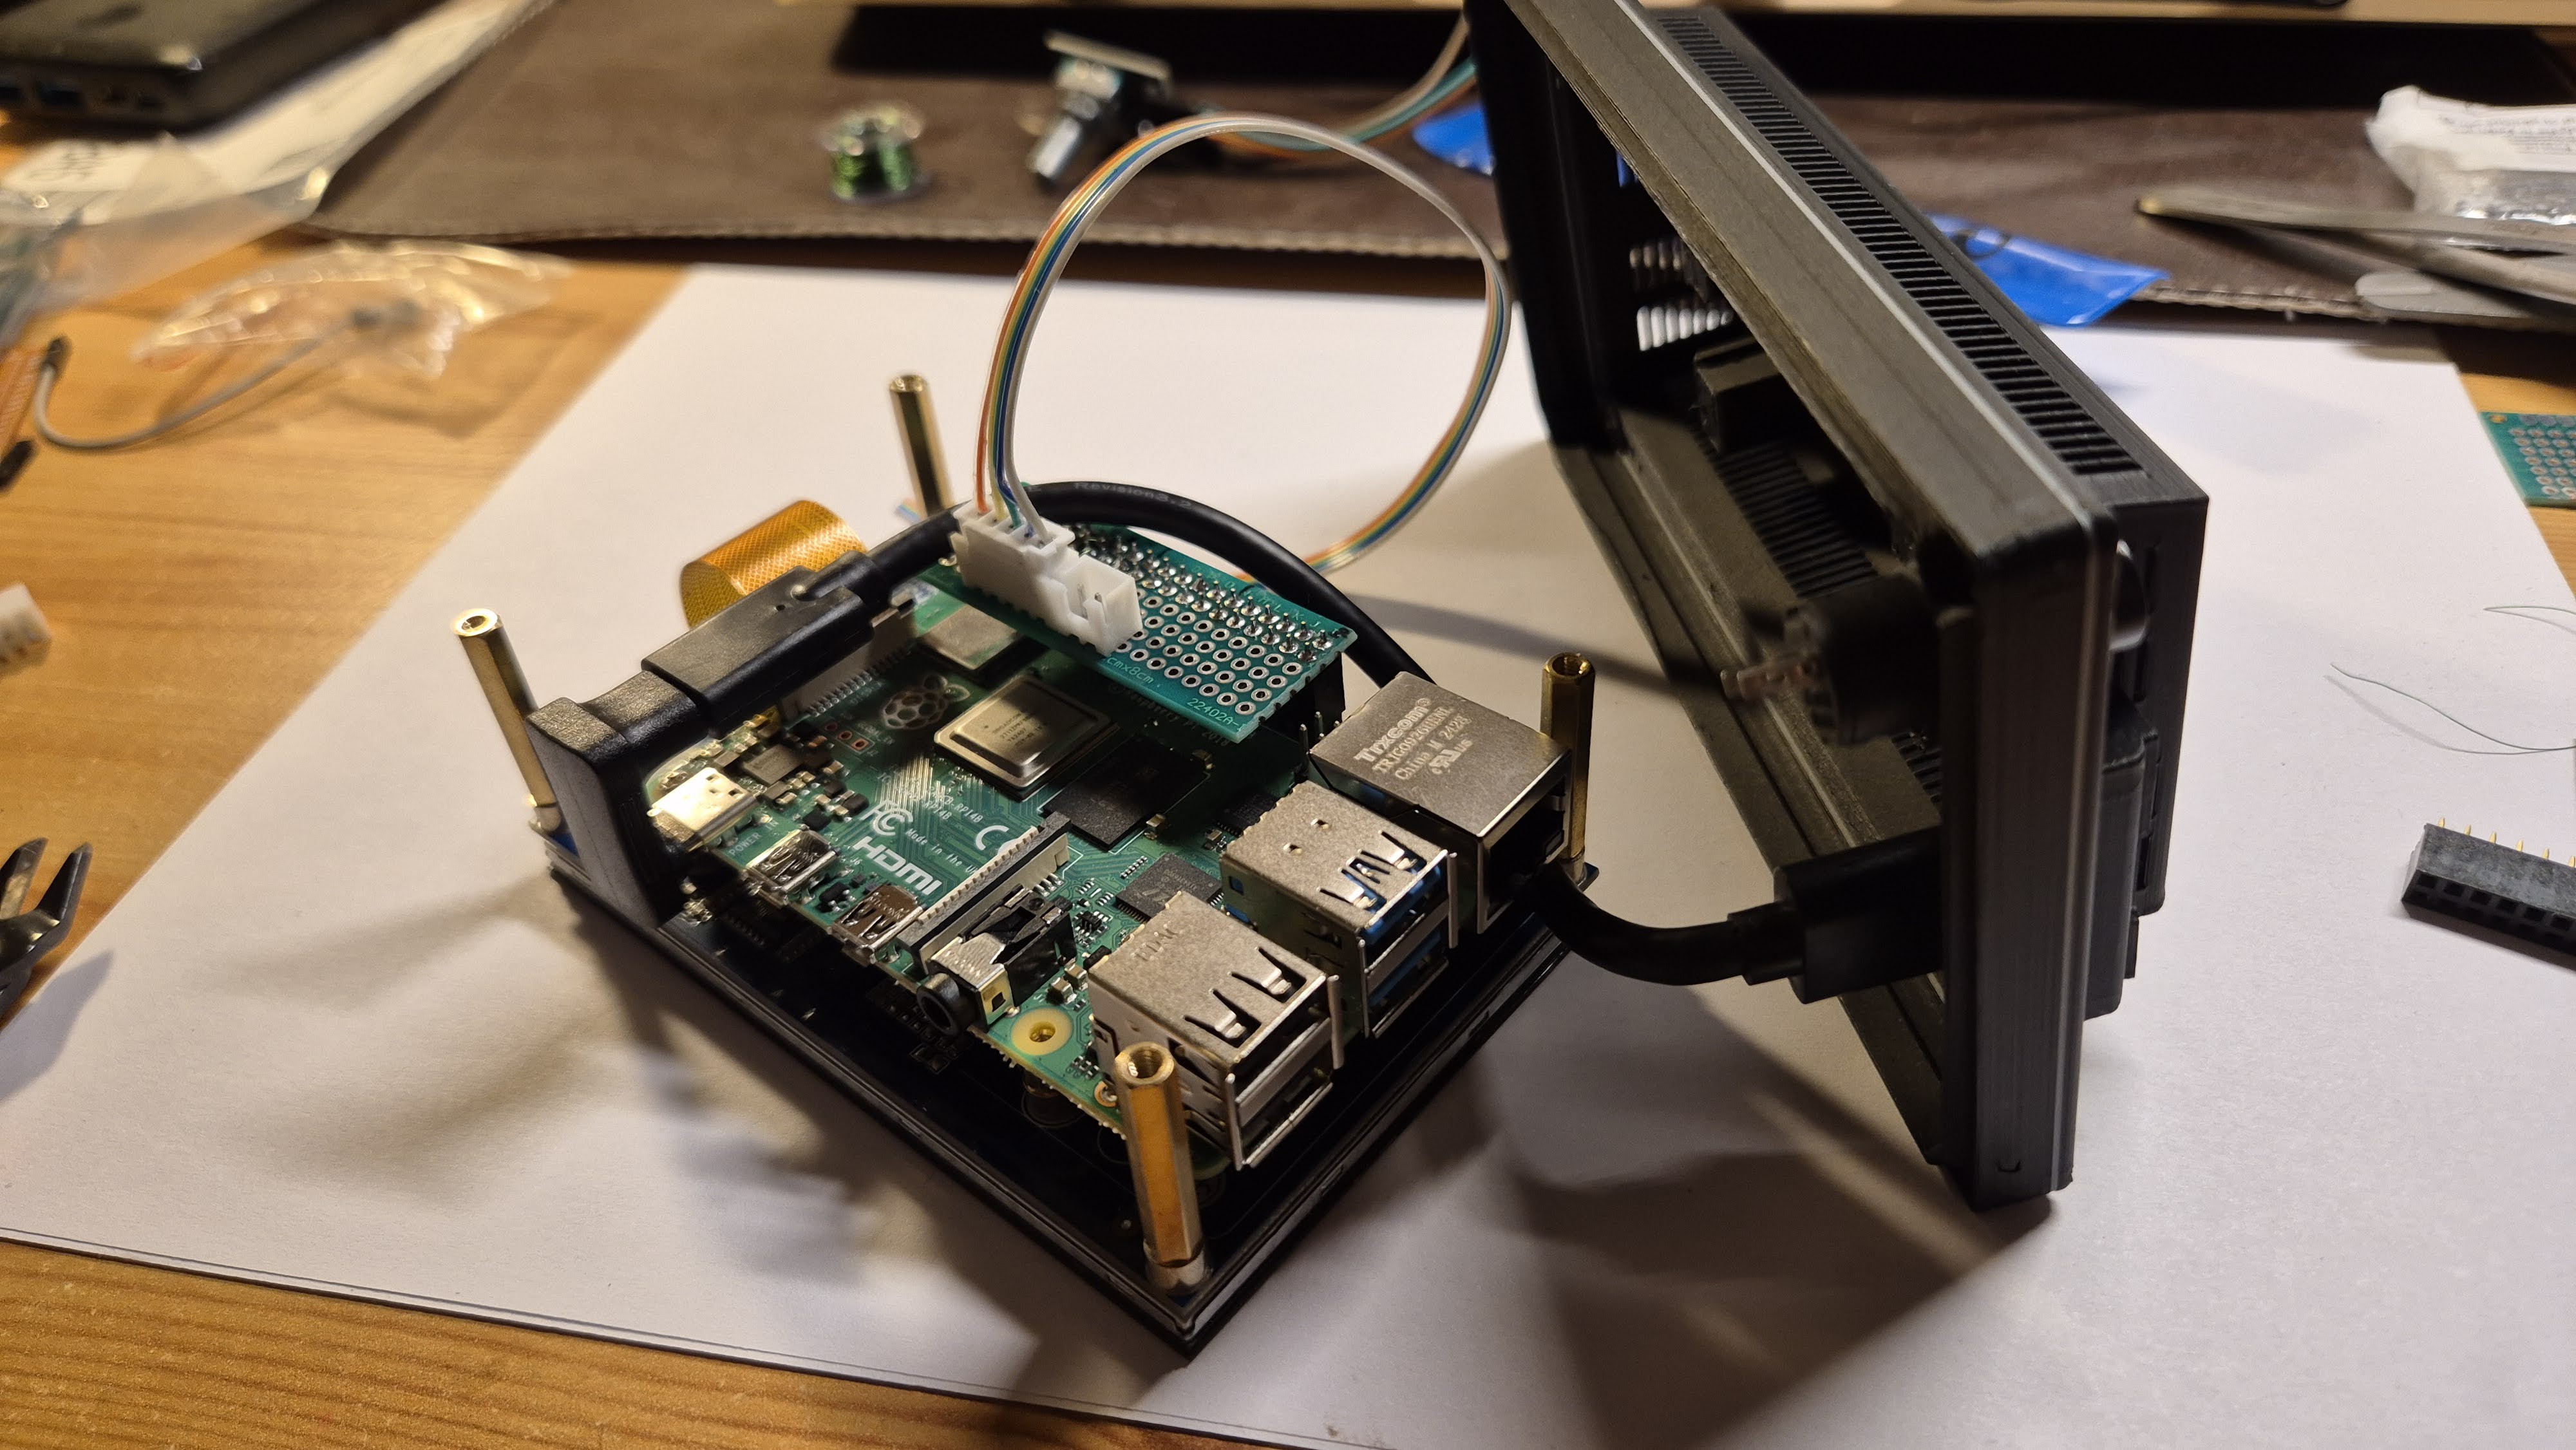
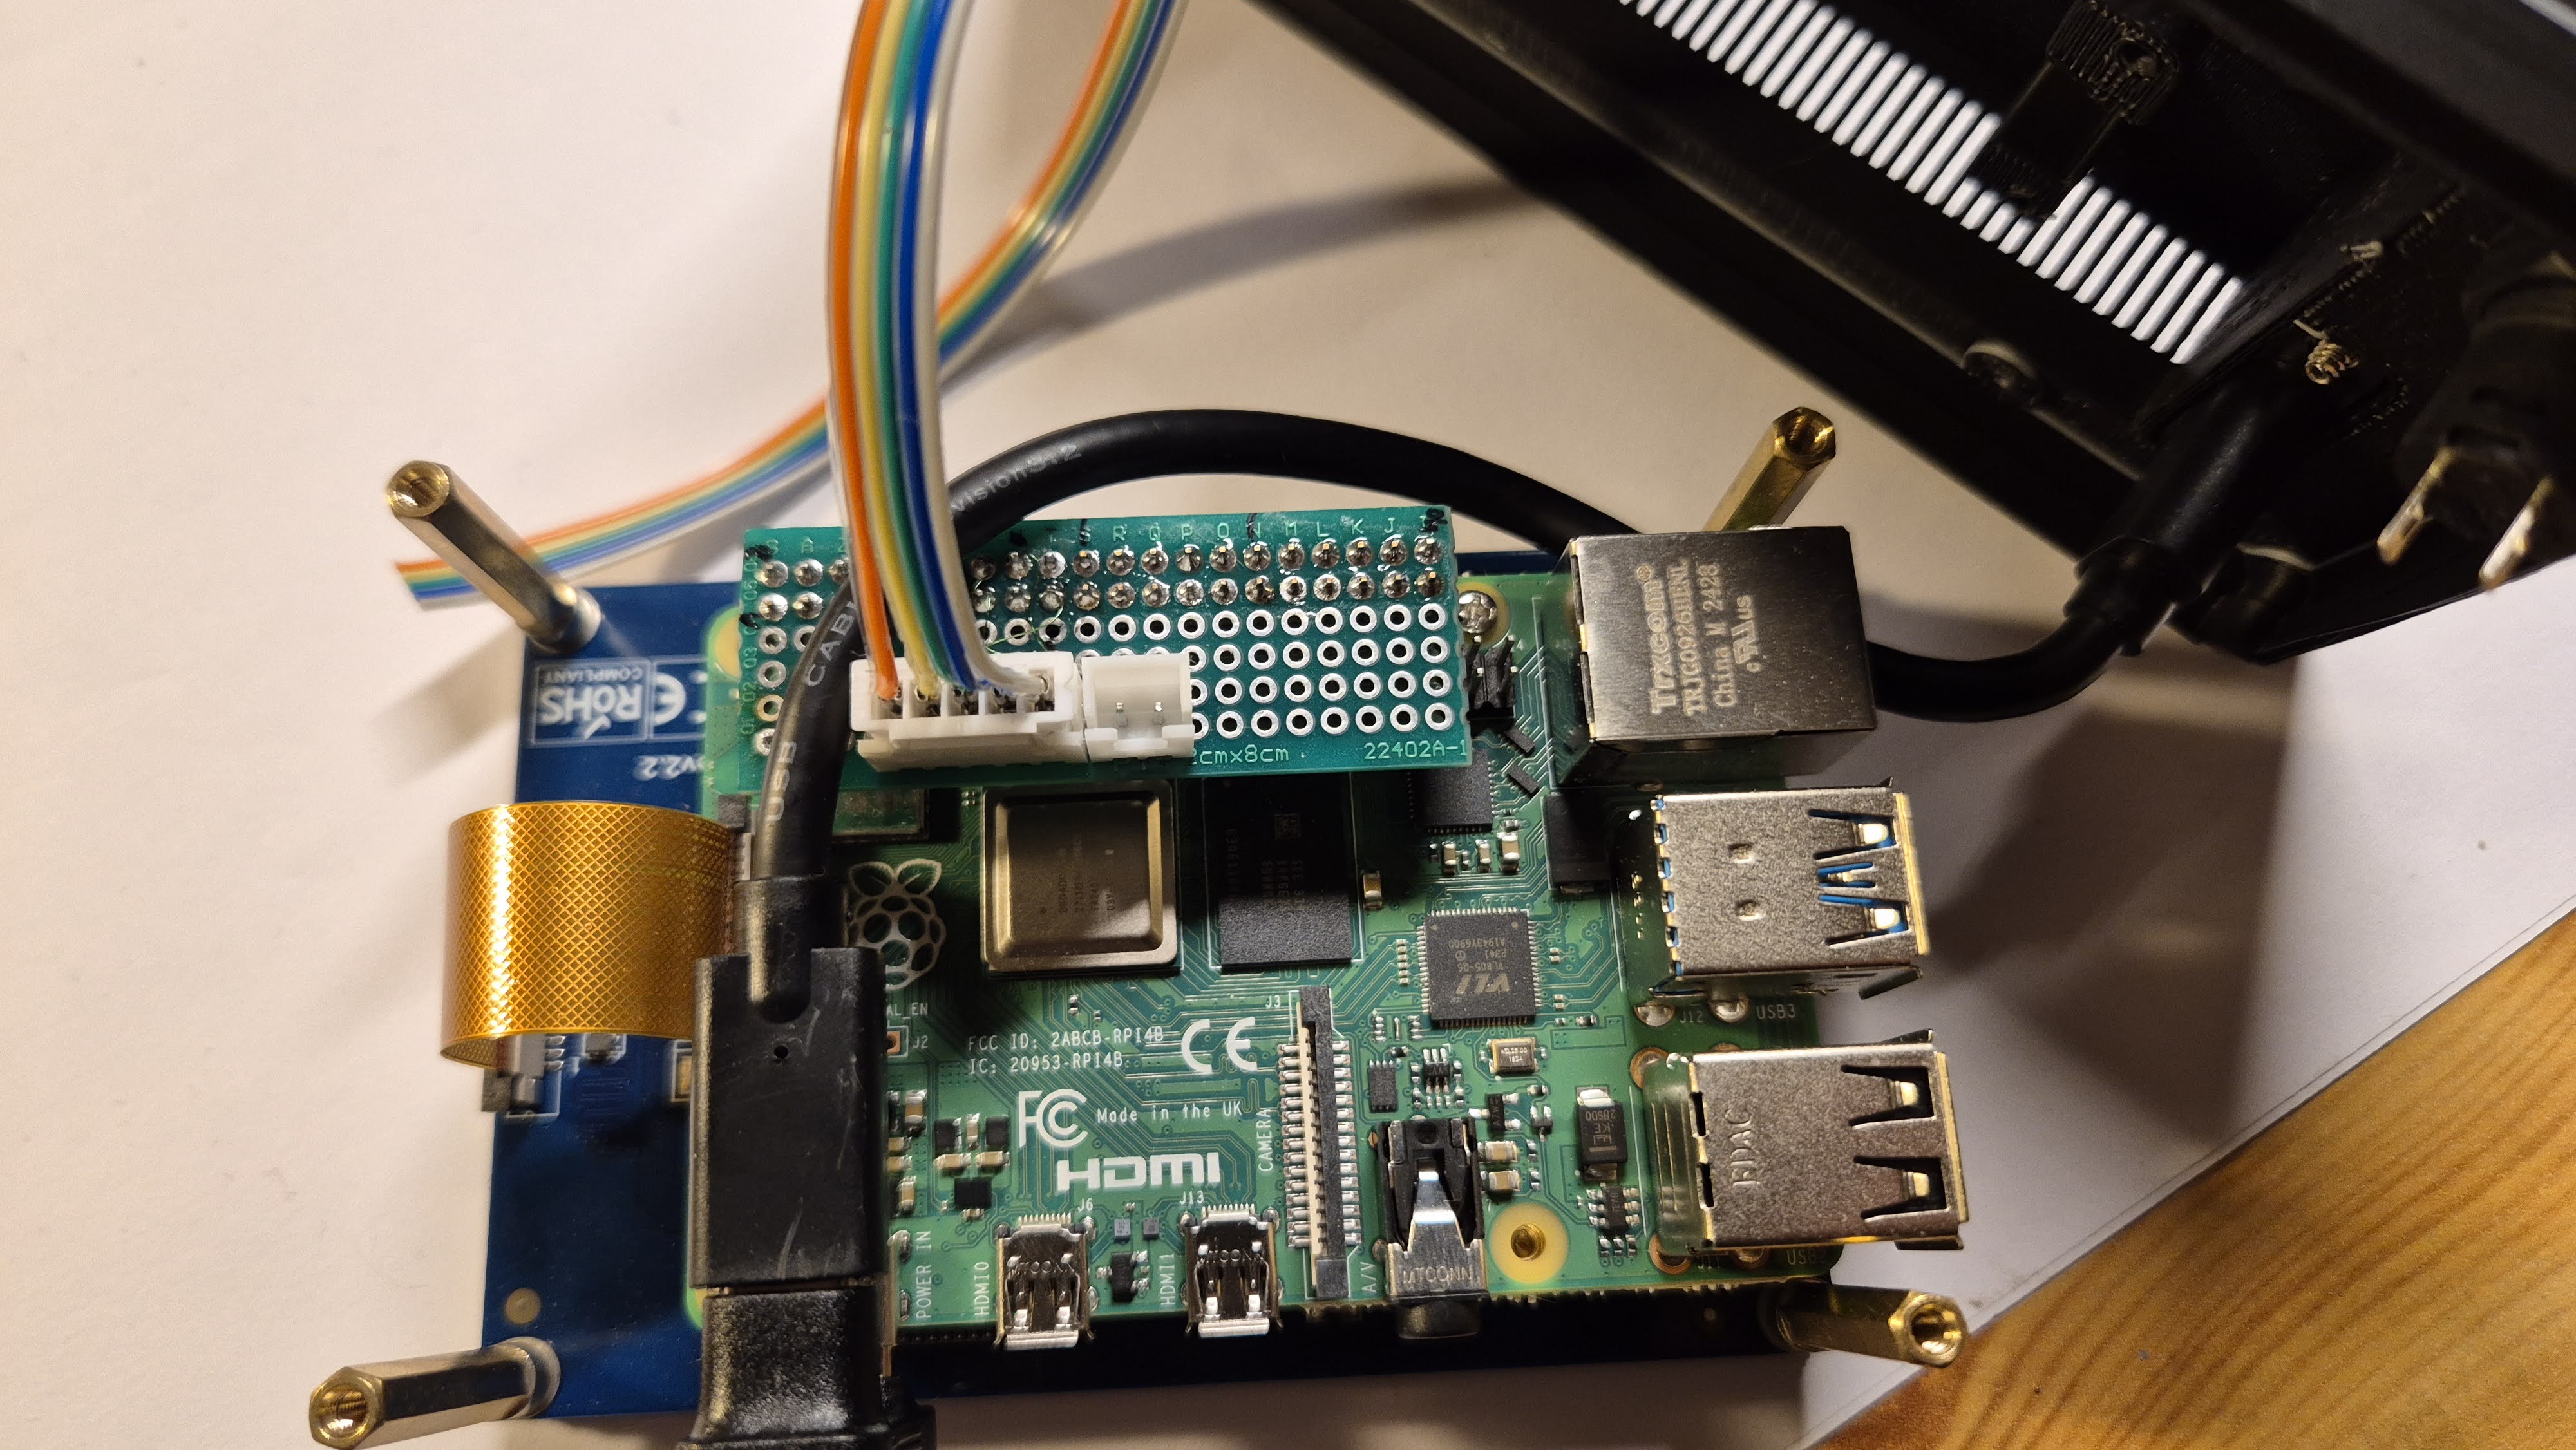
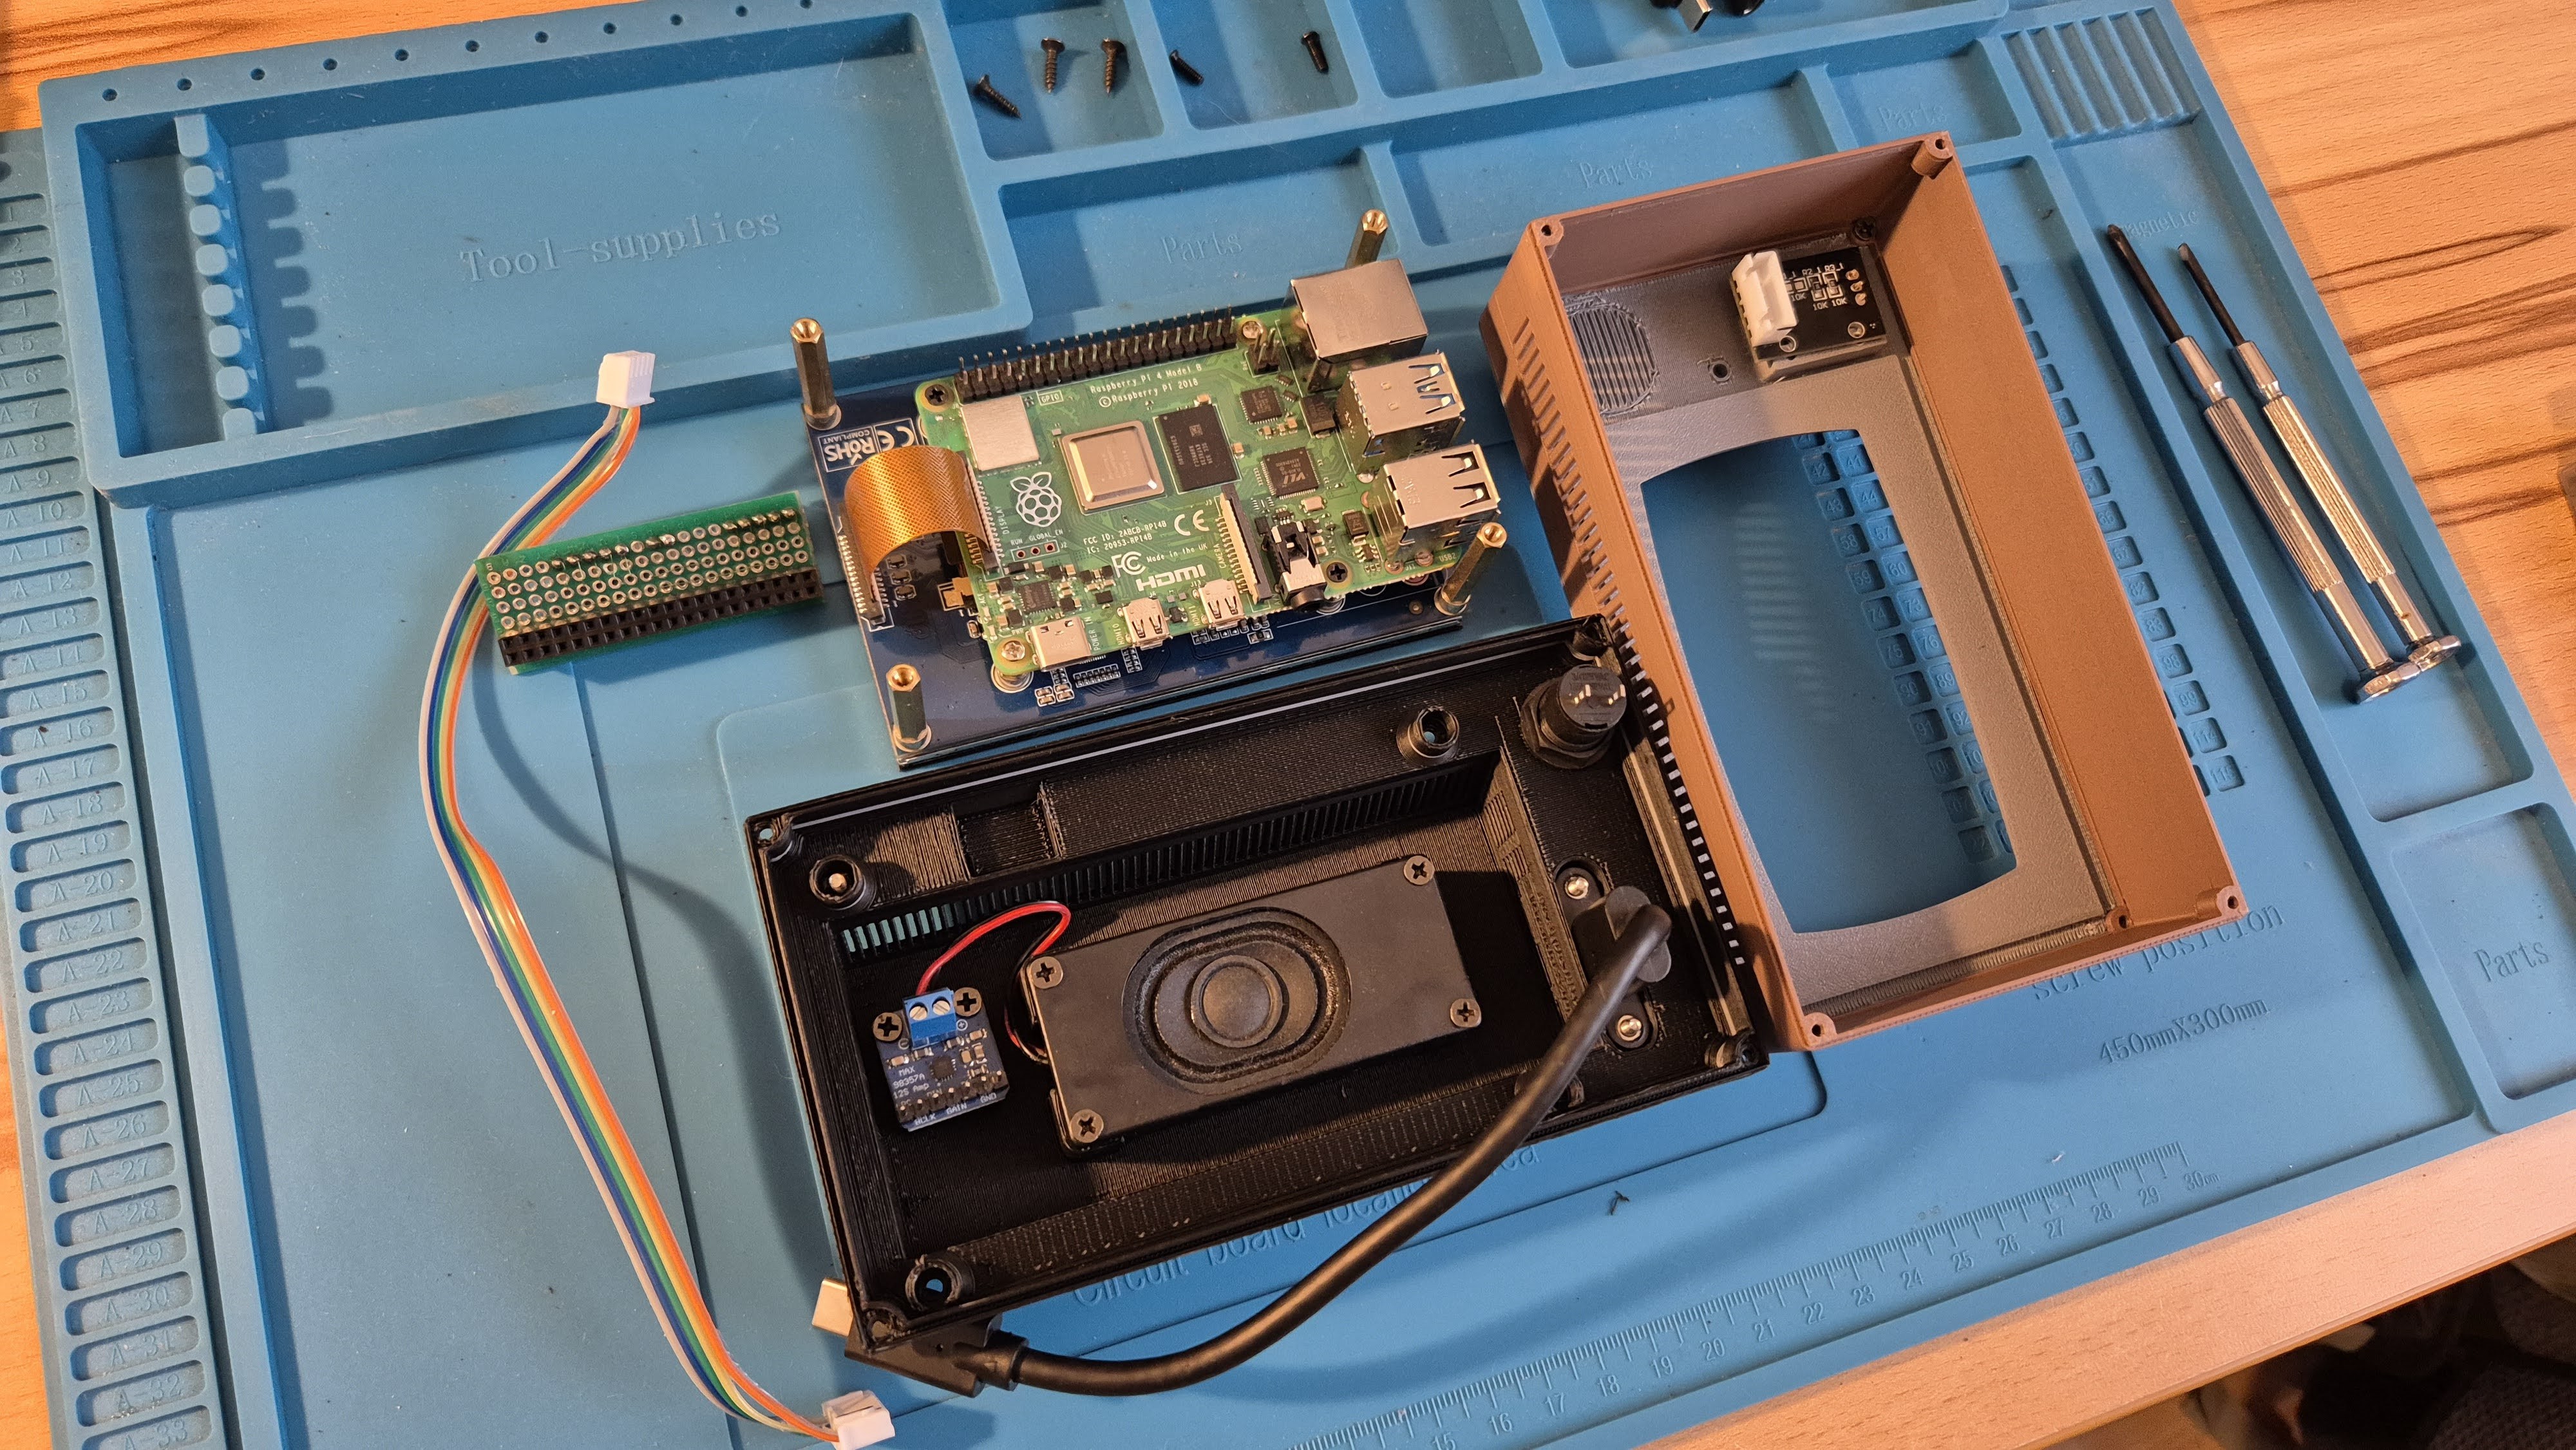
7Putting all together
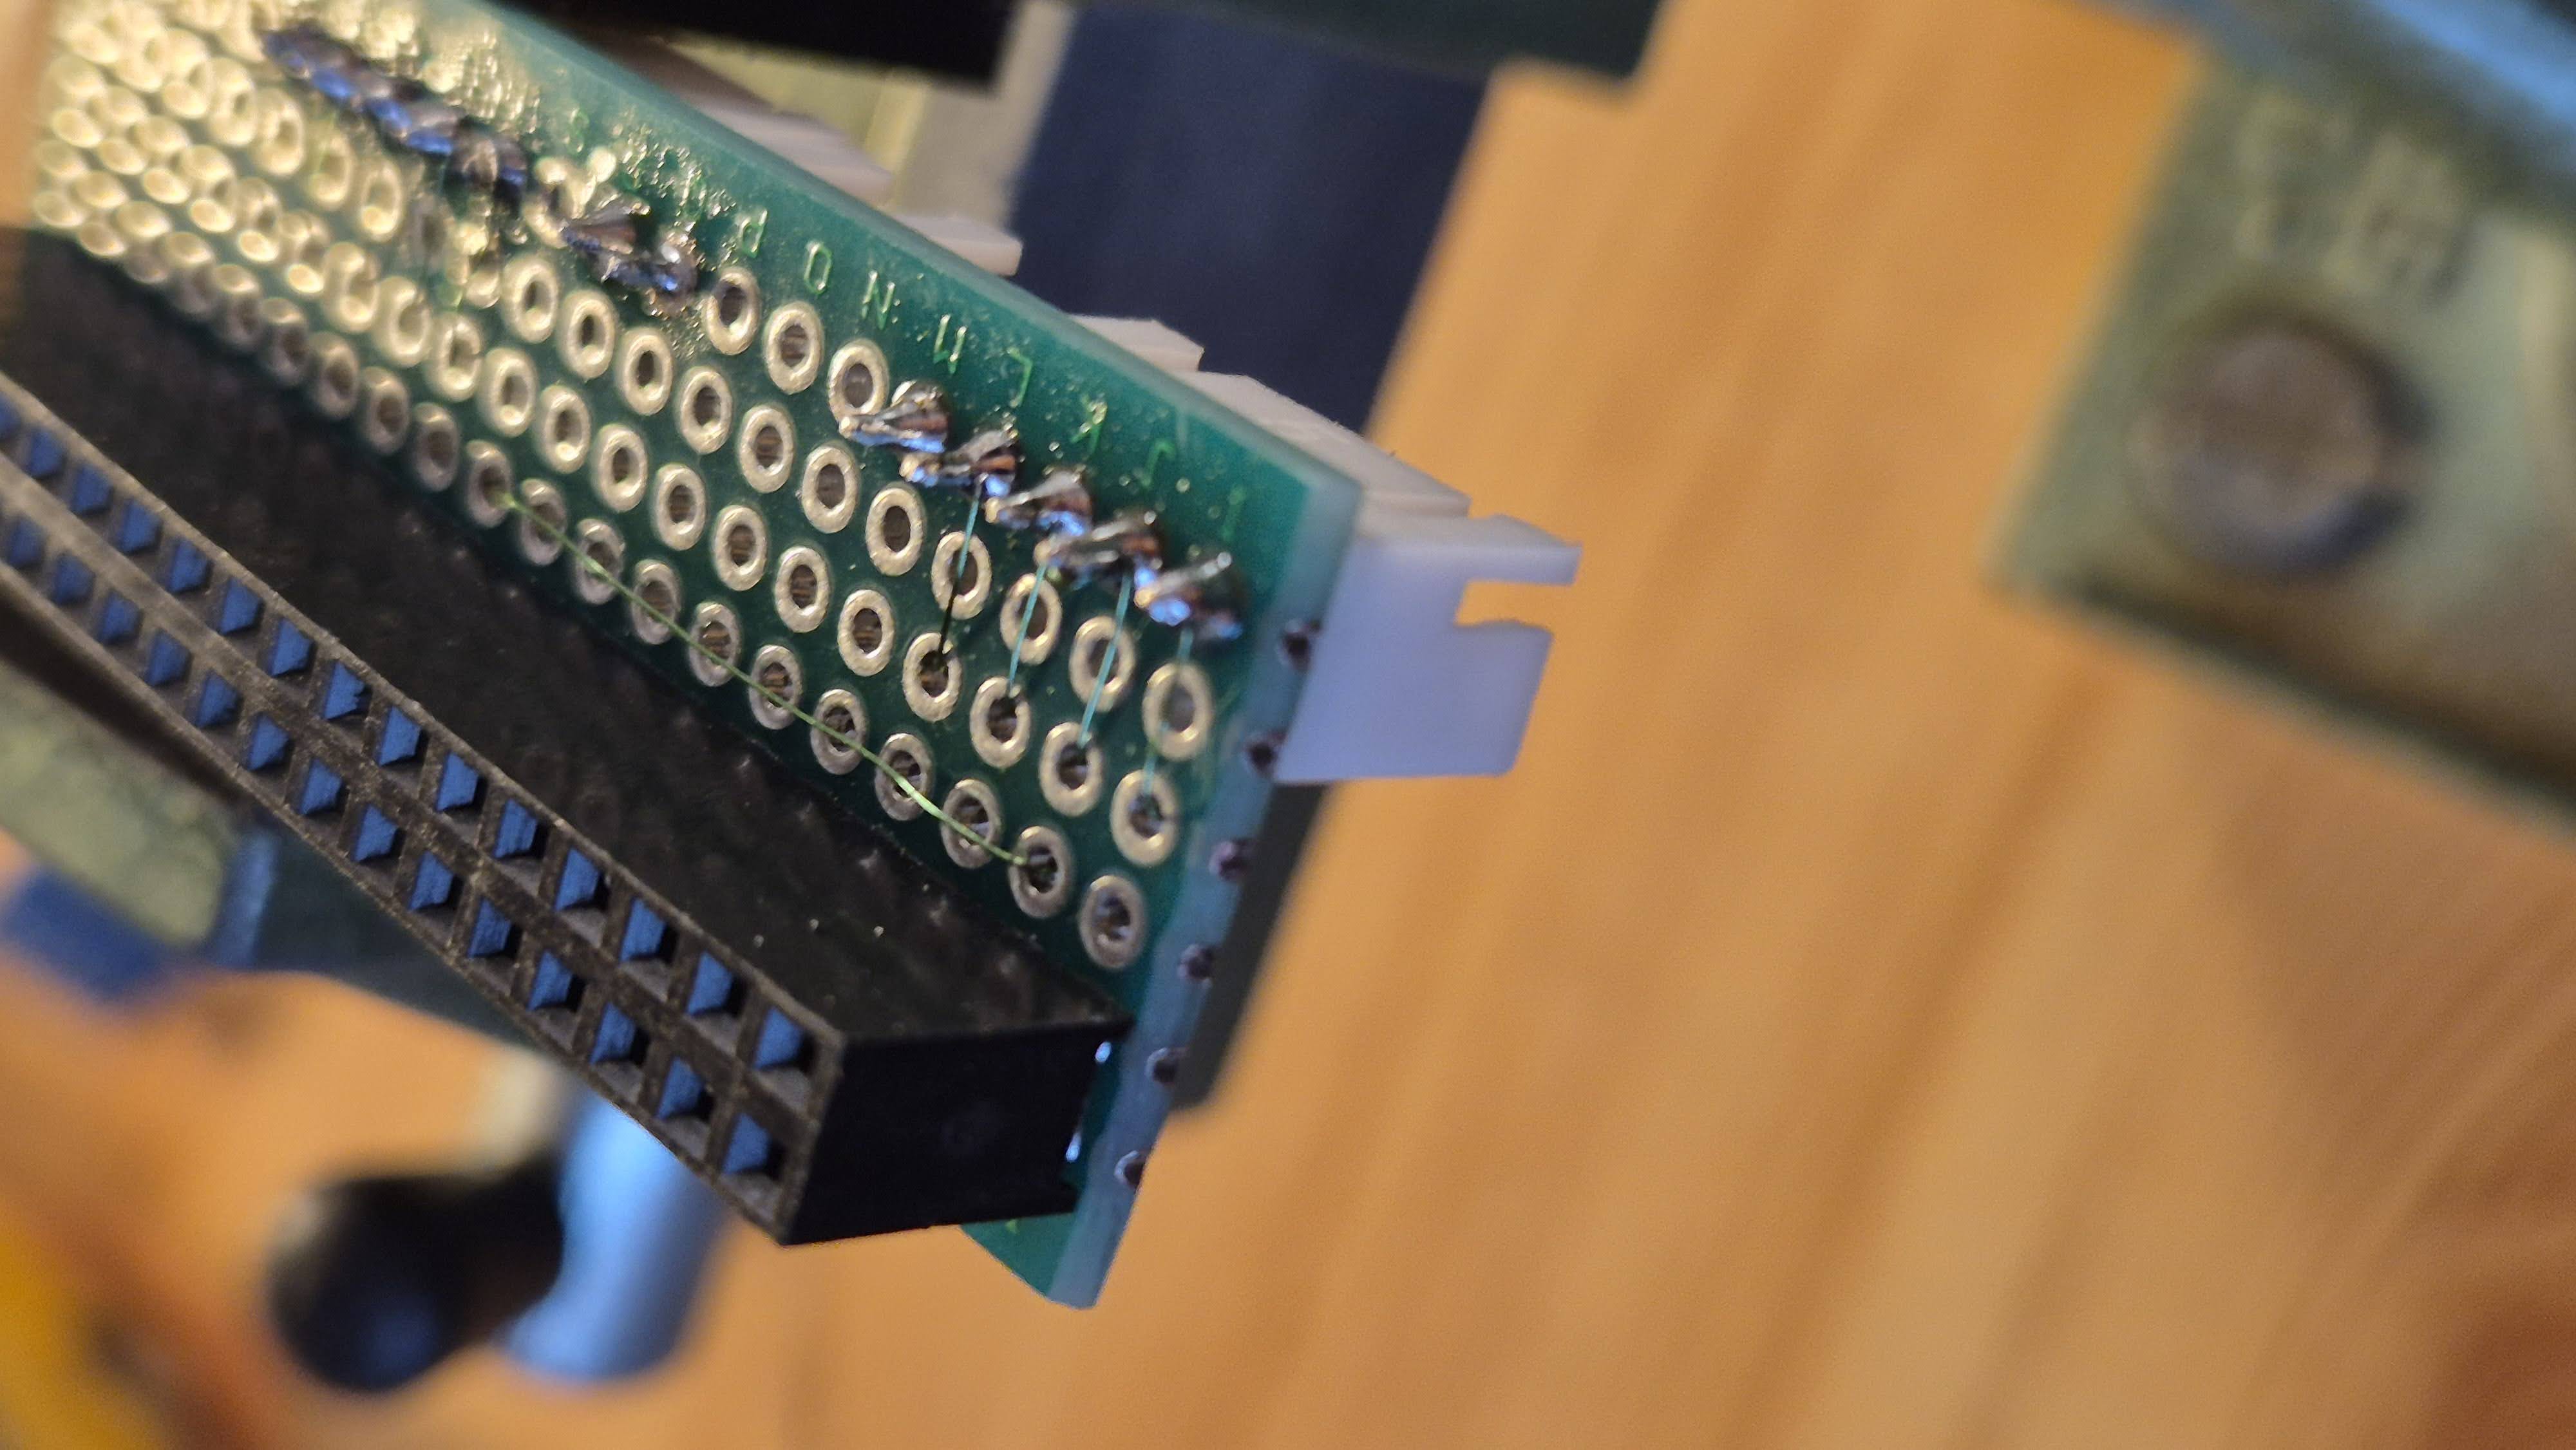
On the hardware side, the only handmade element is a small connection board I built using a double-sided solderable protoboard. It handles the wiring for the audio interface, rotary encoder, and other peripherals, and brings everything together through JST XH 2.5 mm connectors. This makes the installation much cleaner, modular, and safer to maintain. I also assembled all the cables myself, cutting and crimping them to the exact lengths needed for a tidy internal layout.
![]()
![]()
![]()
![]()
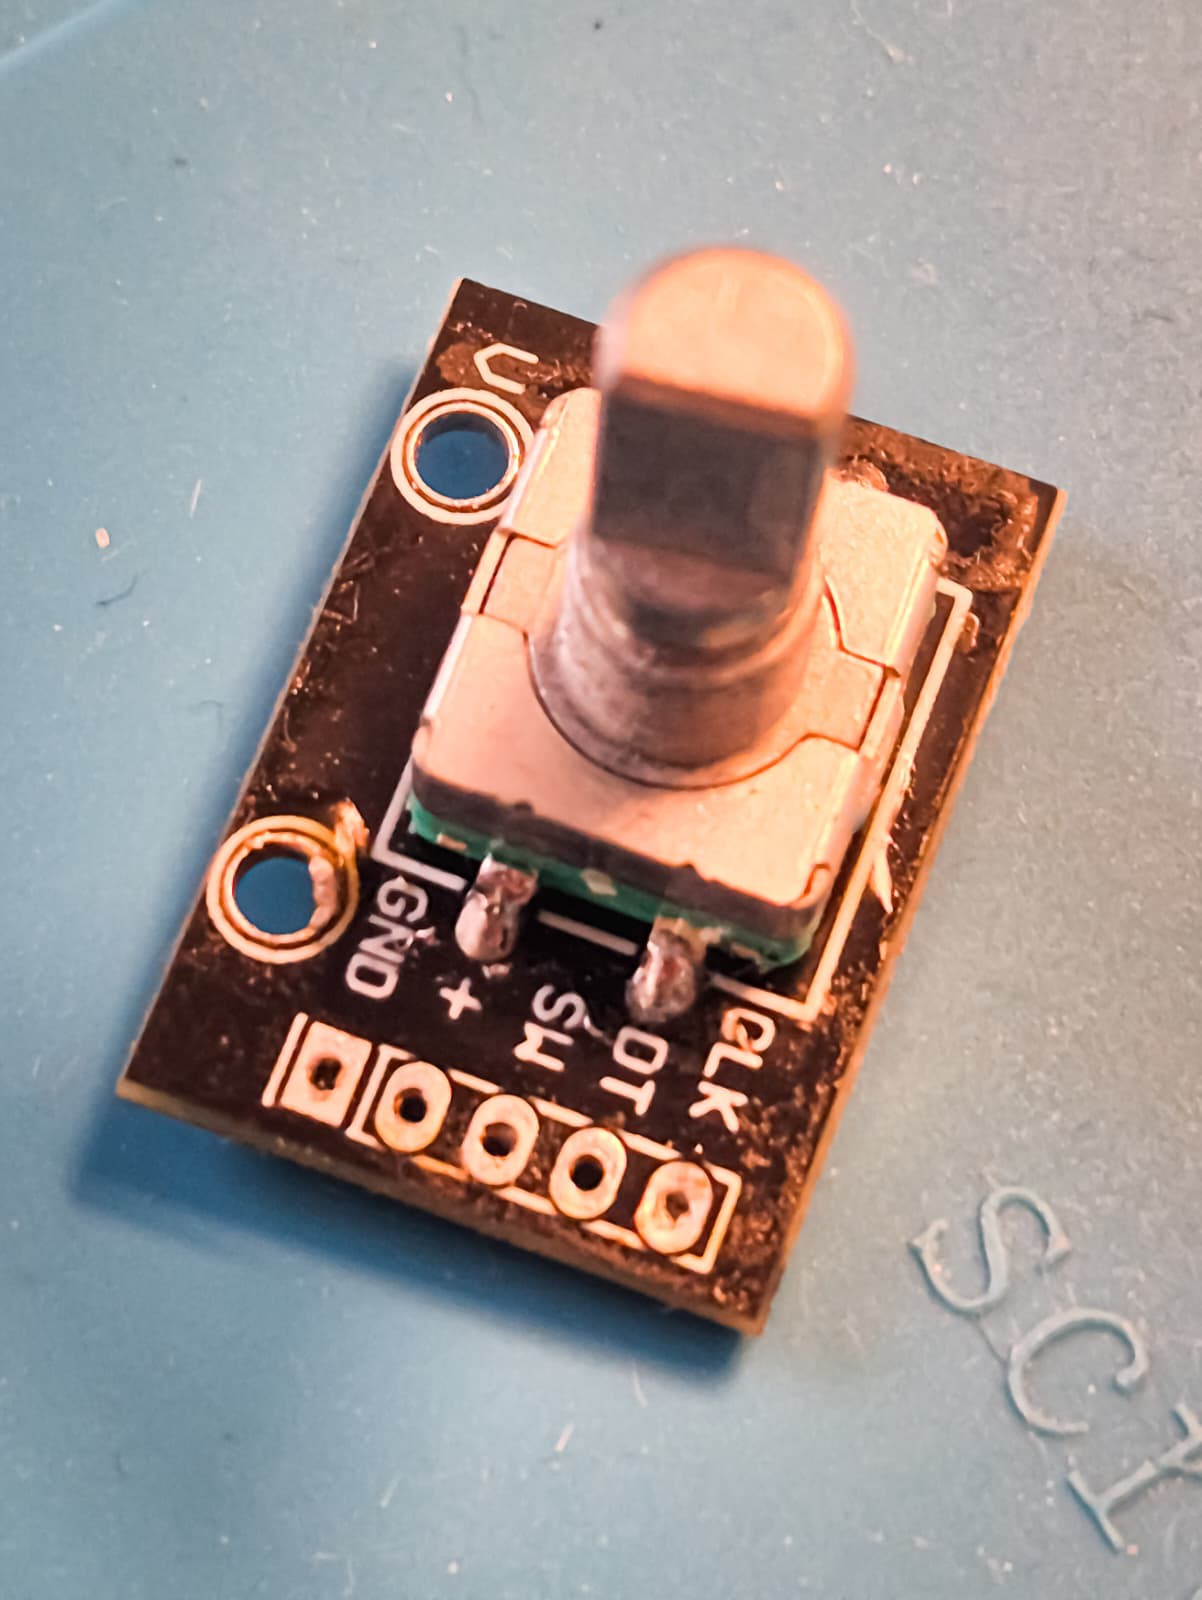
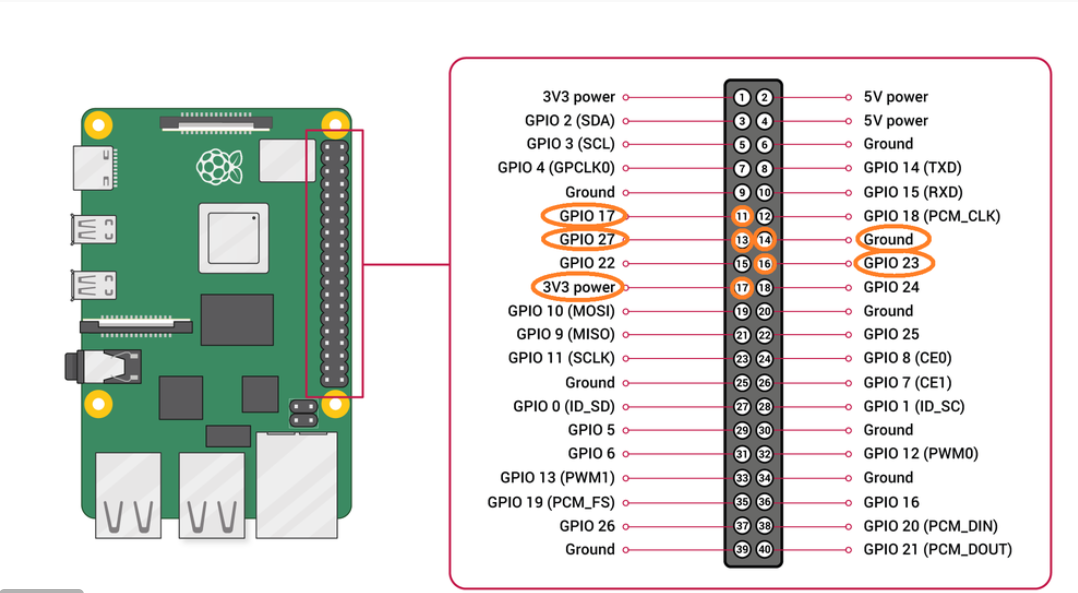
Encoder
For the encoder, the following connection shall be done:
CLK ➔GPIO 23, Pin 16
DT ➔GPIO 17, Pin 11
SW ➔ GPIO 27, Pin 13
GND ➔ pin 14
3V3 ➔ pin 17
![]()
![]()
-
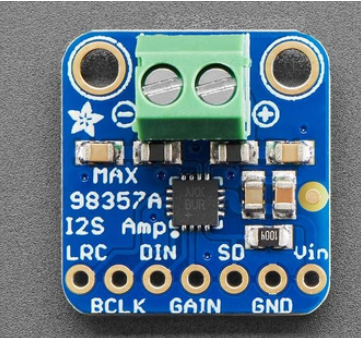
8Audio interface
For the audio interface the following pinout applies:
DIN➔ GPIO 21 (pin 40)
BCLK➔GPIO 18 (pin 12)
LRC➔ GPIO 19 (pin 35)
GND➔ Pin 39
5V➔ Pin 2
![]()
![]()
-
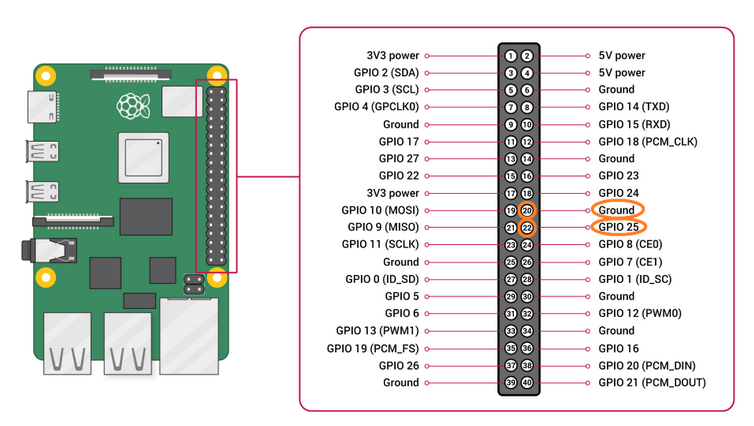
9LED
Connect the following pins to the LED using a 4.7k resistor on one of the pins to lower the current and ensure the LED doesnt shine like a laser pointed at your ayes ;)
LED Anode ➔GPIO 25 , pin 22
LED Catode ➔GND, pin 20
![]()
Retro Raspberry Pi TV Brings Back Channel Surfing
3D-printed Raspberry Pi TV that plays curated clips via a local Flask backend for full offline content control.


Discussions
Become a Hackaday.io Member
Create an account to leave a comment. Already have an account? Log In.