-
1Remove the old bulb
Make sure you have unplugged the device from the power socket and don't plug it back in by mistake!
The translucent top which acts as a diffuser just pulls off by hand. Remove the old halogen bulb carefully and dispose of it properly.
![]()
-
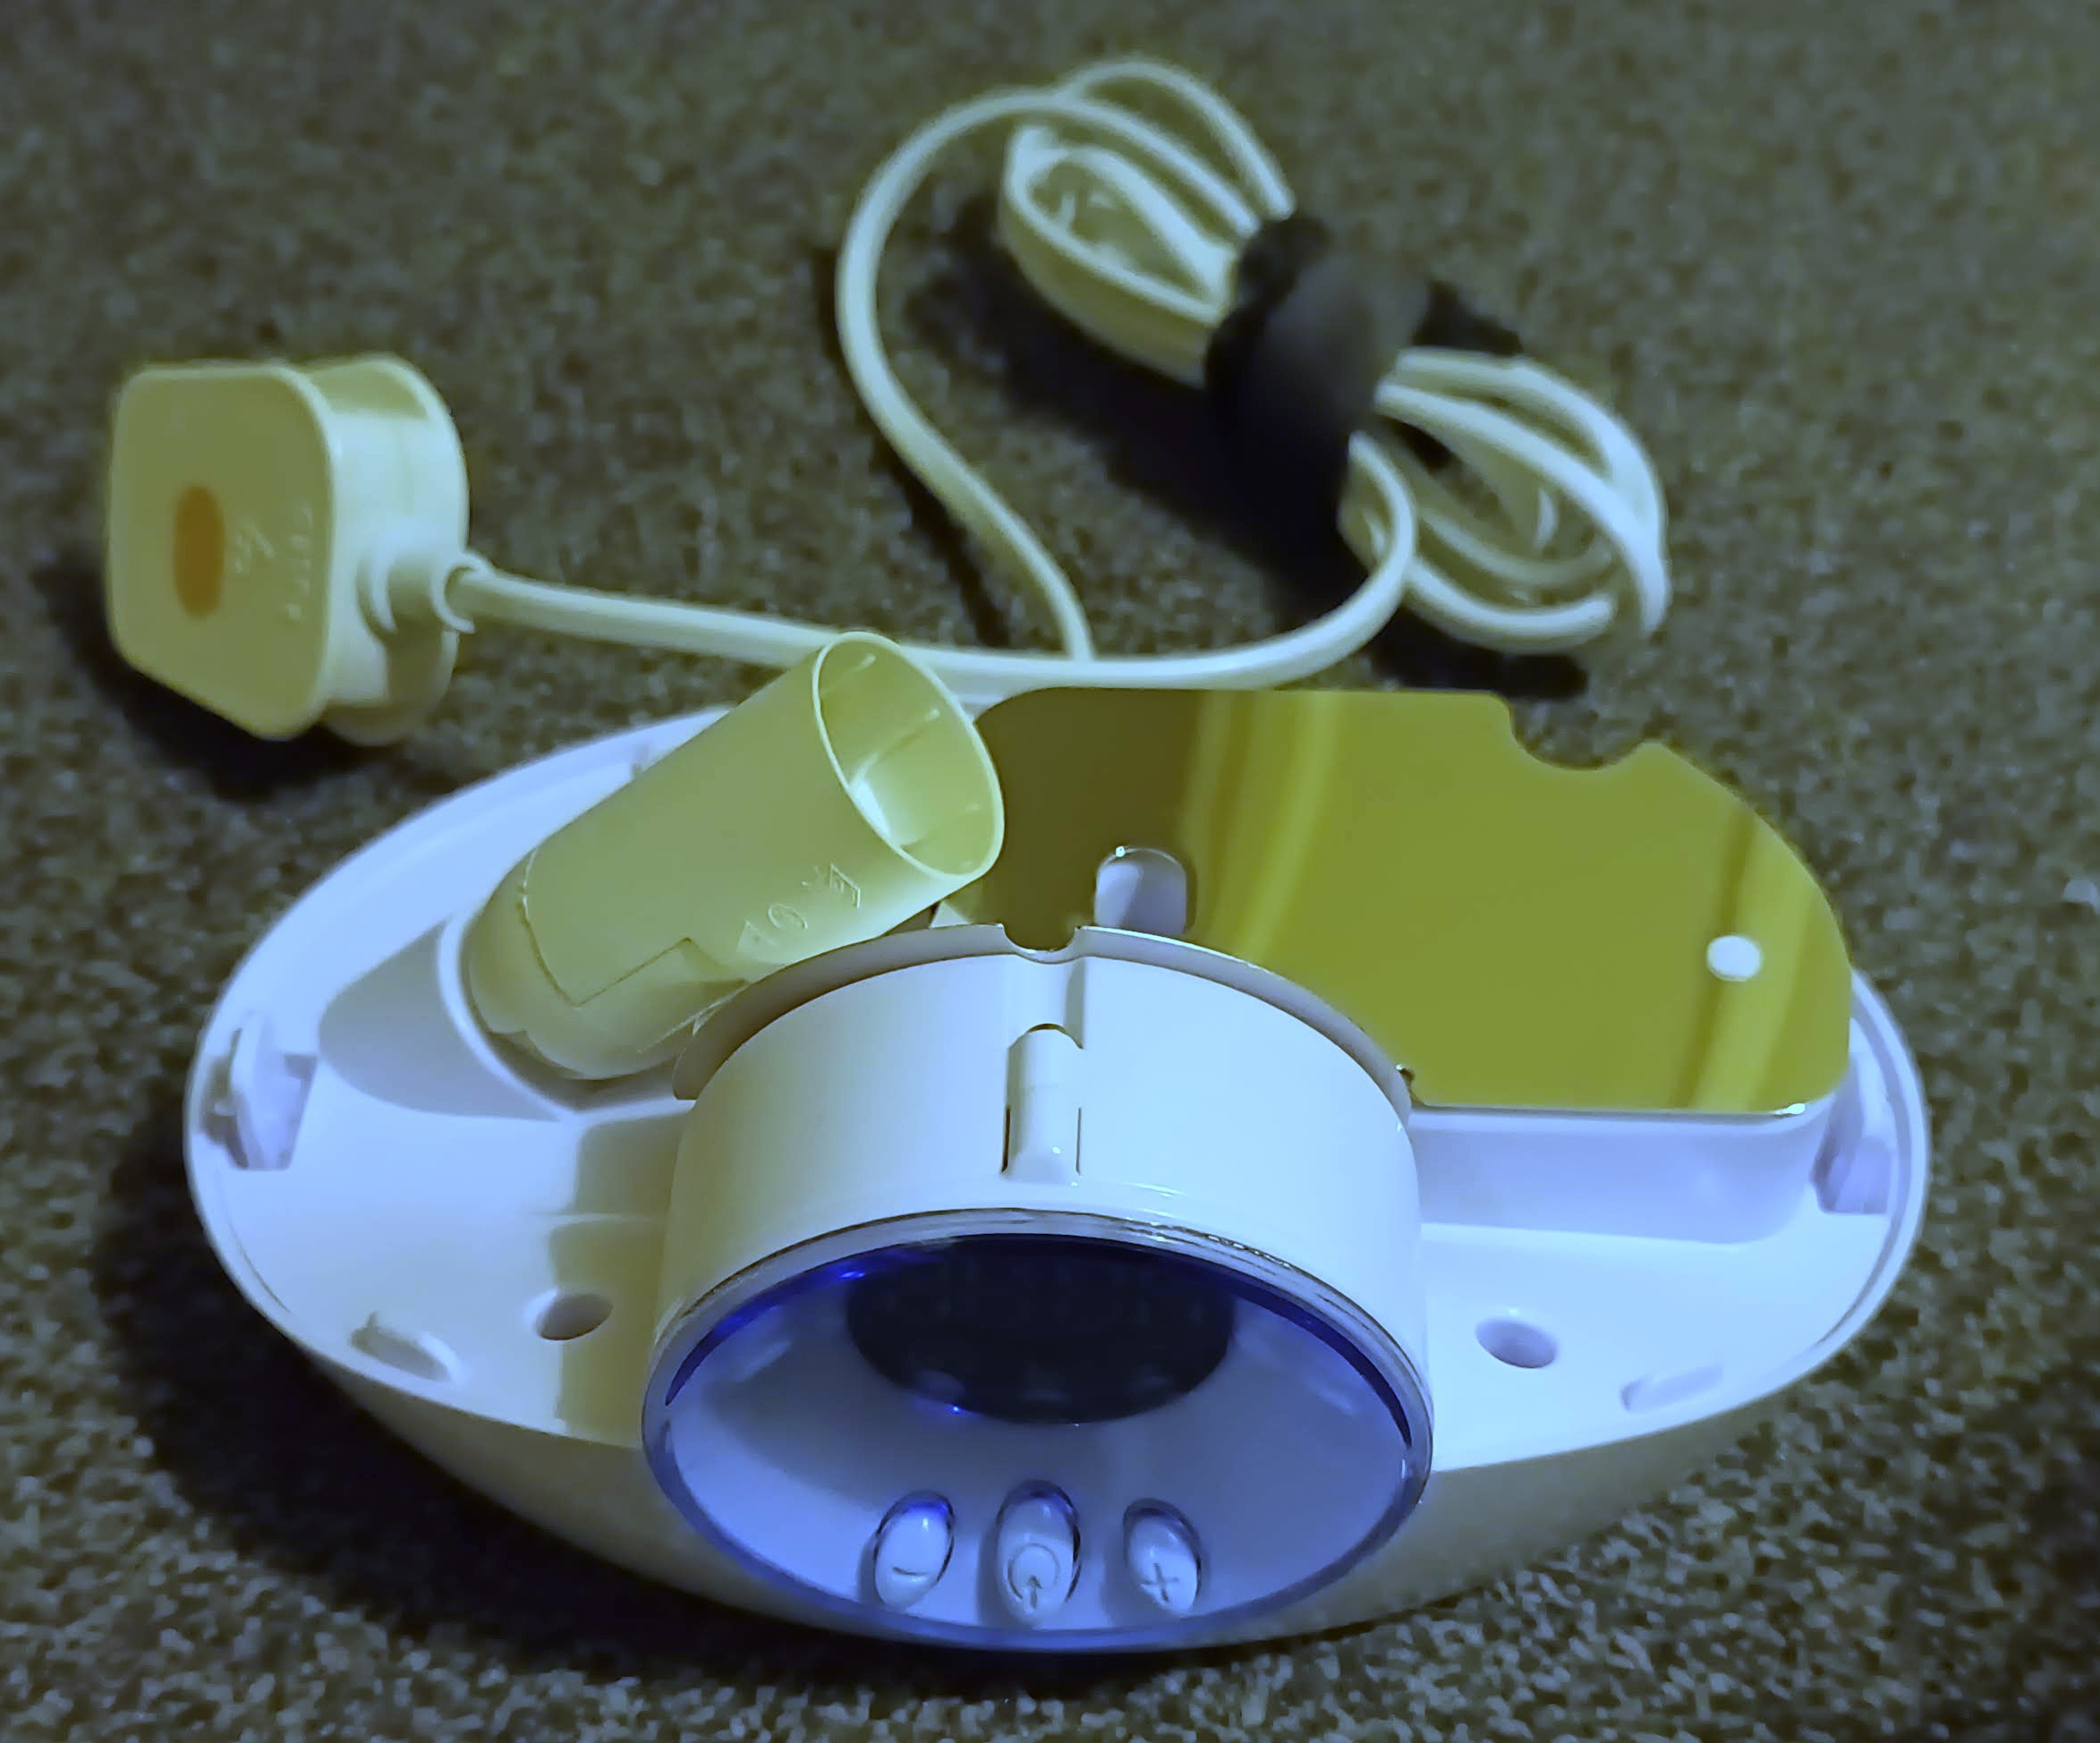
2Remove the mezzanine with the bulb holder and reflector on it
Remove the screws holding down the plastic mezzanine. Note that there's one small screw attaching it to the clock part at the front.
Then you need to get it out and this was really tedious for me as it was mostly an exercise in brute force. It feels like there must be hidden screws e.g. under the rubber feet, but there are none. Let me know if you worked out an easy way to do it!
![]()
In this picture you can see I already unplugged the bulb holder's cable from the main PCB.
-
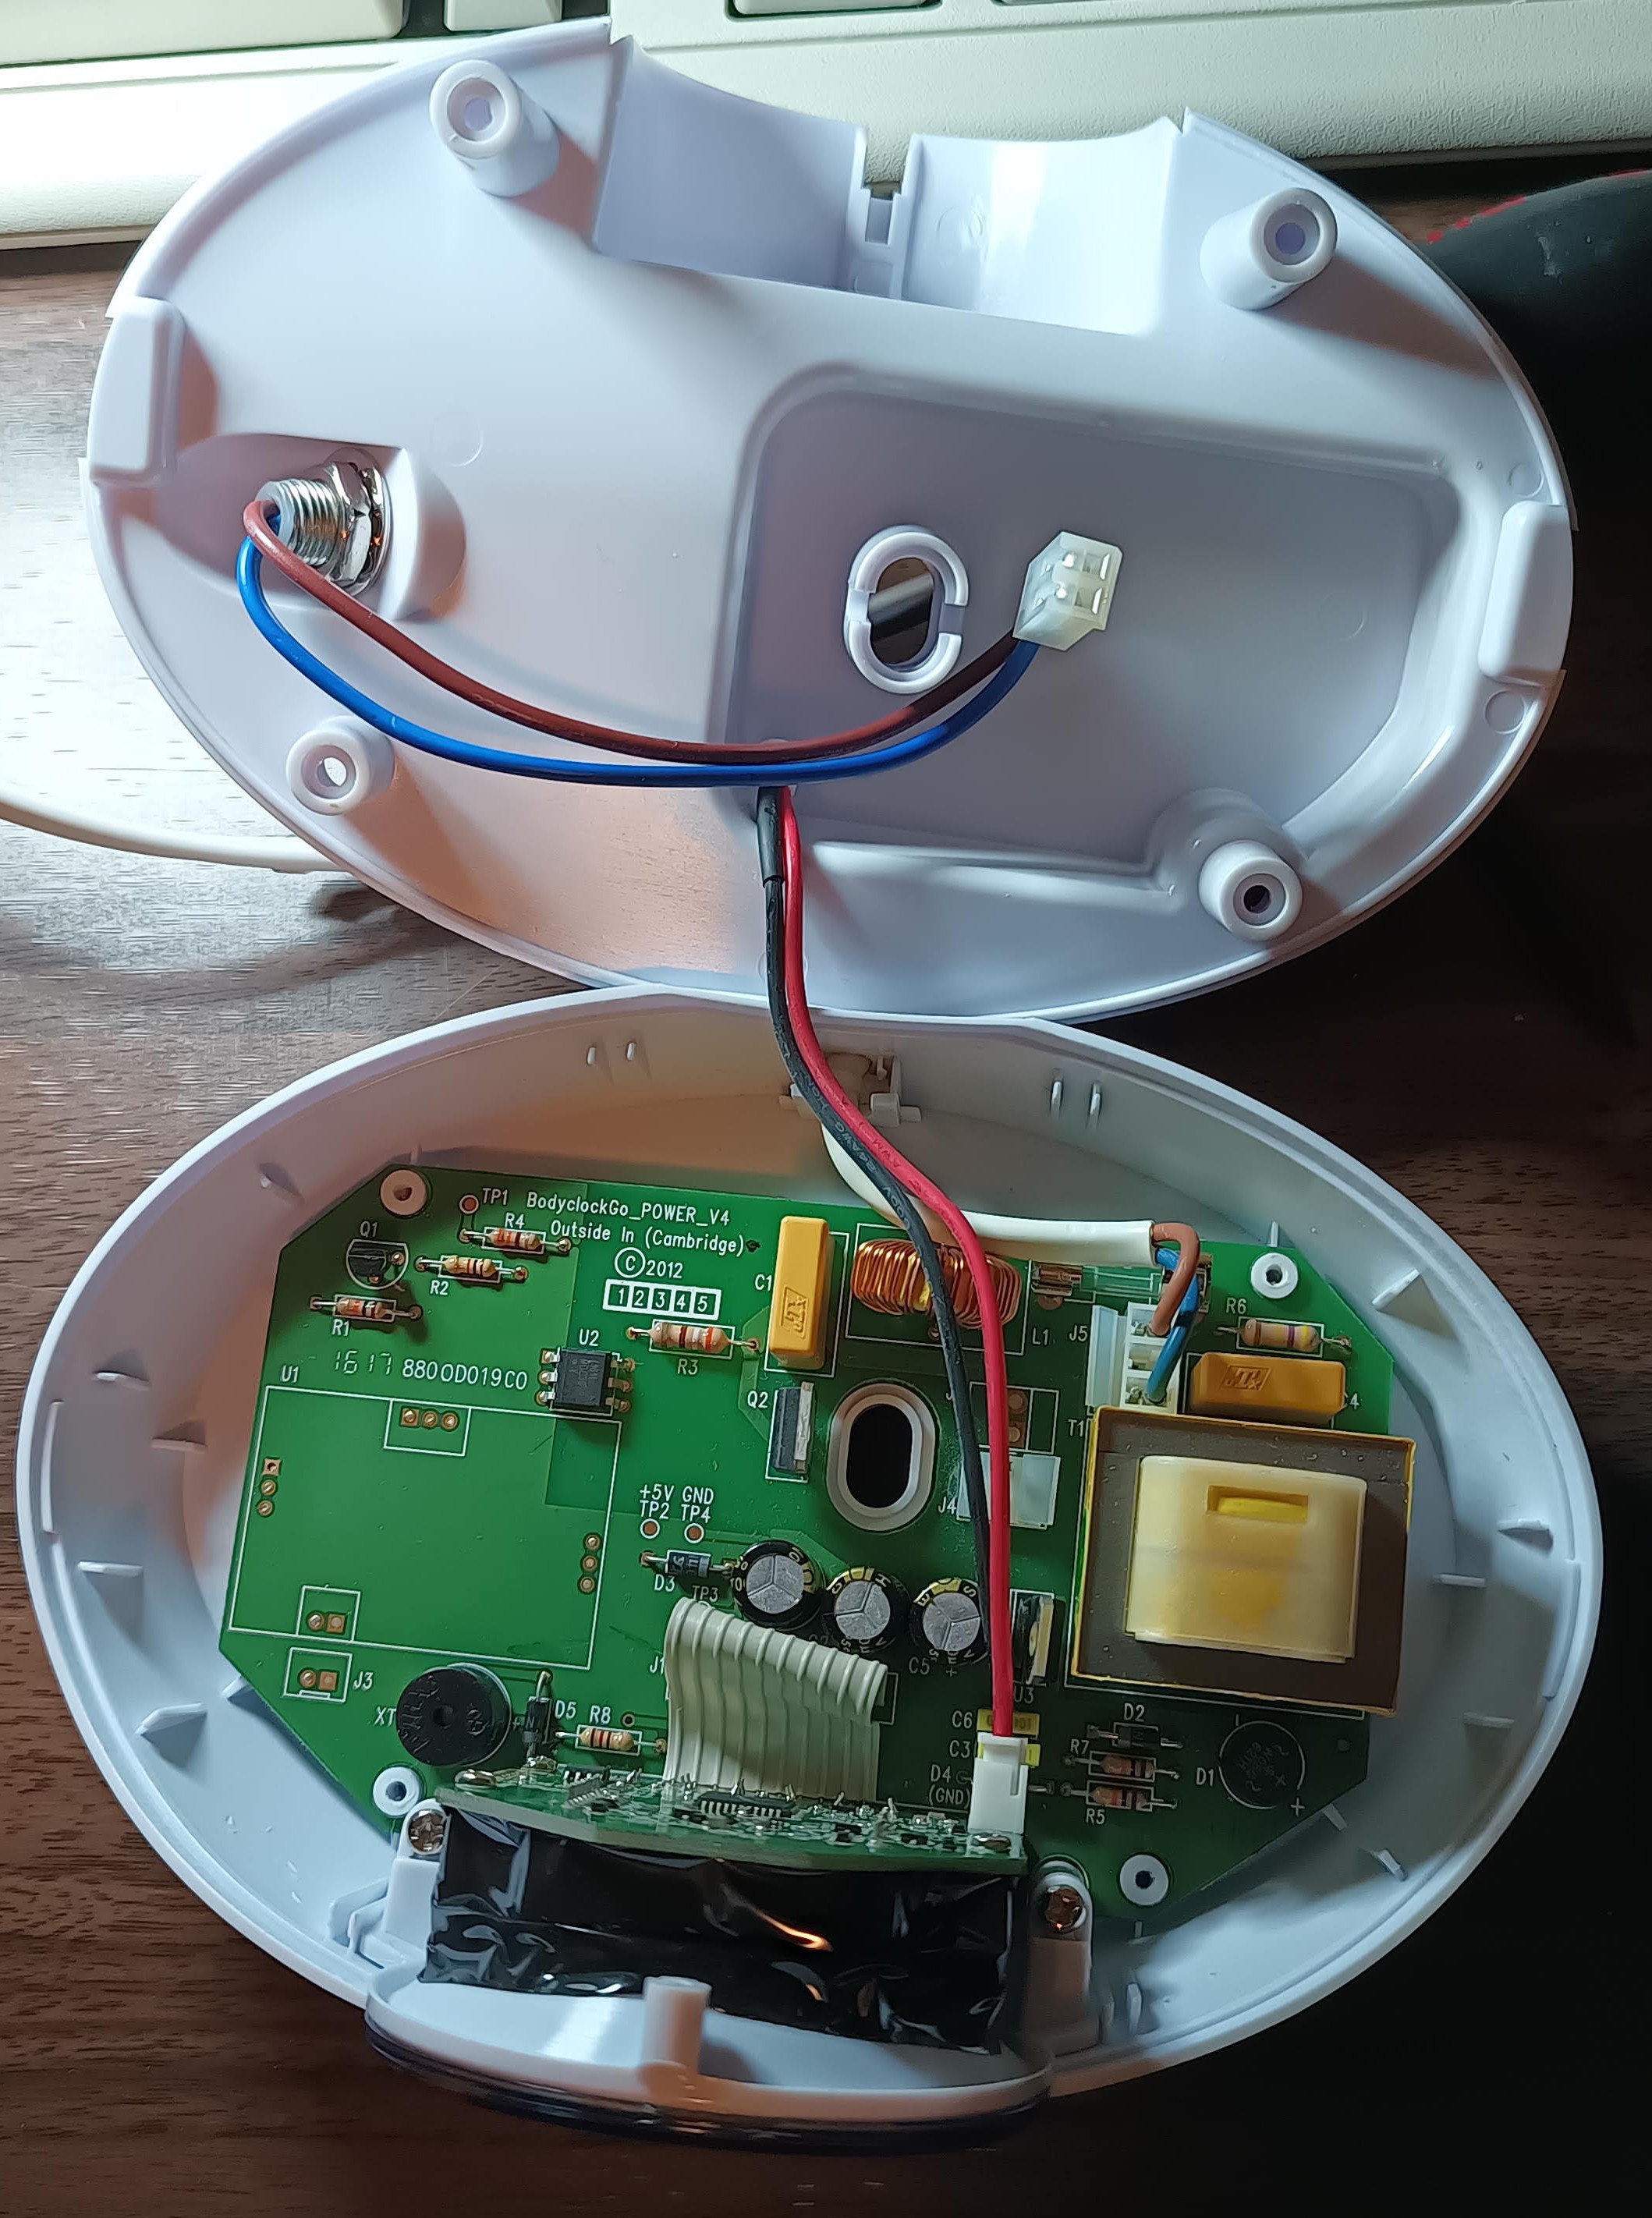
3Splice the power supply cable using Wago terminals
This modification is very simple really. At the moment the power supply cord supplies mains AC voltage to the main PCB. That PCB then controls the brightness of the bulb, presumably using something like a triac. You're going to bypass that part of the PCB so that the mains AC supply from the plug goes to both the main PCB (so the clock still works) and the new LED bulb.
Remove the zip tie which acts as a strain relief on the 2-core power supply cord (from the mains plug) and pull some extra cord through. I found the cord was so long that I had plenty of cable to spare for this.
Cut that cable, but make sure you give yourself a good long tail for the connector to the main PCB. It will help to remove the outer jacket from that so you just have one brown and one blue wire.
Cut off the plug for the wires to the bulb holder - make them as long as you can because you'll need that length to get to the Wago connectors you're adding at the back of the device.
You need one 3-position Wago terminal for the live, and one for the neutral. This device isn't earthed.
Simply connect the incoming live to your live terminal, along with the supply to the main PCB and to the bulb holder. Then do the same with the neutral.
Position the terminal blocks at the back of the device, either side of the cord inlet. I found there was space for them here without disturbing anything else.
Don't forget to put a new zip tie on as strain relief!
![]()
-
4Put the mezzanine back in
This was much easier than taking it out.
-
5Put in the new bulb
Just screw it in, make sure it's fully seated.
-
6Put the diffuser back on
Push it back on as normal.
-
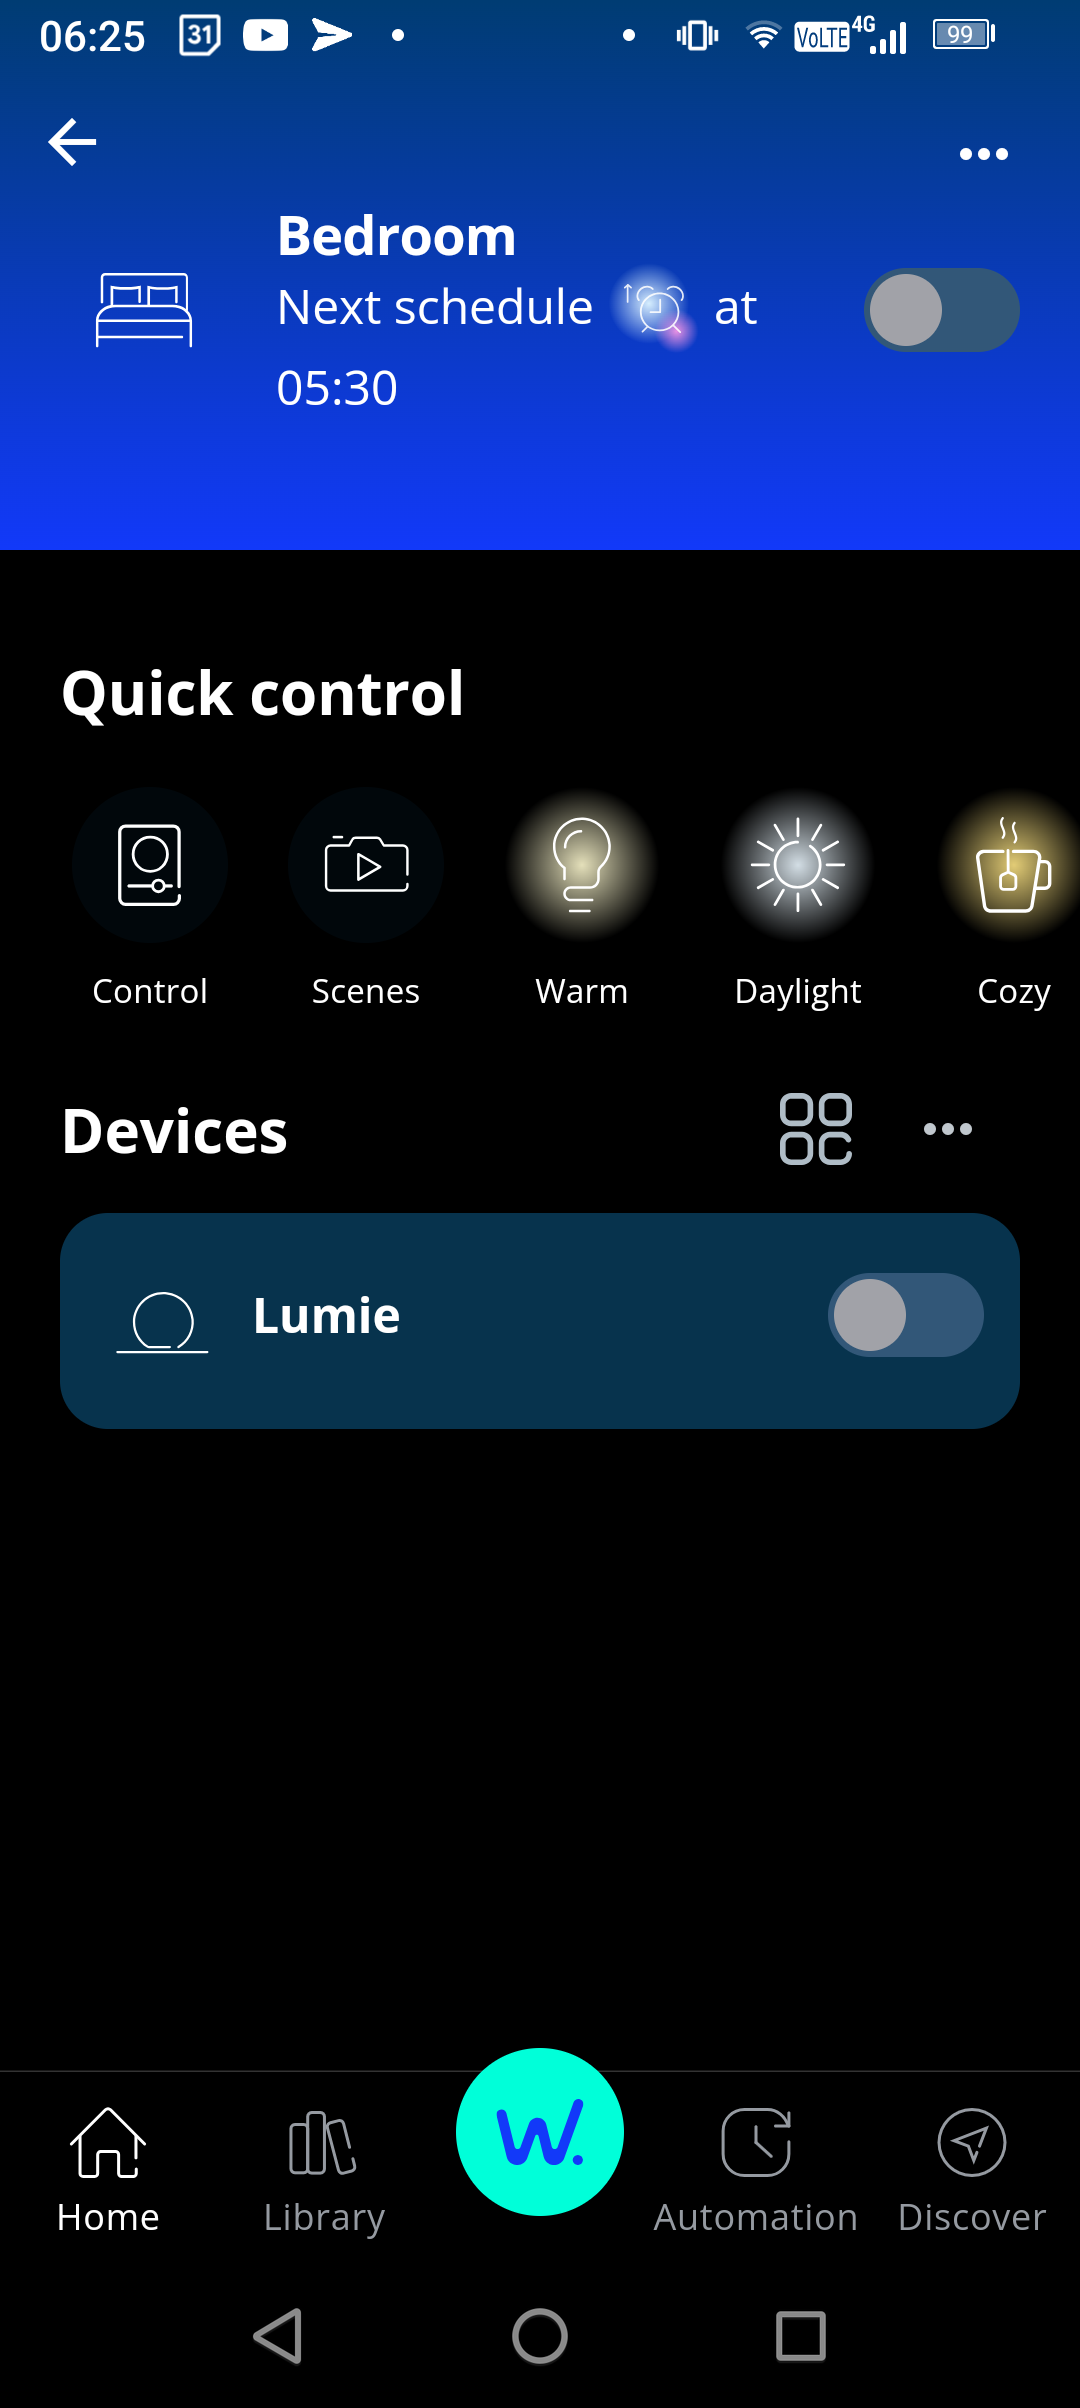
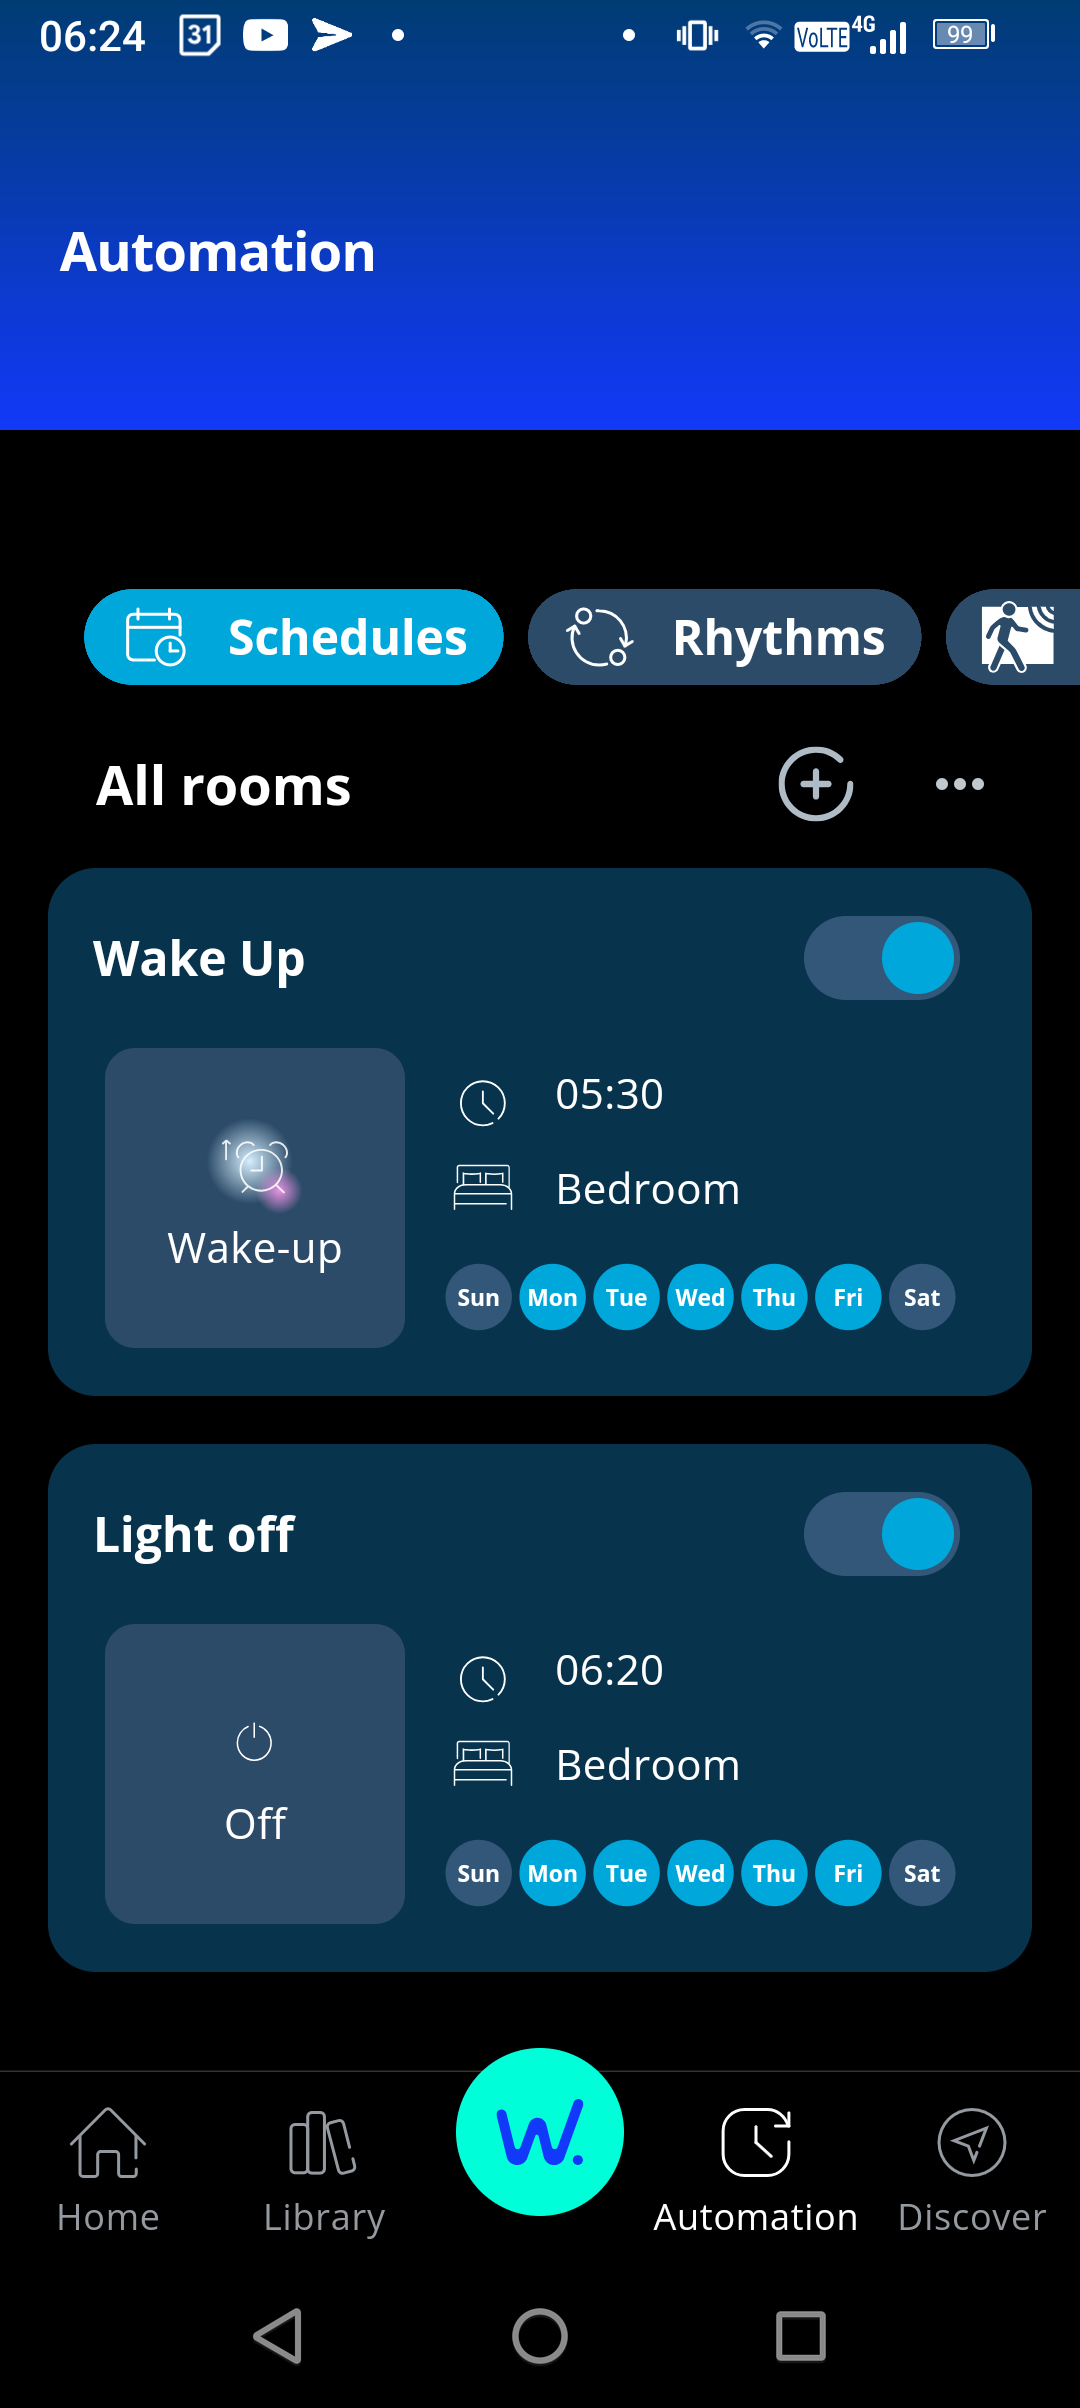
7Set up the new bulb on your phone
I set up the app like this:
![]()
![]()
Lumie Bodyclock Starter LED Retrofit
Replacing the halogen bulb with a modern LED type

Discussions
Become a Hackaday.io Member
Create an account to leave a comment. Already have an account? Log In.