colton.baldridge
-
Project Log 2: Complete!
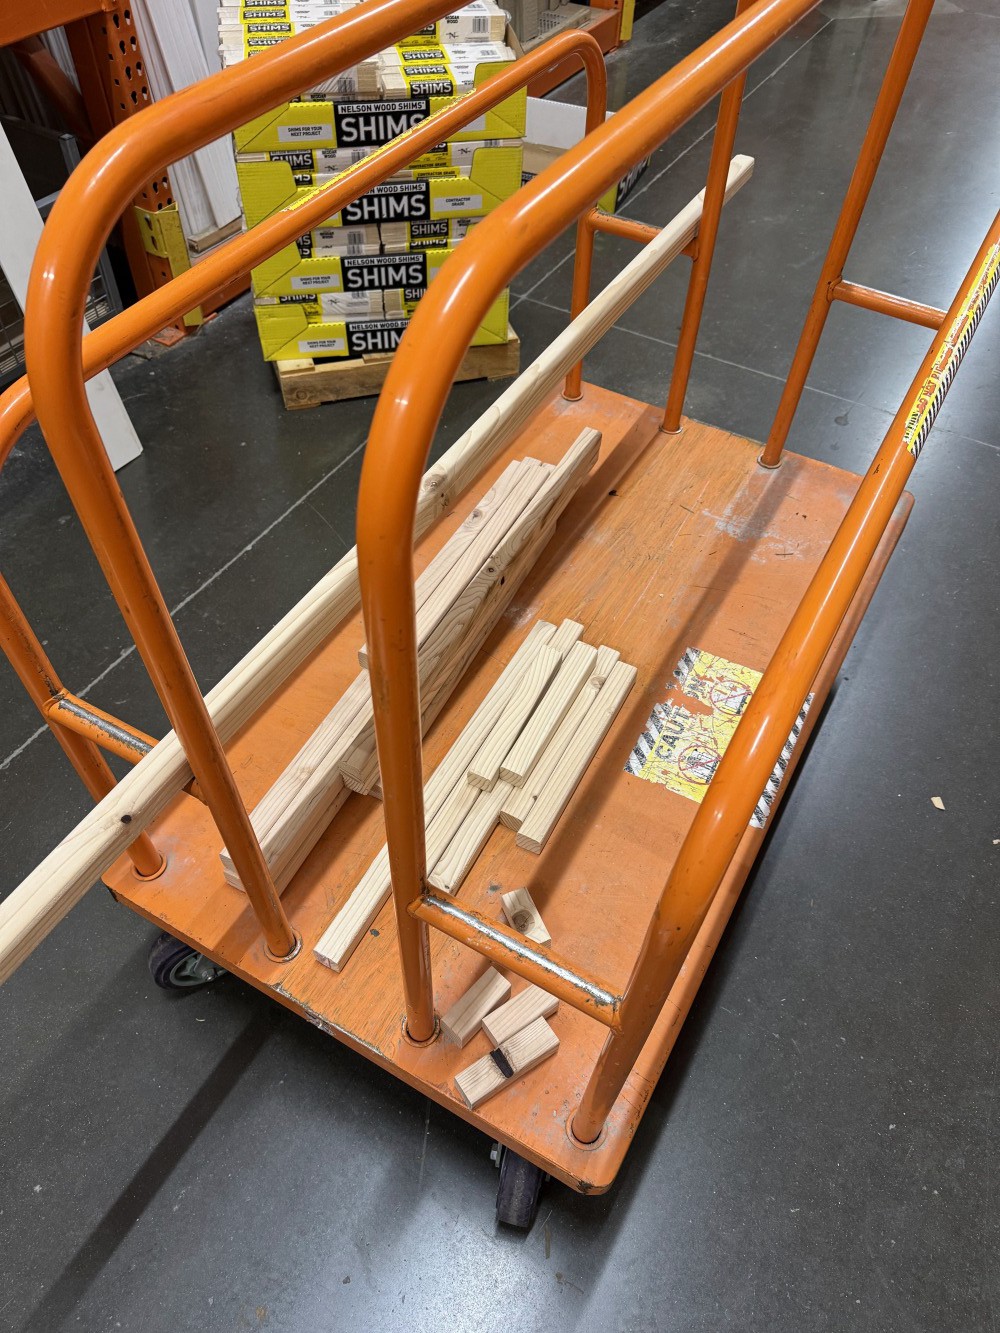
11/17/2025 at 00:45 • 1 commentUnlike nearly all of my other projects, this one was surprisingly straightforward to finish. Picking up after the last log entry, I knew what lengths of wood I needed to cut to build the enclosure. Since I didn't have a chop saw in my apartment (dang I can't wait until I get a garage) I had to find some other way to cut it. Thankfully, Home Depot came to the rescue, as they will cut wood for you. This saved me A LOT of time and elbow grease considering my only other option was a hand saw. The Home Depot staff were incredibly helpful, and per the advice of some people on Reddit, I selected my boards, marked them, and then let the employees take it from there.
Picture of the cutting setup, if anyone is curious.
![]()
Complete boards!
![]()
I took them home, and got to laying them all out. One thing to note about Home Depot's cutting services, though, is that they will only make square cuts. This left me with 8 cuts I needed to make by hand for the angled part of the enclosure. I measured and marked with my calipers to try to get as close to possible to the desired angles.
![]()
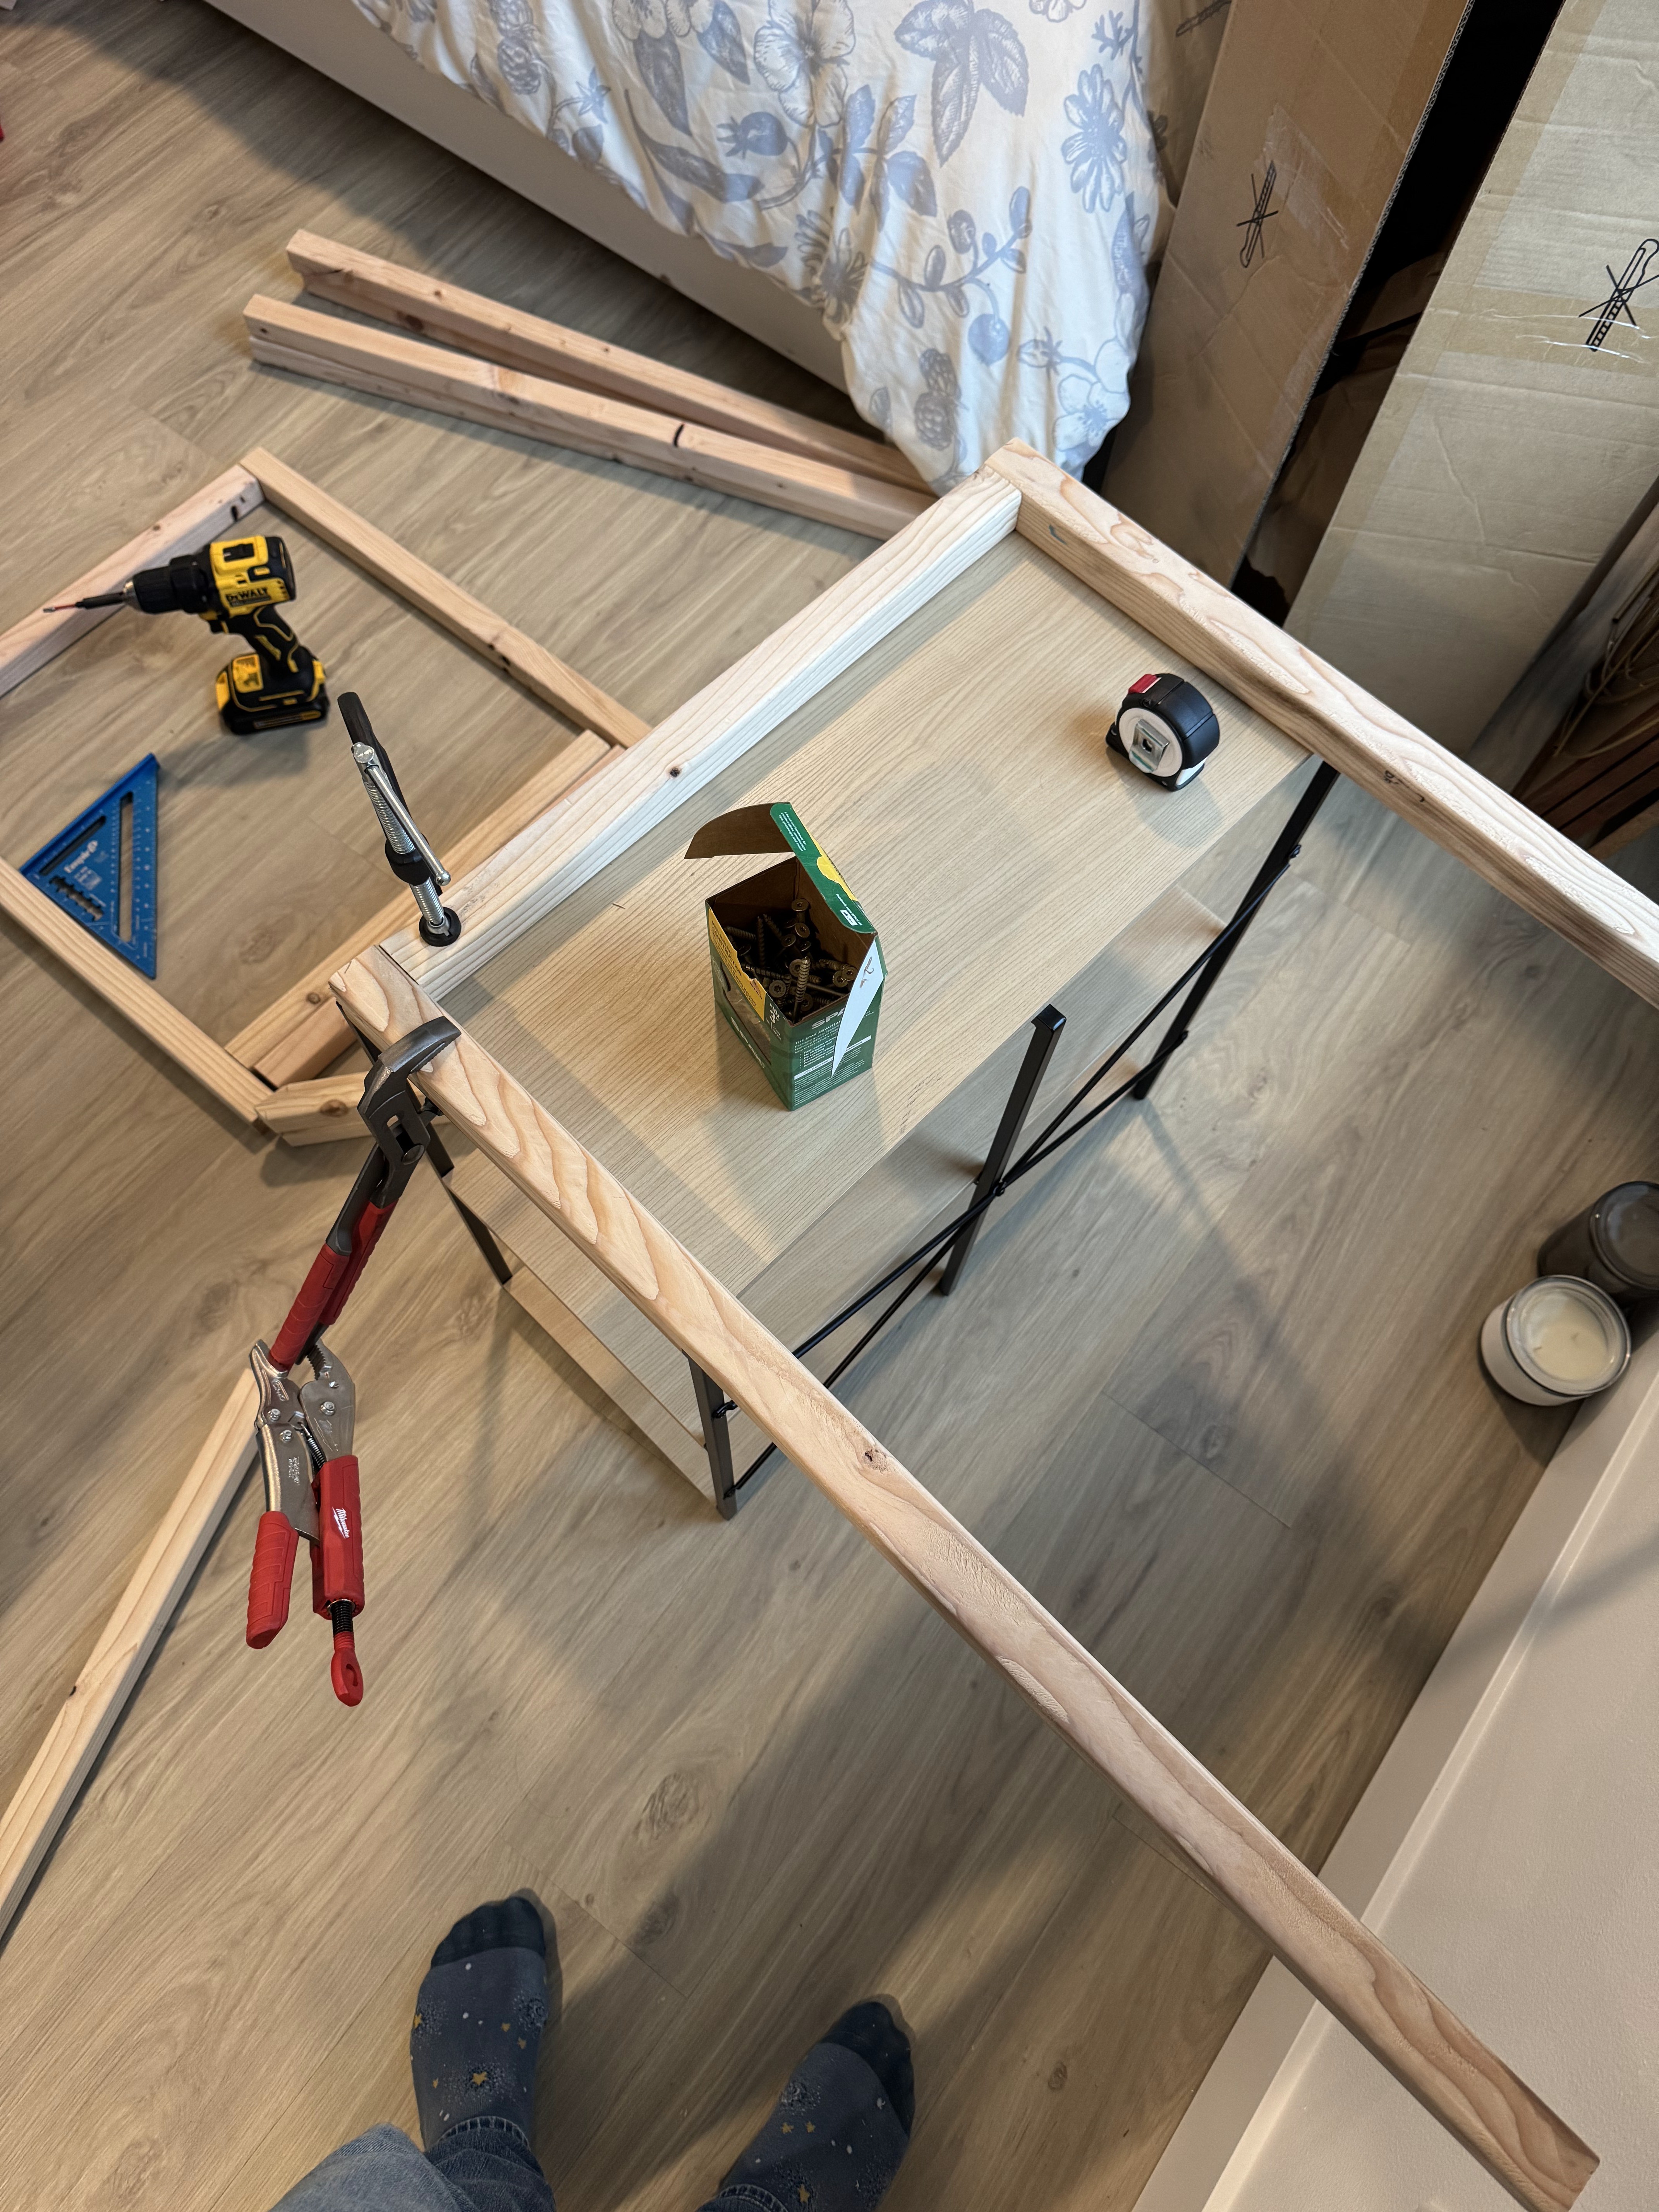
I then used my hand saw to hack away at the corners of the requisite boards. My accuracy was... not great. With no workholding, it was incredibly difficult to get a good cut. This is made worse the the rounded corners of my stock. Eventually though, I was able to get things cut well enough and started screwing them together. For this, I knew I needed a better solution with at least some restraint. My solution: a cheap bookshelf, and 3 clamps.
![]()
I had to get scrappy with this solution, but it worked nonetheless. Here is one of the sides completed:
![]()
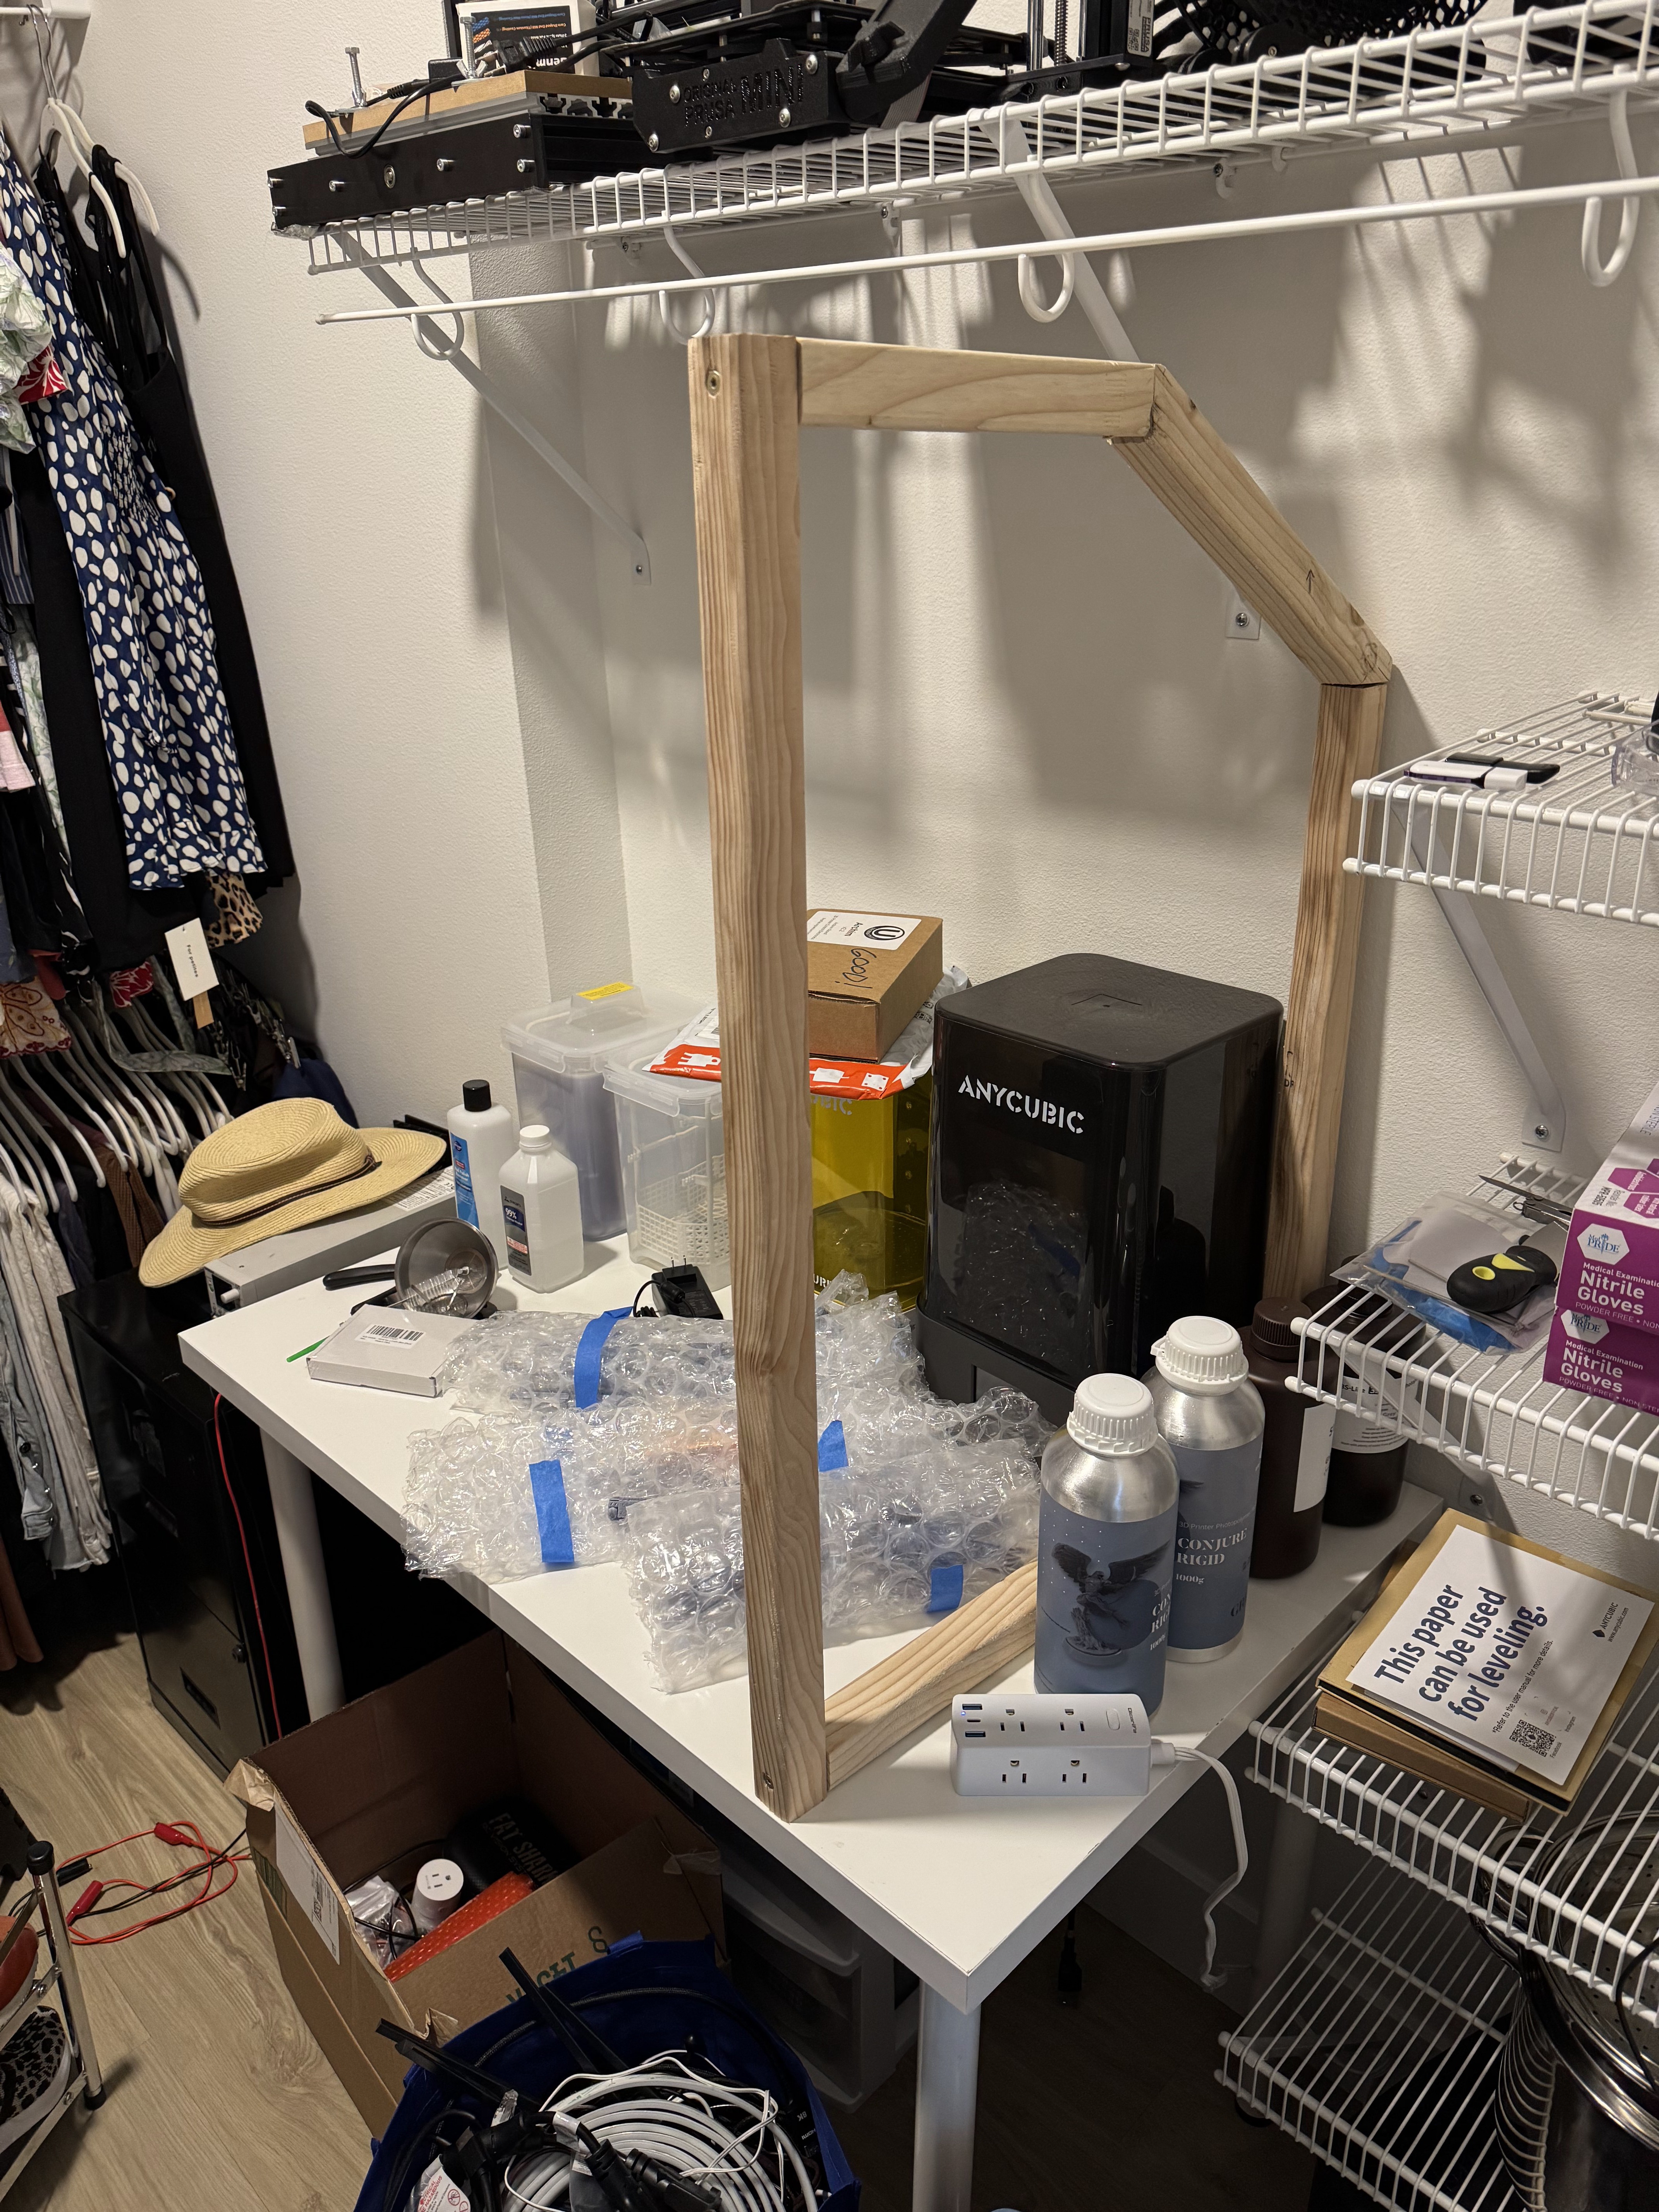
From there, I screwed together the rest of the frame and moved to my next challenge - enclosing the enclosure. I knew I needed something impermeable, but would prefer it to be clear. I also wanted it to be light and easy to cut. This left me with only a couple options: clear plastic film and plexiglass. Lastly, it must be cheap, which meant that plexiglass was off the table. Unfortunately, however, they don't really sell small-ish quantities of clear plastic film that isn't super thin (thickest from Home Depot is 6mil)... or do they? I found the thickest clear plastic shower curtain on amazon and bought the largest option. This thing was SOLID, I measured it at 10mil. It was exactly what I was looking for. Thick enough to have some rigidity and provide some structure, but thin and flexible enough to be easy to cut. I got to work chopping and stapling it to the outside.
![]()
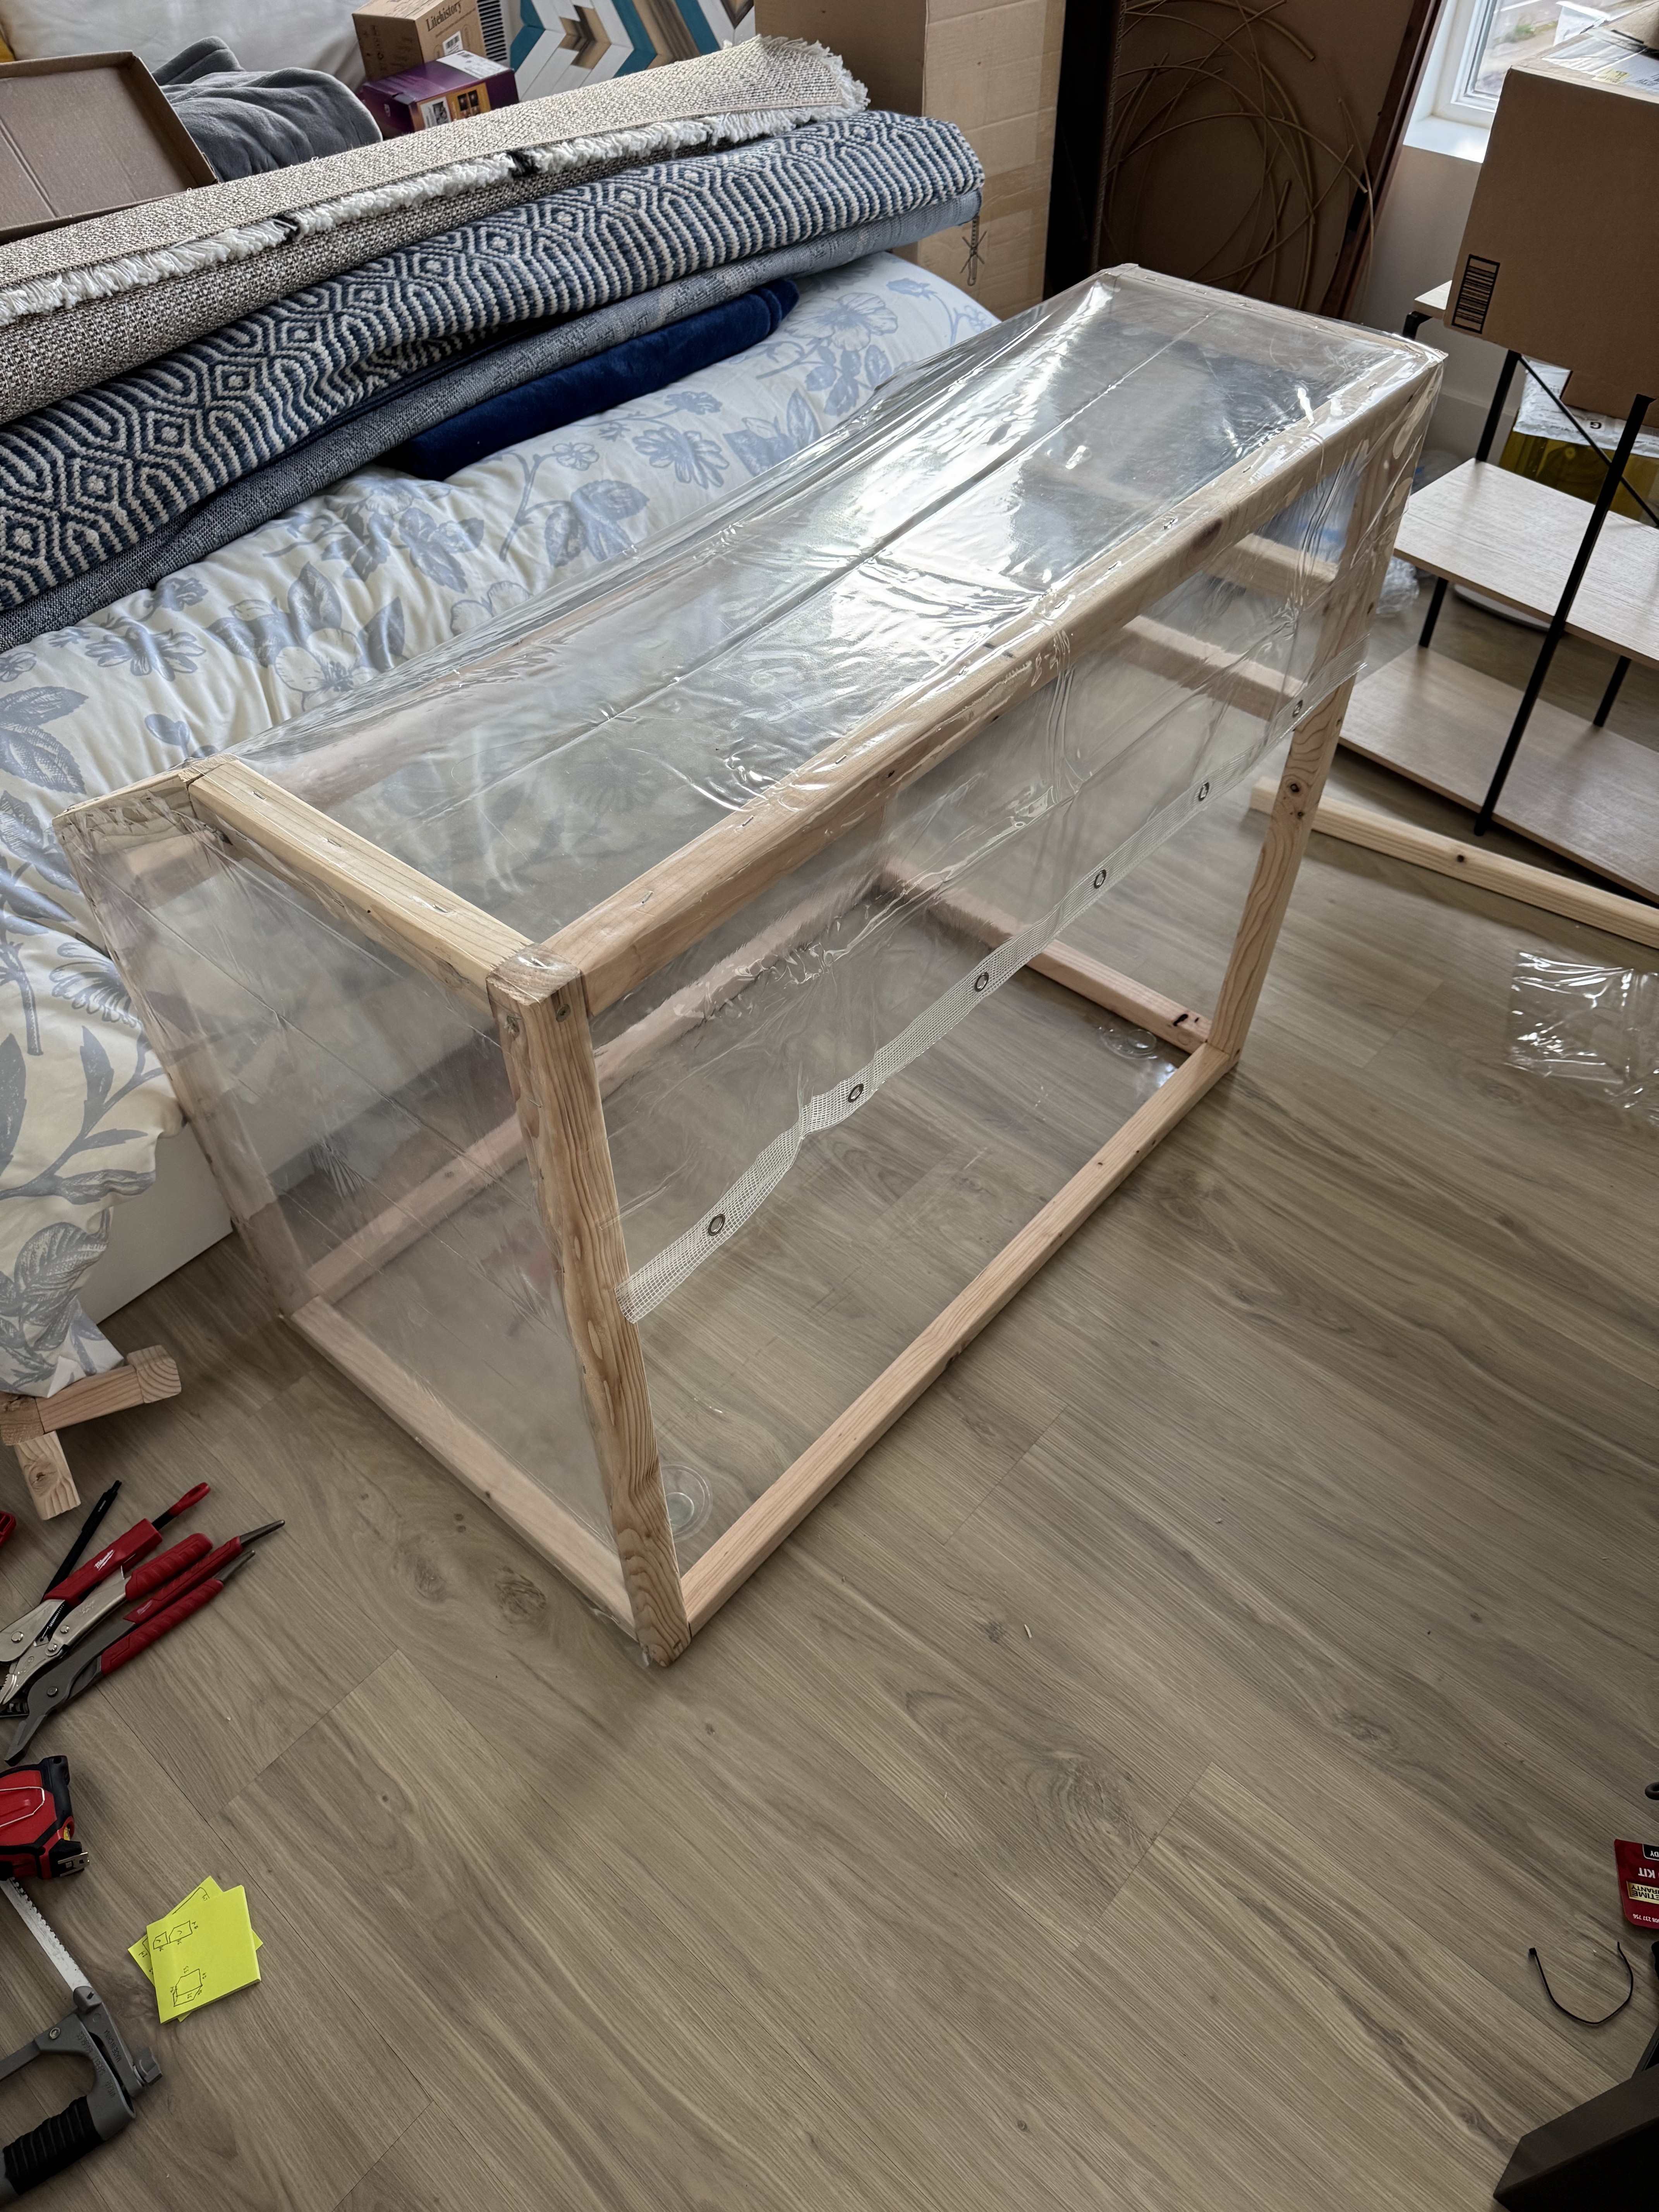
You can see in this image, things were coming together nicely! After some more slicing and dicing, here it is almost complete.
![]()
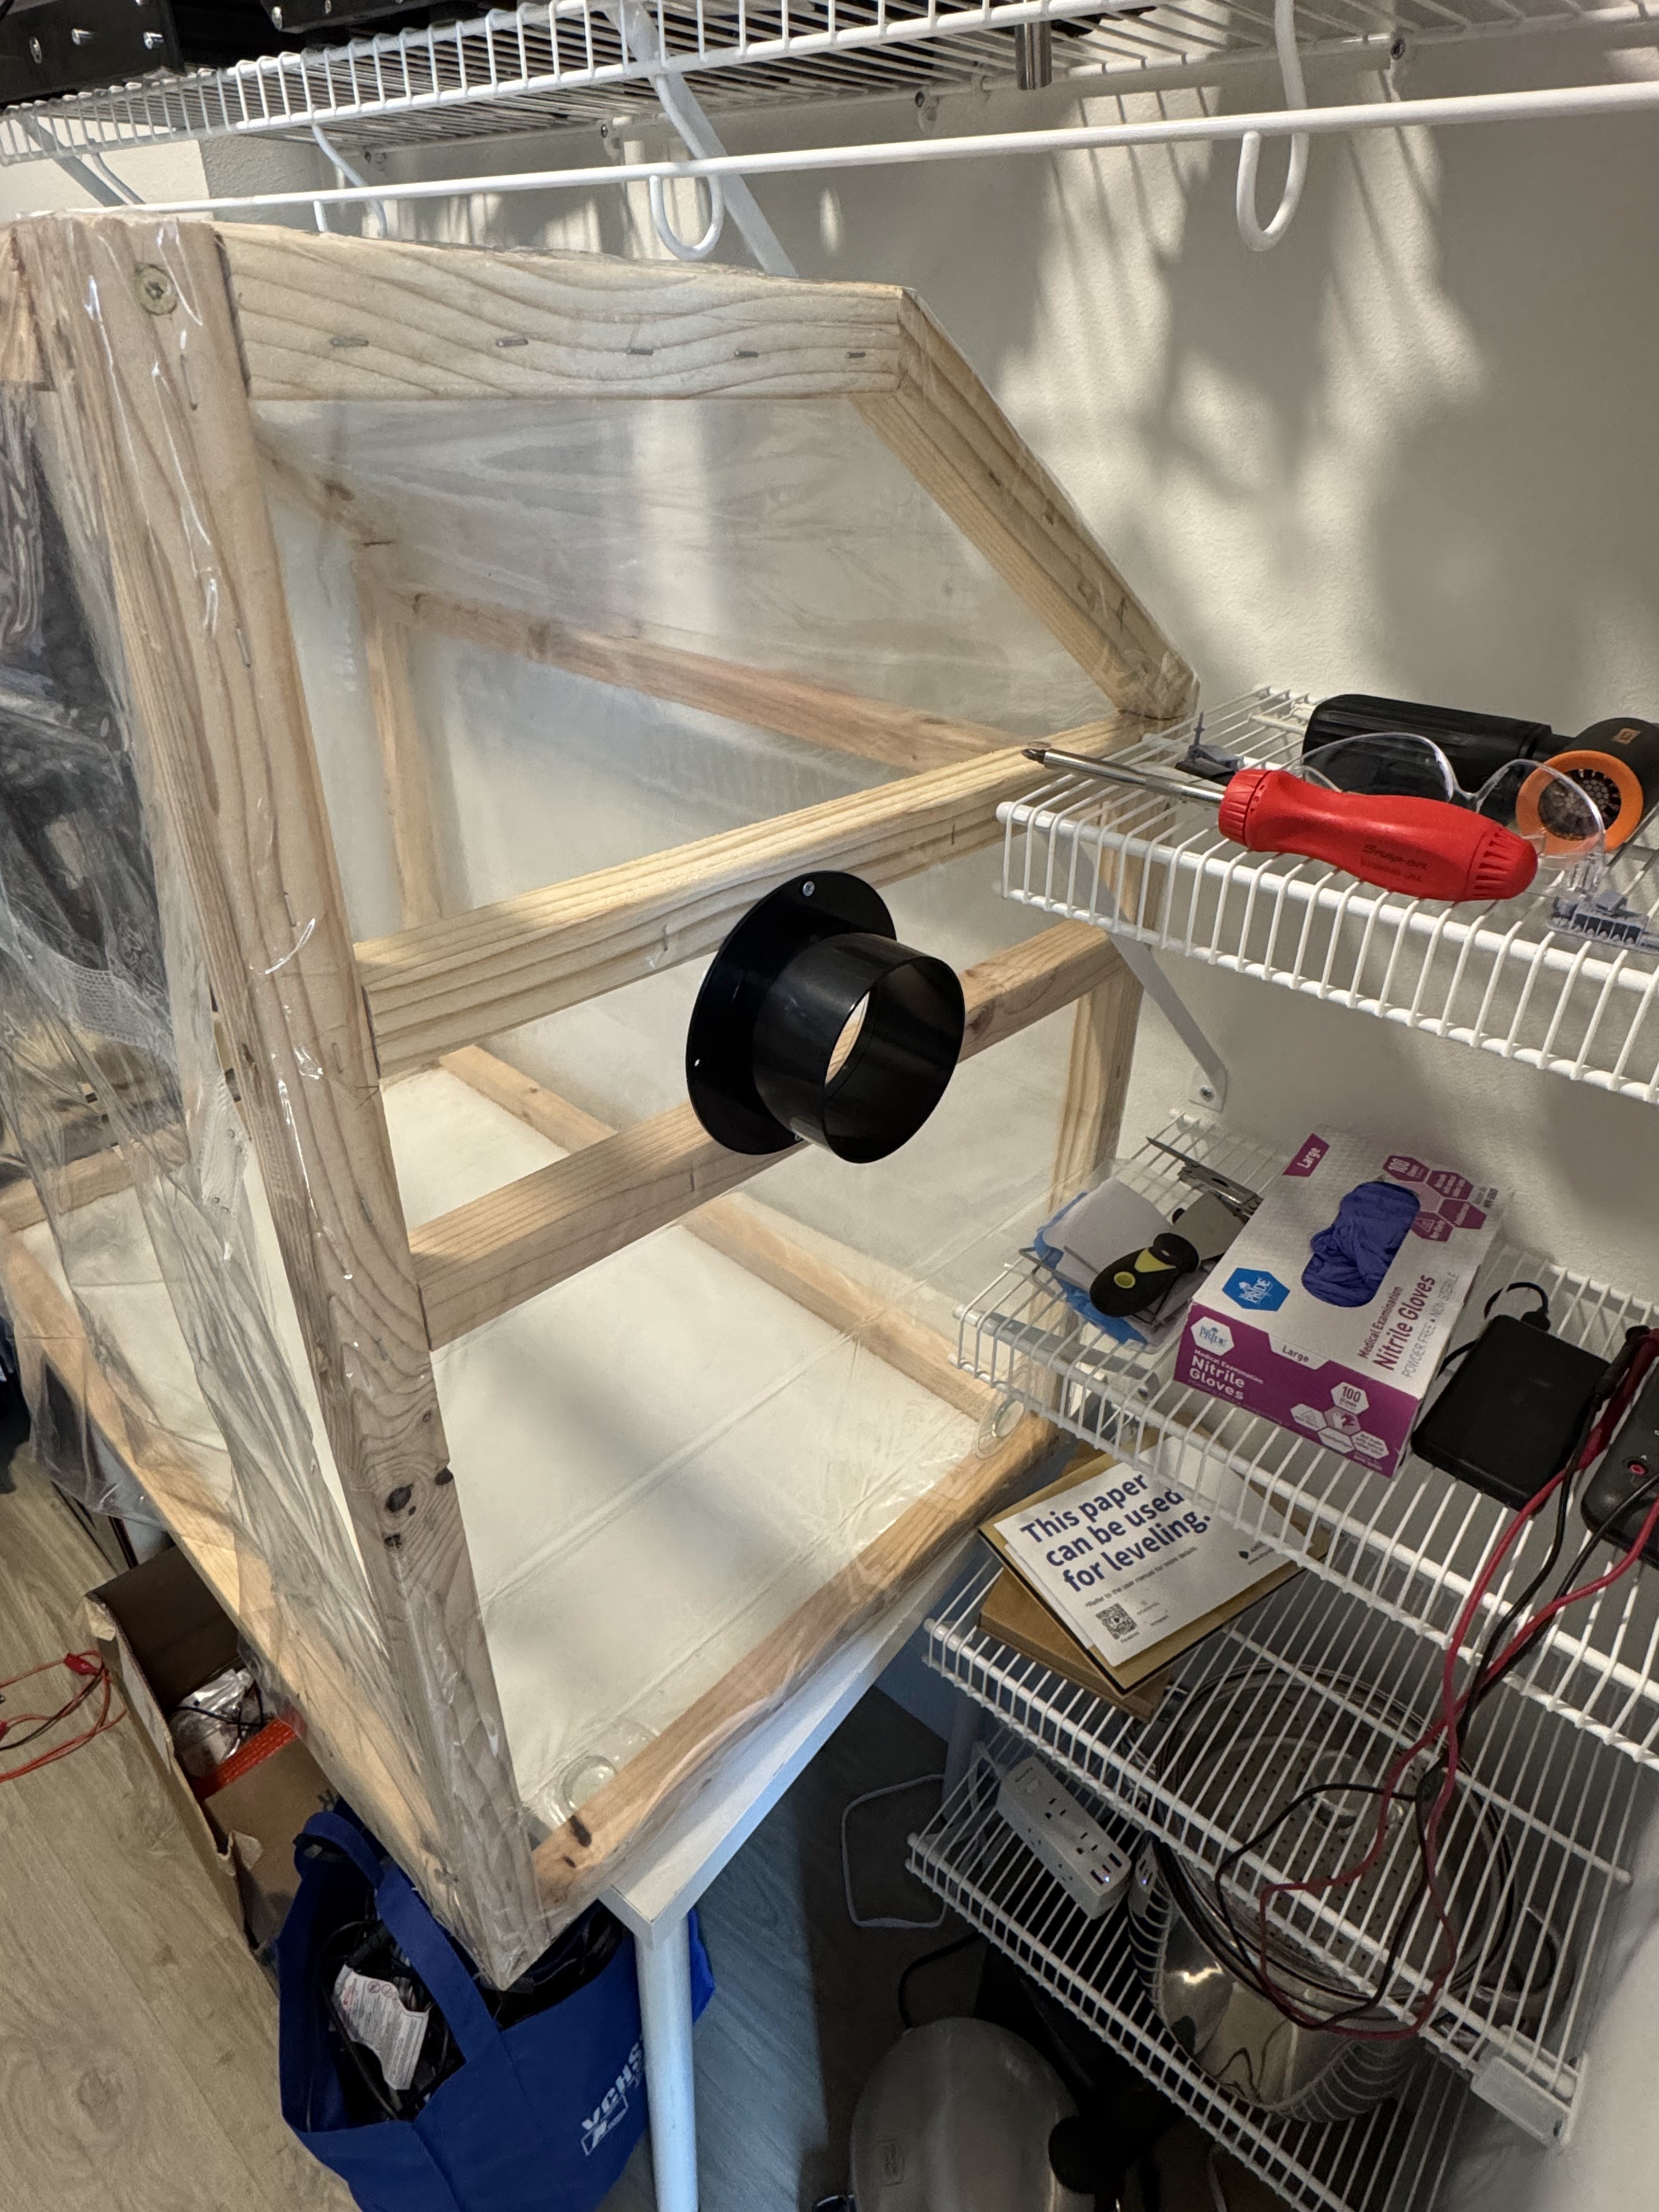
It's hard to see, but I left the flap on the front not stapled, so if I need to open up wide, I can. With some of the last scraps of the shower curtain, I made mini-flaps on the front, each covering about 1/4 of the width of the enclosure, so I can only open up the parts of the enclosure I need to access, and maximizing input airflow through that section. The finishing touch was to add the air outlet.
Planning:
![]()
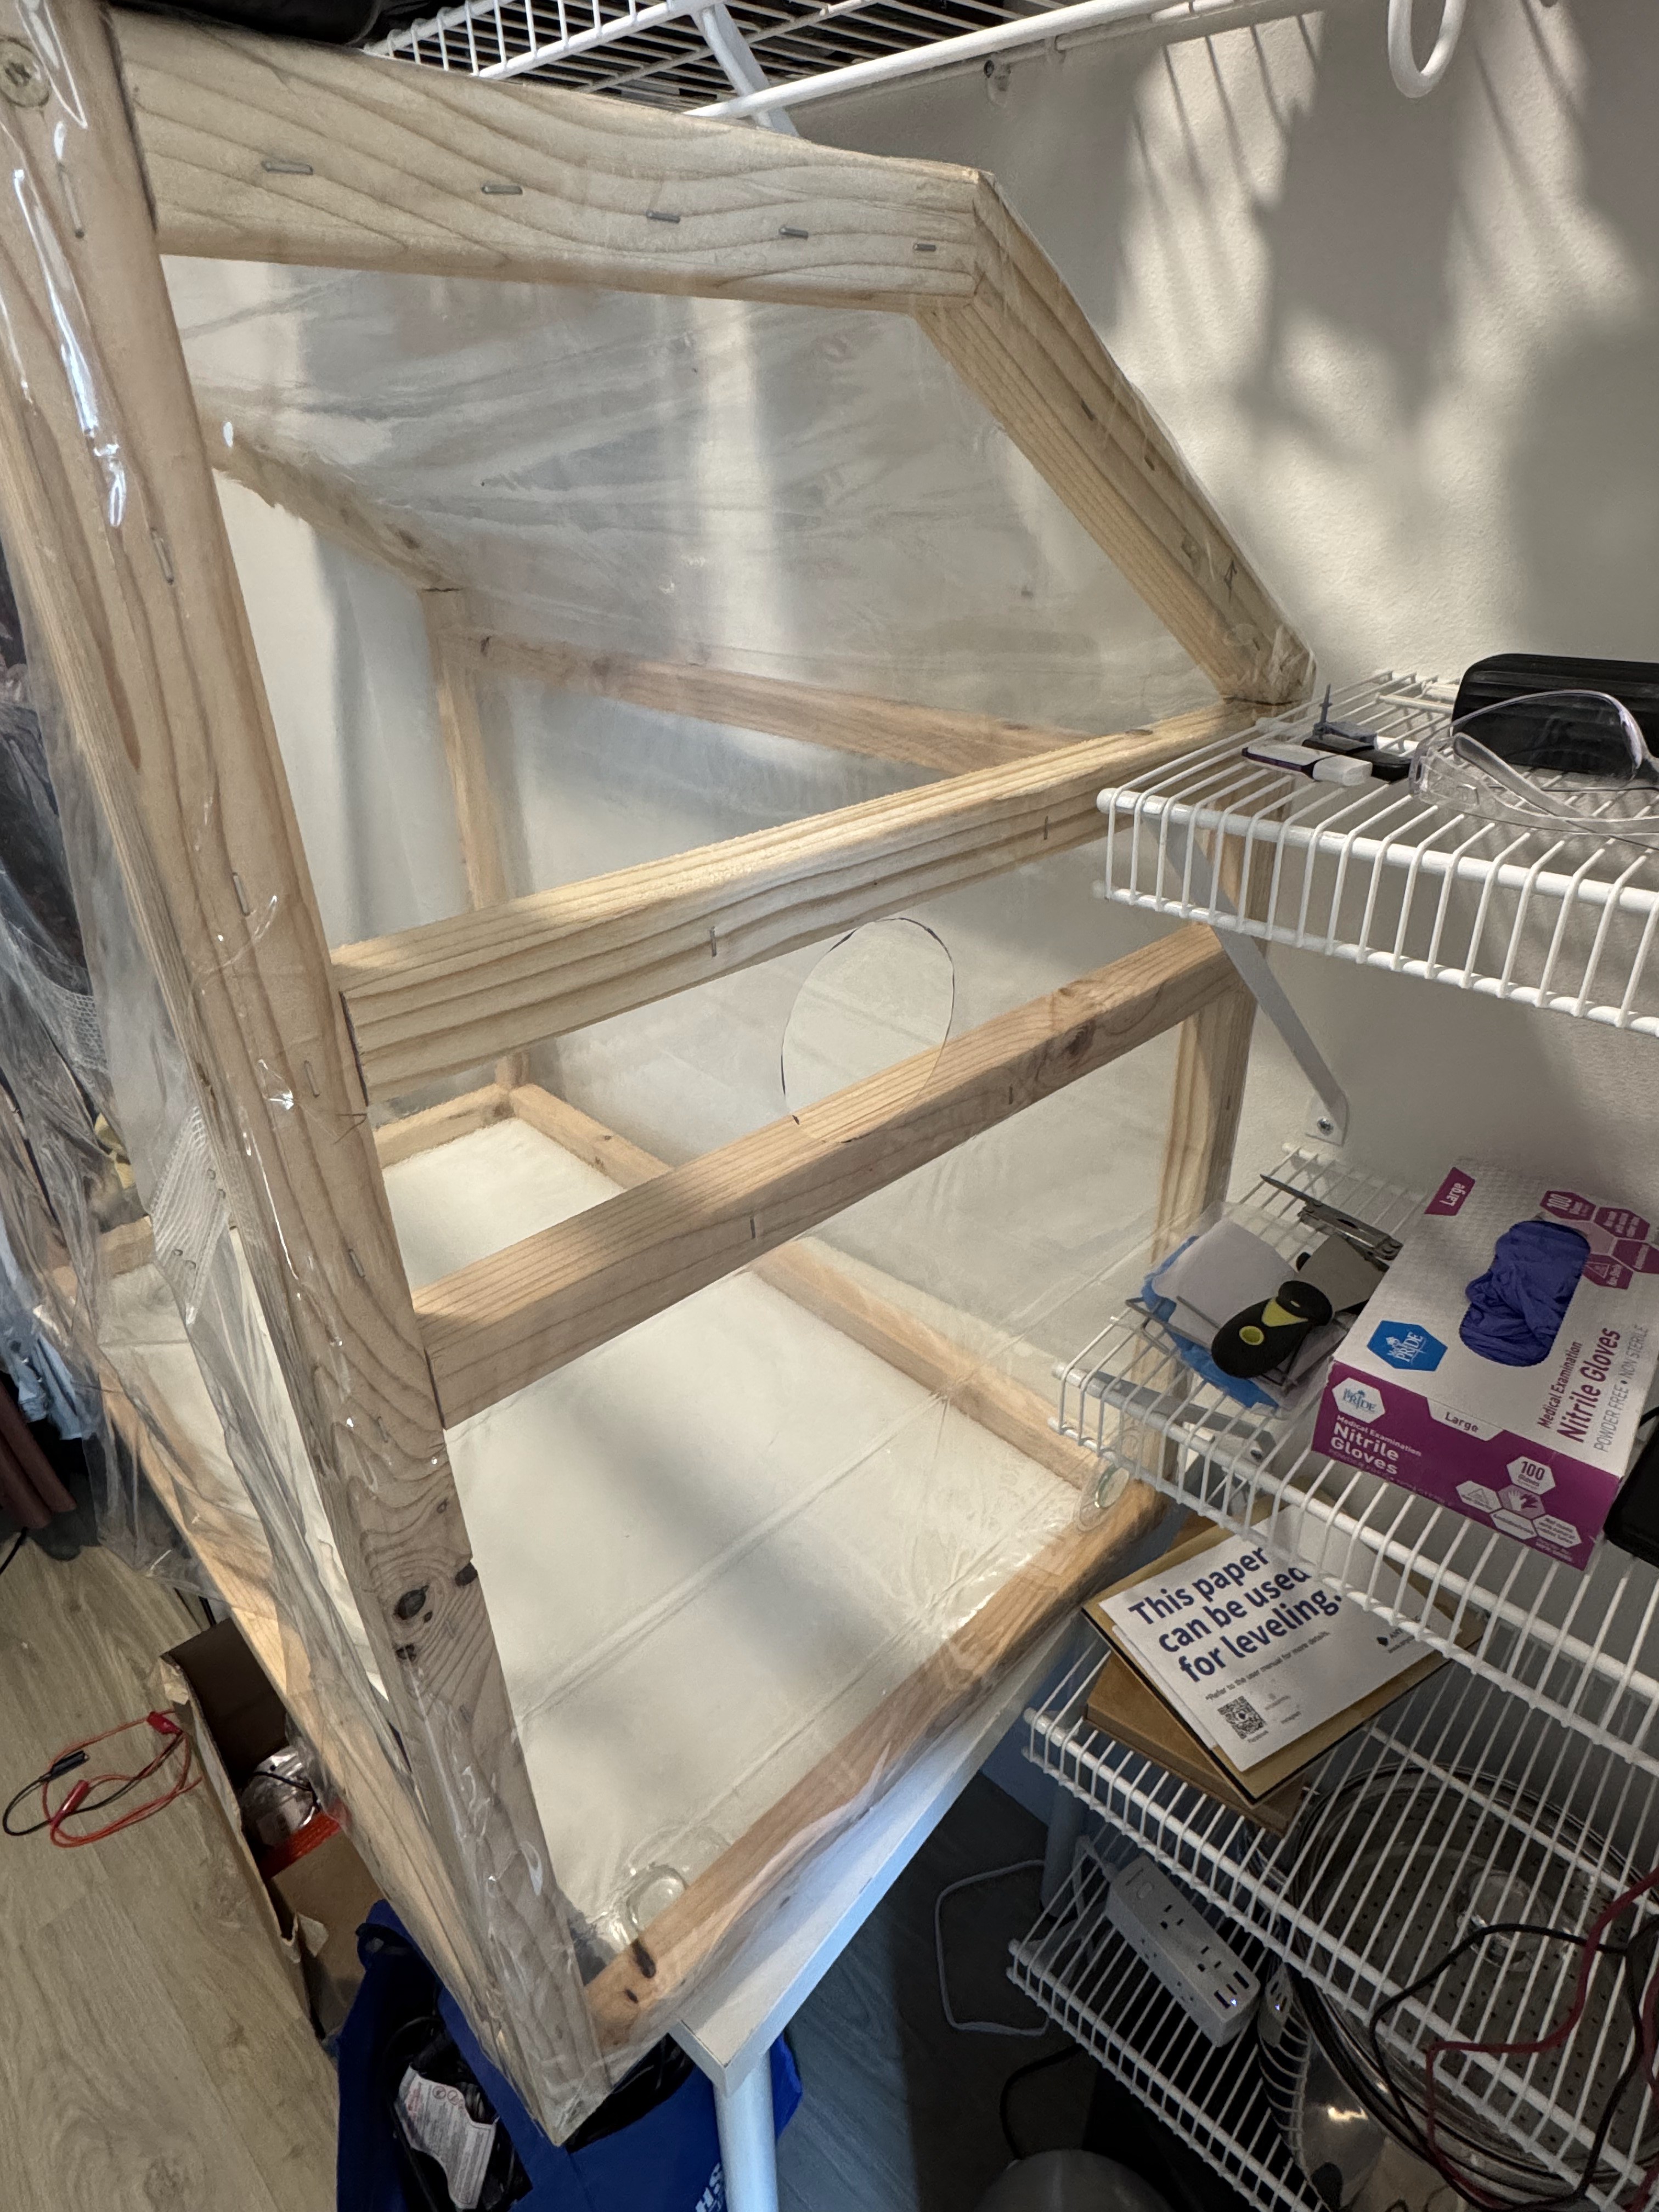
Cutout:
![]()
And once that was done, I taped around the edges to seal it up as best as possible, then the enclosure was complete! I added some ducting, a fan, and one of those portable air conditioner outlets to the window (with gasket to prevent backflow). Here's a video of the completed project:
Thanks for reading! I had a great time building this project, and wouldn't really change a thing. Obviously if I had a nicer shop, it would've been easier, but whaddayagonnado? I've tested it with several print/clean sessions and it performs as expected. If you want the CAD files, feel free to message me!
-
Project Log 1: Establishing a Plan
10/30/2025 at 05:18 • 0 commentsI recently moved in with my girlfriend and with me came all of my fun tools (3D printers, CNC, woodworking stuff). A recent addition to my collection has been a resin 3D printer, specifically an Anycubic Photon Mono 4, along with all the supporting equipment. I have had a great time printing things with it (a different project I may publish in the future), but boy are they right about the resin fumes. They definitely seem toxic, and I'm glad I didn't skimp on the respirator. Since I only got the printer this past summer, and since Seattle summers are so nice, I've been able to simply vent the entire apartment while printing and cleaning parts. I had the printer in my living room, and would just open the sliding doors to the outside and fan it out. Now that I've moved in with the girlfriend, I no longer have the luxury of being able to place my printer in the middle of the living room, and instead have been relegated to the second bedroom closet. An added constraint here is that the closet has no windows, so I have to find some other way to vent out the fumes while working on parts and while printing (though my printer has a ~decently sealed box around it while printing). Furthermore, the closet contains lots of my girlfriends clothes, which I think would be unwise to contaminate with resin fumes. To that end, I planned to build an enclosure for all my resin stuff! I don't have a name for it, but if you think of something, drop a comment.
So at a high level, my requirements looked like this:
- Must contain fumes from resin printer
- Must ventilate fumes out of enclosure and out of apartment
- Must be big enough to hold everything
- Should be relatively cheap and easy to assemble
I brainstormed for a bit with my friends on how to accomplish this, and what I came up with was the following:
A wooden structure made of 2x2 lumber, screwed together and cut by Home Depot (I do not have a chop saw in my apt). This structure would be covered with plastic sheet harvested from cheap shower curtain, then stapled to the wood and sealed on the inside with tape (provides structure and fume-proofing). I would use standard 4" dryer ducting for all the air handling, which would allow me to also leverage low-cost fans and window inserts - the kind usually used for portable AC units.
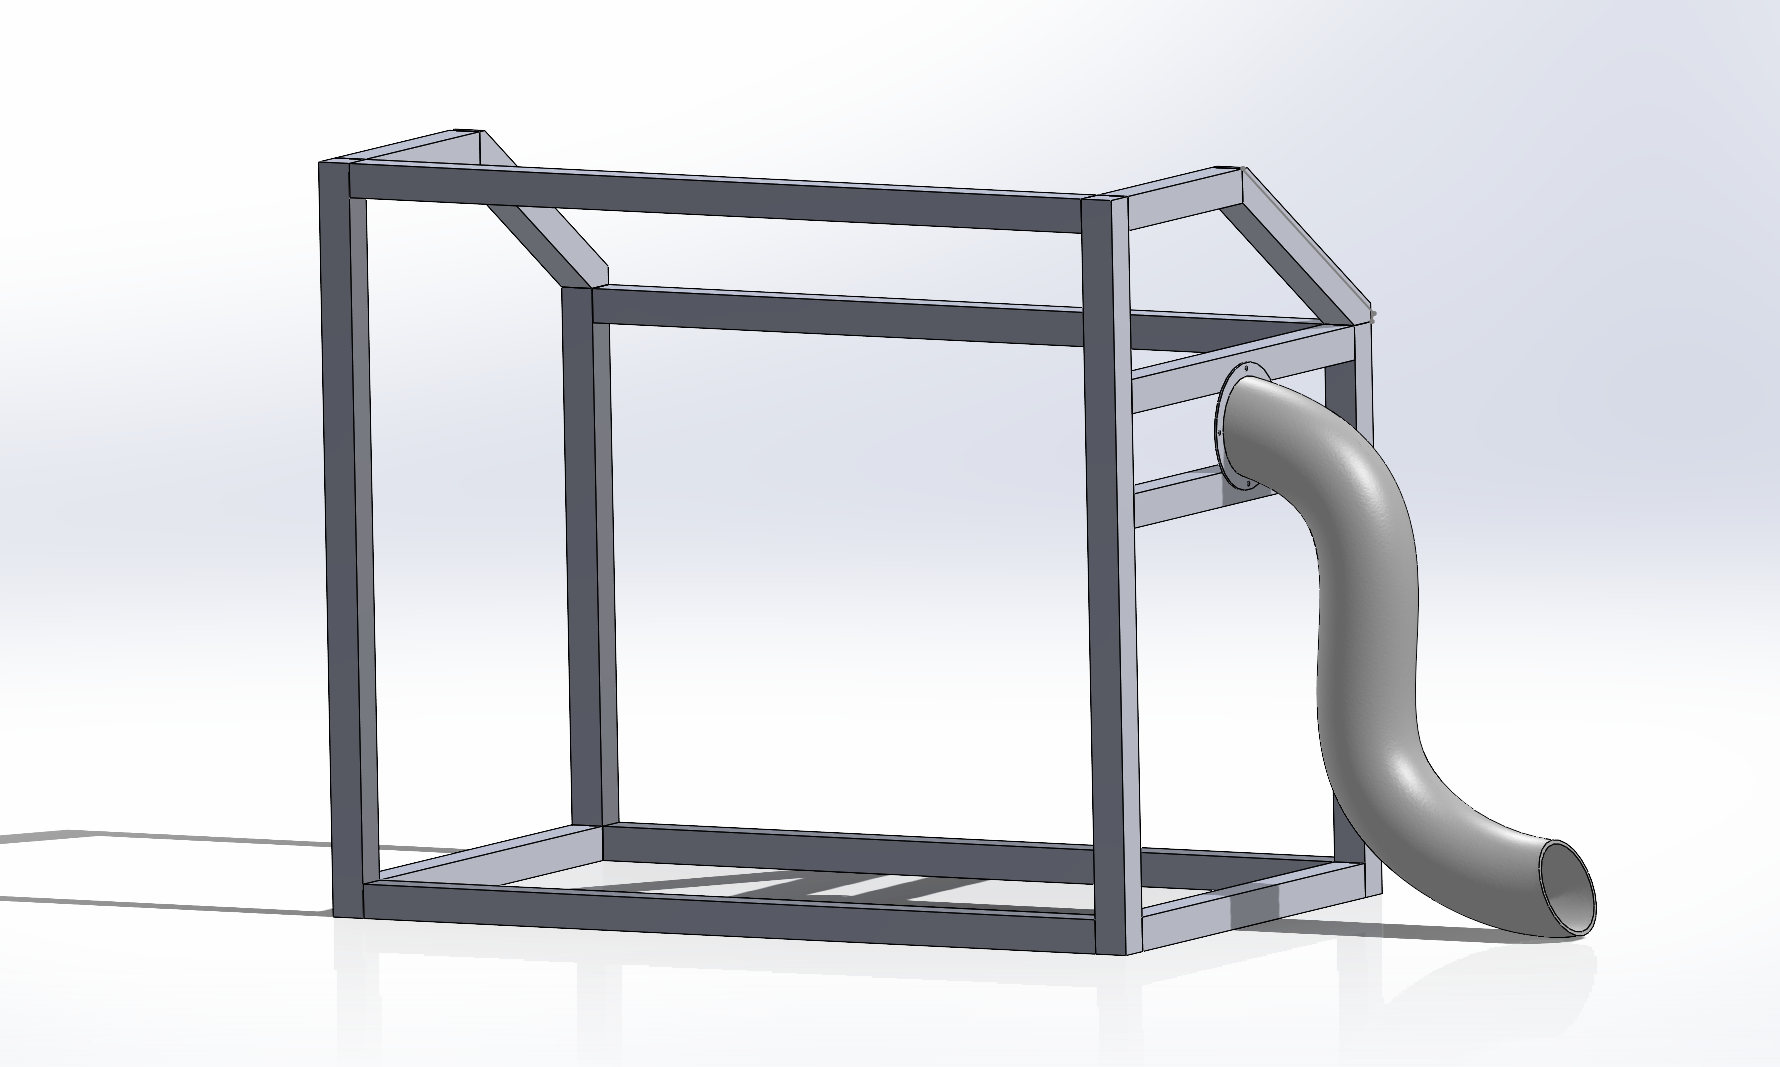
With that in my head, I got to designing in Solidworks, using dimensions I measured of the desk this enclosure would sit on. Here is how it turned out!
![]()
After designing this, I needed to get all the pieces cut, and came to an impasse. How do I cut up the 96" boards that come from Home Depot into my desired lengths while using the fewest number of total boards? Unsurprisingly, this has been a problem for a very long time so a lot of people smarter than me have looked into it. I got dragged into a bit of a rabbit hole, but TL;DR is that this is a 1D variation of the cutting stock problem. There are several ways to solve this, but I figured for fun, I'd let ChatGPT have a crack at it, and it actually did quite a good job, even accounting for the 1/8" kerf that the saw blade imparts when it cuts. I threw the code in a gist if you want to check it out. In summary though, I should be able to get away with only 5 boards or $15 worth of wood. I'll be sure to update next as I put it all together!
Resin Printer Enclosure
DIYing a cheap enclosure for my resin printer