 Arnov Sharma
-
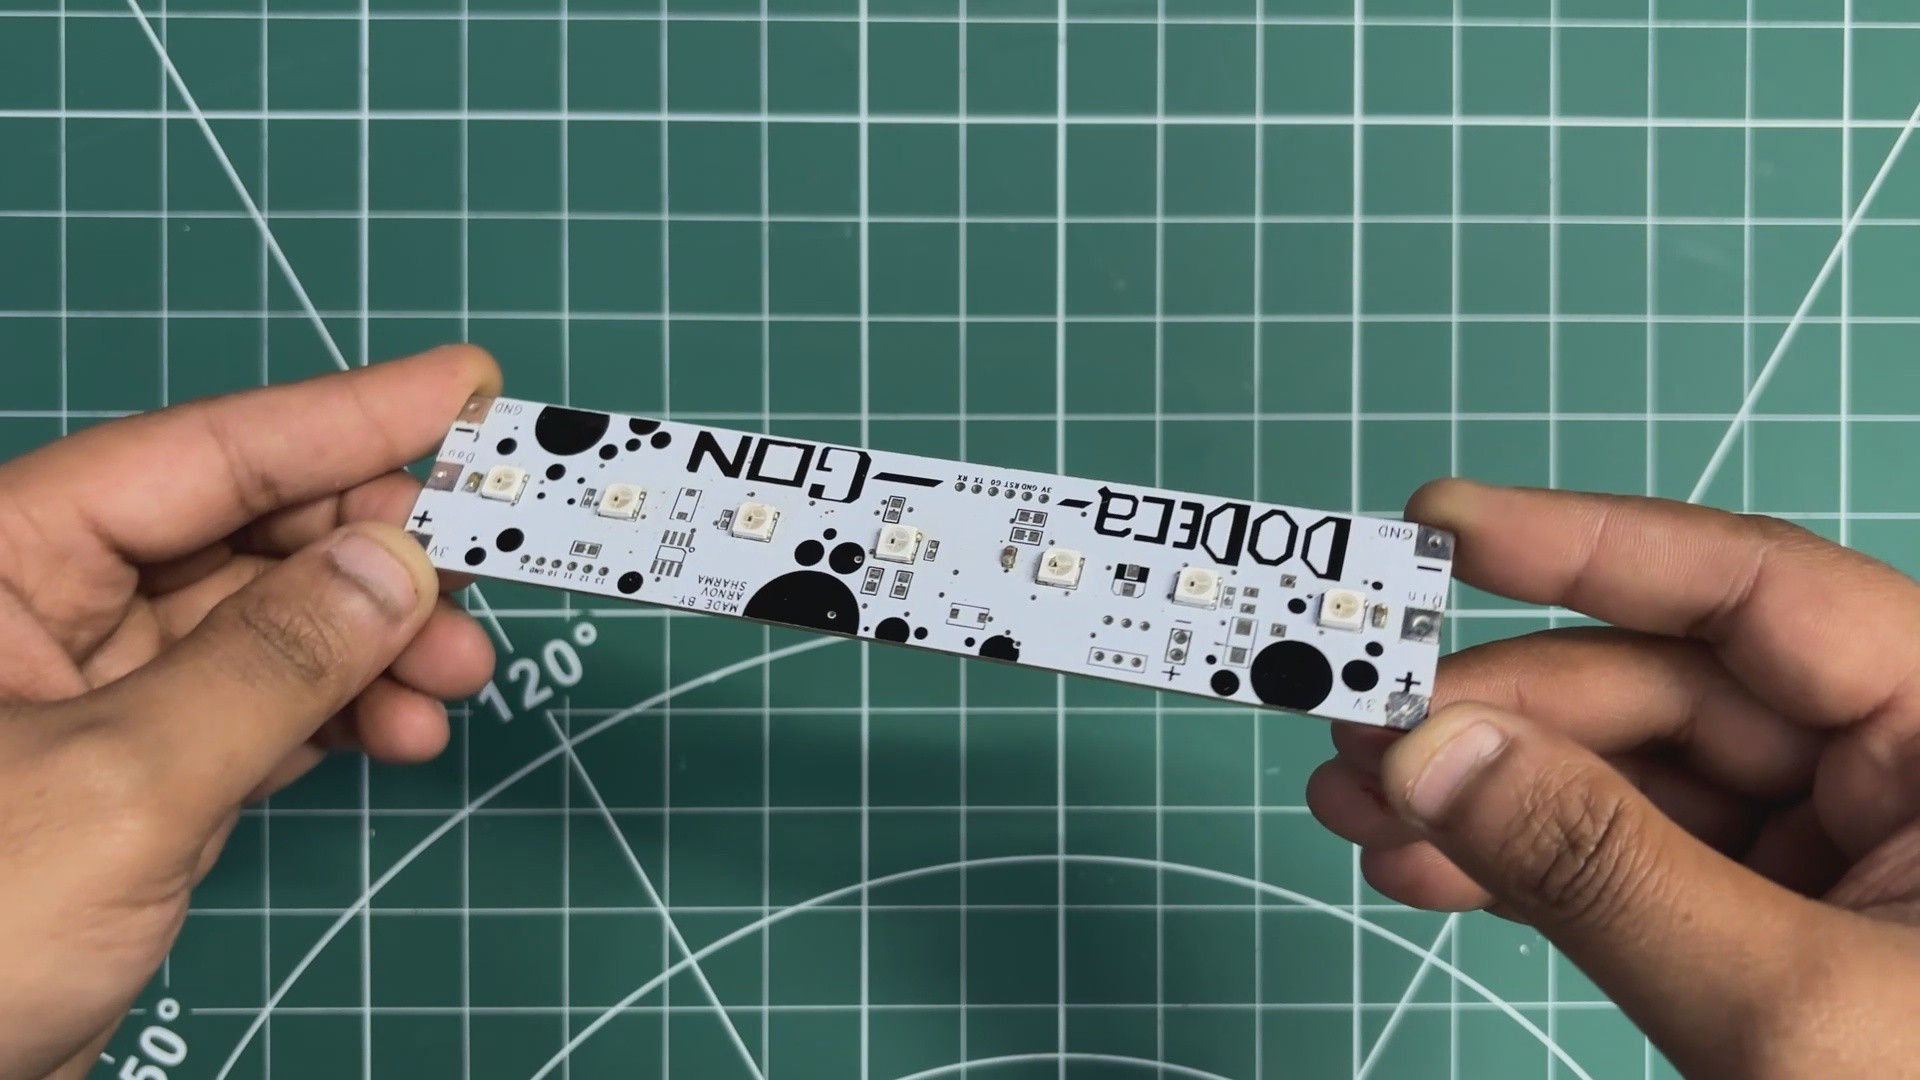
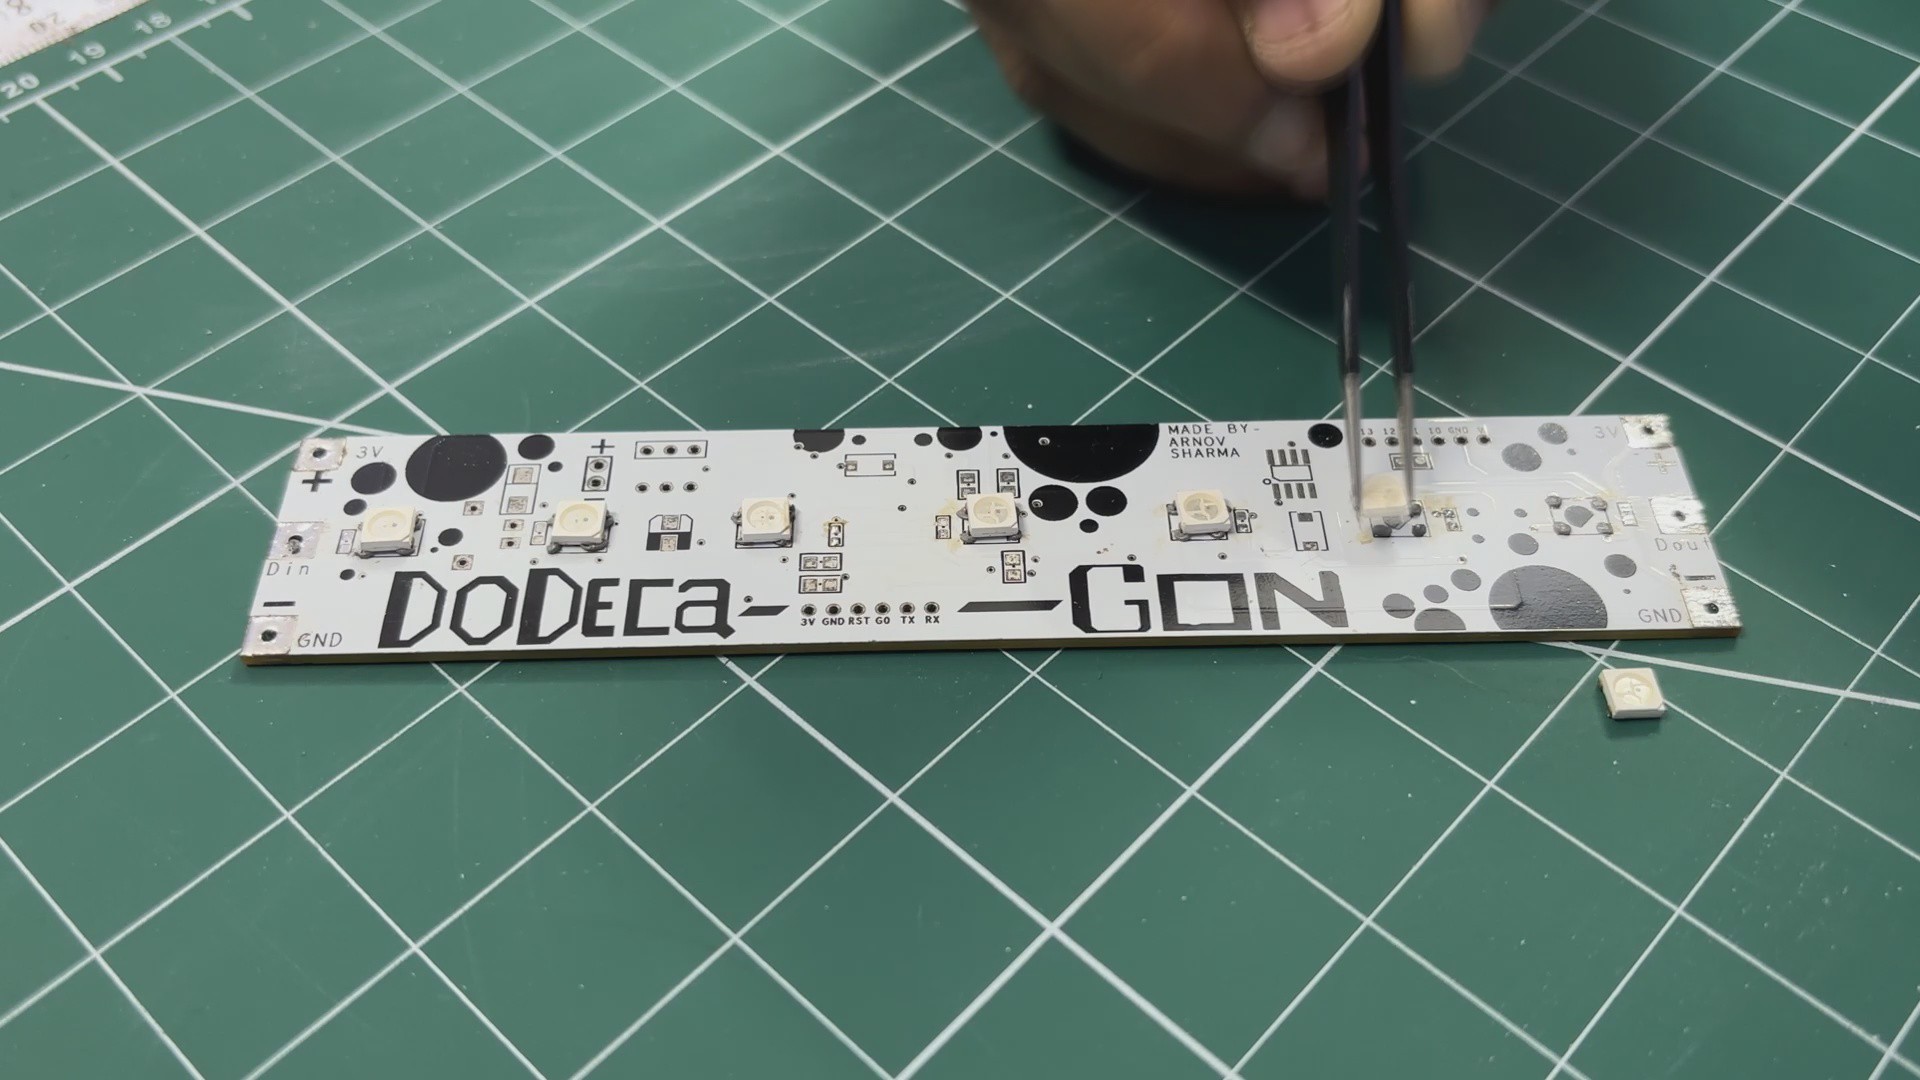
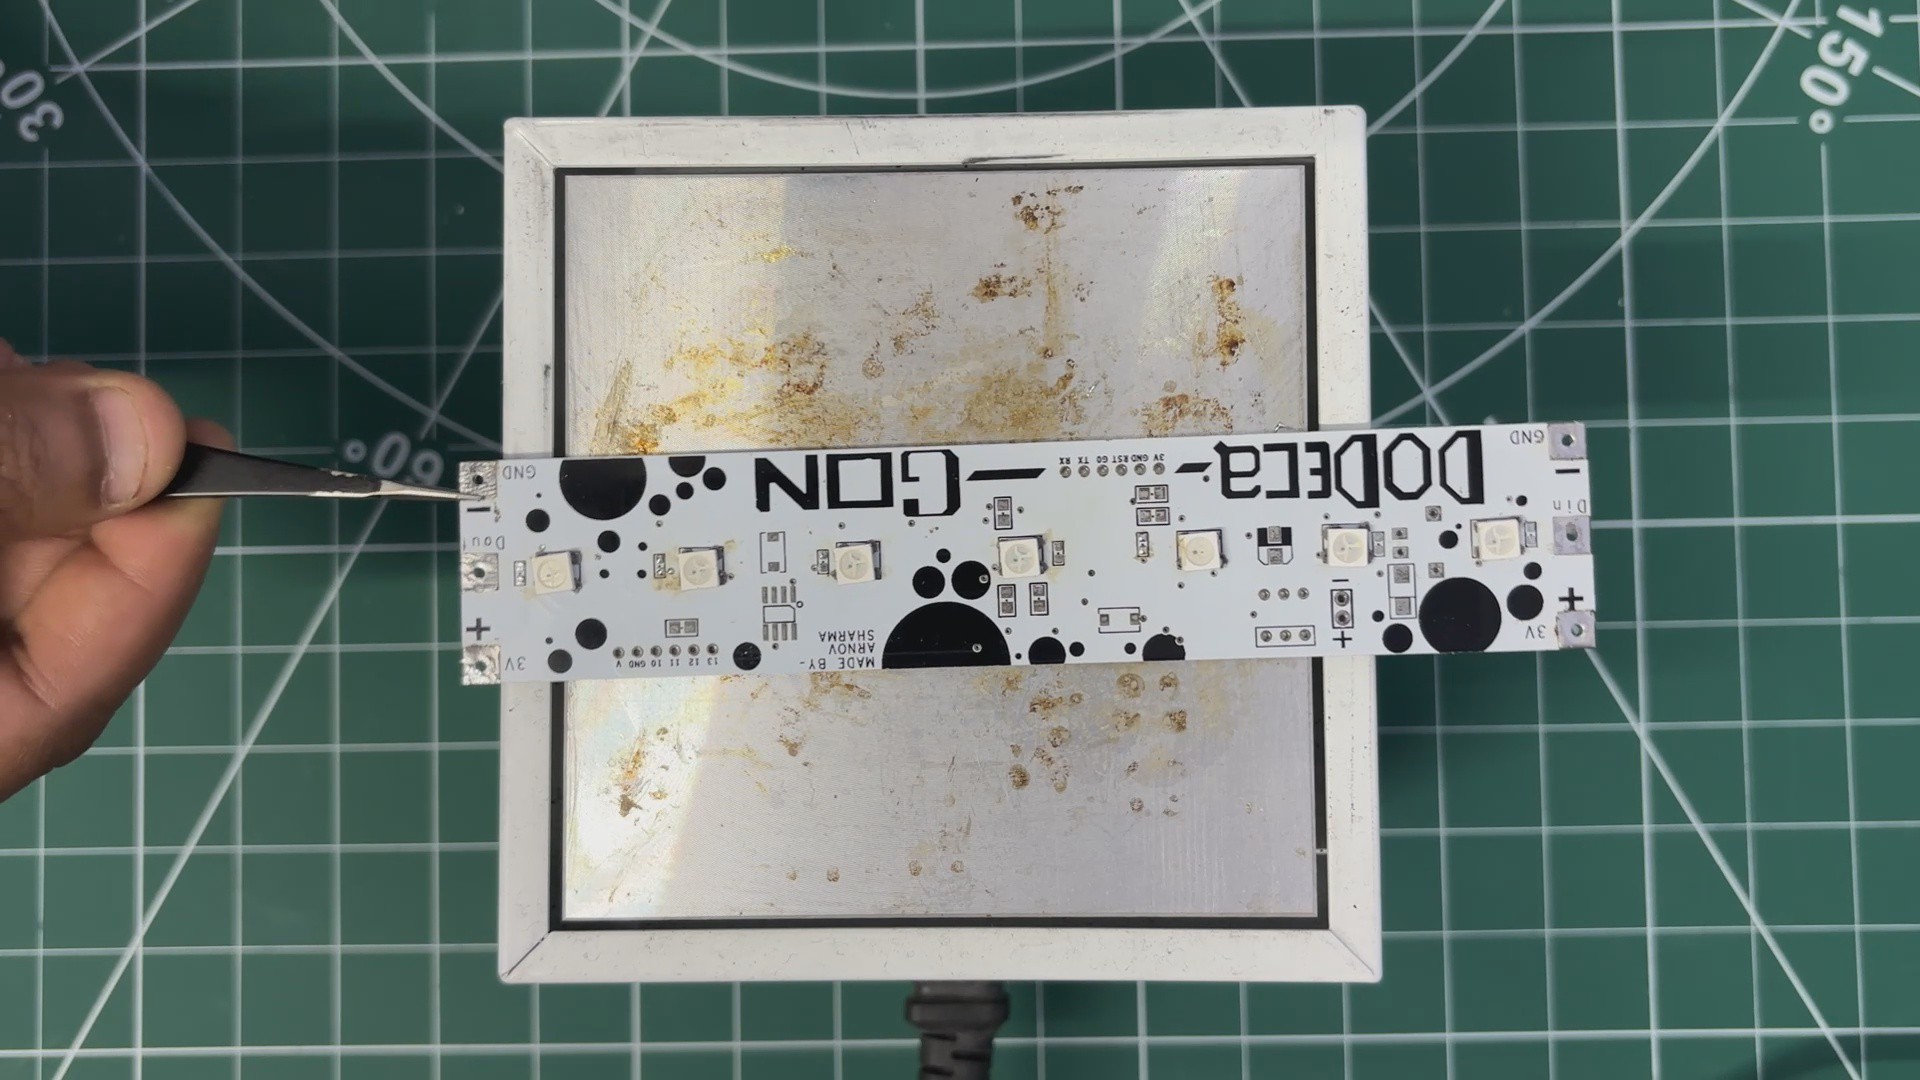
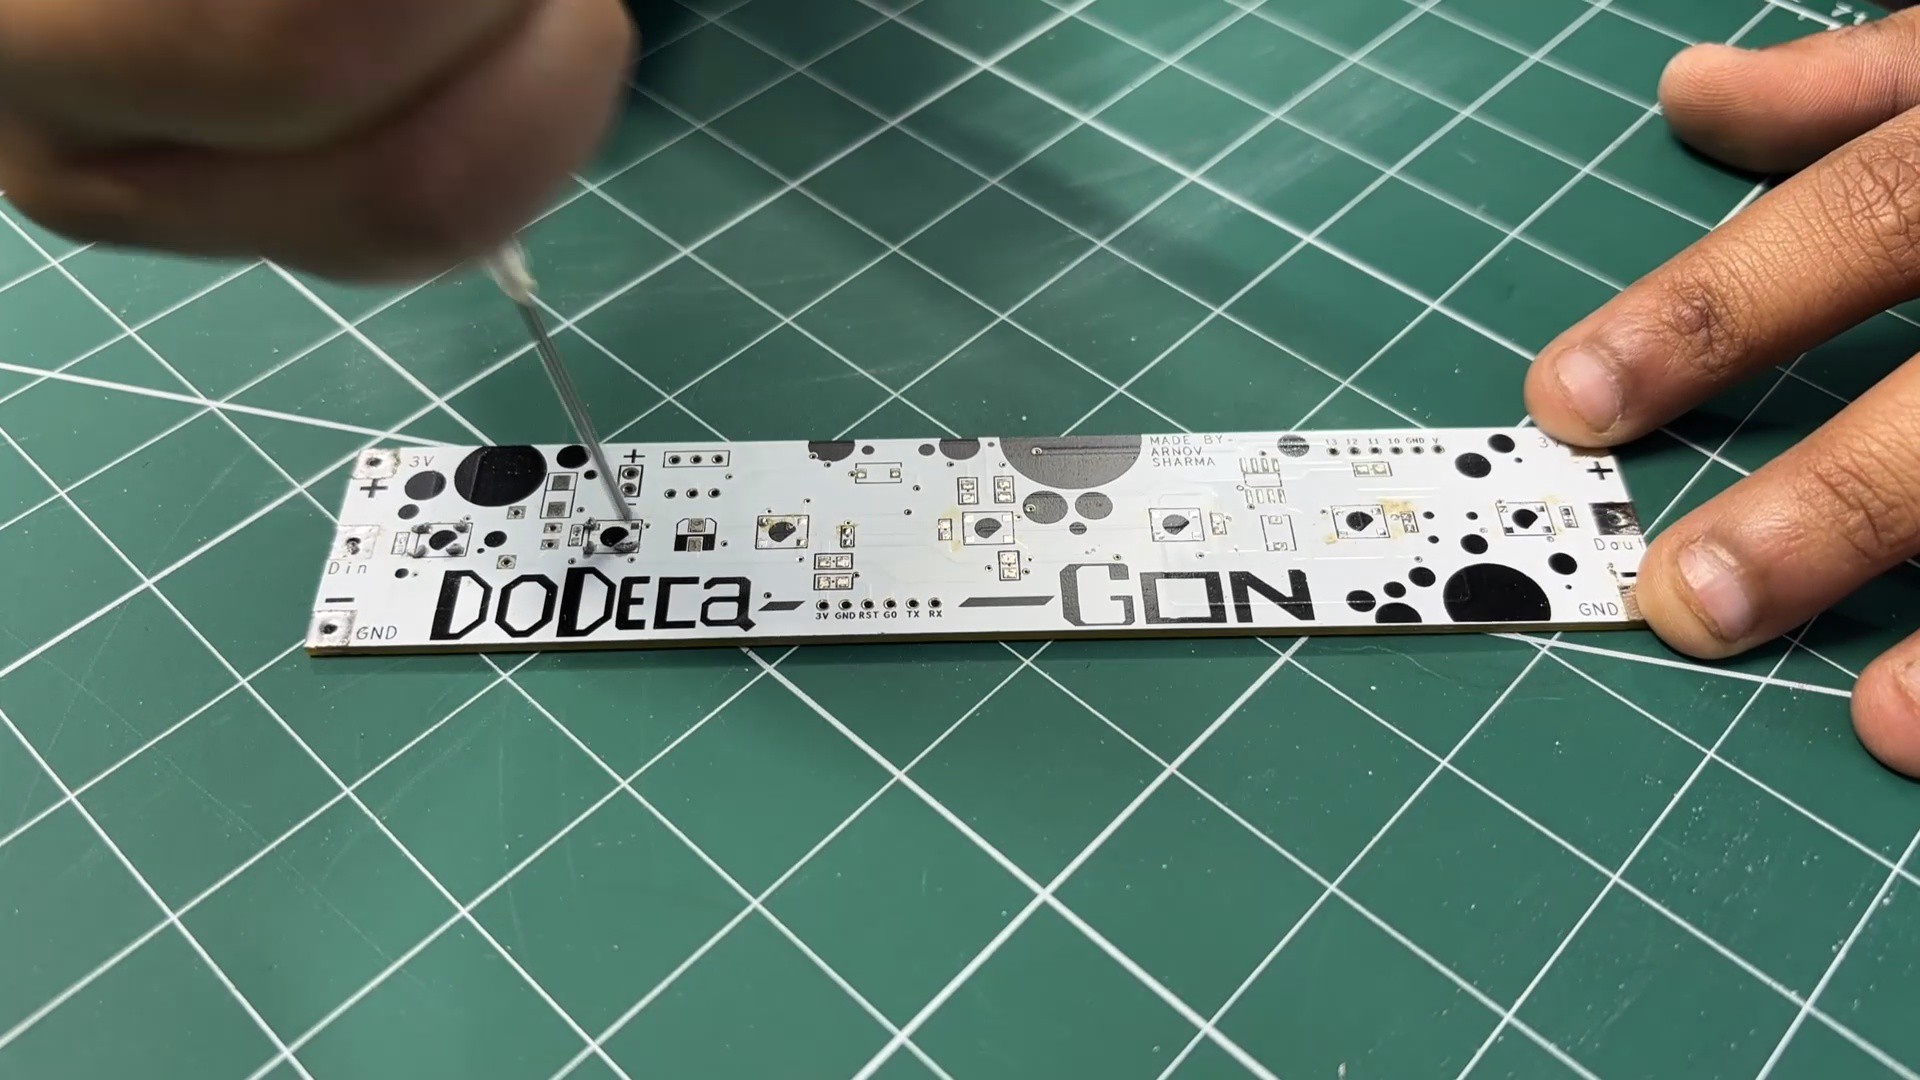
1LED PCB ASSEMBLY
![]()
![]()
![]()
![]()
- We begin by applying solder paste to all the SMD LED pads using a solder-paste dispensing syringe.
- Next, each RGB LED is carefully picked and placed onto its footprint, making sure the orientation is correct.
- The PCB is then placed on a hot plate, which heats the board from below until the solder paste reaches its reflow temperature (around 200°C). This process causes the solder to melt and securely bond all components in place.
The MEDIC MINI main board assembly is covered in detail in a separate Instructables guide, which you can follow for the complete build process.
-
2WIRING
![]()
![]()
![]()
![]()
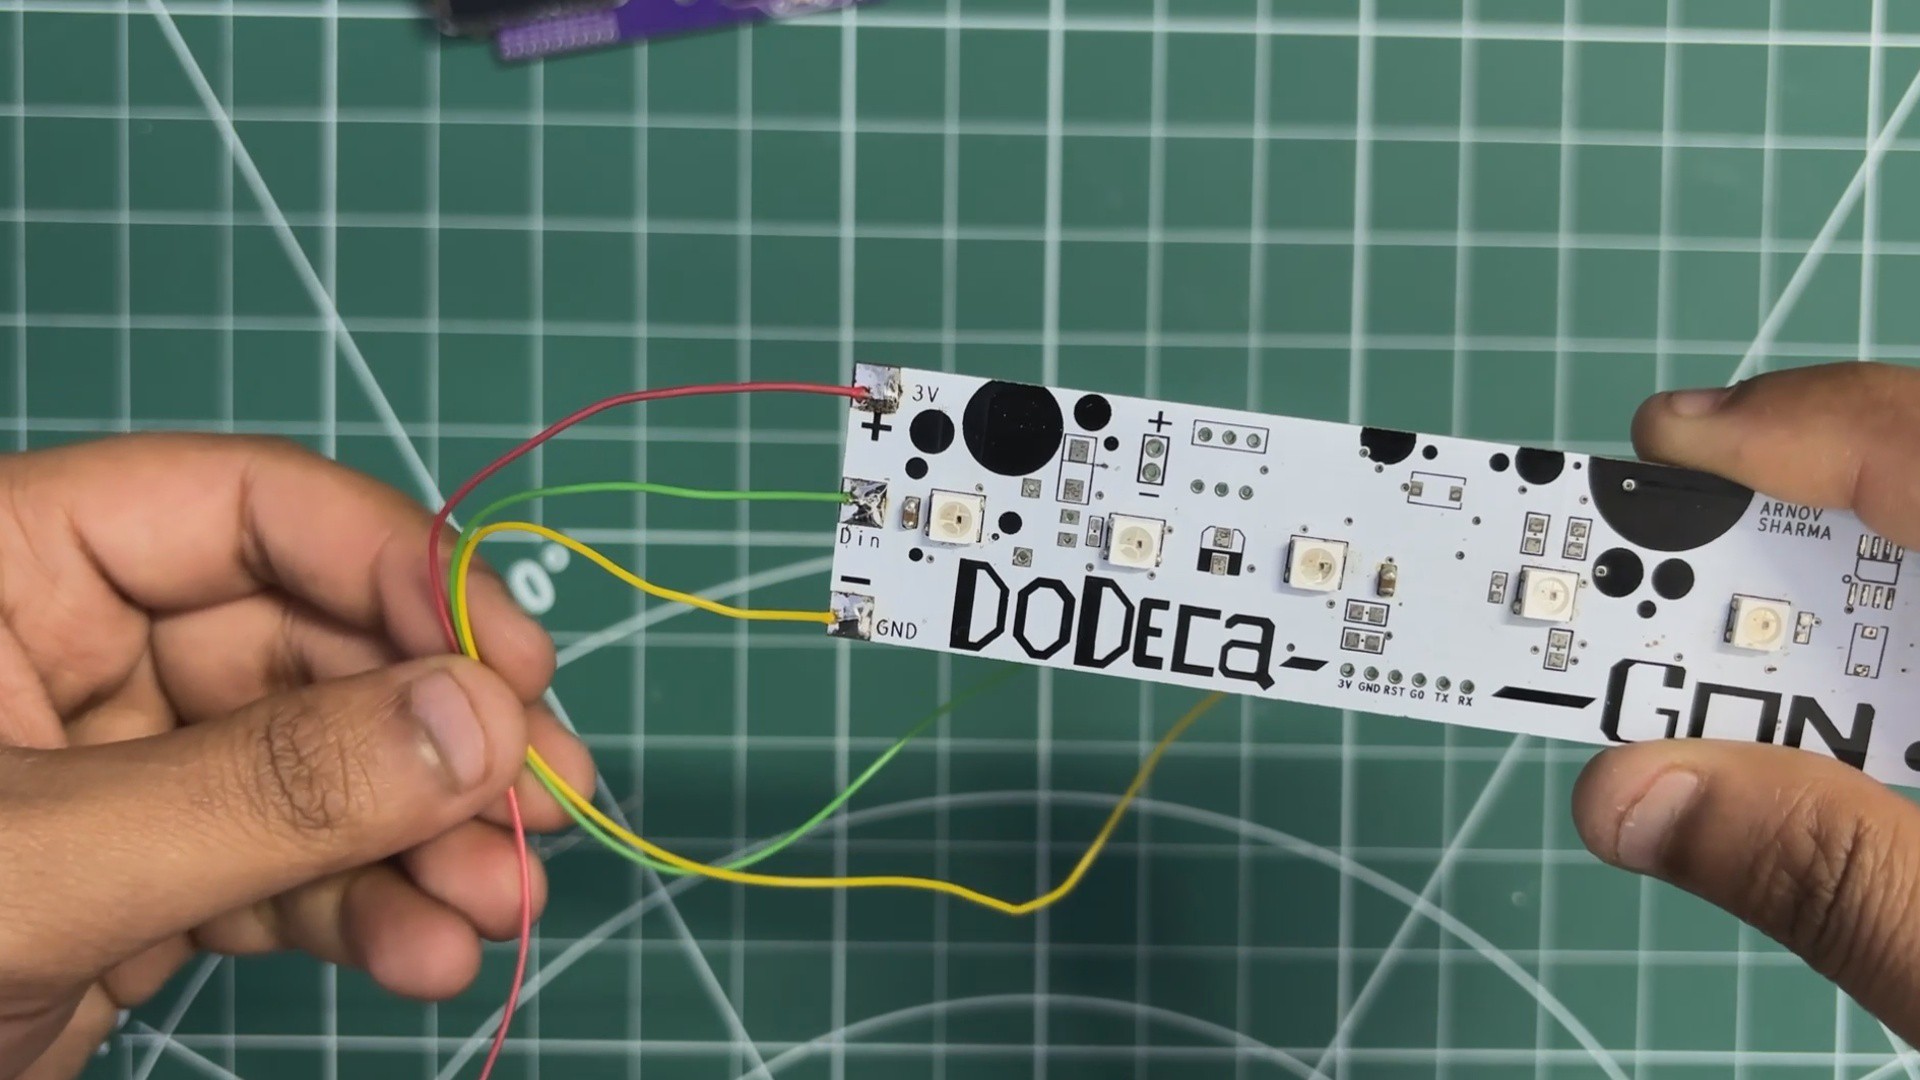
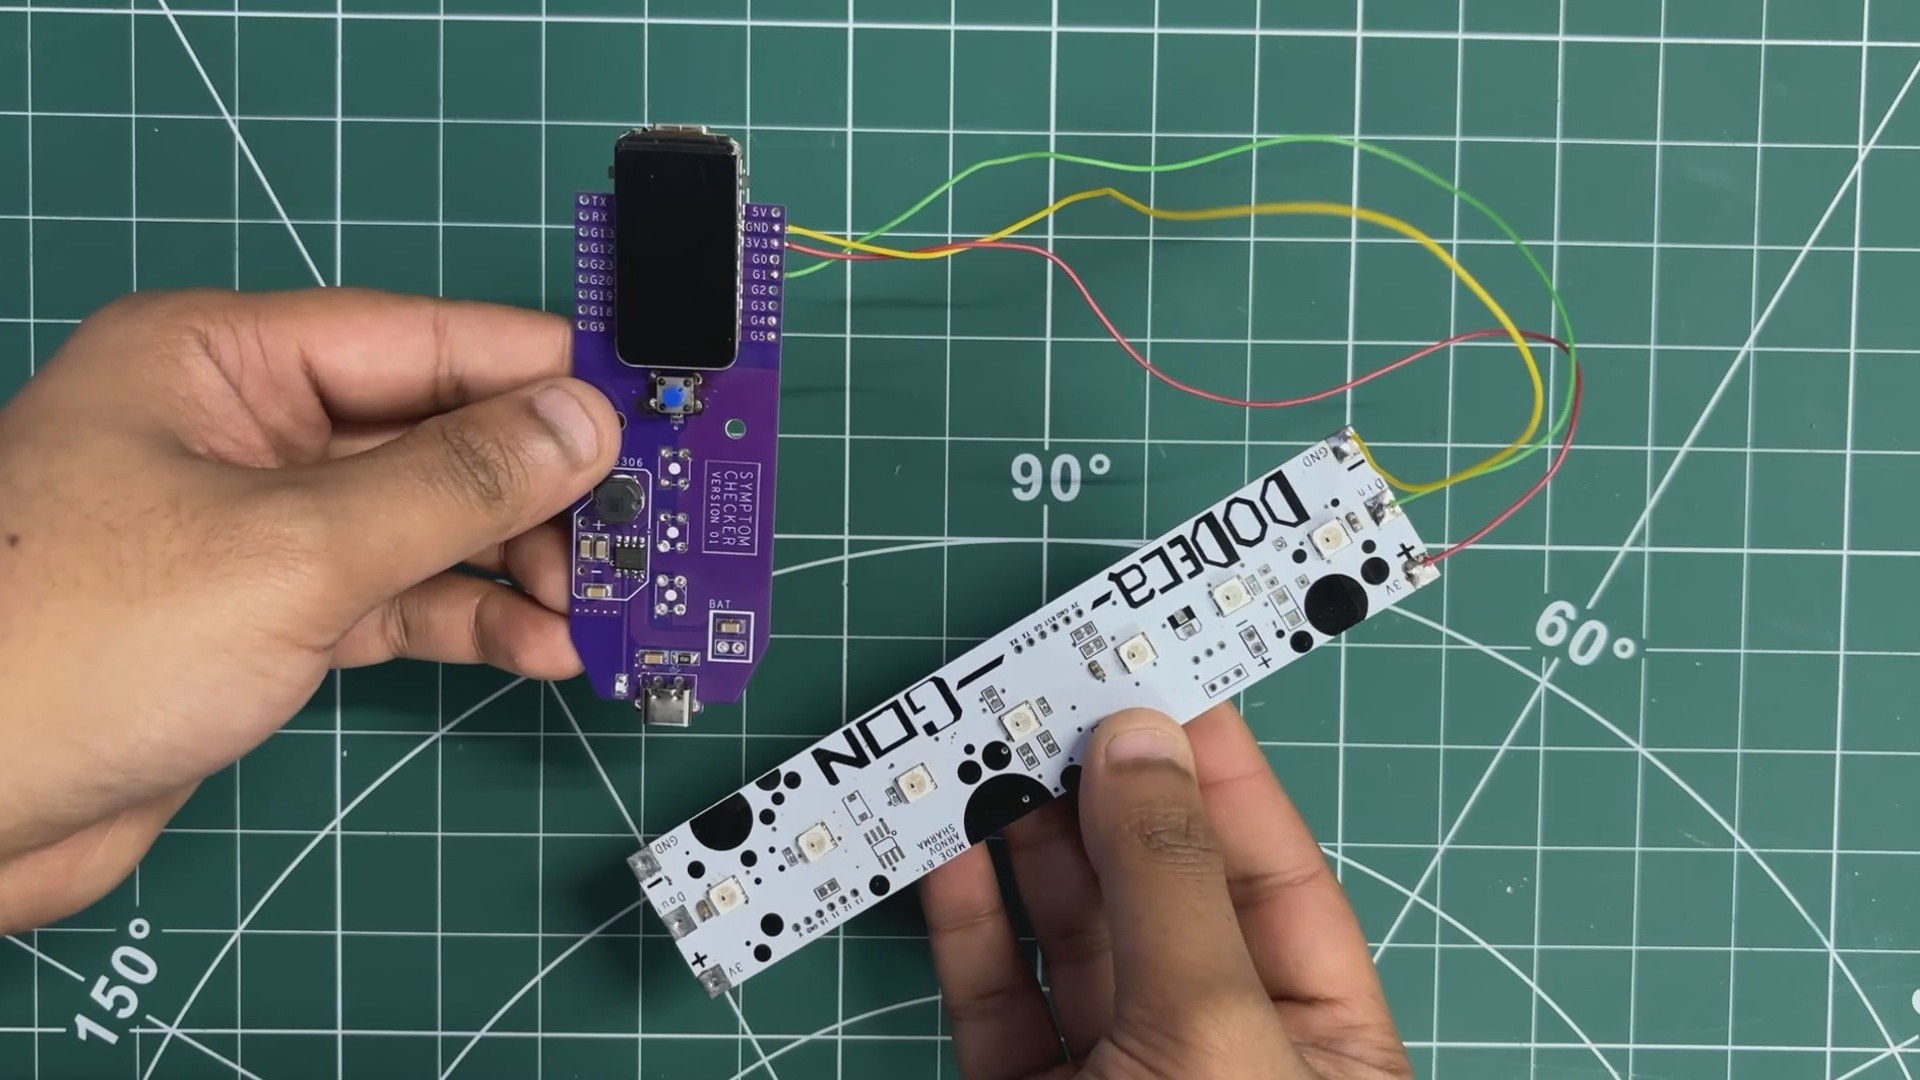
We began the wiring process by soldering wires to the LED board’s VCC, GND, and DIN pads. Once the wires were attached, we connected the LED board to the Medic Mini’s ESP32 module:
- VCC from the LED board goes to the 5V pin
- GND connects to GND
- DIN is connected to GPIO 5
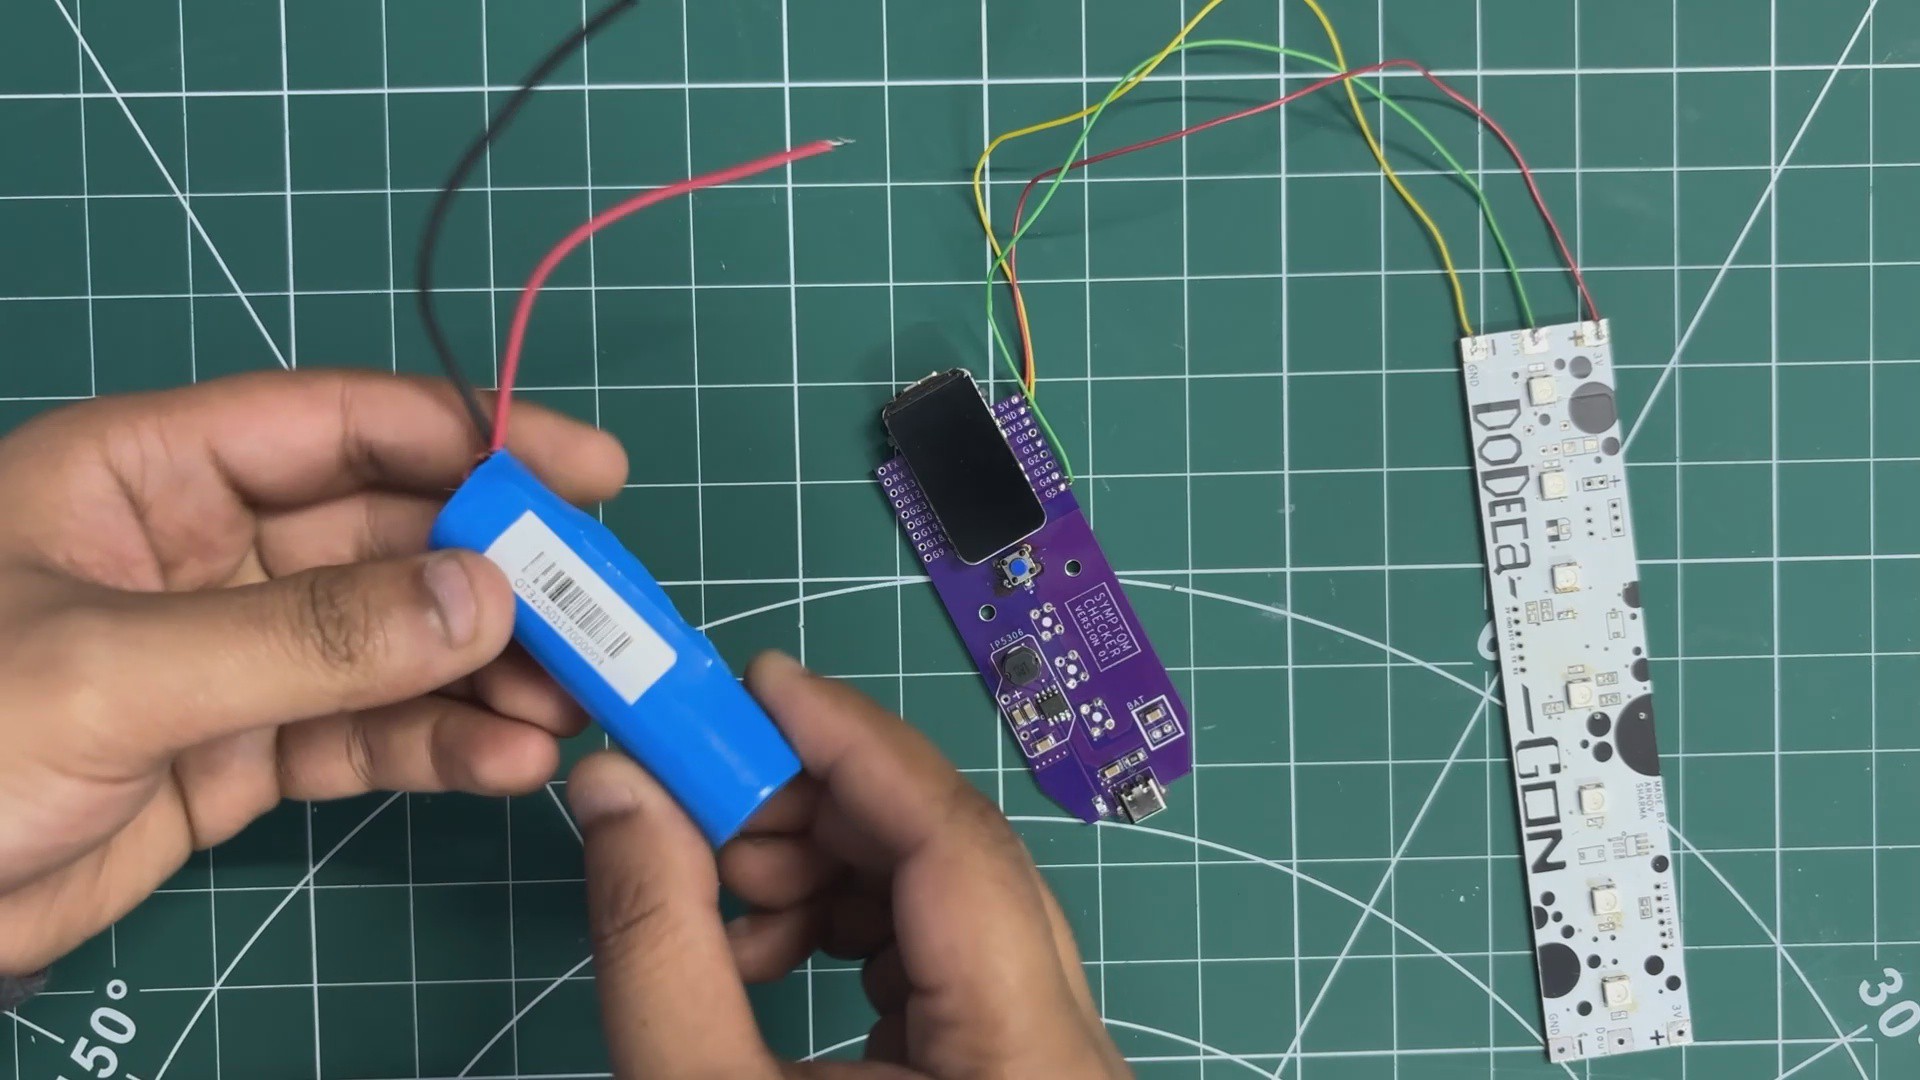
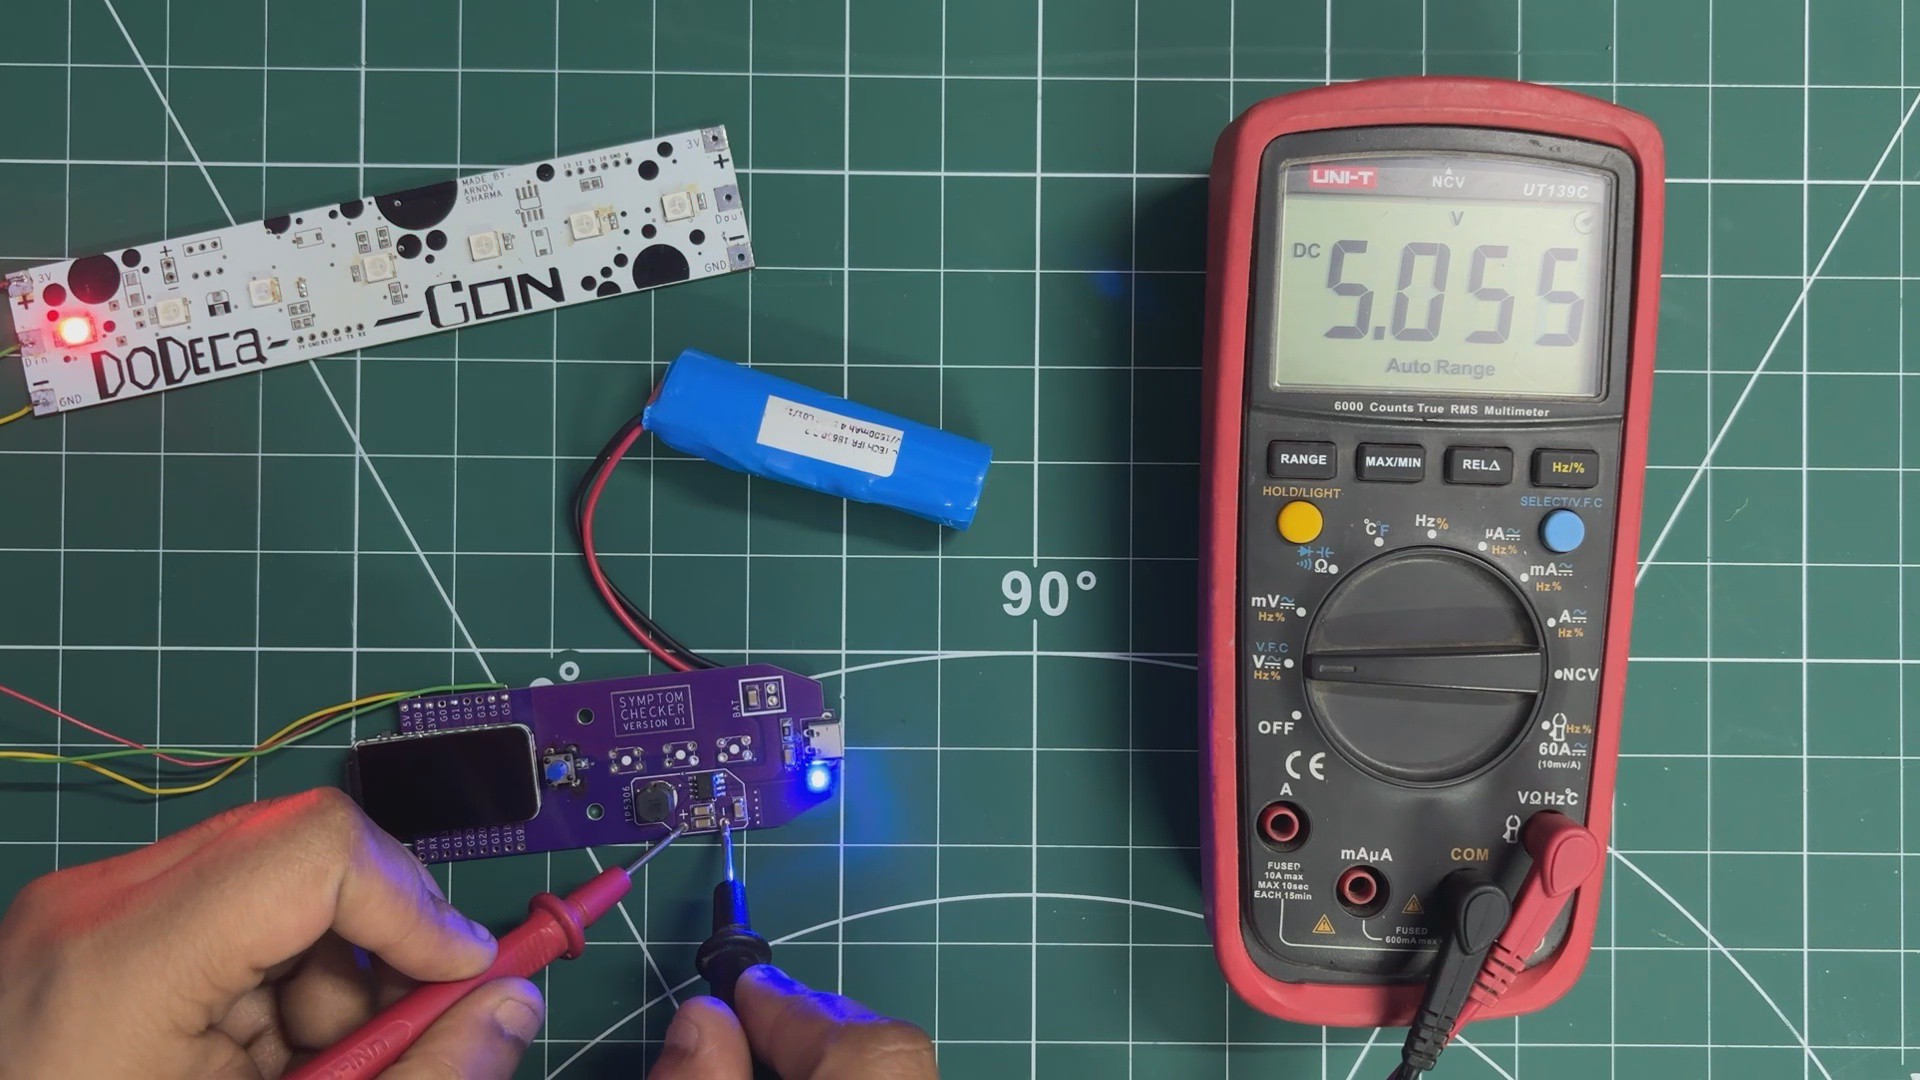
To power the entire setup, we added a 3.7V 2600 mAh Li-ion battery pack. The battery’s positive terminal is connected to the battery positive pad on the Medic Mini board, and the negative terminal goes to battery negative.
The Medic Mini’s onboard power-management circuitry then boosts the 3.7V from the Li-ion cell to a stable 5V output, which is used to run both the ESP32 microcontroller and the RGB LED board.
-
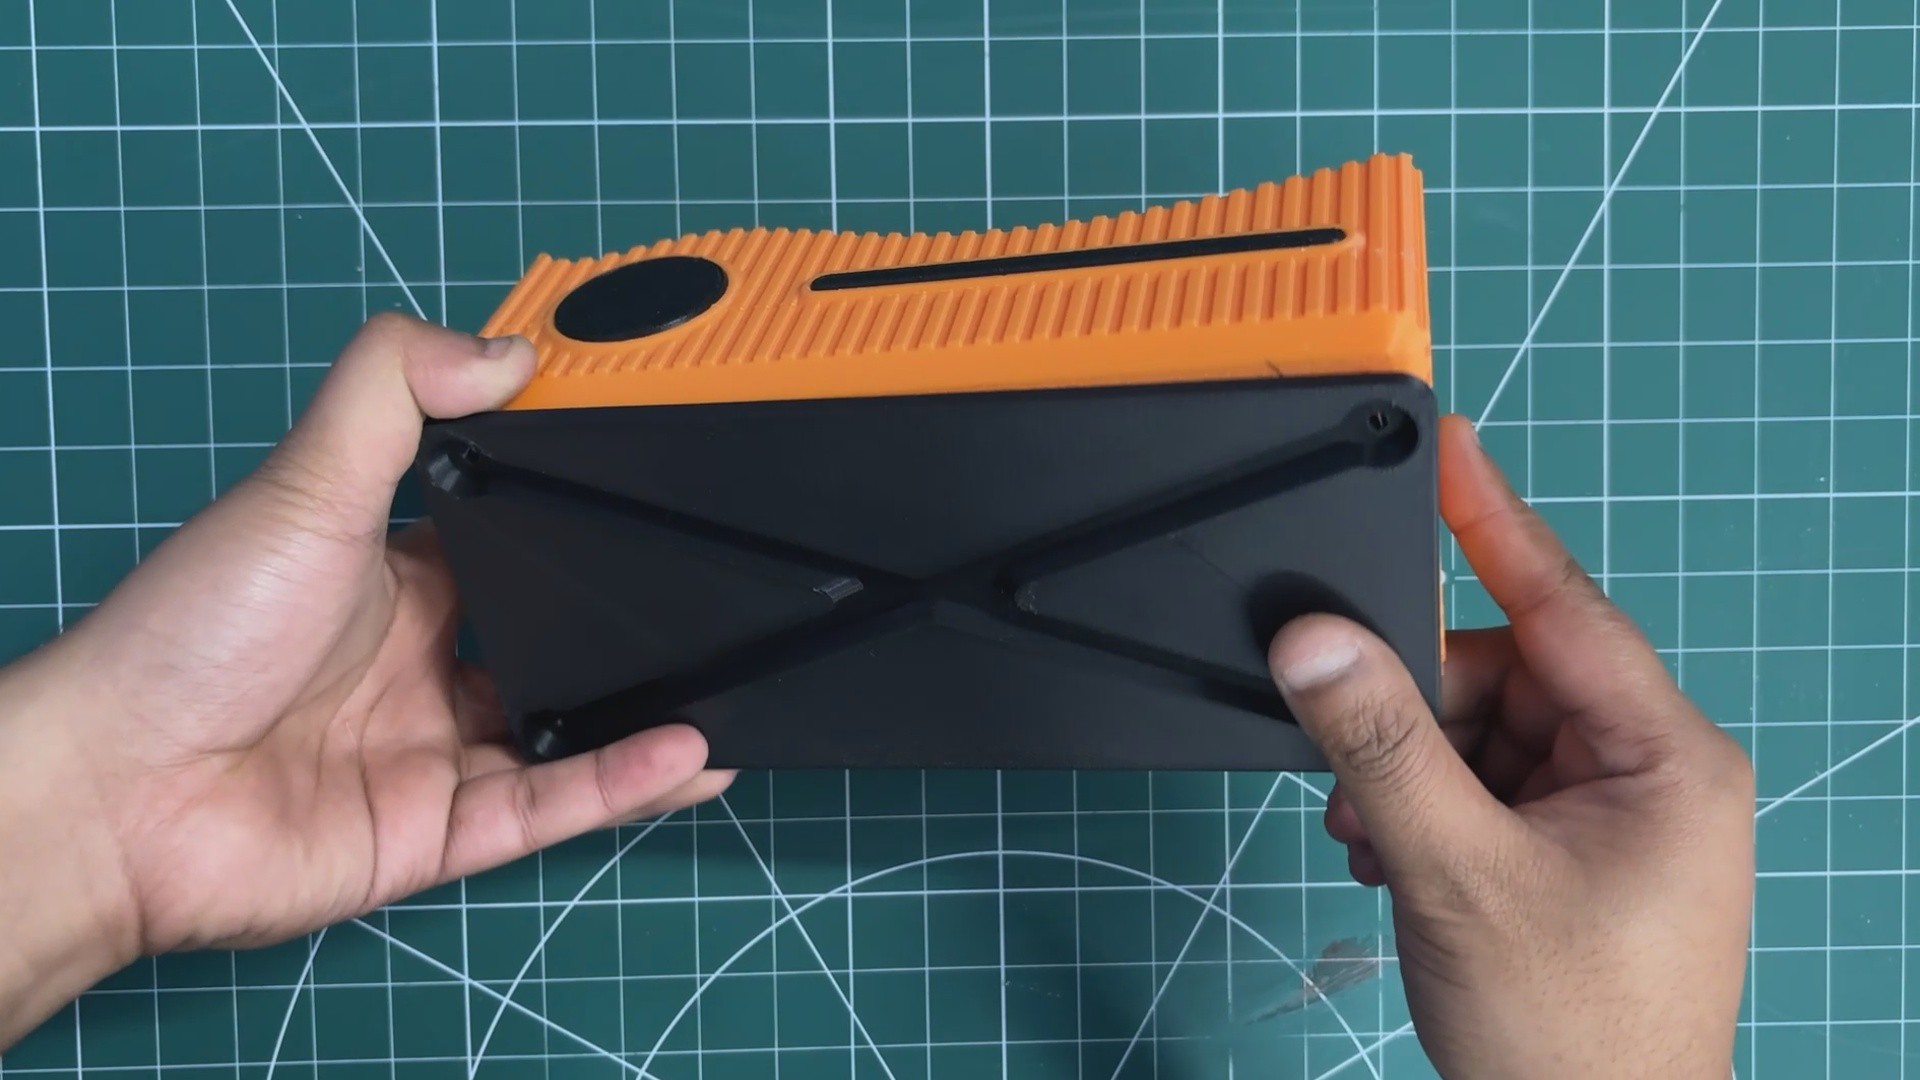
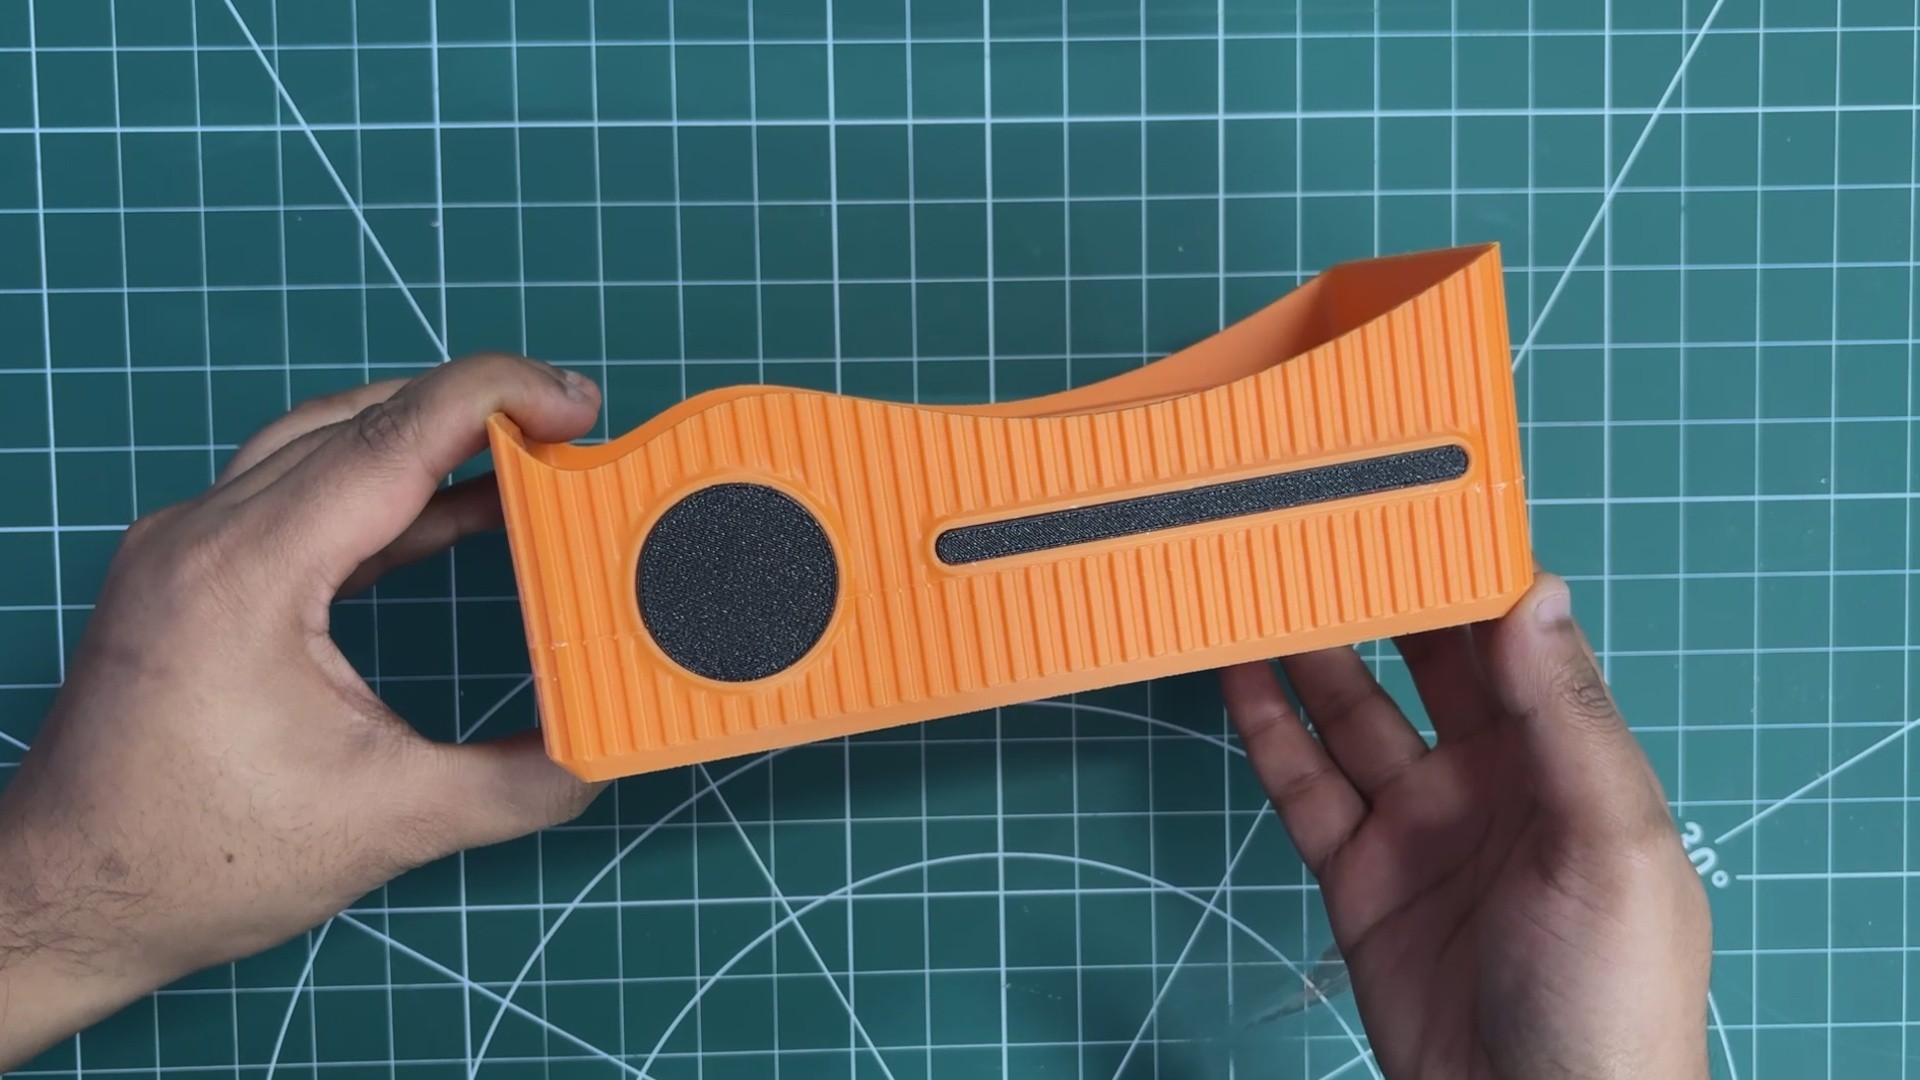
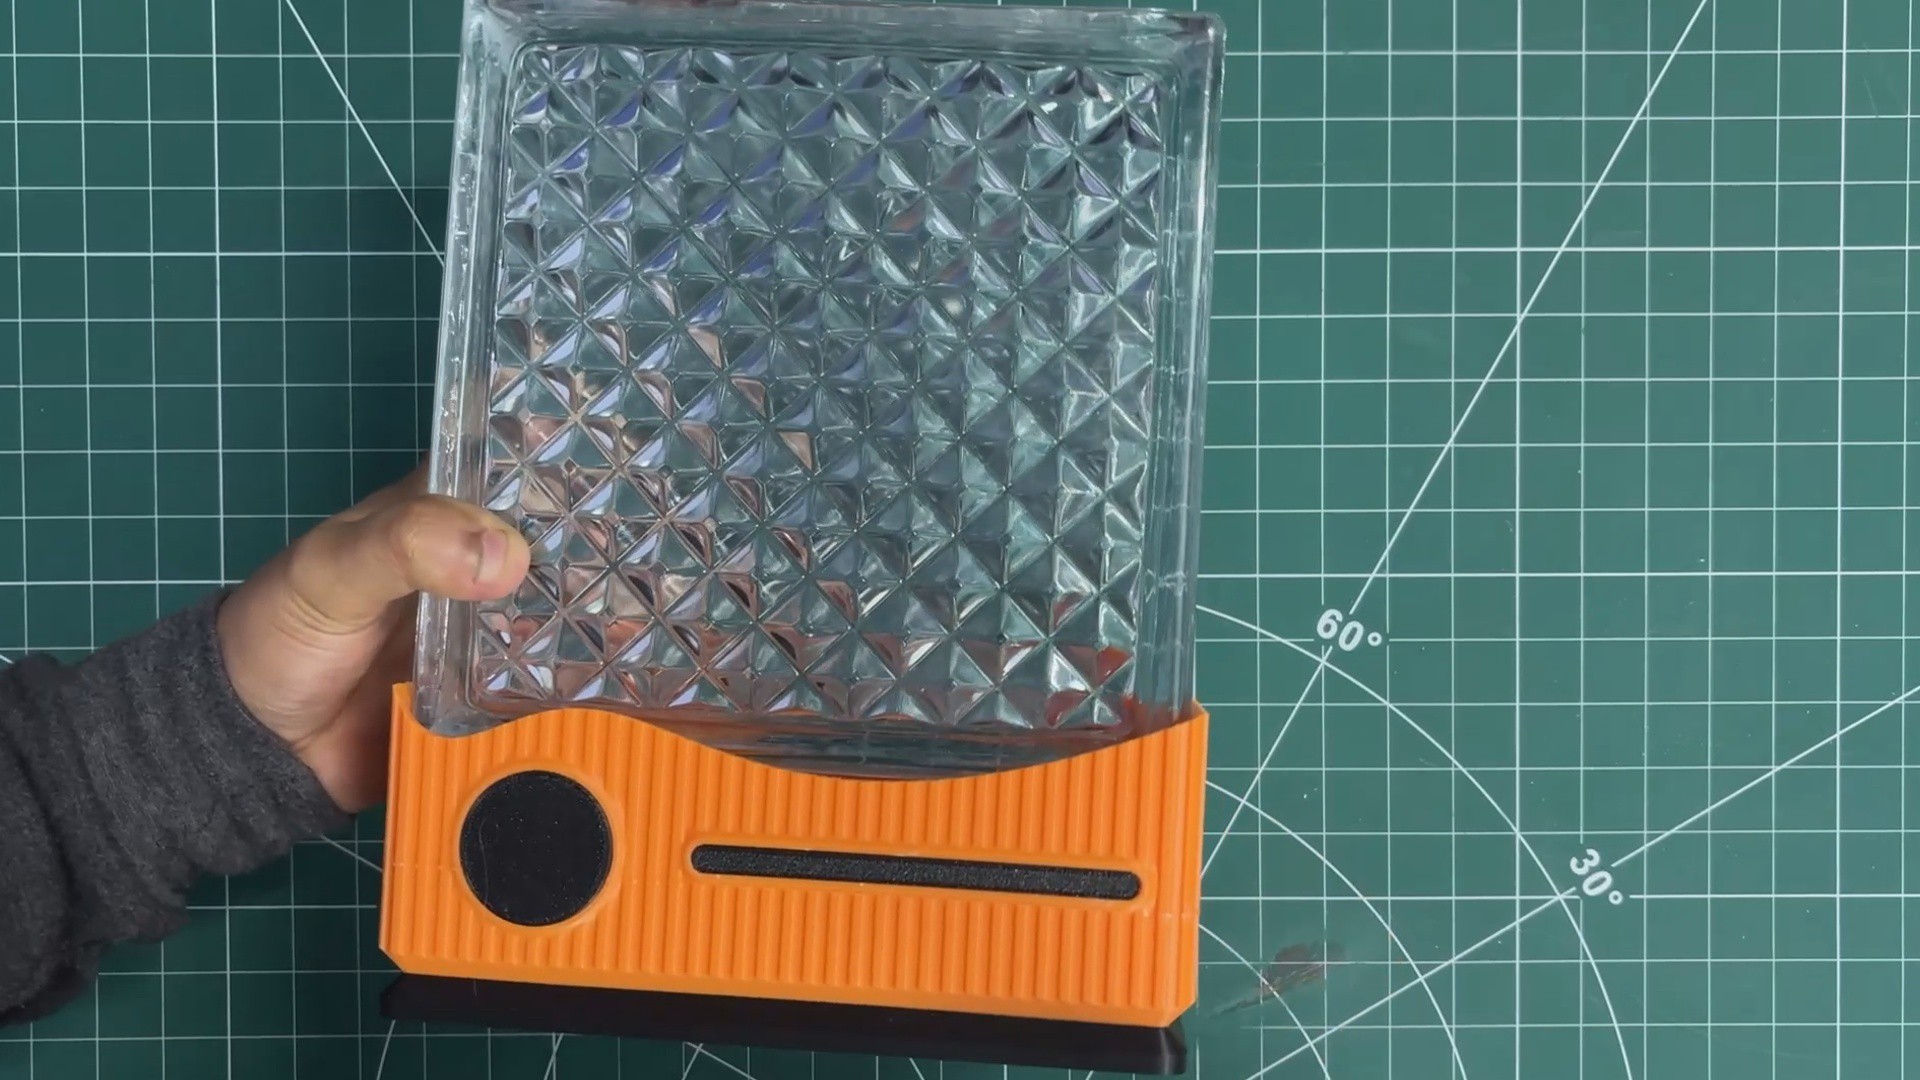
3BODY ASSEMBLY
![]()
![]()
- We now begin the body assembly process. We placed the circular accent part in its place, applied a little bit of pressure, and it fit into its place. We did the same for the other accent part.
- From the bottom side, we placed the base part by aligning the base part with the main body mounting holes.
- Using four M2 screws, both are secured together.
-
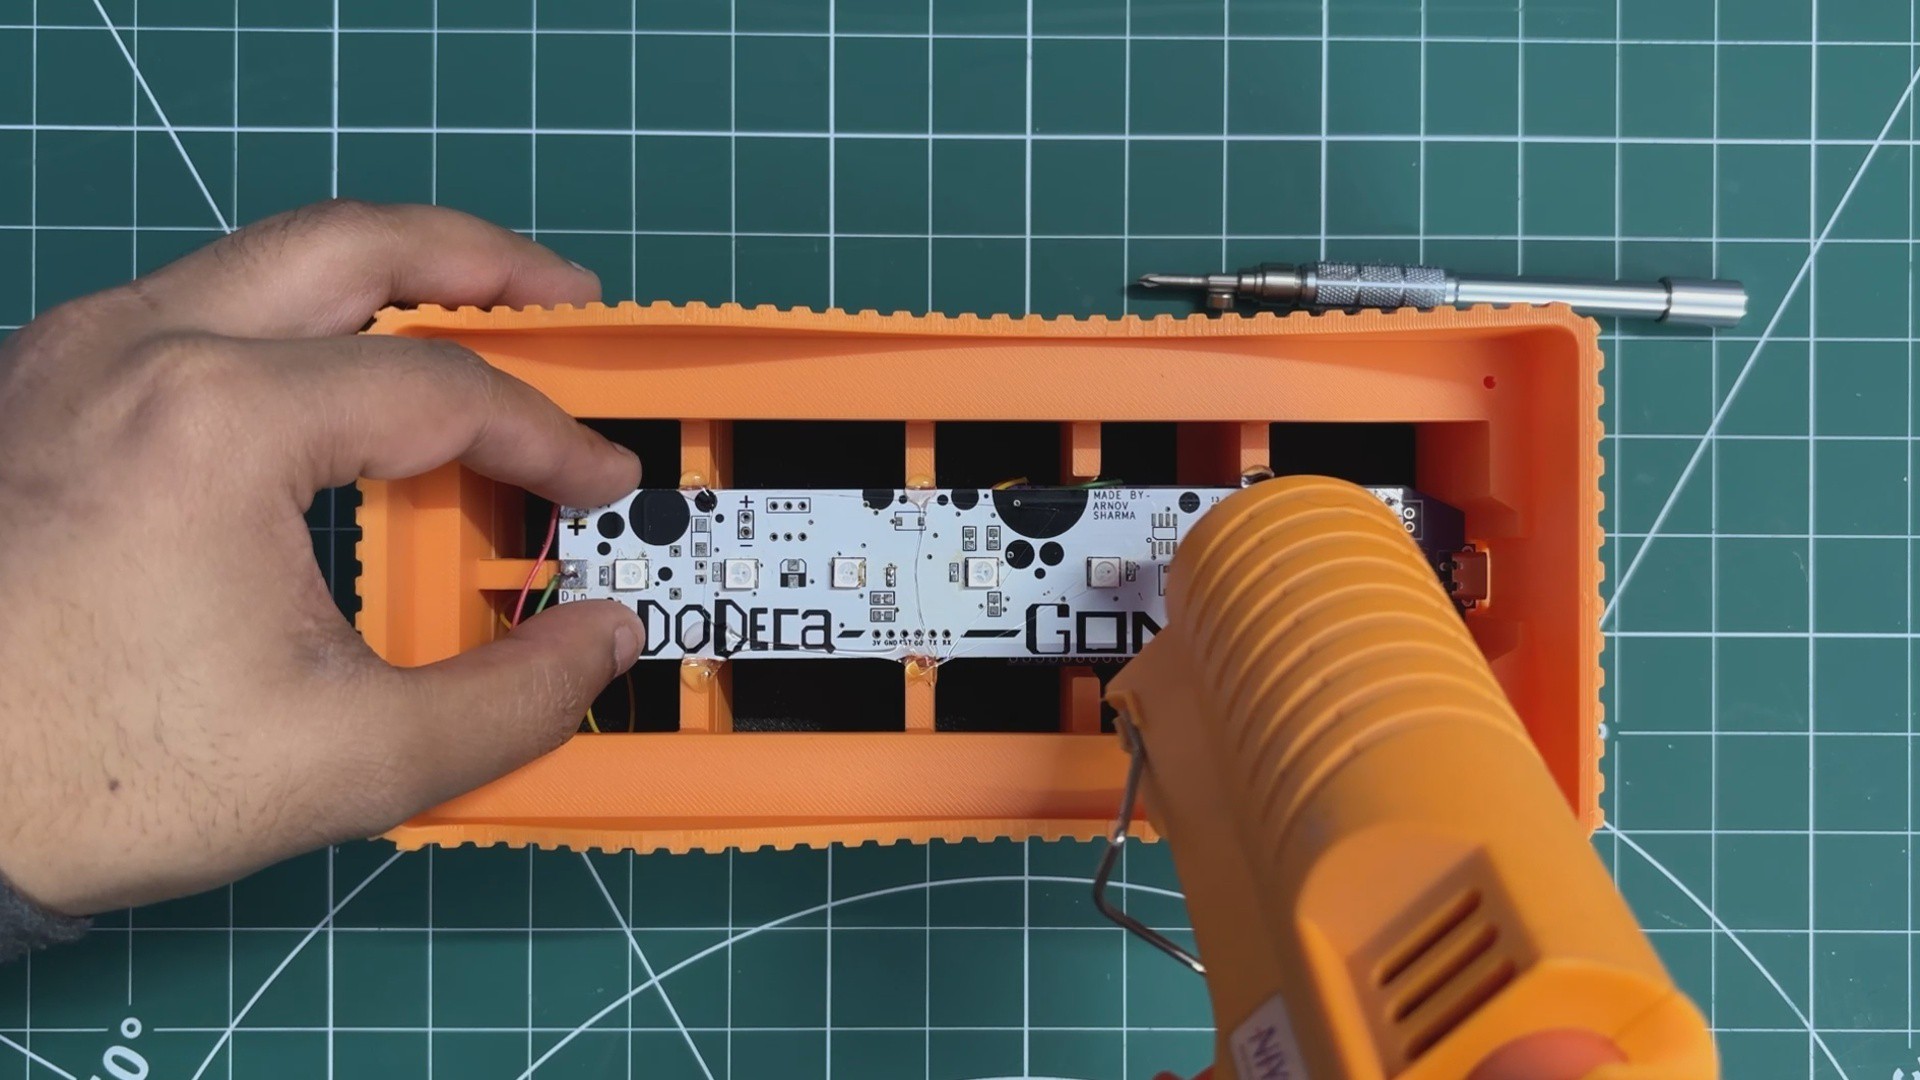
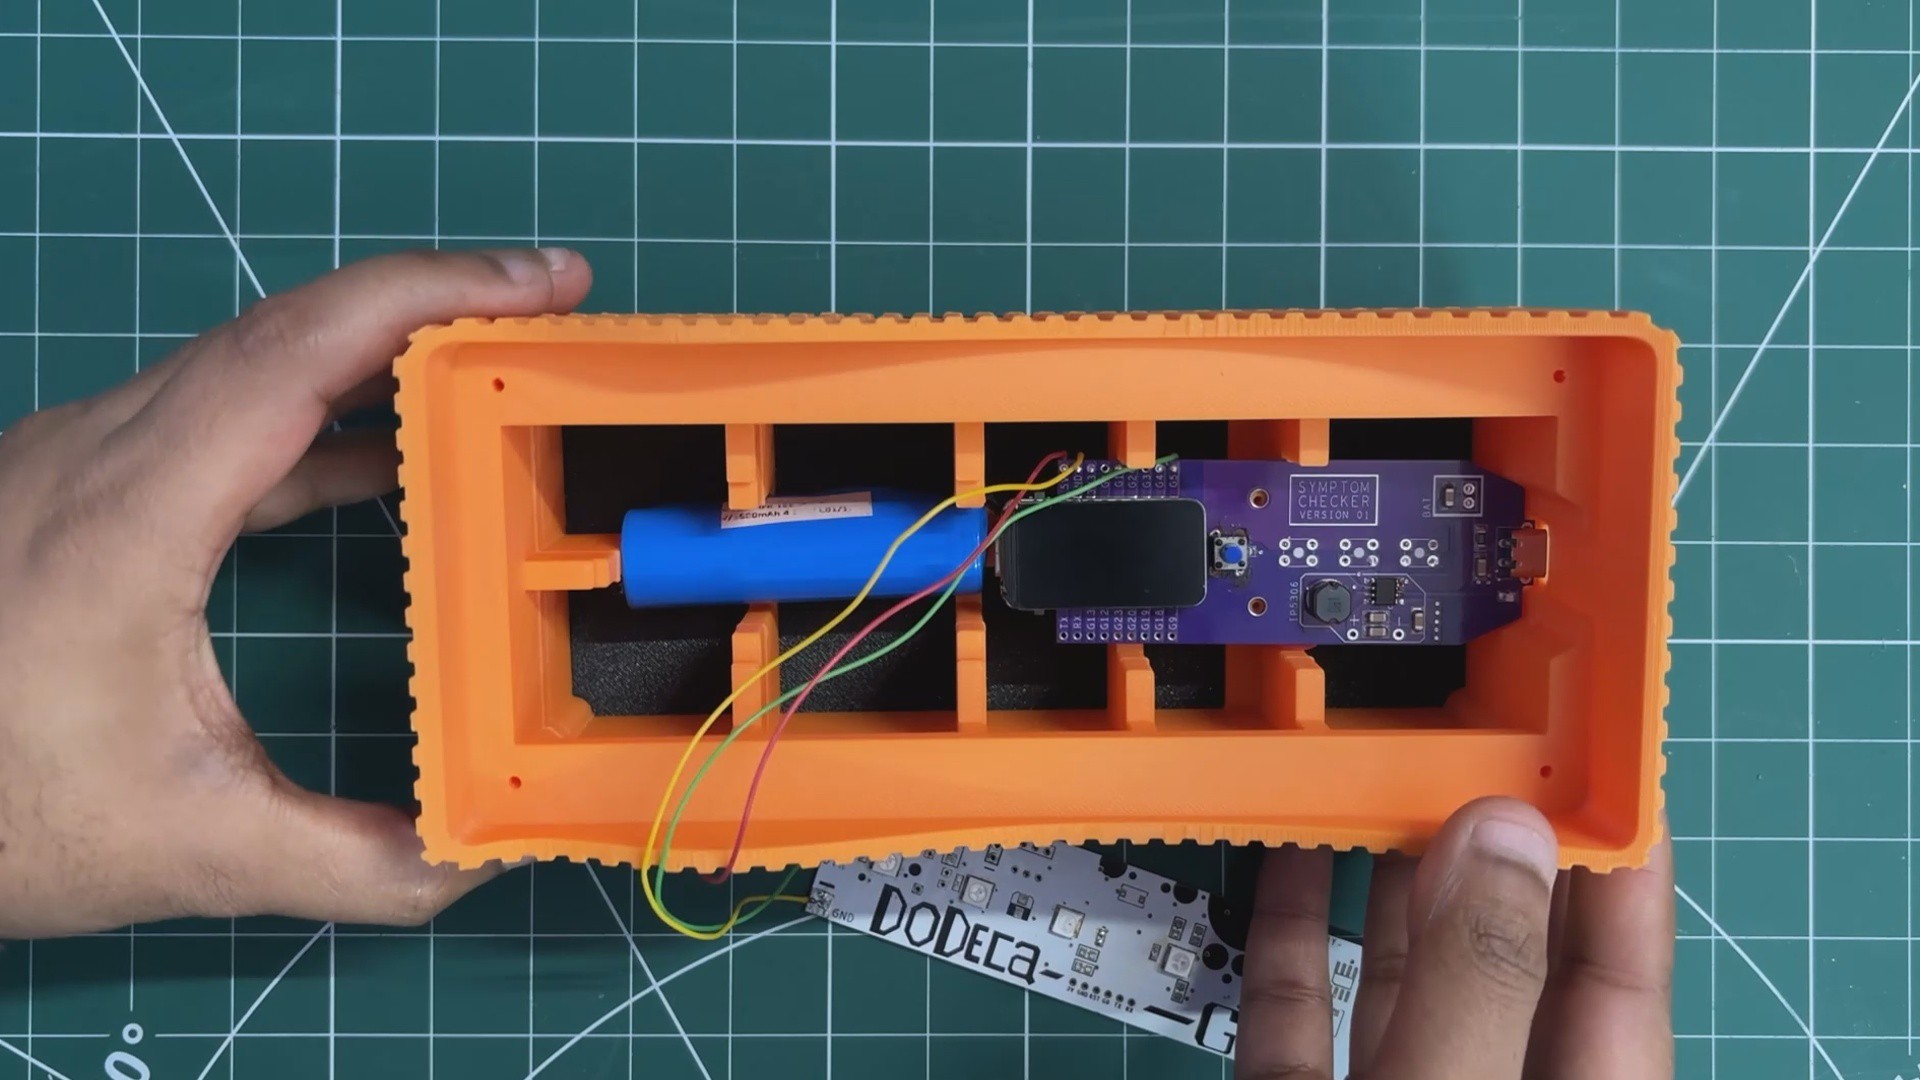
4ELECTRONICS & BODY ASSEMBLY
![]()
![]()
![]()
![]()
- First, we place the lithium cell in its place inside the main body, followed by positioning the Medic Mini PCB by aligning it over the two mounting holes provided inside the main body.
- Using two M2 screws, the Medic Mini PCB is secured in place.
- At last, we position the LED PCB in its place, and it is secured using some hot glue. After letting it cool, the whole assembly process has been completed.
-
5MAIN CODE
This was the main code, and let's have a quick breakdown.
#include <WiFi.h>
#include <WebServer.h>
#include <FastLED.h>
/* ================= LED CONFIG ================= */
#define LED_PIN     5
#define LED_COUNT   7
#define LED_TYPE    WS2812B
#define COLOR_ORDER GRB
CRGB leds[LED_COUNT];
/* ================= WIFI ================= */
const char* ssid     = "SSID";
const char* password = "PASS";
/* ================= WEB ================= */
WebServer server(80);
/* ================= MODES ================= */
enum Mode {
MODE_STATIC,
MODE_OCEAN,
MODE_FIRE,
MODE_OFF
};
Mode currentMode = MODE_STATIC;
/* ================= UI ================= */
const char PAGE_HTML[] PROGMEM = R"rawliteral(
<!DOCTYPE html>
<html>
<head>
<meta name="viewport" chljs-number">1">
<title>Brick of Light</title>
<style>
html, body {
margin: 0;
padding: 0;
height: 100%;
background: #0f0f14;
display: flex;
justify-content: center;
align-items: center;
font-family: system-ui, -apple-system, BlinkMacSystemFont, sans-serif;
color: white;
}
.container {
text-align: center;
}
h1 {
font-weight: 500;
letter-spacing: 0.05em;
margin-bottom: 20px;
opacity: 0.9;
}
canvas {
touch-action: none;
}
.modes {
margin-top: 22px;
display: flex;
justify-content: center;
gap: 18px;
}
.mode-btn {
width: 52px;
height: 52px;
border-radius: 50%;
border: none;
cursor: pointer;
}
.ocean {
background: radial-gradient(circle at 30% 30%, #4fd1c5, #1e4fd8);
}
.fire {
background: radial-gradient(circle at 30% 30%, #ffd166, #ff6b00);
}
.off {
background: radial-gradient(circle at 30% 30%, #444, #111);
}
.mode-btn:active {
transform: scale(0.95);
}
</style>
</head>
<body>
<div class="container">
<h1>Brick of Light</h1>
<canvas id="wheel" width="300" height="300"></canvas>
<div class="modes">
<button class="mode-btn ocean" hljs-string">'/mode?m=ocean')"></button>
<button class="mode-btn fire" hljs-string">'/mode?m=fire')"></button>
<button class="mode-btn off" hljs-string">'/mode?m=off')"></button>
</div>
</div>
<script>
const canvas = document.getElementById("wheel");
const ctx = canvas.getContext("2d");
const r = canvas.width / 2;
function drawWheel() {
for (let a = 0; a < 360; a++) {
const s = (a - 1) * Math.PI / 180;
const e = a * Math.PI / 180;
ctx.beginPath();
ctx.moveTo(r, r);
ctx.arc(r, r, r, s, e);
ctx.closePath();
ctx.fillStyle = `hsl(${a},100%,50%)`;
ctx.fill();
}
}
function hslToRgb(h, s, l) {
let r, g, b;
if (s === 0) r = g = b = l;
else {
const f = (p, q, t) => {
if (t < 0) t += 1;
if (t > 1) t -= 1;
if (t < 1/6) return p + (q - p) * 6 * t;
if (t < 1/2) return q;
if (t < 2/3) return p + (q - p) * (2/3 - t) * 6;
return p;
};
const q = l < 0.5 ? l * (1 + s) : l + s - l * s;
const p = 2 * l - q;
r = f(p, q, h + 1/3);
g = f(p, q, h);
b = f(p, q, h - 1/3);
}
return [Math.round(r*255), Math.round(g*255), Math.round(b*255)];
}
function sendColor(x, y) {
const dx = x - r;
const dy = y - r;
if (Math.sqrt(dx*dx + dy*dy) > r) return;
let angle = Math.atan2(dy, dx) * 180 / Math.PI;
if (angle < 0) angle += 360;
const rgb = hslToRgb(angle/360, 1, 0.5);
const hex = rgb.map(v => v.toString(16).padStart(2,"0")).join("");
fetch(`/set?color=${hex}`);
}
canvas.addEventListener("pointerdown", e => handle(e));
canvas.addEventListener("pointermove", e => { if (e.buttons) handle(e); });
function handle(e) {
const rect = canvas.getBoundingClientRect();
sendColor(e.clientX - rect.left, e.clientY - rect.top);
}
drawWheel();
</script>
</body>
</html>
)rawliteral";
/* ================= HANDLERS ================= */
void handleRoot() {
server.send(200, "text/html", PAGE_HTML);
}
void handleSetColor() {
currentMode = MODE_STATIC;
String hex = server.arg("color");
long v = strtol(hex.c_str(), NULL, 16);
fill_solid(leds, LED_COUNT, CRGB(v >> 16, (v >> 8) & 0xFF, v & 0xFF));
FastLED.show();
server.send(200, "text/plain", "OK");
}
void handleMode() {
String m = server.arg("m");
if (m == "ocean") currentMode = MODE_OCEAN;
else if (m == "fire") currentMode = MODE_FIRE;
else if (m == "off") {
currentMode = MODE_OFF;
FastLED.clear();
FastLED.show();
}
server.send(200, "text/plain", "OK");
}
/* ================= ANIMATIONS ================= */
void oceanAnimation() {
static uint8_t hue = 130;
static int8_t dir = 1;
fill_solid(leds, LED_COUNT, CHSV(hue, 180, 220));
FastLED.show();
hue += dir;
if (hue > 160 || hue < 120) dir = -dir;
delay(30);
}
void fireAnimation() {
for (int i = 0; i < LED_COUNT; i++) {
uint8_t flicker = random(150, 255);
leds[i] = CRGB(flicker, random(60, 100), 0);
}
FastLED.show();
delay(50);
}
/* ================= SETUP ================= */
void setup() {
Serial.begin(115200);
delay(1500);
FastLED.addLeds<LED_TYPE, LED_PIN, COLOR_ORDER>(leds, LED_COUNT);
FastLED.setBrightness(255);
FastLED.clear();
FastLED.show();
WiFi.begin(ssid, password);
while (WiFi.status() != WL_CONNECTED) delay(300);
Serial.print("Brick of Light → http://");
Serial.println(WiFi.localIP());
server.on("/", handleRoot);
server.on("/set", handleSetColor);
server.on("/mode", handleMode);
server.begin();
}
/* ================= LOOP ================= */
void loop() {
server.handleClient();
if (currentMode == MODE_OCEAN) oceanAnimation();
else if (currentMode == MODE_FIRE) fireAnimation();
}
In this code, we use three main libraries. The WiFi.h library connects our ESP32 to Wi-Fi and allows us to use functions like WiFi.begin, WiFi.status, and WiFi.localIP.
Next is WebServer.h, which lets us create a simple HTTP web server on the ESP32 for hosting our LED-controller webpage.
And finally, we use the FastLED library, which handles all the control for the WS2812B RGB LEDs.
Let’s begin with the LED configuration, which defines the GPIO pin we used (GPIO5), the number of LEDs (7), and the LED array.
#define LED_PIN 5#define LED_COUNT 7CRGB leds[LED_COUNT];
Wi-Fi Credentials
This allows the ESP32 to connect with our home Wi-Fi.
const char* ssid = "SSID";const char* password = "PASS";
WebServer Setup
We use the section below to create a web server on port 80, which is the default HTTP port.
WebServer server(80);enum Mode { MODE_STATIC, MODE_OCEAN, MODE_FIRE, MODE_OFF };Mode currentMode = MODE_STATIC;The above section defines which lighting mode is active; there are a total of four modes: static, ocean animation, fire animation, and off mode.
Webpage HTML (WebApp UI)
const char PAGE_HTML[] PROGMEM = R"rawliteral( … )rawliteral";
This stores the entire webpage UI:
- Color wheel (circular picker)
- Three round buttons (Ocean / Fire / Off)
- All CSS styling
- All JavaScript logic
Then we have three request handlers, which serve the webpage, handle the color picker, and handle the mode buttons.
server.on("/", handleRoot);server.on("/set", handleSetColor);server.on("/mode", handleMode);We have added two types of animations in the code. The first is the ocean animation that changes color from blue to green and all the colors in between, not using the color red entirely.
void oceanAnimation() {static uint8_t hue = 130;static int8_t dir = 1;Second is the fire animation that displays a fire-like glow with flickering to imitate glowing fire.
void fireAnimation() {for (int i = 0; i < LED_COUNT; i++) {uint8_t flicker = random(150, 255);leds[i] = CRGB(flicker, random(60, 100), 0);}After uploading the sketch and letting the ESP32 connect to our Wi-Fi, we open the Serial Monitor and set the baud rate to 115200. Once the ESP32 connects, it prints an IP address in the Serial Monitor. We simply copy this IP address and paste it into any browser connected to the same local Wi-Fi network, and this opens our web app.
-
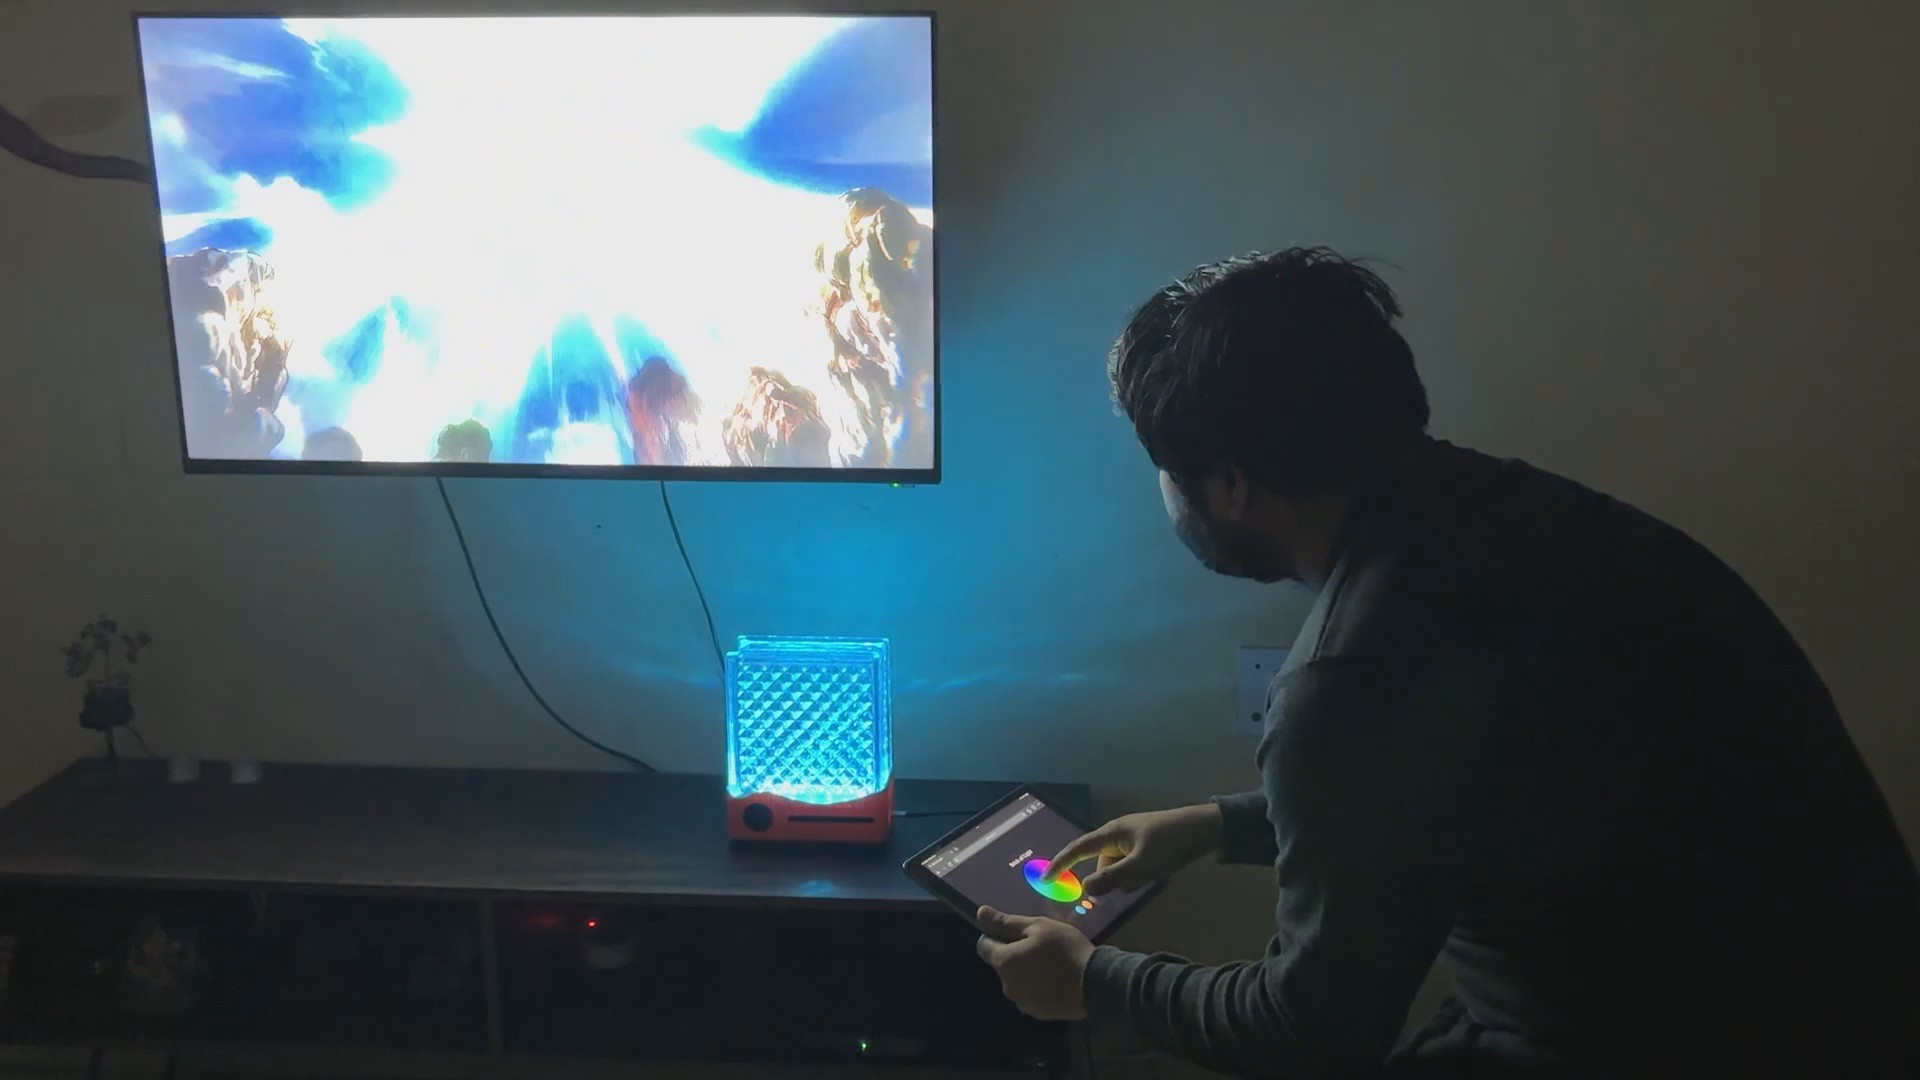
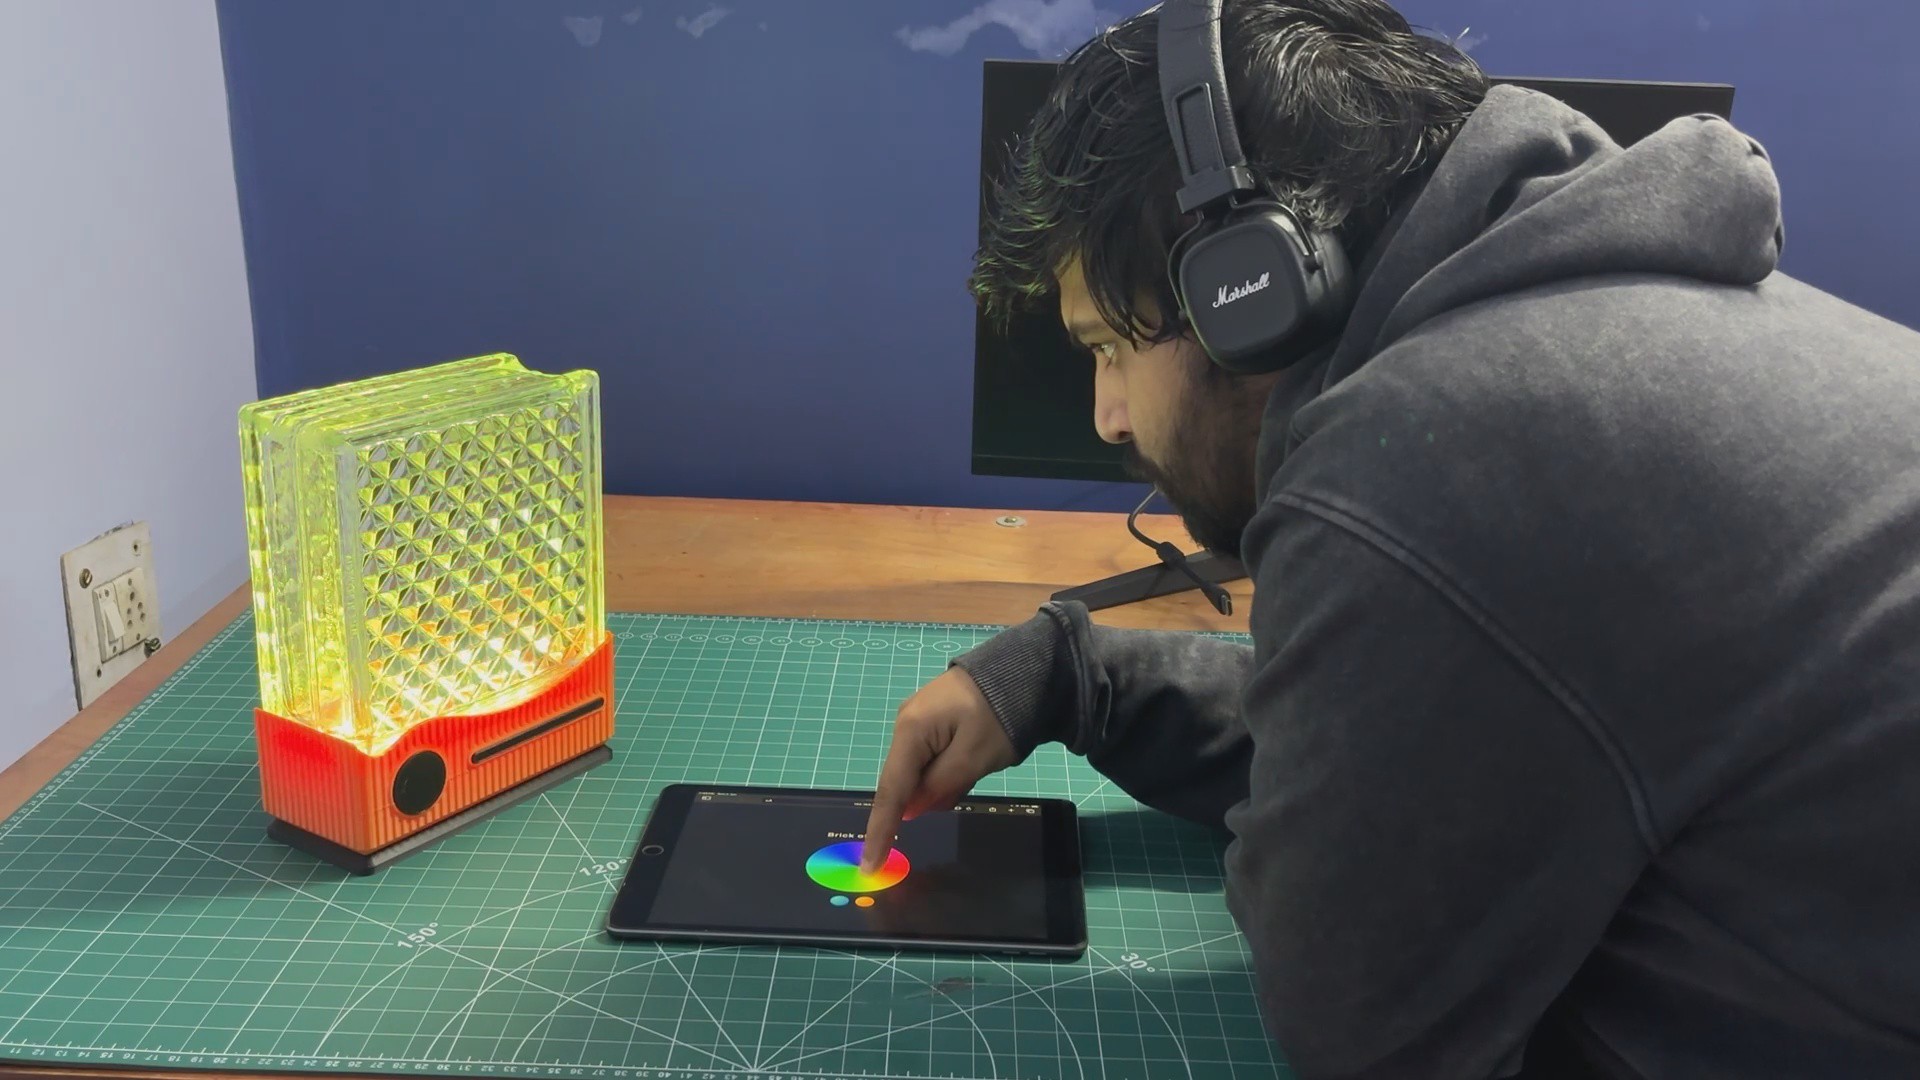
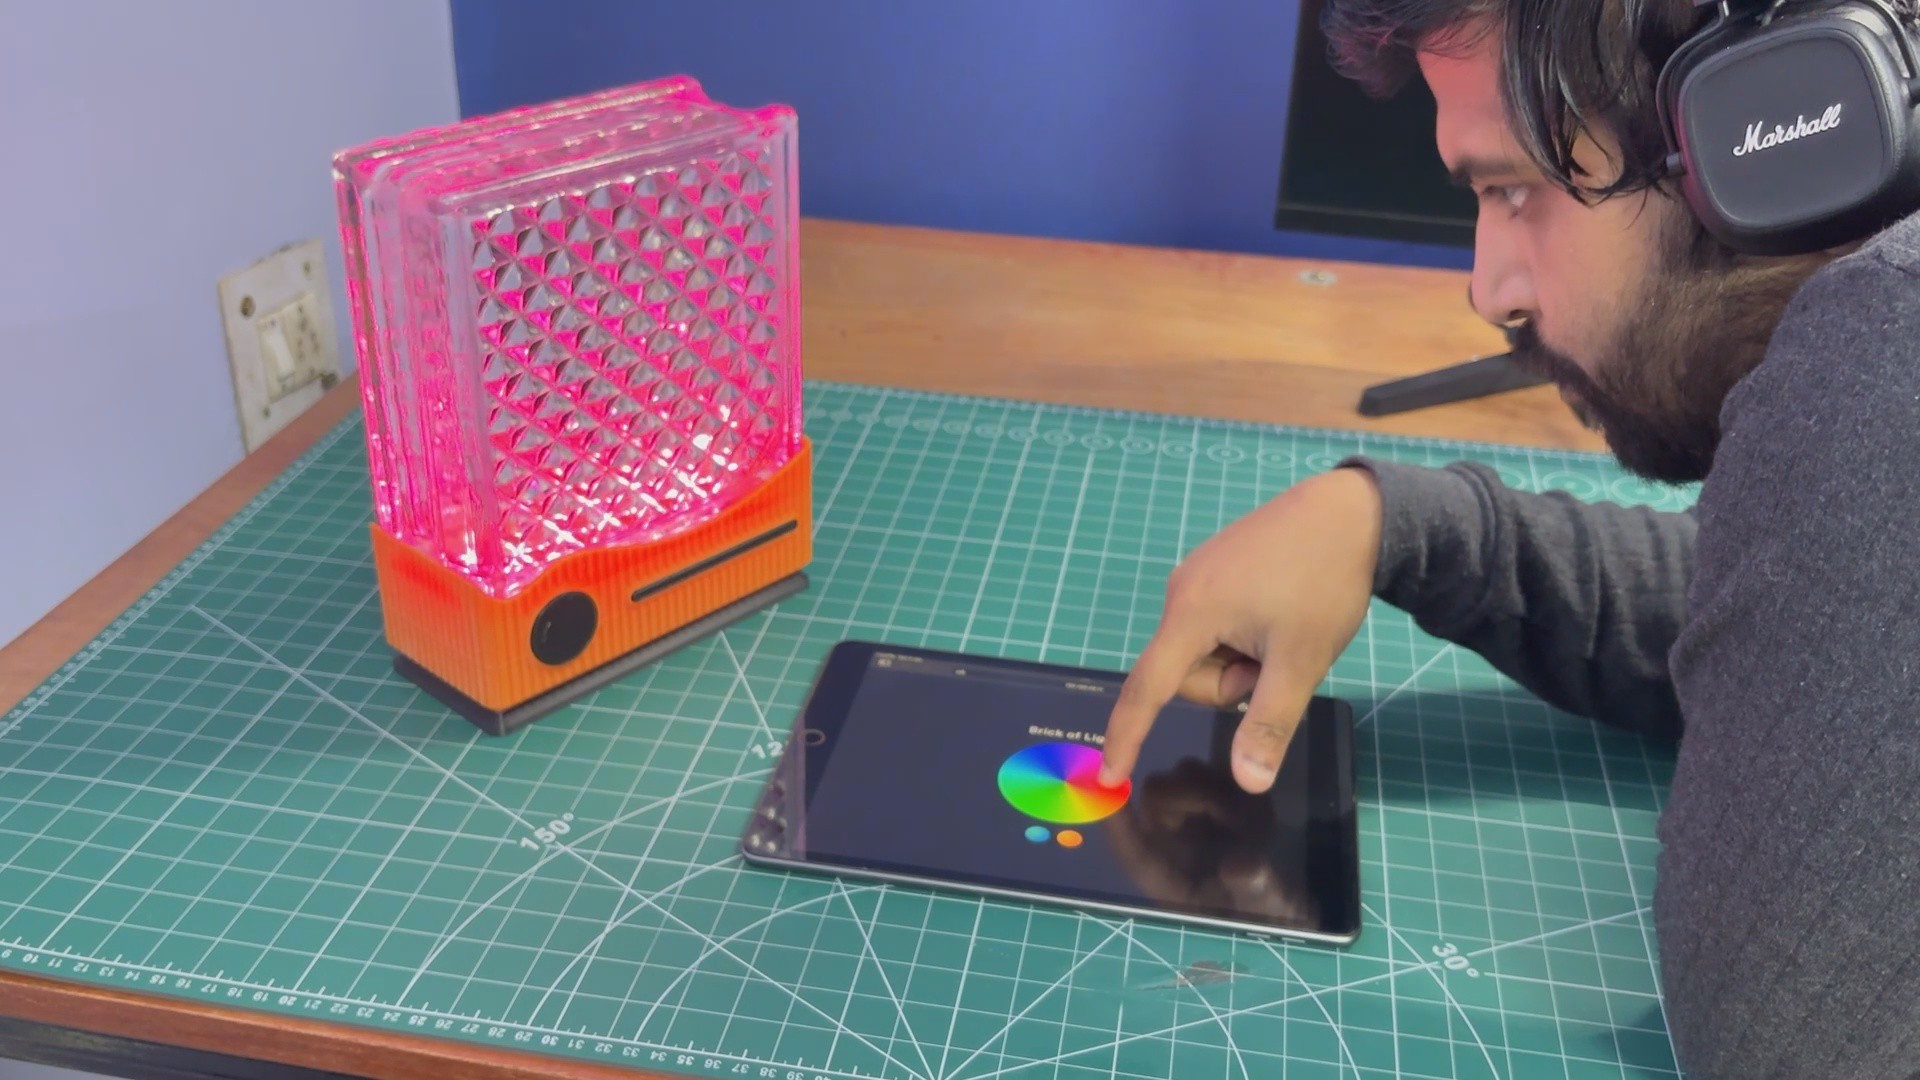
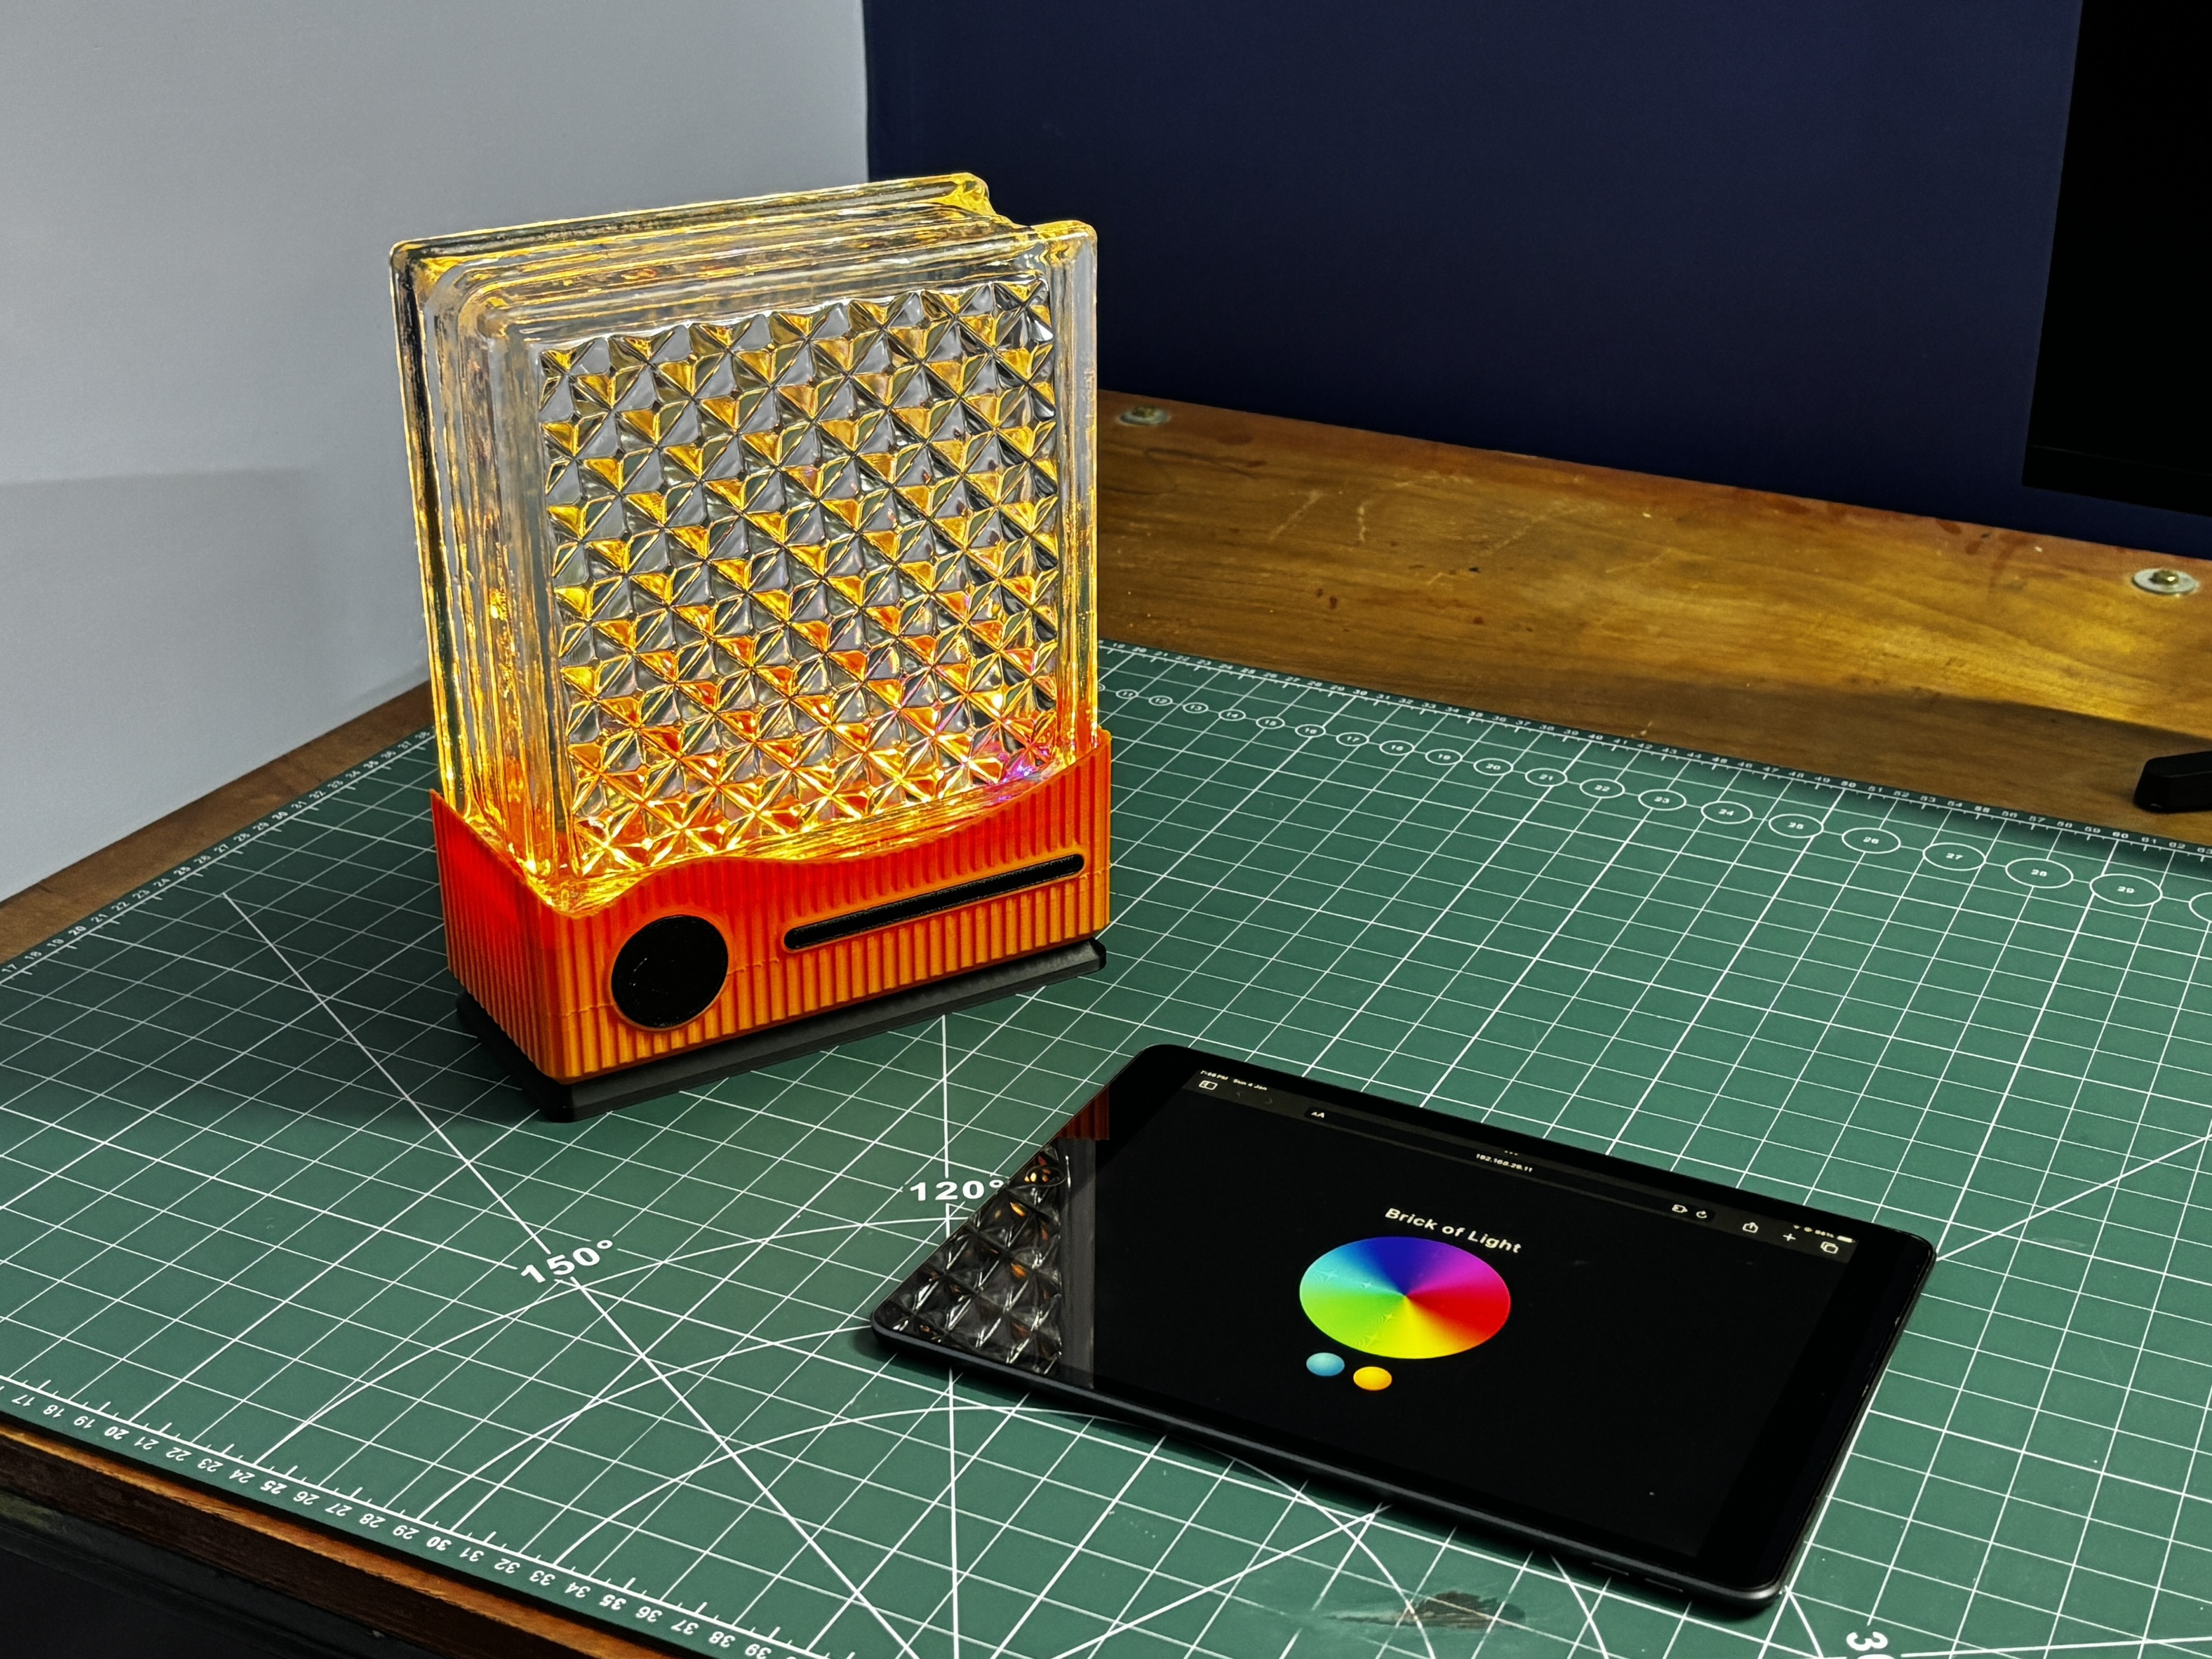
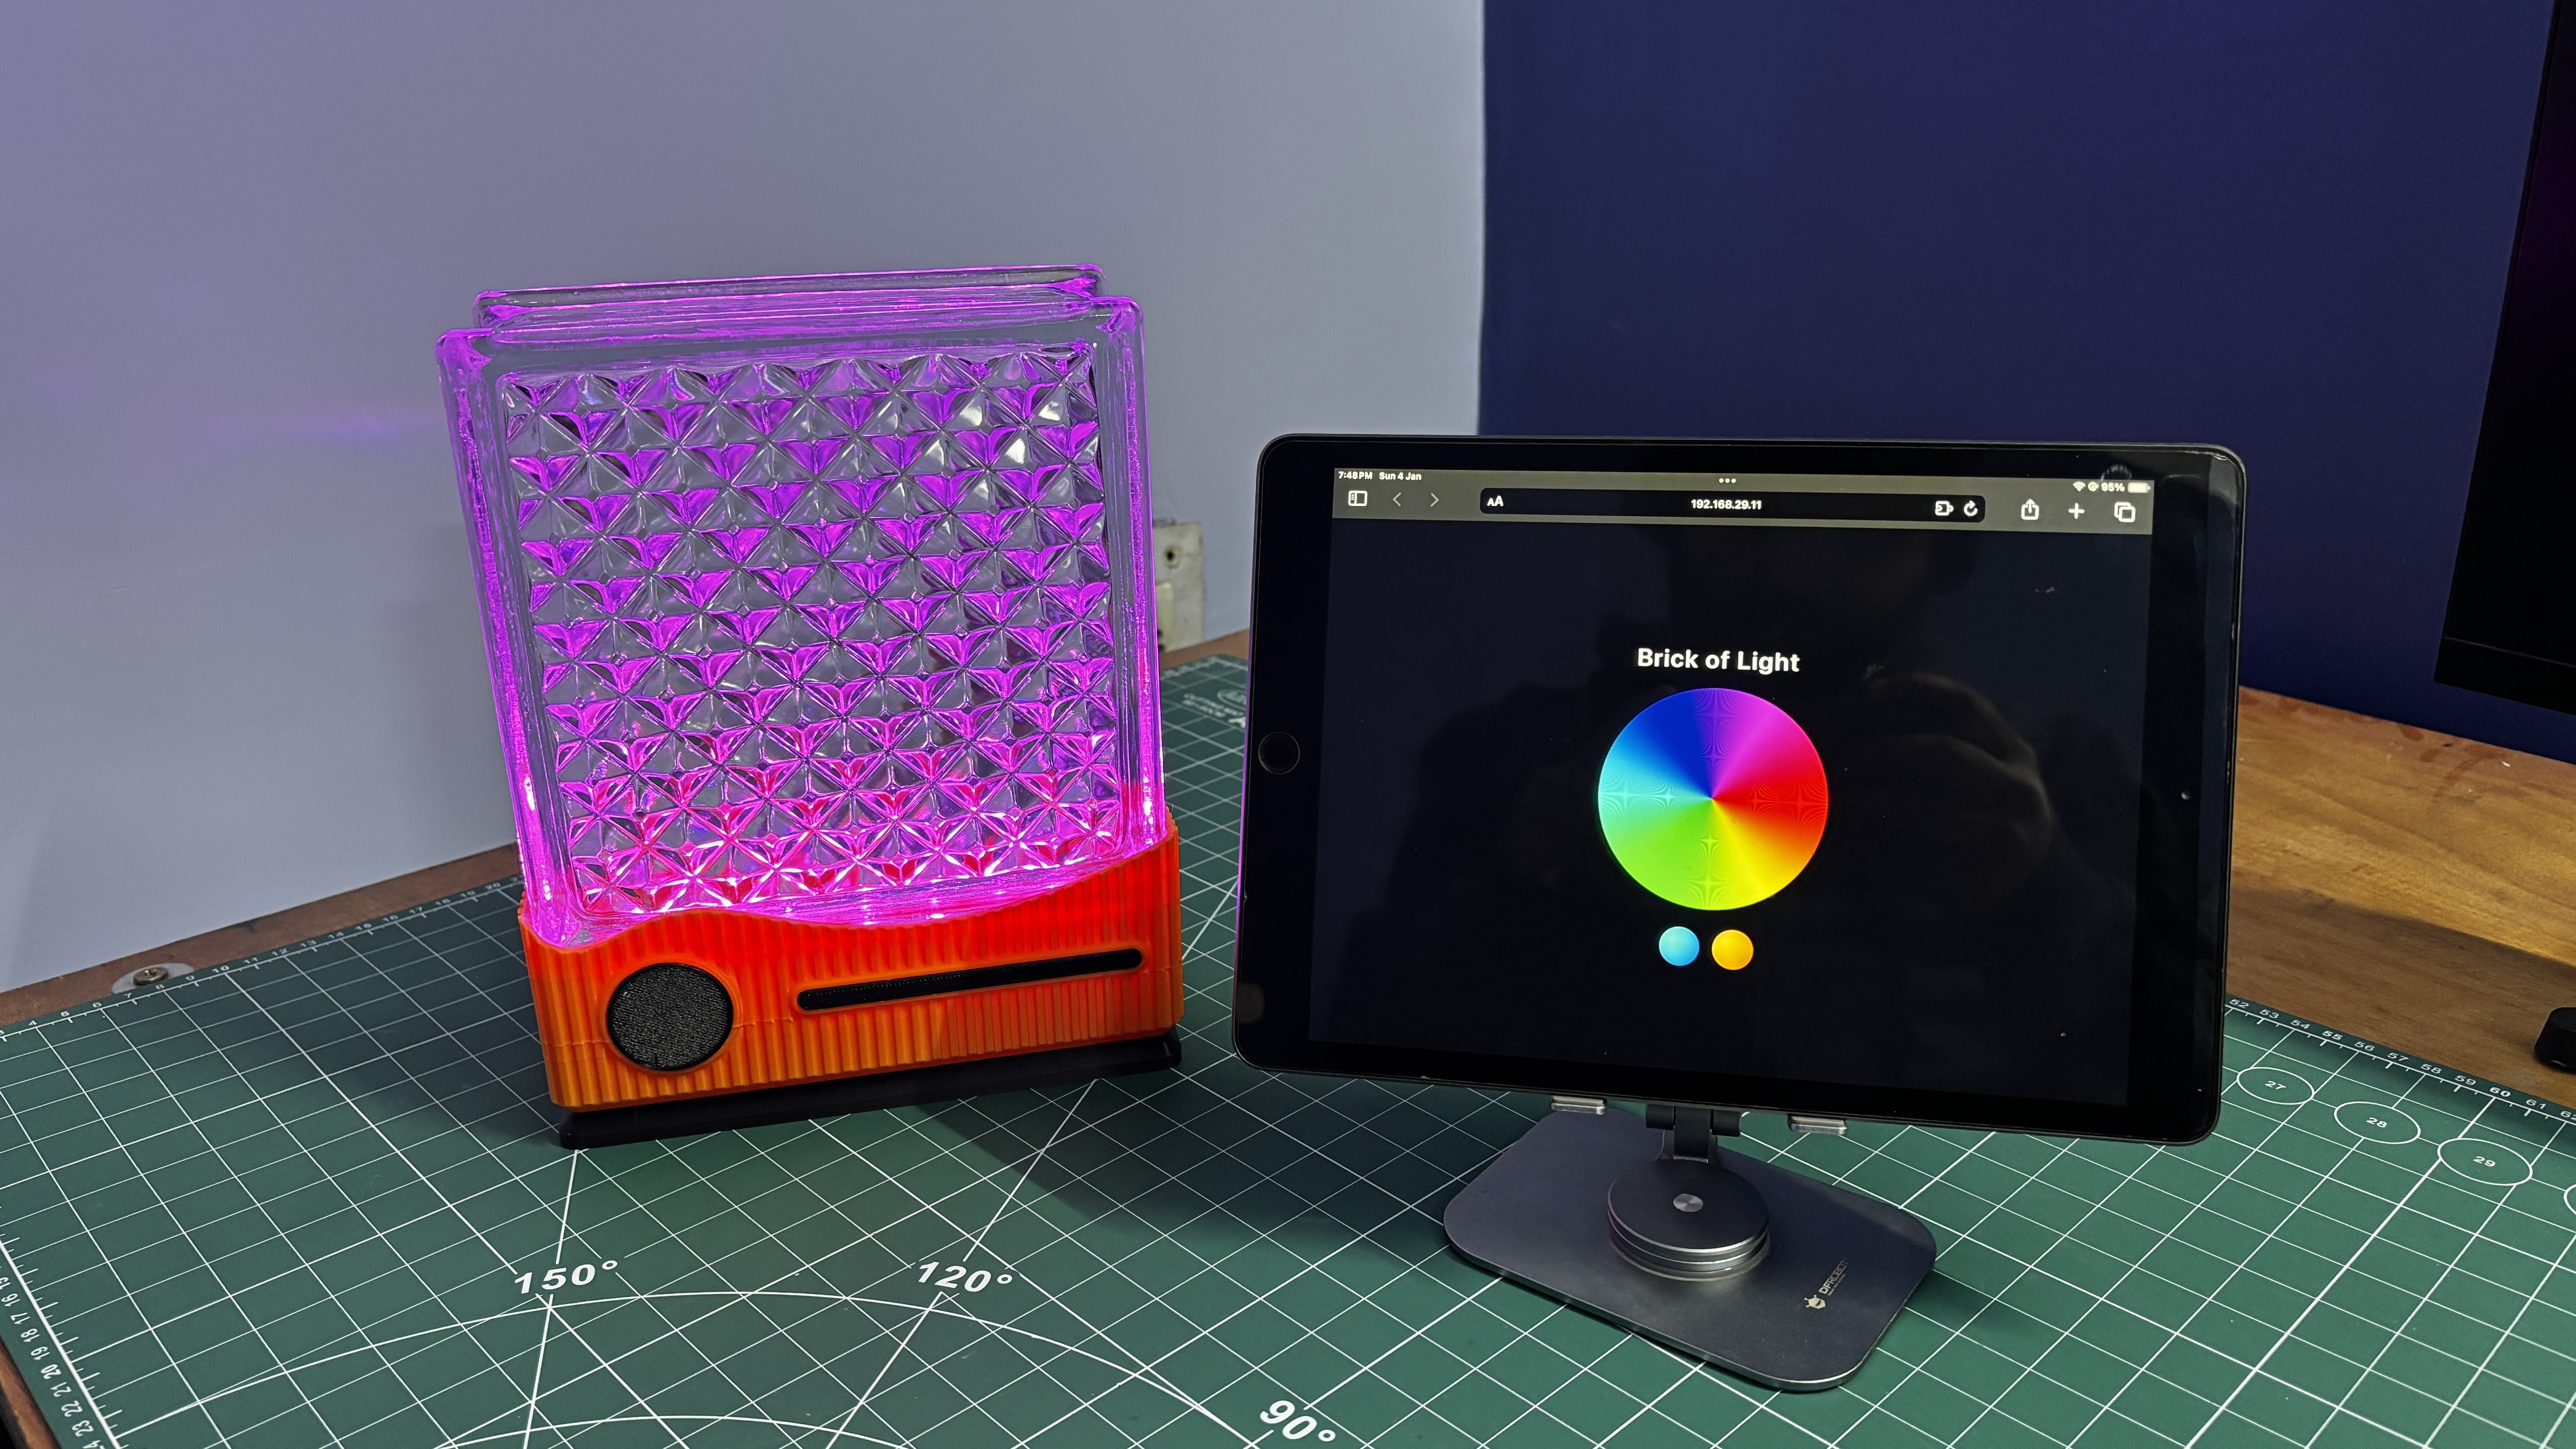
6RESULT
![]()
![]()
![]()
![]()
![]()
![]()
And here it is—the final result of this simple yet surprisingly bright build! A repurposed glass brick transformed into a glowing, modern RGB lamp that you can control from your phone, tablet, or practically any device on your Wi-Fi network. It looks absolutely stunning in person and instantly upgrades the aesthetic of a living room, bedroom, or wherever you decide to place it.
Through a bit of creativity, some custom 3D design , and a handful of electronics, we took an ordinary leftover glass brick and turned it into a stylish, app-controlled décor piece.
Overall, the project was a success, and all design files, code, and resources related to this build are attached on the project page.
Thanks for reaching this far, and I will be back with a new project pretty soon.
Peace.
LIGHT BLOCK- Smart Lamp
DIY RGB LED lamp with glass brick/block and ESP32


Discussions
Become a Hackaday.io Member
Create an account to leave a comment. Already have an account? Log In.