 Profe Tolocka
Introduction
This project is an example of how to apply the concepts we covered in the previous parts of this tutorial. You can check them at the following links:
Imagine that your school, college, or university is hosting an event—like a science fair or expo. This time, the organizers want to do something different: instead of the usual cardboard or plastic name tags, they want participants to use electronic badges that can display information clearly and can be updated at any moment.
Since you’re known for being a curious maker with some tech skills, they come to you with the challenge and share a list of requirements for the project:
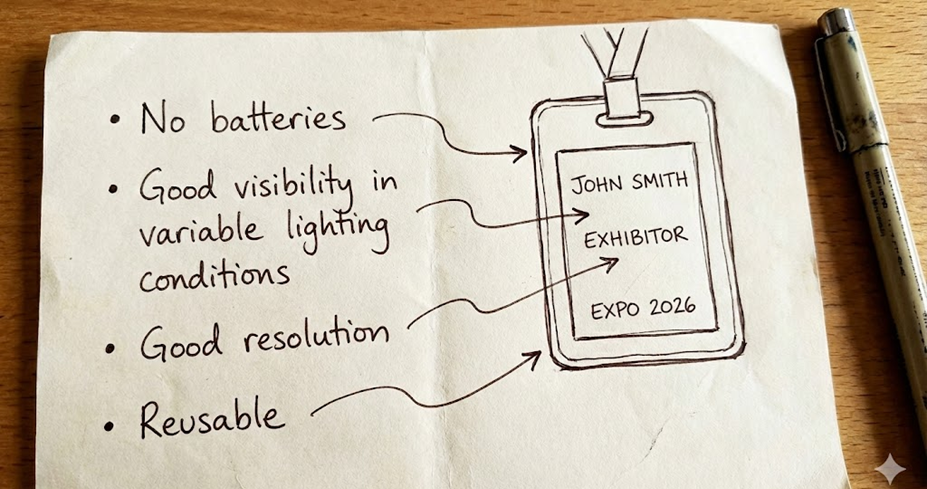
The moment you read the first requirement, your first thought is: "That’s impossible!" Every electronic component needs some form of power—especially displays, whether they’re LCD, OLED, or any other type!
Still, you keep reading: Good visibility in different lighting conditions and decent resolution?
Maybe an OLED display would work, with its bright colors. Or maybe an EPD could do the job, since it can show vibrant colors even in bright light…
Wait, what was that thing about EPDs being bistable?

Could an EPD work without batteries? Yes! Once you load an image onto the screen, the EPD doesn’t need any power to keep it visible.
Can it be reused? Absolutely! You can change the image and use the badge again with any new info you want.
So, the conclusion is clear: this project is perfectly possible using EPD screens.
Commercial Epaper Badges
These kinds of devices already exist commercially under different names, like smart badge, work badge, or ePaper badge. If you look them up online, you’ll find plenty of options available.
Compared to traditional cardboard or plastic name tags, ePaper badges have several key advantages: you can easily update the information, reuse the same device as many times as you want, and even display extra details—like the wearer’s photo, a QR code, or any other relevant info.
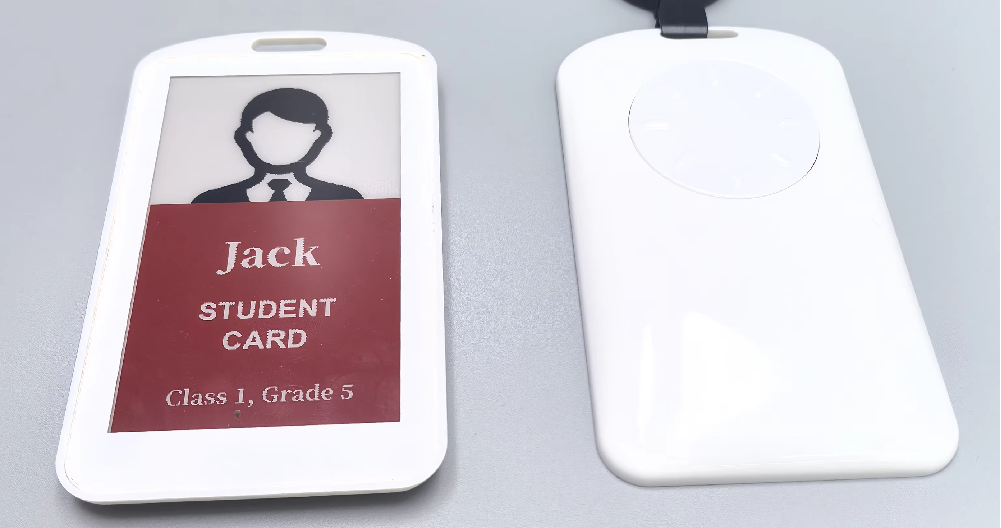
Example of a Commercial Work Badge
Many of these devices include an NFC receiver. NFC stands for Near Field Communication, a short-range technology that allows devices to exchange information when they’re just a few centimeters apart.
Besides sending data, NFC can also be used to power ultra low-power devices by taking advantage of the electromagnetic field generated by the reader—meaning the receiver can work without any batteries at all.
Continuing with our imaginary scenario, let’s say you take this info and ask the event organizers if they’d rather buy an existing solution or develop their own. The answer is clear: they want to create their own project—not just to use it as a badge, but also to showcase it during the event. However, due to budget limitations, the NFC interface won’t be included.
So, with these specs and constraints, let’s get started and design your own ePaper badge together!
Component Selection
With the specs in front of us, the next step is to choose the components we’ll need to build the device.
Let’s put together a preliminary list:
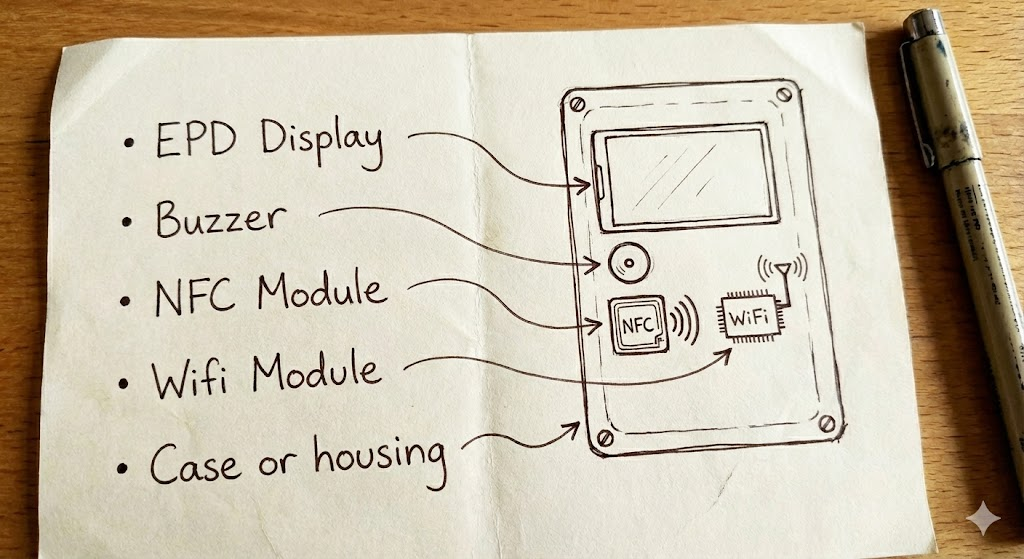
But hold on a second—A buzzer might be useful, but there’s no battery to power it.
NFC was rejected because of the cost, and WiFi also needs a battery and a CPU to control it, so that’s out too.
Let’s cross all of those off the list.
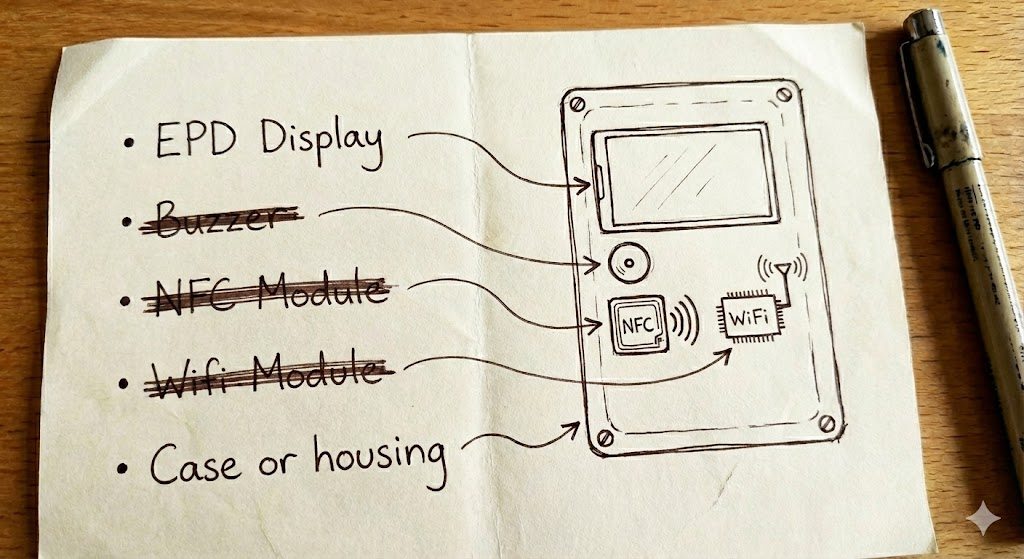
So, what are we left with? An EPD inside a case.
How could the badge work without any communication—no WiFi or NFC—to load the screen’s content?
A compromise solution would be to use a driver board like the EE04, connect the EPD, load the content you want to display, then disconnect it and mount it inside the case.
It’s not the most elegant setup, but it could work. If the badge is used frequently, you might damage the delicate FPC ribbon cable by connecting and disconnecting so much. But if you only need to...
Read more »
 Mike Szczys
 alcor6502