 Profe Tolocka
Introduction
This project is an example of how to apply the concepts we covered in the previous parts of this tutorial. You can check them at the following links:
Do you remember the ePaper badge from the previous project? It was part of an imaginary scenario in which event organizers asked you to create a novel way to identify participants.
Continuing with that idea, let’s say they now have a new request: the event organizers are back with a new challenge — alongside the main exhibition, they will be hosting talks and conferences in different rooms, featuring various speakers
To keep the audience informed about what’s going on, they want to set up a sign at the entrance of each room. This sign should show the speaker’s photo, their name, and the topic of the talk. On top of that, the sign needs to show the current status of the session—whether it’s Scheduled, Ongoing, or Finished—as time goes by.
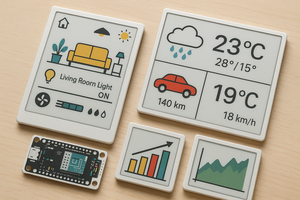
Here’s a sketch of what the organizers have in mind:
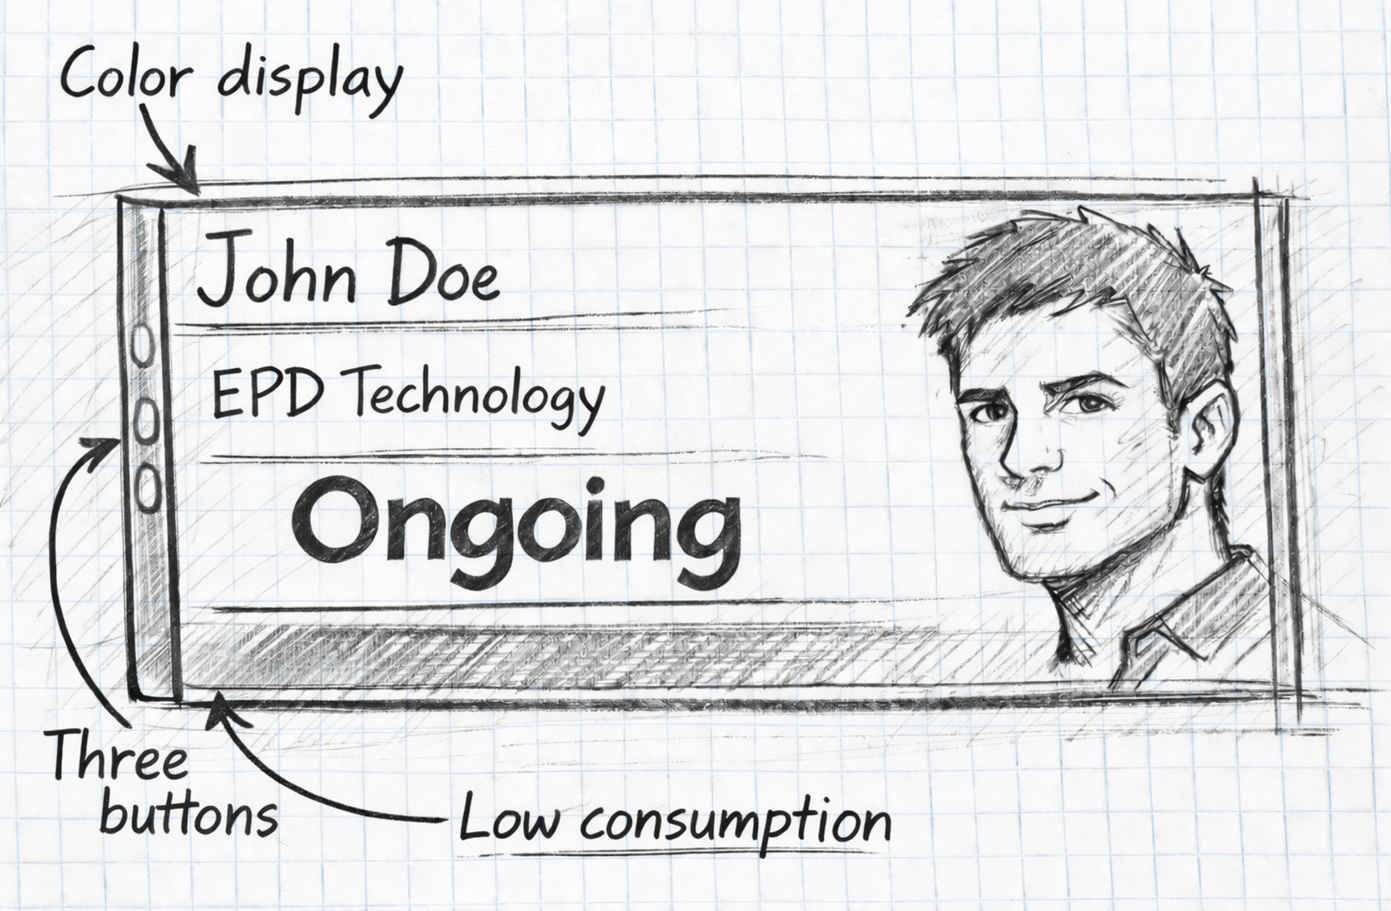
They’re looking for a screen with good visibility and the ability to change the session status by pressing one or more buttons on the side of the device.
Powering is another important point: although the devices will usually be plugged into a steady power source, they should have low power consumption so they can also run from a power bank if needed.
Here’s a quick summary of the requirements:

Component Selection
Let’s look at the requirements and choose the components for this project.
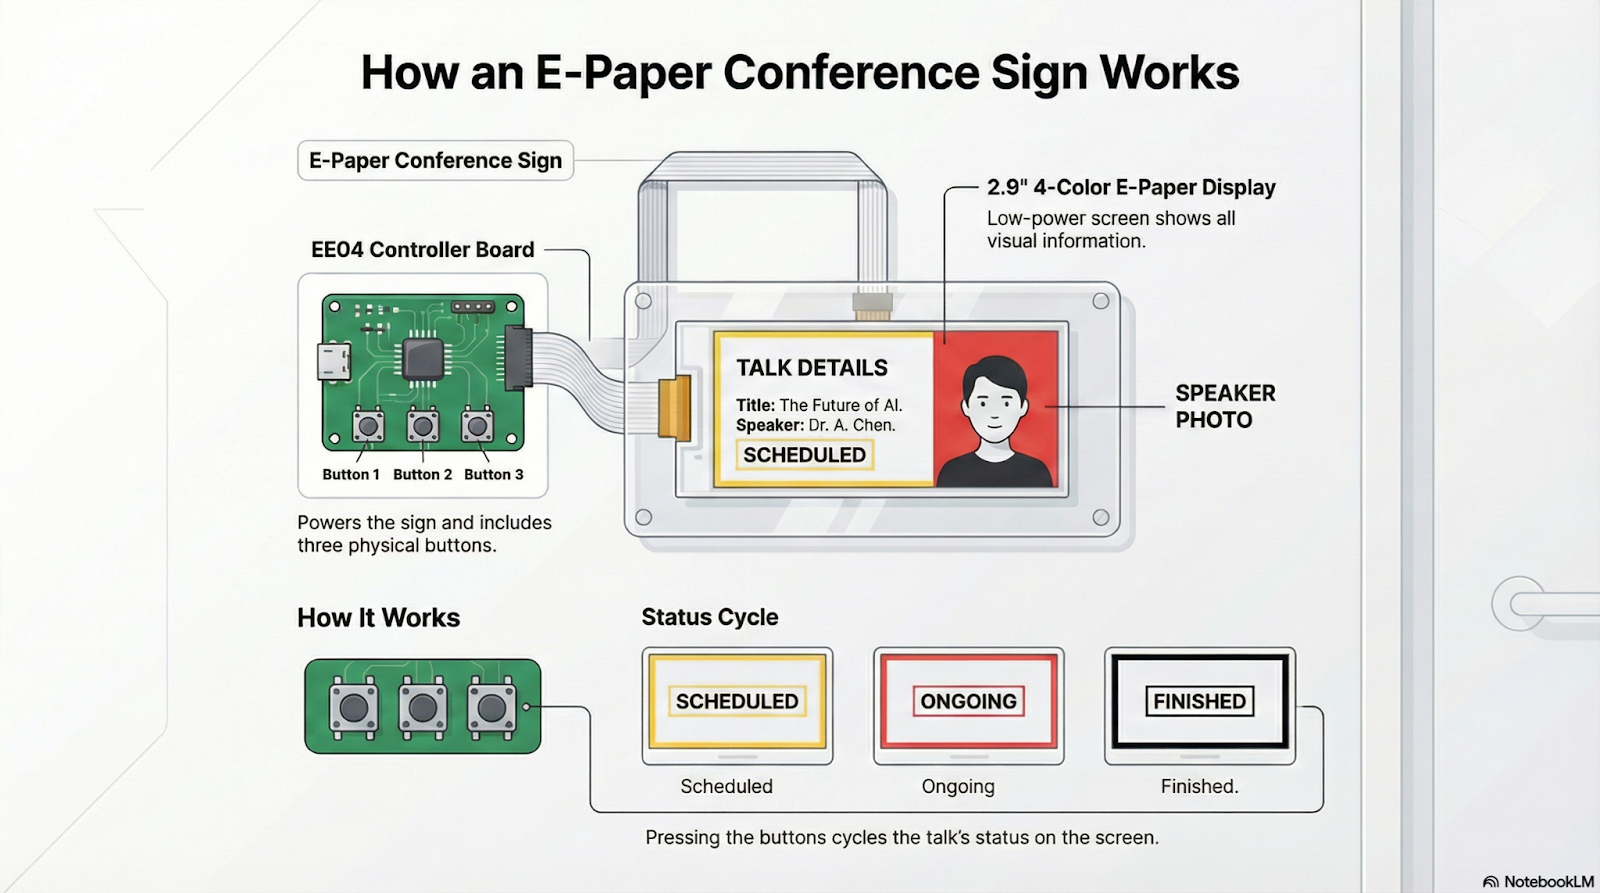
First, the display: It needs to have good visibility and low power consumption, since there’s a chance the device might be powered by batteries. An EPD (ePaper Display) is a perfect fit here because of its extremely low power usage.
Fast refresh isn’t necessary for this application, as the sign’s status won’t change frequently—so a color EPD like the one we used before is ideal.
We’ll also need physical buttons to change the sign’s status, and the EE04 board conveniently comes with built-in buttons, making it the perfect companion for the EPD.
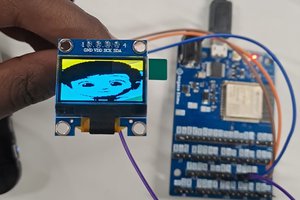
So, for this project, we’ll use the same platform as before: an EE04 board combined with a 2.9-inch, four-color EPD.
Displaying Images
In this project, we need to display an image along with text. The Seeed_GFX library offers two main functions for this: drawBitmap and pushImage.
The drawBitmap function is intended for monochrome images (two colors) and is perfect for simple icons or logos. On the other hand, pushImage allows you to work with color or grayscale images, making it suitable for more detailed graphics like illustrations or photographs.
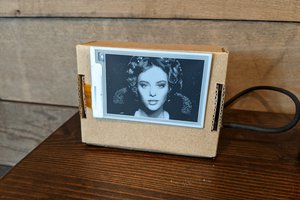
Since in this project we want to show a color photo of a person, we'll use pushImage.
In code, the function is used as follows:
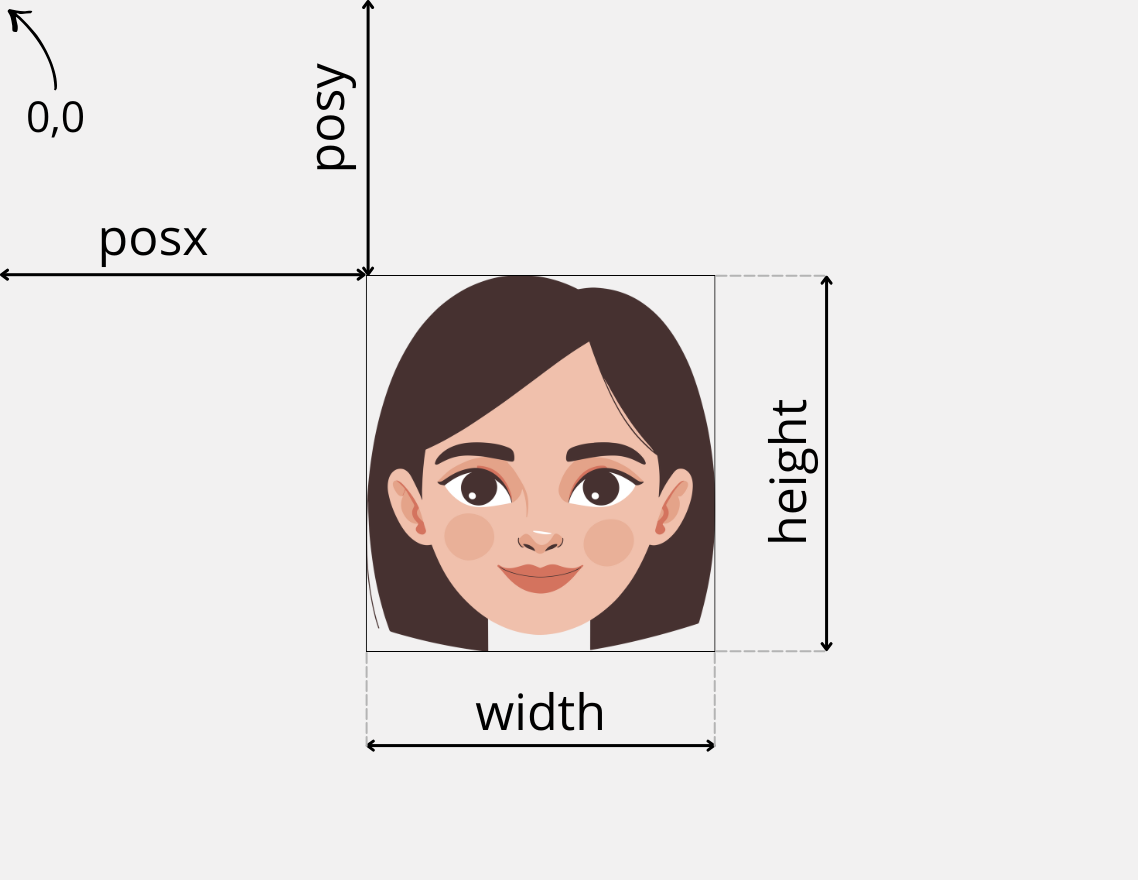
pushImage(posx, posy, width, height, imageData);
- posx and posy are the coordinates where the image will start to be drawn.
- width and height specify how many pixels wide and tall the image will be.
So far, it all seems pretty simple. But what does imageData mean in this function call? Is it the name of the image file, like "photo.jpg"?
Well, no. Here’s where things start to get a bit more complex.
What pushImage expects isn’t the name of an image file, but rather a series of data values that represent the image itself.
To really understand this, let’s review a few concepts about image formats and how color information is encoded.
Image Formats
A digital image is nothing more than a collection of pixels arranged in rows and columns, where each pixel has its own color.
The way this information is organized and stored—such as inside a file—is what we call the image format.
Over time, countless formats have appeared, each designed to meet different needs: some store the data “raw,” others use compression (with or without quality loss), some add transparency, metadata, and so on. That’s...
Read more »
 Mike Szczys