21cncstudio
-
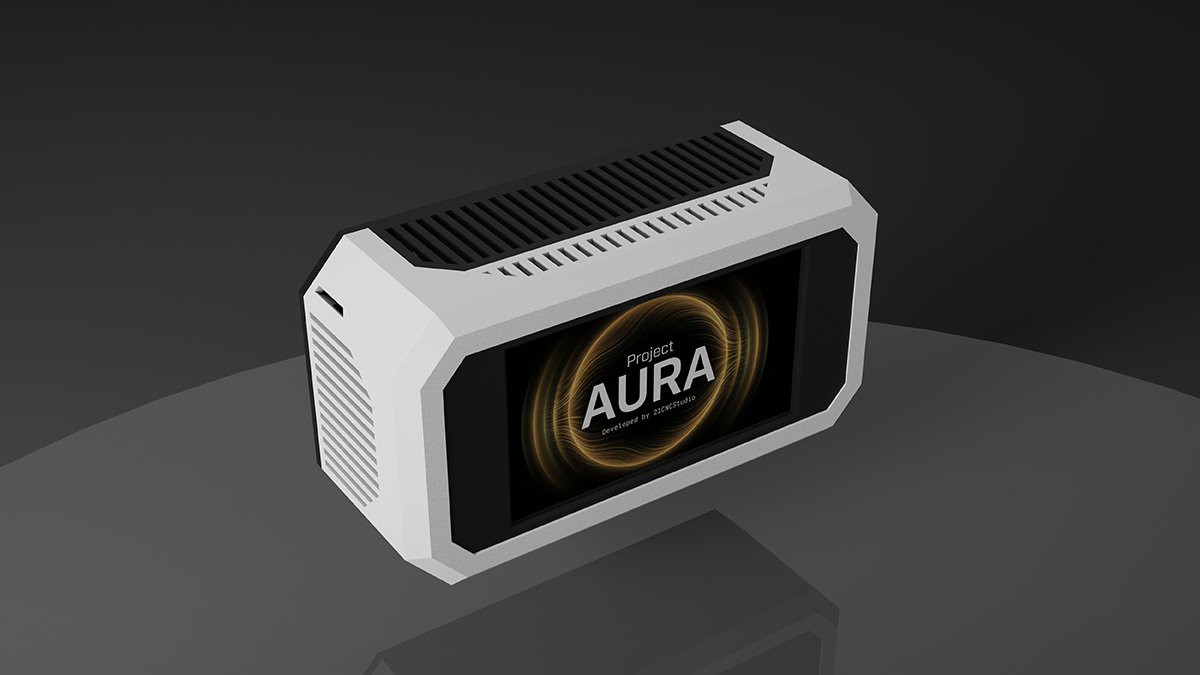
Project Aura: From Monitor to Controller
03/17/2026 at 10:48 • 0 commentsWhen I started Project Aura, I was trying to solve a personal problem: my home office was quietly hitting 1800+ ppm of CO₂, and I had no idea. I built a monitor. I shared it. And somehow, over the past few months, more than two thousand people decided they wanted to build one too.
Today is the last day of the MakerWorld campaign. Late Pledge will remain open after this. But before we move forward, I wanted to write an honest update about what Aura has become — because it's quite a bit more than what I originally described.
2,000+ backers 385 GitHub stars Aura can now control your ventilation, not just report on it
The biggest addition since launch: an optional 0–10V DAC output via the GP8403 module (DFRobot FDR0971). Connect it to any compatible fan, ERV, or ventilation controller, and Aura will drive it automatically based on live air quality.
The key design decision here was to not pick a single trigger metric. Instead, the firmware evaluates all enabled sensors simultaneously — CO₂, CO, PM2.5, VOC, NOx, HCHO, and more — and drives the output from whichever one is currently worst. If your CO₂ is fine but VOC just spiked from cleaning products, the fan responds to that. The logic reacts to the actual problem, not an average.
Manual mode gives you 10 fixed voltage steps from 1V to 10V, with timers up to 8 hours. Auto mode is a separate, explicit arm — you start it intentionally, and a manual stop stays stopped until you restart. After a reboot, auto mode waits 15 seconds before resuming, giving the device time to stabilize. The current DAC output is always visible in both volts and percent, with a clear RUNNING / STOPPED / FAULT status.
All metrics are configurable per-sensor. Disabled or missing sensors are simply excluded from the calculation — no errors, no false triggers.
Here's a full feature overview of the current firmware — ventilation control, UI, Home Assistant integration, and everything else:
Build it from what you can actually find
One of the most common questions I got: "I can't find the exact sensor you listed — will X work?" The answer, increasingly, is yes.
The firmware now auto-detects pressure sensors across six compatible chips: BMP580, BMP581, BMP585, BMP388, BMP390, and DPS310. It probes in order and identifies the installed chip by ID — including shared-address disambiguation to avoid false positives on a busy I2C bus. The official BOM still lists BMP580 or DPS310, but the actual hardware compatibility is now meaningfully wider.
RTC detection works the same way. Both PCF8523 and DS3231 live on address 0x68, so a simple ACK isn't enough. The firmware uses a multi-step probe — checking control registers and temperature data — to correctly identify which chip is installed. There's also a manual override if needed. The detected RTC type is surfaced in the UI, so it's not just an internal detail.
Optional modules — the CO sensor (SEN0466), HCHO sensor (SFA30), and DAC board (DFR0971) — are all presence-detected at boot. Each one can be missing, present-and-working, or present-but-faulted, and the firmware handles all three cases without affecting the rest of the system.
Two new enclosures
The original desktop case isn't going anywhere, but two new variants are now available as STL files for backers.
![]()
Wall-mount — sits flush against the wall. Good for hallways, bedrooms, or anywhere desk space is limited.
![]()
Industrial — heavier aesthetic, works well in a workshop or utility environment.
Thank you
I started this project alone, with a CO₂ problem and a breadboard. I'm ending the campaign with 2,000+ people who decided to take air quality seriously alongside me. That still doesn't fully register.
If you're still on the fence — Late Pledge is open. The firmware, STL files, and full documentation are available on GitHub.
Come build something.
— Volodymyr Papush, 21CNCStudio
-
Project Aura: The Journey from Brain Fog to Industrial-Grade Air Quality Monitor
02/06/2026 at 18:57 • 0 commentsProject Aura: From Idea to Reality
February 6, 2025
Welcome to the first official project log for Project Aura! I'm excited to finally share this journey with the Hackaday community.
How It All Started
This project didn't begin with a business plan or a grand vision. It started with a simple observation: we obsess over tracking our steps, calories, and sleep — but we completely ignore the air we breathe 20,000 times a day.
I noticed my productivity dropping in the afternoons. Headaches. Brain fog. I blamed stress and poor sleep. Then I bought a cheap CO₂ monitor and discovered my home office was hitting 1800+ ppm regularly — well into the "cognitive impairment" zone according to research.
That was my wake-up call.
Why Build Instead of Buy?
I looked at commercial air quality monitors. They all had the same problems:
- Closed-source firmware (no way to verify accuracy)
- Cloud-dependent (what happens when the company shuts down?)
- Limited sensor selection (usually just PM2.5 and CO₂)
- Expensive ($200-500 for decent units)
- Poor Home Assistant integration (if any)
As a maker, I thought: "I can build something better. And I can make it open source so others can too."
Design Philosophy
From day one, I had three non-negotiable principles:
- No soldering required — This needed to be accessible to anyone, not just electronics experts
- Industrial-grade sensors — No cheap DHT11/MQ-135 clones. Real Sensirion sensors or nothing.
- Professional UX — No "Arduino project" aesthetic. It needed to look and feel like a commercial product.
The Hardware Journey
I went through three major iterations:
Version 1: ESP32 DevKit + 2.8" resistive touchscreen + breadboard mess. It worked, but looked terrible. Cable management was a nightmare.
Version 2: Custom PCB + 3.5" capacitive display. Better, but still felt like a prototype. Manufacturing costs would've been too high for a DIY project.
Version 3 (Current): Waveshare ESP32-S3-Touch-LCD-4.3 + Grove/STEMMA QT ecosystem. This was the breakthrough. The integrated display eliminated cable spaghetti, and standardized connectors made assembly trivial.
The Sensirion SEN66 Decision
This was the most expensive component choice (around $60), and I debated it for weeks.
Cheaper alternatives like SGP30 + SCD30 + PMS5003 would've saved $30-40. But they have problems:
- Separate sensors = more cables, more space, more complexity
- No VOC/NOx indices (just raw resistance values that drift over time)
- Optical PM sensors contaminate quickly without proper airflow design
The SEN66 uses Sensirion's Sheath Flow technology — it actively pulls air through a protected channel, keeping the optics clean for years. The VOC and NOx algorithms are calibrated against human perception studies.
In the end, reliability won. This device needs to work accurately for years, not months.
The UI Challenge
Getting LVGL running smoothly on ESP32 was harder than I expected. The 800×480 display needs a ton of RAM for the framebuffer. I had to:
- Use PSRAM aggressively
- Optimize image assets (convert to indexed color)
- Implement smart buffering to avoid tearing
- Pack the Theme Studio web interface into PROGMEM
But the result? smooth gradients, and zero lag when changing themes. Worth every hour of optimization.
Home Assistant Integration: The Killer Feature
I knew from the start this needed seamless Home Assistant integration. Manual YAML configuration is a dealbreaker for most users.
MQTT Auto-Discovery was the answer. The device publishes its entire configuration on startup, and Home Assistant automatically creates 20+ entities. No configuration files. No manual setup. Just works.
I spent weeks perfecting the entity metadata (device classes, units, icons) so everything looks native in HA dashboards.
Going Open Source
I wrestled with this decision. Should I keep the firmware closed and try to monetize it?
Ultimately, transparency won. Air quality affects health. People deserve to know exactly how their data is being collected and processed. Open source builds trust.
The crowdfunding model on MakerWorld lets me monetize the design work (enclosure files + assembly guide) while keeping the firmware free and inspectable.
Current Status & What's Next
The prototype is fully functional and has been running 24/7 in my home office for the past three weeks. Rock solid.
Completed:
- ✅ Hardware design finalized
- ✅ Firmware feature-complete
- ✅ MQTT/Home Assistant integration tested
- ✅ Multi-language UI implemented
- ✅ Theme Studio web interface working
- ✅ Assembly guide in progress (80% done)
Coming Soon:
- 📝 Final assembly PDF with high-res photos
- 📦 Alternative enclosure designs (wall-mount variant, compact version)
- 🔧 Web-based firmware updater (OTA without PlatformIO)
- 📊 Optional cloud dashboard for multi-device tracking
Community Feedback Welcome!
This project is now live on MakerWorld and has already received incredible support from the community. Over 1,000 backers in just a few days!
I'm actively gathering feedback on:
- Which sensors are most important to you?
- Would you prefer a smaller enclosure (no formaldehyde sensor)?
- Are there other air quality metrics you'd like to see?
- What Home Assistant automations would you build with this data?
Feel free to drop questions or suggestions in the comments. This is a community-driven project, and your input directly shapes future development.
Resources
- GitHub: github.com/21cncstudio/project_aura
- MakerWorld Campaign: https://makerworld.com/en/crowdfunding/159-project-aura-make-the-invisible-visible
- Live Demo Video:
Stay tuned!
— Volodymyr Papush
Project Aura — Open-Source ESP32 Air Quality
Professional air quality monitor with Sensirion sensors, 4.3" touch display, and local Home Assistant integration. No soldering required.