Close
0%
0%

PAL 8000 - Room Air Quality Meter

A Talking Room Air Quality Meter that talks and looks like HAL 9000 from the space odyssey 2001

Similar projects worth following
0 followers
Meet PAL 8000, a personal room air quality bot that monitors your indoor air quality with a twist. The twist is that it is inspired by HAL 9000, the iconic AI from Stanley Kubrick's 2001: A Space Odyssey.
The whole idea came about when I rewatched 2001: A Space Odyssey recently and thought, I need a HAL 9000 in my workspace. At the time, I was already working on indoor air quality meters, and that's when it clicked: why not combine both into an assistant-like device that tells you what the air quality in your room is?

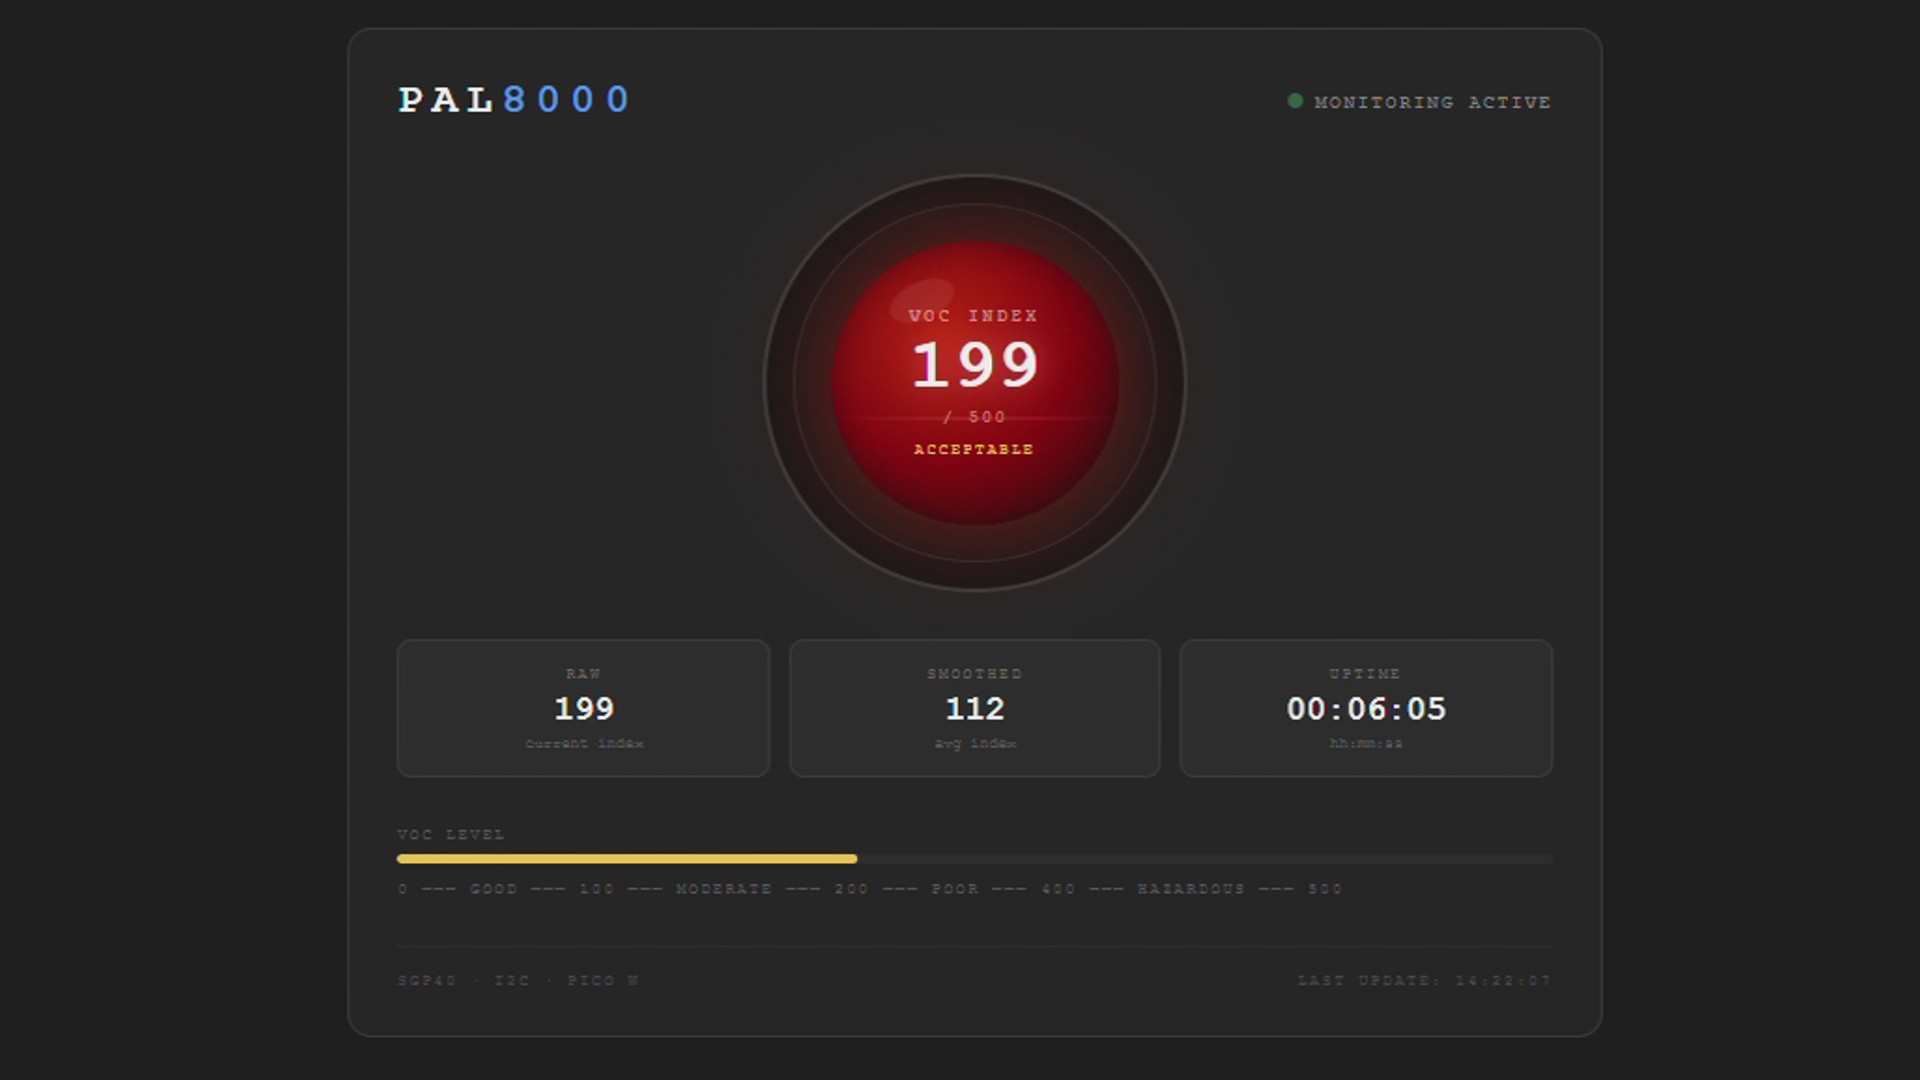
One approach was to build an actual AI model, train it on TVOC readings, and have it classify good or bad air quality intelligently. That could work, but it was tedious, and honestly, I'm a lazy guy.

So I went with the simpler route: a Raspberry Pi Pico 2 paired with a DFRobot DFPlayer Mini module, which plays audio files stored on a microSD card.

These are pre-recorded clips that I made myself using Elevenlabs, One of these clips is an introduction clip that responds like, "I'm PAL 8000, your environmental monitoring system." I have also added a few audio clips that respond to increasing VOC Levels that say "Warning, air quality has degraded" and a few eerie lines like "I'm watching" to give it that sinister HAL 9000 personality.

The logic is straightforward: on startup, PAL 8000 plays an introduction clip. It then continuously reads the VOC index from the sensor. If the reading falls between 0 and 100, it plays the "clean air" clip; as readings rise, it switches to progressively more urgent clips. So it behaves like an AI, but it is completely artificial, and definitely not intelligent.

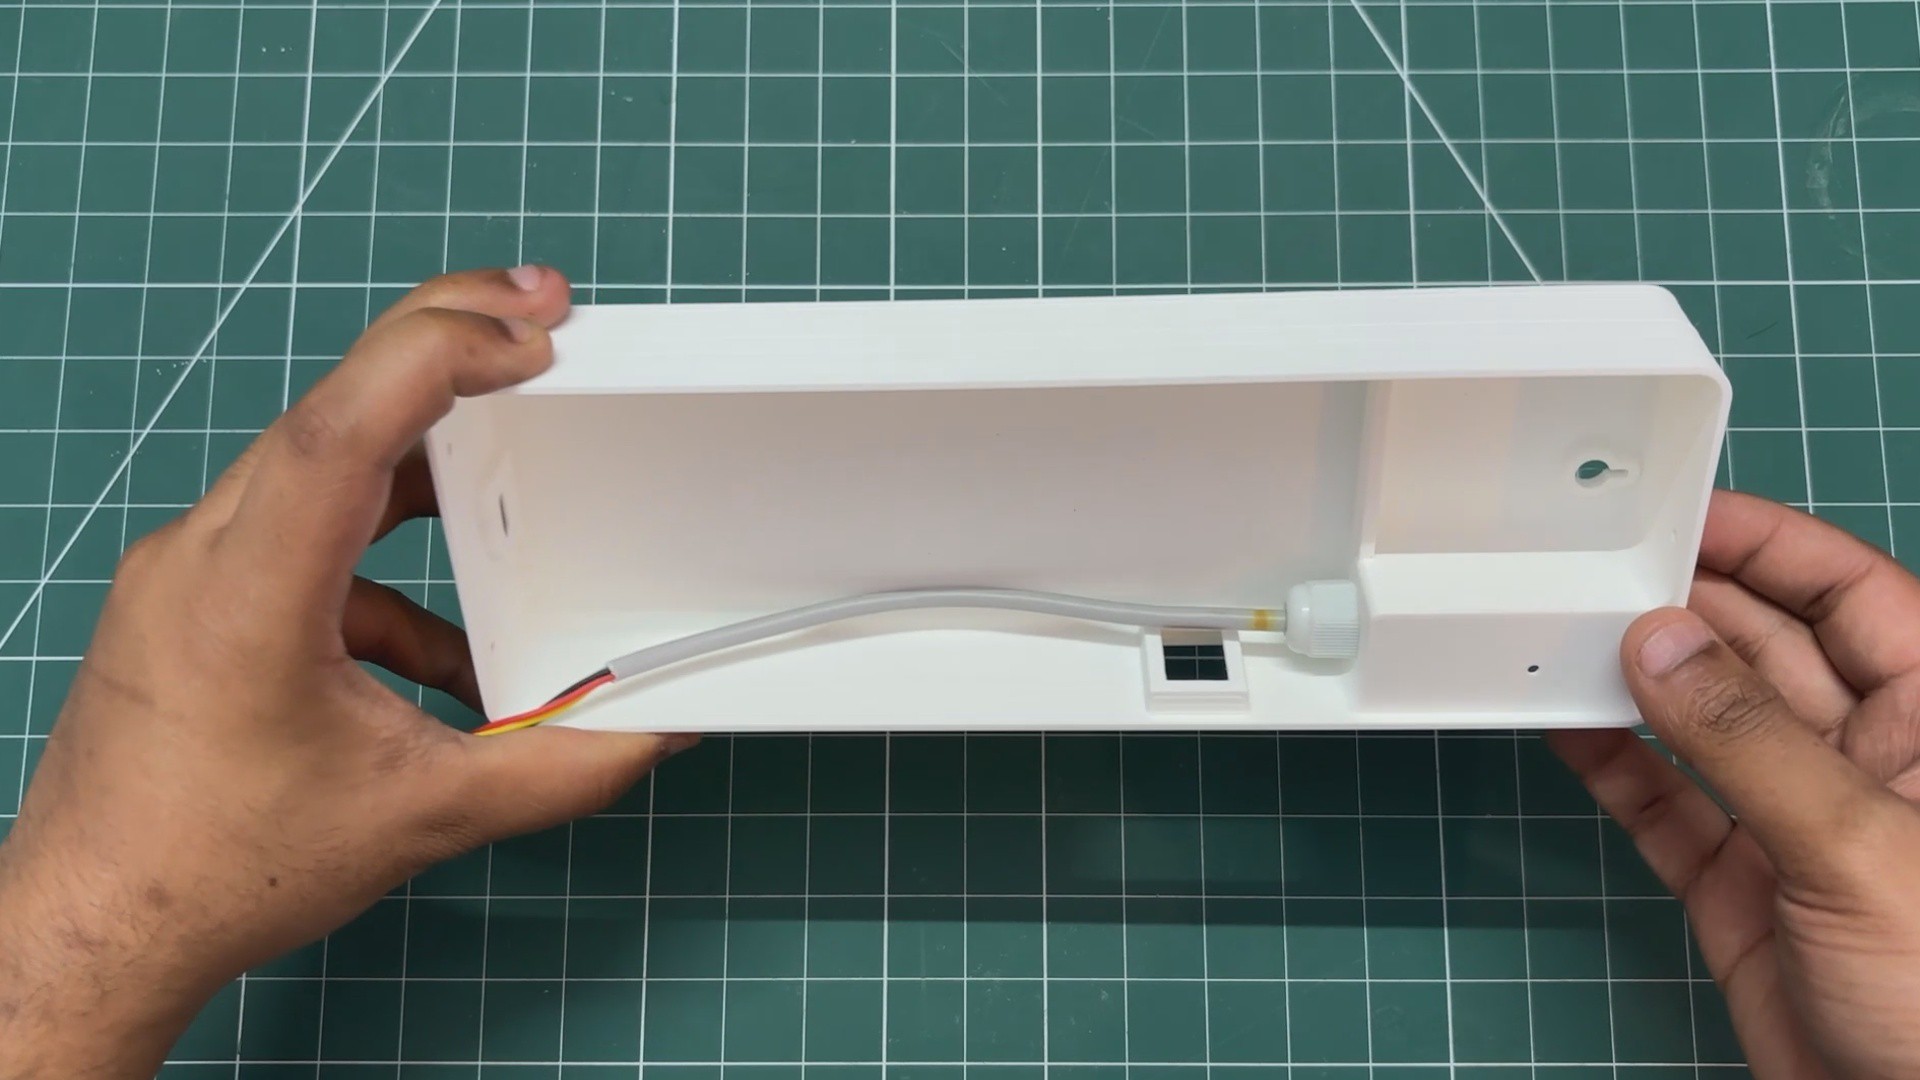
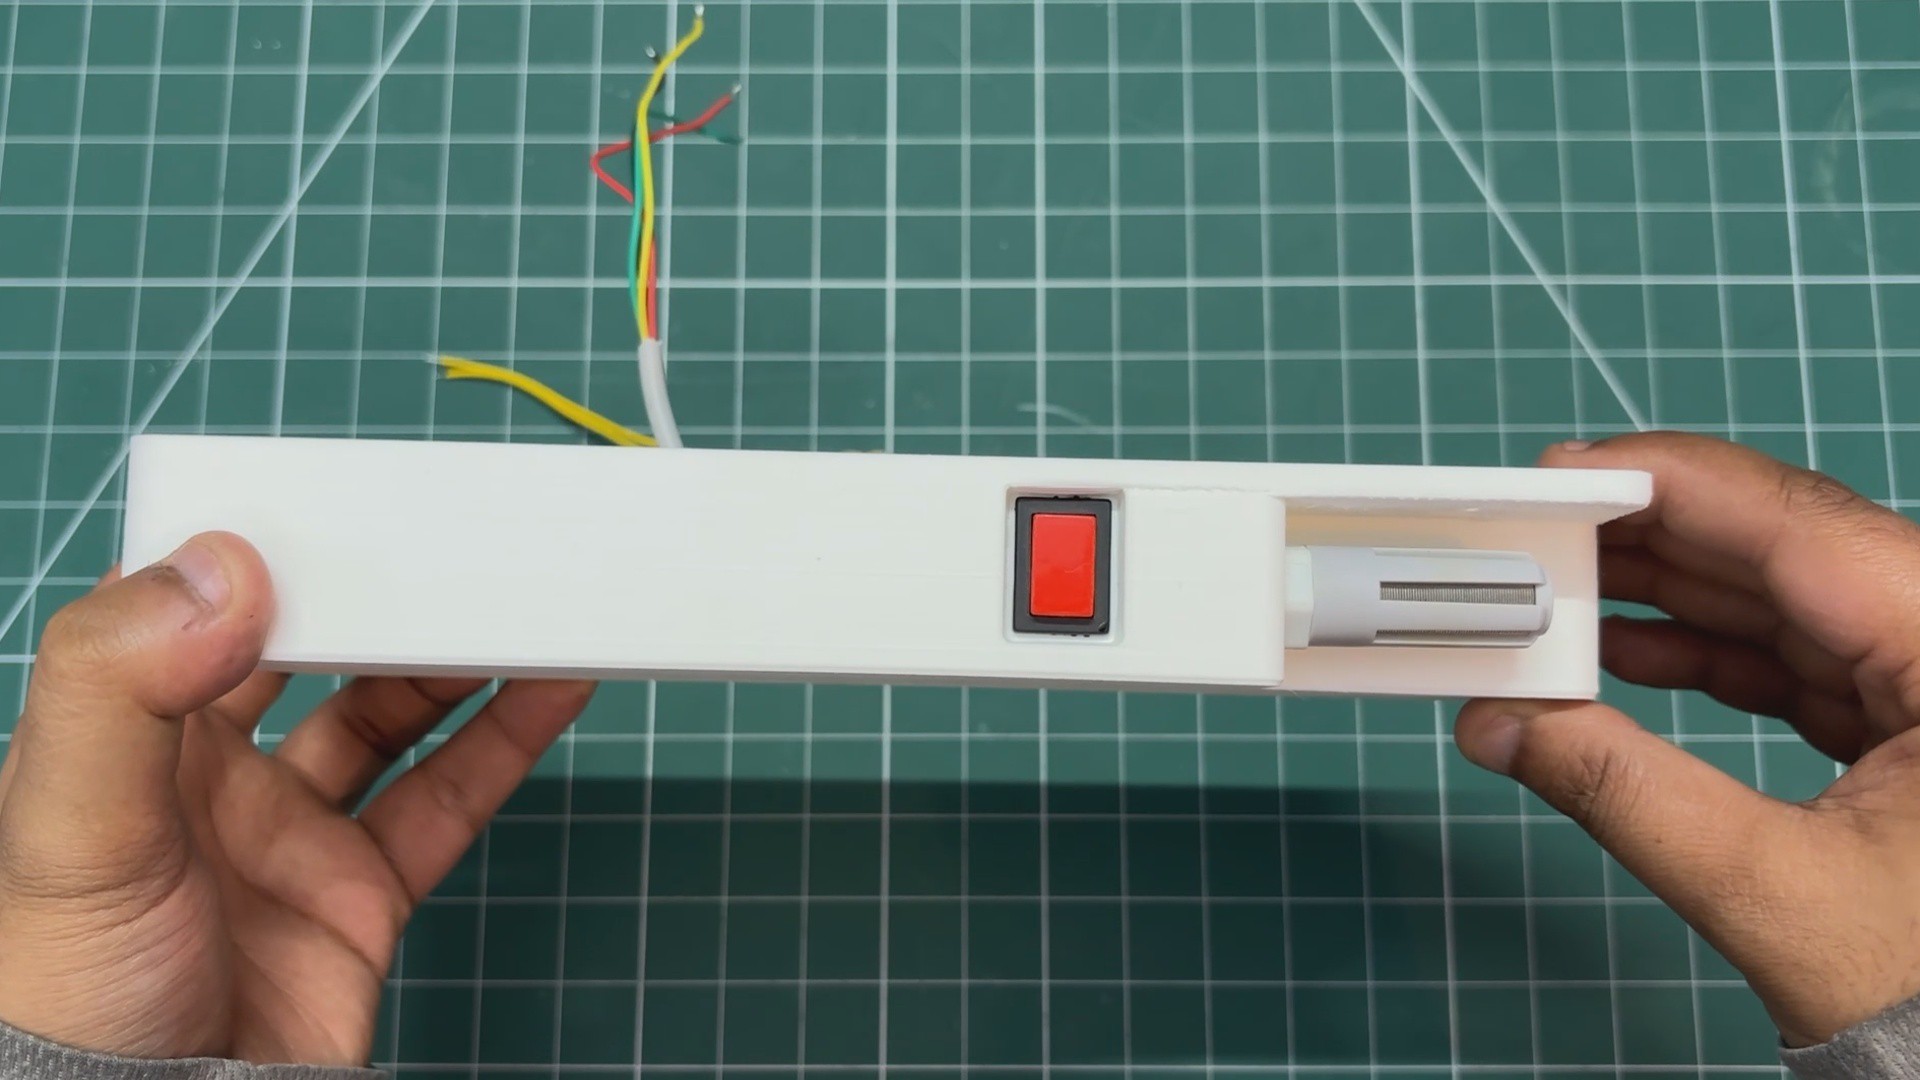
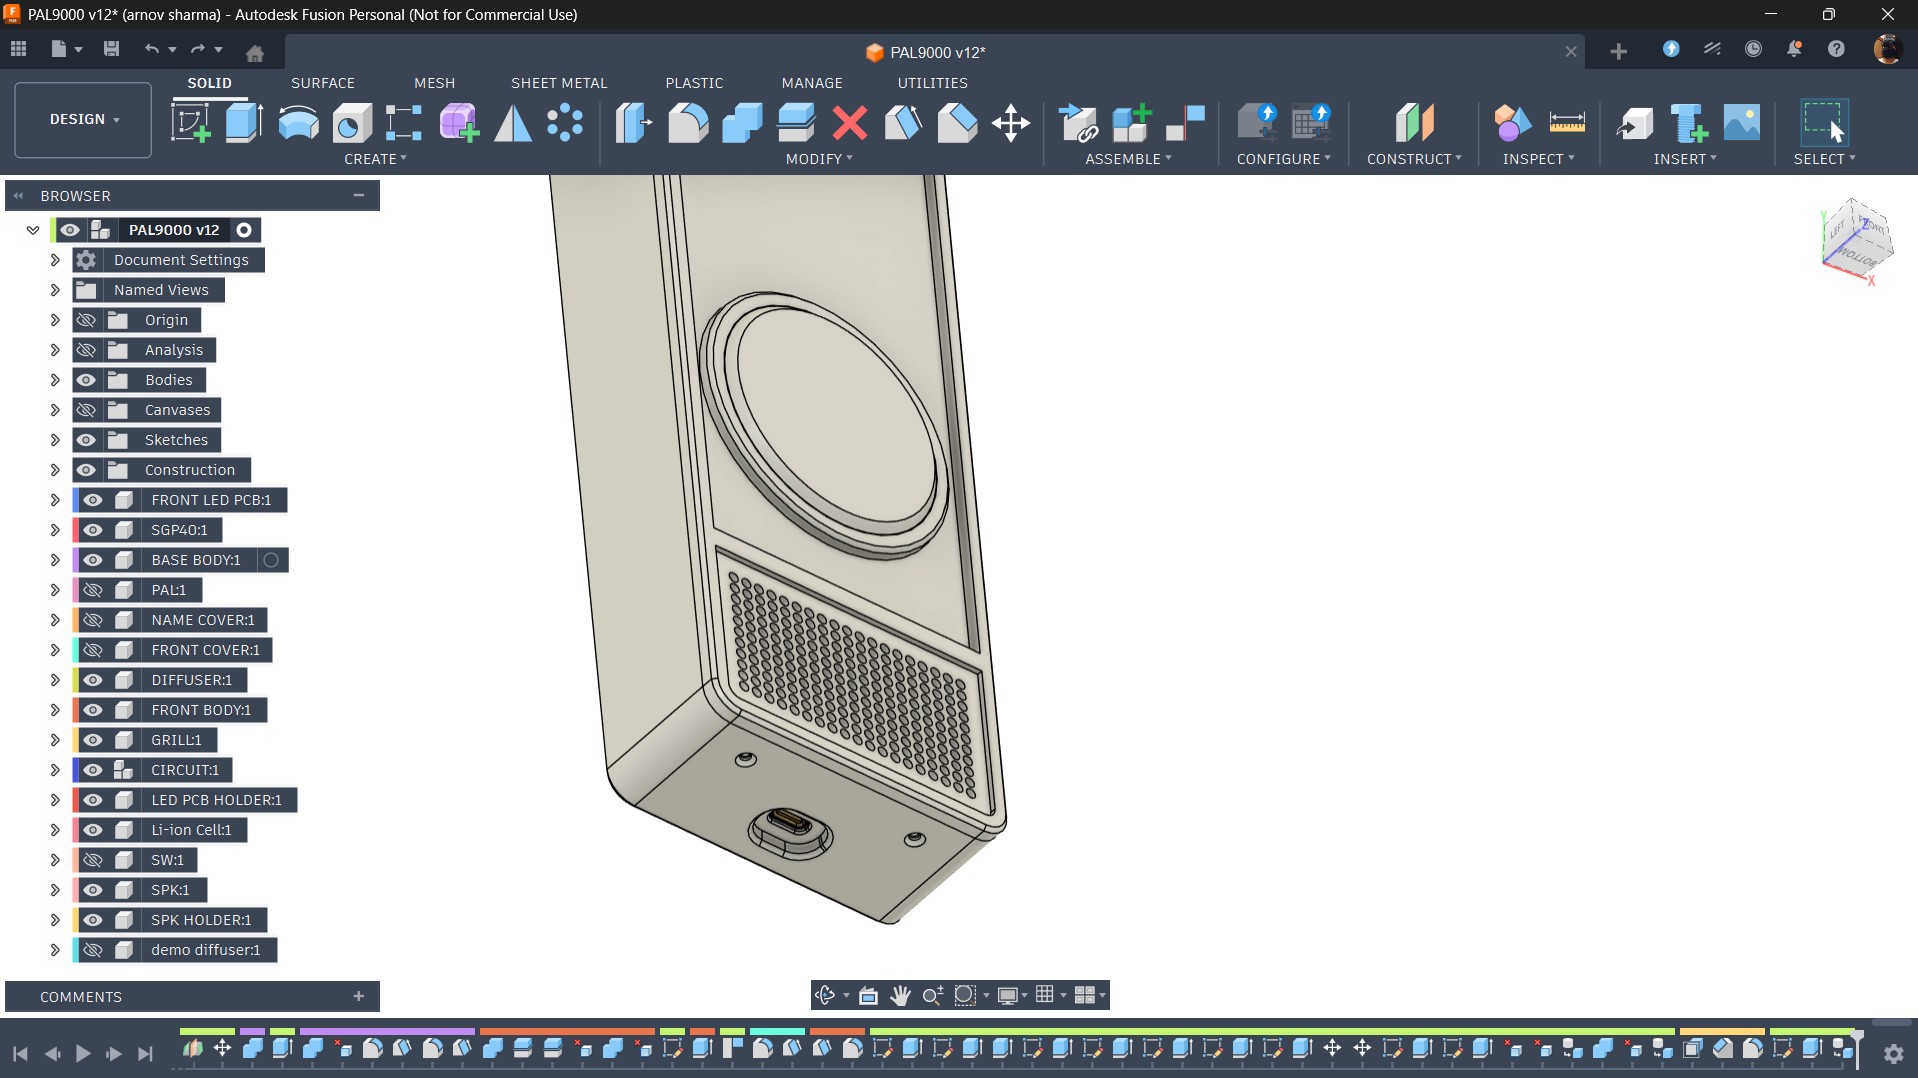
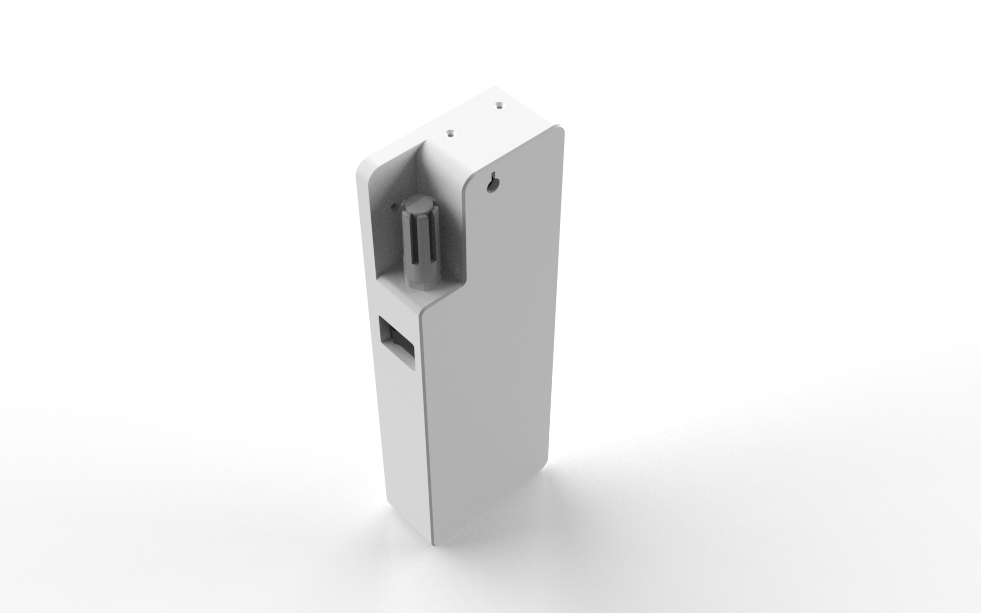
For air quality sensing, I used the Sensirion SGP40, a dedicated indoor VOC (Volatile Organic Compound) sensor. It outputs a VOC index, a value from 0 to 500, where lower is cleaner air. The sensor communicates over I2C and is mounted on the back of the PAL 8000 enclosure.

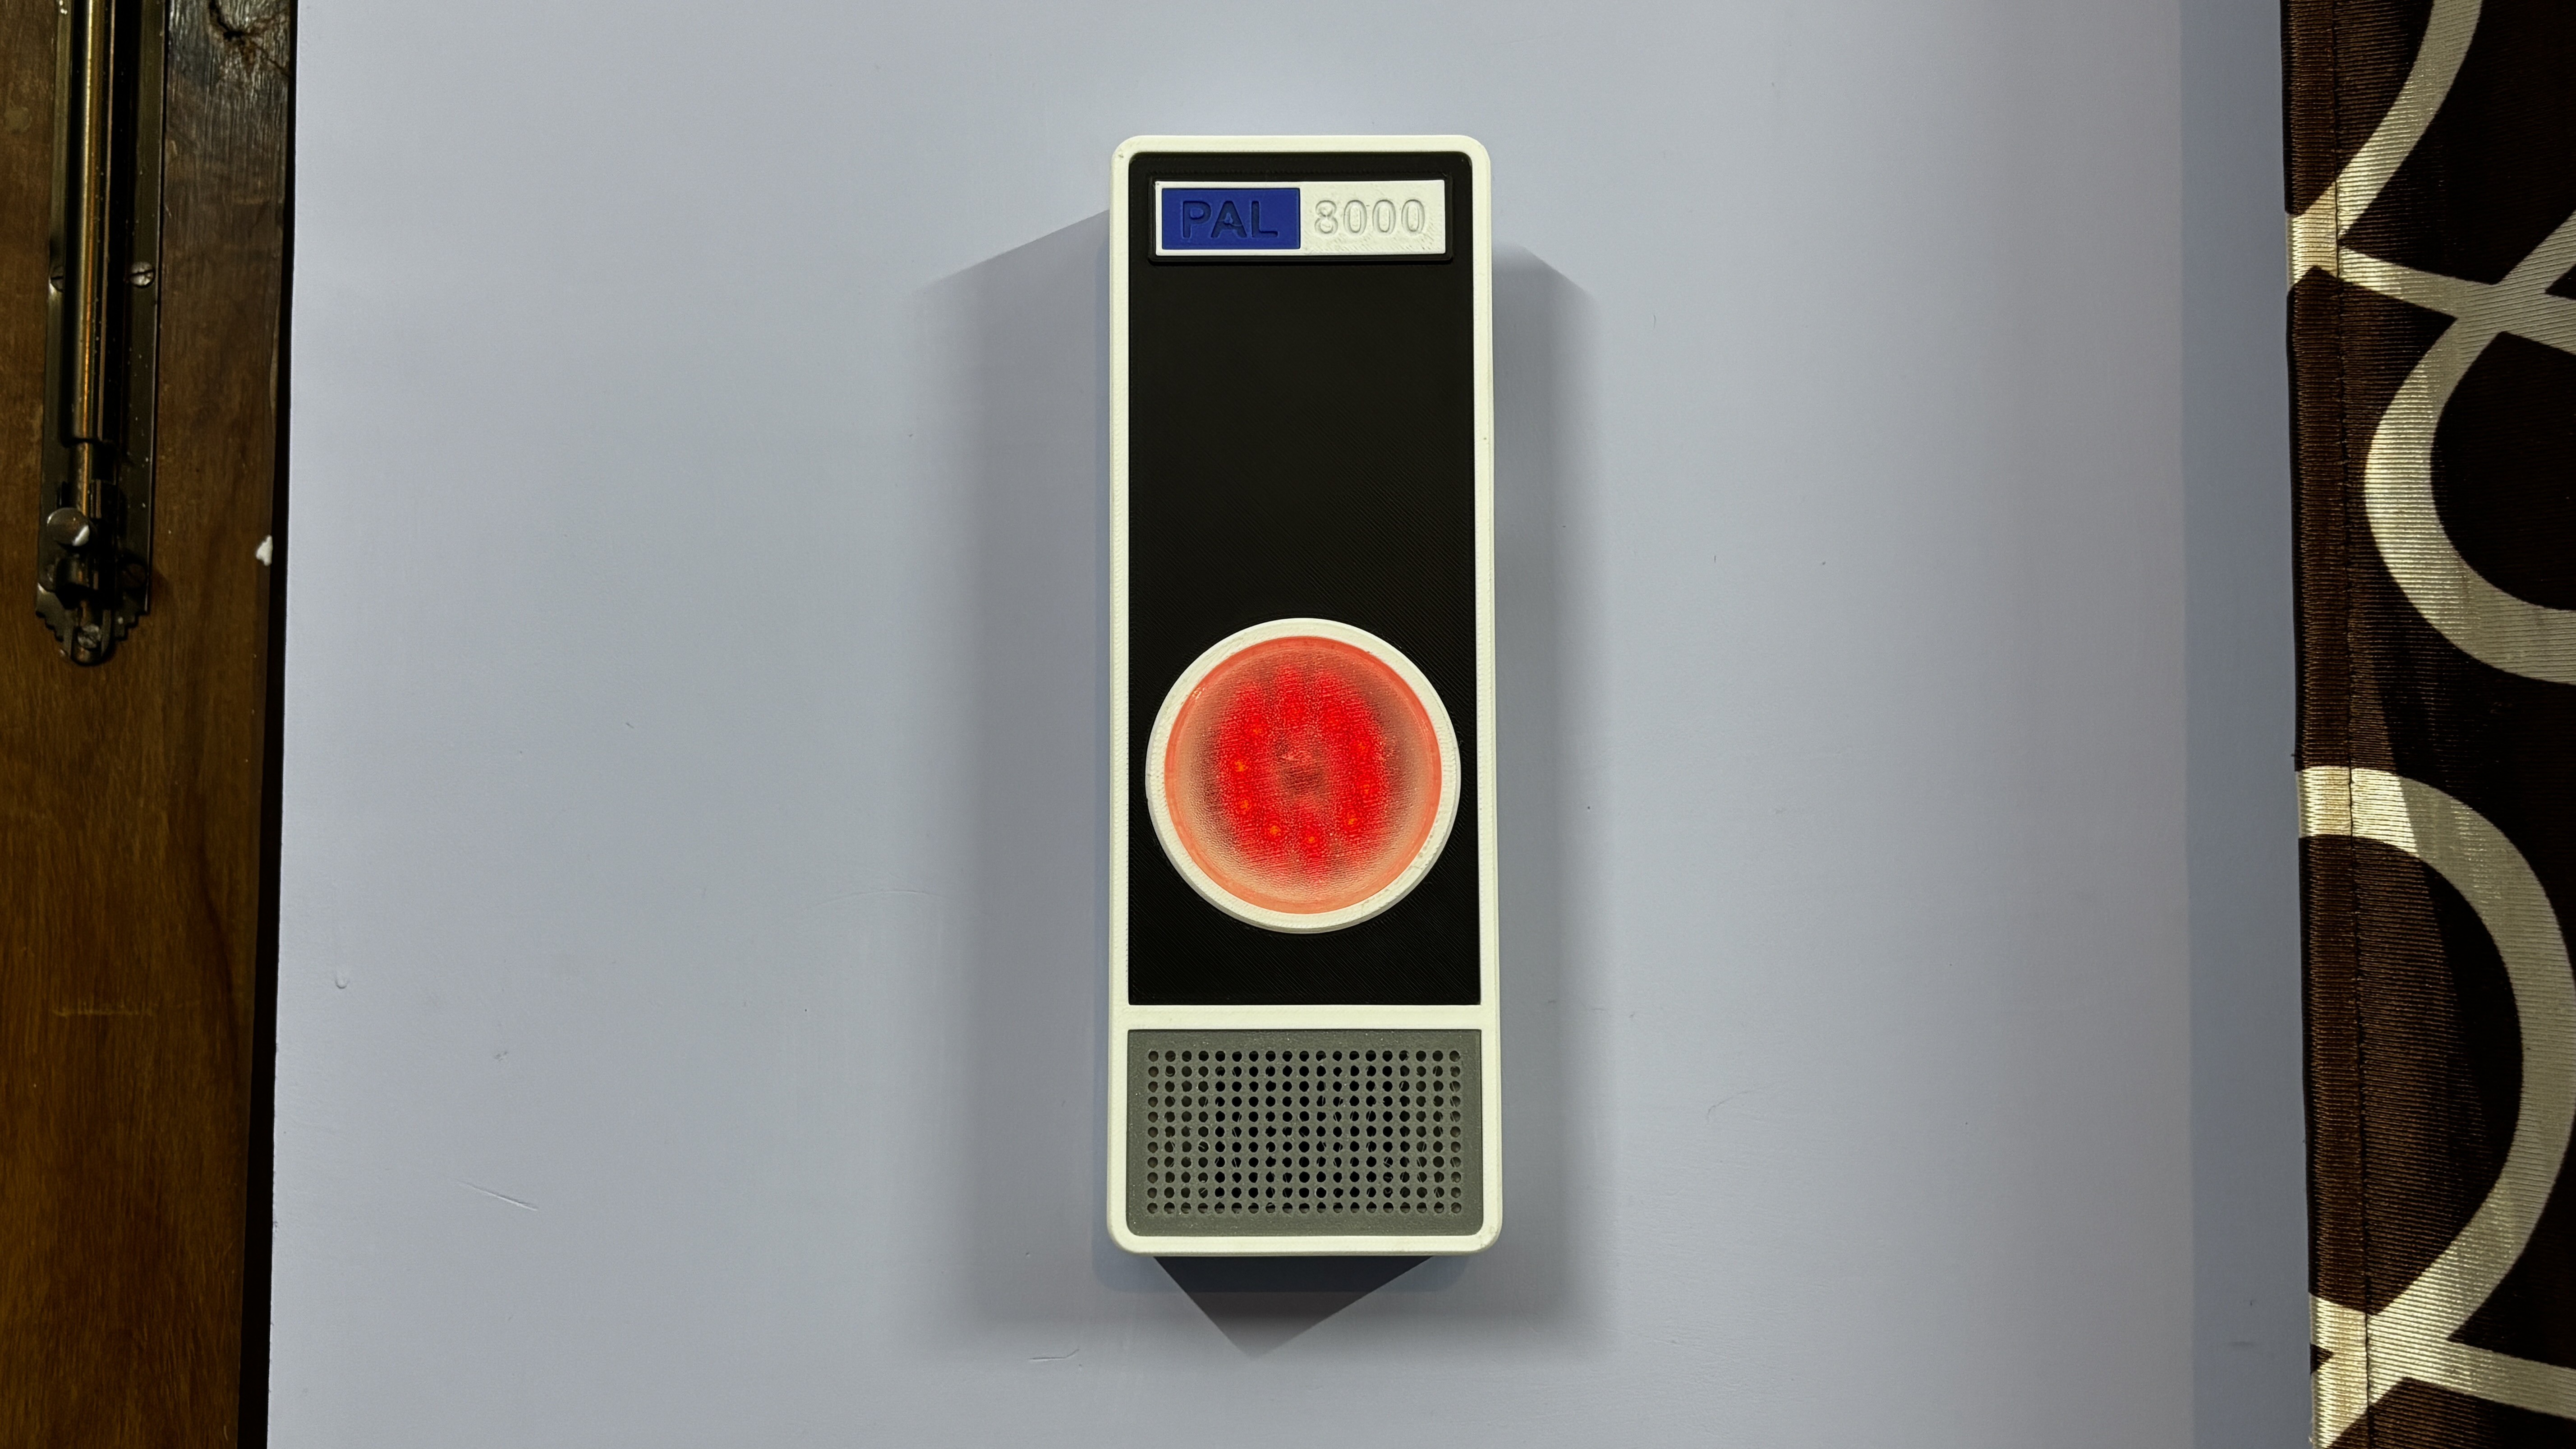
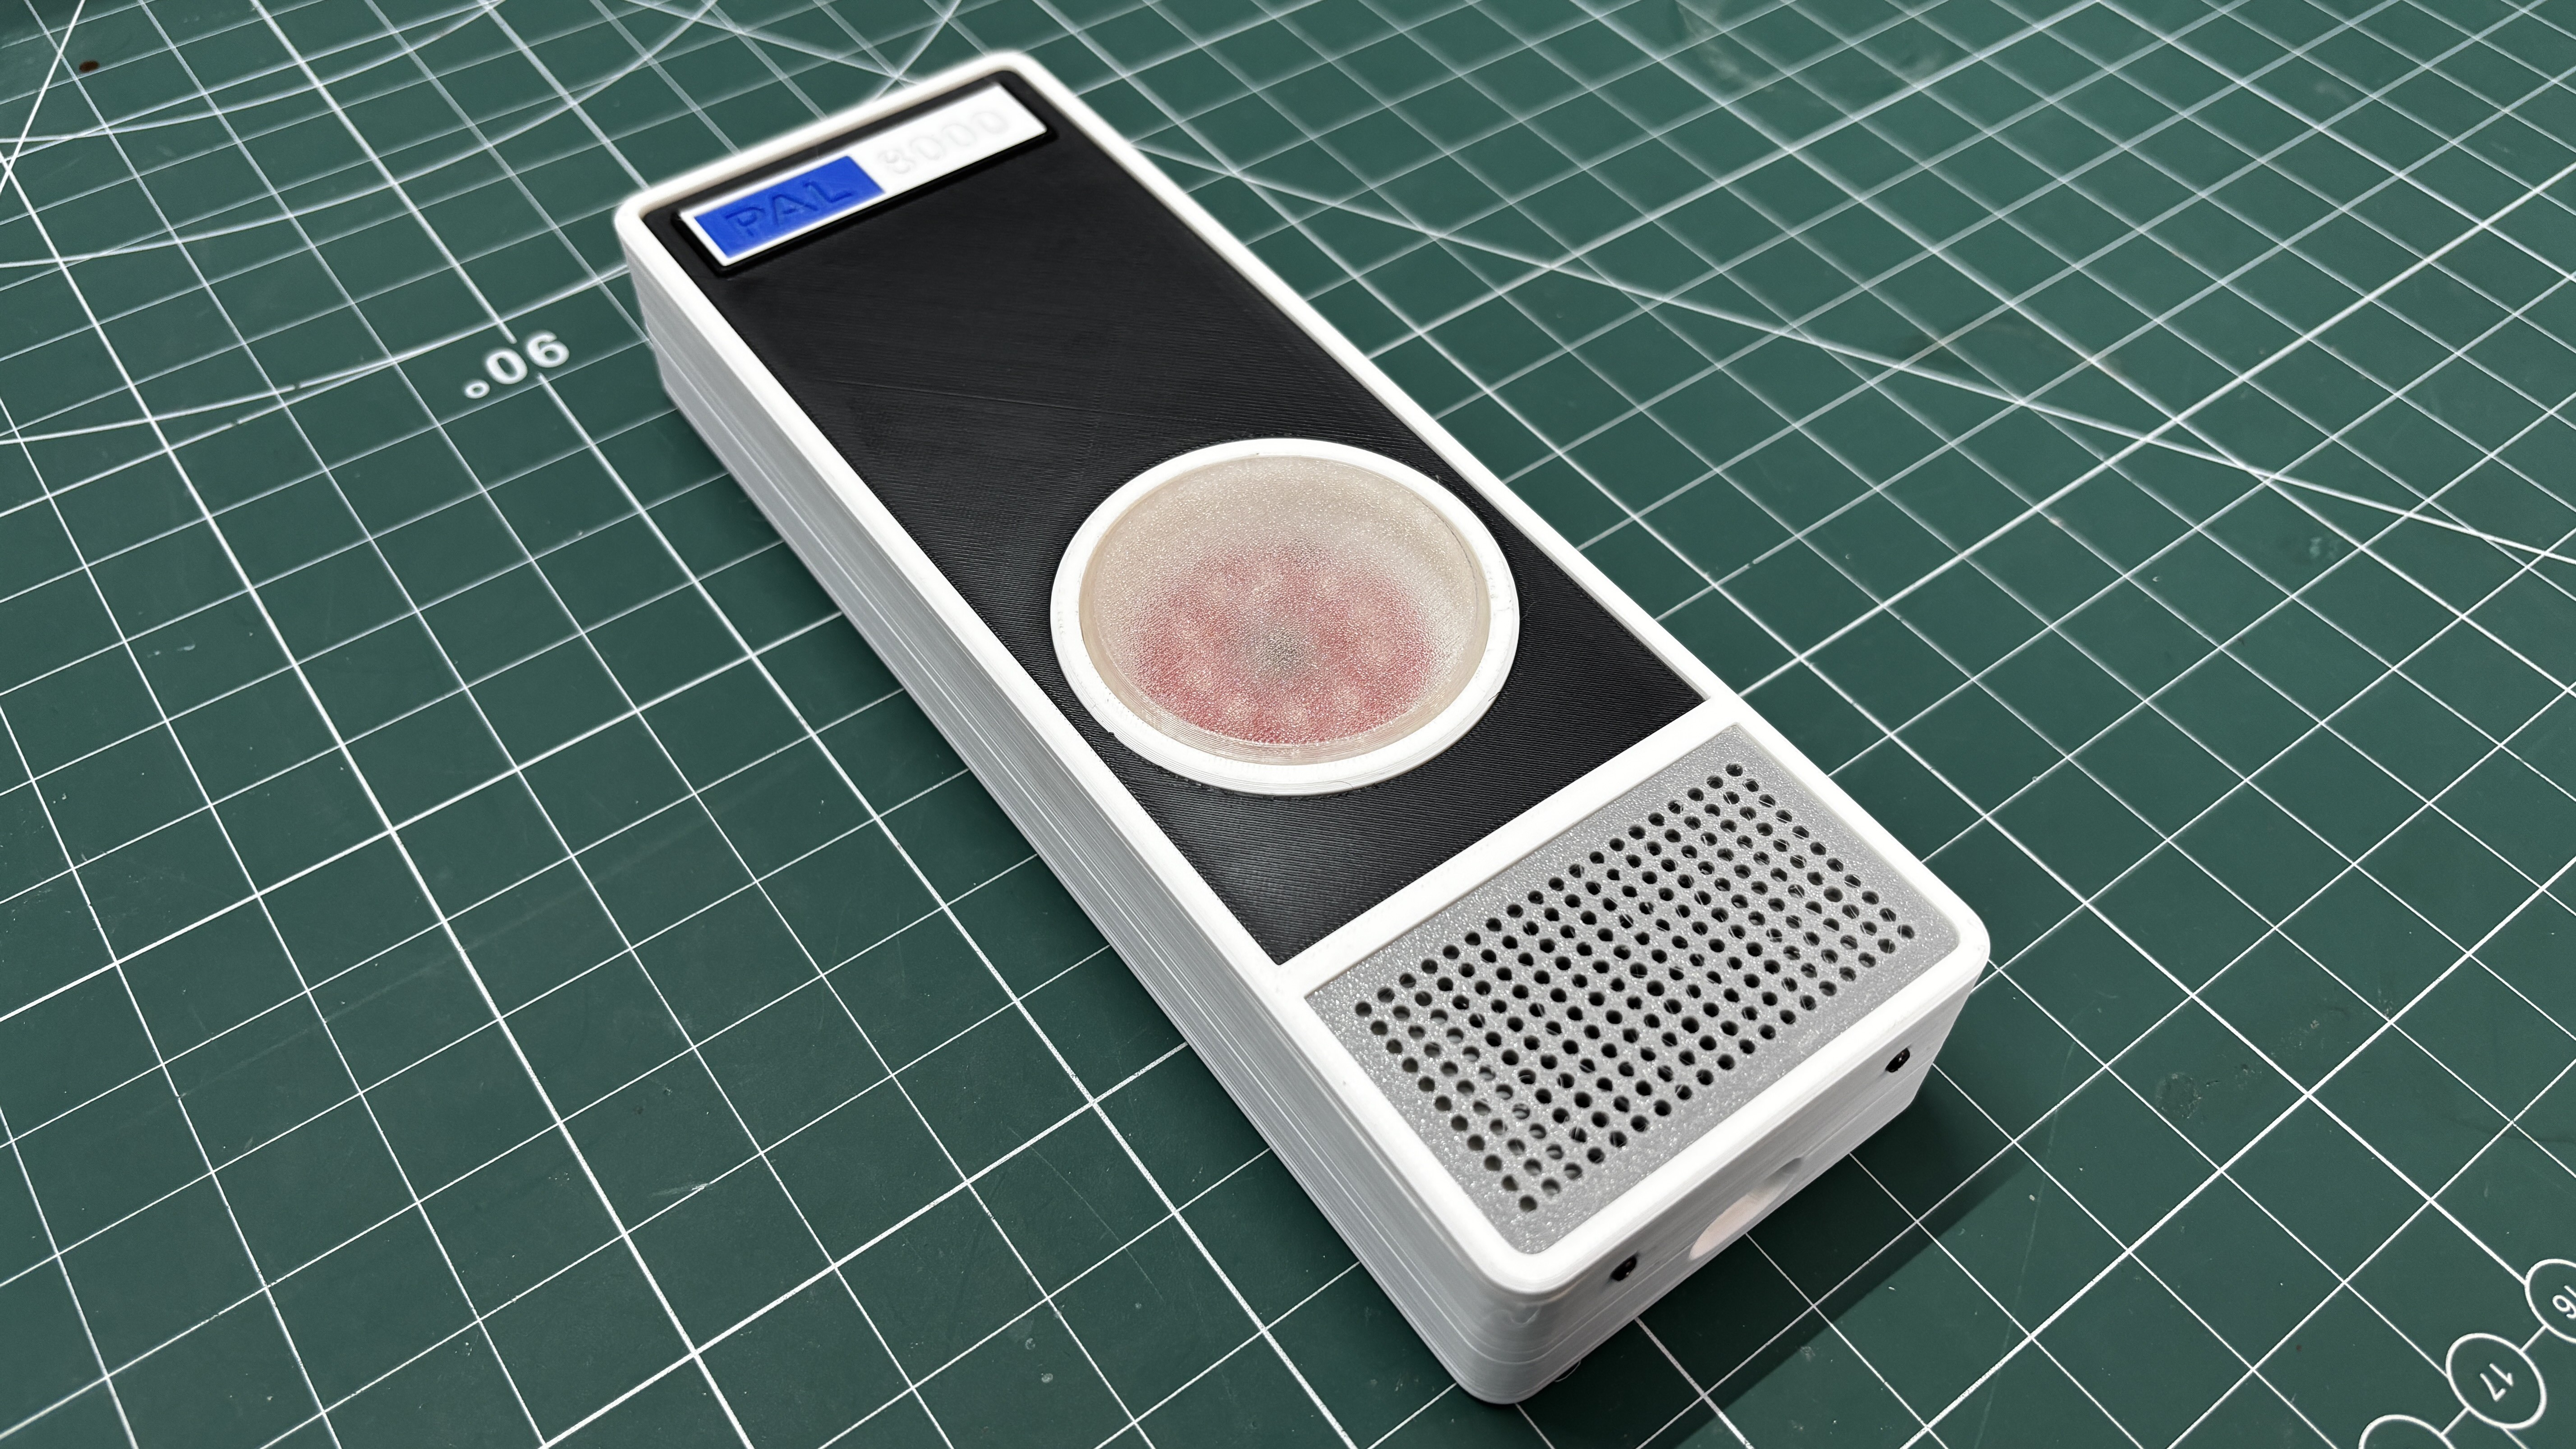
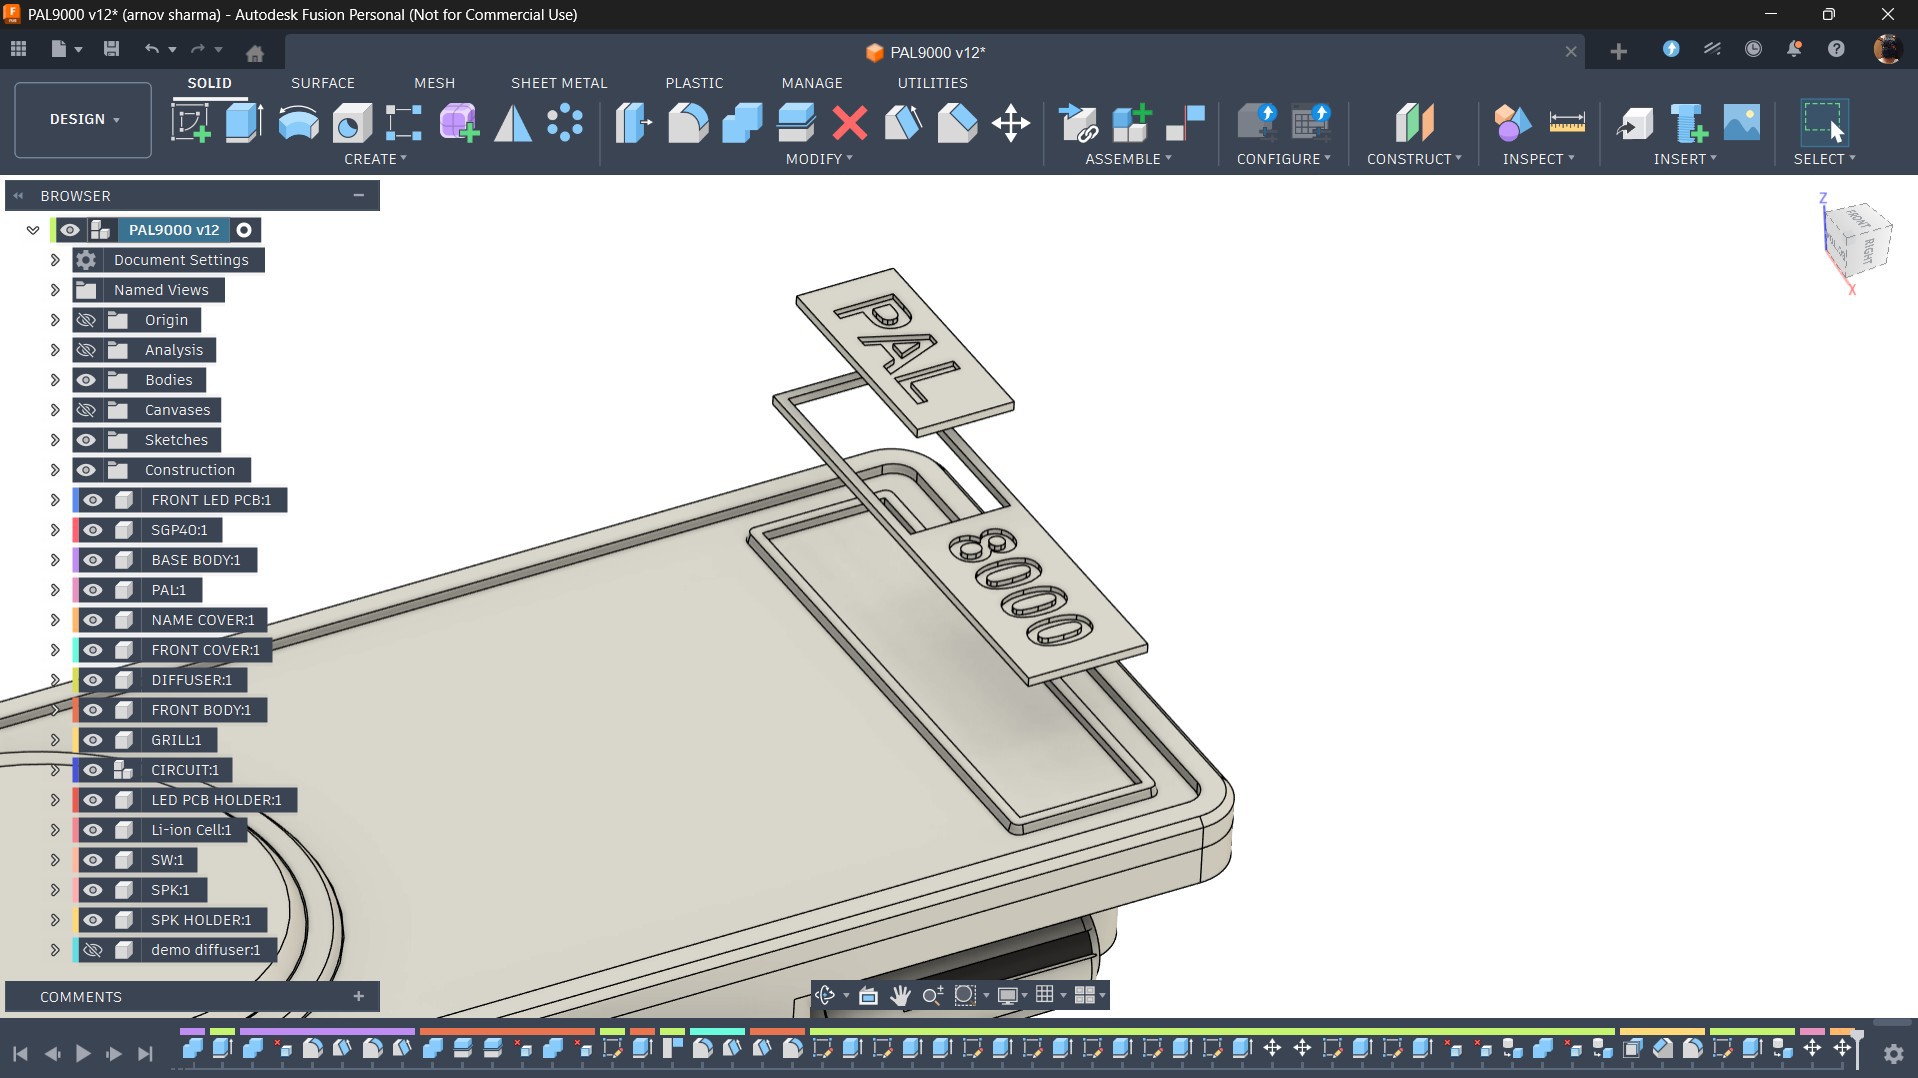
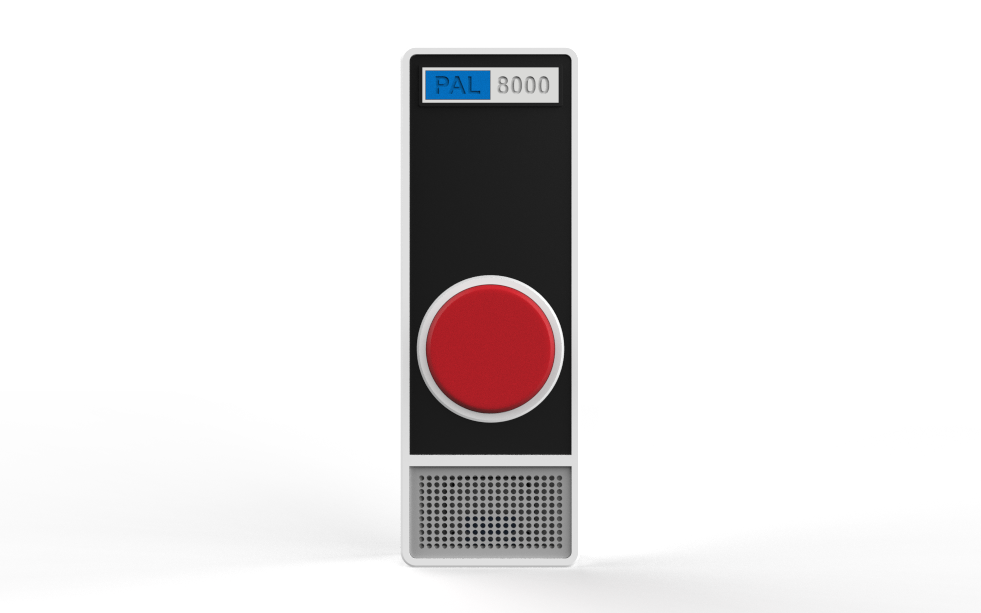
I also designed an enclosure that closely resembles HAL 9000's iconic circular eye design. Mine differs in one way: HAL's enclosure was metallic silver, while mine is white.

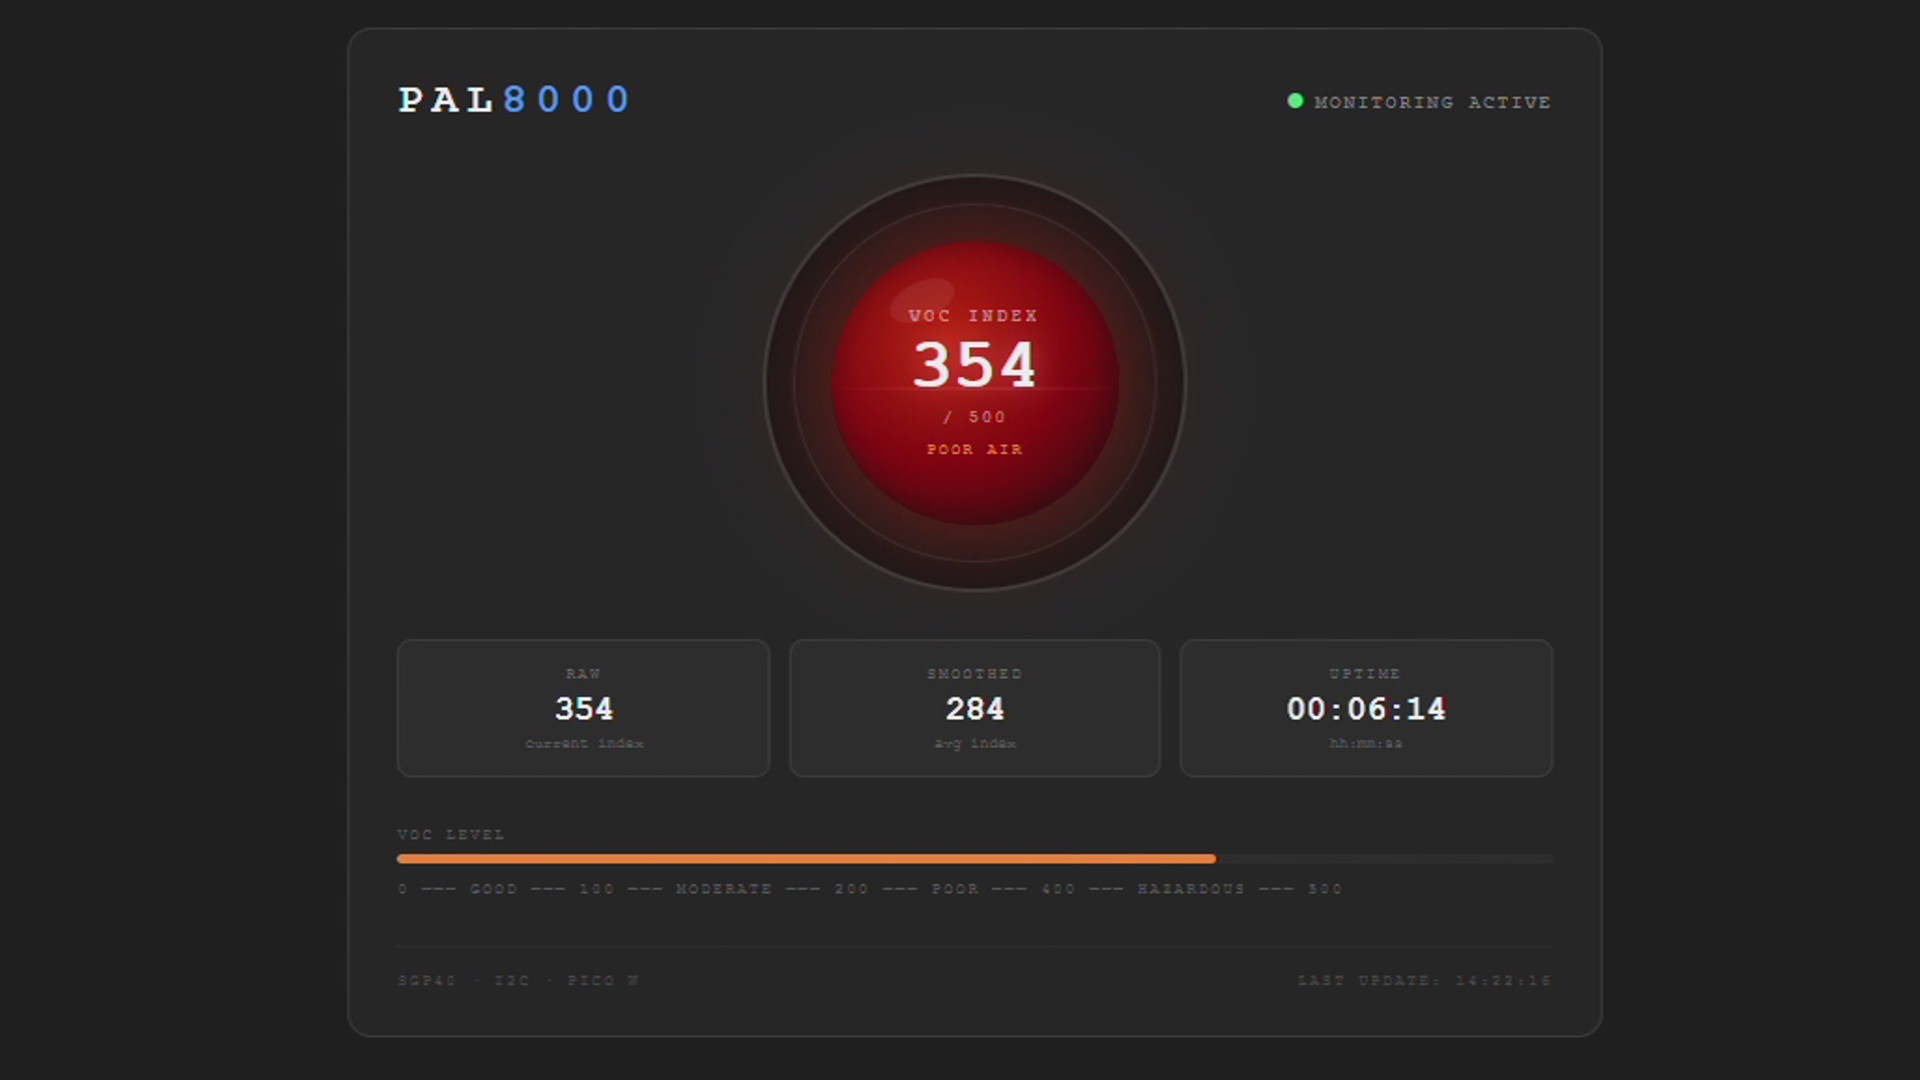
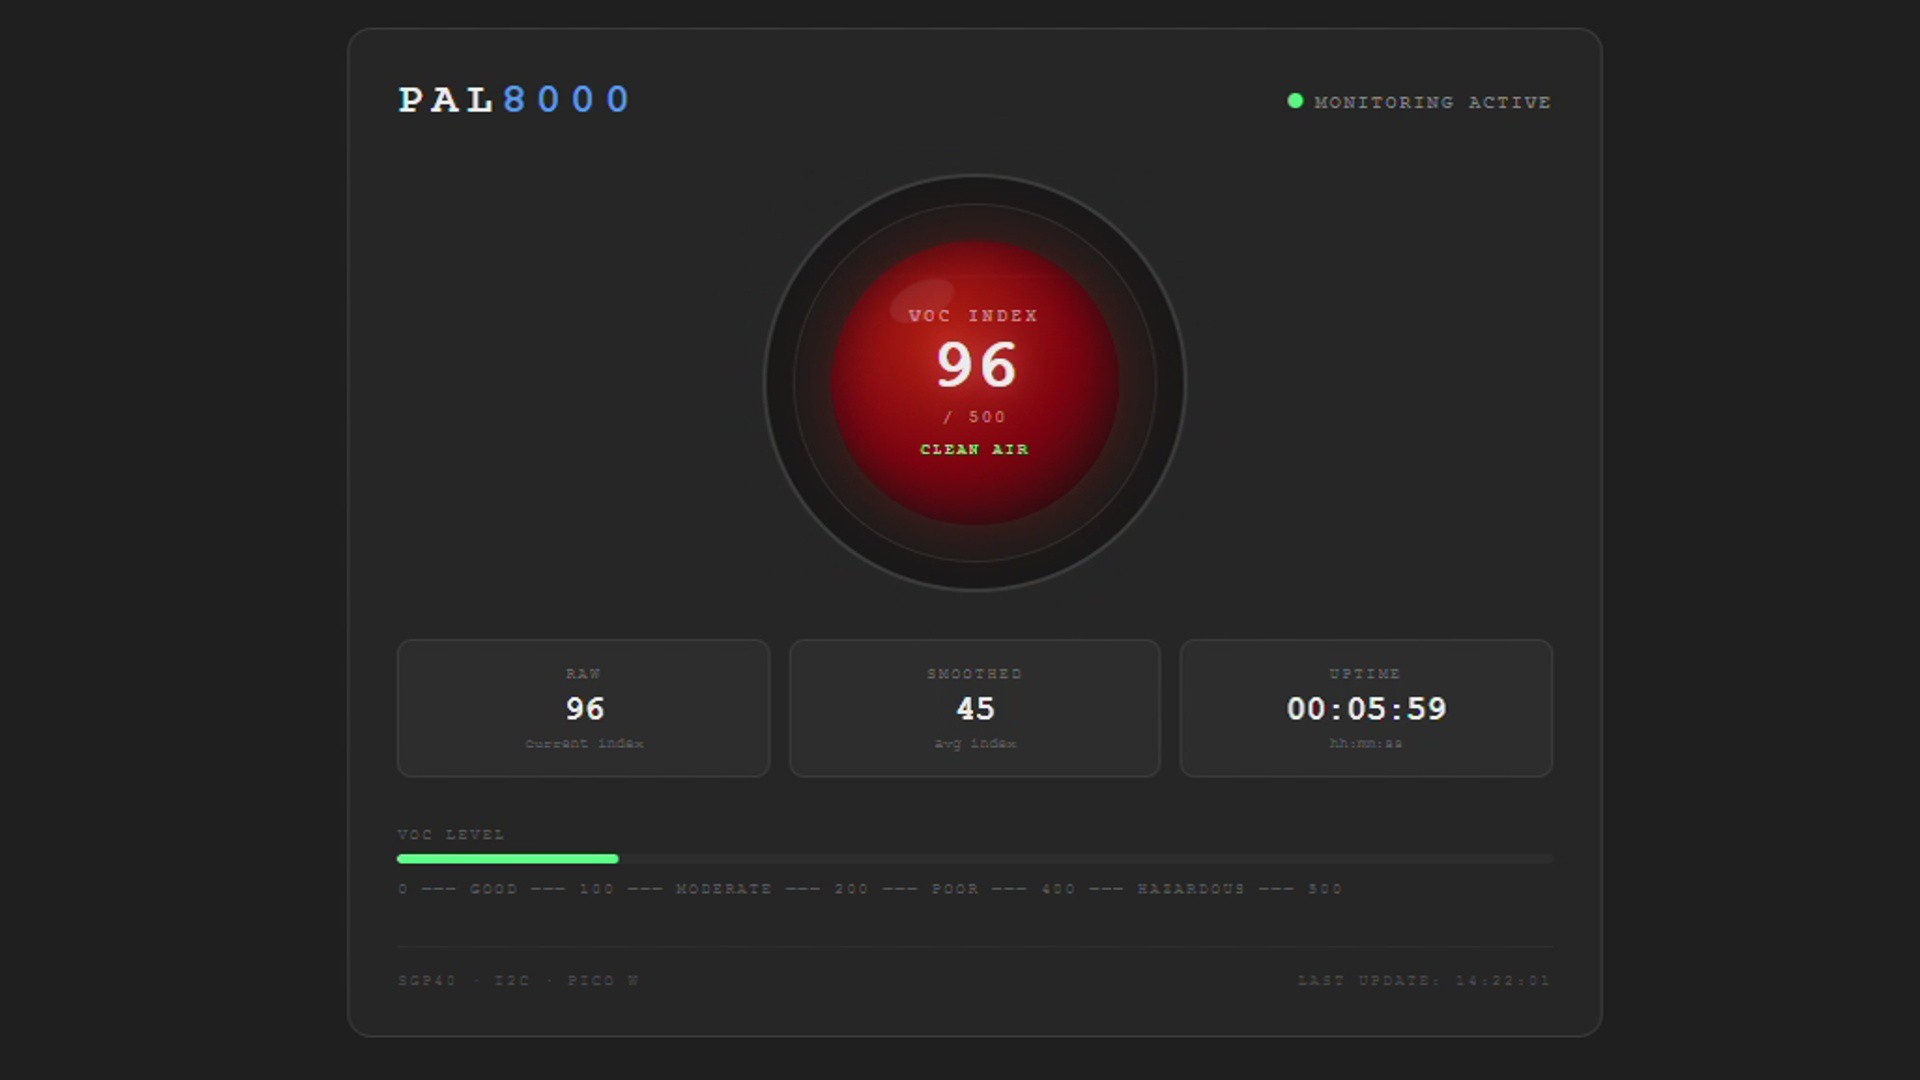
Because we are using a Raspberry Pi Pico W, real-time VOC data can be accessed through a locally hosted web app, letting you monitor your room's air quality directly from a browser on any device on the same network.

This article covers the entire build process from start to finish, so let's get started.

CONCEPT

As stated earlier, the whole idea behind this project came after rewatching 2001: A Space Odyssey, combined with the fact that I was already working on an air quality project. I thought, why not build a HAL 9000-like device that looks and sounds like him while also providing real feedback on air quality?

For those who don't know, HAL 9000 is an artificial intelligence and the onboard computer of the spaceship Discovery One in 2001: A Space Odyssey. He is the hidden main antagonist of the film. HAL is capable of many functions—speech, speech recognition, facial recognition, lip-reading, interpreting and expressing emotions, and even playing chess, all while maintaining every system aboard Discovery. HAL speaks in a soothing male voice, always calm, always measured, which somehow makes him sound even more unsettling.

My goal with PAL 8000 is to recreate that eerie, eerily calm feeling, not a direct copy but something that carries the same atmosphere.

Using a Raspberry Pi Pico 2 paired with a DFPlayer Mini module, along with audio clips I generated using ElevenLabs, I built PAL 8000 around a Sensirion SGP40 indoor air quality sensor. The SGP40 continuously measures VOC (Volatile Organic Compound) levels in the room and outputs a VOC Index value ranging from 0 to 500. Based on where that reading falls, PAL 8000 plays a corresponding audio clip; if the reading is between 0 and 100, it plays a clip indicating clean air; as readings climb higher, the responses become progressively more urgent, shifting from gentle observations to quiet warnings, all delivered in that same unsettling calm tone.

DESIGN

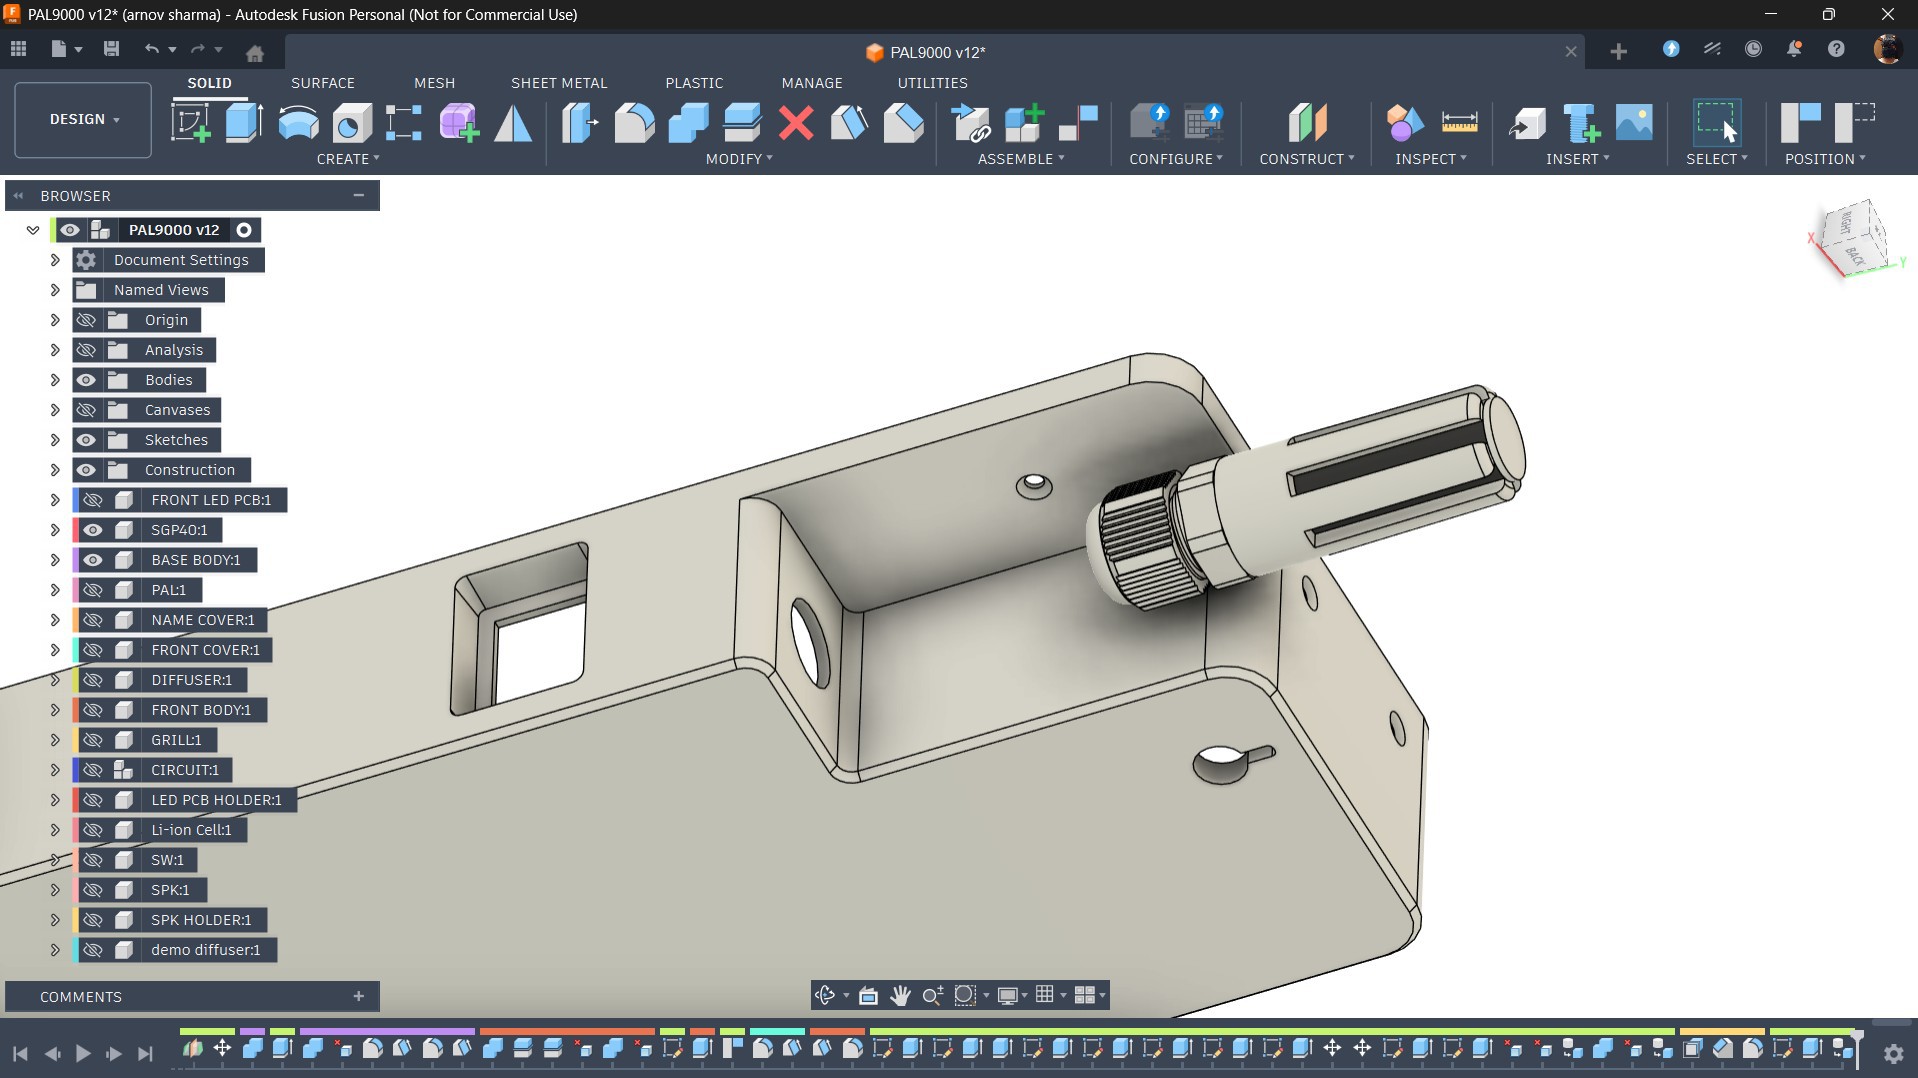
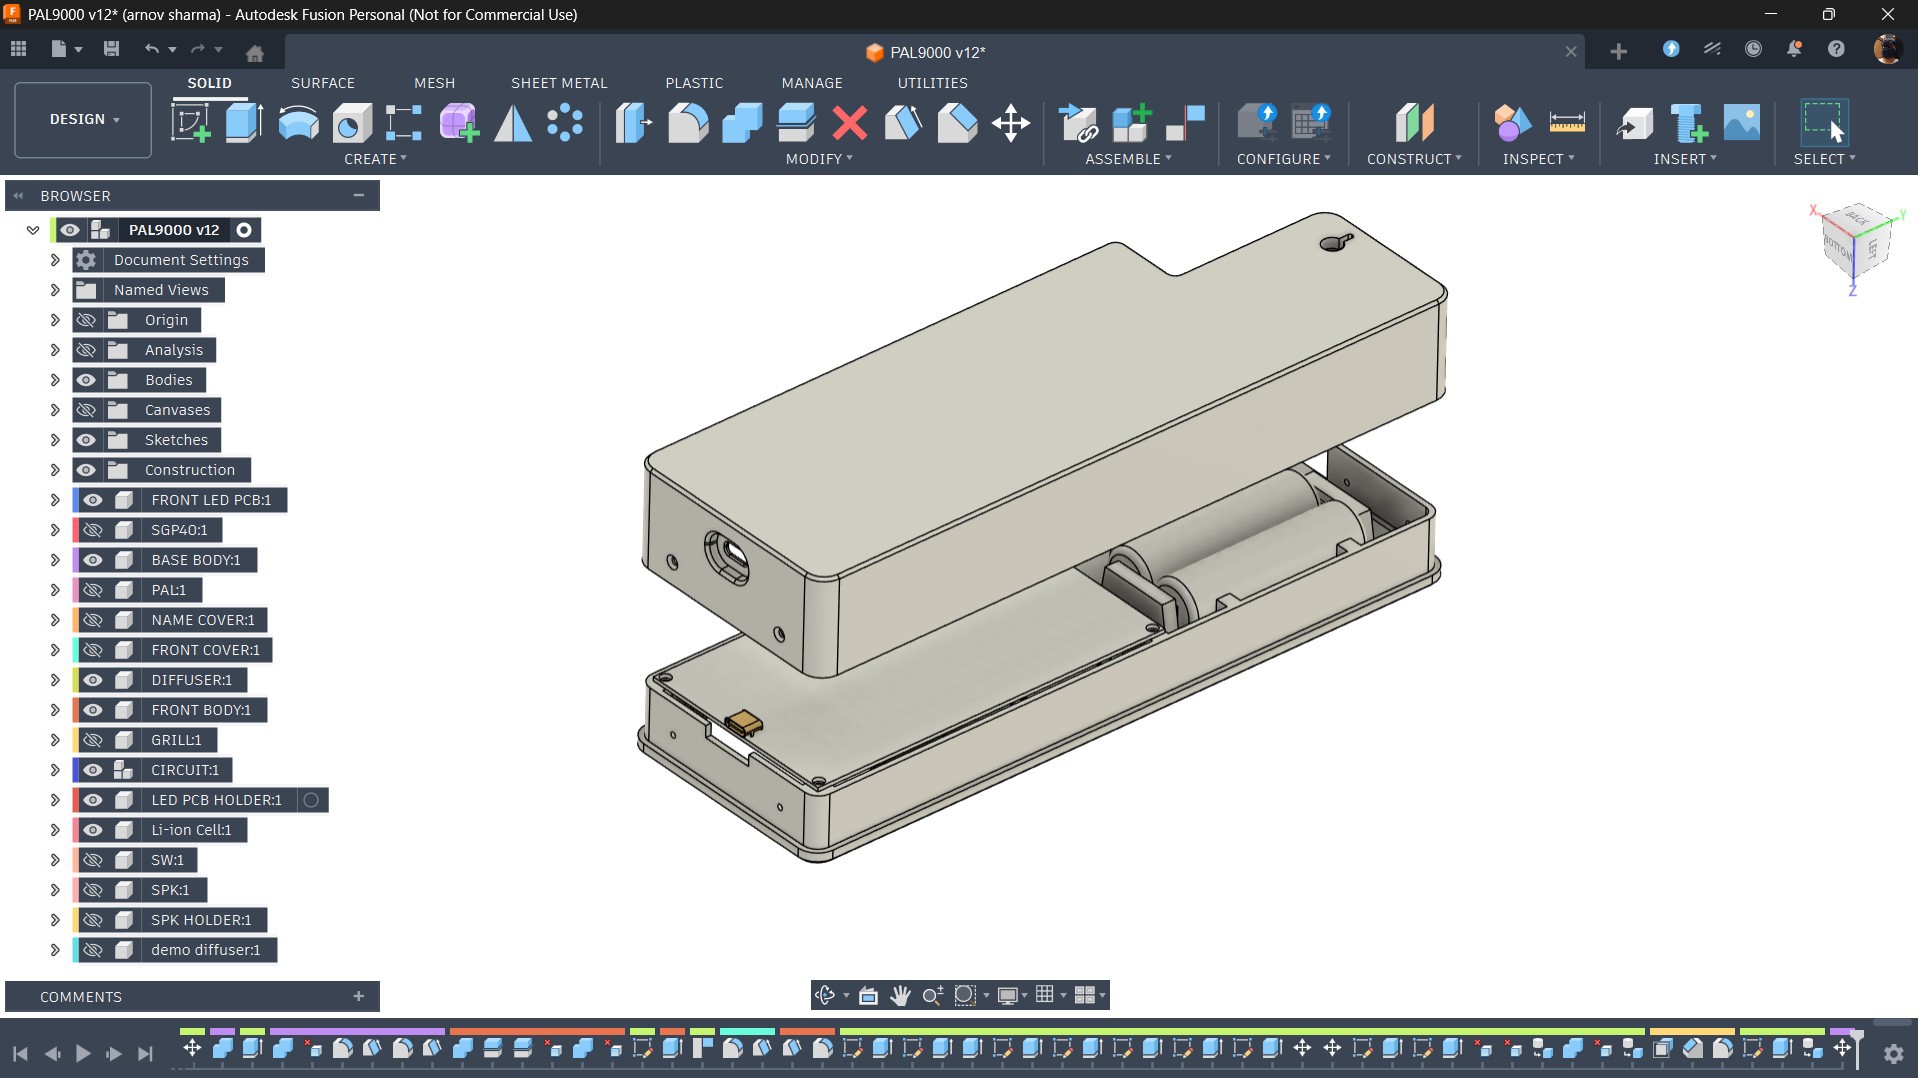
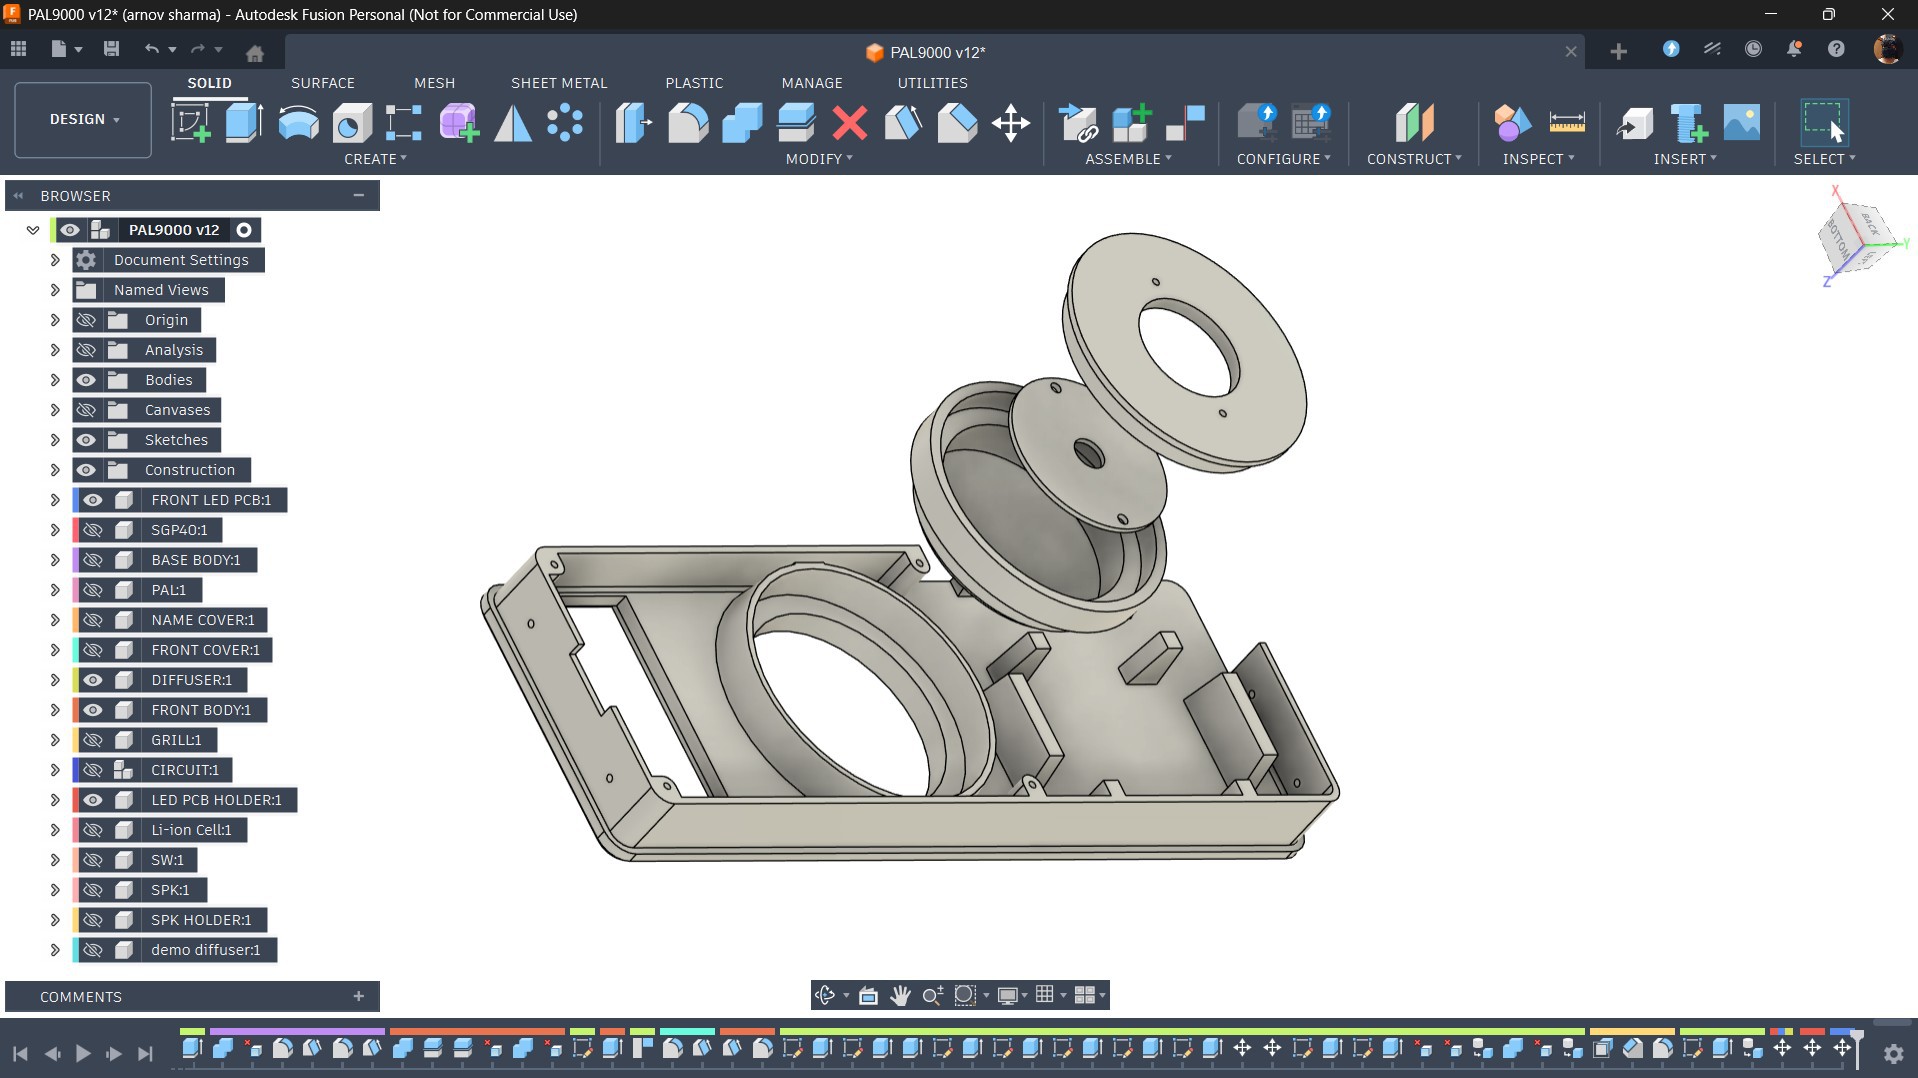
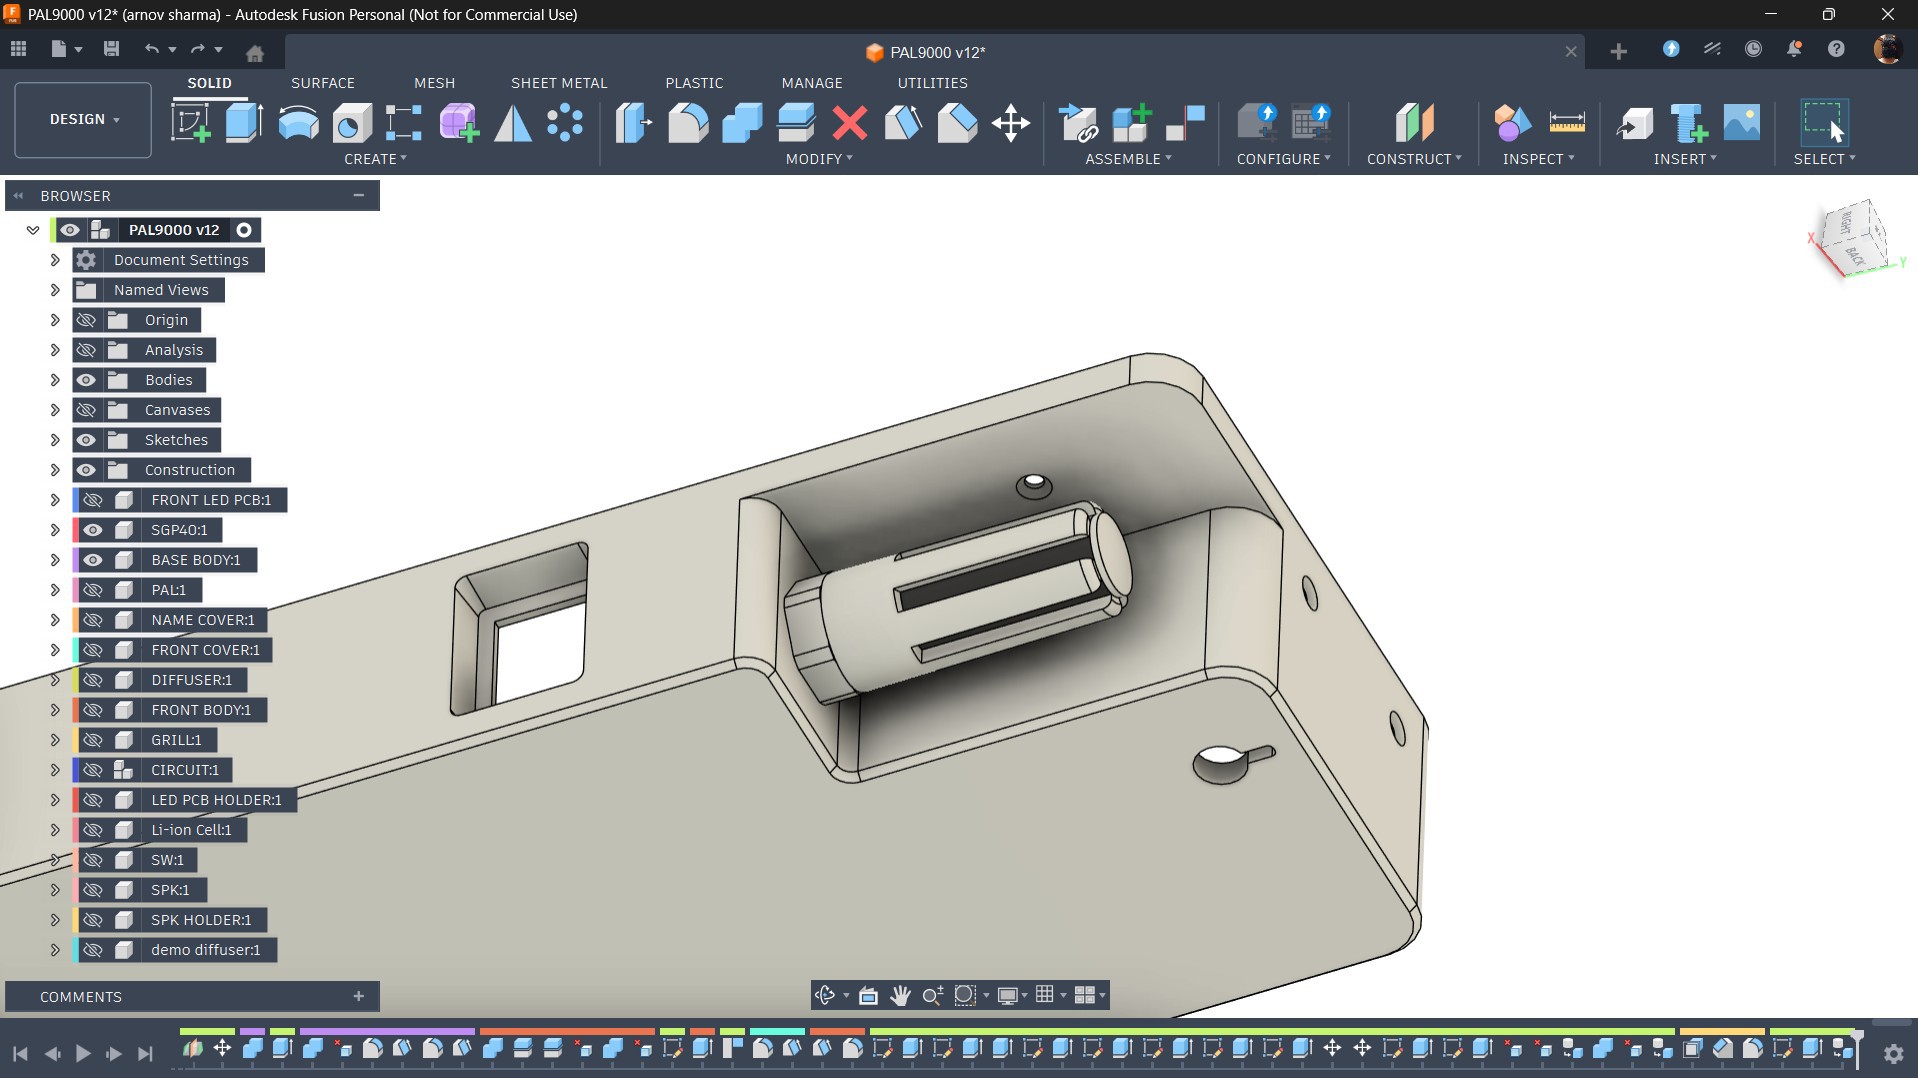
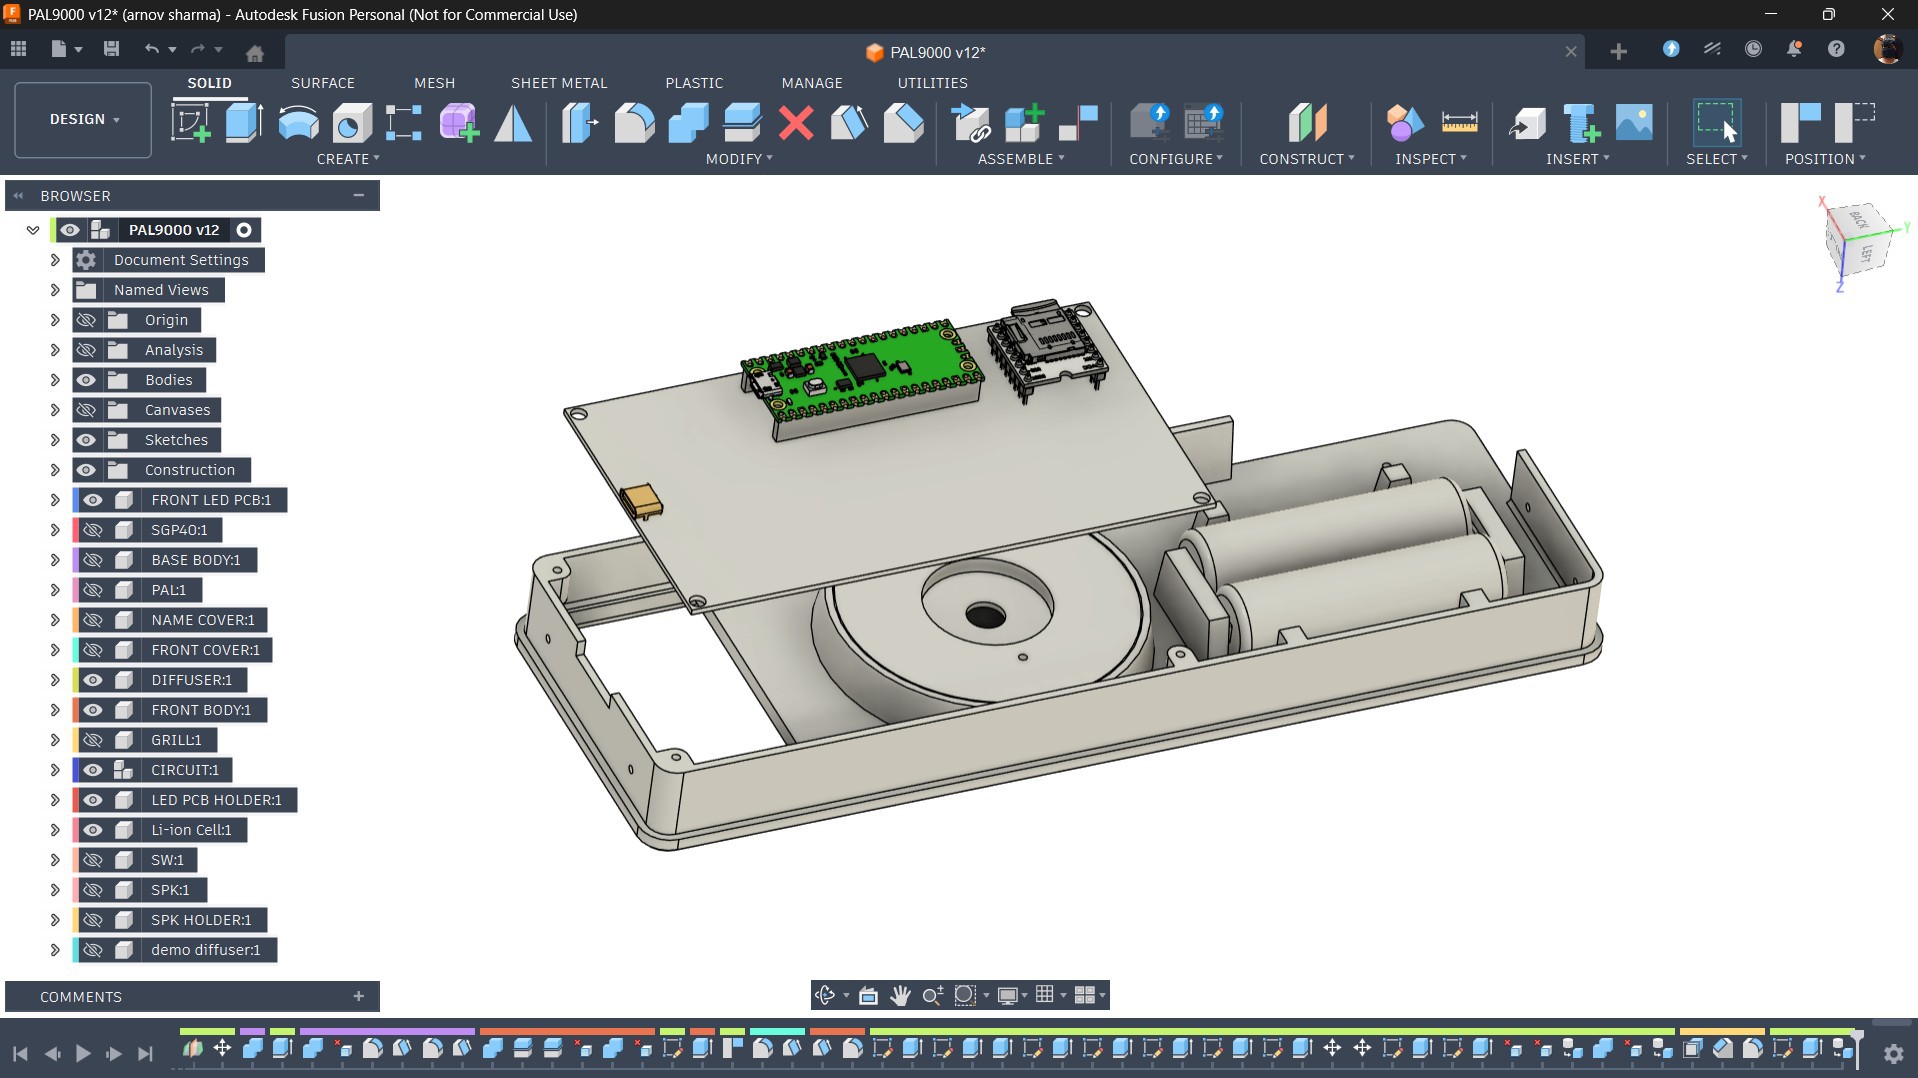
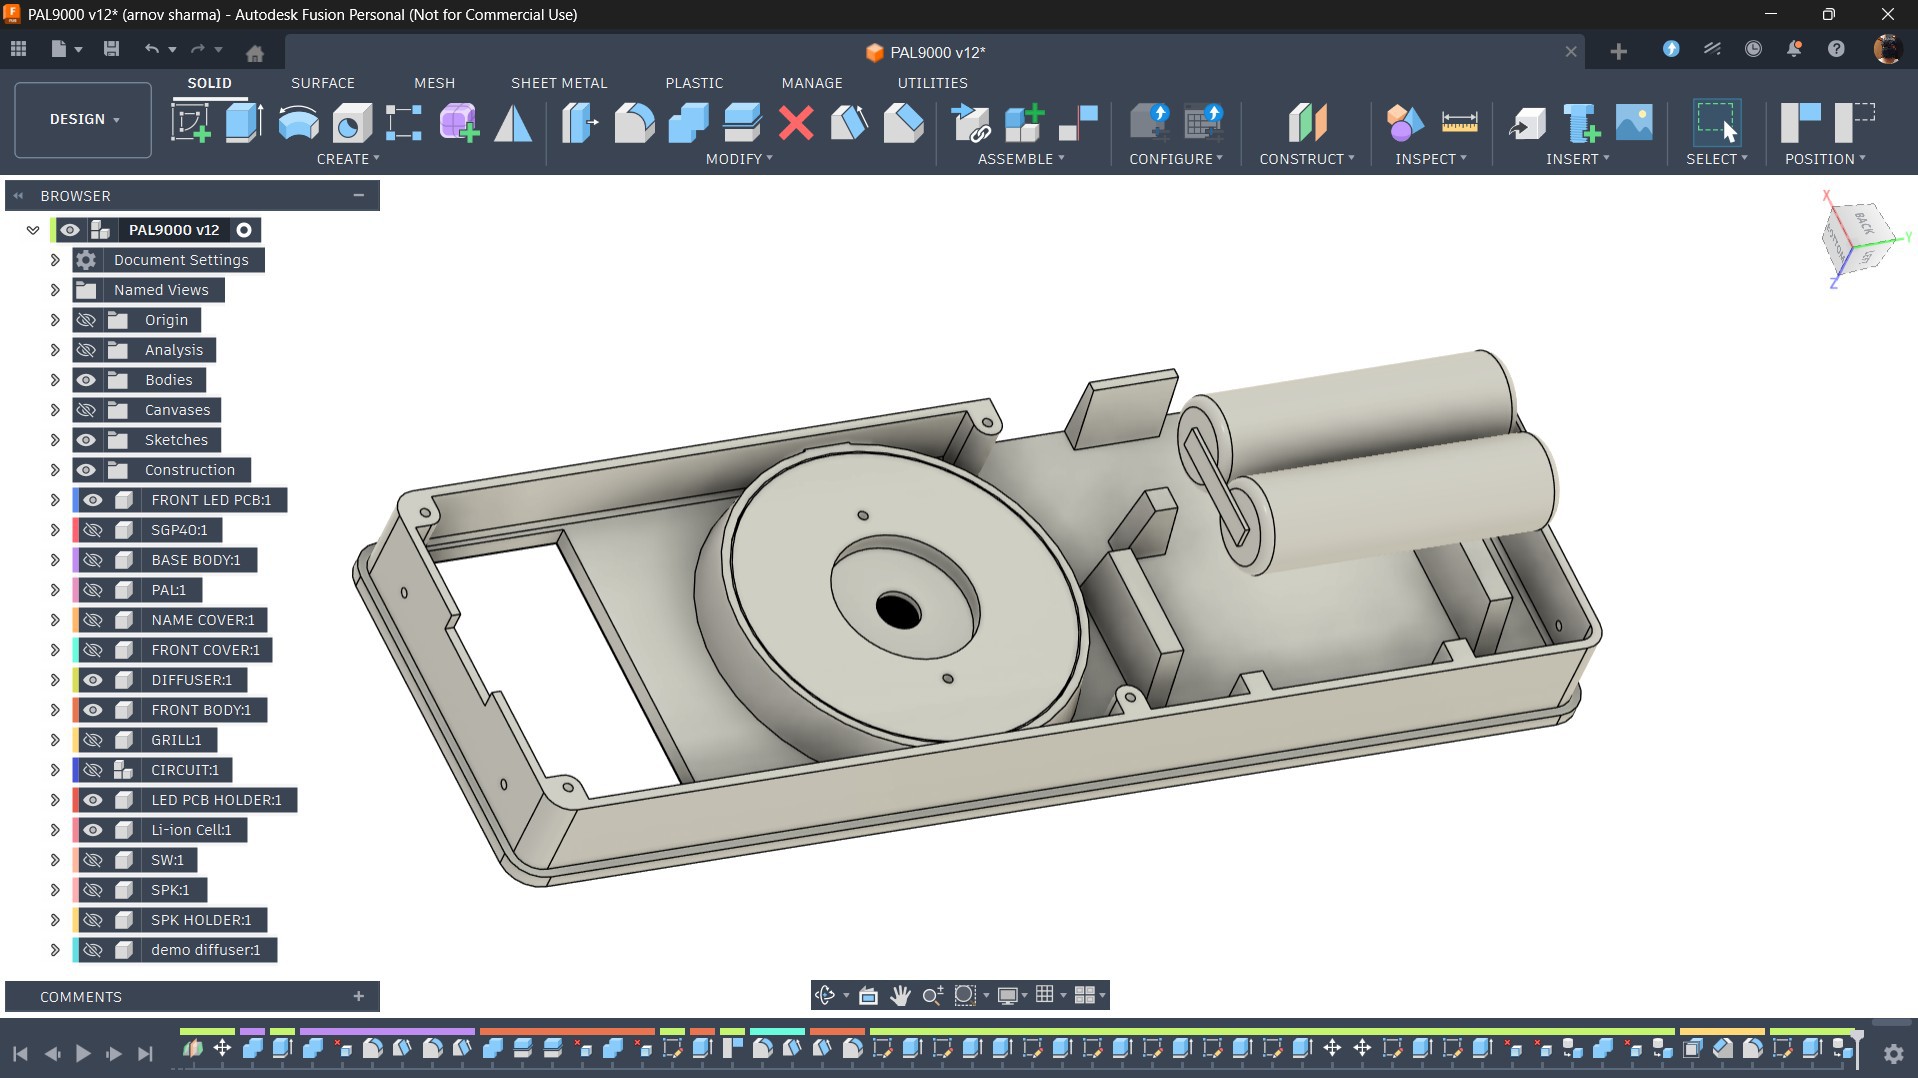
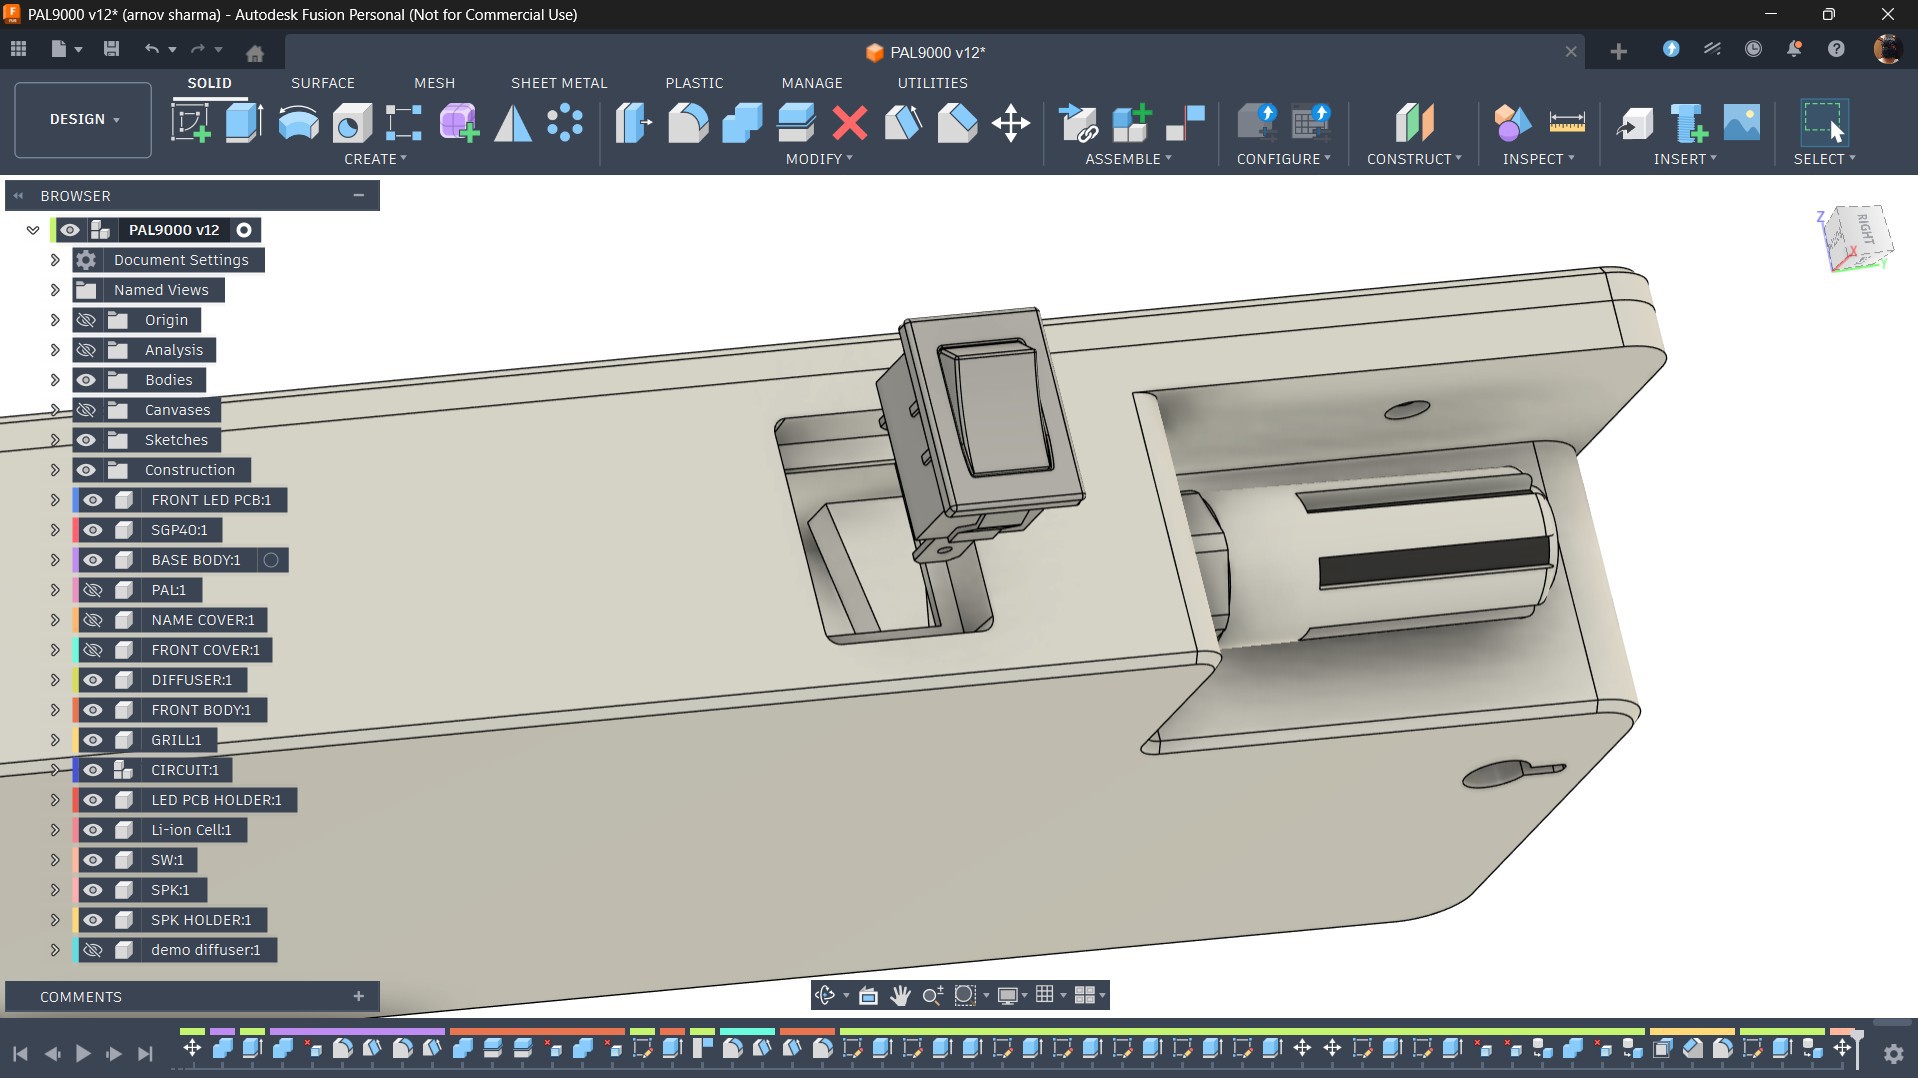
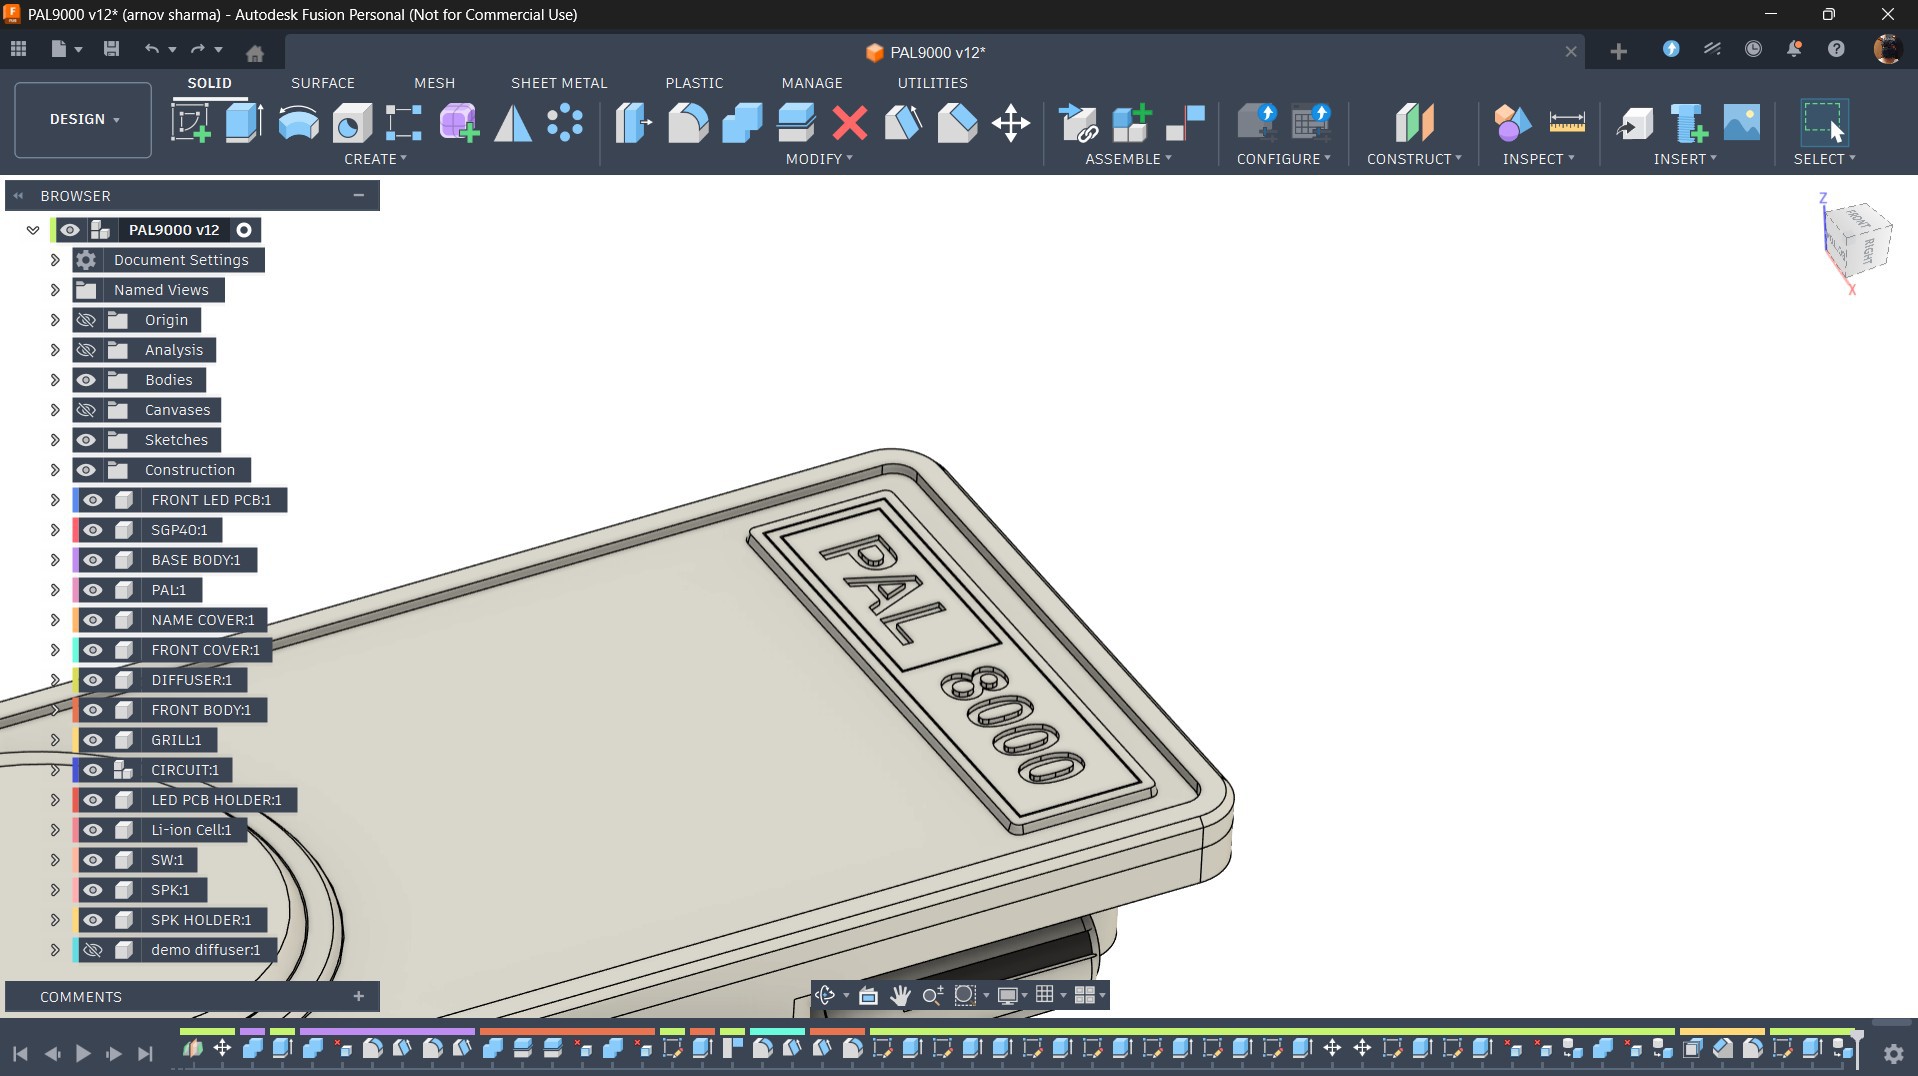
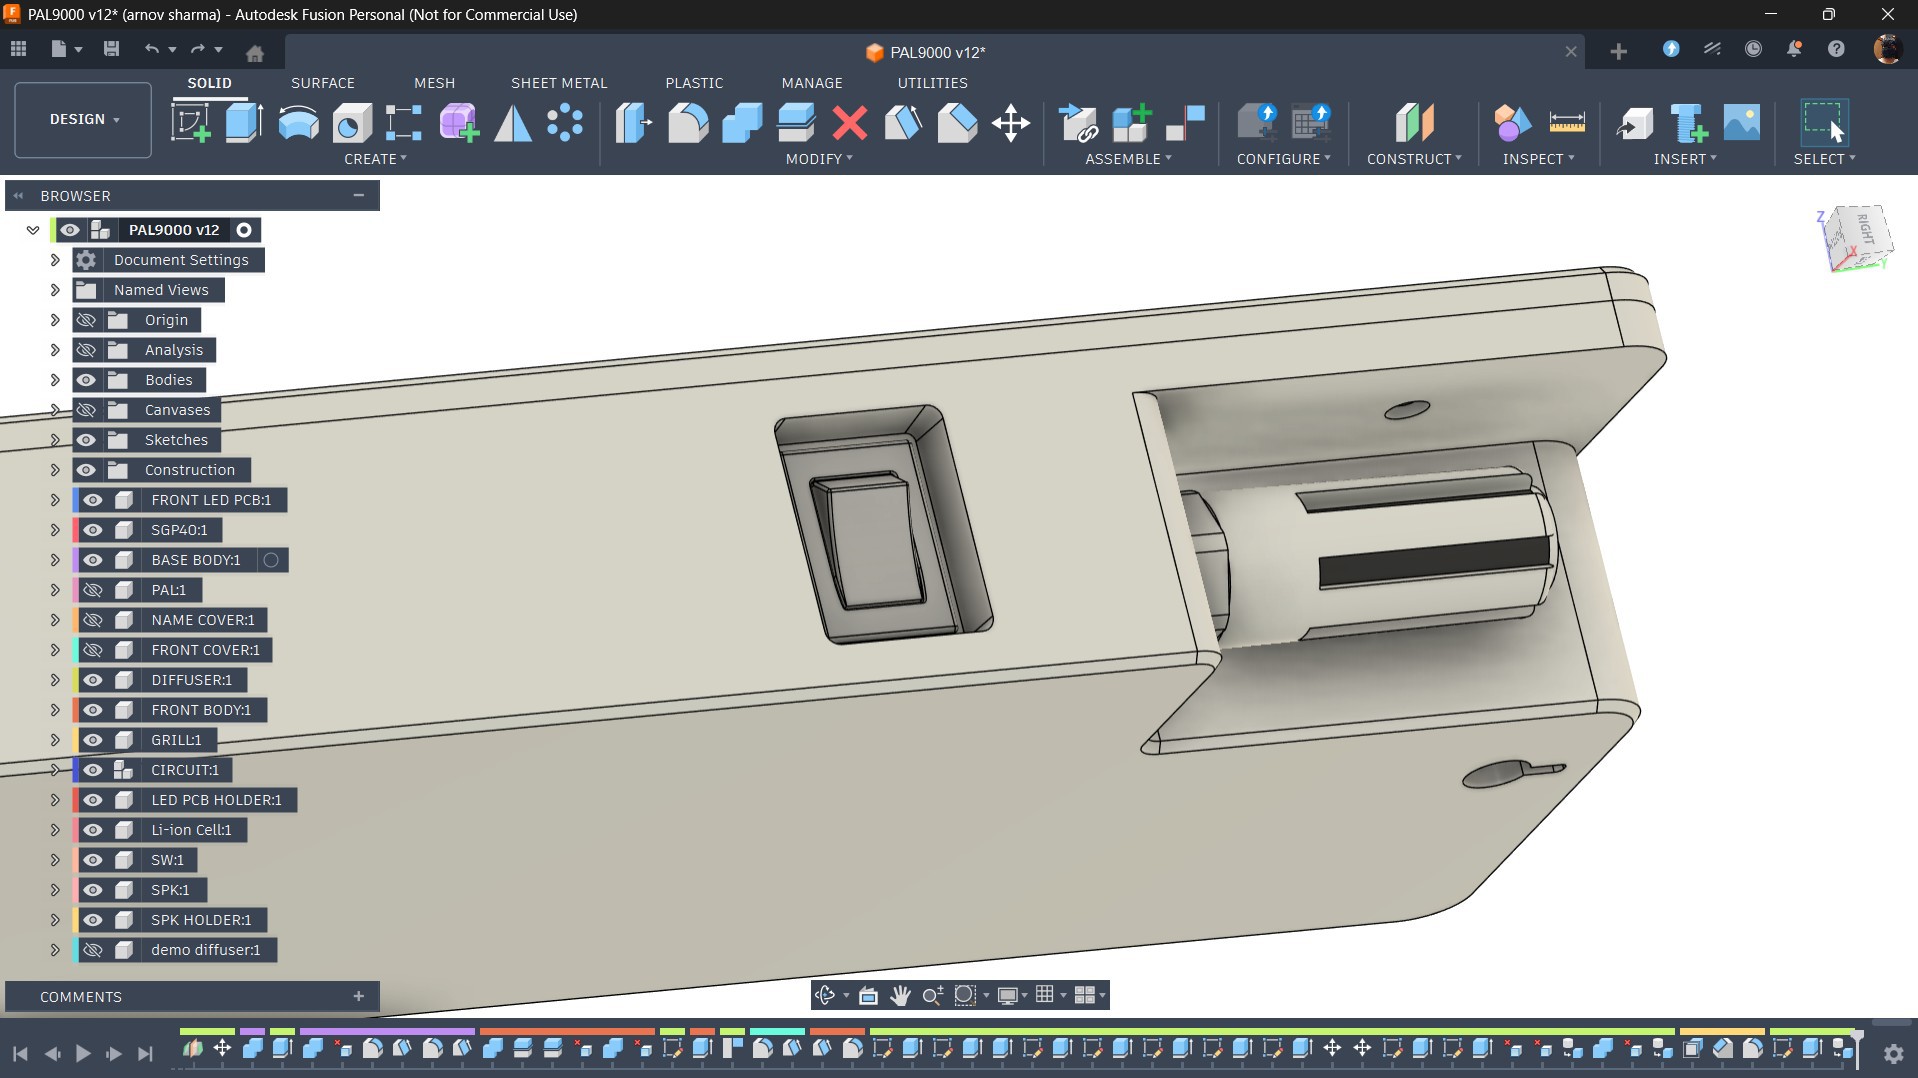
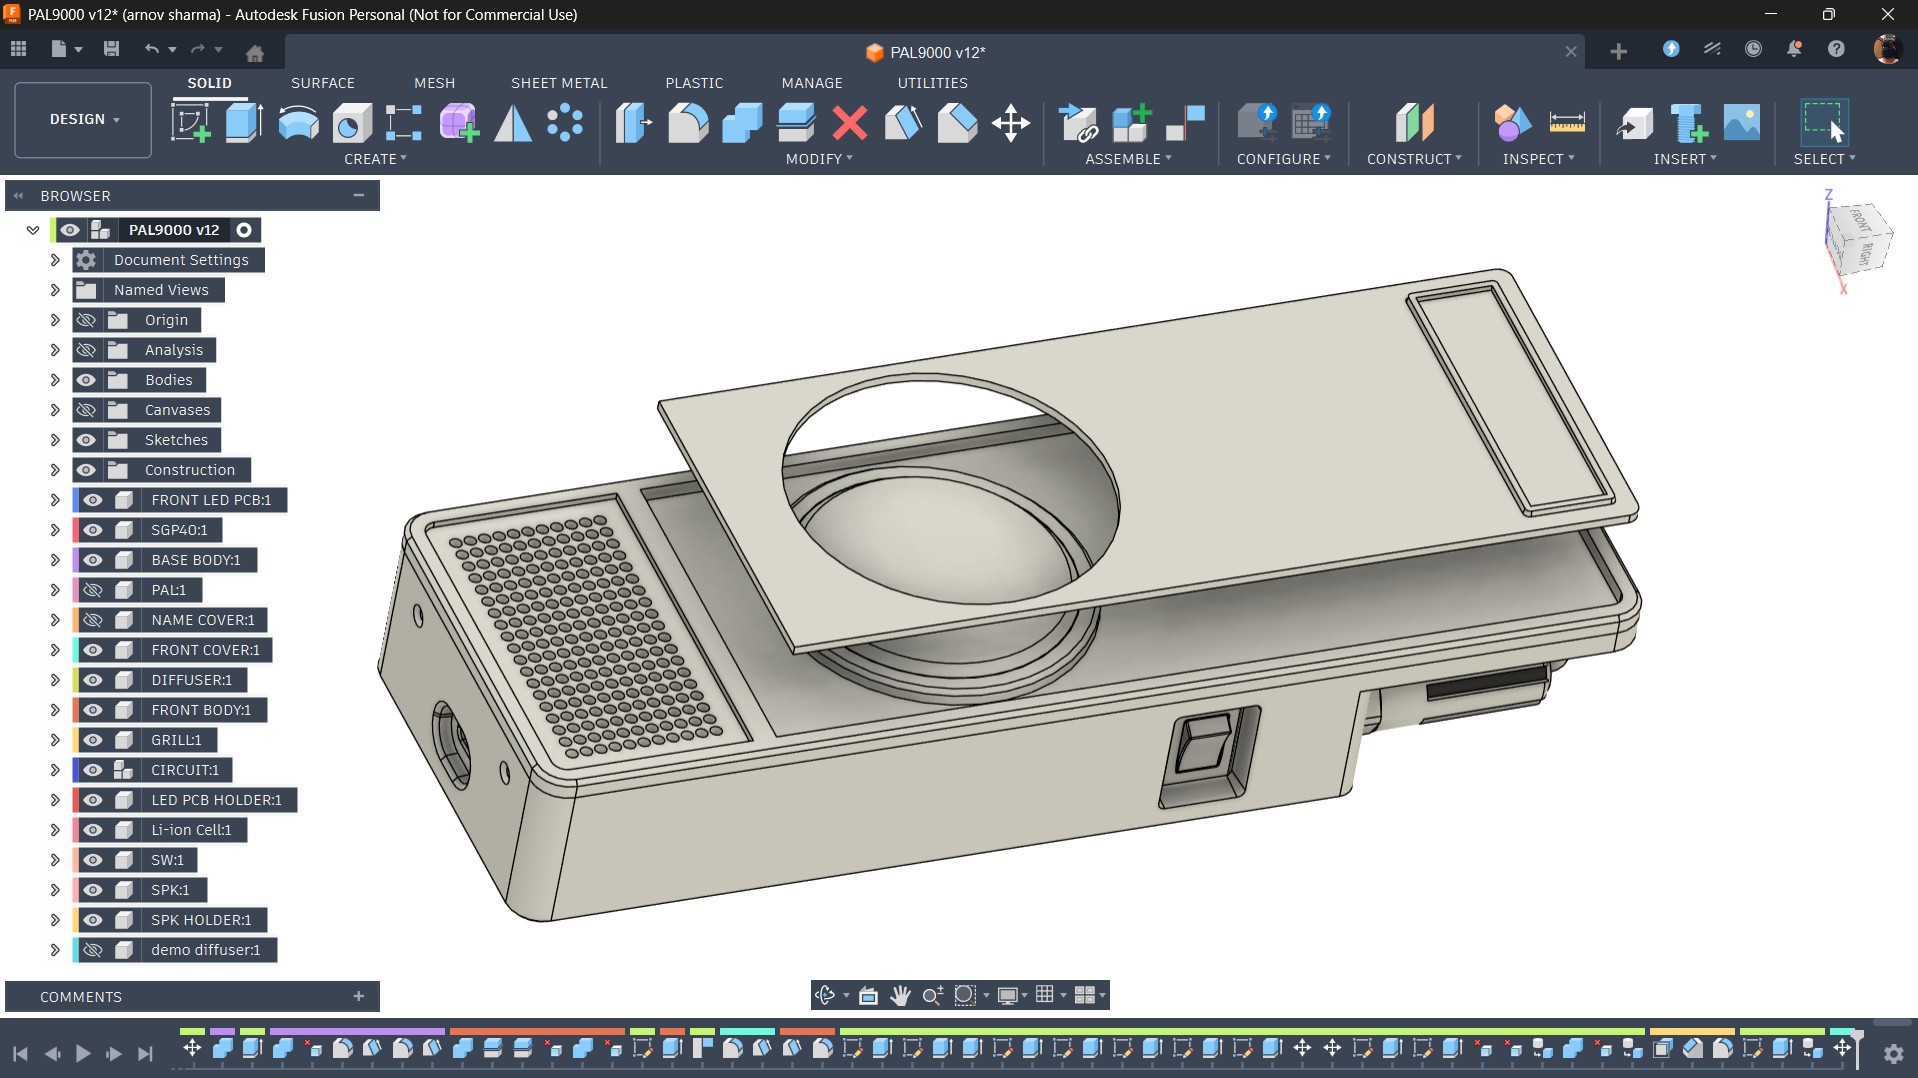
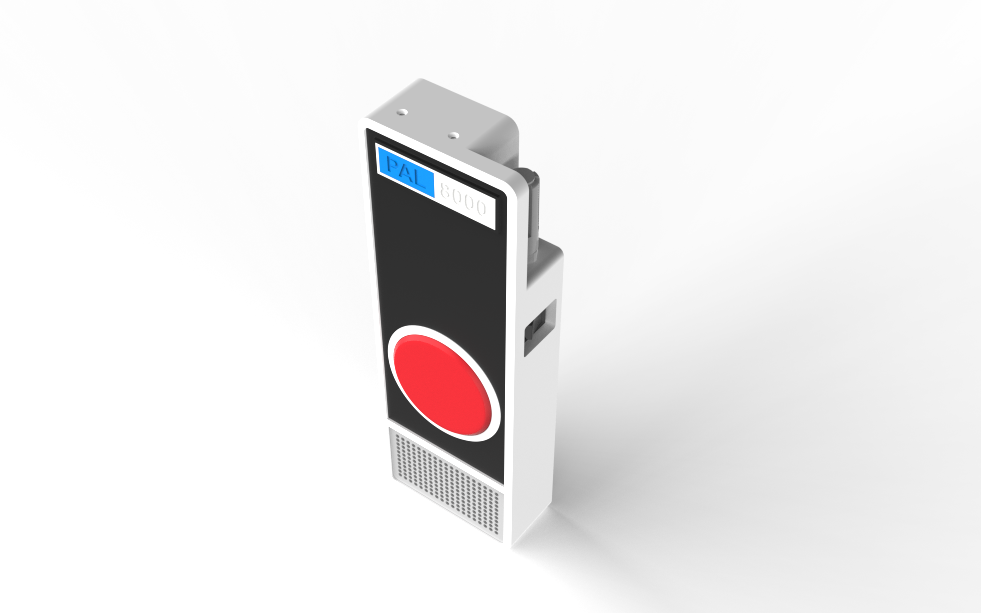
To get started with the design, I began by preparing the enclosure in Fusion 360. I imported 3D models of my existing LED board and Pico driver board from previous projects and searched for a high-quality front-facing reference image of HAL 9000. This image was used to trace the basic outline of the enclosure, which was then extruded and refined to house the Pico driver board and LED board inside. The LED board...

Read more »

PAL9000 v12.step

step - 12.93 MB - 03/31/2026 at 13:26

Download

grill.stl

Standard Tesselated Geometry - 8.59 MB - 03/31/2026 at 13:26

Download

PAL9000 v12.f3d

fusion - 8.76 MB - 03/31/2026 at 13:26

Download

FRONT BODY.stl

Standard Tesselated Geometry - 1.94 MB - 03/31/2026 at 13:26

Download

SPK HOLDER.stl

Standard Tesselated Geometry - 324.30 kB - 03/31/2026 at 13:25

Download

View all 13 files

  • 1
    DEMO CODE—Minimal for Pico 2

    Below is the code we used for phase 1 of this project.

    /*
    * =====================================================
    *  PAL 8000 — Air Quality Monitor  Created by Arnov Sharma
    *  Board   : Raspberry Pi Pico 2
    *  Sensor  : Adafruit SGP40
    *  Audio   : DFRobot DFPlayer Mini
    *  LED     : PAL 8000 Eye (PWM, GPIO 0)
    * =====================================================
    *
    *  Pin Map
    *  -------
    *  GP0  → PAL 8000 Eye LED (PWM)
    *  GP4  → SGP40 SDA  (I2C0)
    *  GP5  → SGP40 SCL  (I2C0)
    *  GP7  → DFPlayer RX  (SoftwareSerial)
    *  GP8  → DFPlayer TX  (SoftwareSerial)
    *
    */
    #include <Arduino.h>
    #include <Wire.h>
    #include <SoftwareSerial.h>
    #include <DFRobotDFPlayerMini.h>
    #include <Adafruit_SGP40.h>
    #define LED_PIN 0
    #define DF_RX 7
    #define DF_TX 8
    #define SGP40_SDA 4
    #define SGP40_SCL 5
    #define LED_IDLE 20
    #define LED_PEAK 80
    const uint16_t TRACK_MS[] = {
    0,      // [0]  unused
    4000,   // [1]  01
    5000,   // [2]  02
    4000,   // [3]  03
    4000,   // [4]  04
    2000,   // [5]  05
    2000,   // [6]  06
    3000,   // [7]  07
    1000,   // [8]  08
    2000,   // [9]  09
    2000,   // [10] 10
    10000,  // [11] 11
    10000,  // [12] 12
    9000,   // [13] 13
    15000,  // [14] 14
    0,      // [15] unused
    0,      // [16] unused
    1000,   // [17] 17
    1000,   // [18] 18
    };
    #define INTERVAL_07 30000UL
    #define INTERVAL_VOC 60000UL
    #define INTERVAL_10 300000UL
    #define INTERVAL_11 600000UL
    #define SENSOR_RETRY 30000UL
    #define VOC_GOOD_MAX 100
    #define VOC_MODERATE_MAX 200
    SoftwareSerial      mySerial(7, 8); // RX, TX
    DFRobotDFPlayerMini player;
    Adafruit_SGP40      sgp;
    bool     sensorOK      = false;
    bool     sensorWasLost = false;
    bool     goodAlt       = false;
    bool     modAlt        = false;
    bool     elevAlt       = false;
    uint16_t vocSmooth     = 0;
    unsigned long lastTime07      = 0;
    unsigned long lastTimeVOC     = 0;
    unsigned long lastTime10      = 0;
    unsigned long lastTime11      = 0;
    unsigned long lastSensorRetry = 0;
    void ledIdle() {
    analogWrite(LED_PIN, LED_IDLE);
    }
    void ledFade(uint8_t from, uint8_t to, uint32_t ms) {
    const int steps = 200;
    int32_t  delta     = (int32_t)to - (int32_t)from;
    uint32_t stepDelay = ms / steps;
    for (int i = 0; i <= steps; i++) {
    analogWrite(LED_PIN, (uint8_t)(from + (delta * i) / steps));
    delay(stepDelay);
    }
    }
    void ledBreatheForMs(uint32_t totalMs) {
    const uint32_t BREATH_CYCLE = 2000;
    uint32_t start = millis();
    while (millis() - start < totalMs) {
    uint32_t elapsed = millis() - start;
    float t      = (float)(elapsed % BREATH_CYCLE) / (float)BREATH_CYCLE;
    float norm   = sin(t * PI);
    float bright = LED_IDLE + norm * (LED_PEAK - LED_IDLE);
    analogWrite(LED_PIN, (uint8_t)bright);
    delay(10);
    }
    ledIdle();
    }
    void playBlocking(uint8_t track) {
    Serial.print(F("[PLAY] ")); Serial.println(track);
    player.play(track);
    delay(800);
    uint32_t remaining = (TRACK_MS[track] > 800) ? TRACK_MS[track] - 800 : 0;
    if (remaining > 0) {
    ledBreatheForMs(remaining);
    }
    delay(200);
    ledIdle();
    }
    bool initSensor() {
    if (sgp.begin()) {
    sensorOK = true;
    Serial.println(F("[SGP40] ready"));
    return true;
    }
    sensorOK = false;
    Serial.println(F("[SGP40] not found"));
    return false;
    }
    void pollVOC() {
    uint16_t raw = sgp.measureVocIndex();
    if (raw > 0) {
    vocSmooth = (vocSmooth == 0) ? raw
    : (uint16_t)((vocSmooth * 7 + raw) / 8);
    Serial.print(F("[VOC] raw=")); Serial.print(raw);
    Serial.print(F(" smooth=")); Serial.println(vocSmooth);
    }
    }
    void reportVOC() {
    Serial.print(F("[REPORT] VOC=")); Serial.println(vocSmooth);
    if (vocSmooth <= VOC_GOOD_MAX) {
    playBlocking(goodAlt ? 2 : 1);
    goodAlt = !goodAlt;
    } else if (vocSmooth <= VOC_MODERATE_MAX) {
    playBlocking(modAlt ? 4 : 3);
    modAlt = !modAlt;
    } else {
    playBlocking(elevAlt ? 6 : 5);
    elevAlt = !elevAlt;
    }
    }
    void setup() {
    Serial.begin(9600);
    pinMode(LED_PIN, OUTPUT);
    analogWrite(LED_PIN, 0);
    mySerial.begin(9600);
    if (!player.begin(mySerial)) {
    Serial.println(F("DFPlayer Mini not found"));
    while (true) {
    ledFade(0, LED_PEAK, 500);
    ledFade(LED_PEAK, 0, 500);
    }
    }
    player.volume(25);
    delay(3000);
    Wire.setSDA(SGP40_SDA);
    Wire.setSCL(SGP40_SCL);
    Wire.begin();
    initSensor();
    Serial.println(F("[BOOT] LED fade up"));
    ledFade(0, LED_PEAK, 10000);
    ledIdle();
    Serial.println(F("[BOOT] track 14"));
    playBlocking(14);
    delay(2000);
    Serial.println(F("[BOOT] track 07"));
    playBlocking(7);
    Serial.println(F("[BOOT] SGP40 warm-up..."));
    uint32_t warmStart = millis();
    while (millis() - warmStart < 27000UL) {
    pollVOC();
    ledIdle();
    delay(500);
    }
    Serial.println(F("[BOOT] first VOC report"));
    reportVOC();
    unsigned long now = millis();
    lastTime07      = now;
    lastTimeVOC     = now;
    lastTime10      = now;
    lastTime11      = now;
    lastSensorRetry = now;
    Serial.println(F("[BOOT] done — entering loop"));
    }
    void loop() {
    unsigned long now = millis();
    if (!sensorOK) {
    if (!sensorWasLost) {
    sensorWasLost = true;
    playBlocking(12);
    lastSensorRetry = millis();
    }
    if (millis() - lastSensorRetry >= SENSOR_RETRY) {
    lastSensorRetry = millis();
    if (initSensor()) {
    sensorWasLost = false;
    playBlocking(13);
    unsigned long t = millis();
    lastTime07 = t; lastTimeVOC = t;
    lastTime10 = t; lastTime11  = t;
    }
    }
    ledIdle();
    delay(500);
    return;
    }
    pollVOC();
    bool vocDue = (now - lastTimeVOC >= INTERVAL_VOC);
    bool t10Due = (now - lastTime10  >= INTERVAL_10);
    bool t11Due = (now - lastTime11  >= INTERVAL_11);
    bool t07Due = (now - lastTime07  >= INTERVAL_07);
    if (vocDue) {
    reportVOC();
    lastTimeVOC = millis();
    } else if (t10Due) {
    playBlocking(10);
    lastTime10 = millis();
    } else if (t11Due) {
    playBlocking(11);
    lastTime11 = millis();
    } else if (t07Due) {
    playBlocking(7);
    lastTime07 = millis();
    } else {
    ledIdle();
    delay(200);
    }
    }

    Here's a little breakdown of this version of the code.

    We use the following libraries in our sketch that you first need to install or update to the latest version in order to compile this code without any issues.

    #include <Arduino.h>#include <Wire.h>#include <SoftwareSerial.h>#include <DFRobotDFPlayerMini.h>#include <Adafruit_SGP40.h>

    This is the Pin Definitions & Constants that define which GPIO Pins are being used.

    #define LED_PIN 0#define DF_RX 7#define DF_TX 8

    We also added a section for controlling led brightness level.

    #define LED_IDLE 20#define LED_PEAK 80

    Here is the audio track timing table that stores the duration of each audio track in ms. This is used so the LED animation matches the audio length.

    const uint16_t TRACK_MS[] = { ... };

    This section controls how often things happen, like the VOC report every 60s, Track 07 every 30s, and other things that happen at longer intervals.

    #define INTERVAL_07 30000UL#define INTERVAL_VOC 60000UL

    This defines Air Quality Levels. Less than 100 is good, more than 200 is poor, and between 100 and 200 is moderate.

    #define VOC_GOOD_MAX 100#define VOC_MODERATE_MAX 200

    Using the below section, we creates object for our MP3 player and SGP40 sensor.

    SoftwareSerial mySerial(7, 8);DFRobotDFPlayerMini player;Adafruit_SGP40 sgp;

    This stores the system state.

    bool sensorOK = false;uint16_t vocSmooth = 0;

    This is used for timing events.

    unsigned long lastTime07 = 0;

    We use the below function to keeps LED at low brightness.

    void ledIdle()

    We have a function for LED fade, which makes led smooth brightness transition.

    void ledFade()

    We also have a breathing effect function, in which LED pulses using singe wave, this make device look alive.

    void ledBreatheForMs()

    We have a playback function that plays a track, wait unitils it finishes, and runs the LED Breathing animation during playback of the track.

    void playBlocking(uint8_t track)

    There is an Init Sensor function that starts SGP40 and sets sensorOK.

    bool initSensor()

    Using the below function, set up reads raw VOC Values and also applies smoothing.

    void pollVOC()

    This does Smoothing.

    (vocSmooth * 7 + raw) / 8

    Using the below section, set up checks for VOC Level, Plays corresponding audio, if value is GOOD, track 1 or 2 will play, if value is moderate, track 3 or 4 will play, if value is poor, track 5 or 6 will play.

    We added alternate tracks for creating variations.

    void reportVOC()

    Next is the setup function.

    void setup()

    In this, the serial starts, the LED is set up, the DF player is initialised, the volume is set, the I2C is initialized with the sensor, and the LED startup animation runs.

    In Setup, we play the intro track, which is 14 then 7. During this playback, the sensor gets warmed up for 27 seconds, and after that first VOC report is provided with corrosponding track.

    SIMPLE LOGIC

    Our Device continuously monitors air quality using the SGP40 sensor. Based on the VOC readings, it classifies air quality into good, moderate, or poor and plays corresponding audio messages that we named 01 to 18 stored in the SD card through the DFPlayer.

    The LED provides visual feedback by staying dim when idle and performing breathing animations during audio playback. We have used timers (millis) to schedule different actions like periodic announcements and system messages without blocking execution.

    If the sensor disconnects, the system detects it, plays an error sound, and keeps retrying until the sensor reconnects, ensuring reliability.

    At this stage, we had only developed the core logic for the PAL8000 to run offline, with no web app functionality included yet. The web features will be integrated later, toward the end of the build. This version of the code was focused purely on establishing and stabilizing the system. We went through extensive debugging during this phase, and in the end, everything came together really well.

  • 2
    BACK BODY & SGP40 SENSOR ASSEMBLY

    After the demo run, we desoldered all the components from the Pico driver board. We did this so we could reinstall them individually, along with the enclosure.

    • We started by removing the retaining nut from the PG7 gland of the SGP40 probe, then passed the wire through the mounting hole on the back body.
    • We positioned the SGP40 sensor in place and tightened the nut back, securing the PG7 firmly.
  • 3
    BACK BODY & SWITCH ASSEMBLY

    Next, we used a push button in the form factor of a rocker switch and positioned it in the slot on the back body. It is pressure-fitted into place, and the rocker switch includes two locking tabs that ensure it is held securely in position.

View all 12 instructions

Enjoy this project?

Share

Discussions

Does this project spark your interest?

Become a member to follow this project and never miss any updates