 mircemk
As you can see from my previous videos, besides Electronics, my fields of experimentation and projects are also natural phenomena such as earthquakes, static electricity, weather conditions and forecasts, etc. In several previous videos () I have described different ways to make weather instruments. This time I will guide you on how to make another weather instrument, but this time with professional features and appearance. Despite the many functions, including weather forecasting for the next 16 days, the device used exclusively free data sources.
The cost of making this device is many times lower than that of similar commercial devices. In fact, the hardware part is ready-made, which means that there is no need for any assembly, soldering or making a case. So it is also suitable for making by absolute beginners. Physically, the device is actually an ELECROW CrowPanel 7-inch HMI display with Acrylic case: which costs around 30 USD along with the acrylic case.
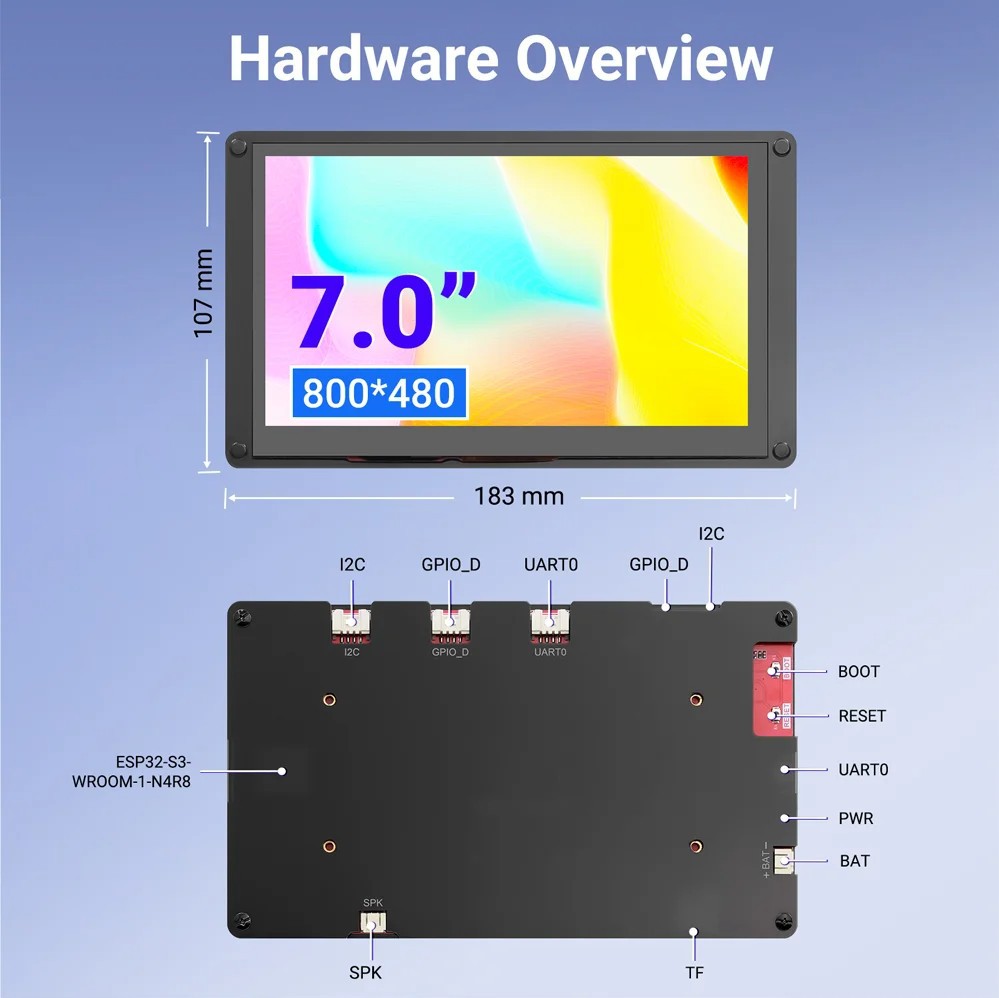
It consists of a 7 inch LCD display with capacitive Touch, ESP32S3 microcontroller that controls the display, USB, Speaker and Battery interfaces, GPIO, I2C and UART ports, as well as a Micro SD card slot. Specifically in this project I use only the Wi-Fi option, but otherwise through the rich selection of I/O interfaces we can use it for many other more complex projects.
First, let's go into a little more detail on how to install the software, because that's the only thing we need to do well to turn this display module into a professional weather dashboard.
This project is sponsored by PCBWay. From concept to production, PCBWay provide cutting-edge electronic design solutions for global innovators, Including hardware design, software development, mechanical design, product testing and certification. PCBWayengineering team consists of experienced engineers in electronics, embedded systems, and product development. They successfully delivered hundreds of projects across industries such as medical devices, industrial automation, consumer electronics, smart home, and IoT.

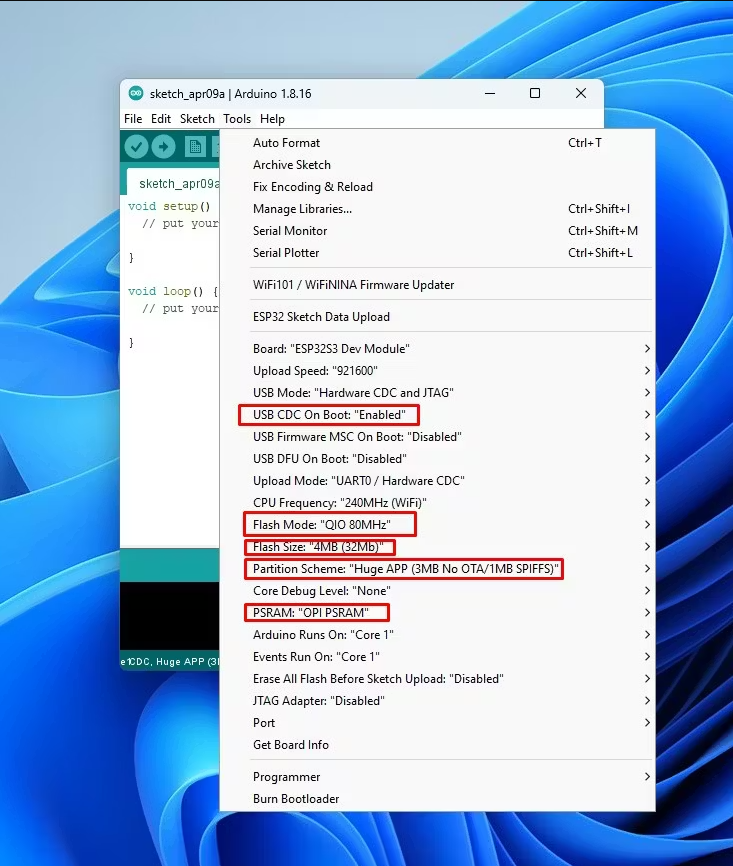
According to the manufacturer's instructions, we need to install ESP32 Core version 2.0.14 or 2.0.15. Then, in the Board Manager, we need to select Board: ESP32S3 Dev Module. Now we need to make a few settings for this board:
- USB CDC On Boot: Enabled
- Flash Mode: QIO 80MHz
- Flash Size: 4mb
- Partition Scheme: HUGE APP
- and PSRAM: OPI PSRAM
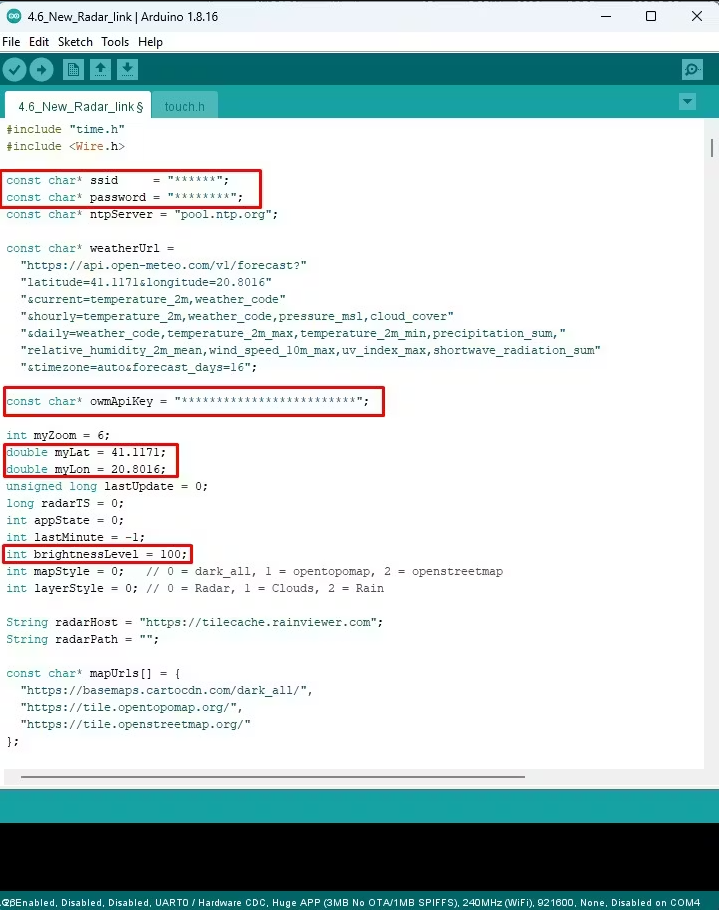
Then, through the library manager, we need to install the latest versions of the LovyanGFX and PNGdec libraries. By the way, the libraries that I used are given at the end of the project. We also need the touch.h header file, which is provided directly by the manufacturer. Next, the code is installed. It is given in a format that should immediately compile and upload without any errors. We just need to unzip the given code file and not change anything in the names of the folders and files. Now we enter the Code_Final folder, and activate the .ino file with the same name. This opens the Arduino editor along with the code. In the code we need to enter some information: Wi-Fi credentials from the local network (user and pass) then Latitude and Longitude for the place to which the dashboard view refers, and an API key from OpenWeatherMap. Let me mention that this API key is only used for displaying maps and is completely free, so you can create it on their website in a few minutes. For the current and 16-day weather forecast, data from the Open-Meteo website is used and no registration is required for them. The exact time is downloaded from an NTP server. Now we press compile and then upload. If everything is completed without errors - that's it, we have successfully completed the project.
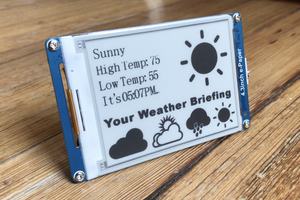
The most interesting part follows, a description of how it works and a demonstration of all functions and options. By turning on the module, the message "connecting to internet" appears, and then "connected". This is followed by the "Loading map" message,...
Read more »
 Alex
Alex