 Arnov Sharma
-
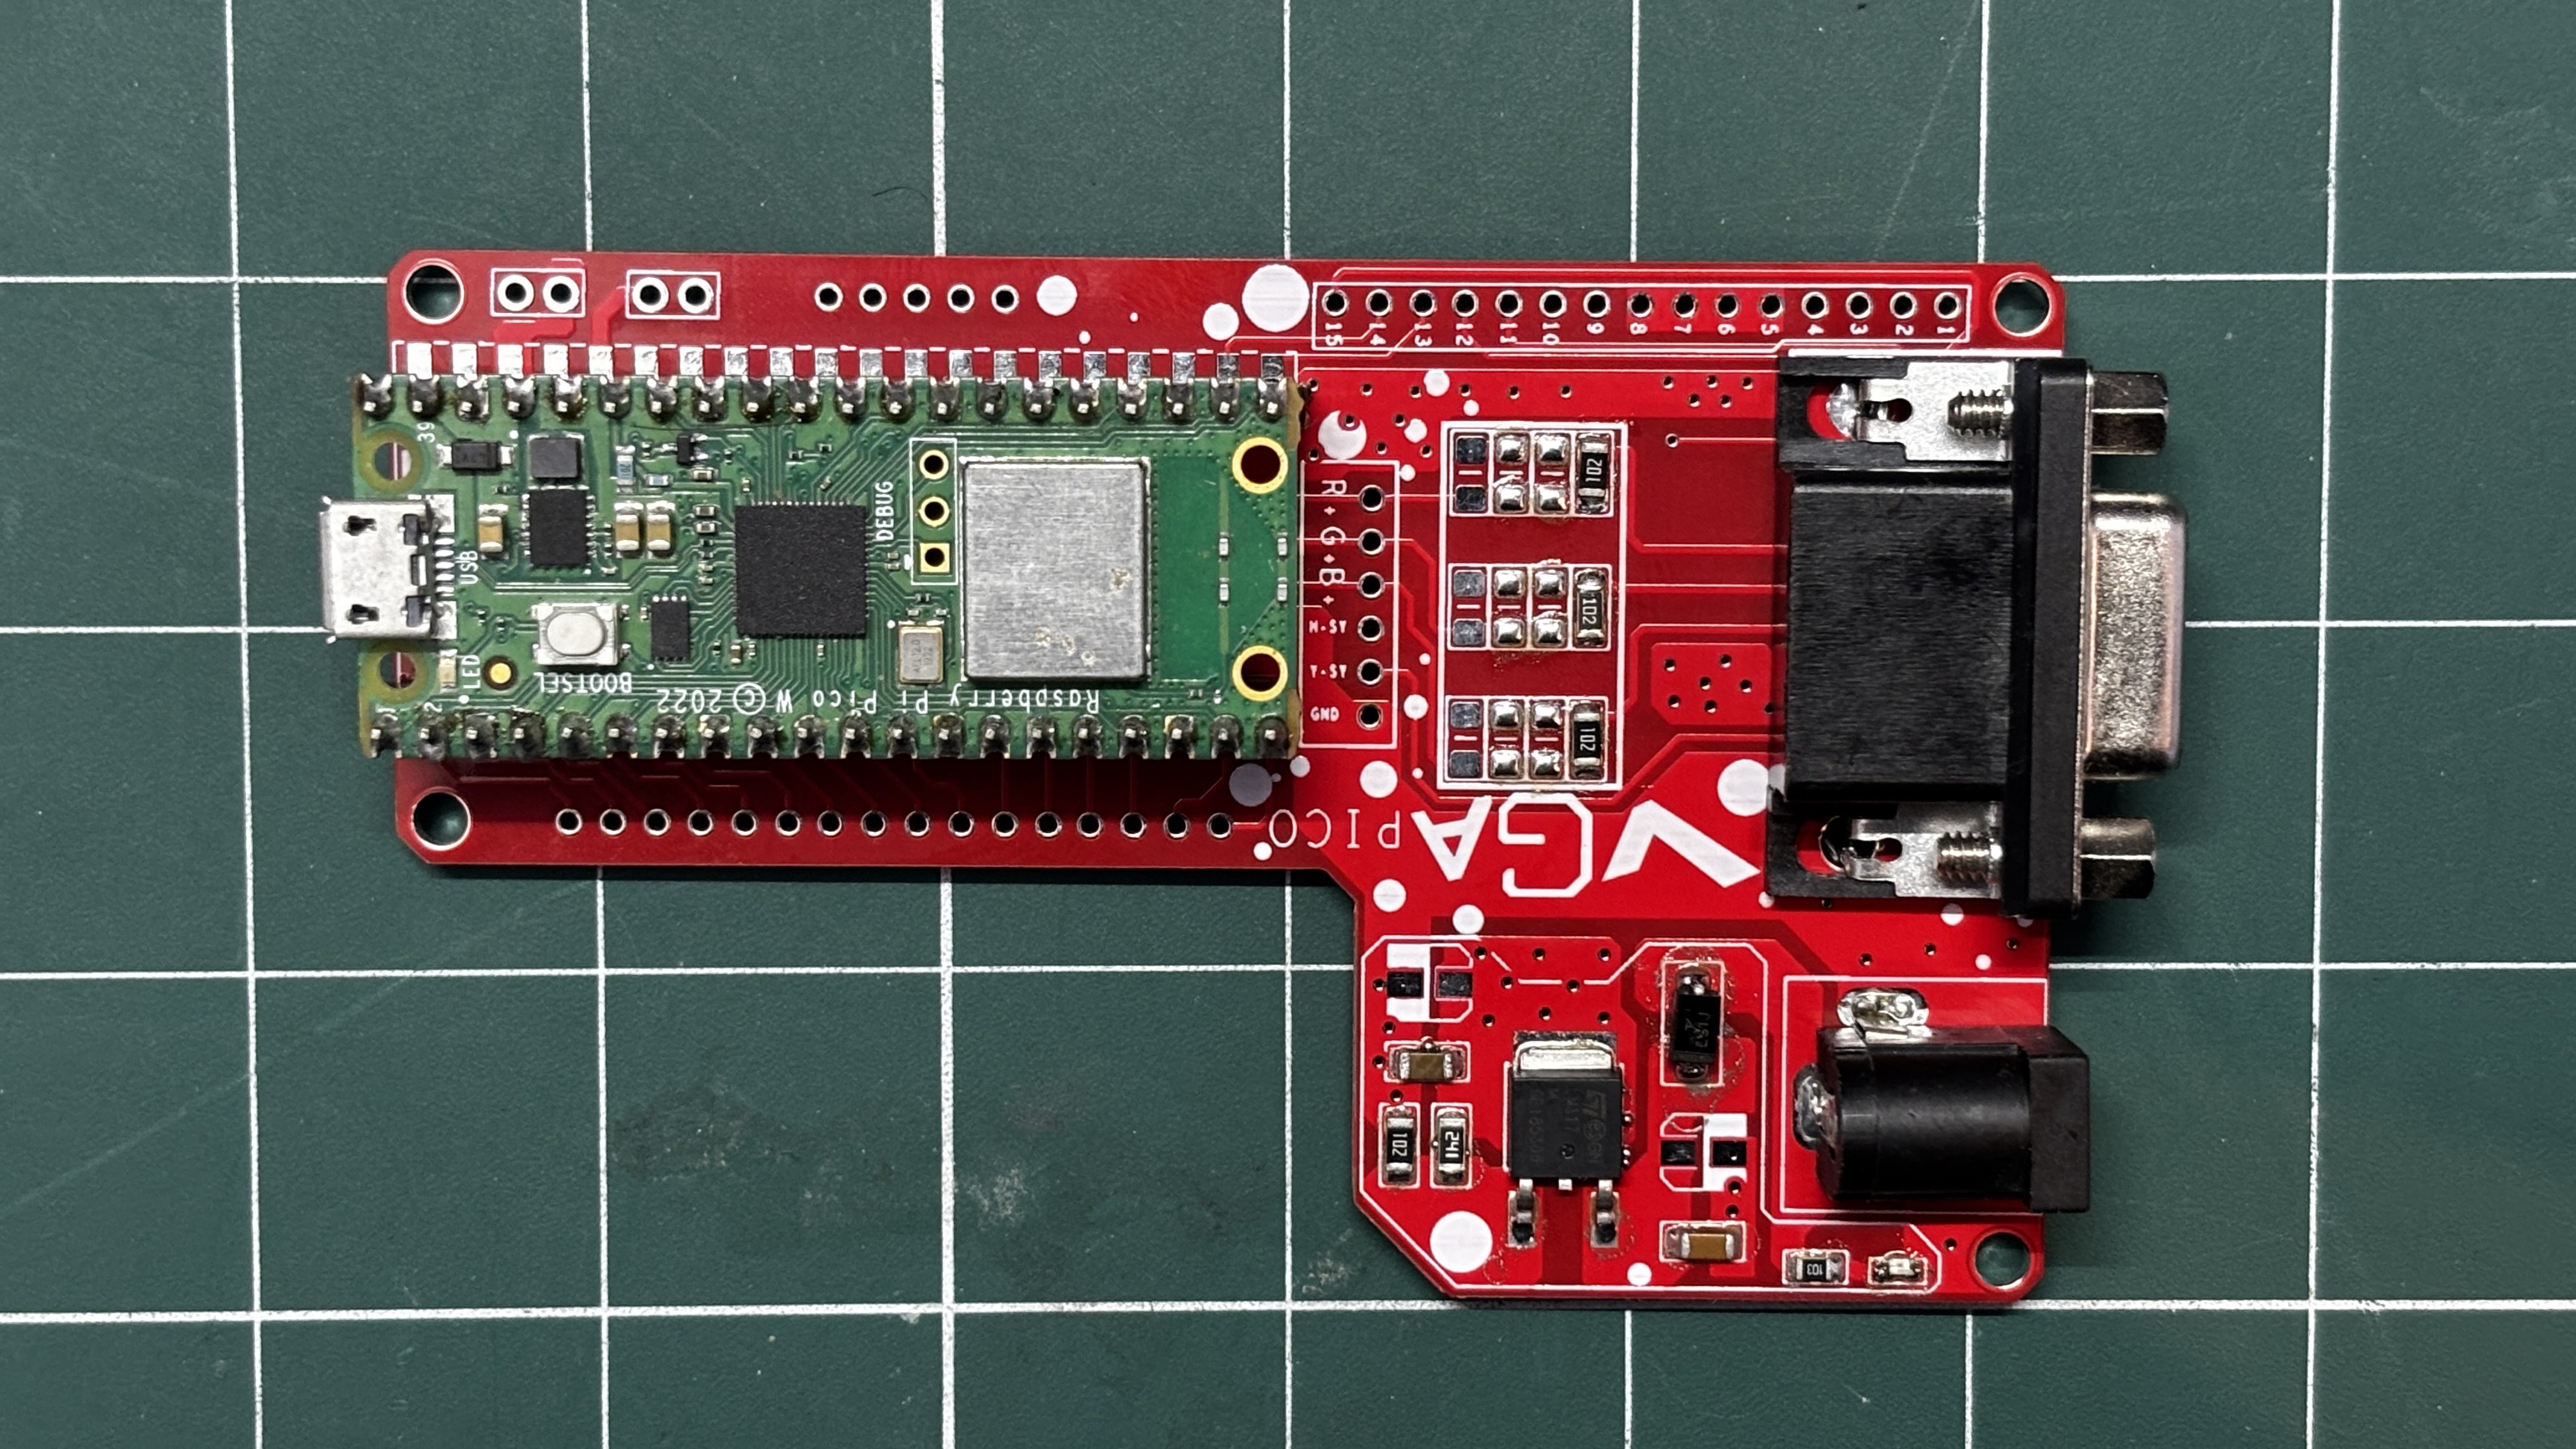
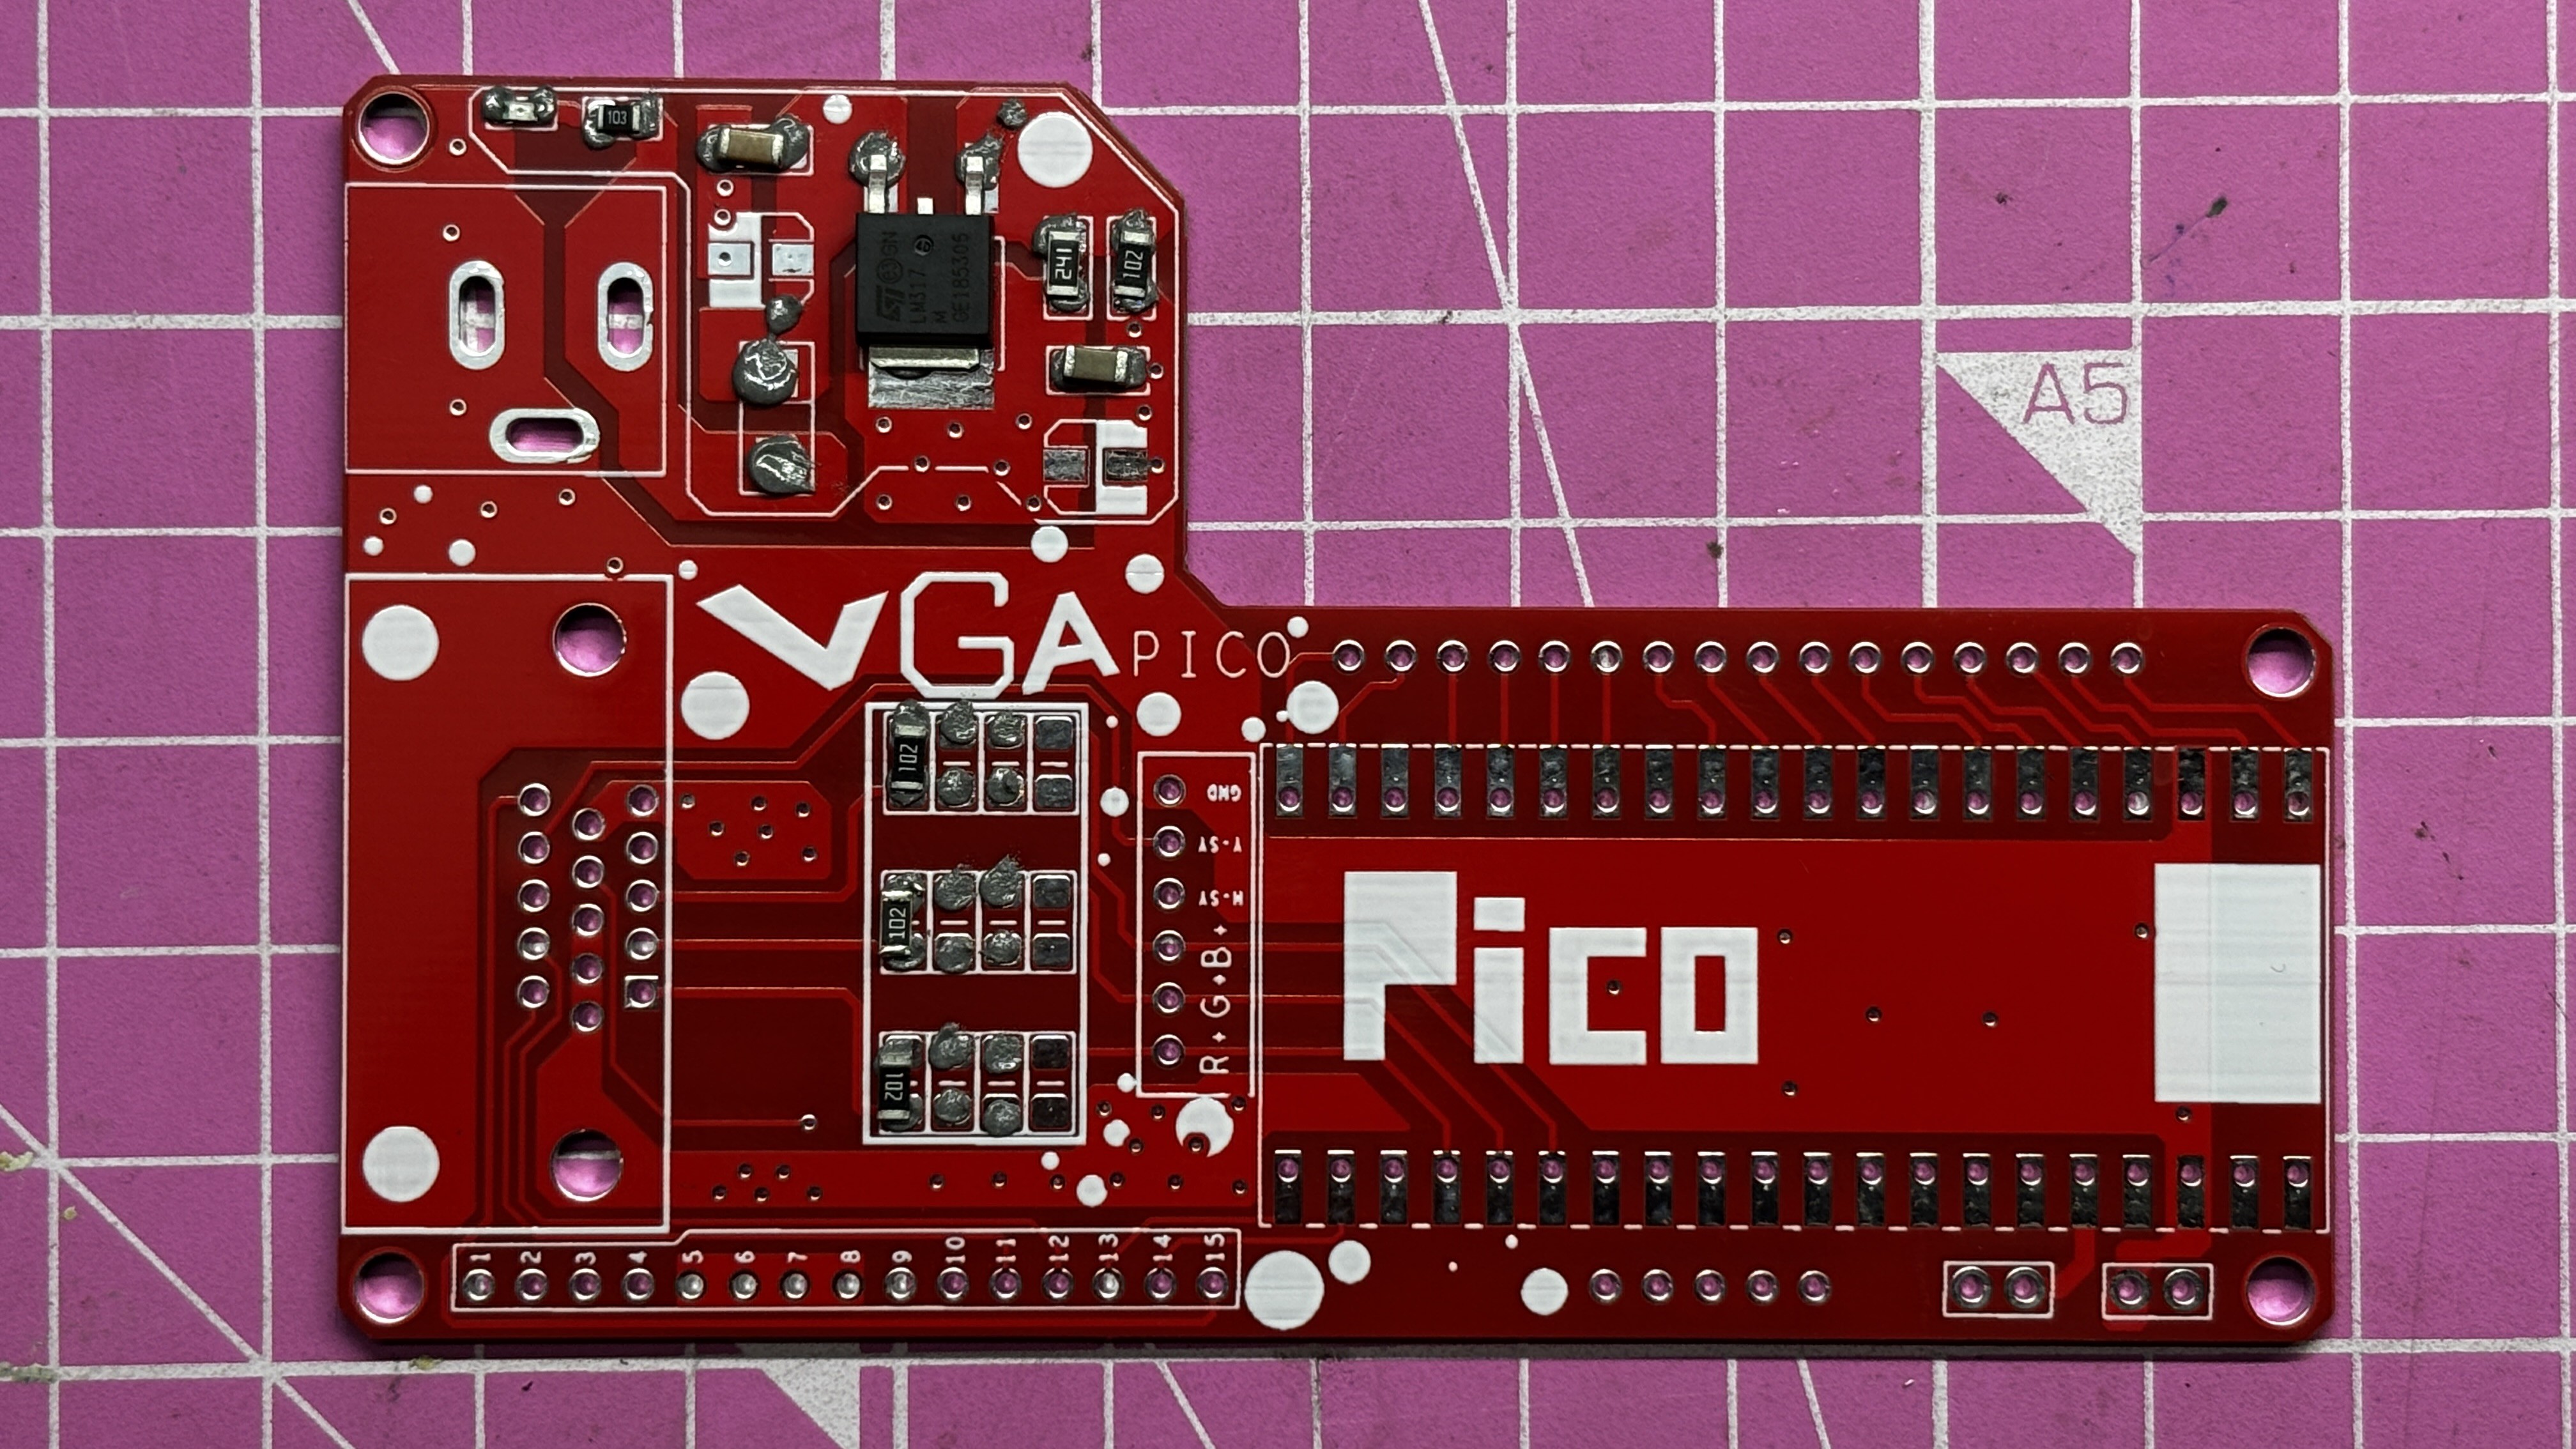
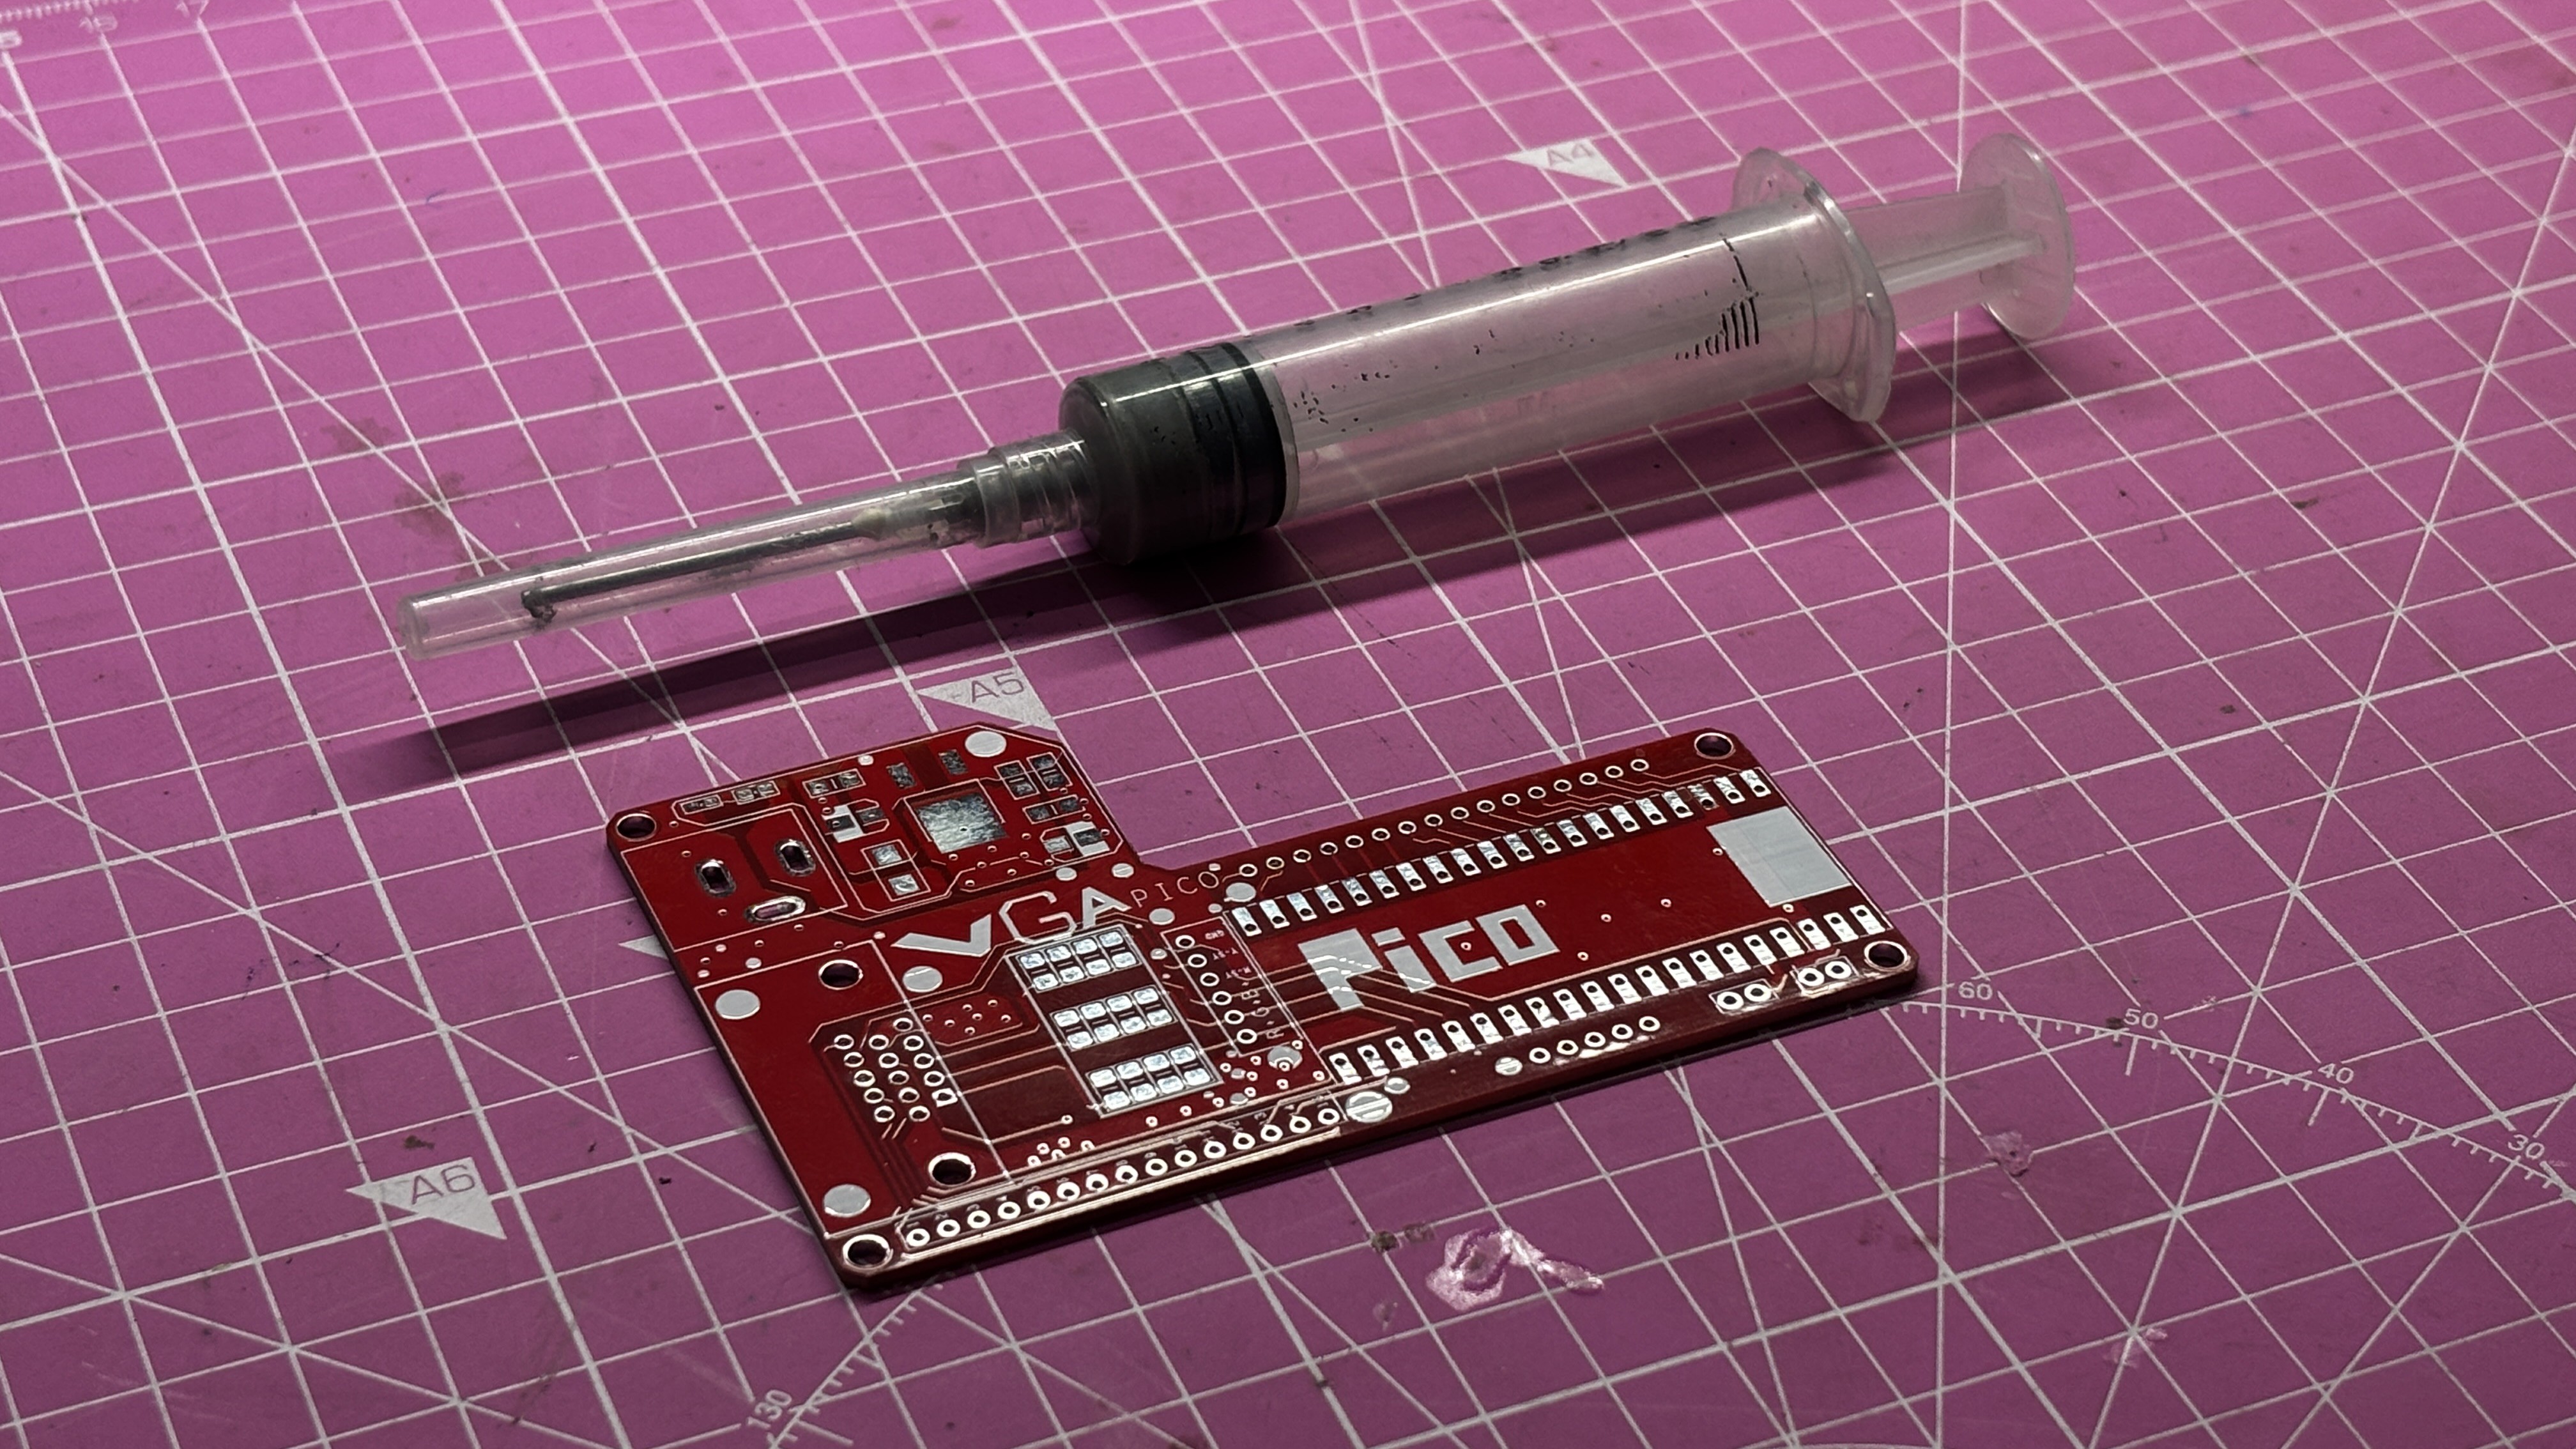
1PCB ASSEMBLY PROCESS
![]()
![]()
![]()
![]()
![]()
- We begin the PCB assembly process by first adding solder paste to each component’s pads one by one using a solder paste dispensing needle. Here, we are using 63/37 SnPb solder paste.
- We then pick and place each SMD component in its correct location.
- The PCB is then placed on a reflow hotplate, which heats the PCB from below up to the solder paste melting temperature. As soon as the PCB reaches that temperature, the solder paste melts, and all components are secured in their positions.
- For the through-hole assembly process, we added the D-Sub 15 connector in its position, followed by the barrel DC jack and two CON20 female header pins in place of the Pico. By turning the board over and using a soldering iron, we solder all the through-hole component leads, securing everything in position.
- At last, we place the Pico W in its position over the female header pins. This completes the assembly process of the driver board.
-
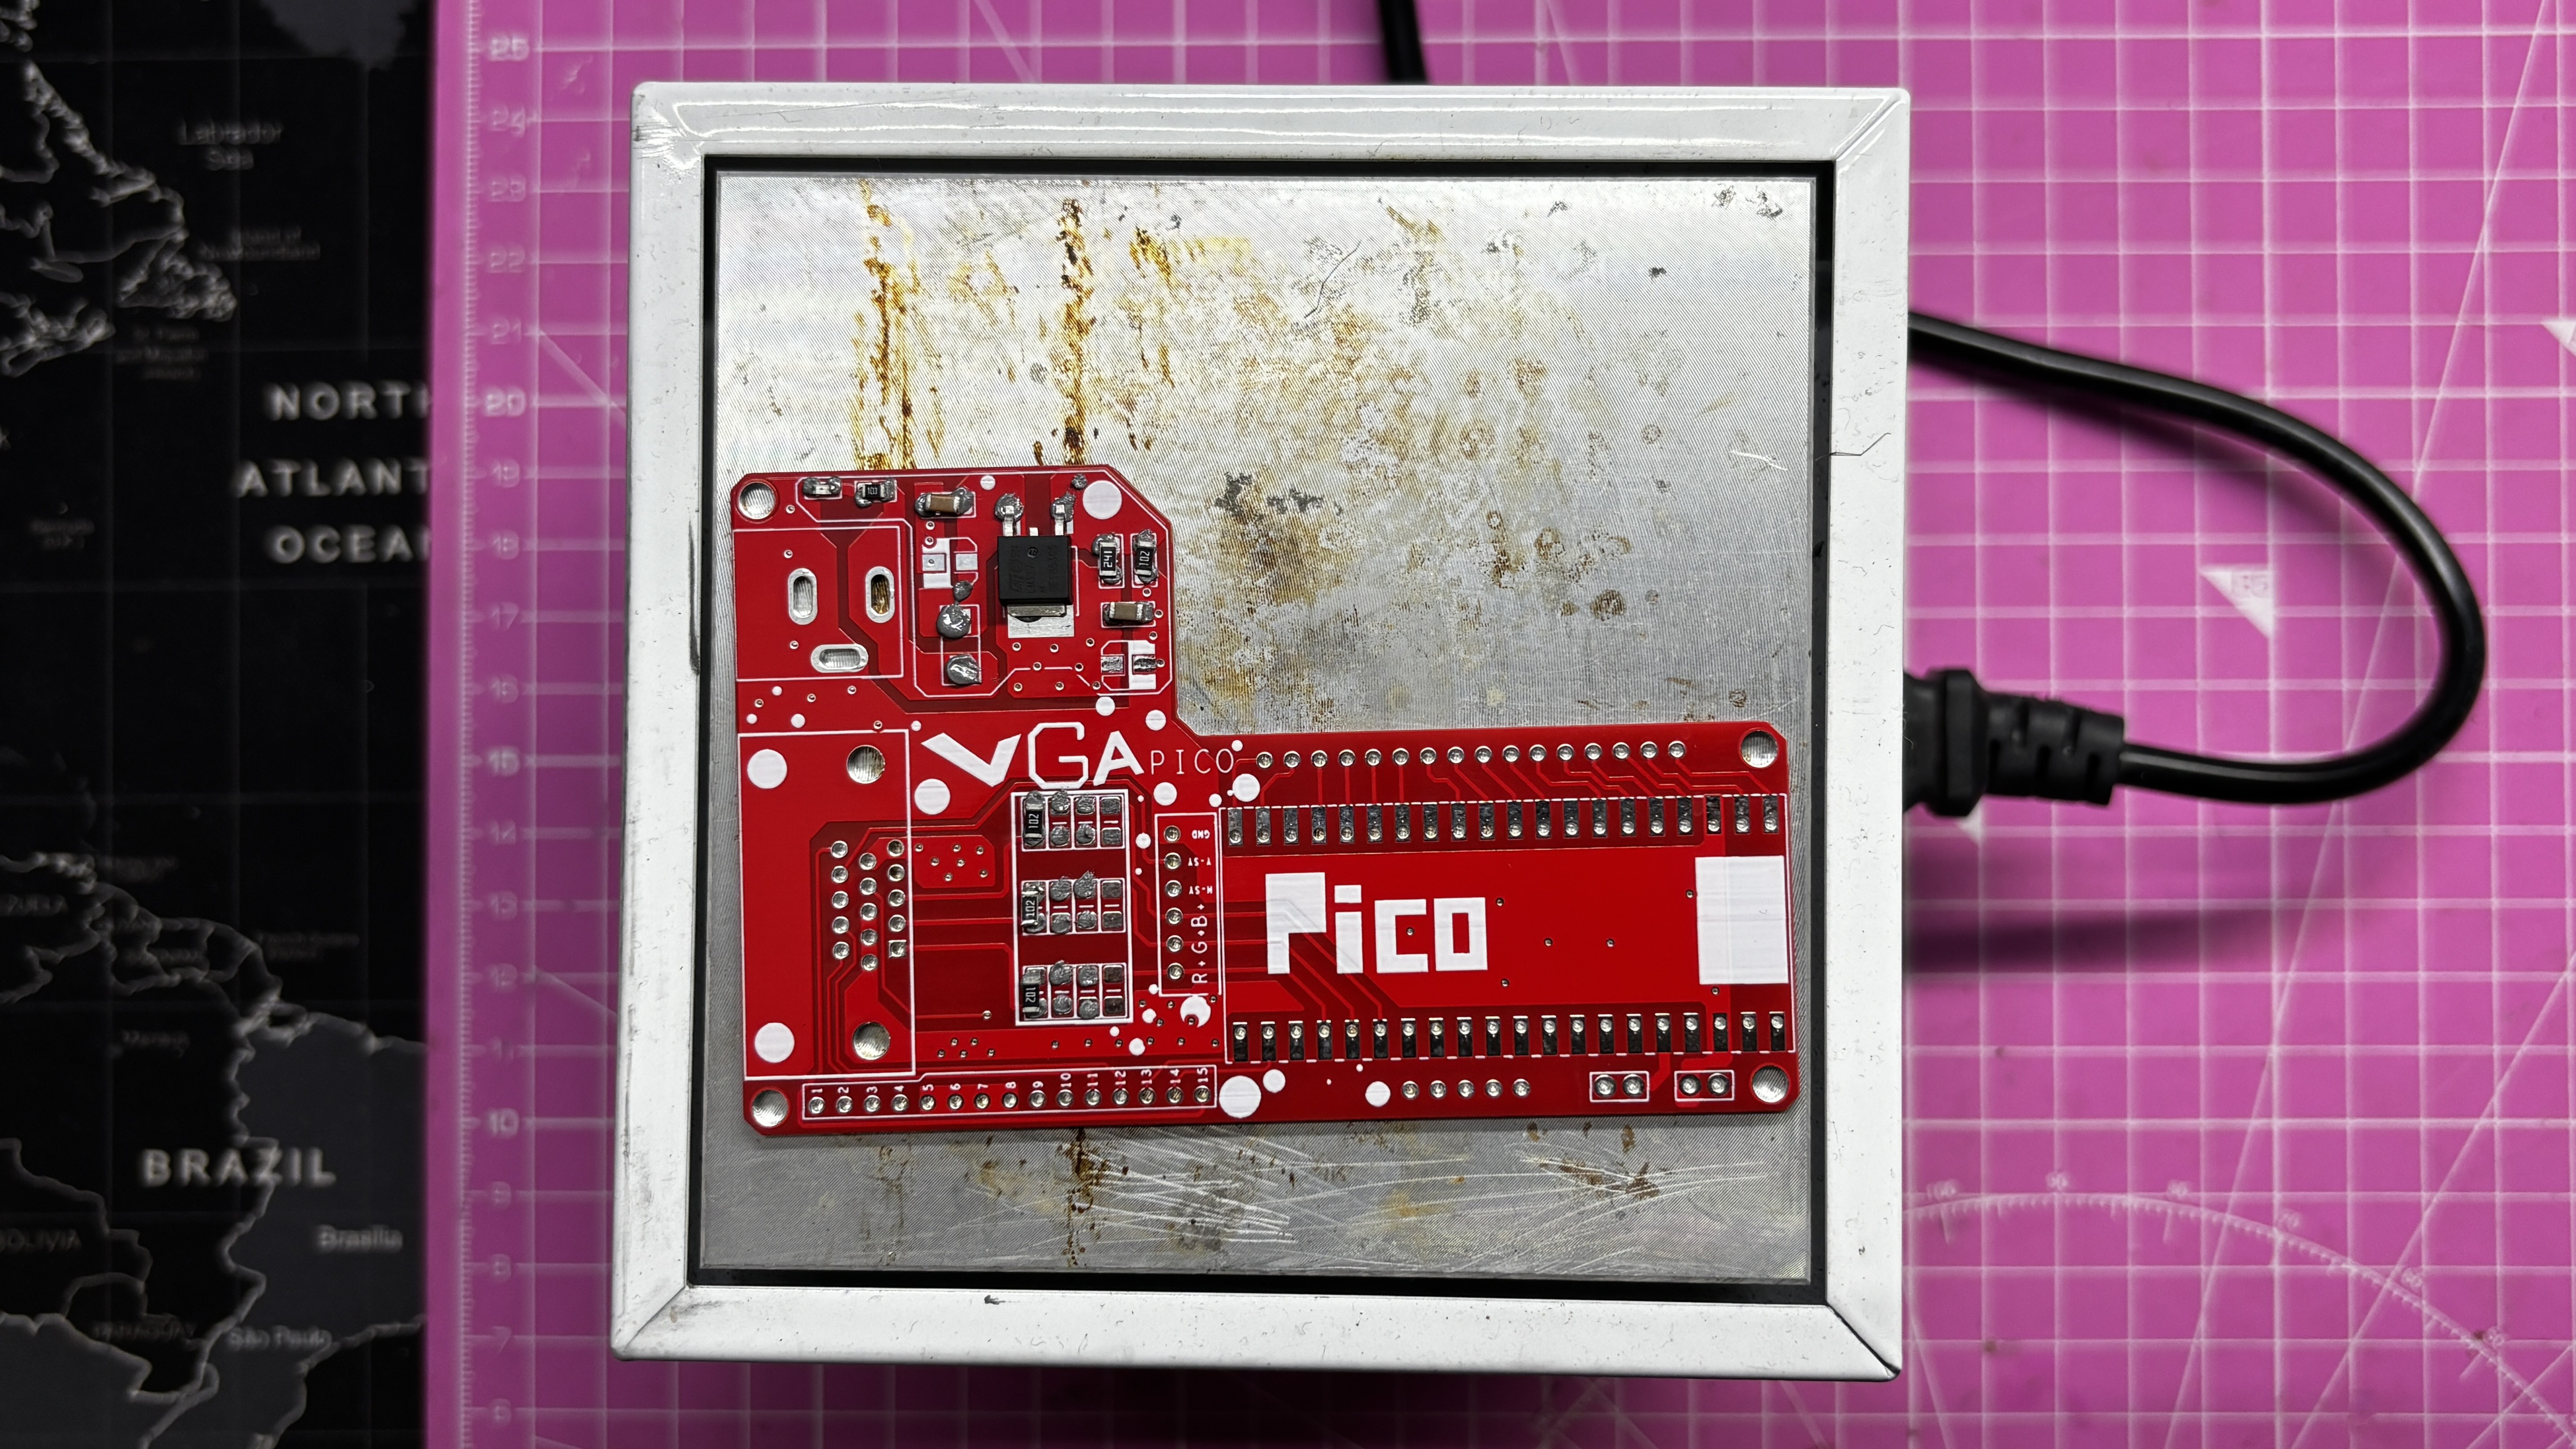
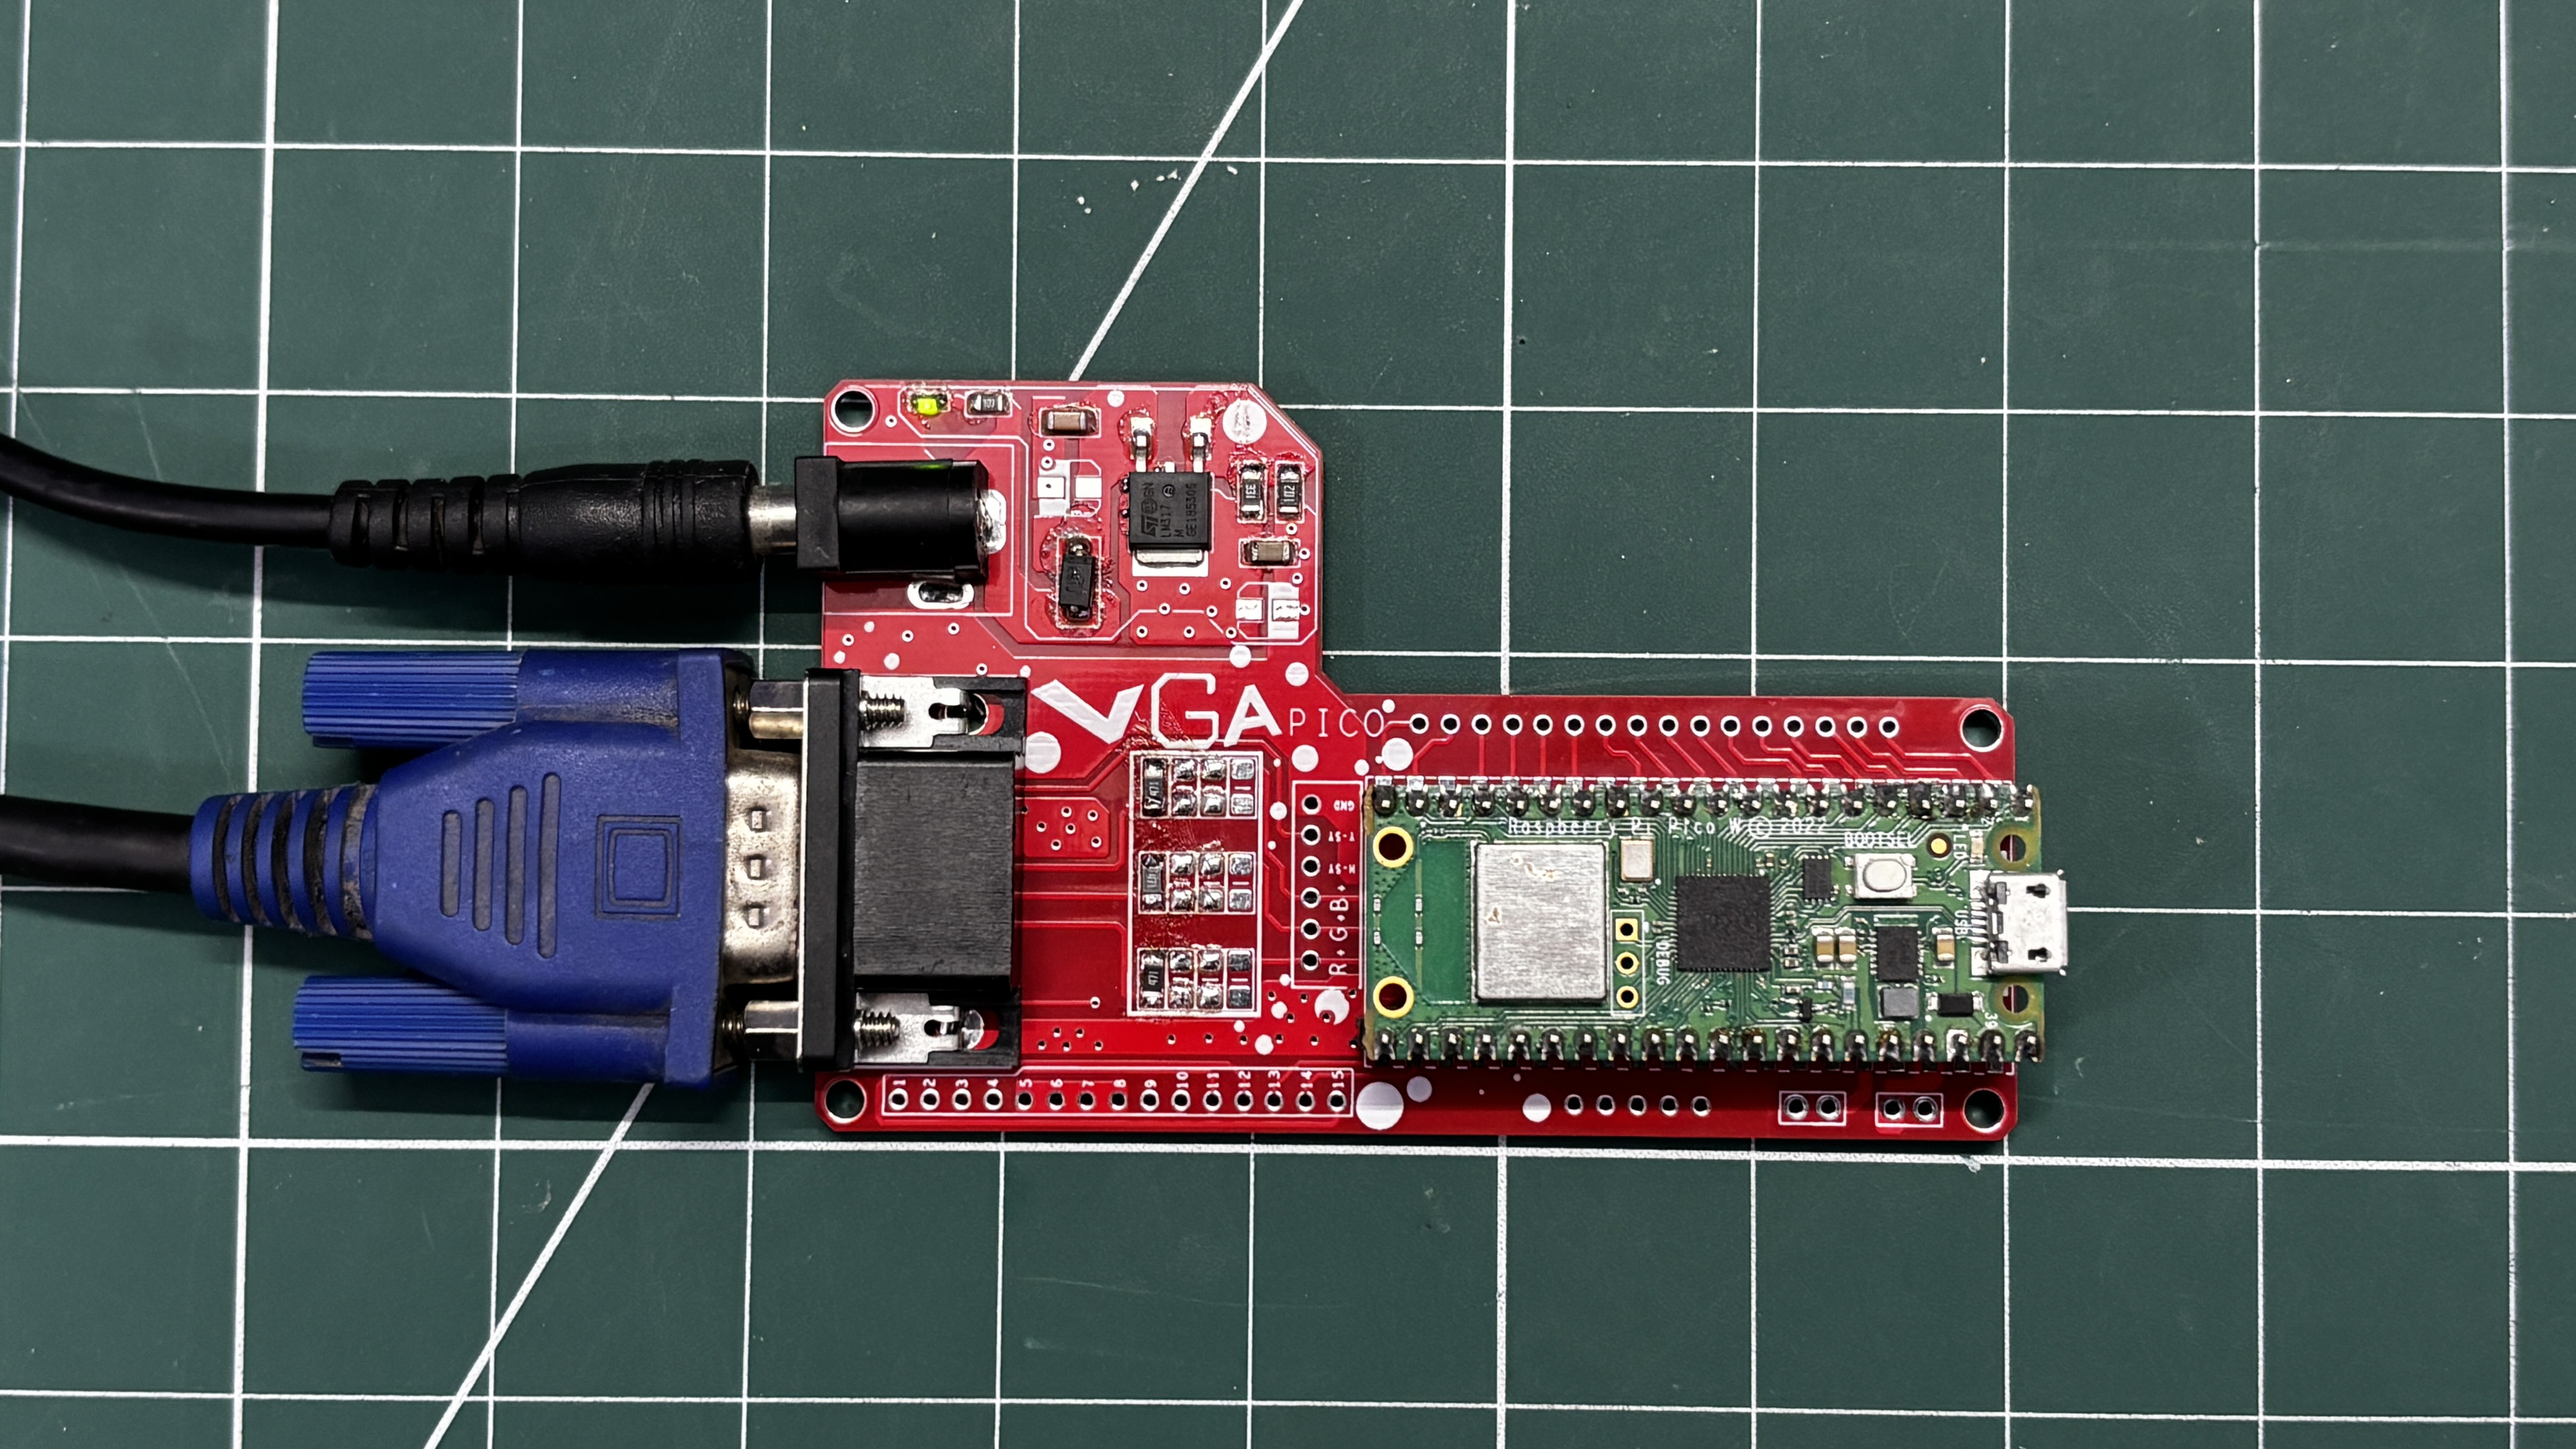
2GETTING VGA PICO BOARD READY
![]()
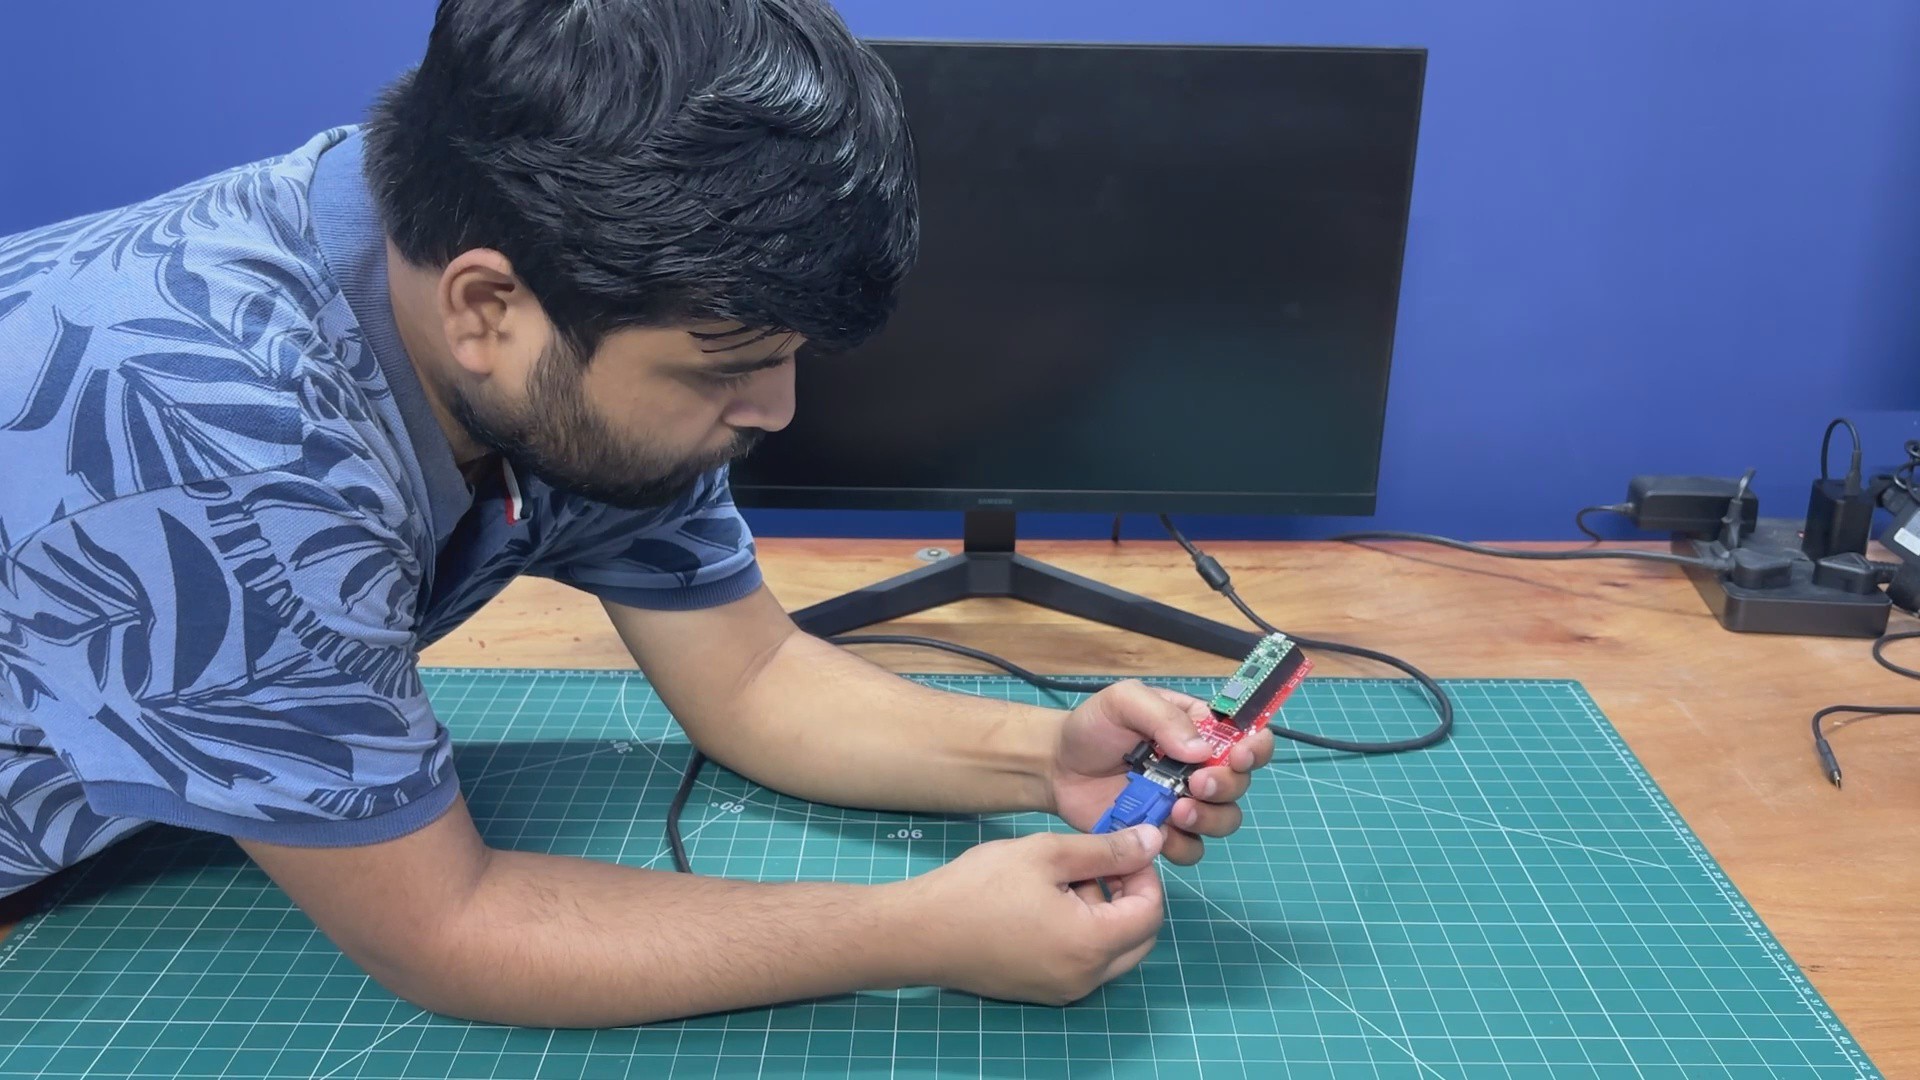
Before getting started with the code, we connect our Pico VGA Board to a 24-inch monitor using a VGA cable. We plug the VGA cable from the monitor into the VGA port of our circuit, and then connect the power adapter via the DC barrel jack connector.
-
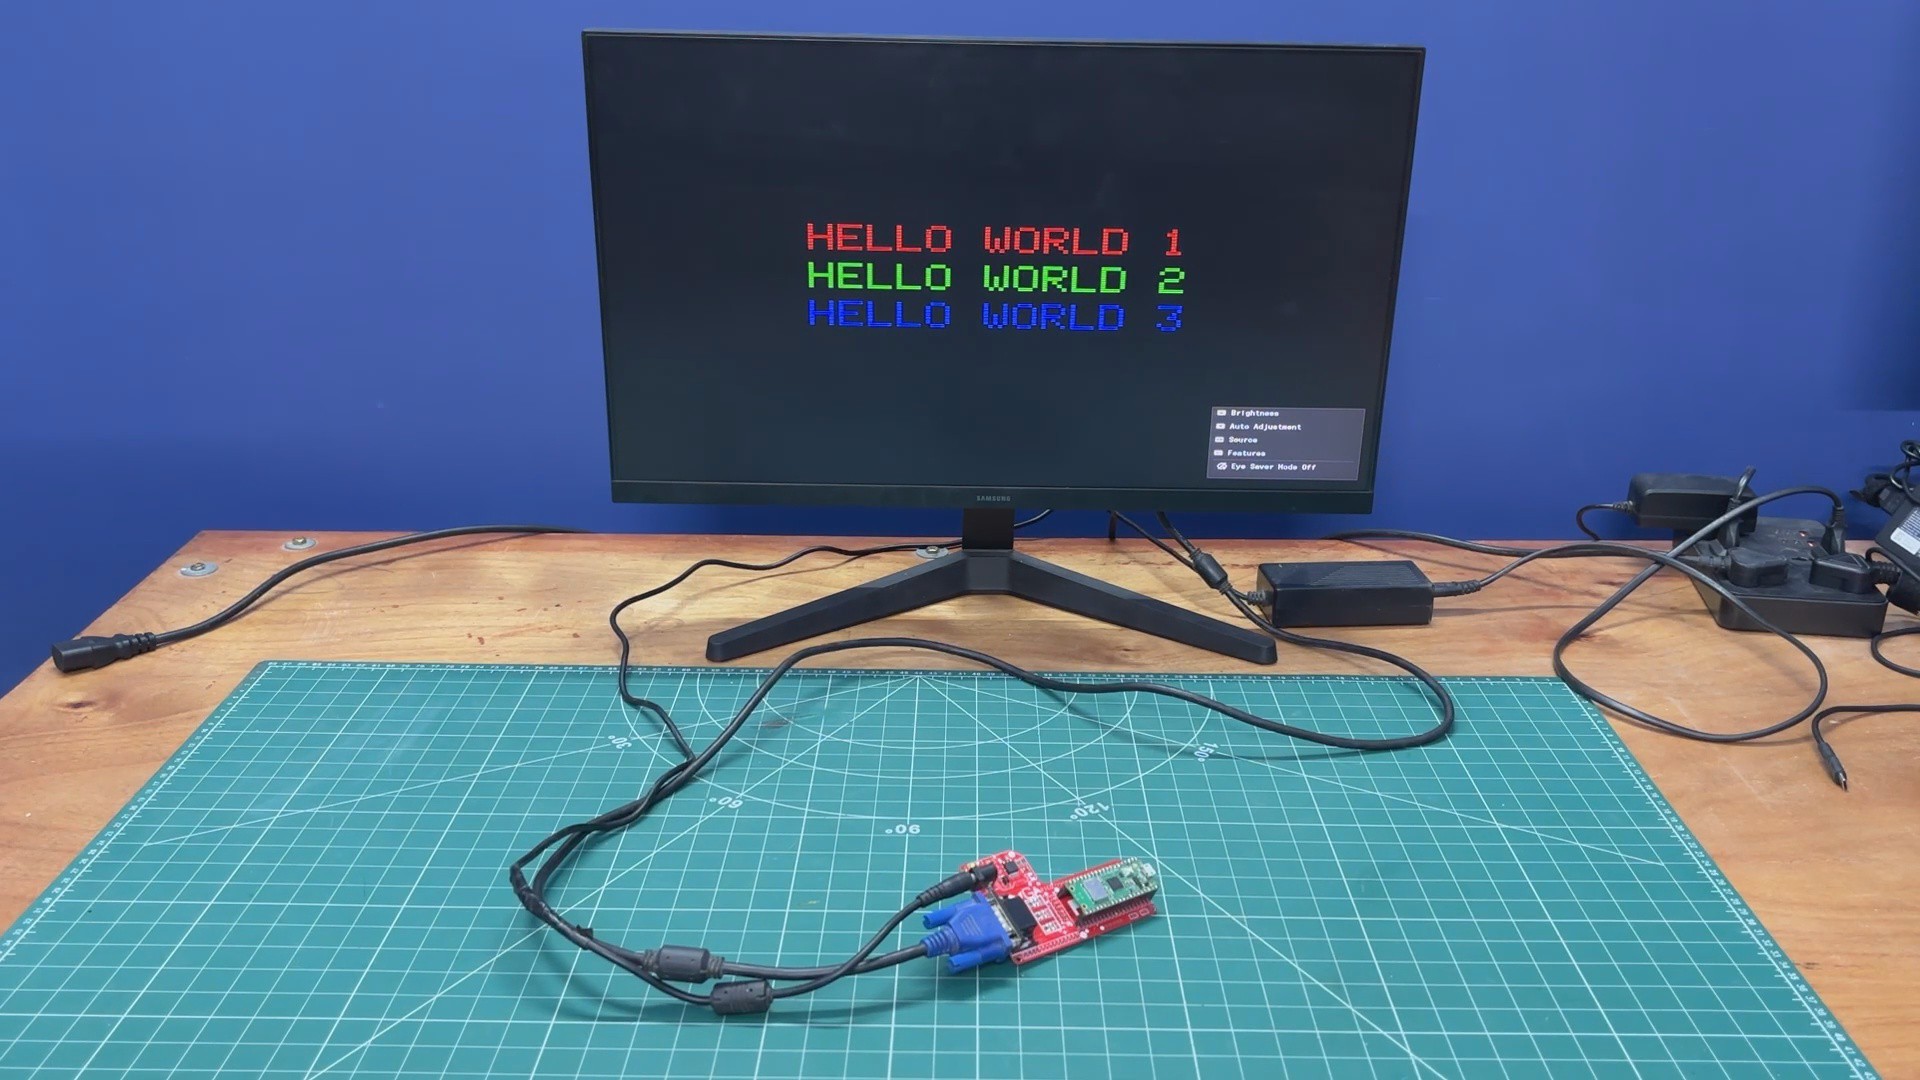
3DEMO 1- Hello World
![]()
We begin the demo of our setup by flashing PICO W with a Hello World code first.
This was a simple print statement like skeytch that prints hello world in three different colours, R, G, and B.
Here's a little code breakdown.
#include "vga_graphics.h"
#include <string.h>
/* ── Screen ───────────────── */
#define SW 640
#define SH 480
/* ── Text scale ──────────── */
#define SCALE 4
/* ── Centered print ───────── */
void printCentered(const char* text, int y, char color) {
int len = strlen(text);
int textWidth = len * 6 * SCALE;
int x = (SW - textWidth) / 2;
for (int i = 0; i < len; i++) {
drawChar(x + i * 6 * SCALE, y, text[i], color, BLACK, SCALE);
}
}
/* ── CRT Scanlines ───────── */
void drawScanlines() {
for (int y = 0; y < SH; y += 2) {
drawHLine(0, y, SW, BLACK);  // dark line every other row
}
}
/* ── Setup ─────────────── */
void setup() {
initVGA();
clearScreen();
int lineHeight = 8 * SCALE;
int totalHeight = lineHeight * 3 + 20; // spacing included
int startY = (SH - totalHeight) / 2;
// Line 1 (RED)
printCentered("HELLO WORLD 1", startY, RED);
// Line 2 (GREEN)
printCentered("HELLO WORLD 2", startY + lineHeight + 10, GREEN);
// Line 3 (BLUE)
printCentered("HELLO WORLD 3", startY + (lineHeight + 10) * 2, BLUE);
// CRT overlay
drawScanlines();
}
/* ── Loop ─────────────── */
void loop() {
}
We begin by defining VGA resolution.
#define SW 640#define SH 480
We defined the size of text scaling that enlarges the font size. Default fonts are 6x8 pixels, with a scale of 4; each character becomes 24x32 pixels.
#define SCALE 4
This is a center text function that does three major things.
void printCentered(const char* text, int y, char color)
It first calculates the width of the text, then centers it horizontally, and then draws each character.
int textWidth = len * 6 * SCALE;int x = (SW - textWidth) / 2;drawChar(x + i * 6 * SCALE, y, text[i], color, BLACK, SCALE);
Also, I added a CRT Scanline effect using the following function.
void drawScanlines()
How it works is super simple, it just draws a black horizontal line every 2 pixels, which creates a retro CRT Look.
void drawScanlines()for (int y = 0; y < SH; y += 2)drawHLine(0, y, SW, BLACK);
In Setup, we print 3 coloured lines.
printCentered("HELLO WORLD 1", startY, RED);printCentered("HELLO WORLD 2", startY + lineHeight + 10, GREEN);printCentered("HELLO WORLD 3", startY + (lineHeight + 10) * 2, BLUE);We apply the CRT effect using below function.
drawScanlines();
The loop is kept empty because this is a static display.
-
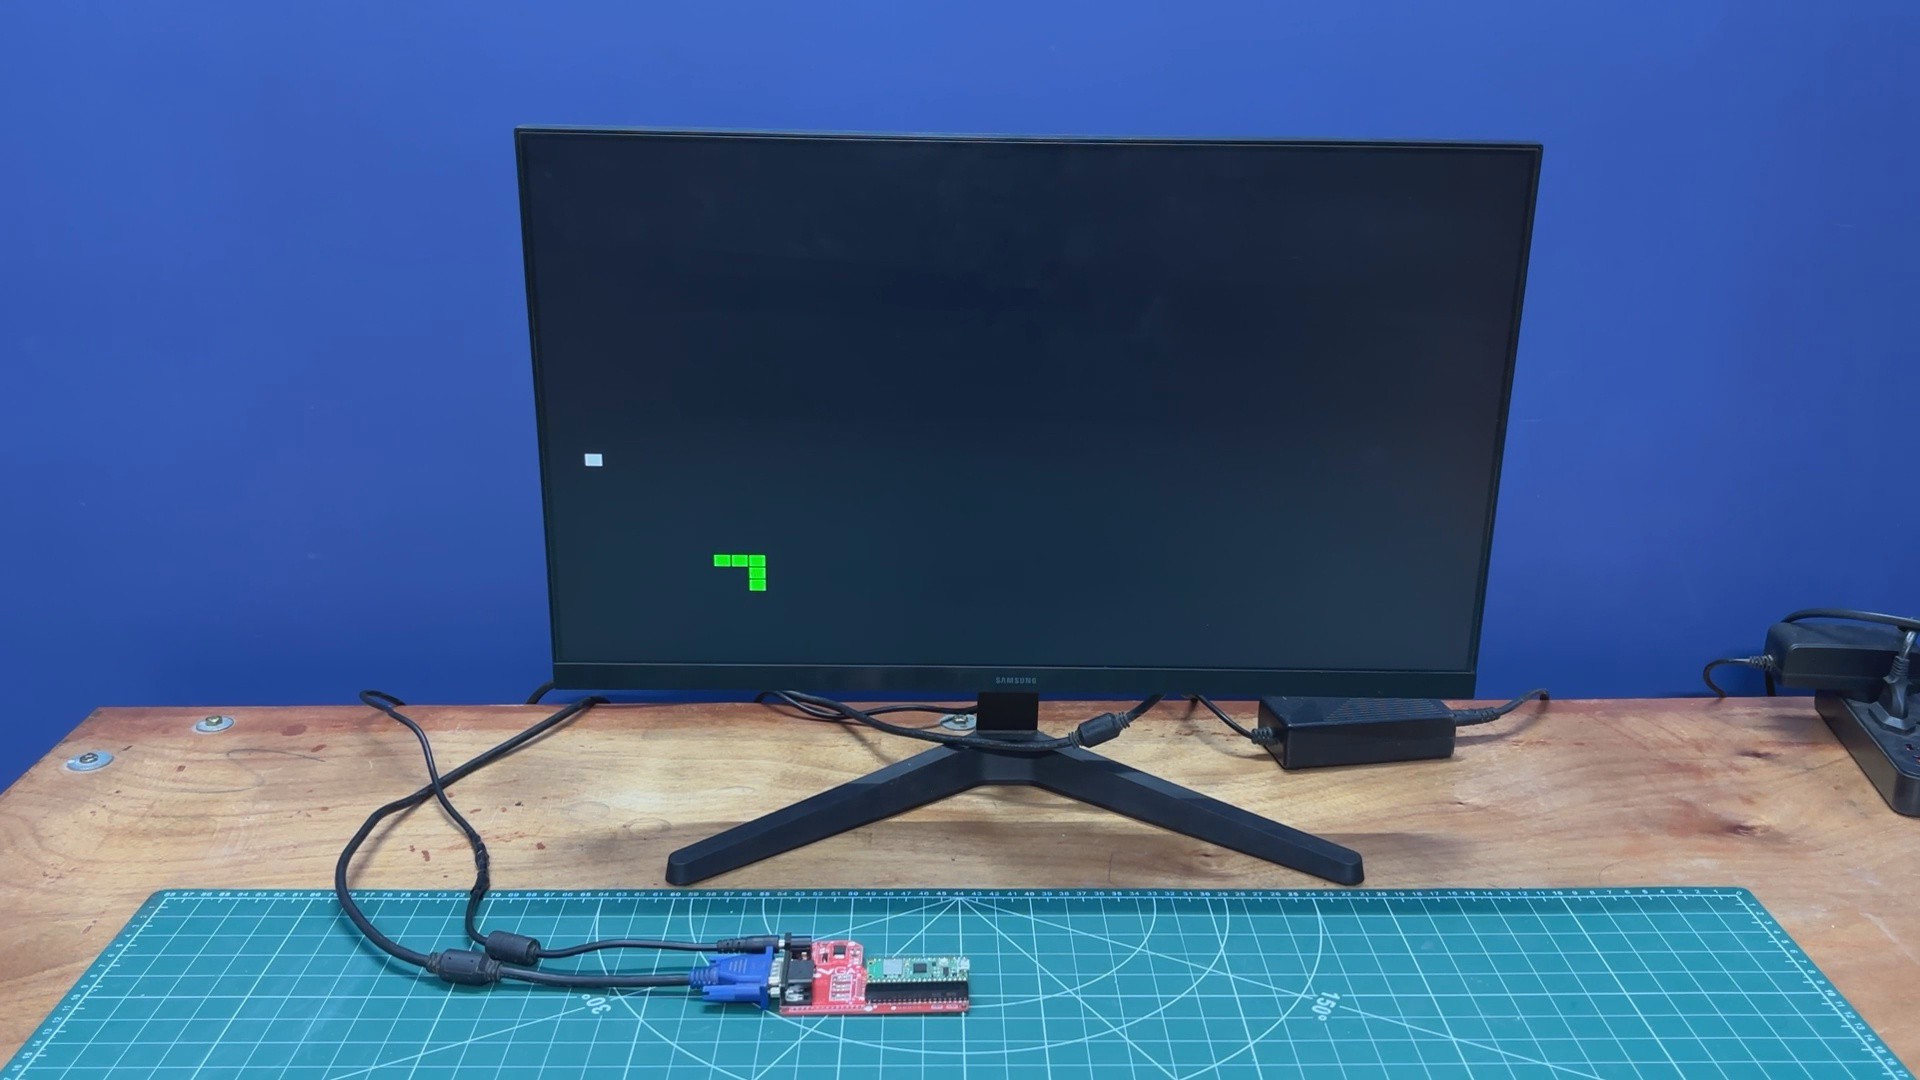
4DEMO 2- Snake Game
![]()
We then prepared a snake game sketch for this setup. The snake game code was taken from one of my previously created snake game console projects, in which we are able to control the movement of the snake.
For this VGA demo, we made the snake move randomly, but button controls can be added, and perhaps we can prepare a Snake Game Console XL project with this setup, but that’s a bit off topic.
Here’s the code breakdown.
#include "vga_graphics.h"
/* ── Screen ───────────────── */
#define SW 640
#define SH 480
/* ── Grid ───────────────── */
#define CELL 12
#define GRID_W (SW / CELL)
#define GRID_H (SH / CELL)
/* ── Snake ─────────────── */
struct Segment {
int x;
int y;
};
Segment snake[200];
int snakeLength = 5;
int dx = 1, dy = 0;
int foodX, foodY;
int prevTailX, prevTailY;
/* ── Random food ───────── */
void placeFood() {
foodX = random(2, GRID_W - 2);
foodY = random(2, GRID_H - 2);
}
/* ── Reset ─────────────── */
void resetGame() {
clearScreen();
snakeLength = 5;
dx = 1; dy = 0;
for (int i = 0; i < snakeLength; i++) {
snake[i].x = GRID_W / 2 - i;
snake[i].y = GRID_H / 2;
}
placeFood();
}
/* ── Random movement ───── */
void randomMove() {
if (random(0, 10) < 3) {  // 30% chance
int dir = random(0, 4);
if (dir == 0 && dy == 0) { dx = 0; dy = -1; } // up
if (dir == 1 && dy == 0) { dx = 0; dy = 1; }  // down
if (dir == 2 && dx == 0) { dx = -1; dy = 0; } // left
if (dir == 3 && dx == 0) { dx = 1; dy = 0; }  // right
}
}
/* ── Collision ─────────── */
bool selfCollision() {
for (int i = 1; i < snakeLength; i++) {
if (snake[0].x == snake[i].x && snake[0].y == snake[i].y) {
return true;
}
}
return false;
}
/* ── Draw one cell ─────── */
void drawCell(int gx, int gy, char color) {
fillRect(gx * CELL, gy * CELL, CELL - 1, CELL - 1, color);
}
/* ── Setup ─────────────── */
void setup() {
initVGA();
clearScreen();
randomSeed(analogRead(26)); // Pico randomness
resetGame();
}
/* ── Loop ─────────────── */
void loop() {
// random AI movement
randomMove();
// store tail
prevTailX = snake[snakeLength - 1].x;
prevTailY = snake[snakeLength - 1].y;
// move body
for (int i = snakeLength - 1; i > 0; i--) {
snake[i] = snake[i - 1];
}
// move head
snake[0].x += dx;
snake[0].y += dy;
// wrap screen
if (snake[0].x >= GRID_W) snake[0].x = 0;
if (snake[0].x < 0) snake[0].x = GRID_W - 1;
if (snake[0].y >= GRID_H) snake[0].y = 0;
if (snake[0].y < 0) snake[0].y = GRID_H - 1;
// self collision
if (selfCollision()) {
delay(500);
resetGame();
return;
}
// food
if (snake[0].x == foodX && snake[0].y == foodY) {
snakeLength++;
placeFood();
}
// erase tail
drawCell(prevTailX, prevTailY, BLACK);
// draw snake
for (int i = 0; i < snakeLength; i++) {
drawCell(snake[i].x, snake[i].y, GREEN);
}
// draw food
drawCell(foodX, foodY, WHITE);
delay(120);
}
We first define the screen and grid setup.
#define SW 640#define SH 480
We also define VGA Resolution, where each cell consists of 12x12 pixels, and each grid becomes 53 columns x 40 rows.
#define CELL 12#define GRID_W (SW / CELL)#define GRID_H (SH / CELL)
Here is the structure of a snake.
struct Segment { int x; int y;};Each snake segment stores its position.
Segment snake[200];int snakeLength = 5;
Snake can grow up to 200 segments and start with a length of 5.
This is the Movement variables.
int dx = 1, dy = 0;
This places food randomly with safe grid bounds, also avoiding edges slightly.
void placeFood()
This is the Reset Game function that clears the screen, resets the snake's length and direction, places the snake at the center, and spawns new food.
void resetGame()
This is the Random Movement function, which has like 30% chance to change direction, and the setup prevents reversing direction.
void randomMove()if (random(0, 10) < 3)
Food is drawn by the following section.
drawCell(foodX, foodY, WHITE);
We control the speed of snake using delay(120);
-
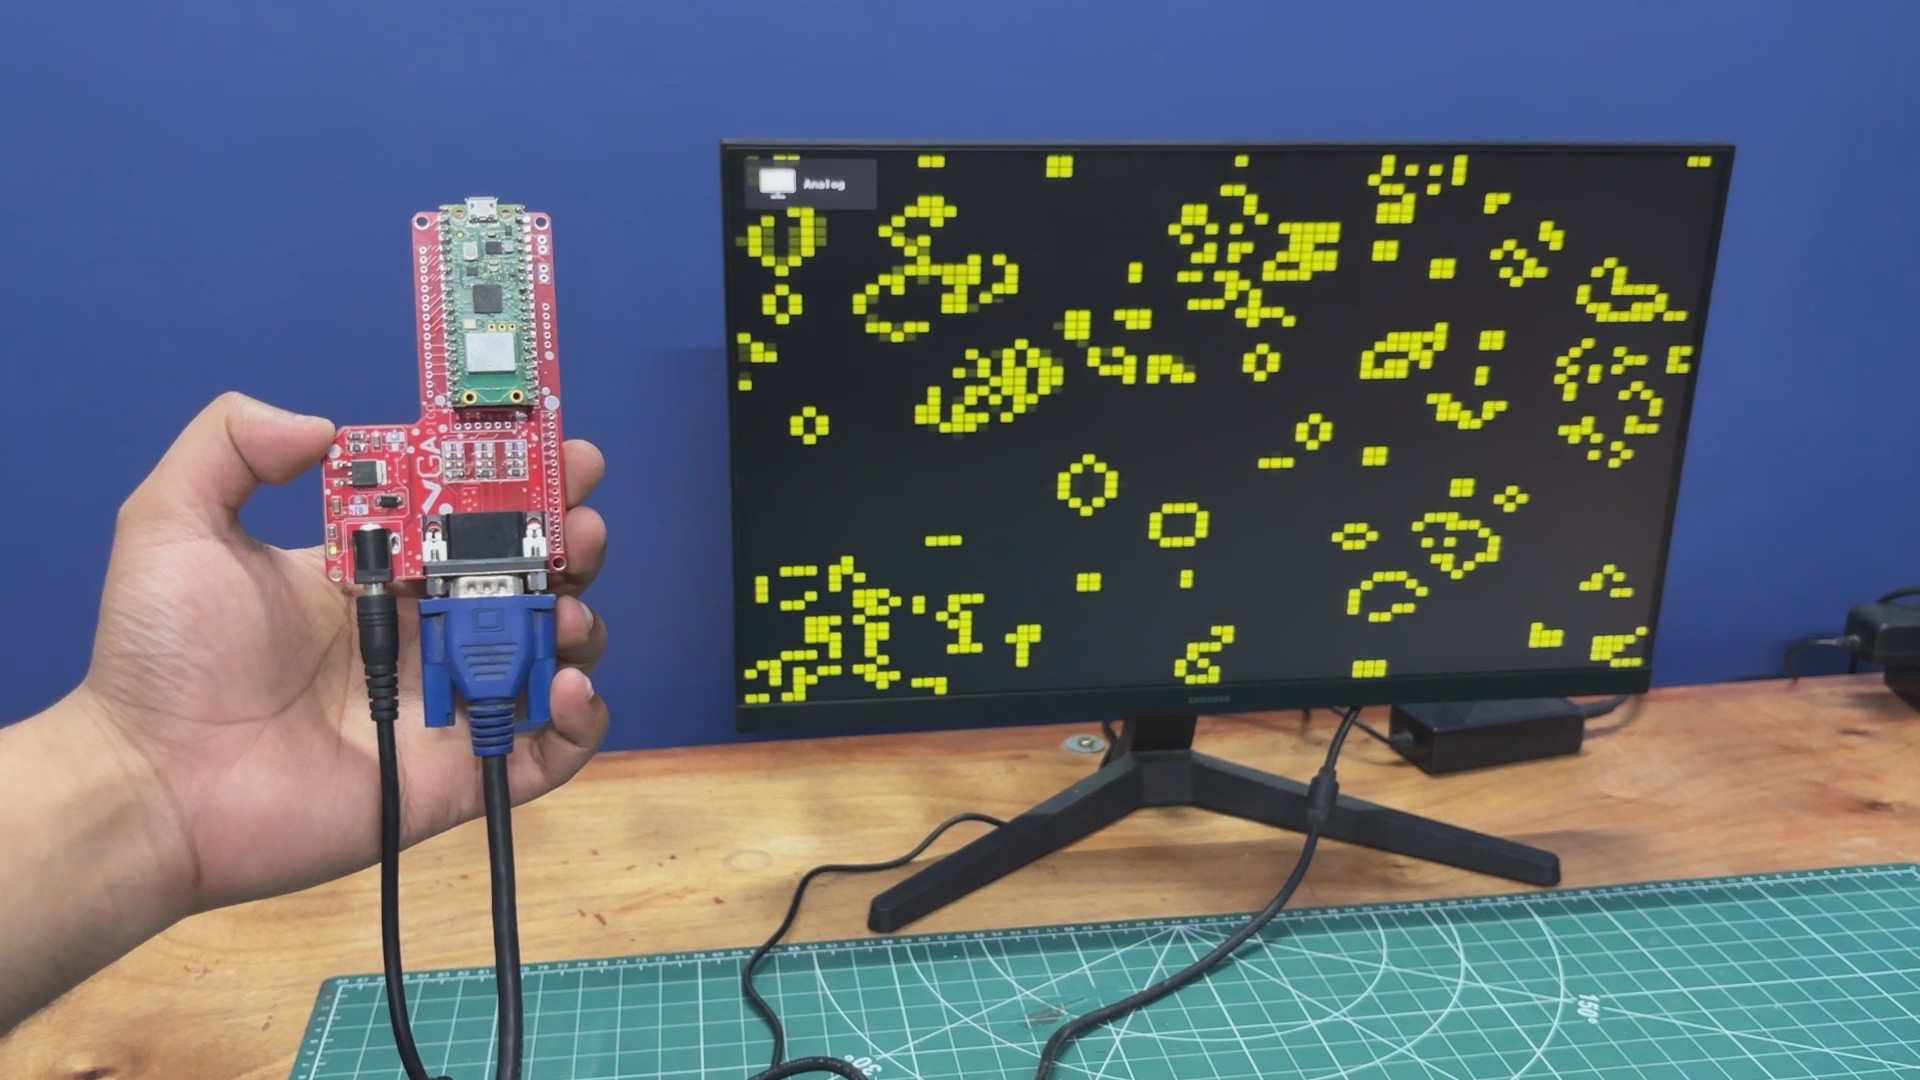
5DEMO 3- Conway's Game of Life
![]()
Next is the Game of Life sketch, and here's a little code breakdown.
#include "vga_graphics.h"
/* ── Screen ───────────────── */
#define SW 640
#define SH 480
/* ── Grid ───────────────── */
#define CELL 8
#define GRID_W (SW / CELL)
#define GRID_H (SH / CELL)
/* ── Buffers ───────────── */
bool grid[GRID_W][GRID_H];
bool nextGrid[GRID_W][GRID_H];
/* ── Draw cell ─────────── */
void drawCell(int x, int y, bool alive) {
fillRect(
x * CELL,
y * CELL,
CELL - 1,
CELL - 1,
alive ? YELLOW : BLACK
);
}
/* ── Random init ───────── */
void randomizeGrid() {
for (int x = 0; x < GRID_W; x++) {
for (int y = 0; y < GRID_H; y++) {
grid[x][y] = random(0, 2);
drawCell(x, y, grid[x][y]);
}
}
}
/* ── Count neighbors ───── */
int countNeighbors(int x, int y) {
int count = 0;
for (int dx = -1; dx <= 1; dx++) {
for (int dy = -1; dy <= 1; dy++) {
if (dx == 0 && dy == 0) continue;
int nx = x + dx;
int ny = y + dy;
// wrap around edges
if (nx < 0) nx = GRID_W - 1;
if (nx >= GRID_W) nx = 0;
if (ny < 0) ny = GRID_H - 1;
if (ny >= GRID_H) ny = 0;
if (grid[nx][ny]) count++;
}
}
return count;
}
/* ── Update simulation ─── */
void updateGrid() {
for (int x = 0; x < GRID_W; x++) {
for (int y = 0; y < GRID_H; y++) {
int neighbors = countNeighbors(x, y);
if (grid[x][y]) {
// alive
nextGrid[x][y] = (neighbors == 2 || neighbors == 3);
} else {
// dead
nextGrid[x][y] = (neighbors == 3);
}
}
}
// apply + redraw only changes
for (int x = 0; x < GRID_W; x++) {
for (int y = 0; y < GRID_H; y++) {
if (grid[x][y] != nextGrid[x][y]) {
drawCell(x, y, nextGrid[x][y]);
}
grid[x][y] = nextGrid[x][y];
}
}
}
/* ── Setup ─────────────── */
void setup() {
initVGA();
clearScreen();
randomSeed(analogRead(26)); // Pico randomness
randomizeGrid();
}
/* ── Loop ─────────────── */
void loop() {
updateGrid();
delay(80);  // speed control
}
Code begins by defining the screen resolution, which is the following.
#define SW 640#define SH 480
We next define the grid size for cells. Each cell is 8x8 Pixels, the grid becomes 640/8 = 80 columns and 480/8 = 60 rows.
#define CELL 8#define GRID_W (SW / CELL)#define GRID_H (SH / CELL)
Below is the buffer or core of our simulation. This prevents overwriting data while calculating.
bool grid[GRID_W][GRID_H];bool nextGrid[GRID_W][GRID_H];
Next up is drawing a cell logic. This first converts the grid position into screen pixels.
void drawCell(int x, int y, bool alive)
Using this, a square is drawn.
x * CELL, y * CELL
This is a random function that fills the grid randomly when the code starts.
void randomizeGrid()
This is the core logic of the game of life, which is counting neighbours. It checks all 8 surrounding cells.
int countNeighbors(int x, int y)
Game Rules are set with the following.
Alive Cell survives if there are 2 or 3 neighbours. Dead cells become alive if there are exactly 3 neighbours.
if (grid[x][y]) { nextGrid[x][y] = (neighbors == 2 || neighbors == 3);} else { nextGrid[x][y] = (neighbors == 3);}Using the section below, we only redraw the cells that are changed instead of a full-screen redraw.
if (grid[x][y] != nextGrid[x][y]) { drawCell(x, y, nextGrid[x][y]);}This is the copy state that moves next from the current frame.
grid[x][y] = nextGrid[x][y];
In the setup, VGA is initialized, randomness is added, and the simulation starts.
initVGA();clearScreen();randomSeed(analogRead(26));randomizeGrid();
In the loop, the simulation is updated continuously, and its speed is controlled. Lower delay means fast evolution, and higher delay results in a slower, easier-to-see evolution.
updateGrid();delay(80);
-
6CONCUSION
![]()
This setup works quite well, and with this, I’m even preparing a game project and a couple of sensor interface display-like projects. One of the reasons for making this Pico VGA Board was to use a full-size monitor with the Pico as a display for showing XYZ stuff, and with the help of our hardware, this is now super simple.
We just need to download and install my custom library, prepare the VGA Pico Board setup (whose details are all attached in this article), make your own VGA Pico Board, and just display XYZ stuff on a monitor. Super simple.
The board can be powered via the DC Barrel jack with a 12V Adaptor.
For now, this project has been completed, and it’s been a success. Make sure to check out the video I prepared for this project, and if you are interested in these display-related projects, check out my older work.
Thanks for reaching this far in the article, and I will be back with a new project real soon.
Pico VGA Board 1.0
Drive VGA/HDMI Monitors with this Raspberry Pi PICO-based Dev board.
Discussions
Become a Hackaday.io Member
Create an account to leave a comment. Already have an account? Log In.