Jakub Kaderka
-
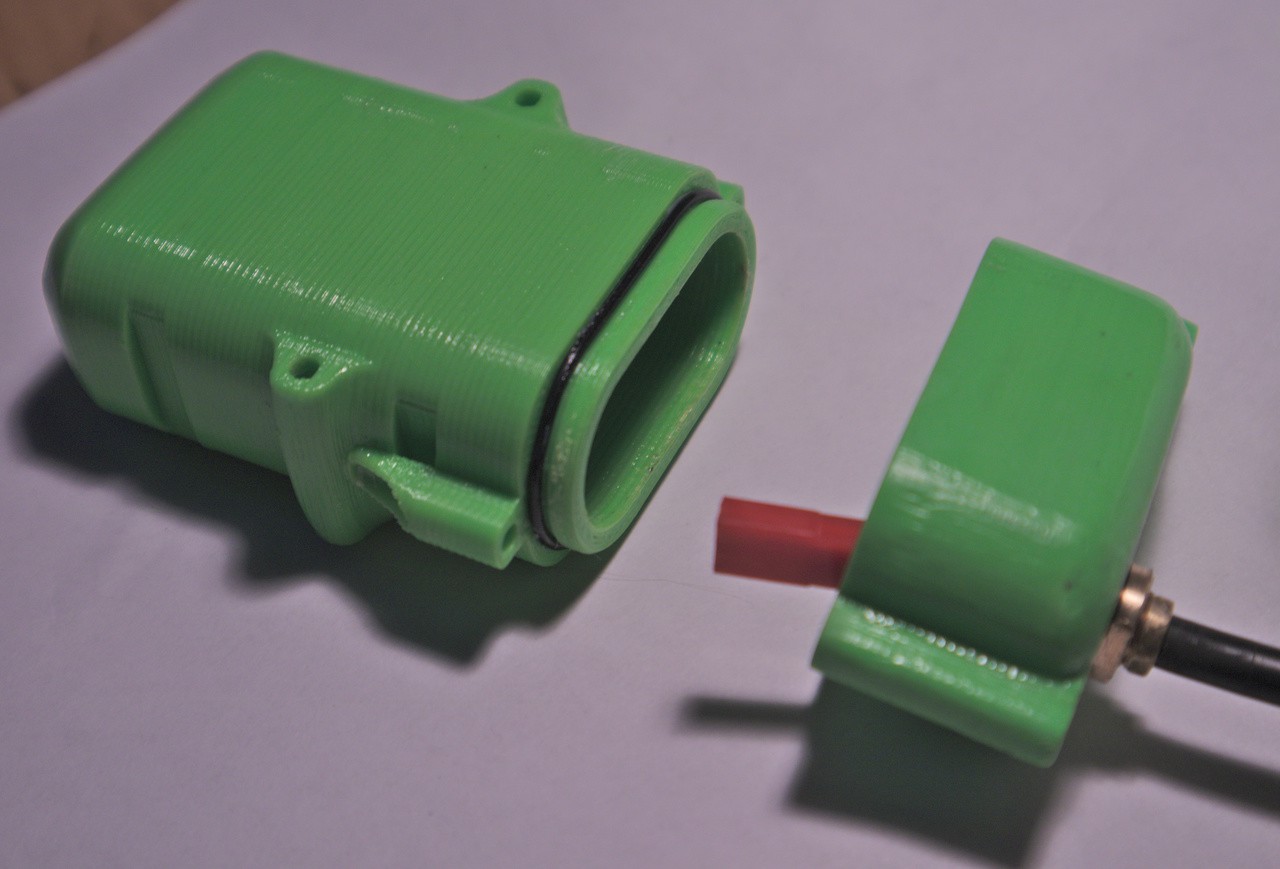
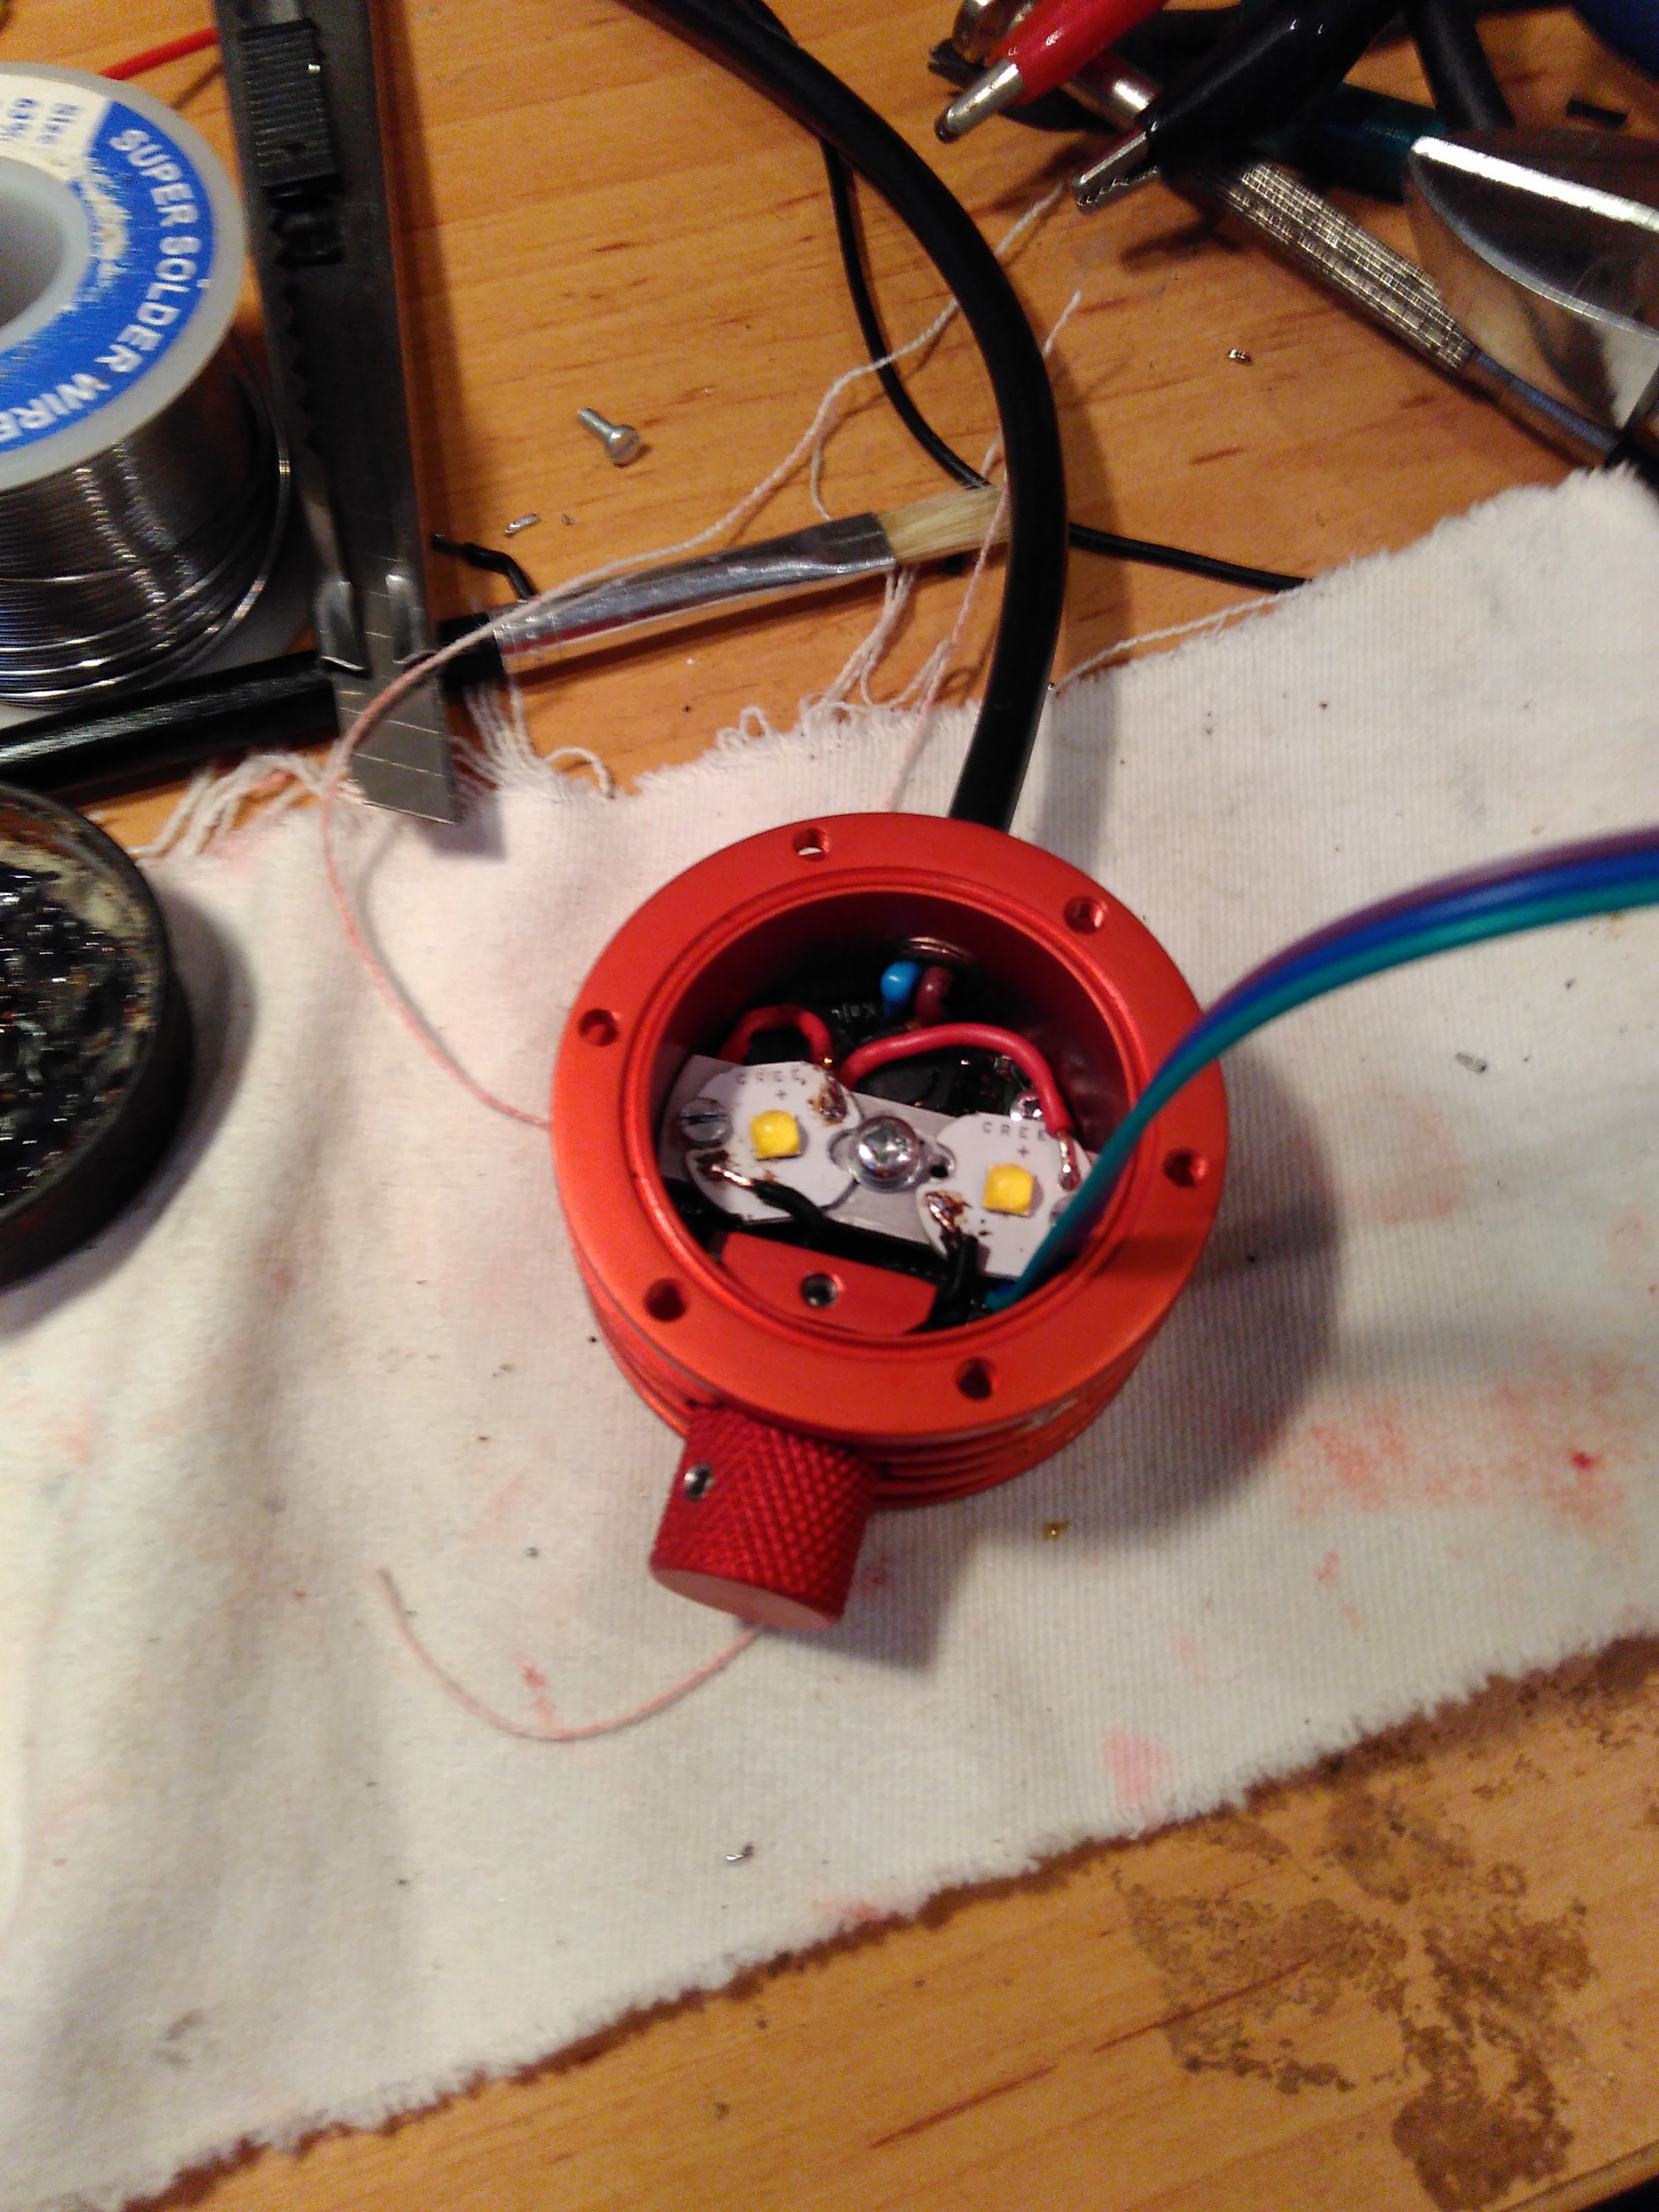
New battery box
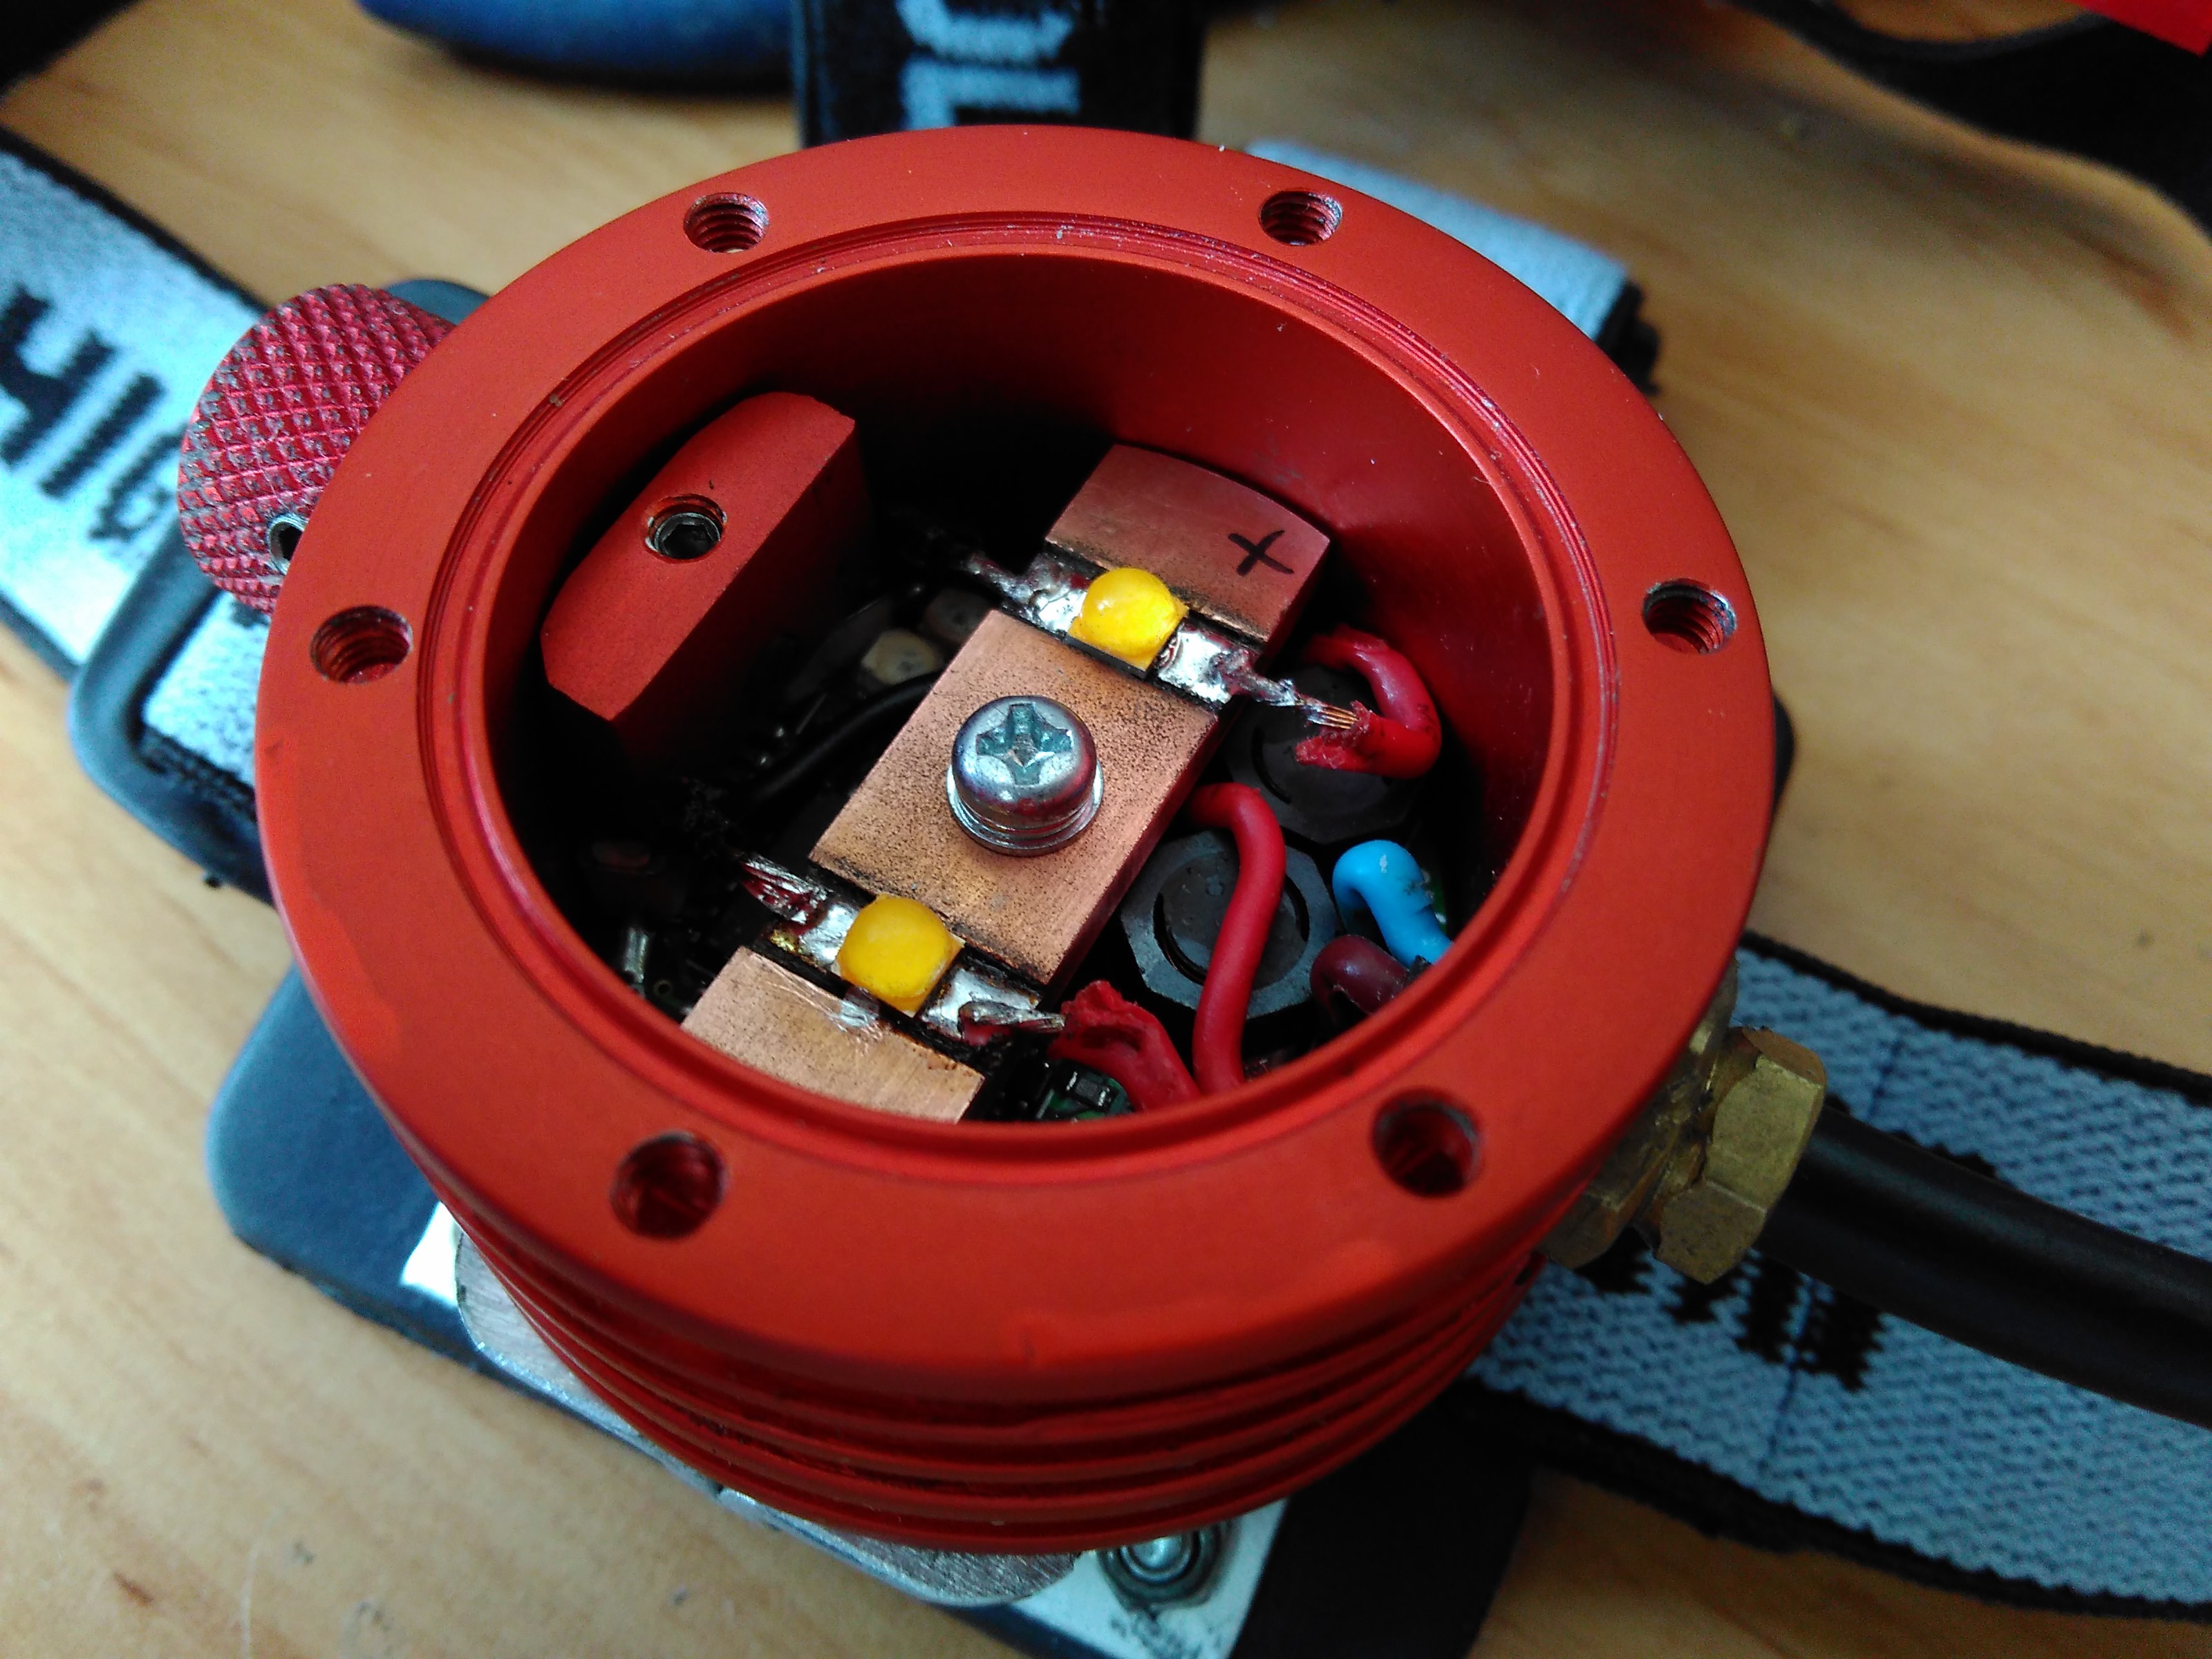
12/23/2017 at 15:10 • 0 commentsFinally I finished the battery box. The previous version was far from good, the O-Ring was not held by anything when the box was open, so it was very easy to loose it. The new version has this problem fixed, I didn't have much time to test how much waterproof it is, but a brief test in the kitchen sink was successful.
Also I'm building another two lamps for my friends, the green version look pretty awesome, I guess I'll try more different colors next time.
![]()
![]()
-
Make of the DarkStar
12/05/2017 at 18:04 • 0 comments
Made a short video how the lamp was made - x64 speeded up. -
Still not dead
11/20/2017 at 22:16 • 0 commentsThe basic design was finished some time ago, but I'm still making some small improvements:
- Updated few bits in the firmware to make it more readable and removed some smaller annoying bugs and features (like there was no way to turn the lamp off immediately - useful when taking photos,...)
- Replaced teflon insulation by loctite threadlocker, the seal seems to work well, several minutes submerged to two meters and no water got inside.
- Got rid of the phototransistor. Adaptive light control sounds cool, but you'll be very glad it can be turned off after few minutes from entering the cave. It's working somehow on the surface, but there are tons of reflective surfaces down there. Let's stick with the manual controls.
- Updating the battery box design (still in progress), the original one is prone misplacing the o-ring seal during changing batteries underground due to a poor o-ring groove placement.
- Looking into building a spot welder, soldering Li-Ion cells together is not the best idea...
-
Shared documentation, project mostly finished
05/22/2017 at 20:23 • 0 commentsThe documentation and source code were shared on github.
The issue with blinking and turning off was caused by casting temperature to unsigned... Stupid mistake, fixed. Now it works reliably. To ensure it will work under various heat conditions, I put the whole lamp (except batteries) to a freezer (-18 °C) for 30 minutes, to oven (70 °C) for 30 minutes and repeated 3 times. After such treatment it worked well. Only problem noticed was a bit warped battery box as it got soft in the oven.
To test impact resistance, I dropped the lamp from 2 meters on concrete floor 6 times under various angles (approximation of cube). Unfortunately the lens was a bit too heavy for the LED, when the lamp hit the floor, lens mass pushed on the LED and caused separation of CREE optics from the chip itself. Fix is simple - just use a bit of glue to fix the lens in space.
I guess the project can be marked as finished. All important parts work as expected.
-
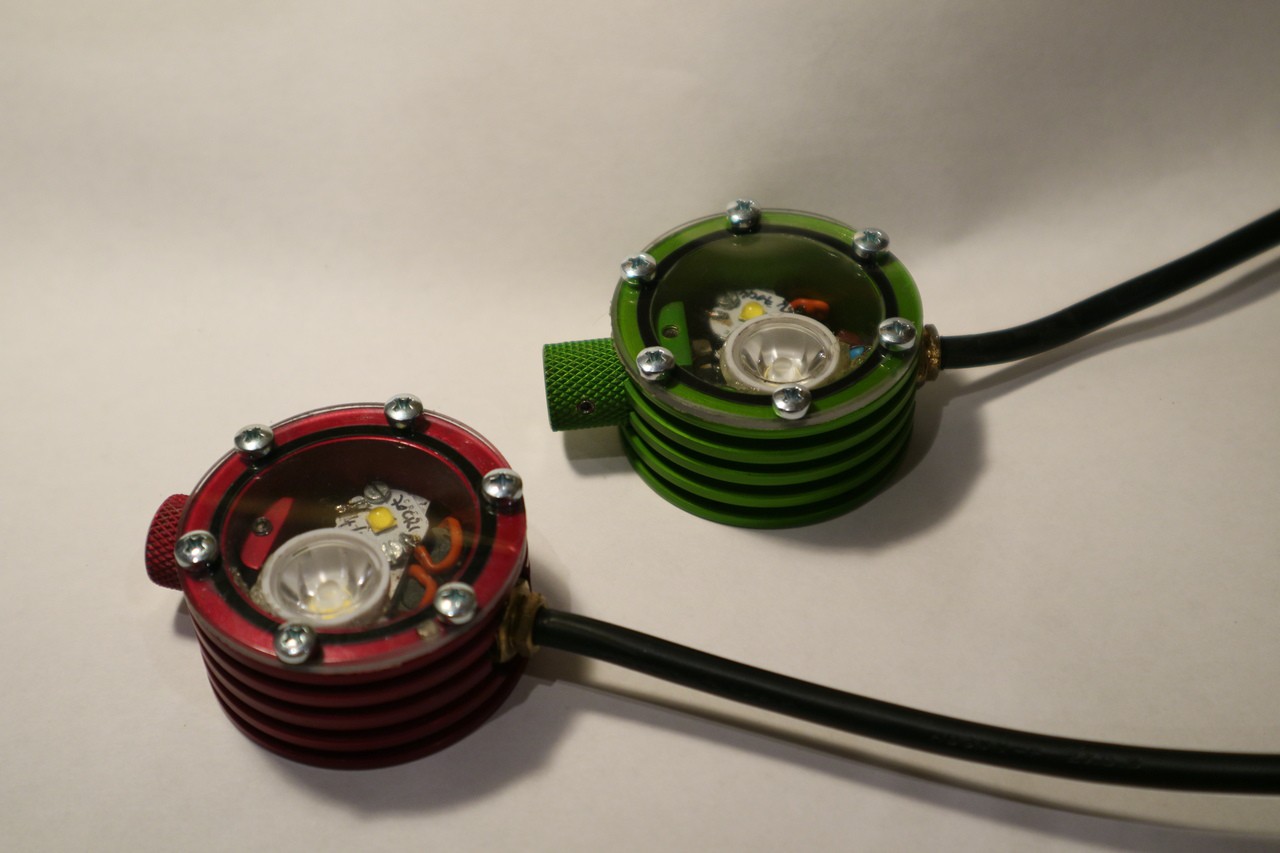
Light measurements, cave testing.
05/16/2017 at 20:07 • 0 commentsFirst regarding the temperature issues. I resoldered one of the leds from cooper heatsink to aluminium one. When compared with brand new LED on the same heatsink it was clearly visible that old led is heating on much faster rate. Therefore the heat performance on cooper was worse due to the overheating LEDs during soldering.
Also I measured the luminous flux. Maximal value was 869 lumens. The 70 CRI XP-L2 4000K LED topped at 562 lumens, 80 CRI one at 383 lumens. With both leds in 70 CRI variant the lamp should go over 1000 lumens easily.
Anyway, I've finally tested the lamp in small local cave. From mechanical side of view it worked well. The light is quite pleasant and strong enough for my needs. Only drawback is the light stability :) - after hour or so it started blinking and after powering off I wasn't able to turn the main light on again. But that seems to be a firmware issue, I guess disable limit checking magic key combination could be useful.
![]()
-
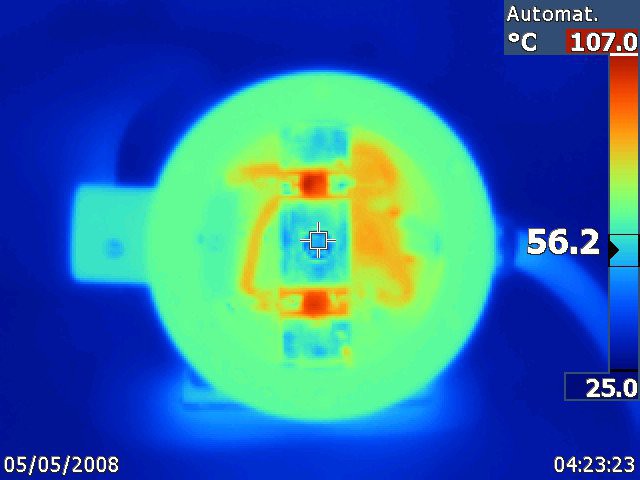
Cooper heatsink
05/05/2017 at 08:09 • 0 commentsI've been experimenting with soldering LEDs directly to the cooper heatsink. A piece of cooper was milled to desired shape, led thermal pad is soldered directly to the heatsink and other two pins are soldered to small pieces of FR4 i inserted below.
I expected much better heat dissipation and lower LED temperatures, unfortunately the temperature settles on 107 °C. That makes me wonder, what's wrong. LED not correctly soldered to heatsink? I don't think so, it lies directly on the cooper with thin layer of solder. LED damaged during soldering? Bad thermal contact between the cooper and the aluminium body? Small surface area in contact with heatsink? XP-L2 is quite small, on aluminium heatsink, there was a thin insulation between the led and heatsink, but the whole LED was placed directly on the heatsink, now only the thermal pad is in contact with the heatsink... Or is there any dark magic involved? :)
![]()
![]()
-
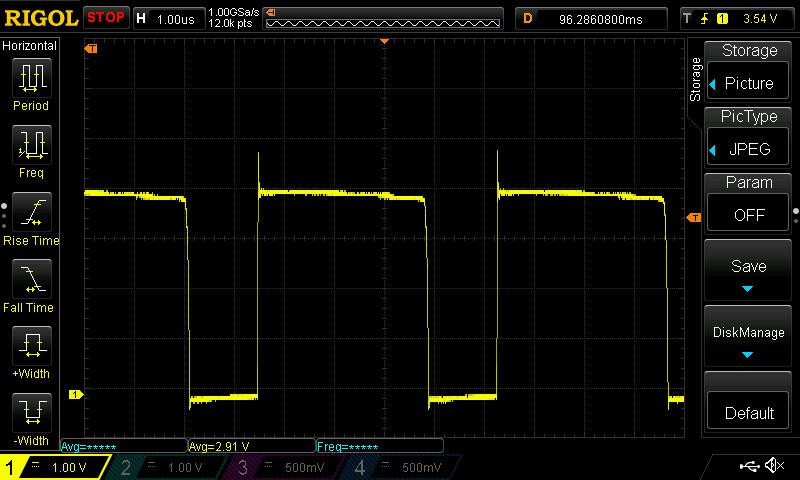
Measurements...
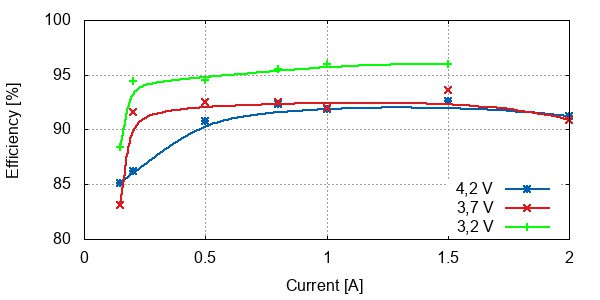
04/29/2017 at 20:54 • 0 commentsSo it's time to measure how it behaves on electrical side of things:
First the efficiency, it depends on the current of course and the power supply voltage. It's pretty good, over 90 % for currents higher than 0,5 A for the whole power supply voltage. The efficiency is topping at 96,9 %!
![]()
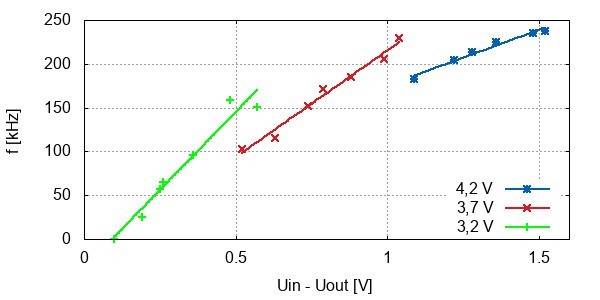
The frequency side is similar, the buck driver frequency depends on the voltage difference and absolute value of input voltage, from almost 250 kHz it drops to 0 when voltage difference between led and power supply is under 100 mV:
![]()
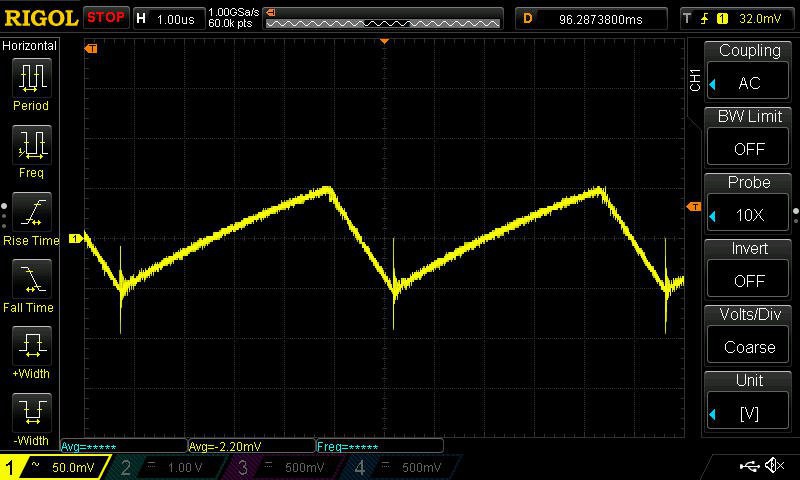
The current through LED looks like:
![]()
And the voltage in switching point (where diode, transistor and coil are connected together):
![]()
-
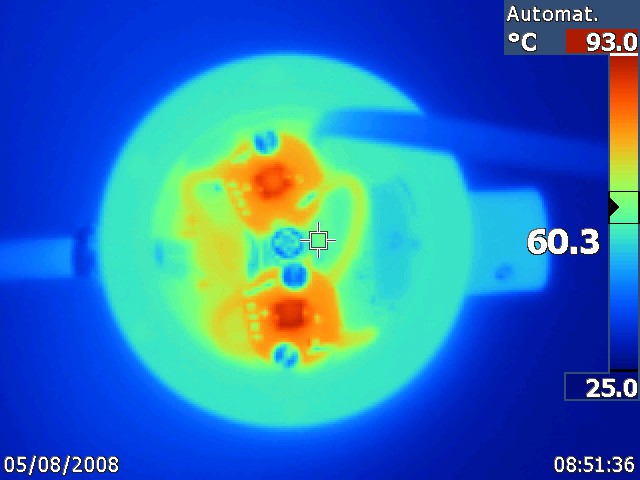
Mostly finished
04/18/2017 at 10:24 • 0 commentsAfter the body was assembled, I could finally test the heat dissipation. On full power body goes to 60 degrees Celsius in few minutes. But full power is ridiculously high, nice for huge domes or for photography, but it makes no sense to use it very often.
The aluminium star heatsinks are not perfect, I guess I'll replace them with LEDs mounted directly on piece of cooper to reduce the temperature of LED itself.
(ignore the date on the image, the thermal camera battery died and the time was restarted)
![]()
![]()
-
Hard anodizing, heat management, etc.
04/09/2017 at 11:10 • 0 commentsThe mechanical work is mostly finished.
After few attempts, I was able to hard anodize the headlamp body at home and it looks quite well for the price! The process is quite simple, 30 seconds in 20% NaOH, washing, 45 minutes in 20% H2SO4 with current density about 2 A / dm^2, washing, 60 minutes in egg paint solution heated to 50°C and finally 1 hour in 90°C water. That's it. The final surface looks amazing and it's scratch resistant.
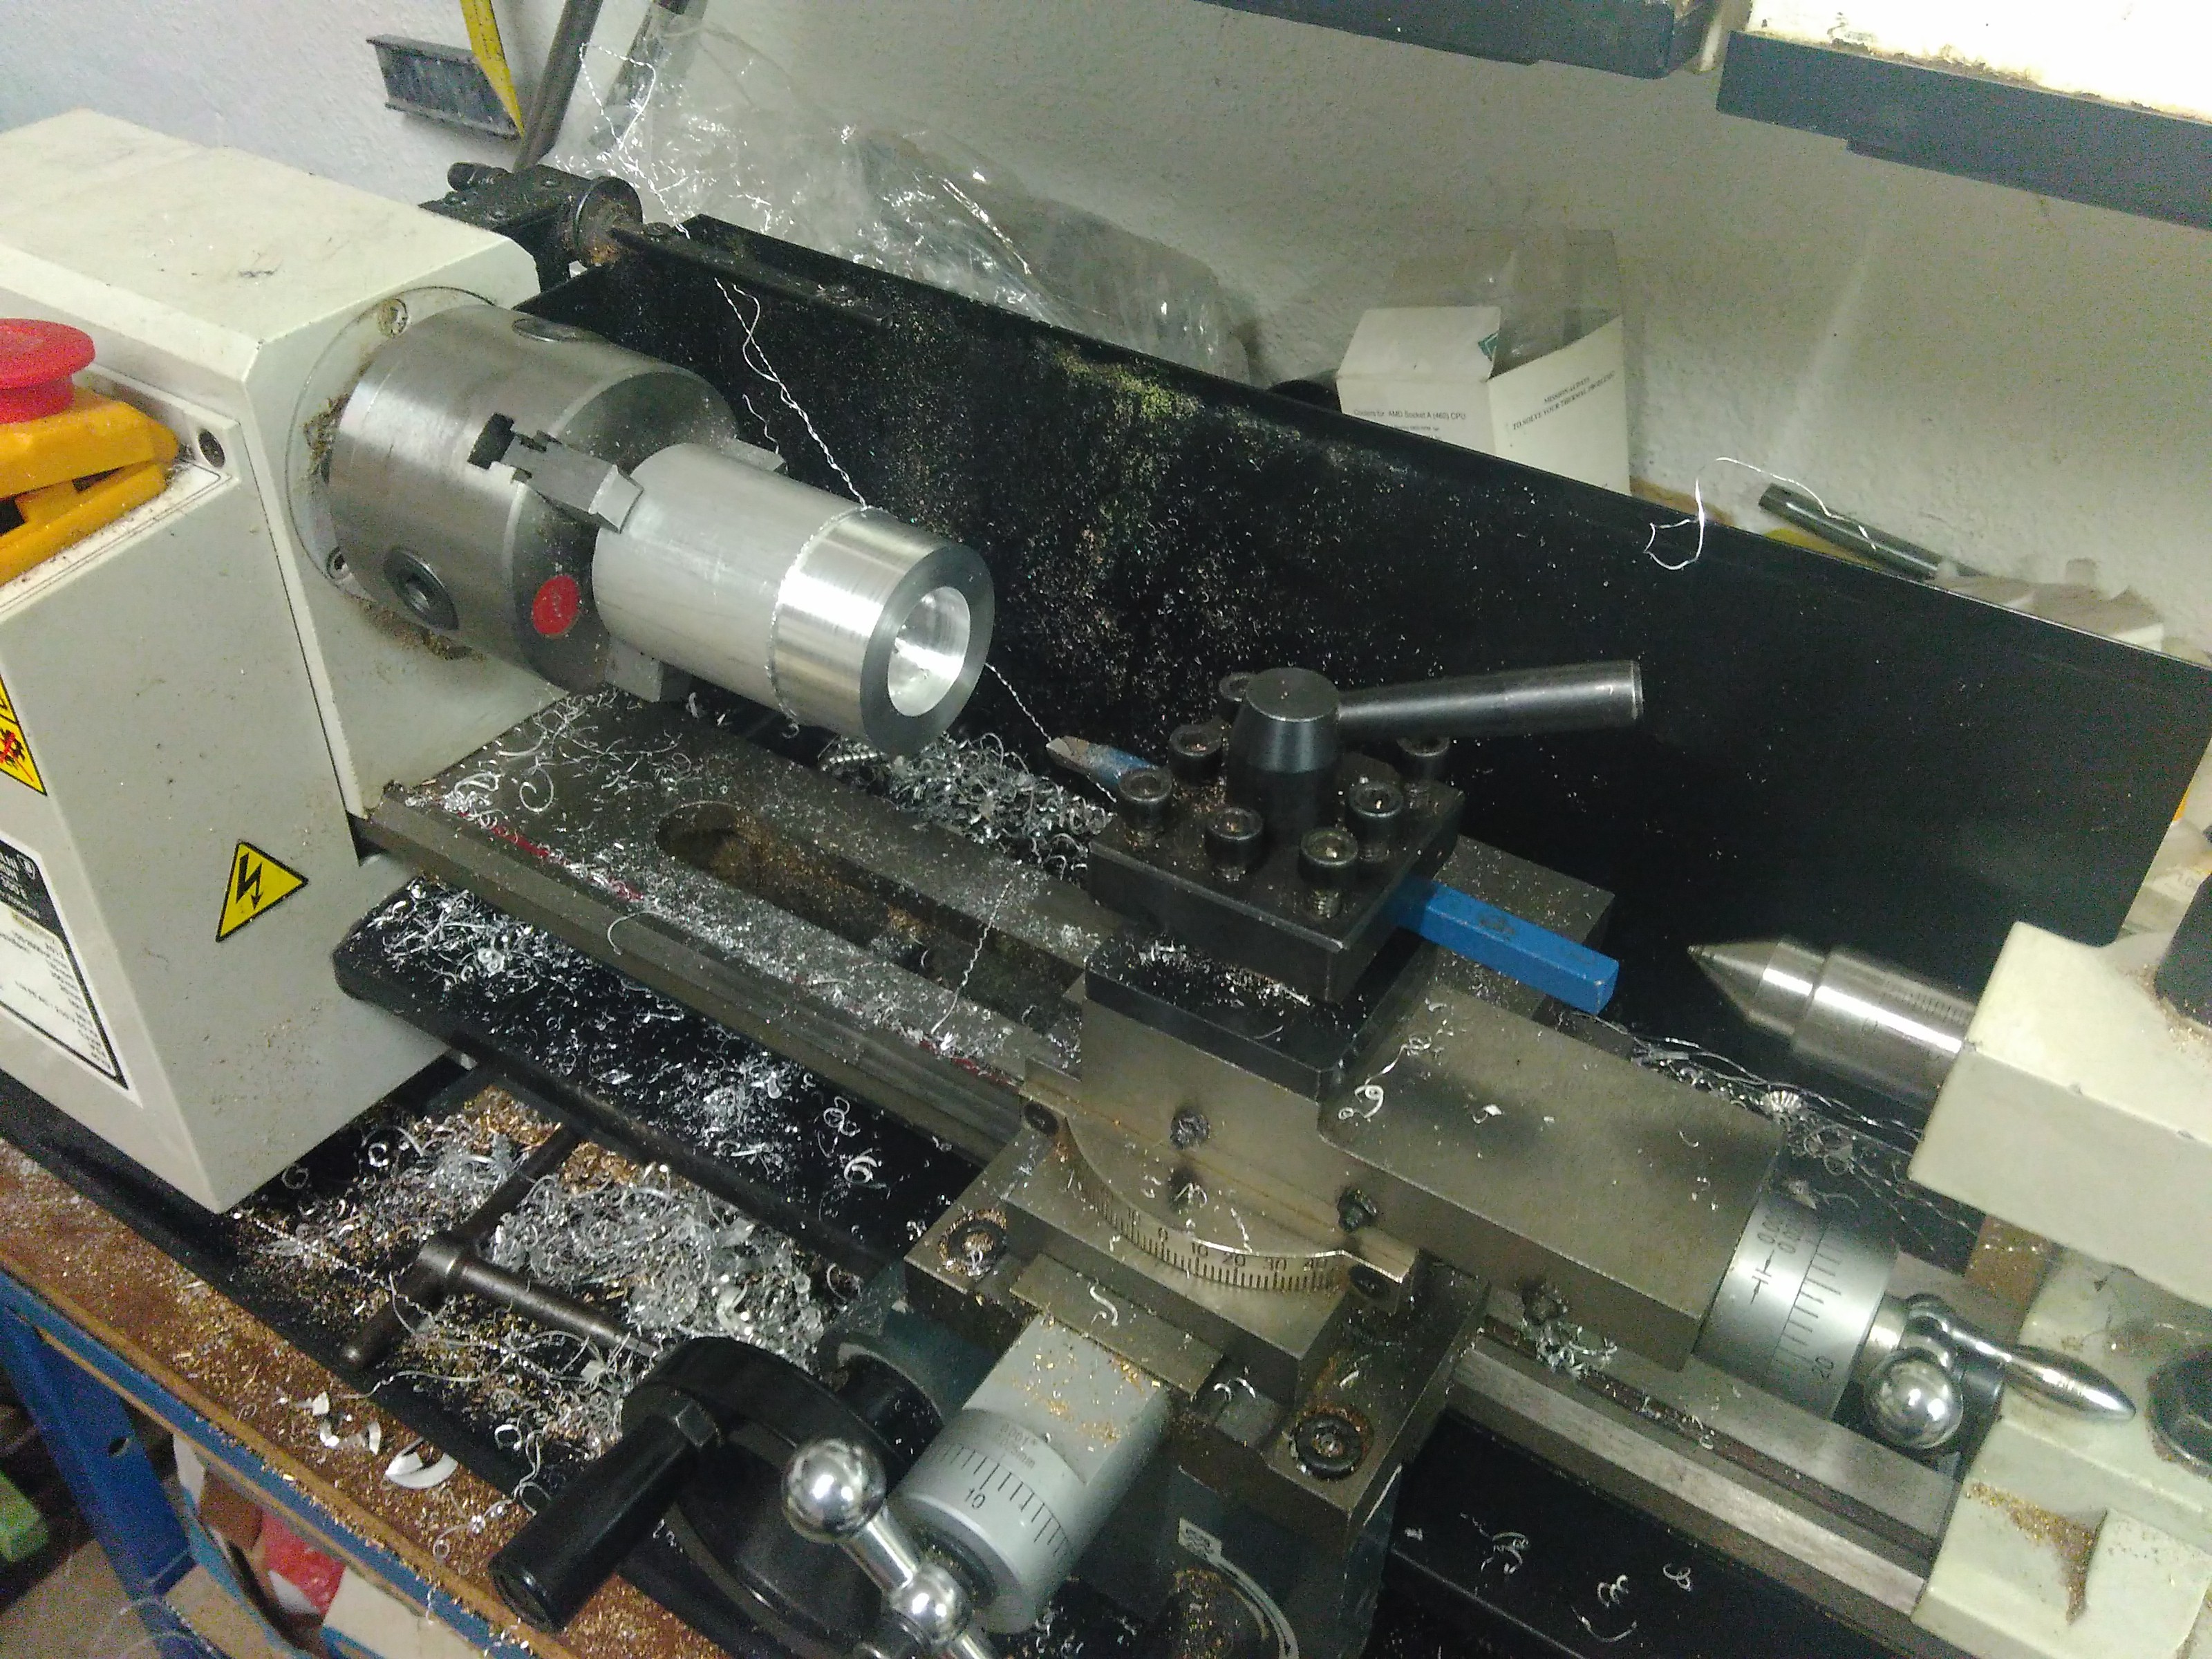
Also few electronic design tests were conducted. Under maximum operating voltage of 4,2 V and 2 A per LED the board behaves as expected. After 1 hour running on highest setting, the highest temperature measured was 66°C. That's for board placed on the table and room temperature of about 25°C. When sealed in the headlamp body, the temperature will rise higher, but I guess it won't go much over 90°C.![Machining the body]()
![]()
![]()
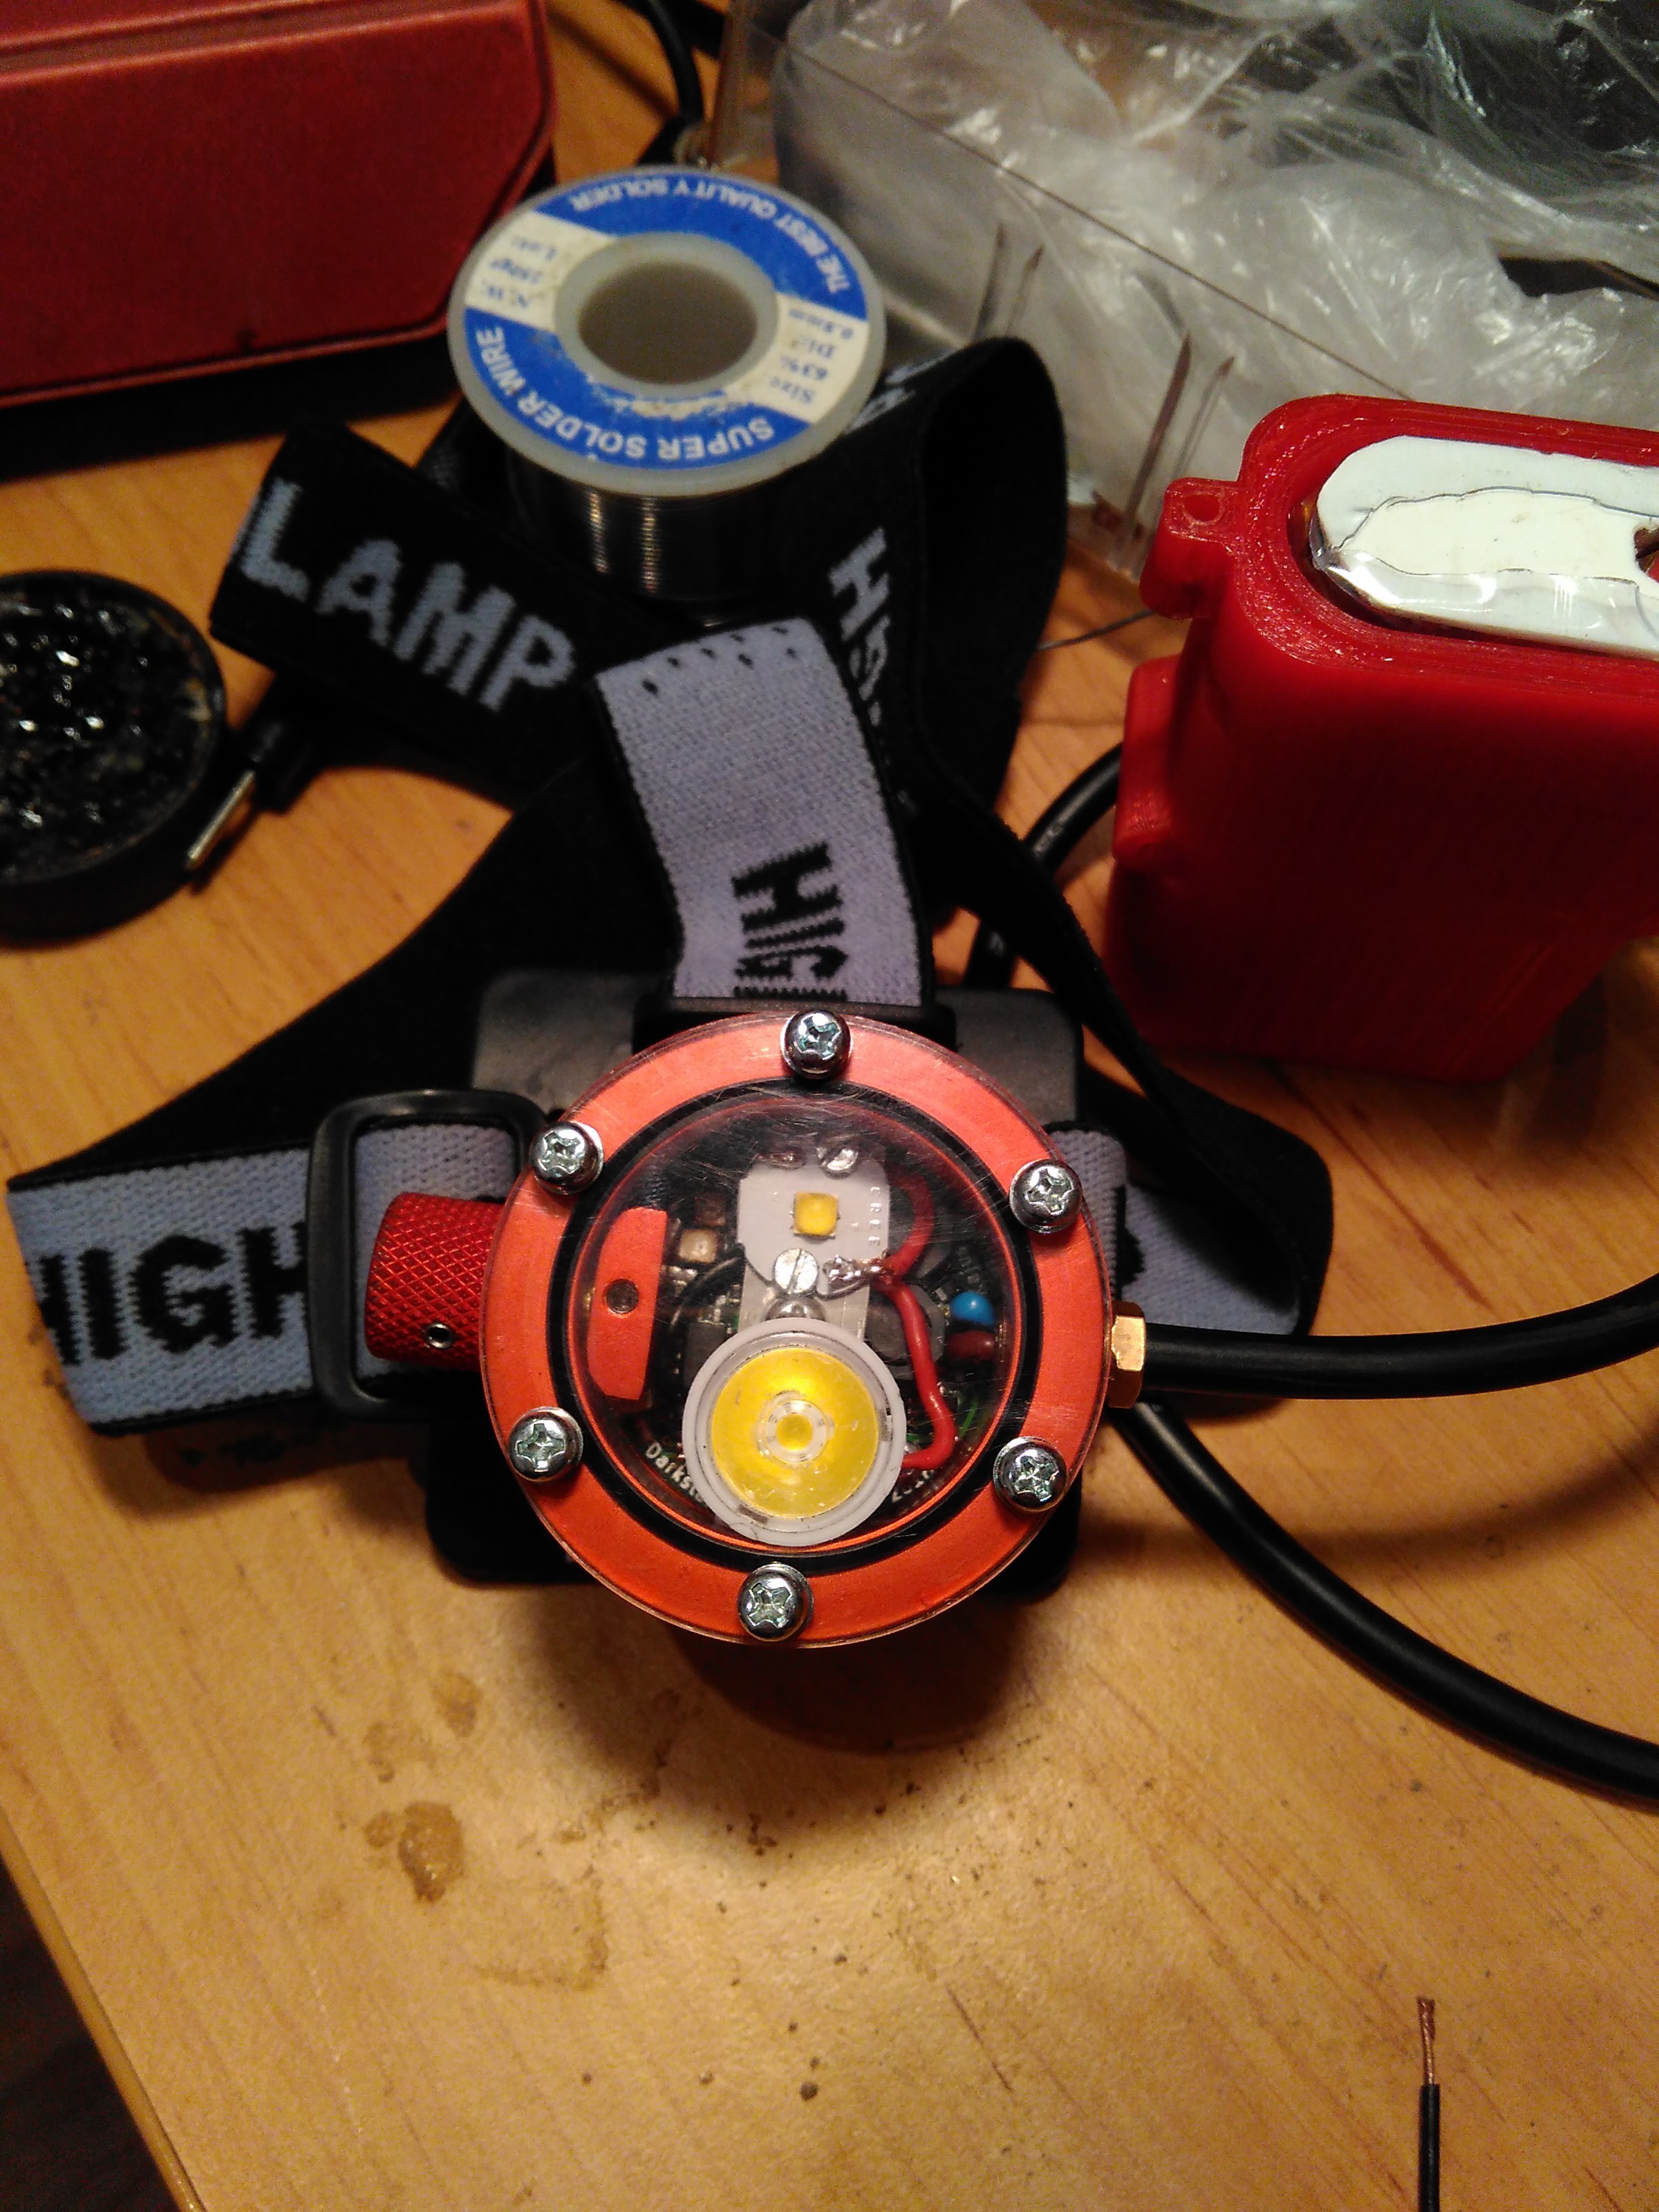
Darkstar Mk.II
High power custom caving headlamp you can rely on. Small, not that heavy, water and bomb proof.