 Donitz
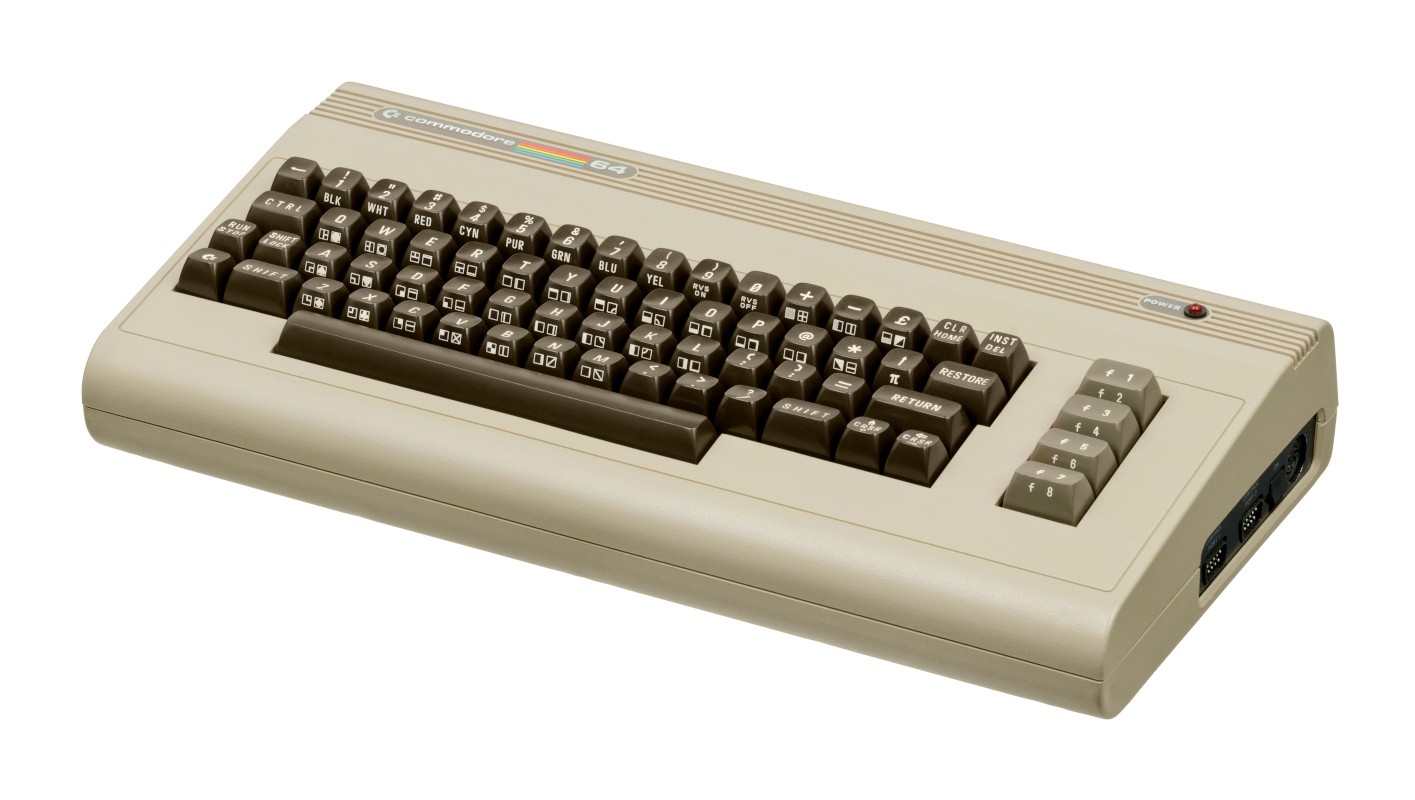
With the rise of the Commodore 64 Ultimate, it was time to do some modding.
There is a short demo video at the bottom of the page.
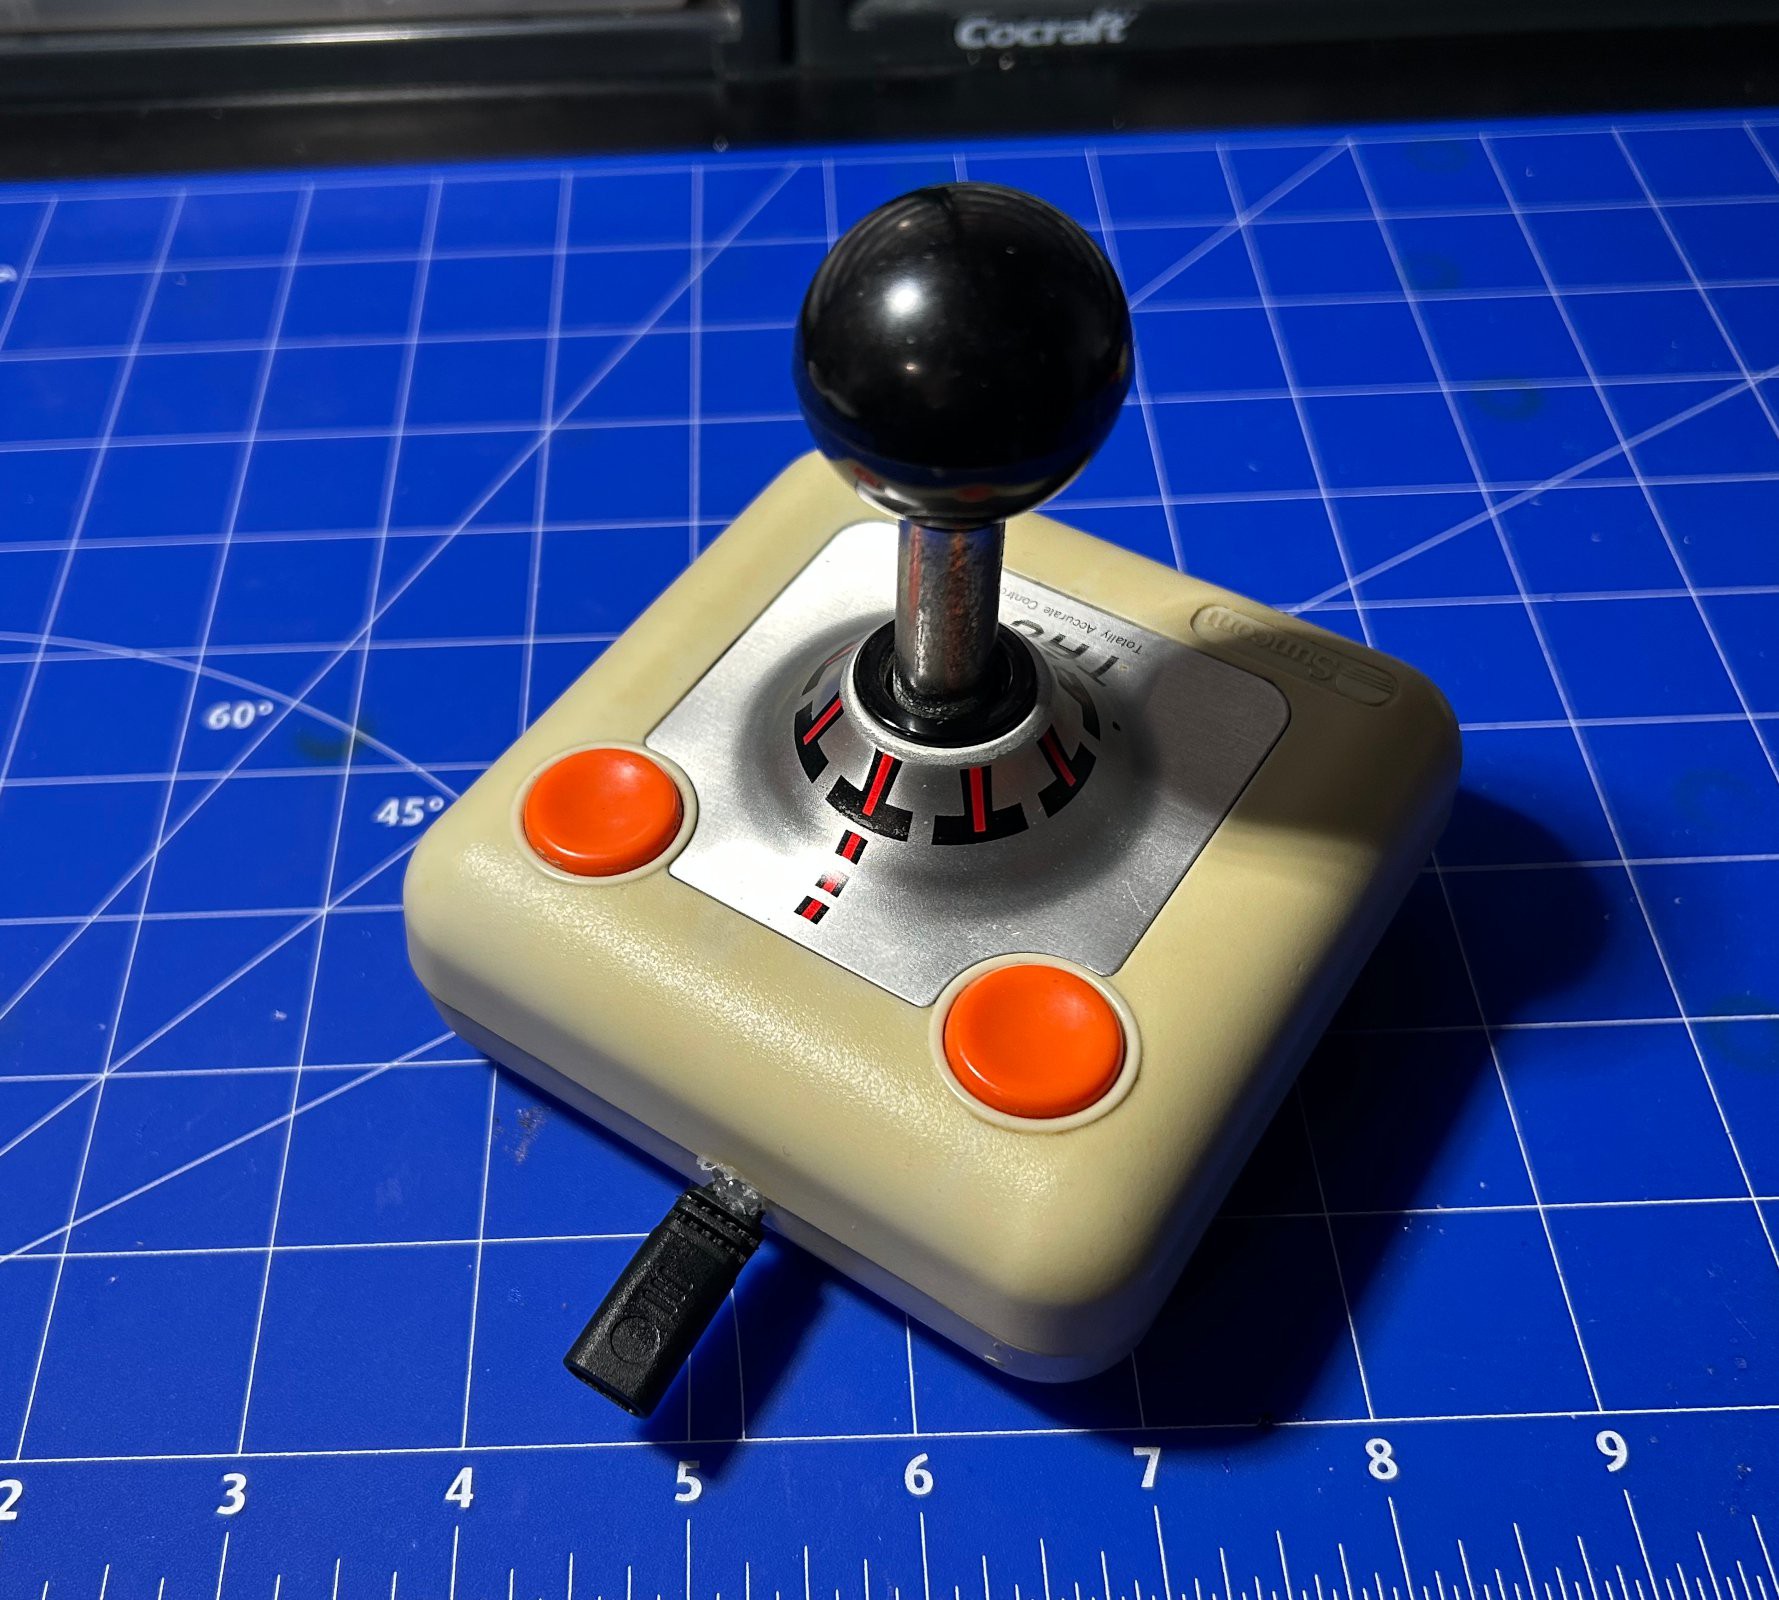
If you've ever used a Commodore 64, you are most likely aware of the cult status of the TAC-2 Joystick. A simple, sturdy joystick made for the Atari 9-pin joystick standard and later used for the C64. It only has a single fire button connected to two physical buttons and four directional inputs.
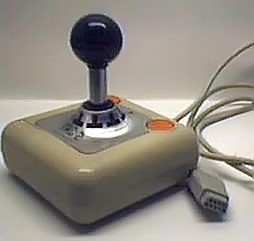
One flaw with these joysticks is the length of the cable. It's short, like really short. Great if you're sitting in front of the computer. Not so great if you want to sit in the sofa. So my brother and I decided to mod an old broken TAC-2 to work using Bluetooth. The following is a very TL;DR guide on how that can be achieved.
Components needed
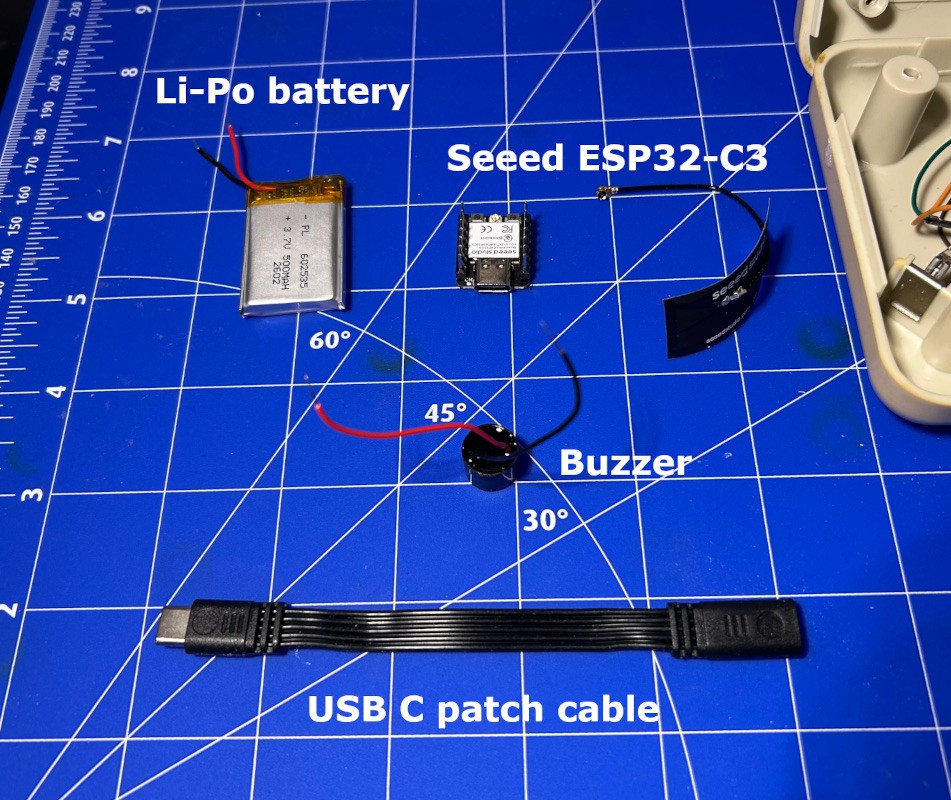
First, you need a microcontroller with Bluetooth support. Luckily, these days you have a massive, way too big, selection to choose from. Among the most popular are various flavors of ESP and ESP32 microcontrollers. They usually come with built-in Wi-Fi, Bluetooth sometimes only Bluetooth Low Energy or BLE, and a lot of GPIO input/output pins for connecting various devices and sensors.
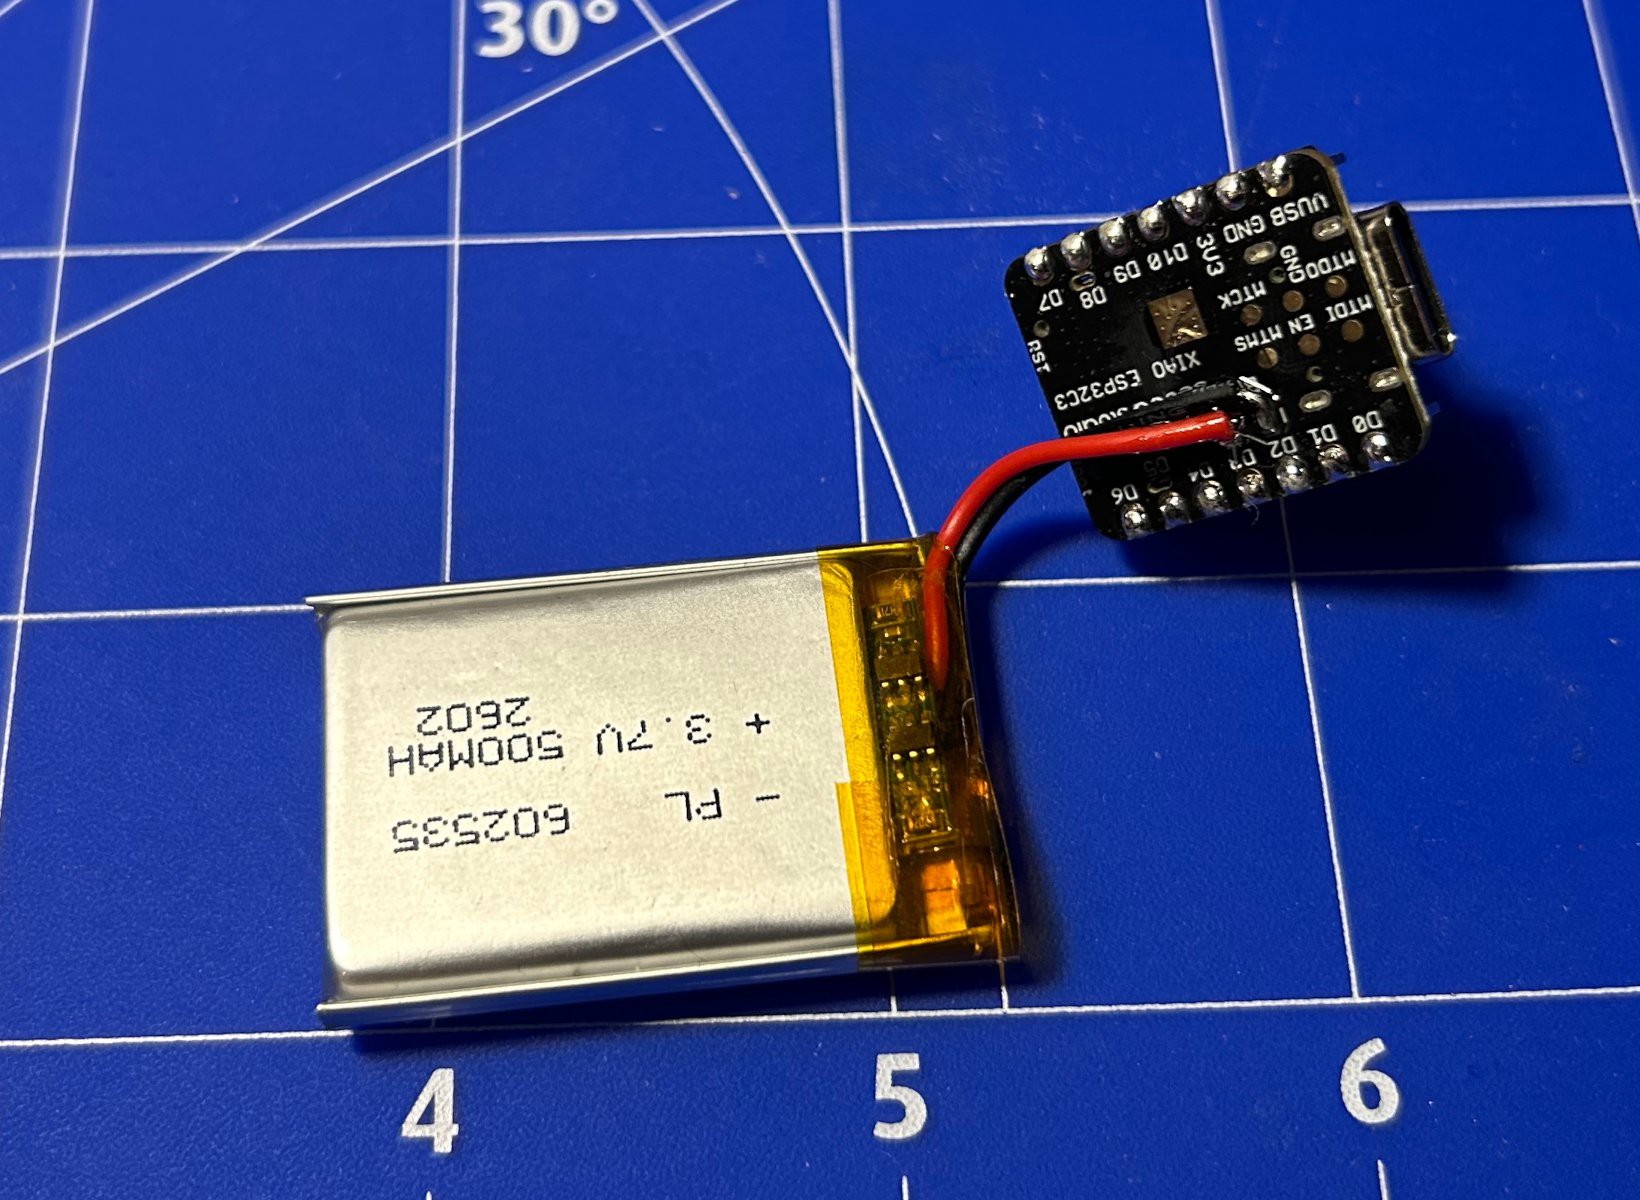
My requirement was: The microcontroller should have a battery connector/pads, and also include the charging circuits for Li-Po batteries. The Seeed Studio XIAO ESP32-C3 had that at a comfortable 5 euro a pop. Of course you get what you pay for, but it was sufficient for this project.
To power the microcontroller, we need a battery small enough to fit comfortably in the shell. I went with a really small 3.7V 500 mAh Li-Po from Amazon. The battery will recharge via the microcontroller when it is connected to a USB port. When unplugged, the microcontroller draws power from the battery.
Second, I wanted a buzzer. Without an external LED, I needed a way to communicate state to the user. I chose to go with a simple 3V Piezo buzzer.
Finally, we need a way to connect the microcontroller to an external USB cable without opening the case, for charging and uploading new firmware. I bought the smallest USB patch cable I could find, which served its purpose well.
Process
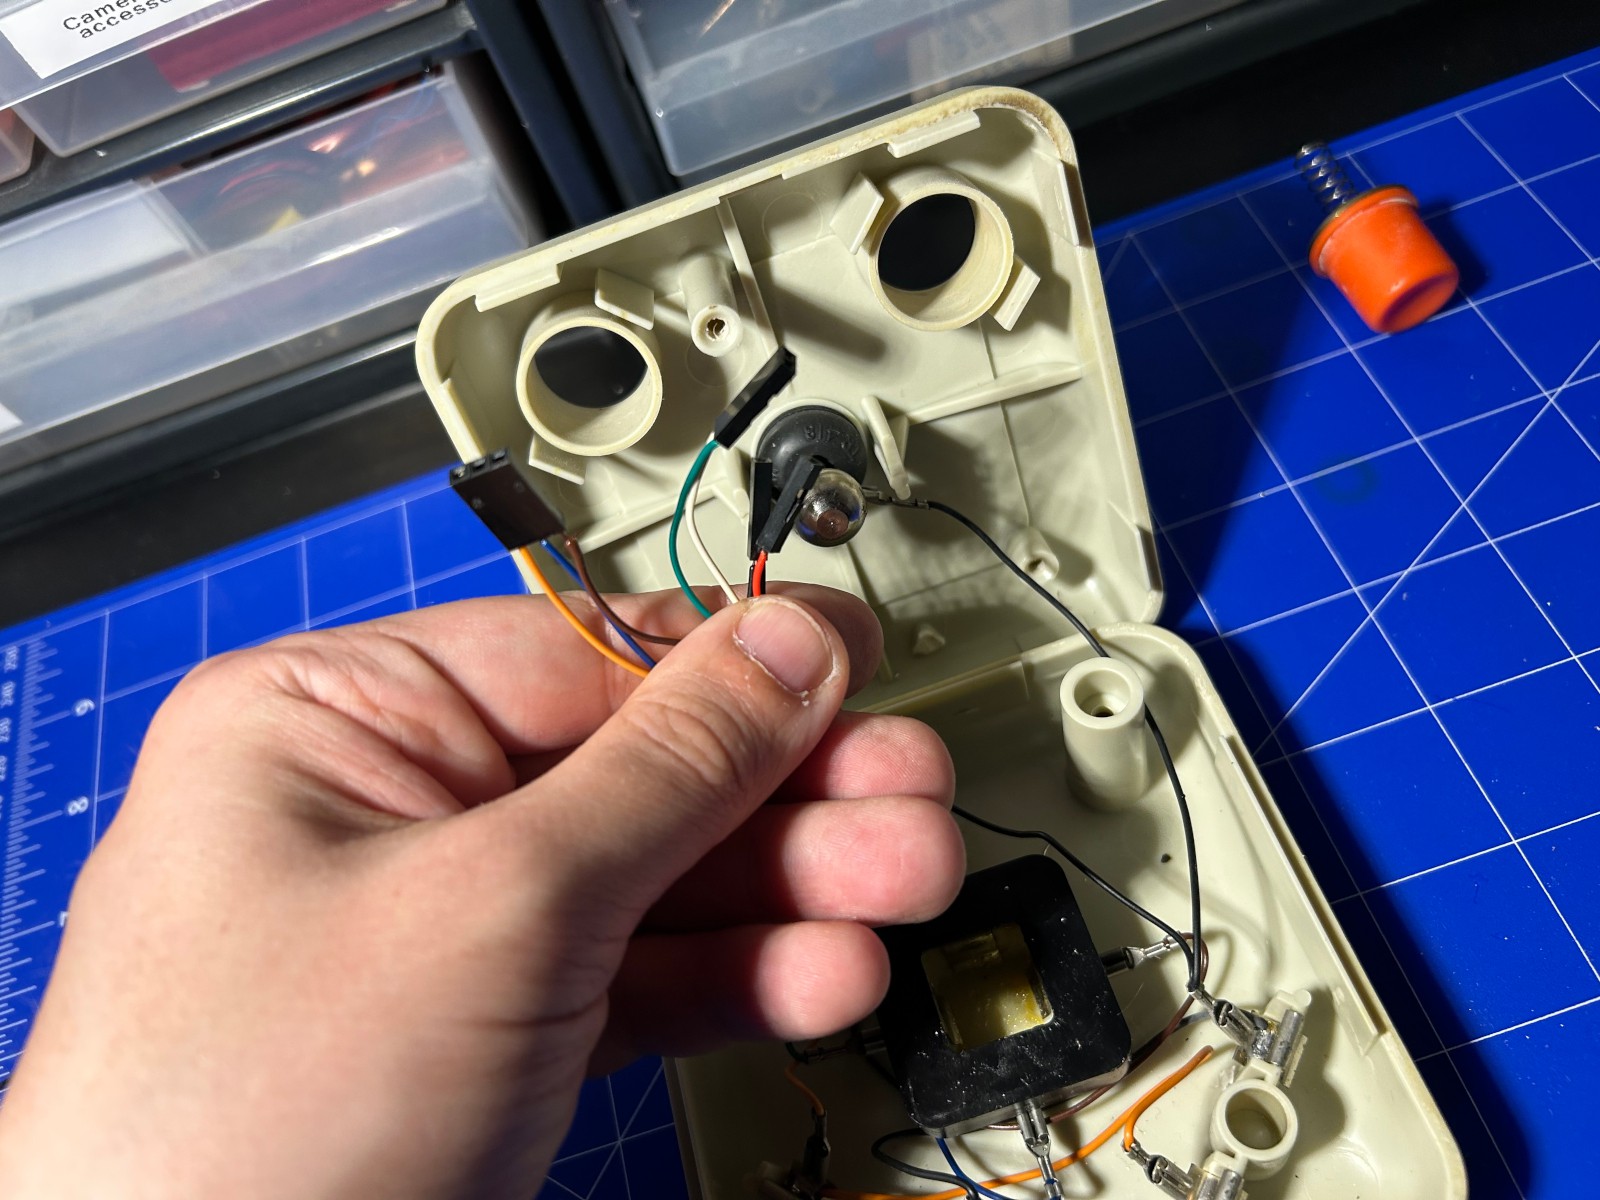
After opening the TAC-2 joystick, we can see the wonderfully basic design from the 80s. The joystick's metal ball and the buttons are all connected through a simple circuit. Then we have five signal wires for: fire, left, right, up, down. Notice how there are no microswitches, just four metal plates that the joystick ball touches to close the connection.
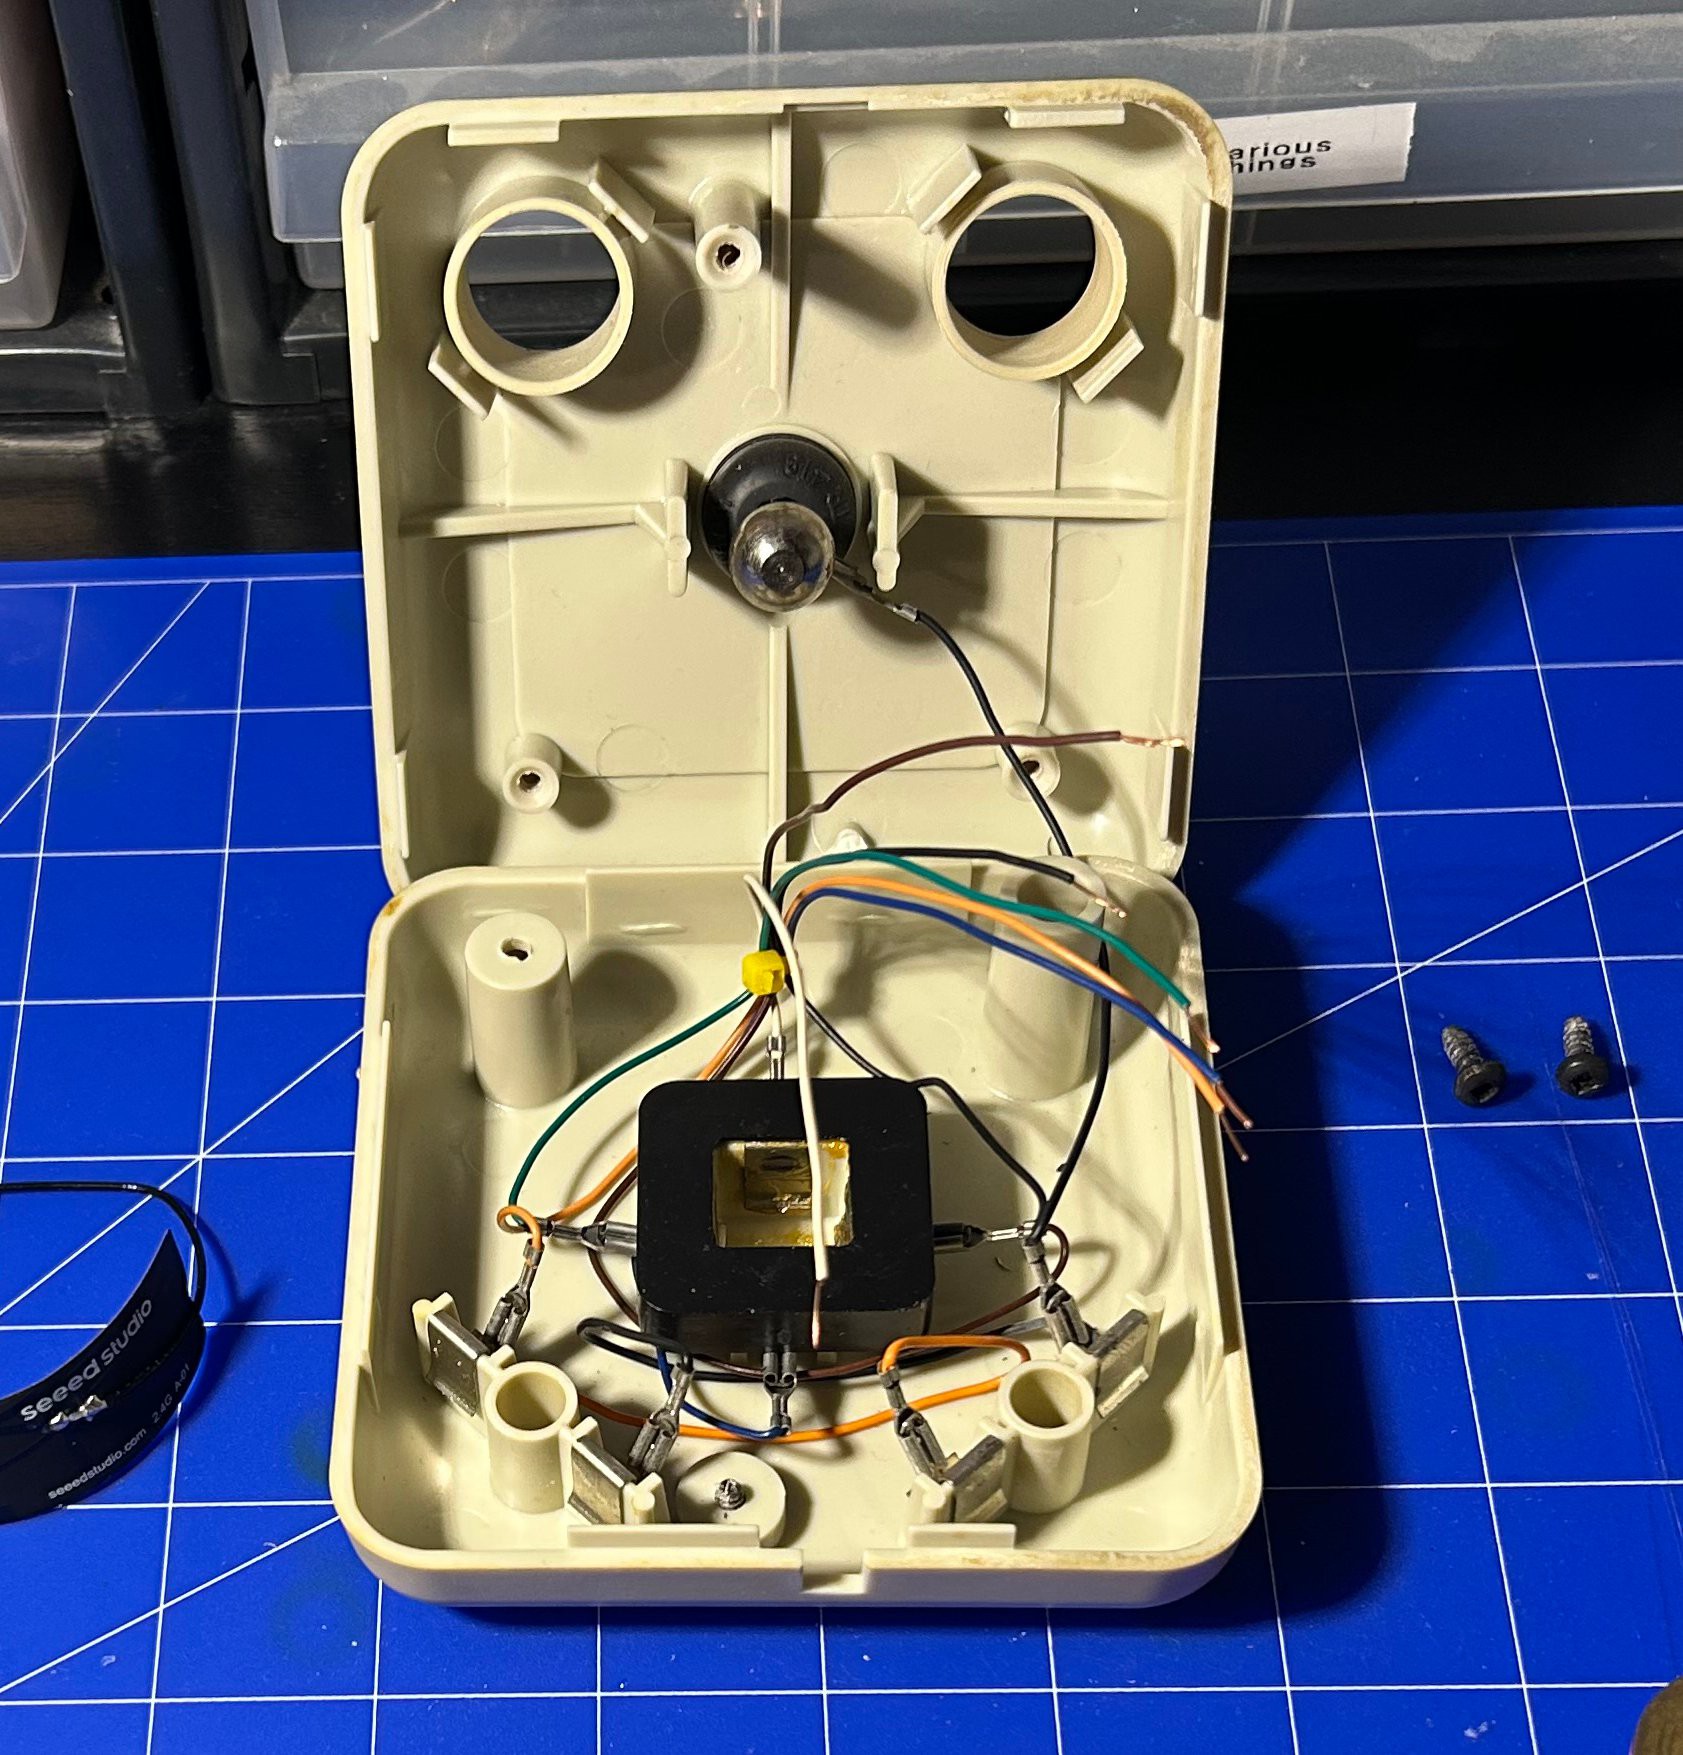
I decided to strip and crimp these wires to make them easier to hot plug, but in retrospect I really should have soldered them straight to the microcontroller, as the Dupont headers took up an inordinate amount of space in the already cramped joystick.
I soldered the Li-Po battery connectors to the ESP32-C3, and stuck them both together in a small little package.
To prevent the microcontroller from moving around too much and short-circuiting on something, I decided to hot glue it to the inside of the shell. Not pretty, but it should hold it in place. It would have been better to build some form of scaffold inside the shell, but this is quite ad-hoc. The buzzer was glued to the shell.

The new Bluetooth TAC-2. You could hardly tell unless you have eyes.
I wrote a small Arduino program using the ESP32 BLE Gamepad library. TL;DR: This library allows your ESP32 microcontroller to emulate a regular Bluetooth gamepad, detected by anything that can use Bluetooth gamepads, such as in Windows and with various USB dongles, depending on implementation. It's a good first test, as it is easy enough to simply upload a new firmware later for a more specific implementation.
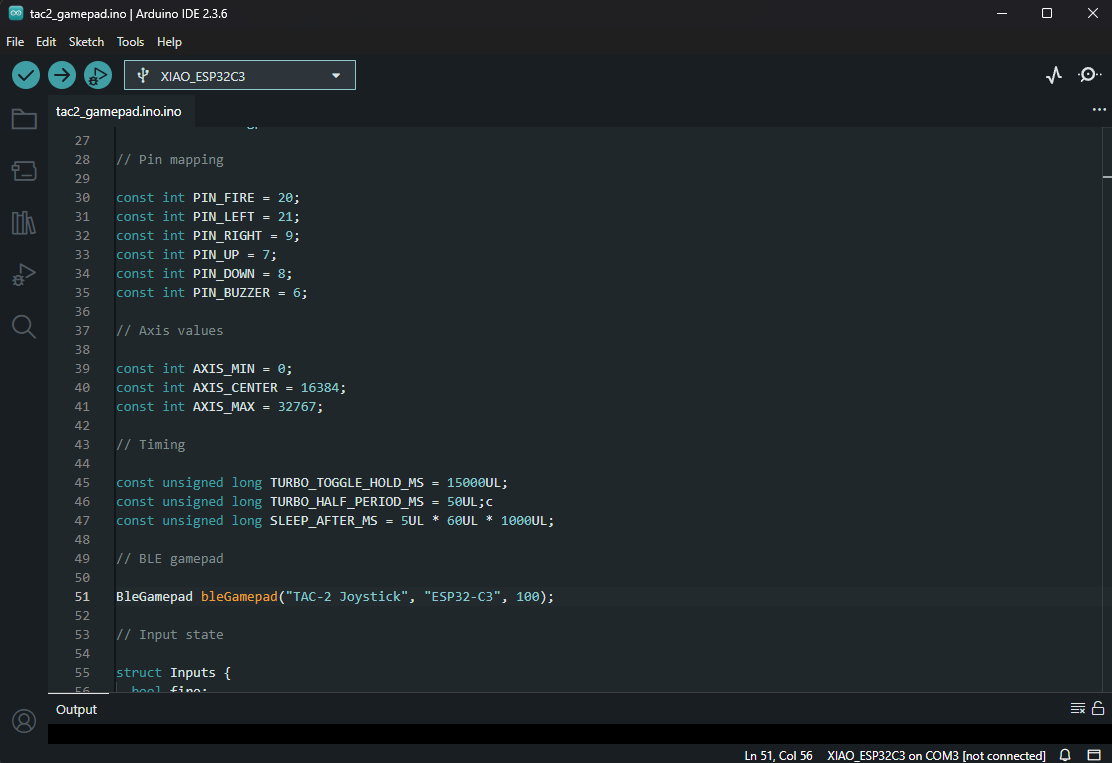
The Arduino program puts the controller to sleep after 5 minutes of inactivity, and wakes automatically whenever any of the joystick inputs change. This will make the battery last much longer. The buzzer works great as a signalling...
Read more »
 sjm4306
 ElectroBoy
 Enrico Placci
 SAYANTAN PAL