Arnov Sharma
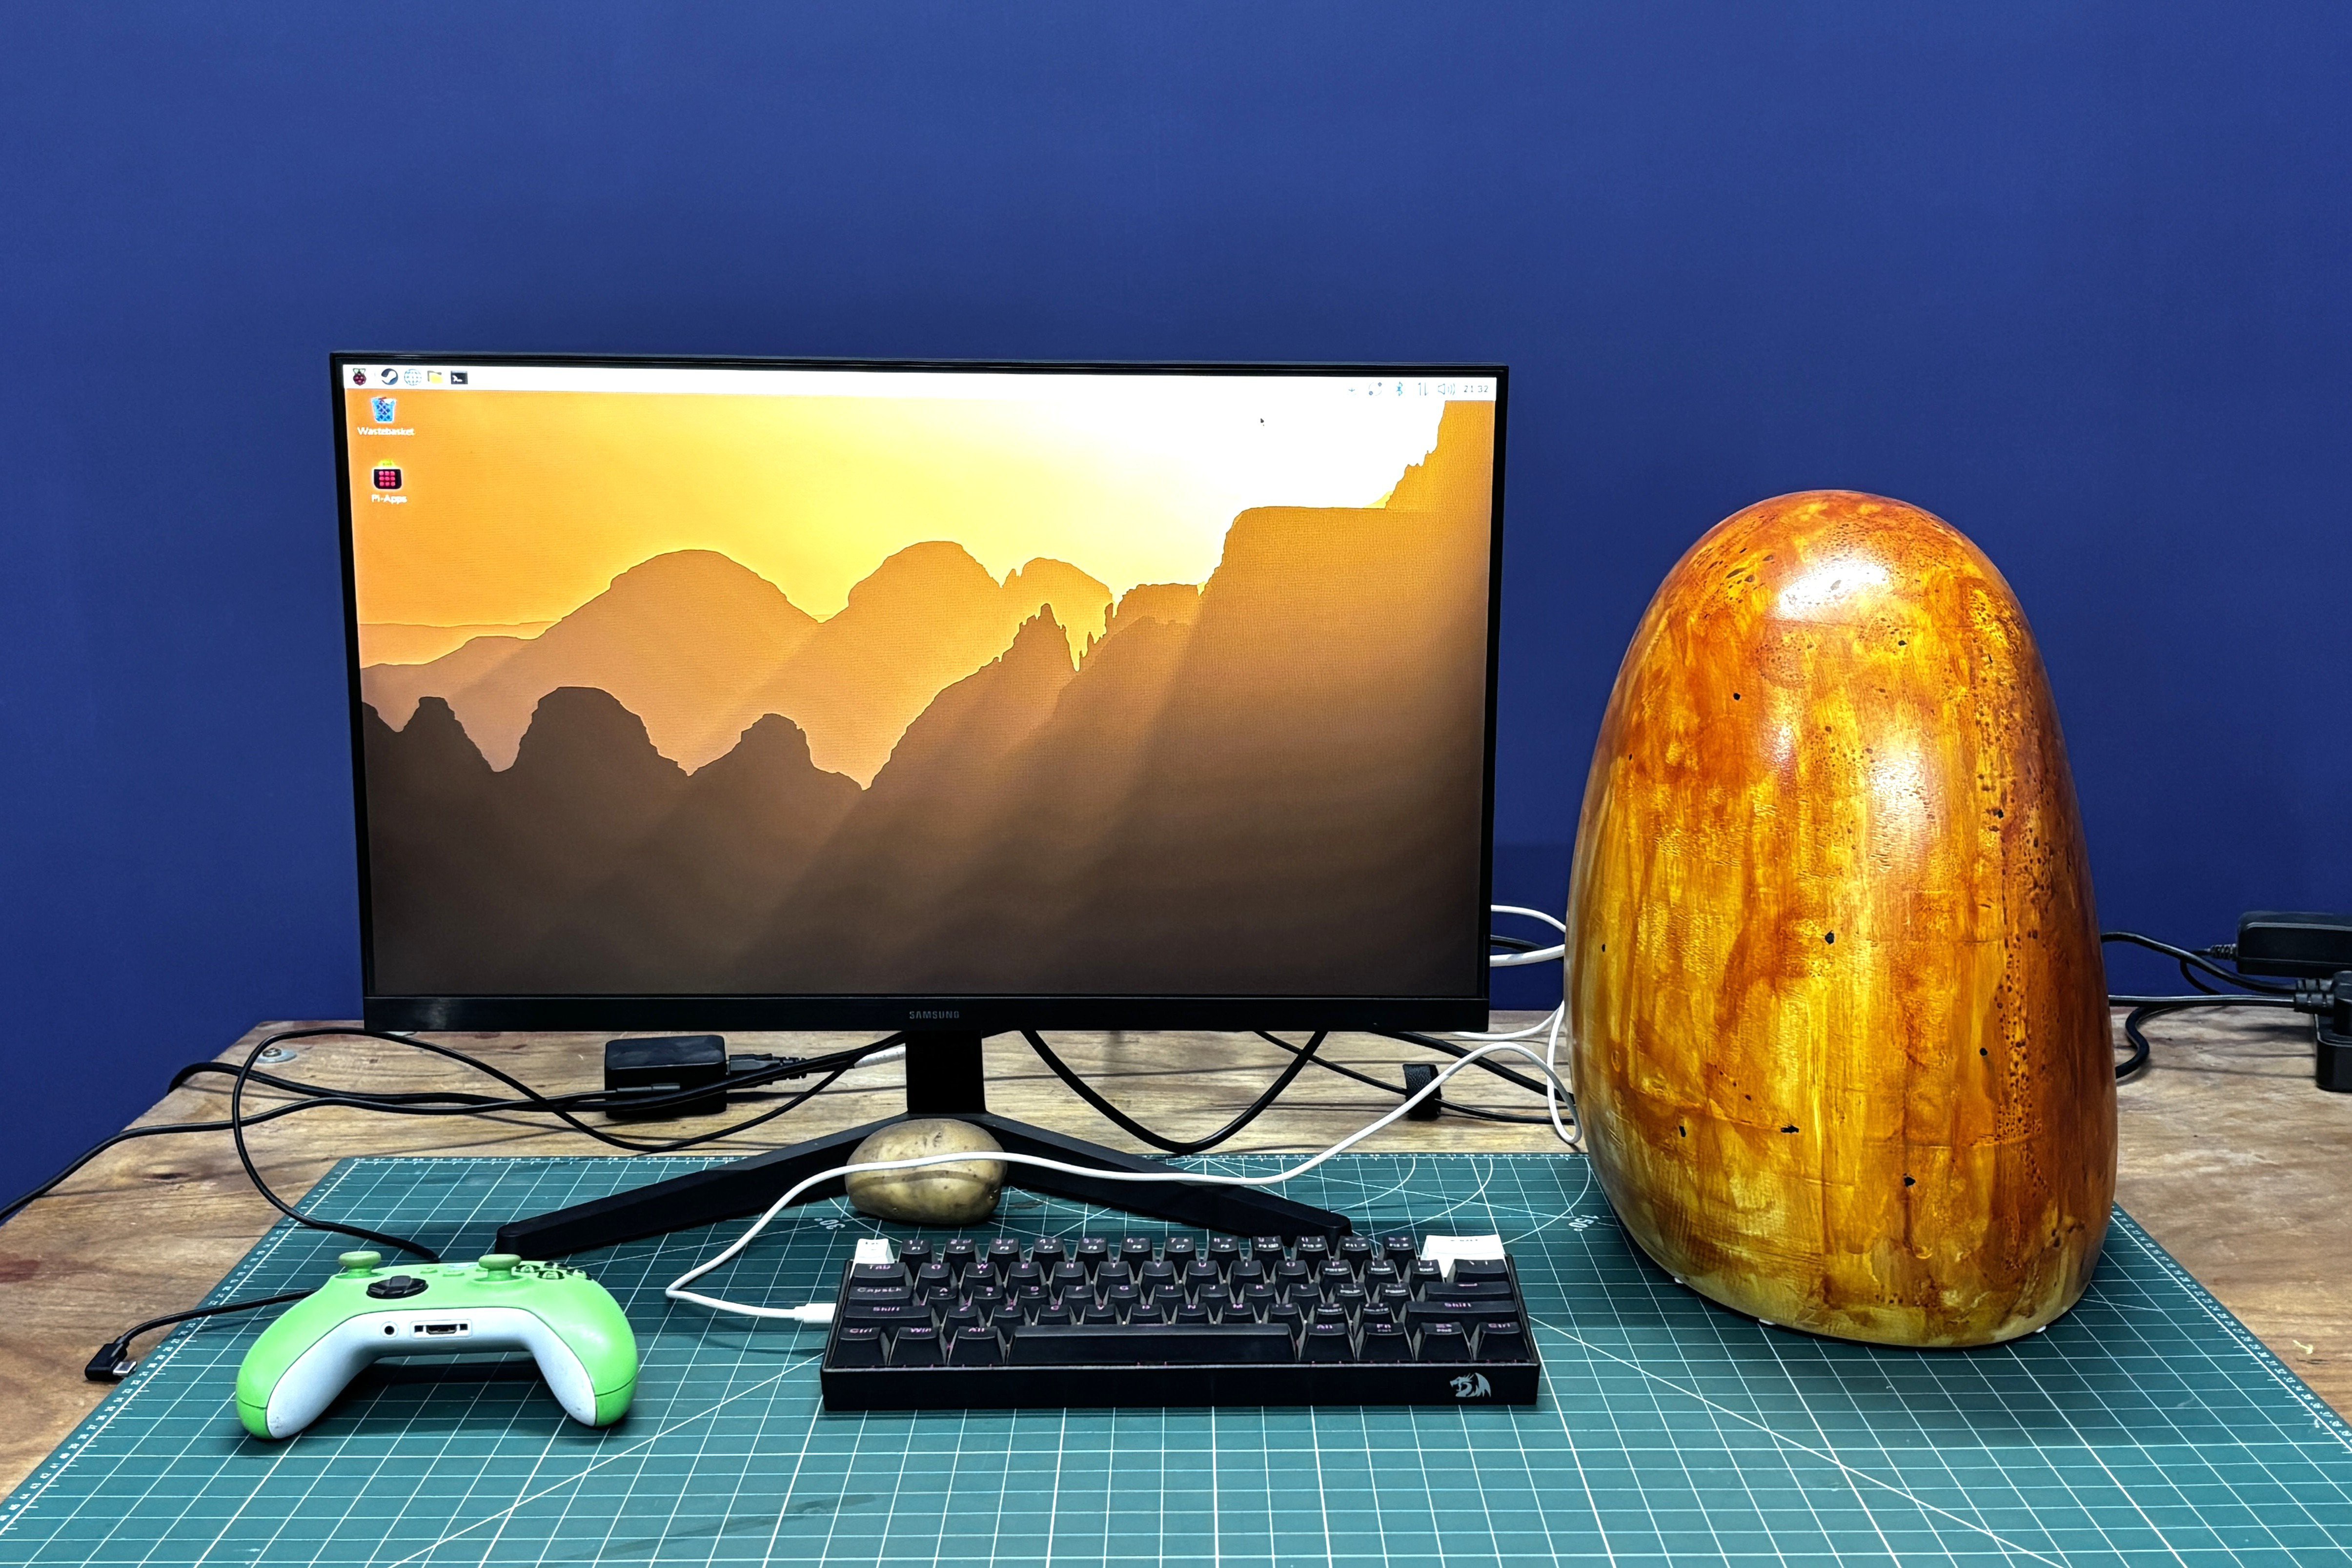
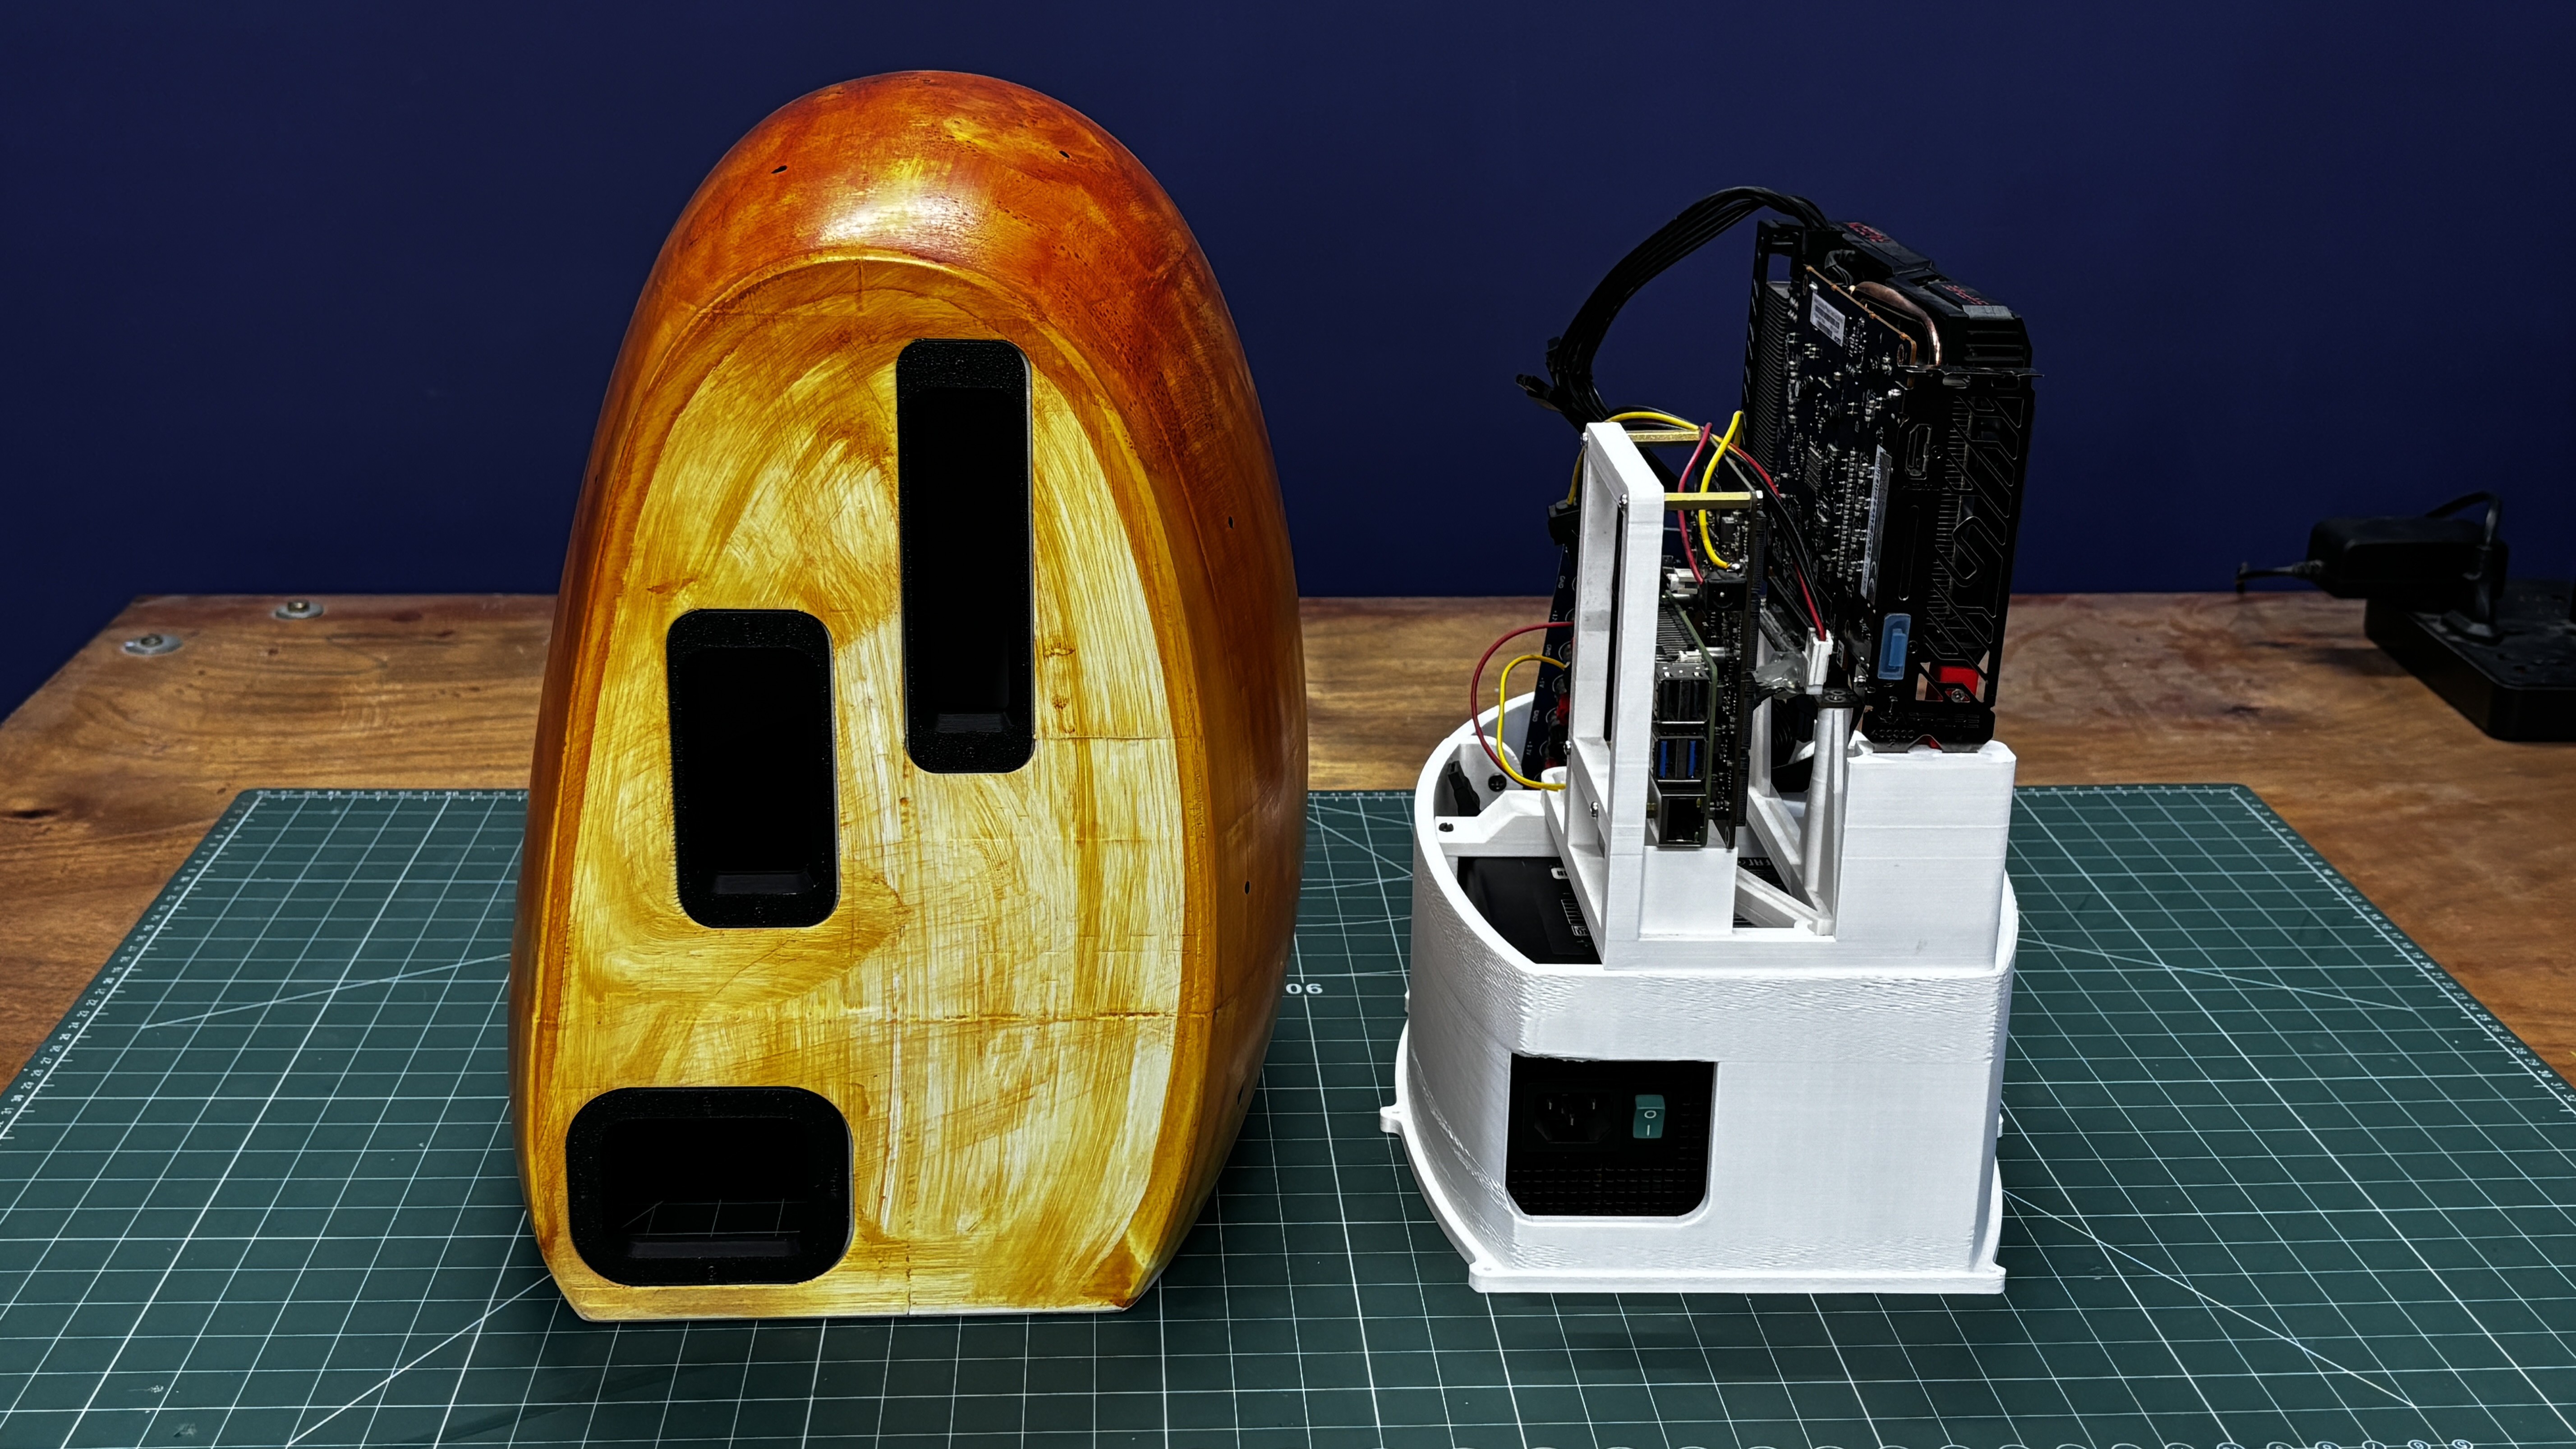
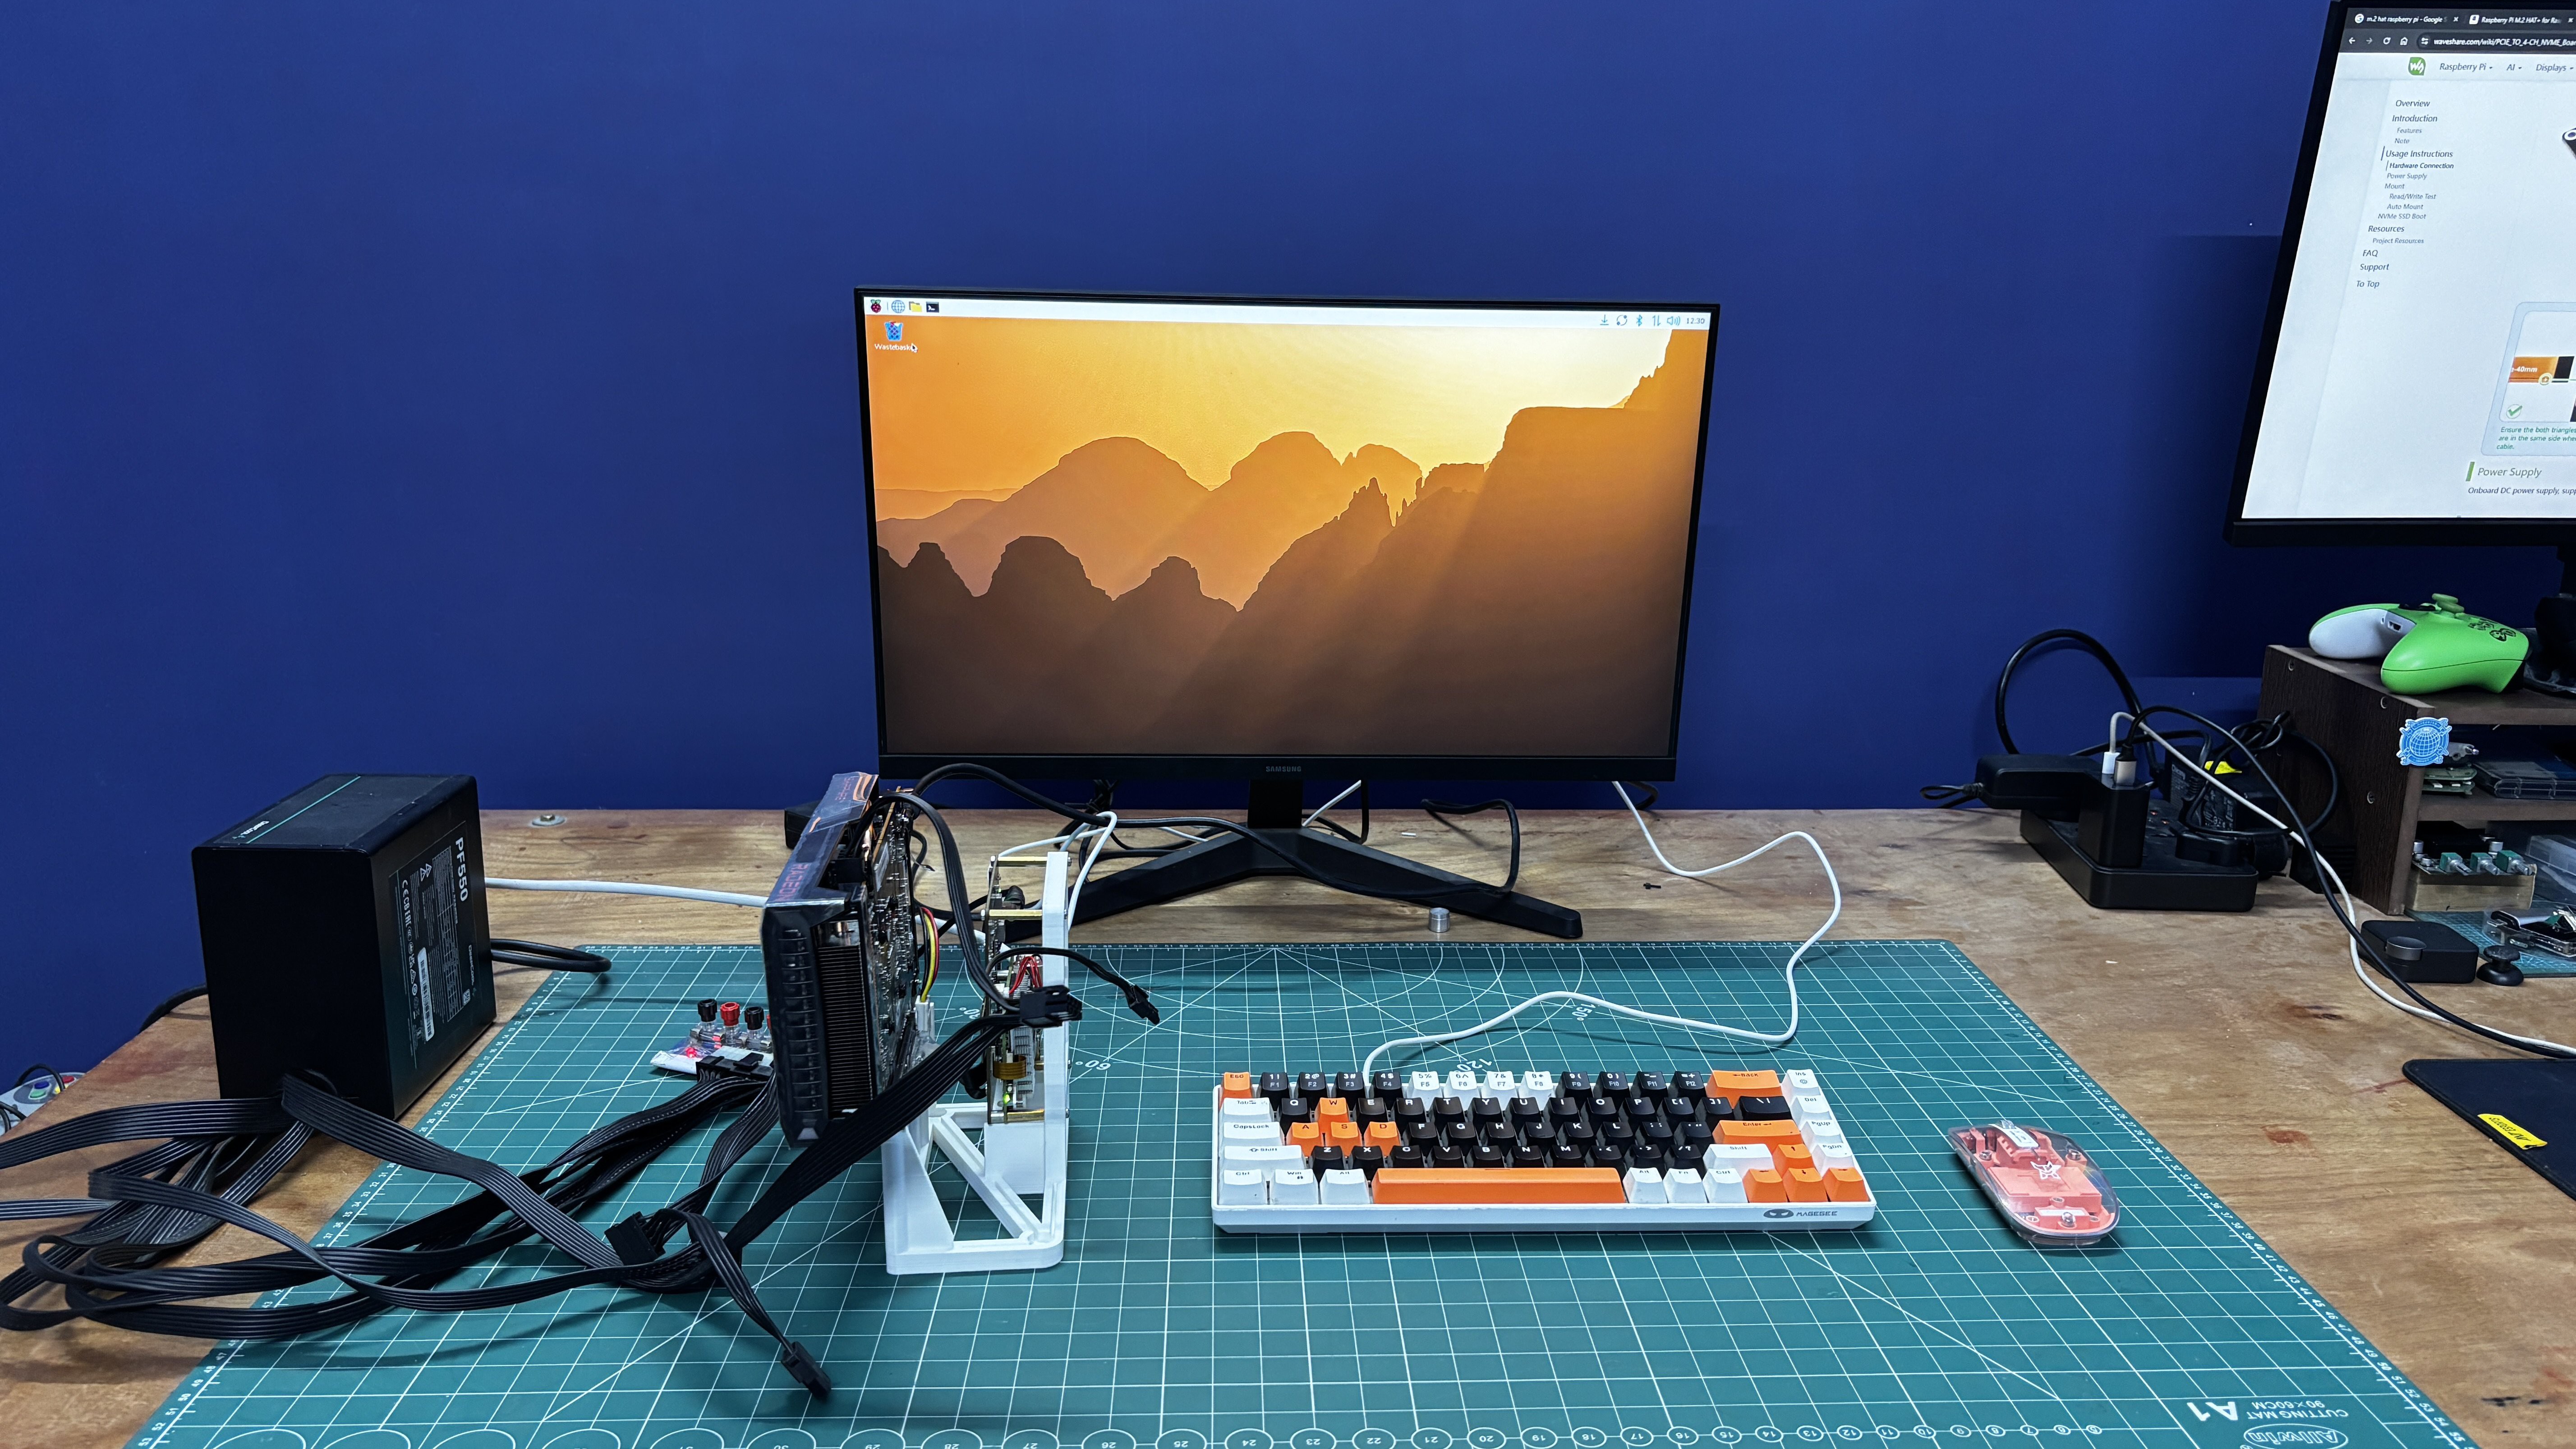
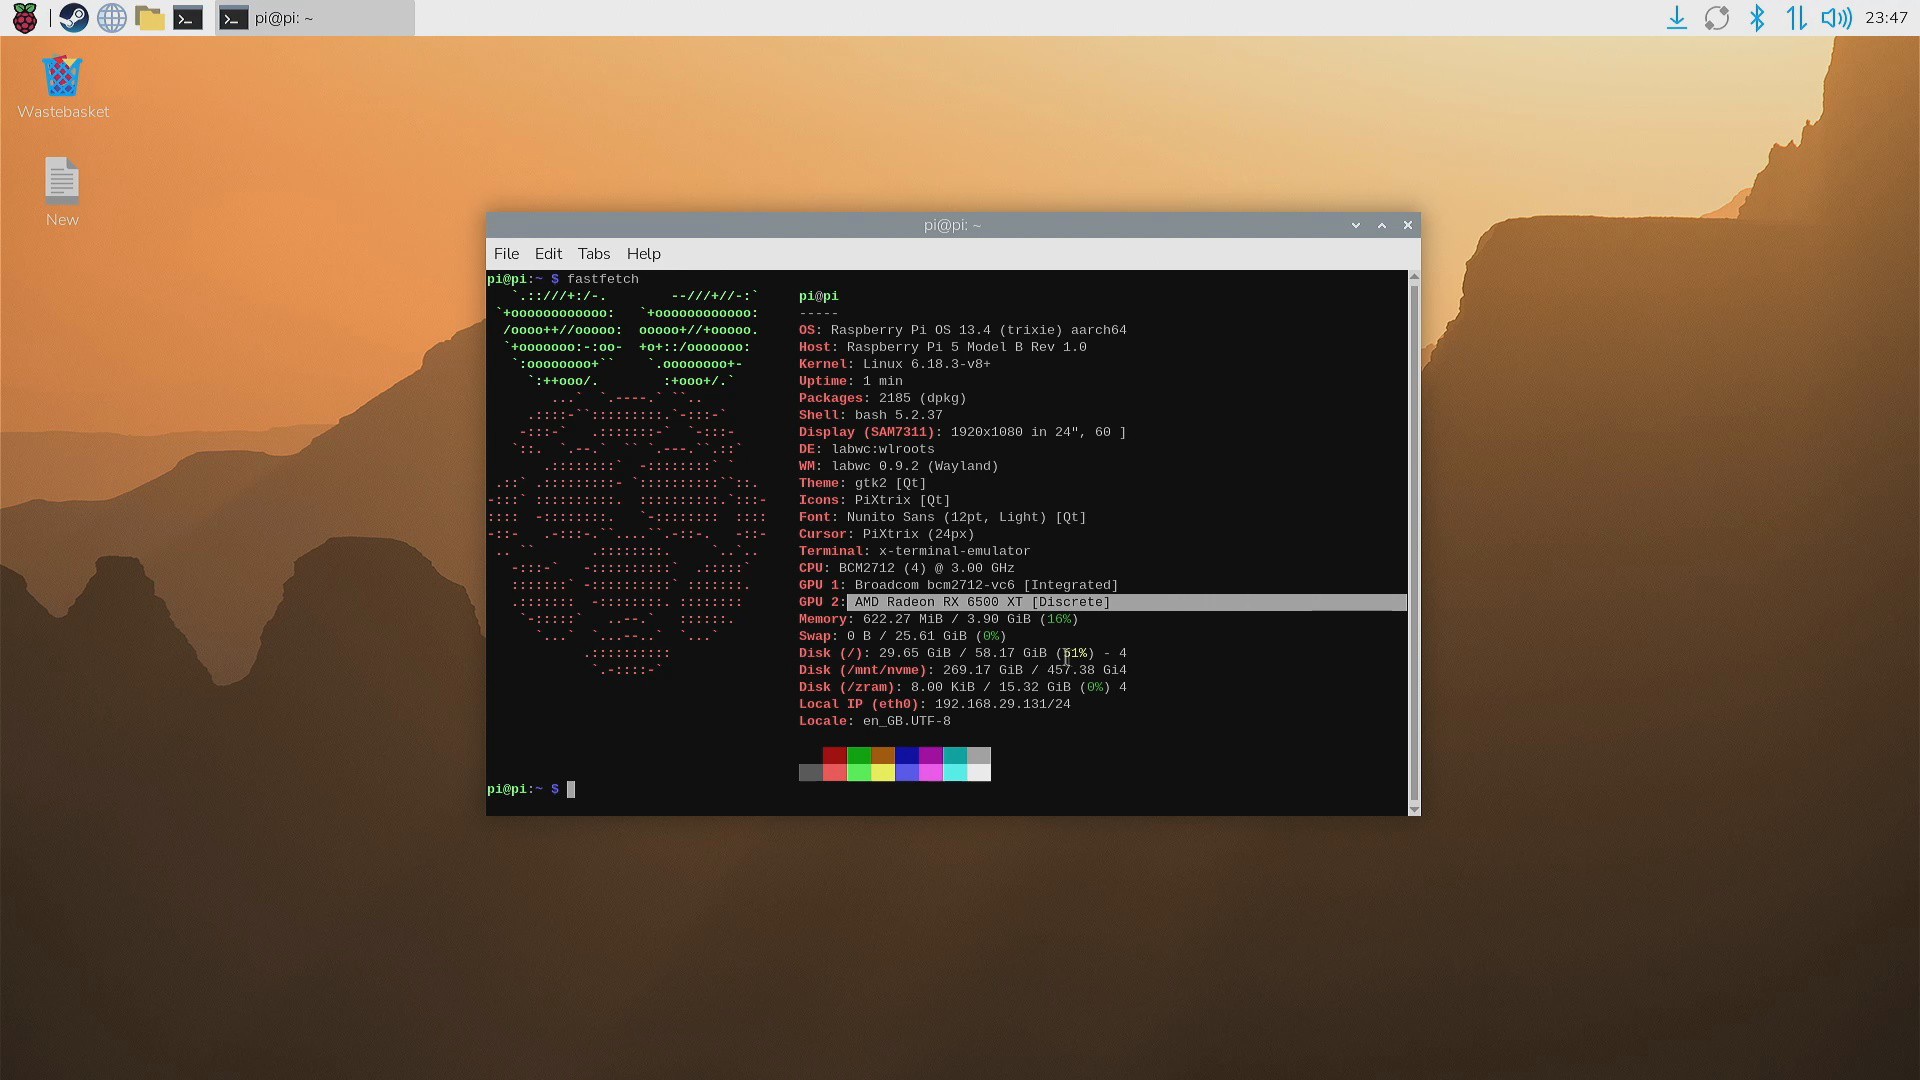
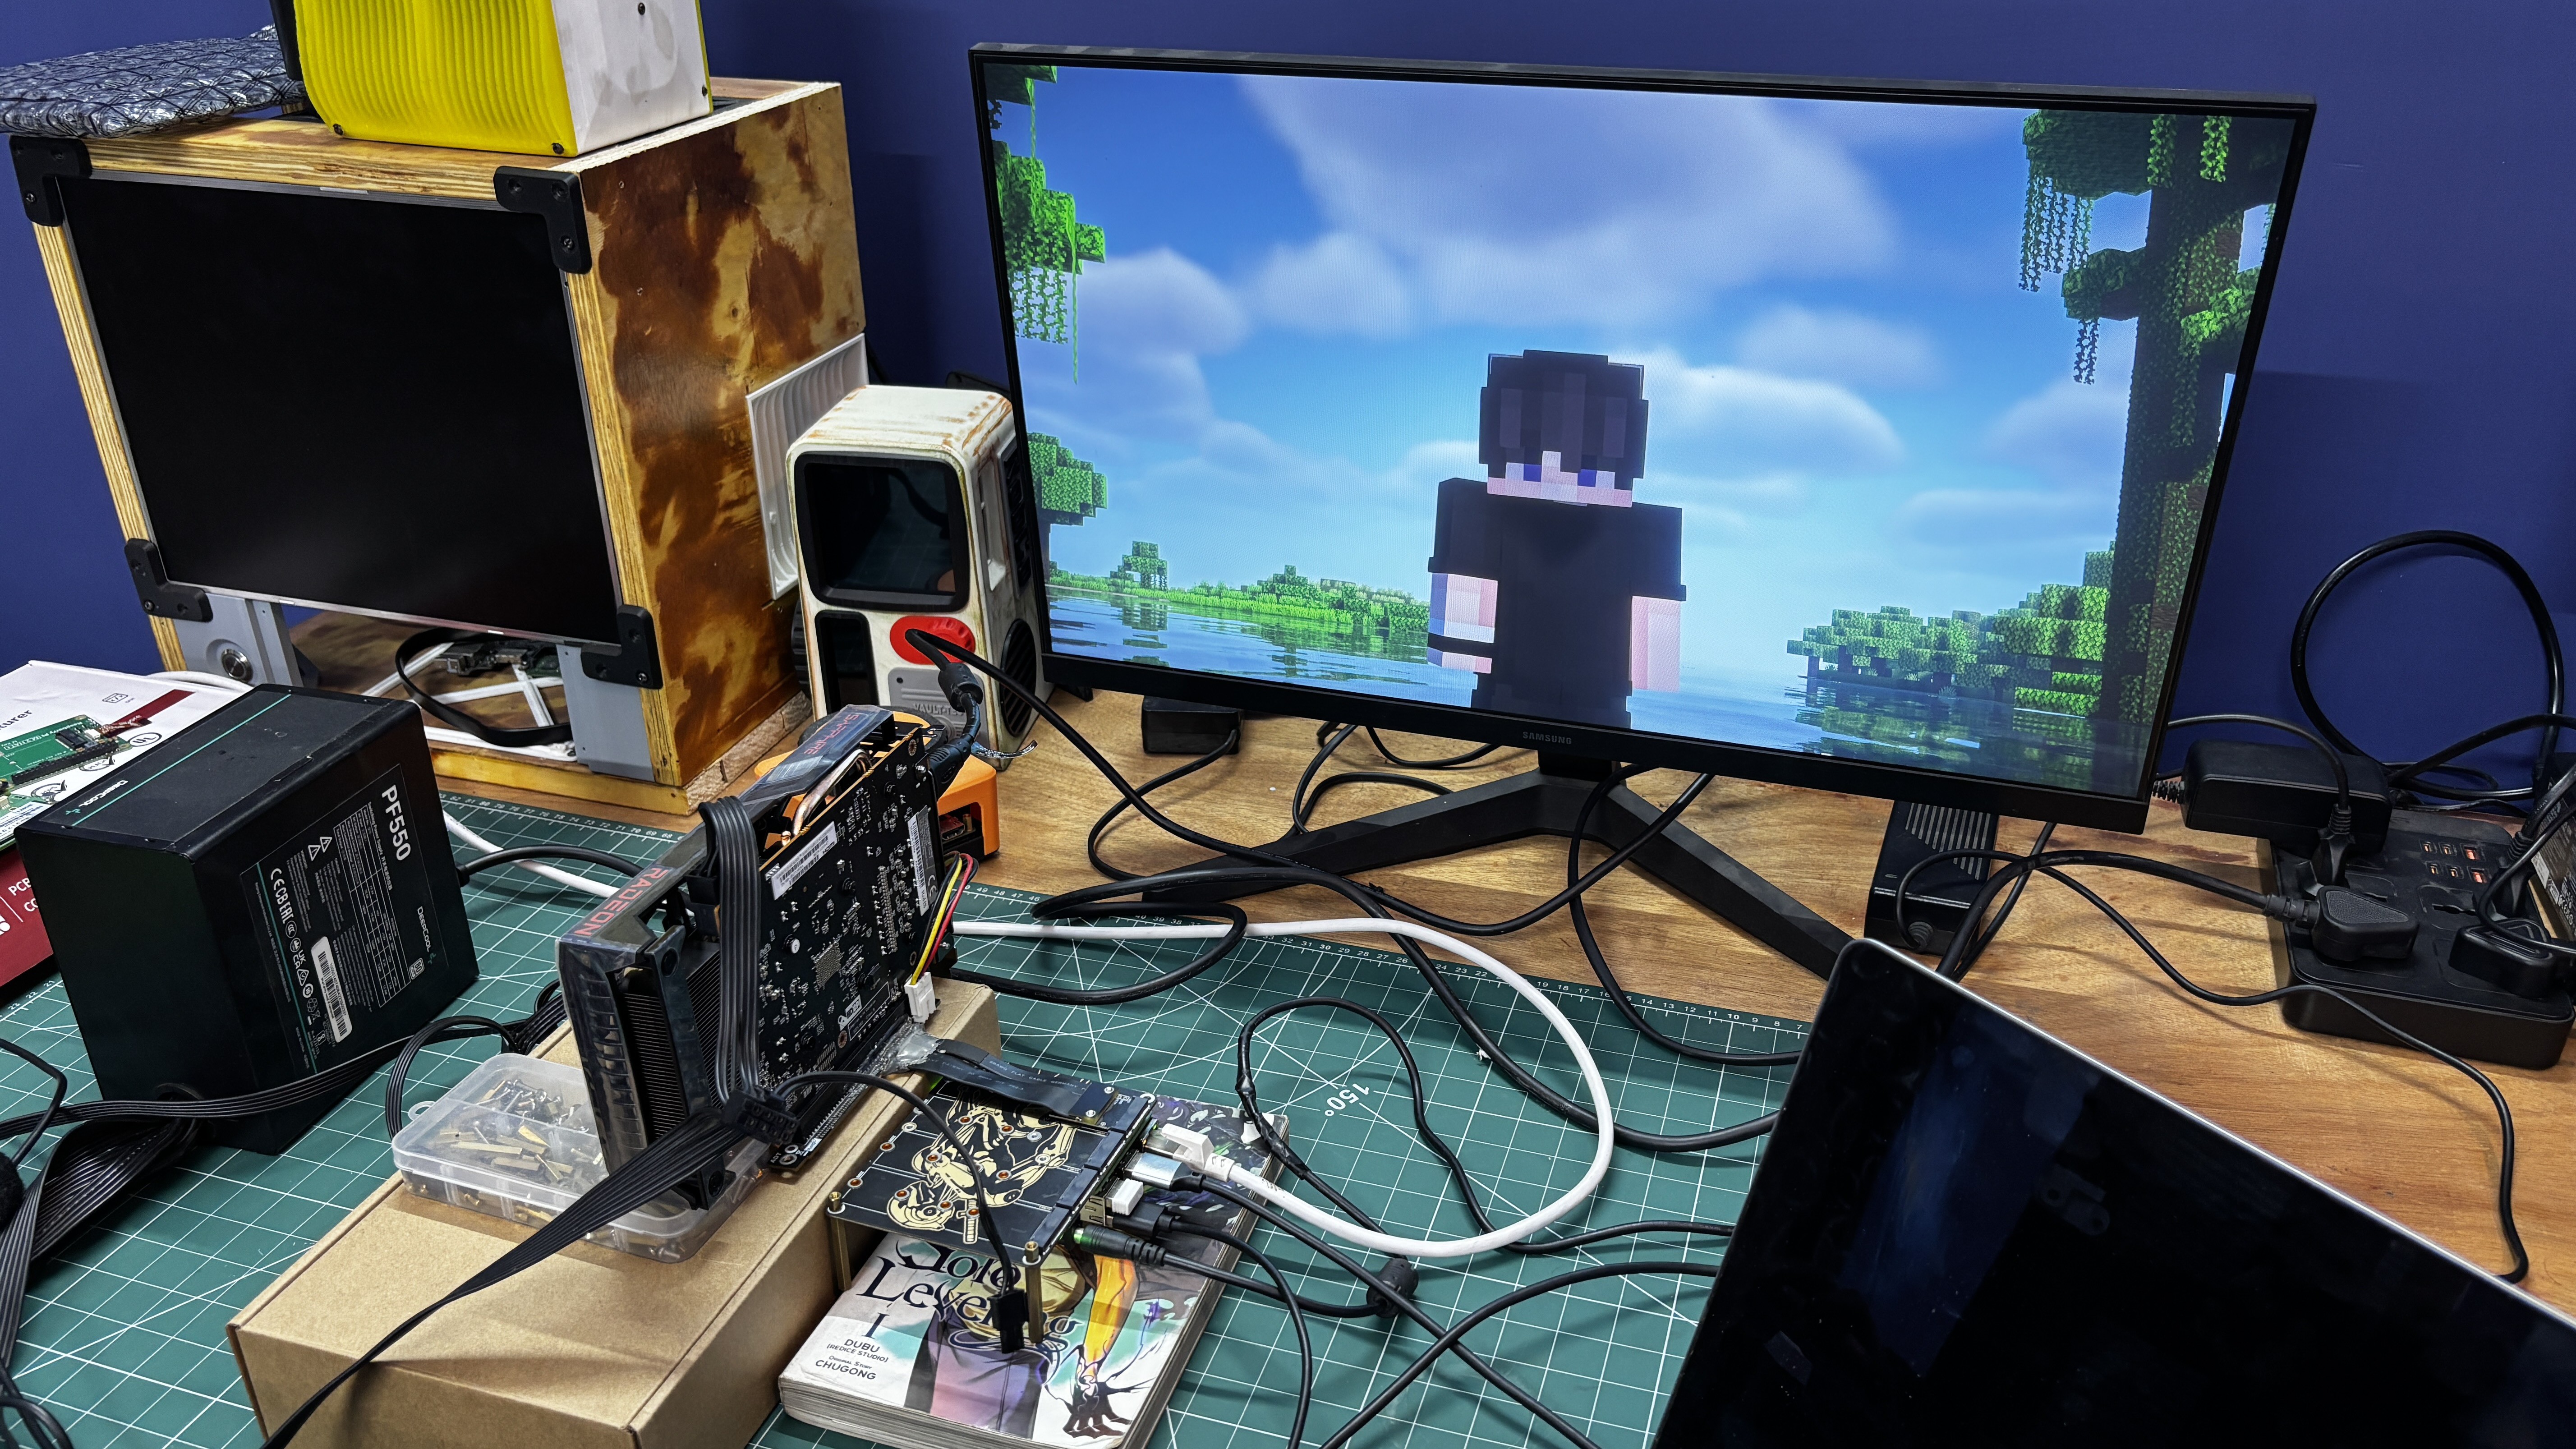
To make the system significantly more capable, I paired the Raspberry Pi 5 with a desktop-class AMD Radeon RX 6500 XT using the Raspberry Pi’s PCIe interface.
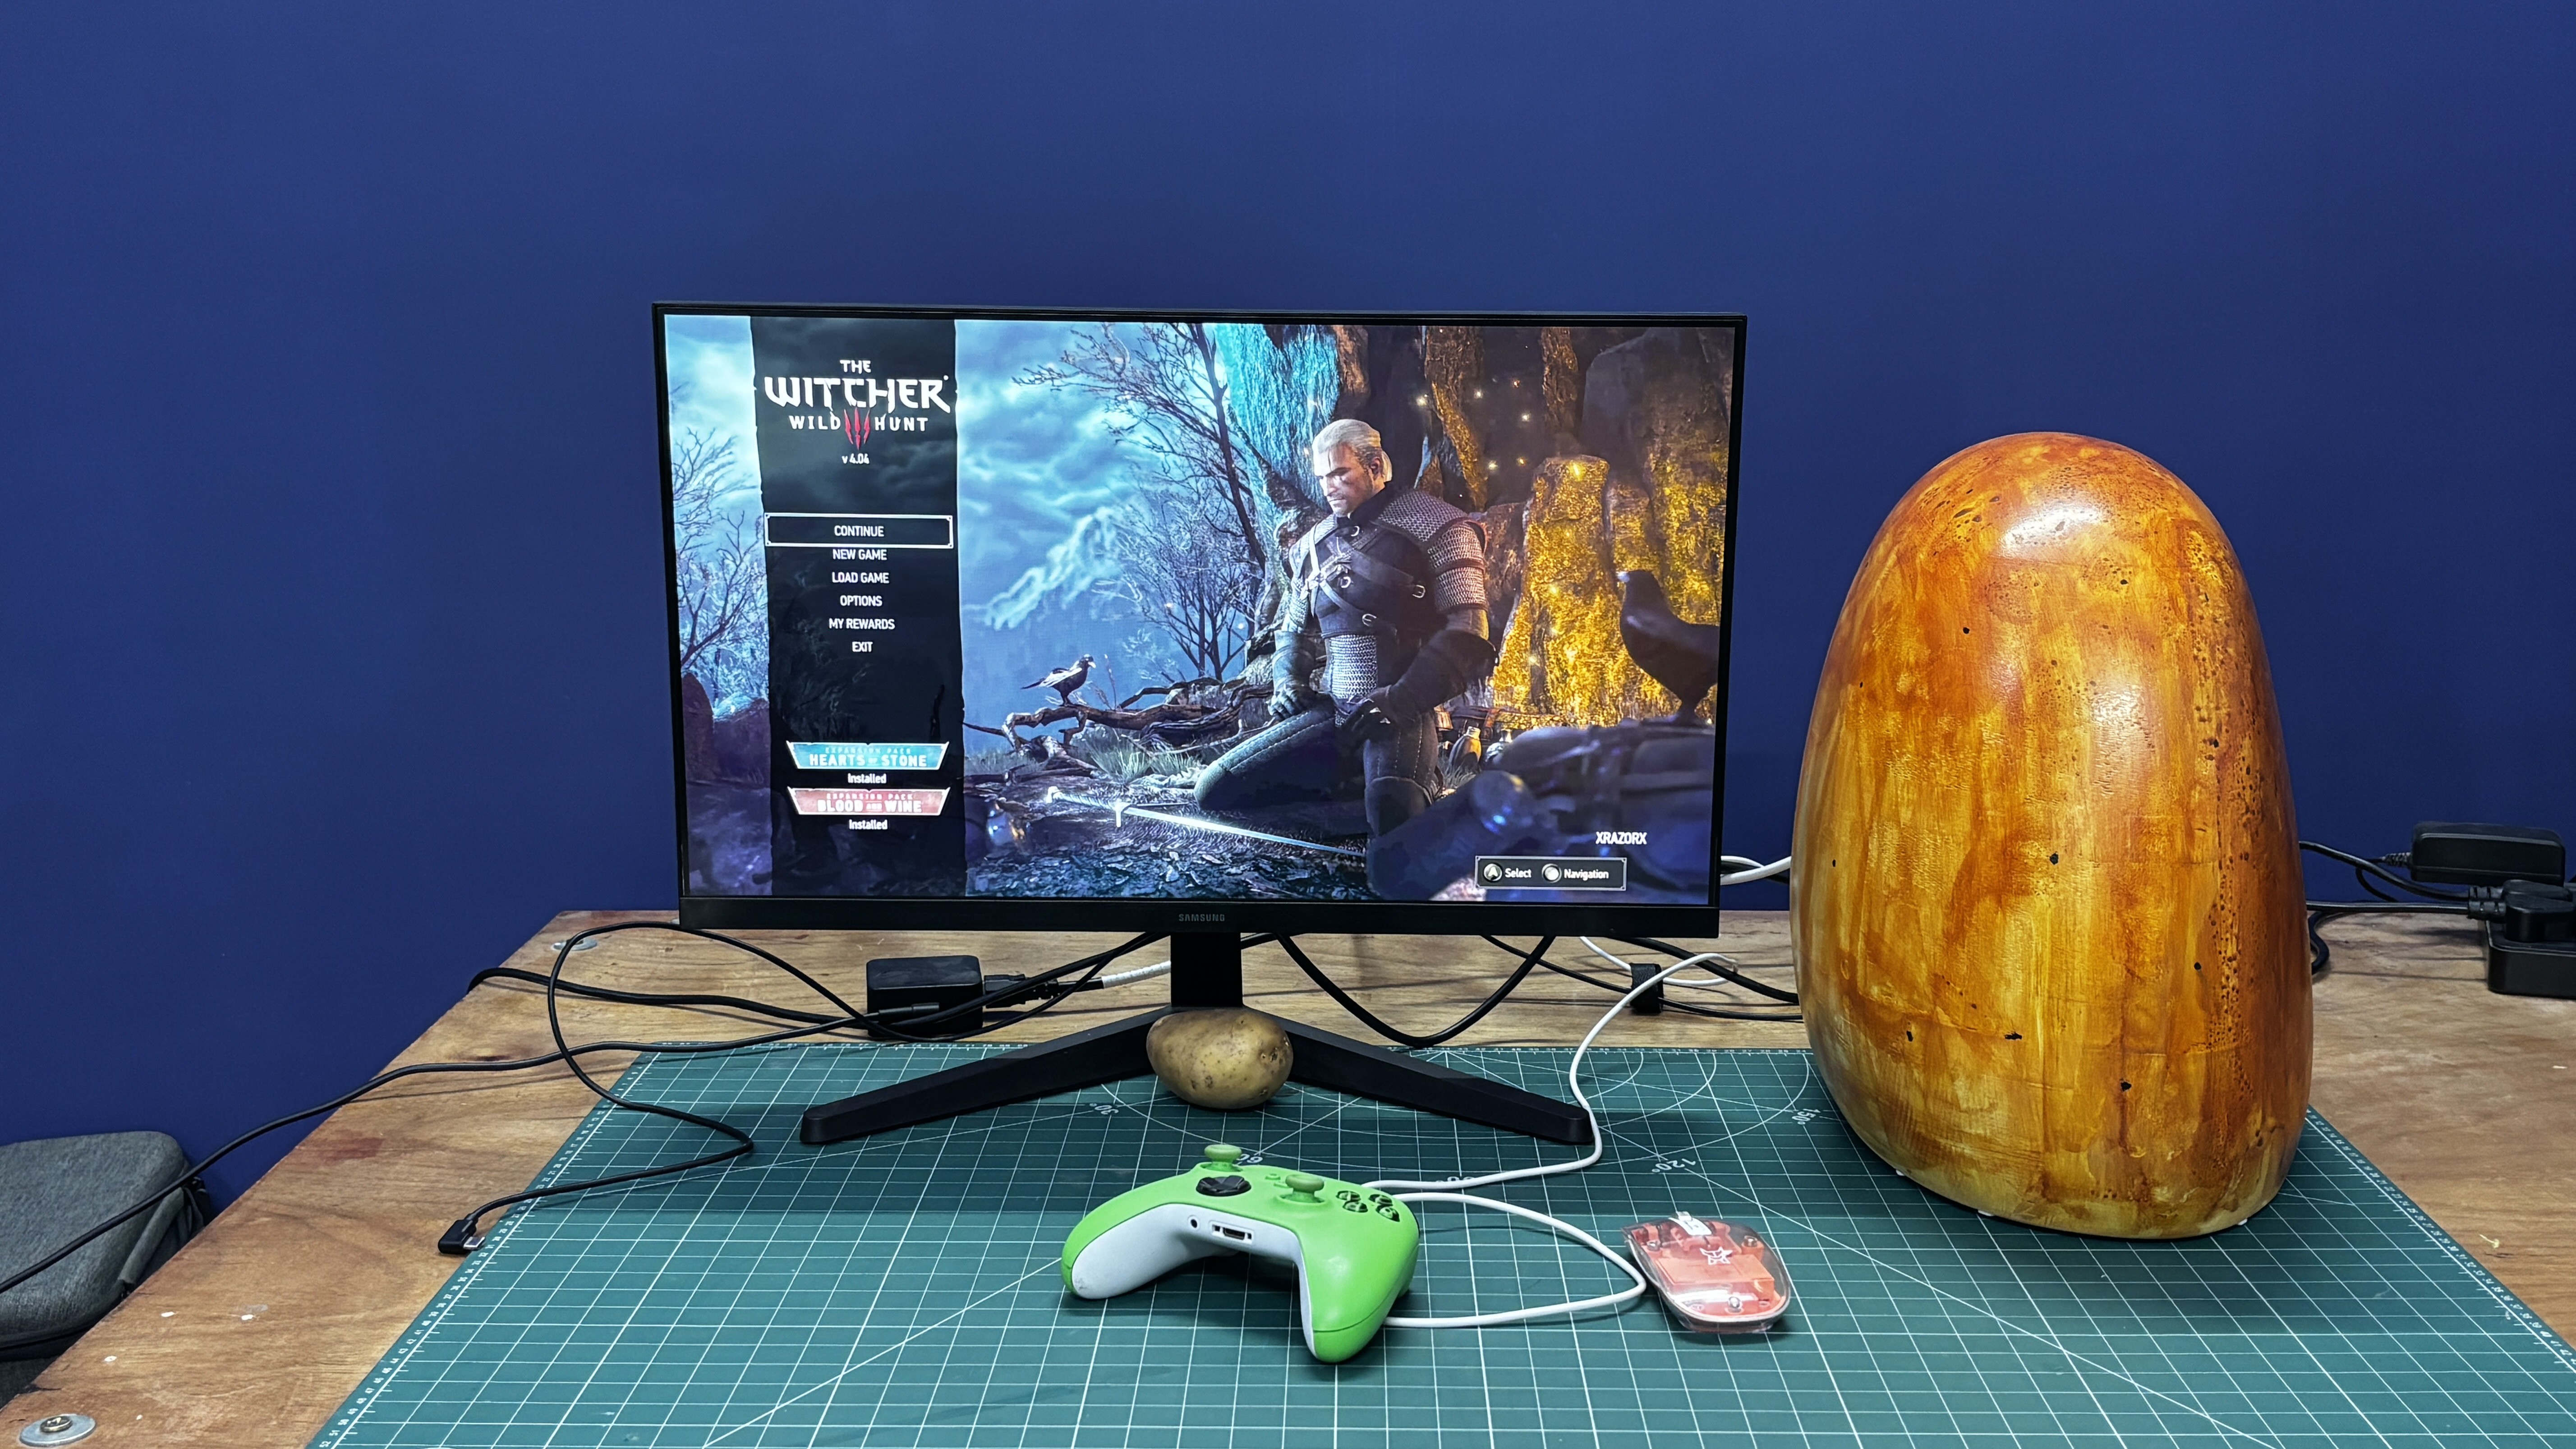
With this desktop-level GPU, the Pi is now able to function much more like a standard PC. While some applications do not run natively because the Pi uses an ARM-based SoC, I was still able to run a wide range of software, including games through Steam and many other applications.
This article covers the complete build process, from designing and constructing the Potato PC enclosure to setting up the Raspberry Pi with the GPU and assembling the final system.
HARDWARE: RASPBEERY Pi 5
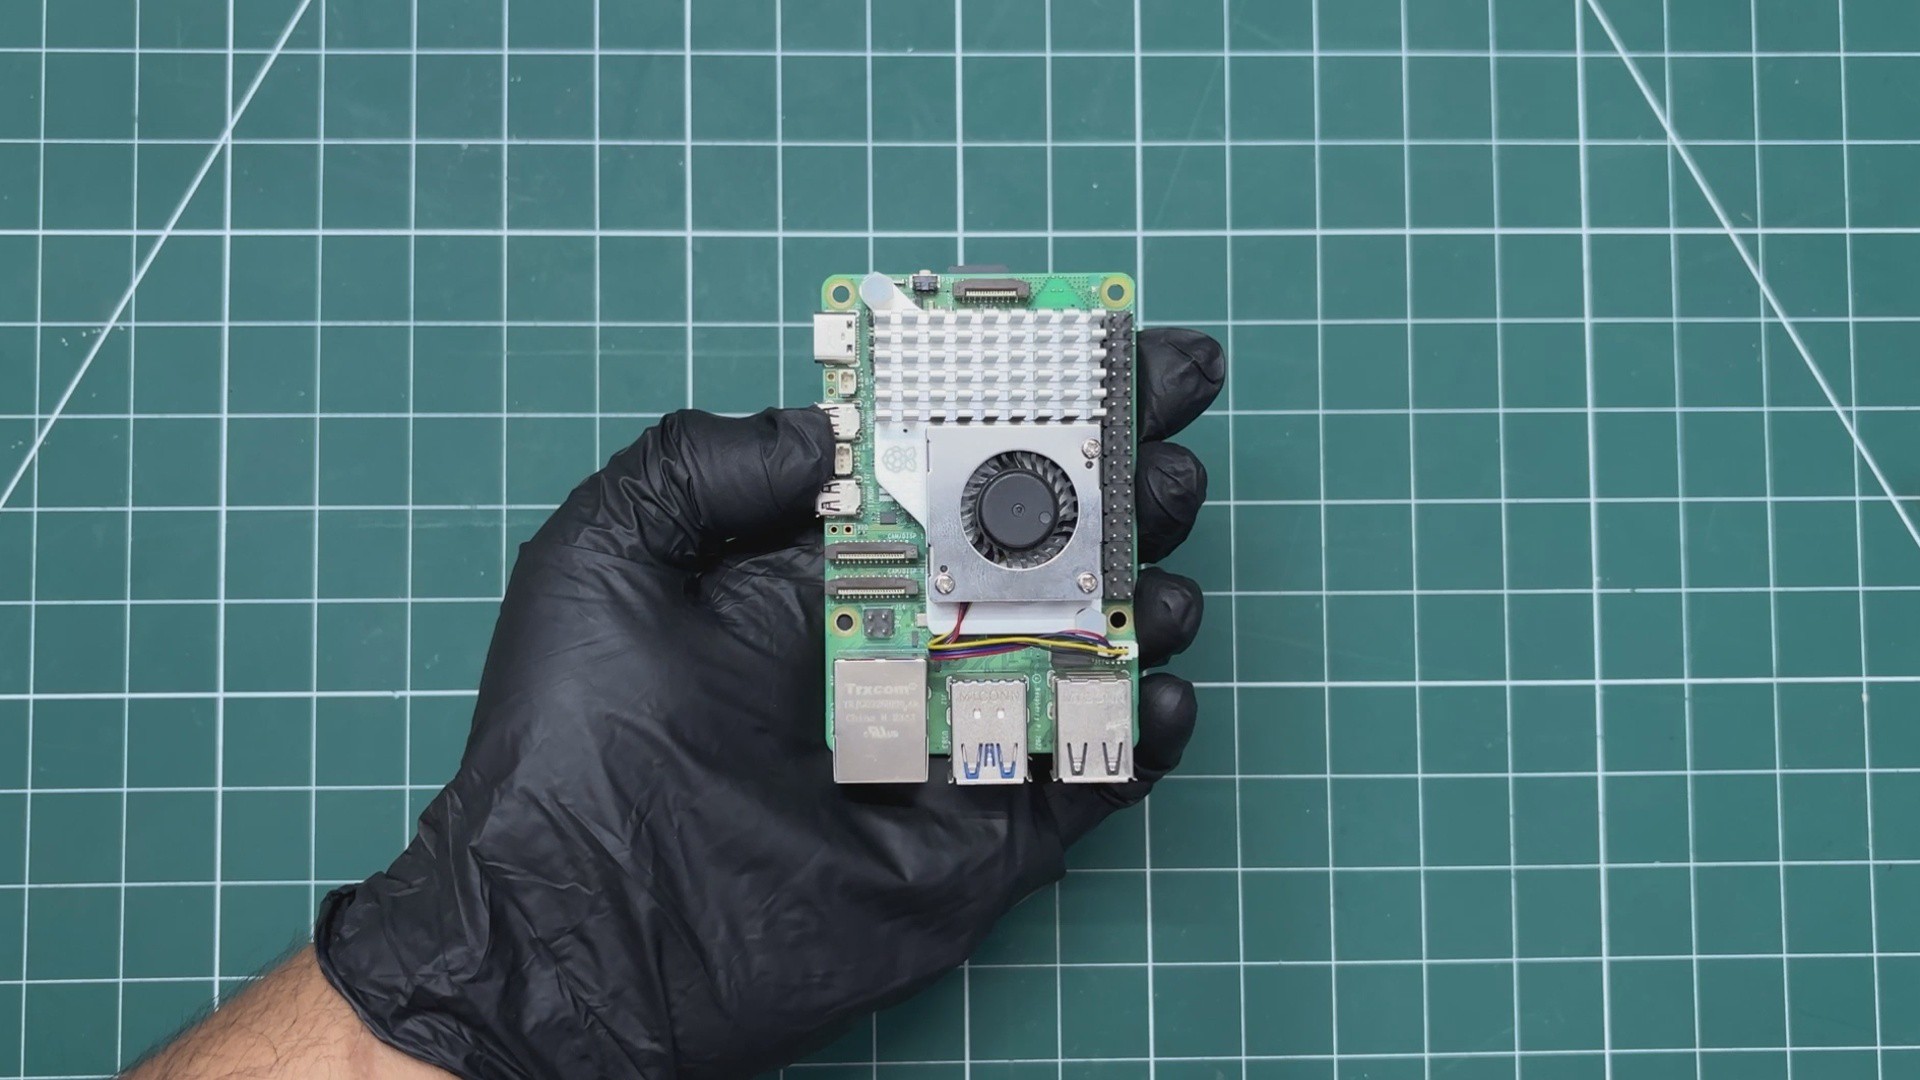
The brain of this project is the Raspberry Pi 5. I’m using the 4GB variant, but a 16GB version is recommended for this project, as I discovered that most applications run, but they often crash because of low memory issues. The Pi 5 is paired with the official Raspberry Pi 5 heatsink and fan, which keep the SoC cool.
Raspberry Pi 5 features the Broadcom BCM2712 quad-core Arm Cortex A76 processor clocked at 2.4 GHz; it also has an onboard VideoCore VII GPU, which supports OpenGL ES 3.1 and Vulkan 1.3.
My goal for using the Pi was simple: I was making a Potato PC, and the Pi fits that category perfectly. The Pi itself is a great tool for developers and makers, but when used as a daily driver, it can sometimes feel like a potato PC. So my goal was to make the Pi perform better for tasks where I would normally use a regular PC instead of a Pi.
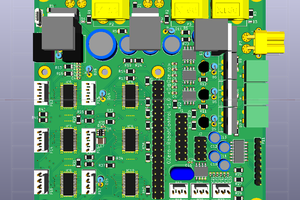
HARDWARE: WAVESHARE 4 CH NVME BREAKOUT BOARD

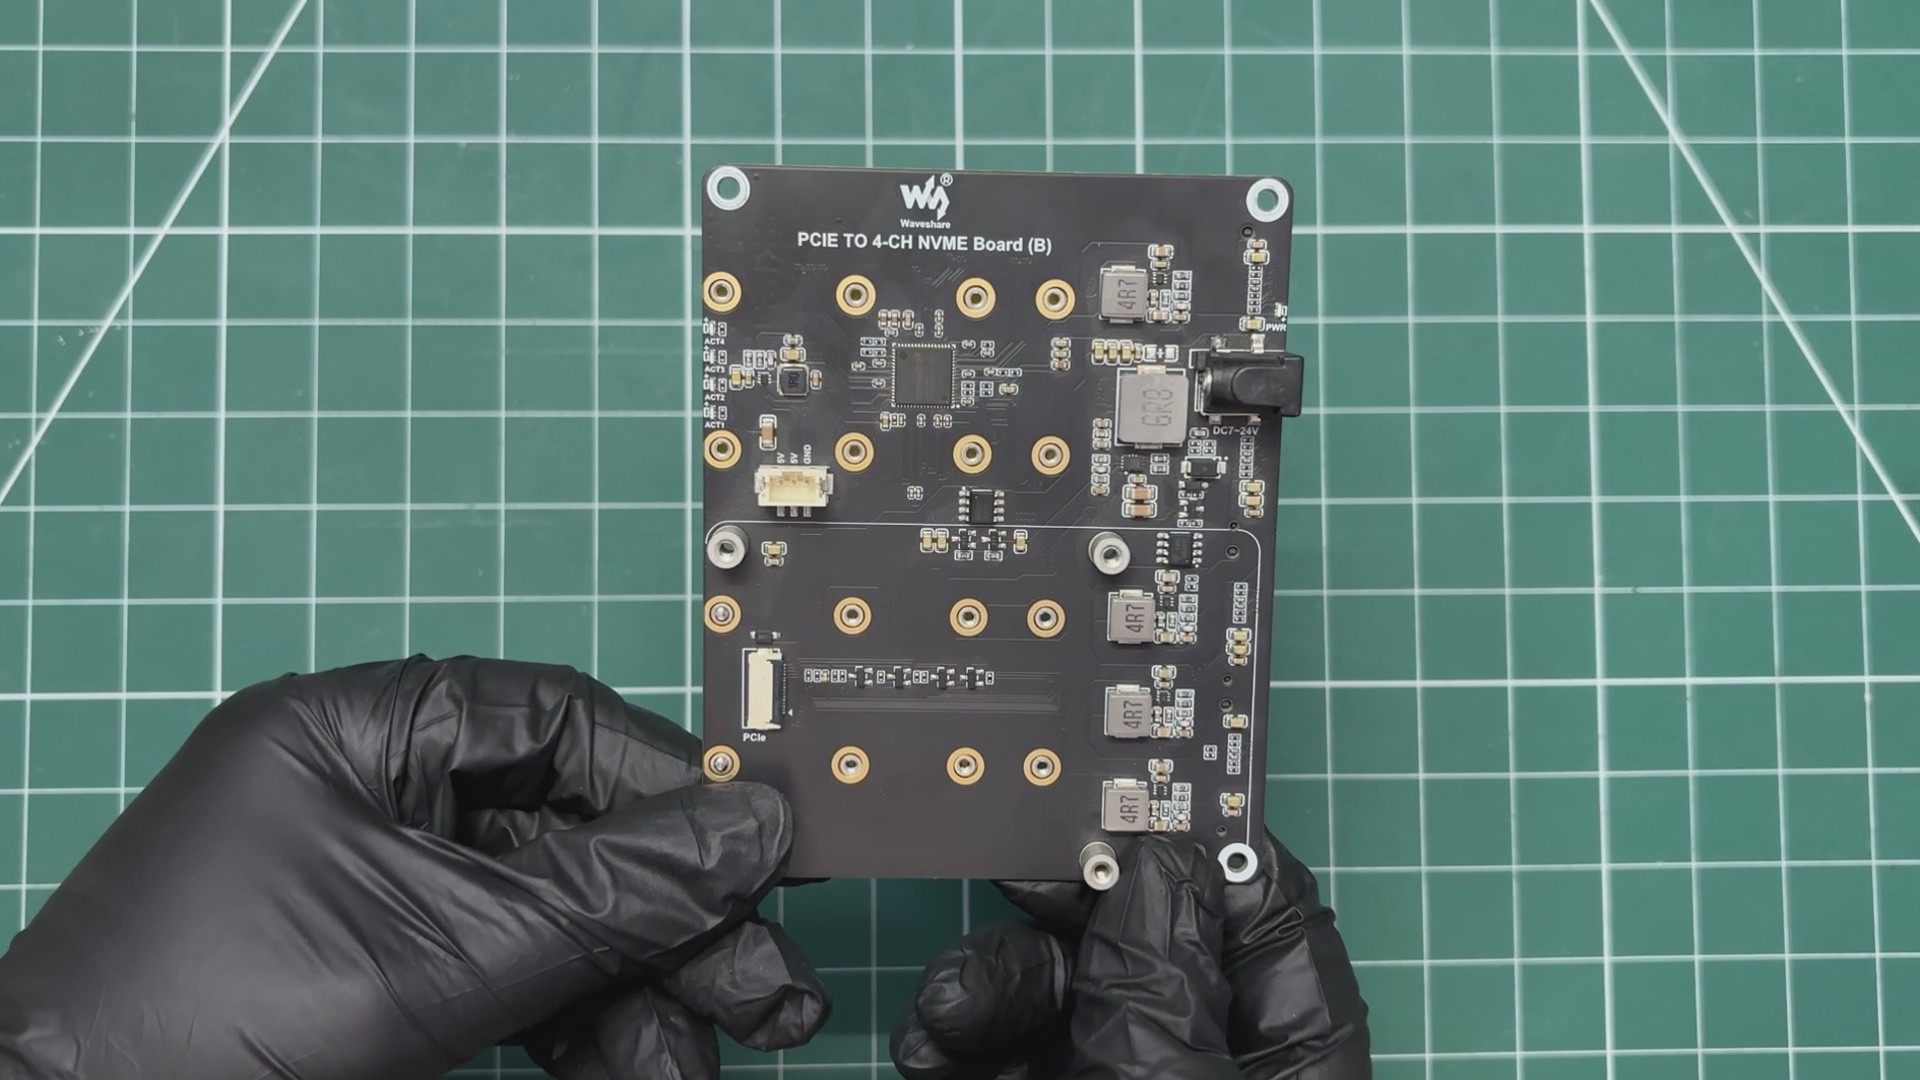
Our Raspberry Pi 5 does not include a built-in NVMe slot, but it does feature a PCIe connector. This was a revolutionary addition when Raspberry Pi introduced it, as it greatly expanded the board’s storage and expansion capabilities.
Raspberry Pi also released an official HAT that provides an M.2 NVMe slot and connects to the board using the FPC PCIe connector.
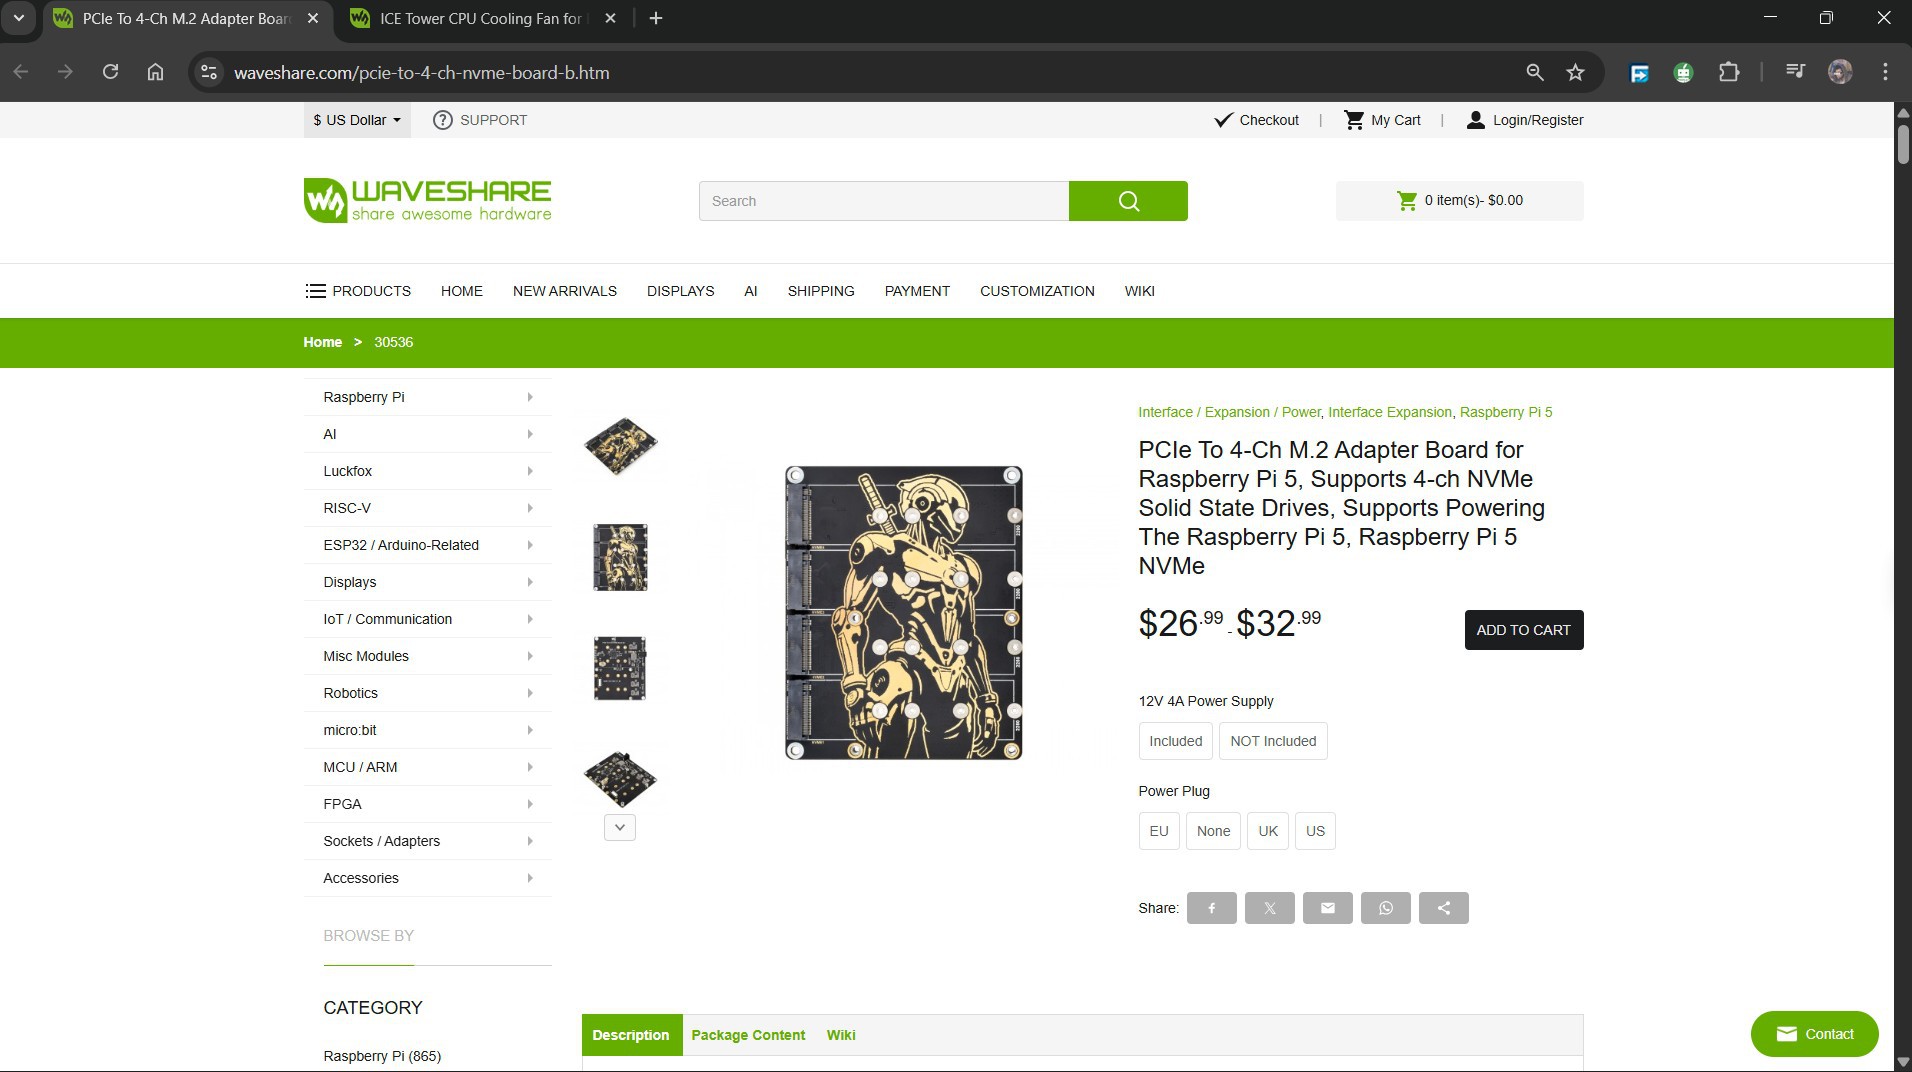
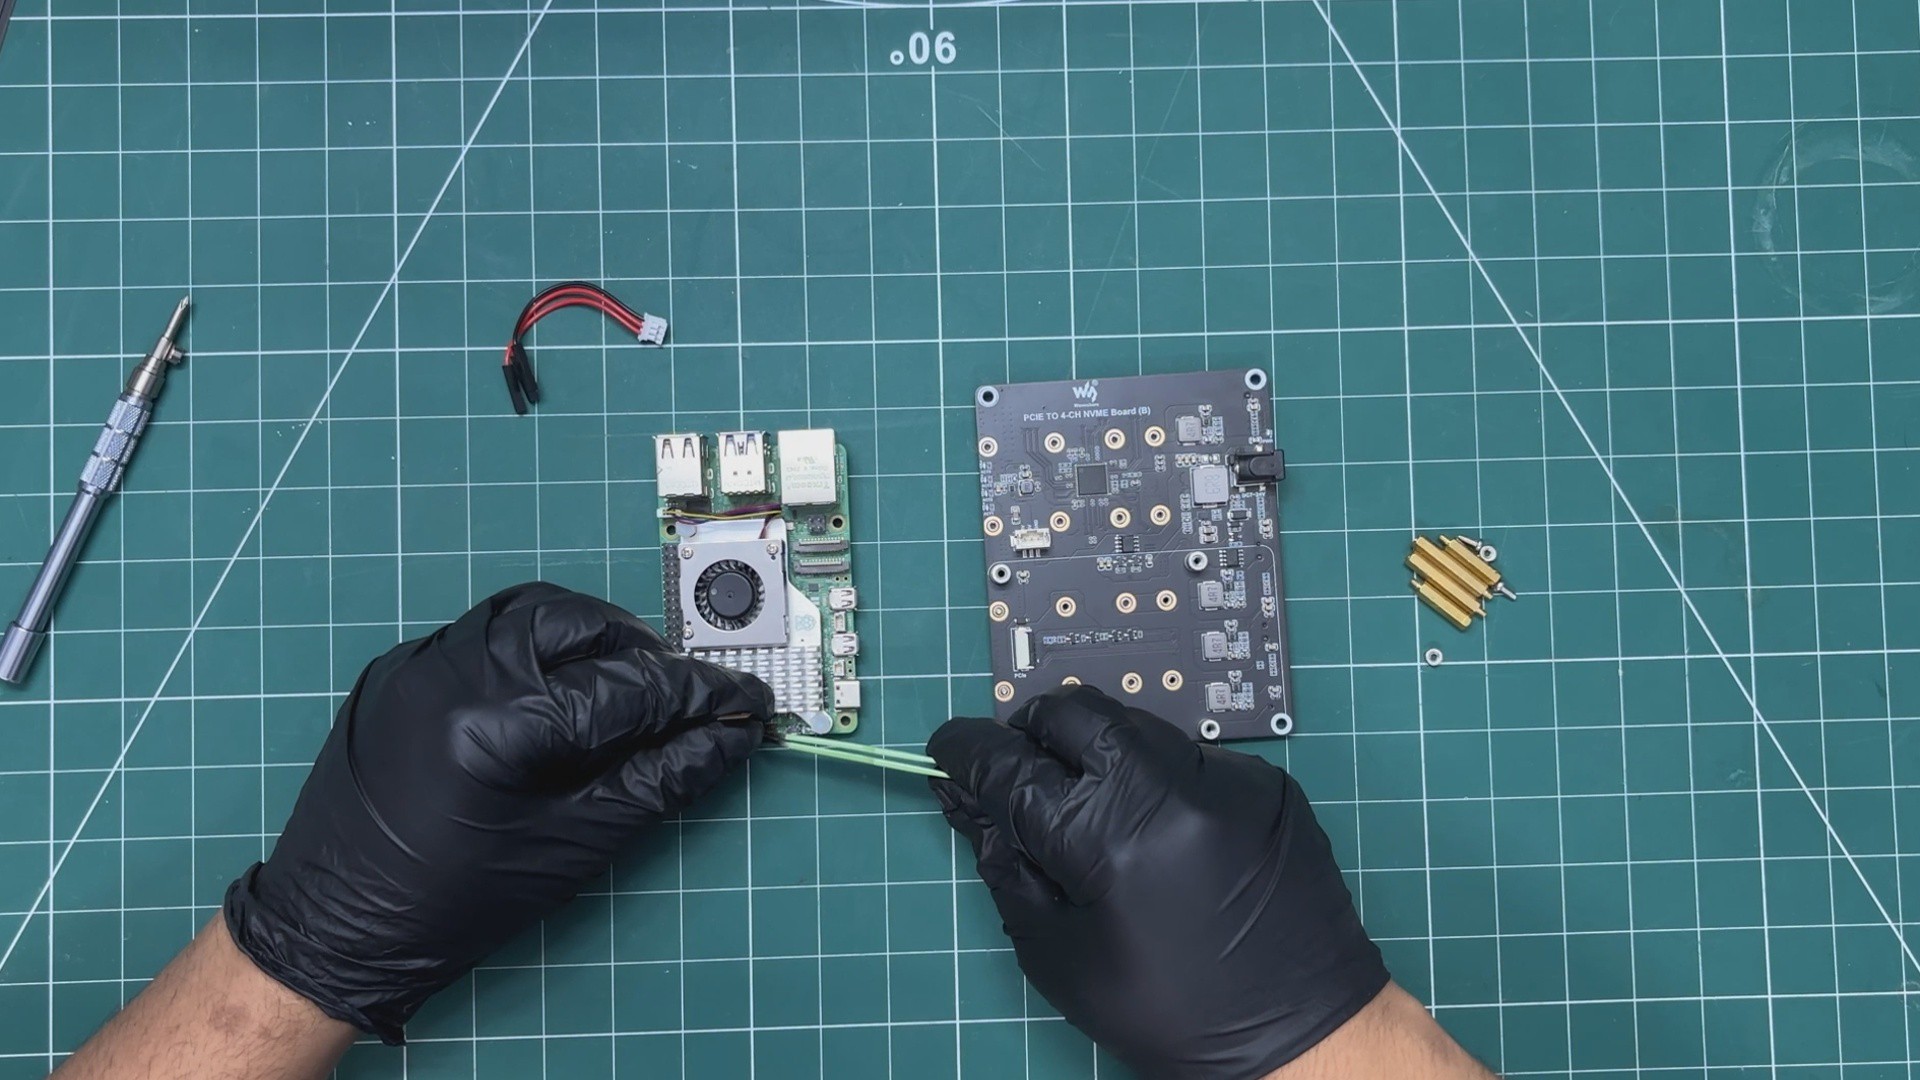
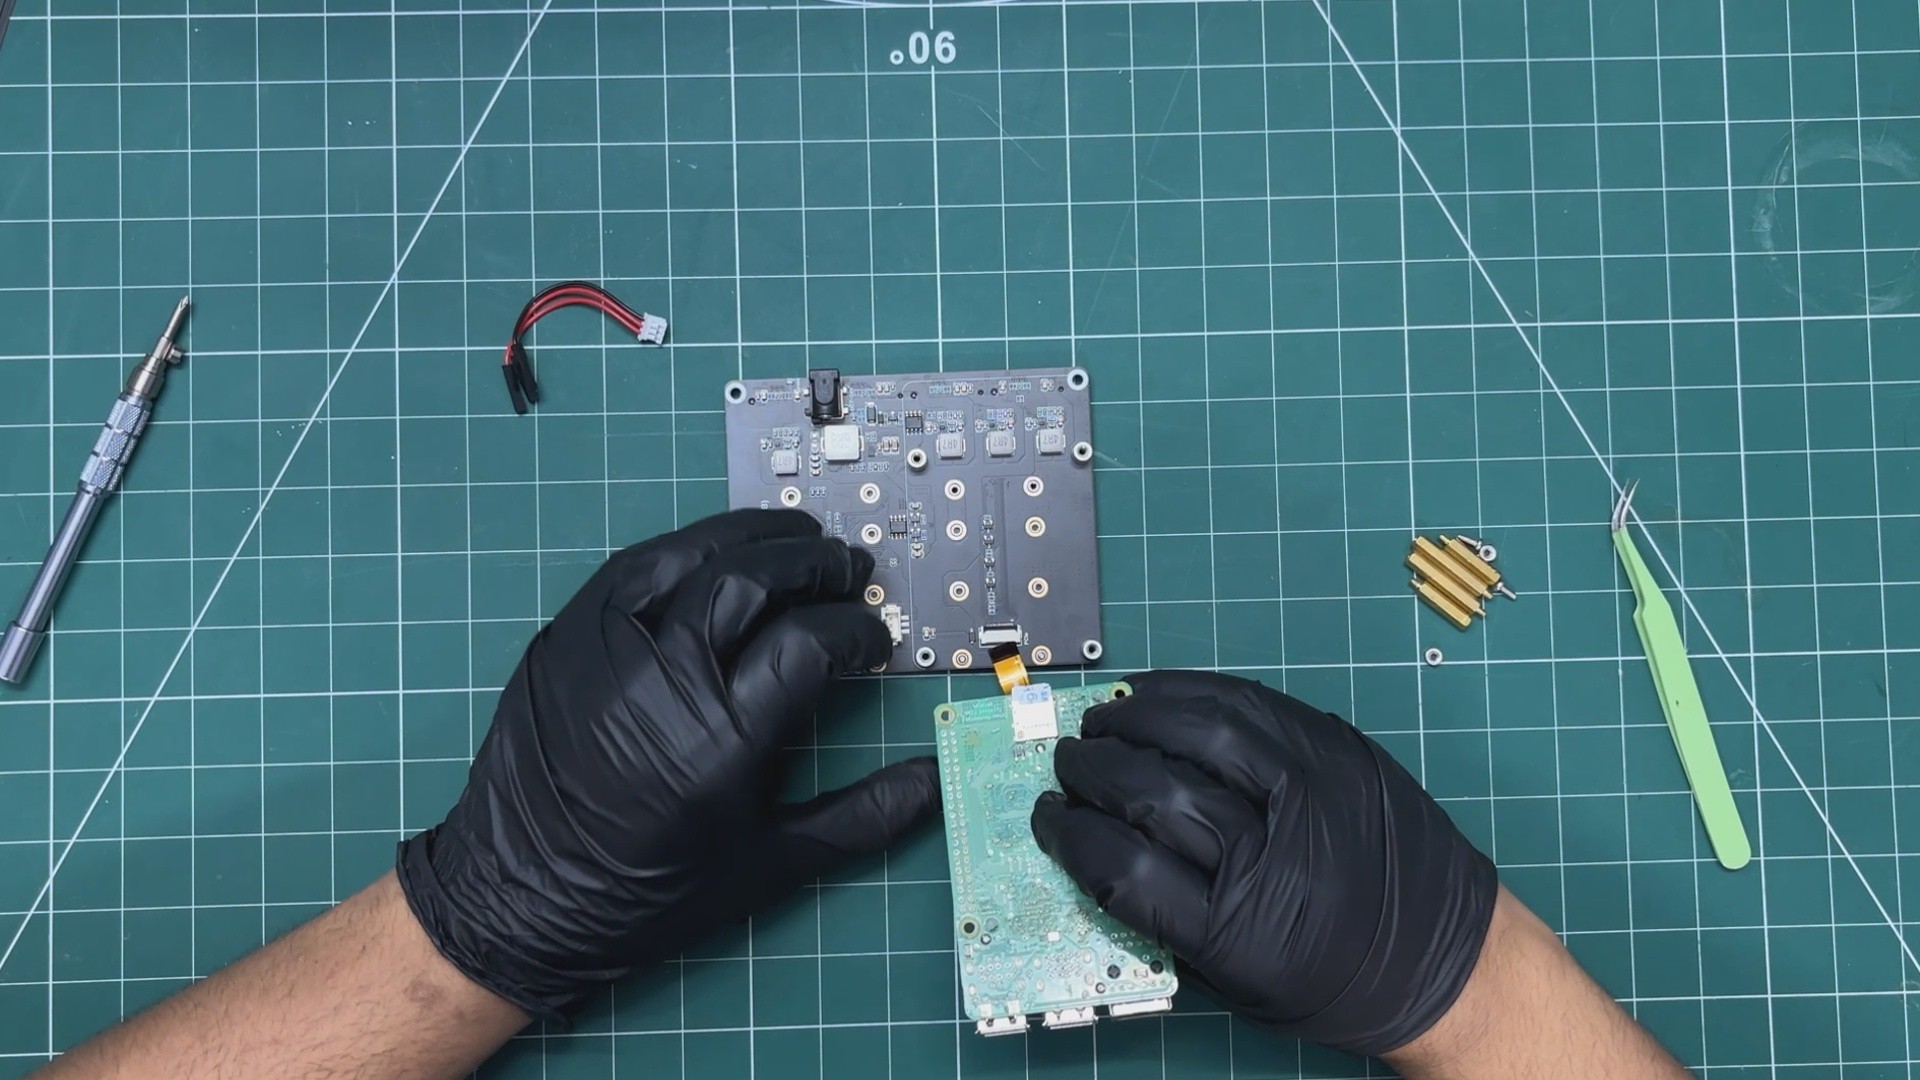
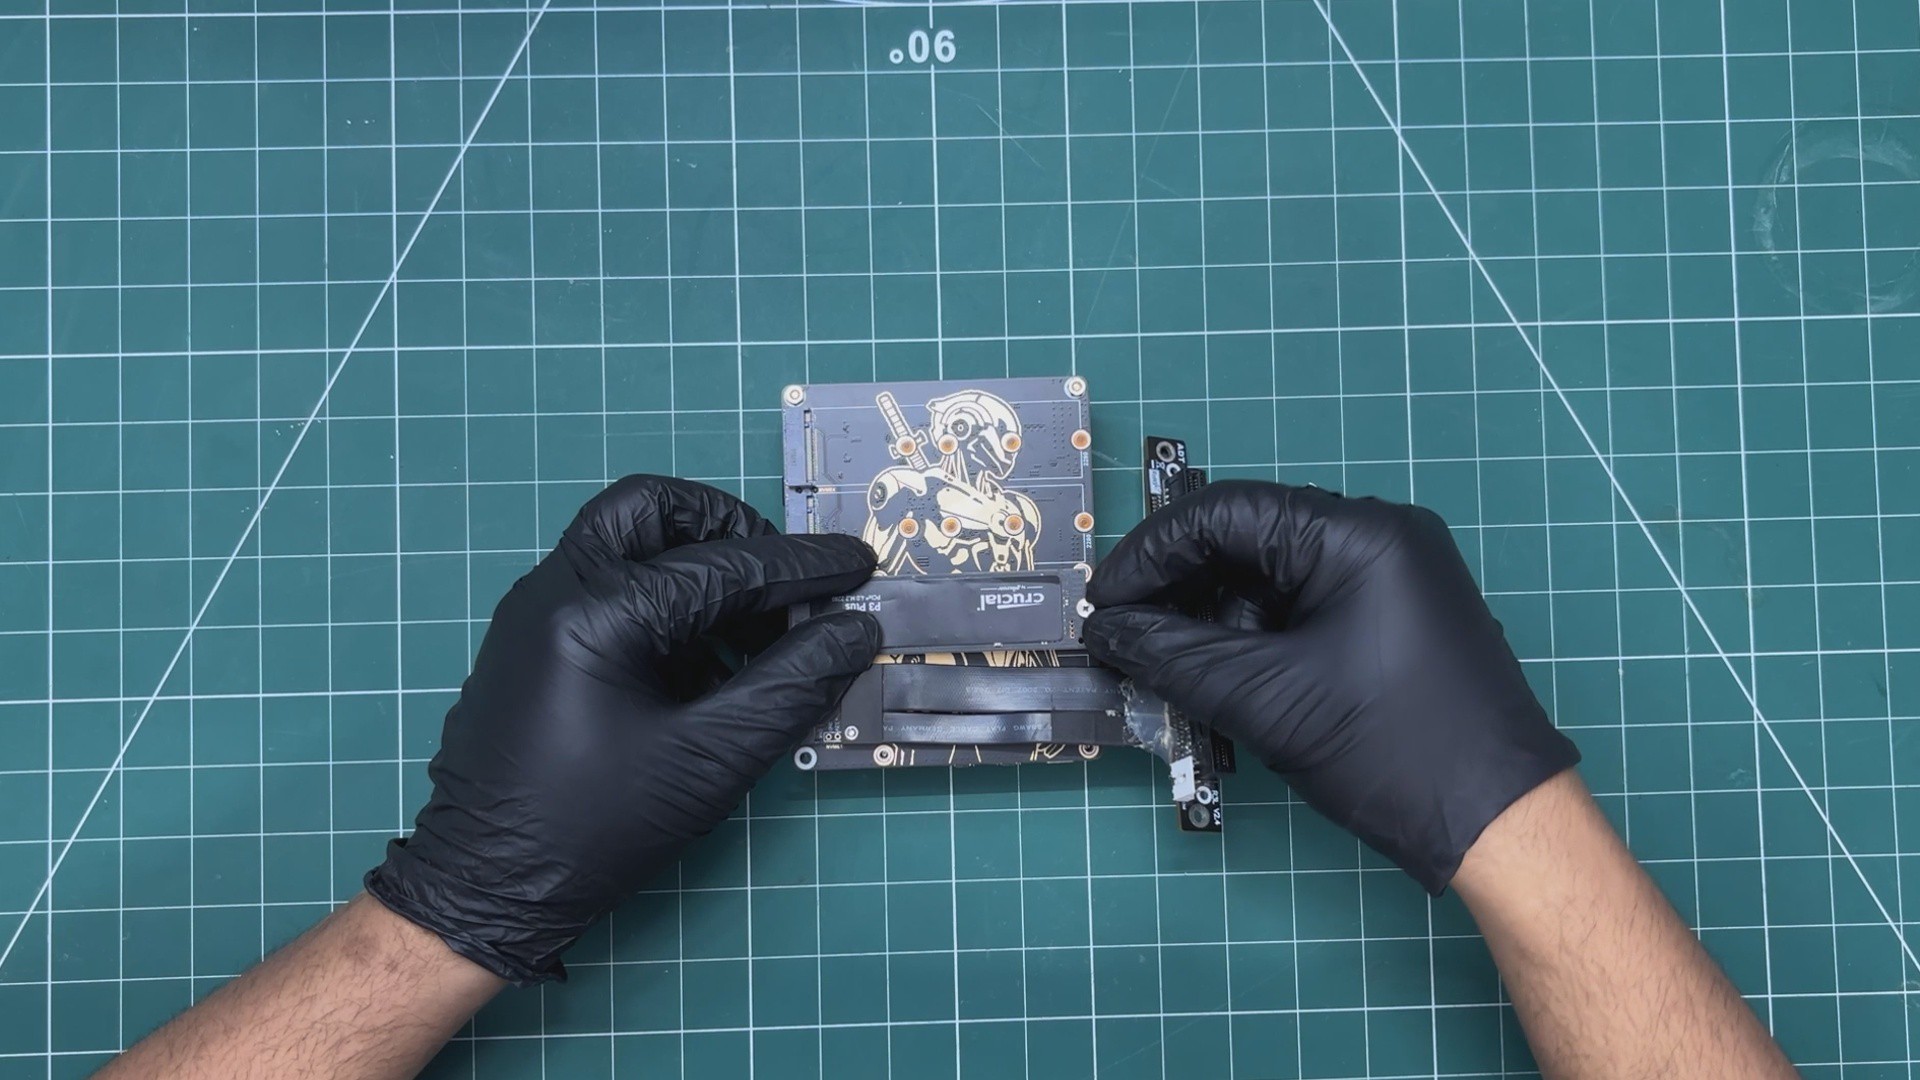
Following this, many other companies began developing expansion boards for the Raspberry Pi 5. One particularly useful option comes from Waveshare, which offers an expansion board that includes four M.2 slots.
This board connects directly to the Pi’s PCIe port and supports up to four M.2 NVMe SSDs in 2230, 2242, 2260, and 2280 sizes, all running in PCIe Gen2 ×1 mode.
One of the biggest advantages of this board is that it also supports NVMe booting, allowing the Pi 5 to start its operating system directly from an NVMe SSD instead of a microSD card, giving a huge boost in speed and reliability. We will also pair a PCIEx16 to M.2 Adaptor with this setup in order to connect our GPU to this board.
The board includes helpful onboard LEDs that show power status and drive activity, and it can even supply power back to the Raspberry Pi 5 itself, reducing cable clutter.
With these features combined, multi-drive support, NVMe boot capability, broad SSD size compatibility, and clean power handling, the Waveshare 4-Channel NVMe adapter becomes the perfect backbone for building our Potato PC.
Check out its wiki page for more in-depth info from the link below.
https://www.waveshare.com/pcie-to-4-ch-nvme-board-b.htm?&aff_id=Arnov
WAVESHARE SERVICE
Special thanks to Waveshare for providing the hardware used in this project. The PCIe to 4-Channel NVMe Adapter Board and supporting accessories were supplied as review units for testing and evaluation.
Waveshare is a leading global provider of electronic components, modules, and development tools used across robotics, IoT, automation, education, and many other fields. With a strong focus on quality, reliability, and continuous innovation, Waveshare has earned the trust of engineers, designers, hobbyists, and makers worldwide.
Their extensive product lineup, from displays and HATs to expansion boards and embedded modules, makes them a go-to choice for both professional builds and DIY projects.
Waveshare had no involvement in the build process, configuration, testing methods, or results shared...
Read more »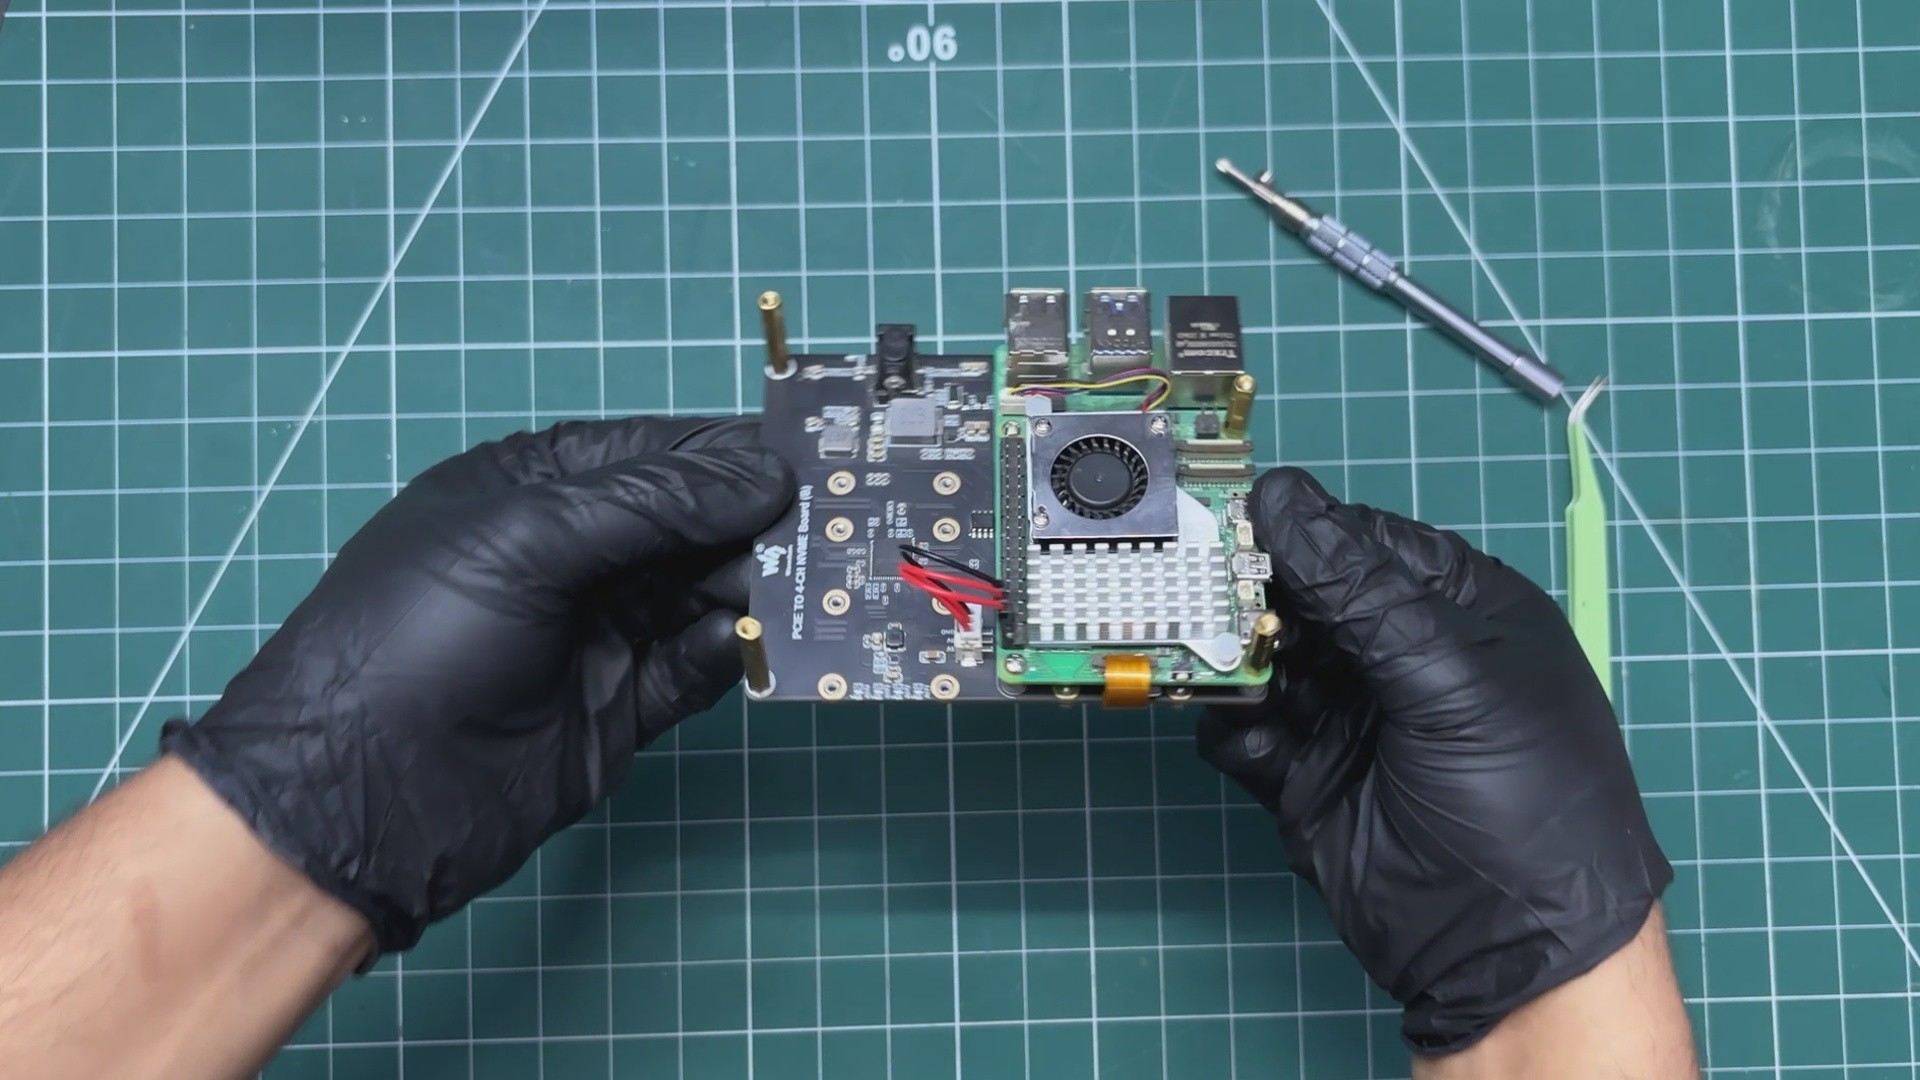


 Dmitry
 andriy.malyshenko