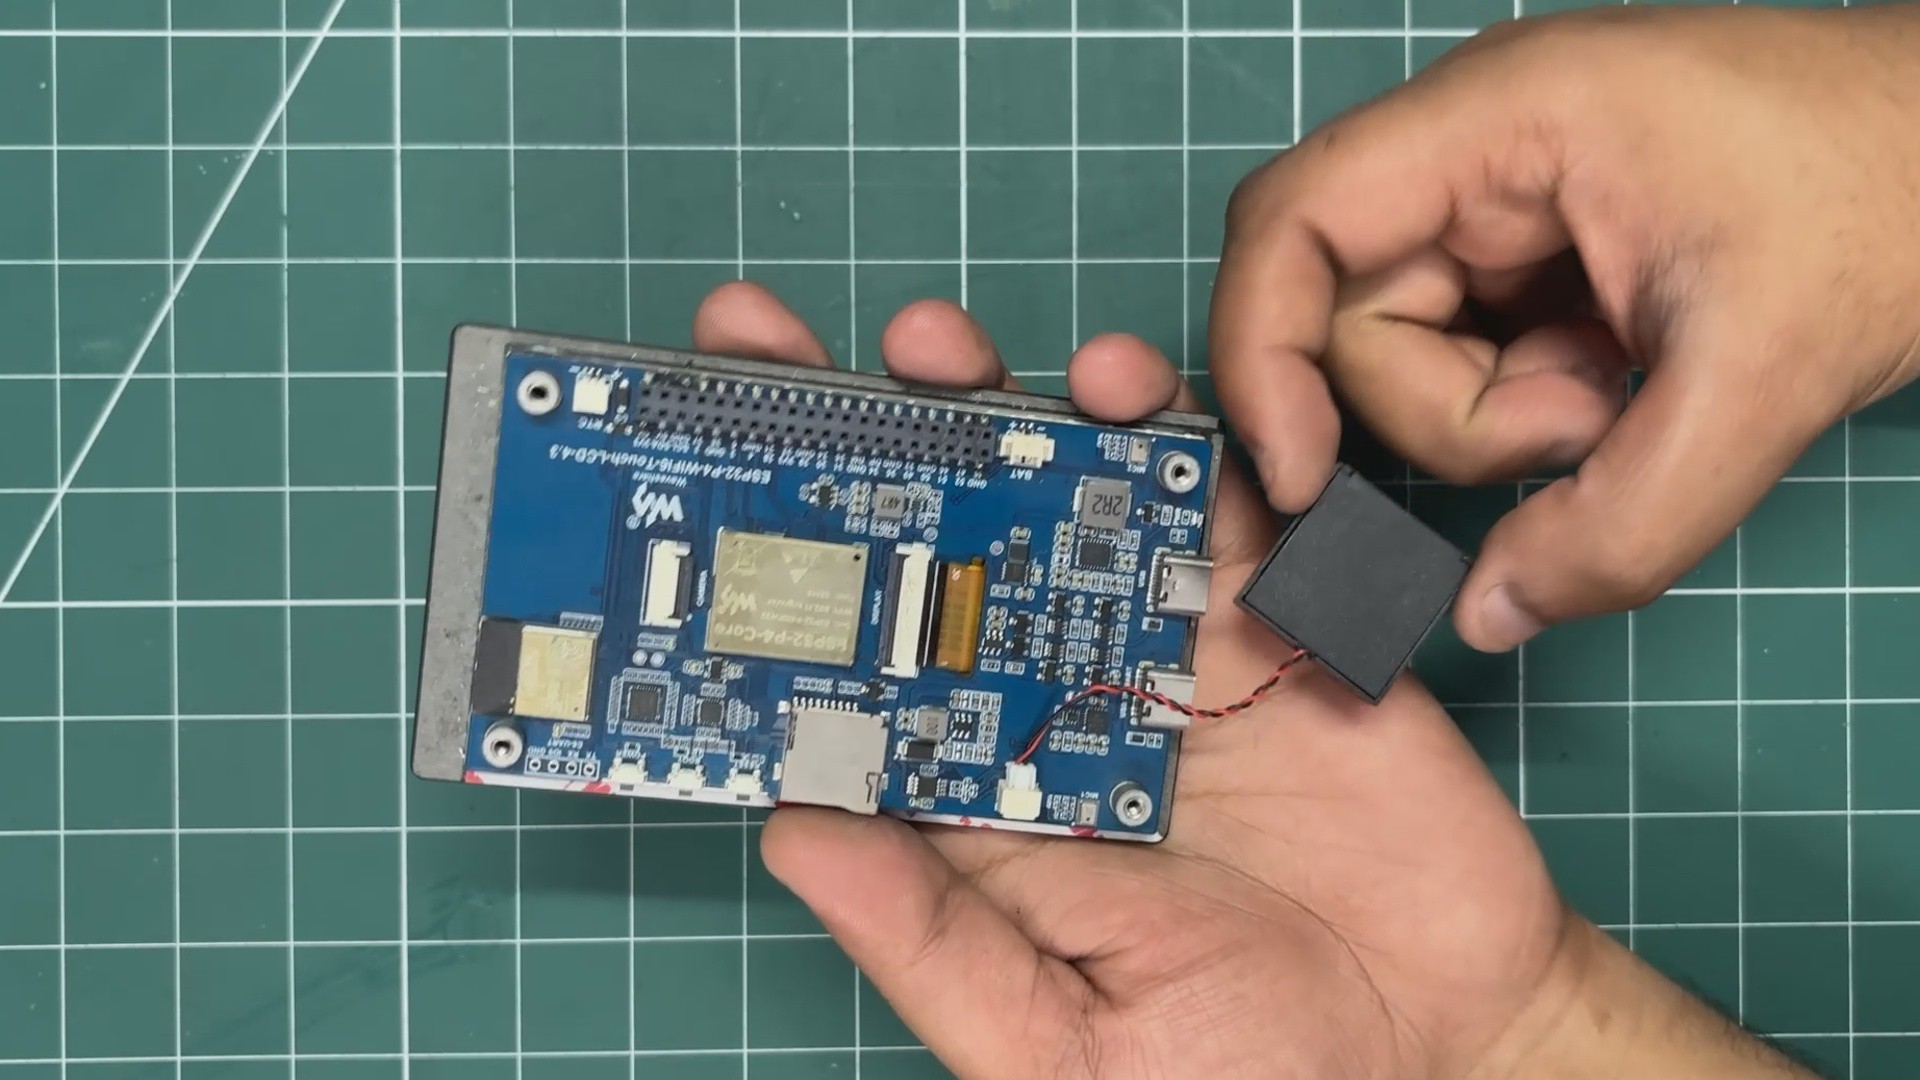
For audio output, I used the 4Ω mini speaker that came included with the Waveshare ESP32-P4 development kit. Connecting it was quite straightforward; the speaker has a JST connector, which plugs directly into the corresponding JST connector on the Waveshare development board.
For storing the music and other media, I used the SD card slot built into the development board.
Our iPod Mini supports a range of common media formats:
Audio: .mp3, .wav, .flac, .m4a, and .aac, with ID3 metadata used for filename cleanup and better organization.
Photos: .jpg, .jpeg, .png, and .bmp. Images are decoded on the fly using the LVGL TJPGD and LodePNG decoders.
Videos: .mjpeg and .avi. Video frames are streamed directly into PSRAM for playback.
2
CODE & DEMO RUN
Here's the main code used in this project and it's a simple one; i have broken it down into small files.
System 'main.c'
#include"freertos/FreeRTOS.h"#include"freertos/task.h"#include"esp_log.h"#include"nvs_flash.h"#include"bsp_init.h"#include"audio_player.h"#include"ui_main.h"#include"media_scanner.h"staticconstchar *TAG = "MAIN";
voidapp_main(void){
ESP_LOGI(TAG, "Starting iPod Media Player Firmware on ESP32-P4...");
// 1. Initialize NVS (Non-Volatile Storage)esp_err_t ret = nvs_flash_init();
if (ret == ESP_ERR_NVS_NO_FREE_PAGES || ret == ESP_ERR_NVS_NEW_VERSION_FOUND) {
ESP_ERROR_CHECK(nvs_flash_erase());
ret = nvs_flash_init();
}
ESP_ERROR_CHECK(ret);
// 2. Initialize Waveshare Hardware (Display, Touch, SD Card, I2S Audio)
ESP_ERROR_CHECK(app_bsp_init());
// 3. Initialize Audio Pipeline & Spawn Audio Decode Task on Core 1
ESP_ERROR_CHECK(audio_player_init());
// 4. Scan SD card for songs, photos, and videos
media_scanner_scan("/sdcard");
// 5. Initialize LVGL 9 User Interface on Core 0
ui_init();
ESP_LOGI(TAG, "System startup complete. Core 0 -> UI, Core 1 -> Audio.");
// 6. Periodic UI state synchronization loop (runs every 100ms)while (1) {
ui_update_loop();
vTaskDelay(pdMS_TO_TICKS(100));
}
}
#include"ui_main.h"#include"esp_lv_adapter.h"staticlv_obj_t *s_menu_view = NULL;
staticlv_obj_t *s_np_view = NULL;
staticlv_obj_t *s_sb_title = NULL;
staticlv_obj_t *s_sb_play_icon = NULL;
staticipod_view_t s_current_view = VIEW_MENU;
/*
* Switches active visible screen (Split Menu <-> Now Playing)
*/voidui_set_view(ipod_view_t view){
s_current_view = view;
if (view == VIEW_MENU) {
lv_obj_remove_flag(s_menu_view, LV_OBJ_FLAG_HIDDEN);
lv_obj_add_flag(s_np_view, LV_OBJ_FLAG_HIDDEN);
lv_label_set_text(s_sb_title, "iPod");
} elseif (view == VIEW_NOW_PLAYING) {
lv_obj_add_flag(s_menu_view, LV_OBJ_FLAG_HIDDEN);
lv_obj_remove_flag(s_np_view, LV_OBJ_FLAG_HIDDEN);
lv_label_set_text(s_sb_title, "Now Playing");
}
}
/*
* Click Wheel button dispatcher
*/staticvoidon_wheel_click(wheel_button_t btn){
switch (btn) {
case WHEEL_BTN_MENU:
if (s_current_view == VIEW_NOW_PLAYING) {
ui_set_view(VIEW_MENU);
} else {
ui_menu_back();
}
break;
case WHEEL_BTN_CENTER:
if (s_current_view == VIEW_MENU) {
ui_menu_select();
}
break;
case WHEEL_BTN_PLAY_PAUSE:
audio_player_toggle_play();
break;
case WHEEL_BTN_PREV:
ui_library_play_prev();
break;
case WHEEL_BTN_NEXT:
ui_library_play_next();
break;
}
}
/*
* Master UI Initialization
*/voidui_init(void){
esp_lv_adapter_lock(-1);
lv_obj_t *scr = lv_scr_act();
lv_obj_remove_style_all(scr);
lv_obj_set_size(scr, 480, 800);
// 1. Top Display Screen (480x400)lv_obj_t *disp_cont = lv_obj_create(scr);
lv_obj_remove_style_all(disp_cont);
lv_obj_set_size(disp_cont, 480, 400);
lv_obj_align(disp_cont, LV_ALIGN_TOP_LEFT, 0, 0);
// Status bar (28px height)lv_obj_t *sb_bar = lv_obj_create(disp_cont);
lv_obj_remove_style_all(sb_bar);
lv_obj_set_size(sb_bar, 480, 28);
lv_obj_set_style_bg_color(sb_bar, lv_color_hex(0xF2F2F2), 0);
lv_obj_set_style_bg_opa(sb_bar, LV_OPA_COVER, 0);
s_sb_play_icon = lv_label_create(sb_bar);
lv_obj_align(s_sb_play_icon, LV_ALIGN_LEFT_MID, 10, 0);
lv_label_set_text(s_sb_play_icon, "");
s_sb_title = lv_label_create(sb_bar);
lv_label_set_text(s_sb_title, "iPod");
lv_obj_align(s_sb_title, LV_ALIGN_CENTER, 0, 0);
// Create sub-views
s_menu_view = ui_menu_view_create(disp_cont);
s_np_view = ui_now_playing_view_create(disp_cont);
lv_obj_add_flag(s_np_view, LV_OBJ_FLAG_HIDDEN);
// 2. Bottom Click Wheel (480x400)
ui_click_wheel_create(scr, ui_menu_scroll, on_wheel_click);
esp_lv_adapter_unlock();
}
/*
* Called from main task loop every 100ms
*/voidui_update_loop(void){
audio_state_t state;
if (audio_player_get_state(&state)) {
esp_lv_adapter_lock(-1);
// Update status bar play iconif (state.is_playing) {
lv_label_set_text(s_sb_play_icon, LV_SYMBOL_PLAY);
} else {
lv_label_set_text(s_sb_play_icon, LV_SYMBOL_PAUSE);
}
// Update Now Playing screen if currently visibleif (s_current_view == VIEW_NOW_PLAYING) {
ui_now_playing_update(&g_ipod_state);
}
esp_lv_adapter_unlock();
}
}
LAYOUT OF IPOD UI
Top Screen
The status bar 28px displays play/pause status indicators and the current view title
content viewpoint 372px houses the split menu; let 240px item list with blue gradient highlights right 240px live preview panel now playing cover art, scrub bar, fullscreen photo view or video canvas
Bottom Screen
dedicated virtual iPod click wheel chassis with a 280px outer white disc and 96px inner silver select button
Virtual Click Wheel (Polar Mathematics)
Real iPod click wheels used capacitive rotary sensing rings. We simulate this on a standard capacitive touch screen using real-time polar coordinate mathematics.
the center of the virtual wheel is fixed at (x_c, y_c) = (240, 600). When a touch event is captured at a point (x, y), the firmware computes:
$$\Delta x = x - 240, \quad \Delta y = y - 600$$$$\text{Radius } R = \sqrt{\Delta x^2 + \Delta y^2}$$$$\text{Angle } \theta = \text{atan2}(\Delta y, \Delta x) \times \frac{180}{\pi} \quad [-180^\circ \dots +180^\circ]$$
Dual Core Execution Pipeline
to guarantee stutter-free 60 fps graphics alongside lossless audio decoding, the firmware leverages FreeRTOS dual-core task pinning.
Photos '.jpg' , '.jpeg' , '.png' , '.bmp' . Decoded on the fly via LVGL TJPGD and LodePNG decoders.
Videos '.mjpeg' , '.avi' . Stremed frame by frame directly into PSRAM
Step-by-Step Ui Design
recreating the authentic iPod classic user experience required combining vintage design aesthetics with modern embedded GUI engineering. Here is exactly how we structured, styled, and rendered the user interface using LVGL 9.
Authentic Color Palette
To faithfully mirror the 6th/7th generation iPod Classic, we defined a strict design system with curated hex colors and typography tokens:
#define IPOD_COL_BG lv_color_hex(0xFFFFFF) /* Clean white list background */#define IPOD_COL_PREVIEW_BG lv_color_hex(0xF0F0F0) /* Subtle gray preview pane */#define IPOD_COL_CHASSIS lv_color_hex(0xEBEBEB) /* Anodized aluminum body */#define IPOD_COL_STATUSBAR lv_color_hex(0xF2F2F2) /* Top silver status bar */#define IPOD_COL_DIVIDER lv_color_hex(0xCCCCCC) /* 1px column separator */#define IPOD_COL_SEL_TOP lv_color_hex(0x4FA5FF) /* Glossy blue gradient top */#define IPOD_COL_SEL_BOT lv_color_hex(0x0066FF) /* Glossy blue gradient bottom */#define IPOD_COL_TEXT lv_color_hex(0x000000) /* High-contrast text */#define IPOD_COL_TEXT_SUB lv_color_hex(0x888888) /* Secondary artist/album gray
LVGL Widget Tree & Screen Hierarchy
instead of creating and destroying screens dynamically, all ui views are pre-allocated once in PSRAM during start and placed inside the top 480x400 viewpoint. View transitions happen instantaneously with zero heap fragmentation simply by toggling the 'LV_OBJ_FLAG_HIDDEN' flag.
lv_scr_act() (480x800 Base Screen)├── s_display_cont (Top 480x400 Display Container)│ ├── s_sb_bar (28px Top Status Bar)│ │ ├── s_sb_play_icon (Left: Play/Pause indicator)│ │ ├── s_sb_title (Center: "iPod" / "Now Playing")│ │ └── s_sb_battery (Right: Battery level icon)│ ││ ├── s_menu_view (Split Menu View: 480x372)│ │ ├── s_left_list (240px: Vertical flex item list)│ │ ├── div (1px: Vertical divider line)│ │ └── s_right_preview (240px: Live preview & album art)│ ││ ├── s_np_view (Now Playing View: 480x372)│ │ ├── s_art_box (140x140 album artwork card with drop shadow)│ │ ├── s_title_lbl (Marquee circular scrolling track title)│ │ ├── s_artist_lbl & s_album_lbl│ │ └── s_scrub_bar (Interactive progress slider & timestamps)│ ││ ├── s_photo_view (Full-screen Photo & Slideshow View)│ └── s_video_view (480x360 MJPEG Video Canvas & Control Bar)│└── s_wheel_cont (Bottom 480x400 Virtual Click Wheel)└── s_wheel_outer (280px white disc with concentric 96px center button)
Crafting the 2-column split menu
the signature iPod split-screen layout divides the display into two 240px columns
The left pane uses 'LV_FLEX_FLOW_COLUMN' to hold selectable rows; each row contains a label and a right-aligned chevron. When selected, 'set_row_selected()' applies a vertical linear gradient 'LV_GRAD_DIR_VER' from '#4FA5FF' down to '#0066FF' and turns the text crisp white
Right pane Updates synchronously as the user scrolls; when highlighting "Music," it displays a music note icon with total song counts; when hovering over individual songs, it displays the track album art and artist metadata
Designing the "Now Playing" Screen 'ui_now_playing.c'
Album Art Tile a 140x140 square with a 6px border radius and a subtle drop shadow 'LV_OPA_45' offset Y = 4 to give physical depth
Circular Marquee Title: Long song titles automatically scroll horizontally without clipping using 'LV_LABEL_LONG_SCROLL_CIRCULAR'
Scrubber Bar built using an 'lv_slider' with an accent blue indicator bar flanked by current and remaining time labels
Building the Fullscreen Photo & Video Viewer
Photo Viewer 'photo_viewer.c' uses LVGL's streaming TJPGD decoder to render high resolution JPEGs directly from the SD card a translucent dark header bar '#1A1A1A' at 'LV_OPA_200' displays the photo index and slideshow status
Video Screen 'ui_video_screen.c' directly draws decoded MJPEG video frames onto a 480x360 PSRAM canvas while displaying a sleek bottom control bar with a live scrub slider
Layering the Virtual Click wheel 'ui_click_wheel.c'
the virtual click wheel is rendered using concentric circular widgets:
Outer Disc: a 280x280 circular container 'LV_RADIUS_CIRCLE' in pure white '#FFFFFF' with a soft 10px drop shadow
Inner Center Button a 96x96 circular silver disc '#D6D6D8' entered within the outer wheel
Quadrant Labels placed precisely at top 'MENU' , bottom 'PLAY PAUSE' , left 'PREV' and right 'NEXT' using Montserrat fonts and iconic symbols
Touch Interceptor a single unified event callback attached to the root chassis listen to 'LV_EVENT_ALL' , running the polar mathematics engine to detect taps and rotary swirling.
`/Music/` $\rightarrow$ Copy your MP3 / WAV / FLAC files.`/Photos/` $\rightarrow$ Copy your JPEG / PNG photos.`/Videos/` $\rightarrow$ Copy your 480×360 MJPEG files.
Insert the card into the Waveshare ESP32-P3 board and reboot.
3
DESIGN
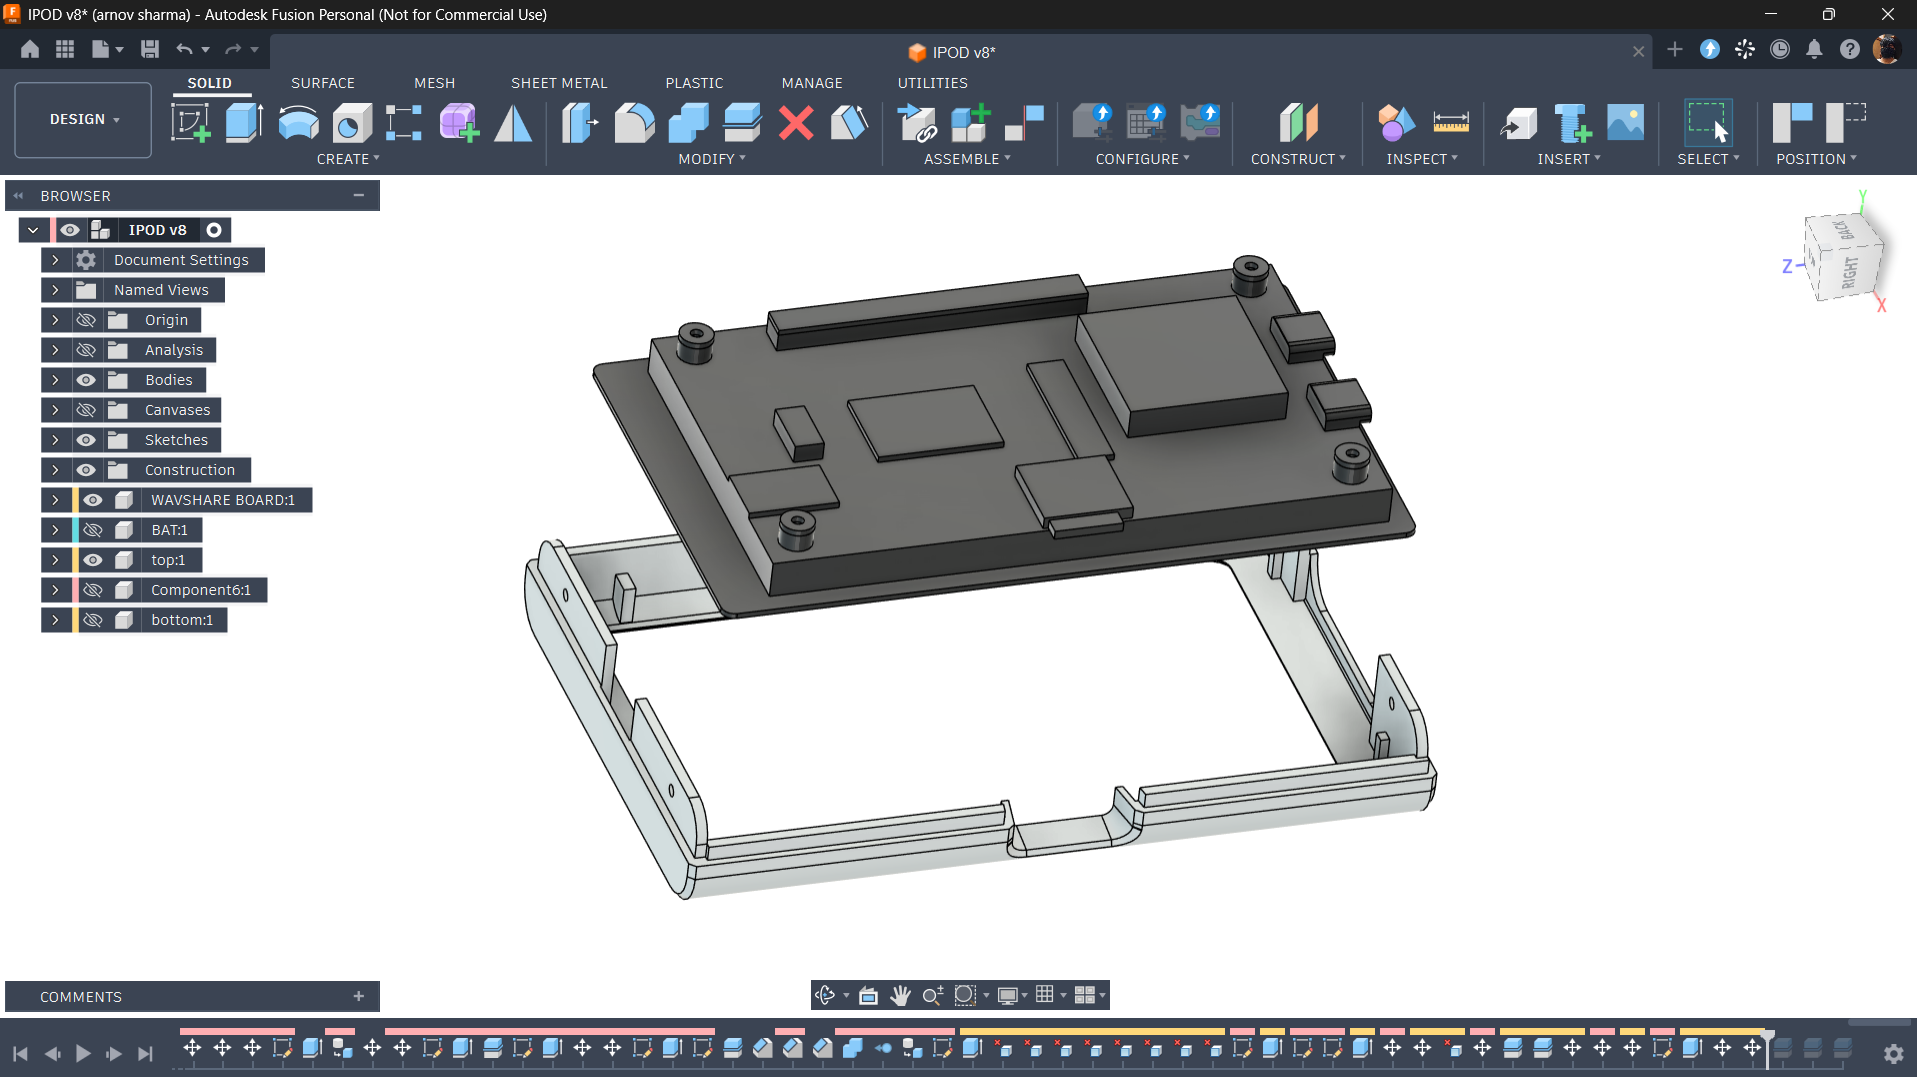
For the enclosure design, my first hurdle was the display itself.
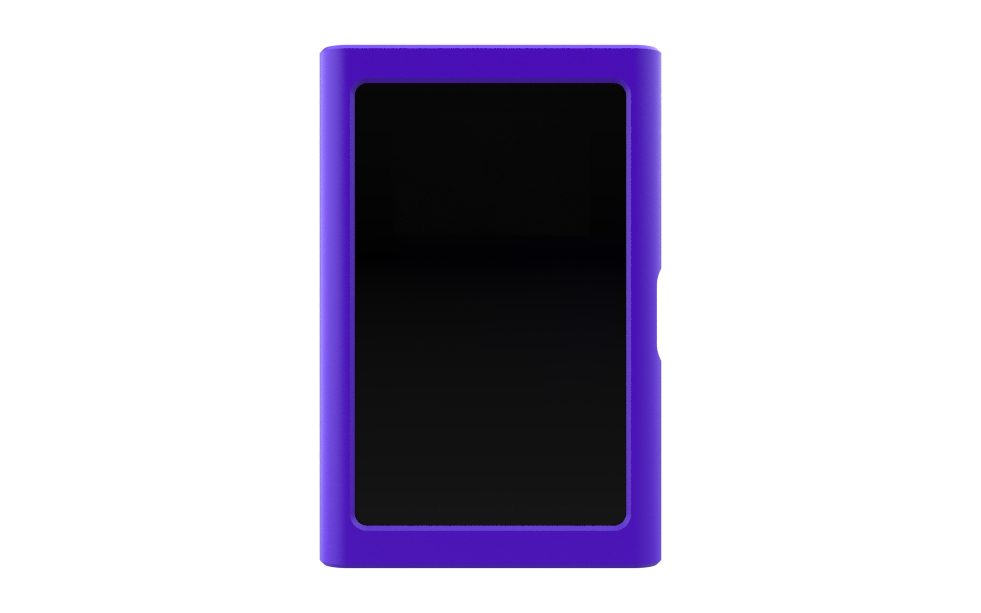
The classic iPod has a very distinctive form factor, with a relatively small display and the iconic scroll wheel positioned underneath it. The overall design is also quite boxy, although the newer generations gradually became thinner compared to the older, chunkier models.
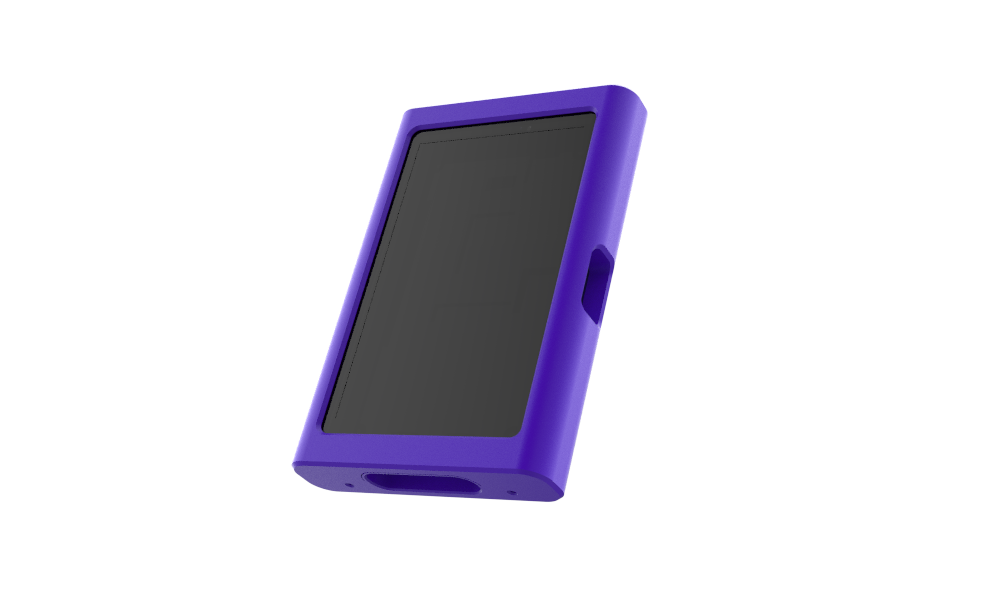
Since I wanted to loosely base my design on the iPod, I decided to keep the enclosure simple and boxy as well. However, the thickness had to be increased to accommodate the Waveshare ESP32-P4 development board along with the LiPo battery inside.
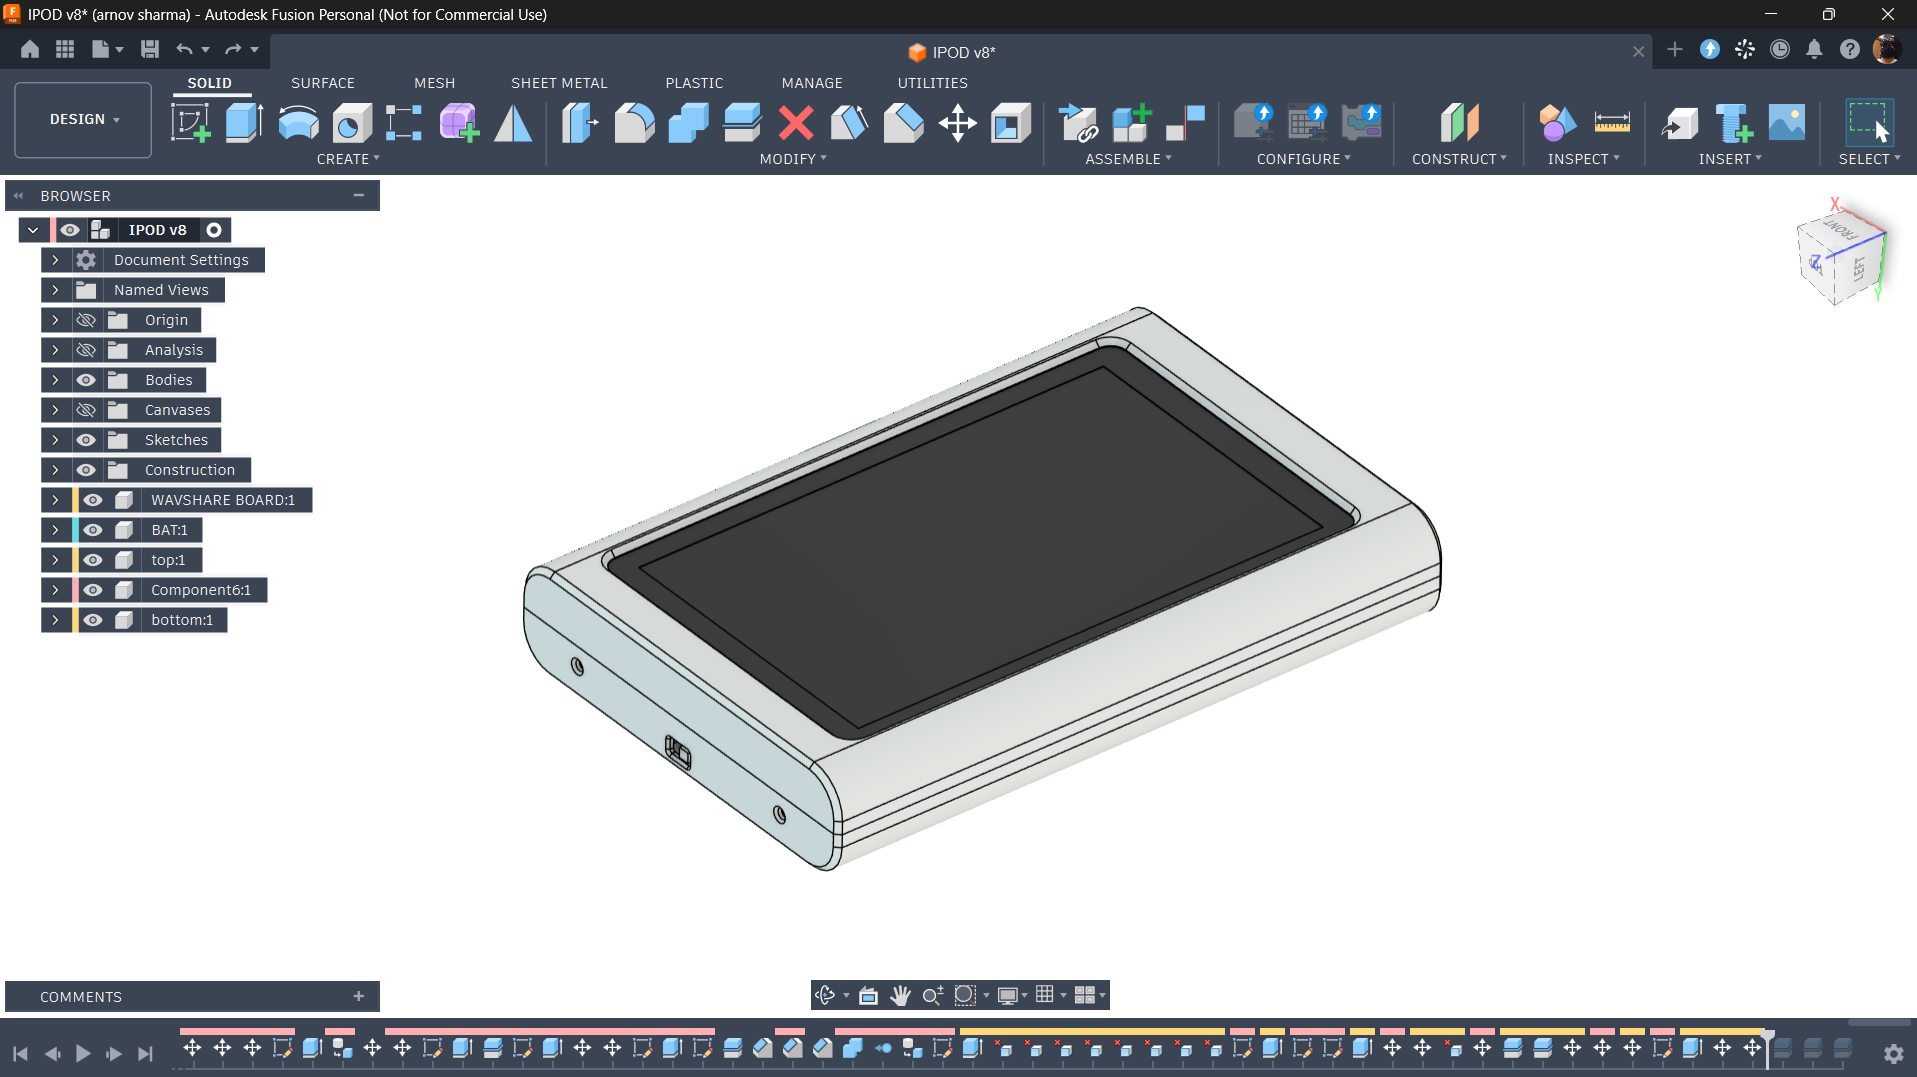
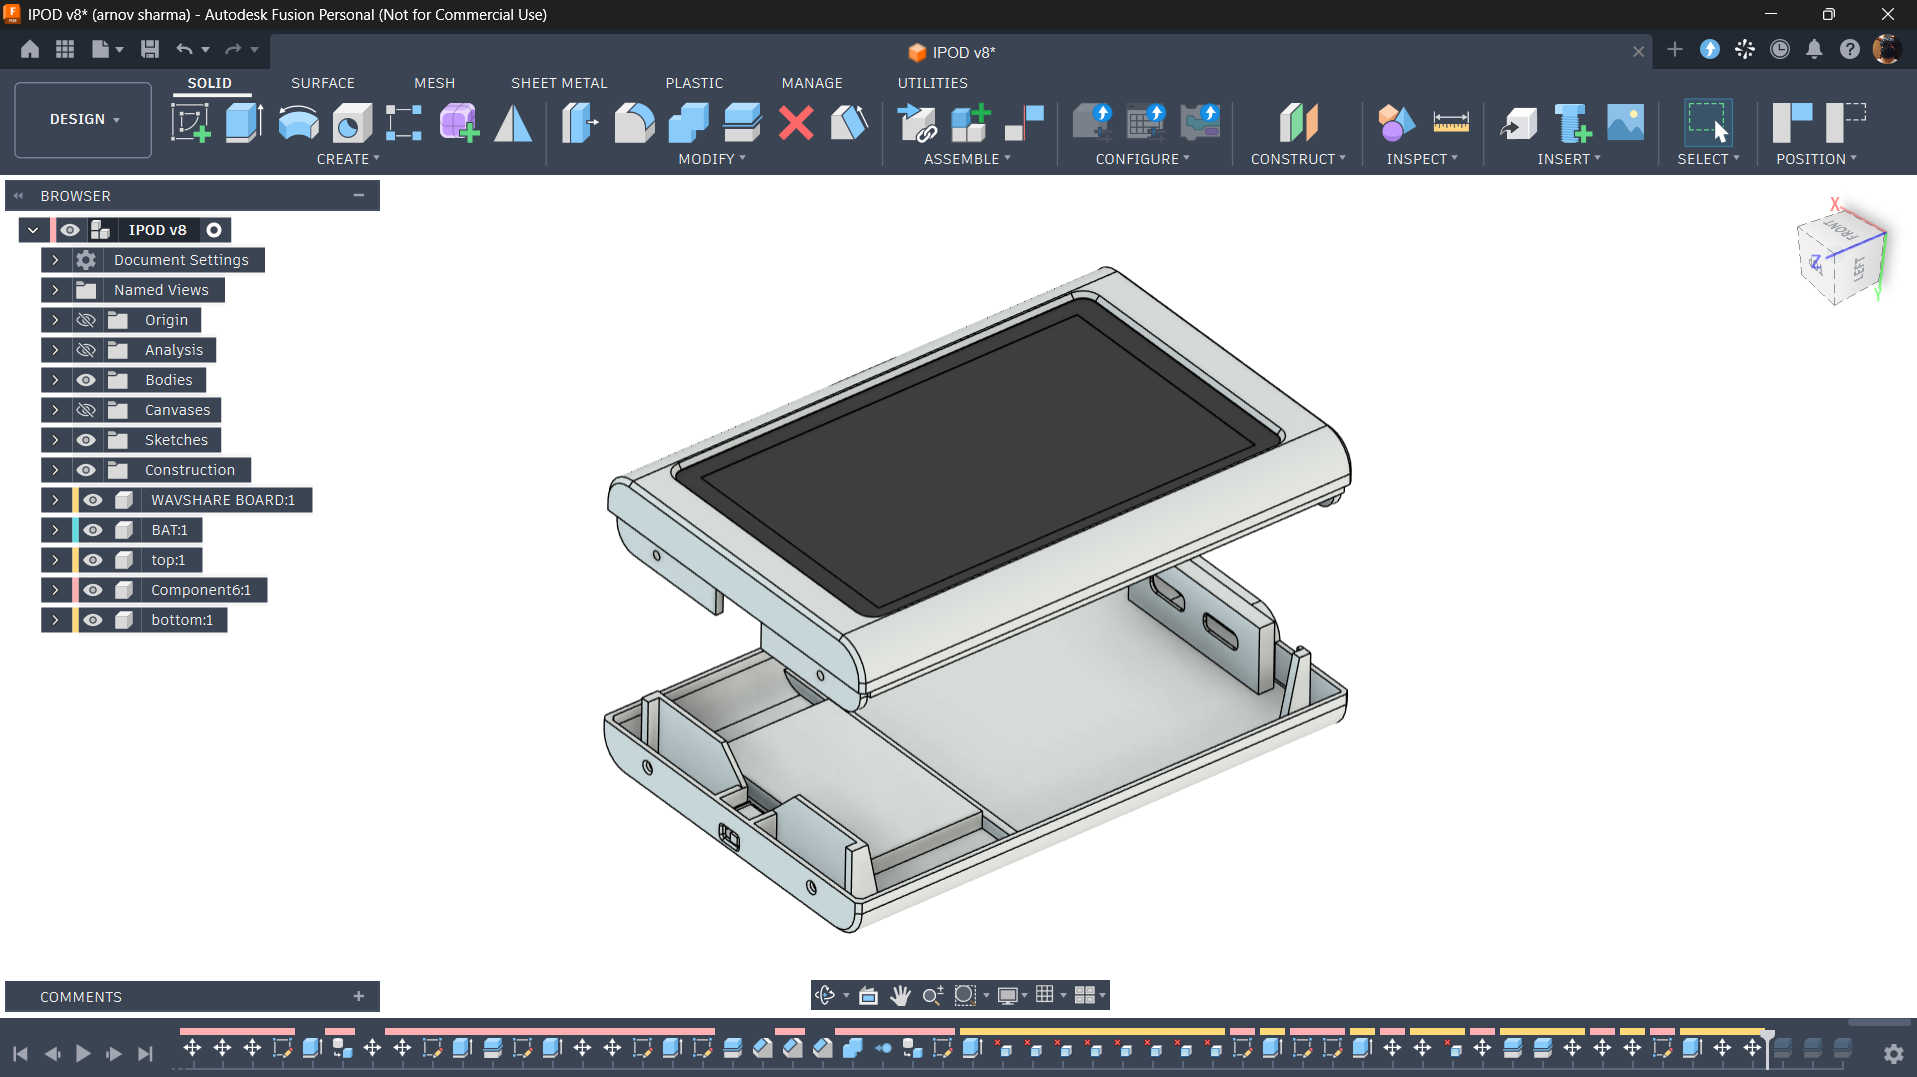
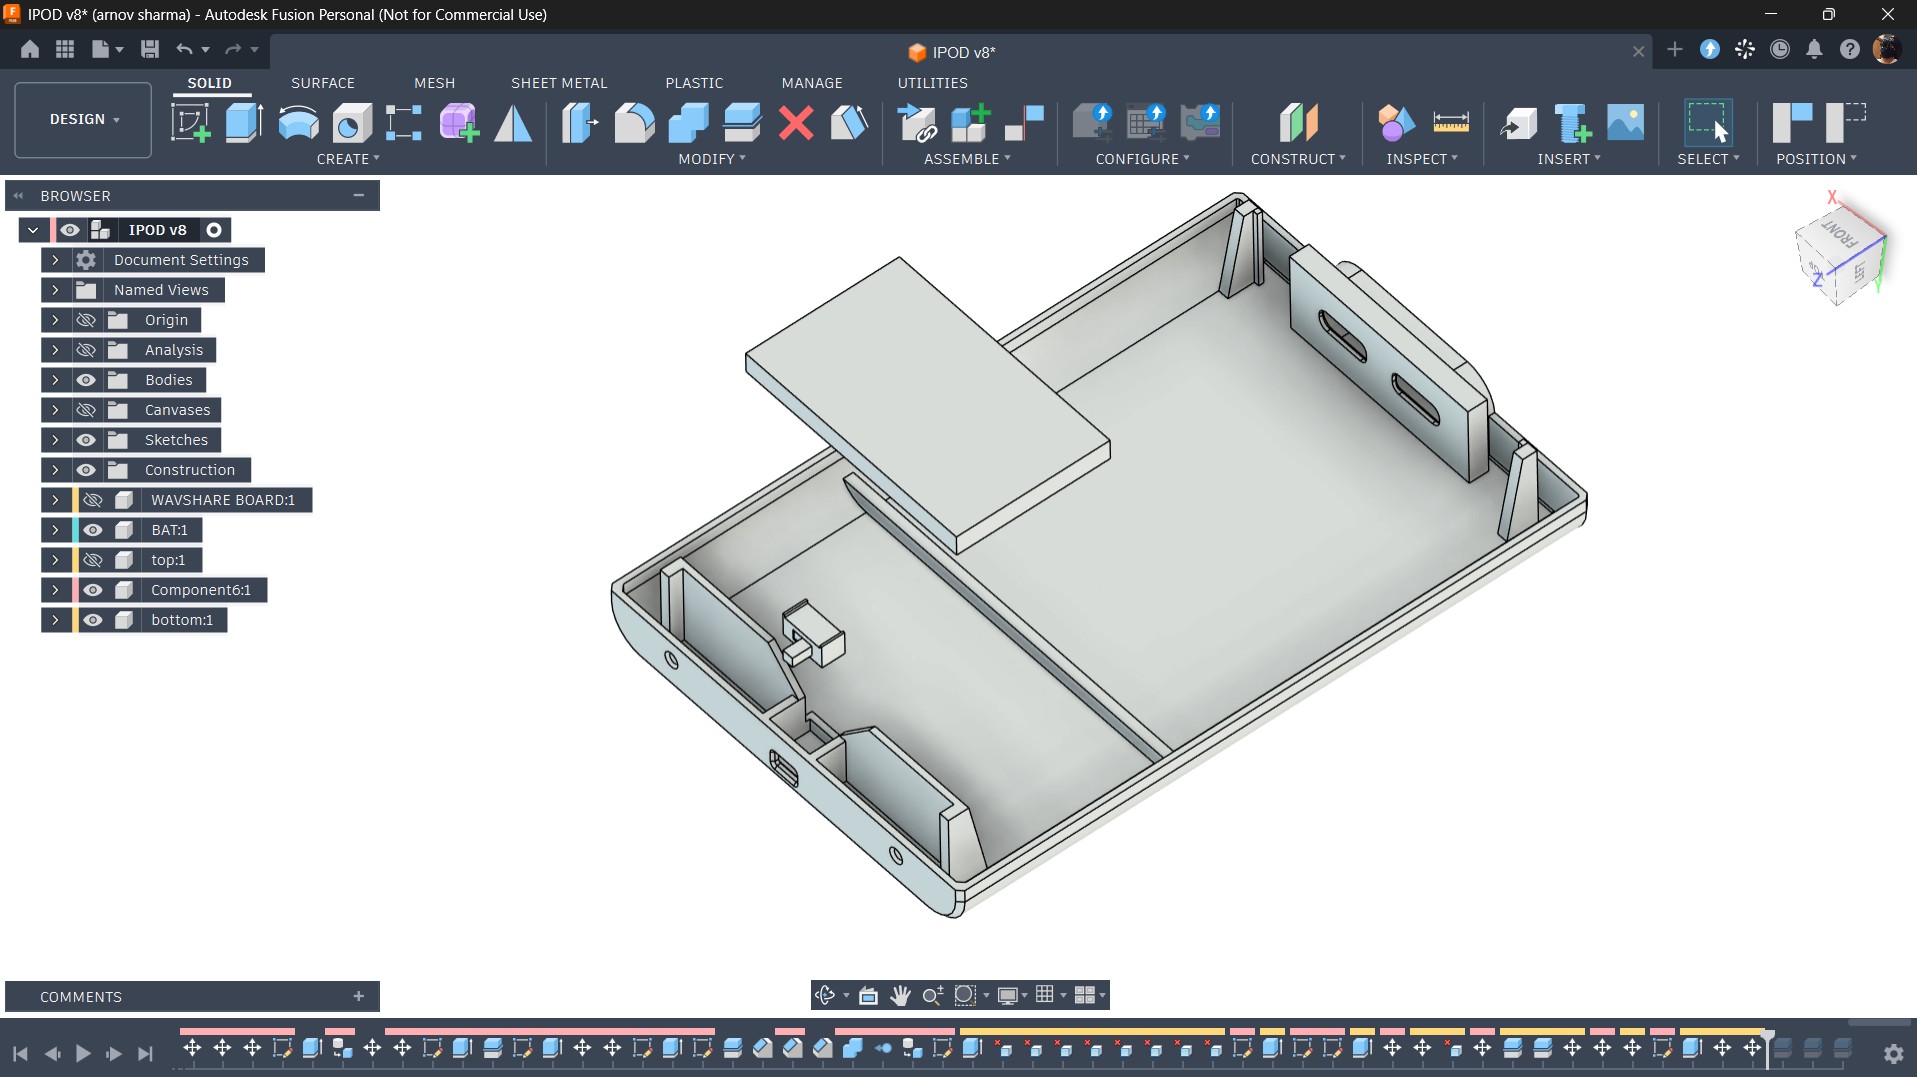
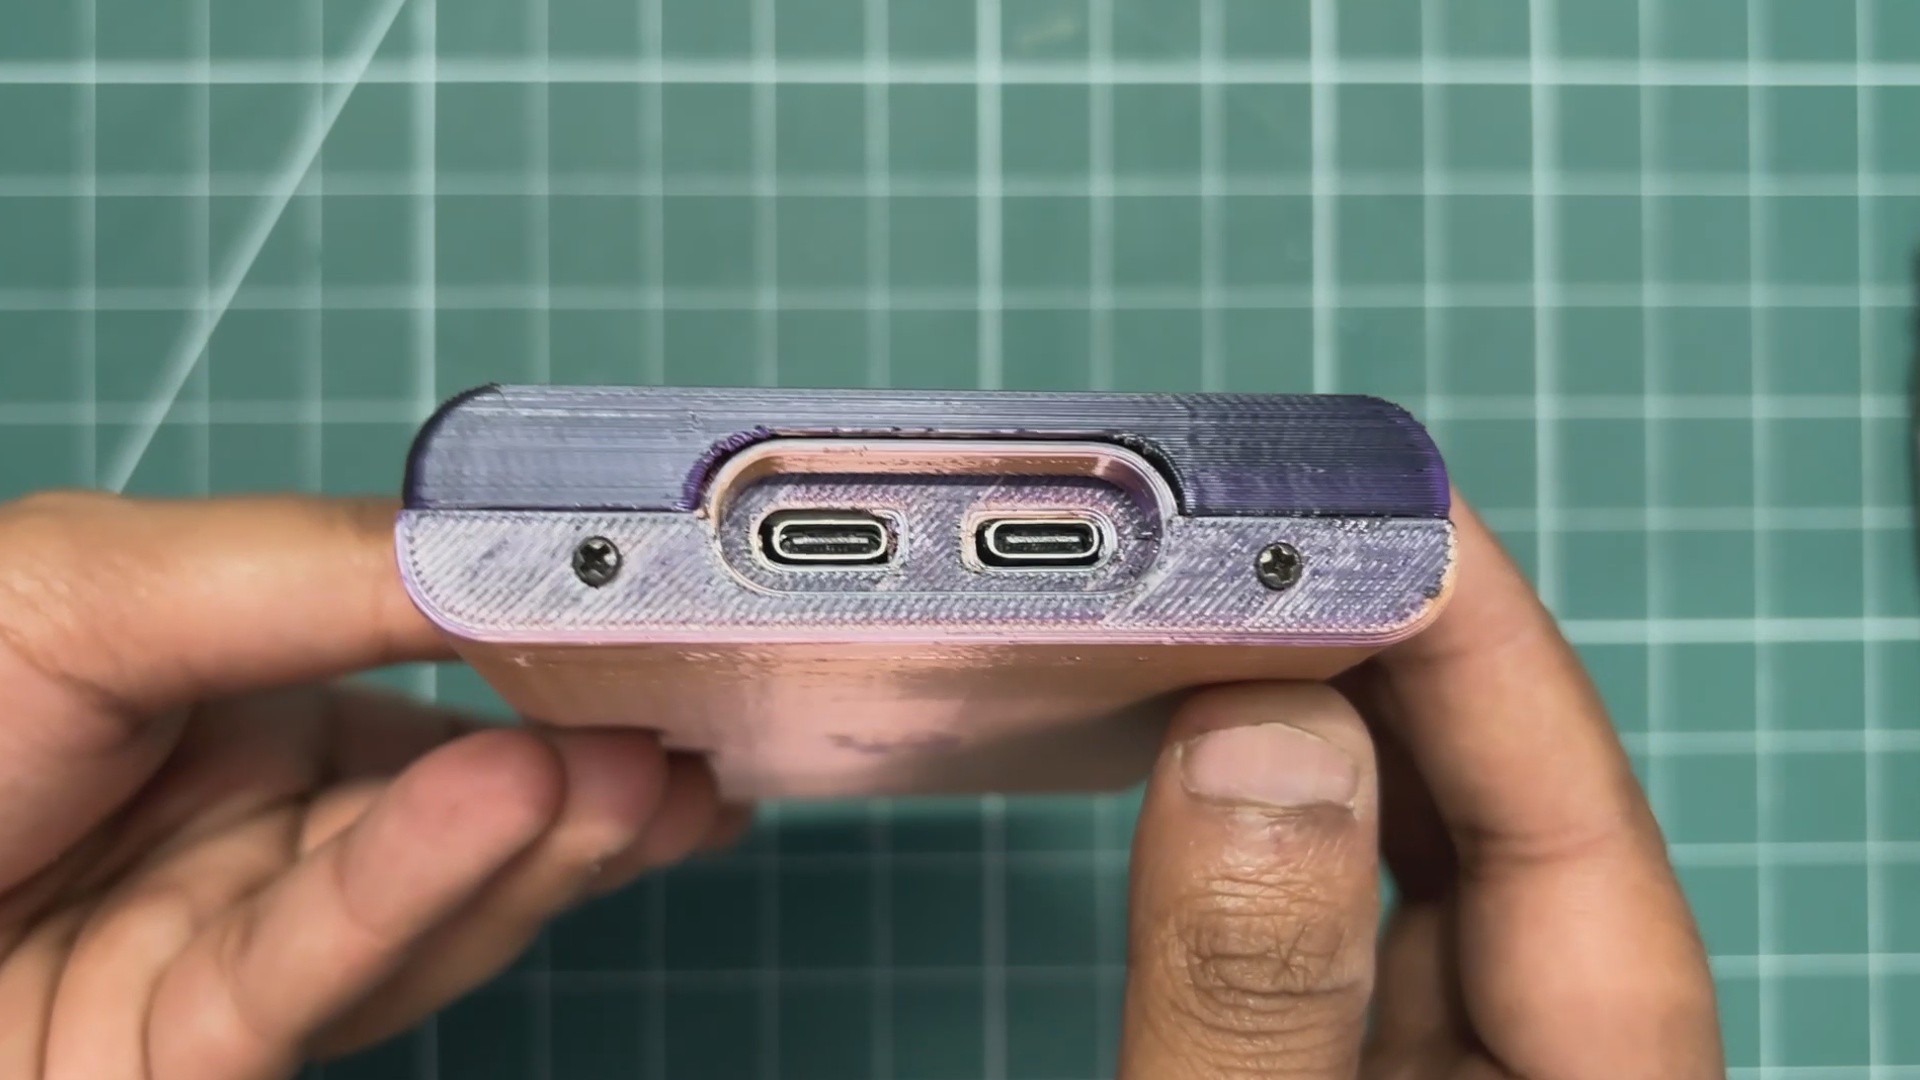
I designed the enclosure as two separate halves, a front enclosure and a back enclosure. Both halves are joined together using four M2 screws, with mounting points placed along the top and bottom.
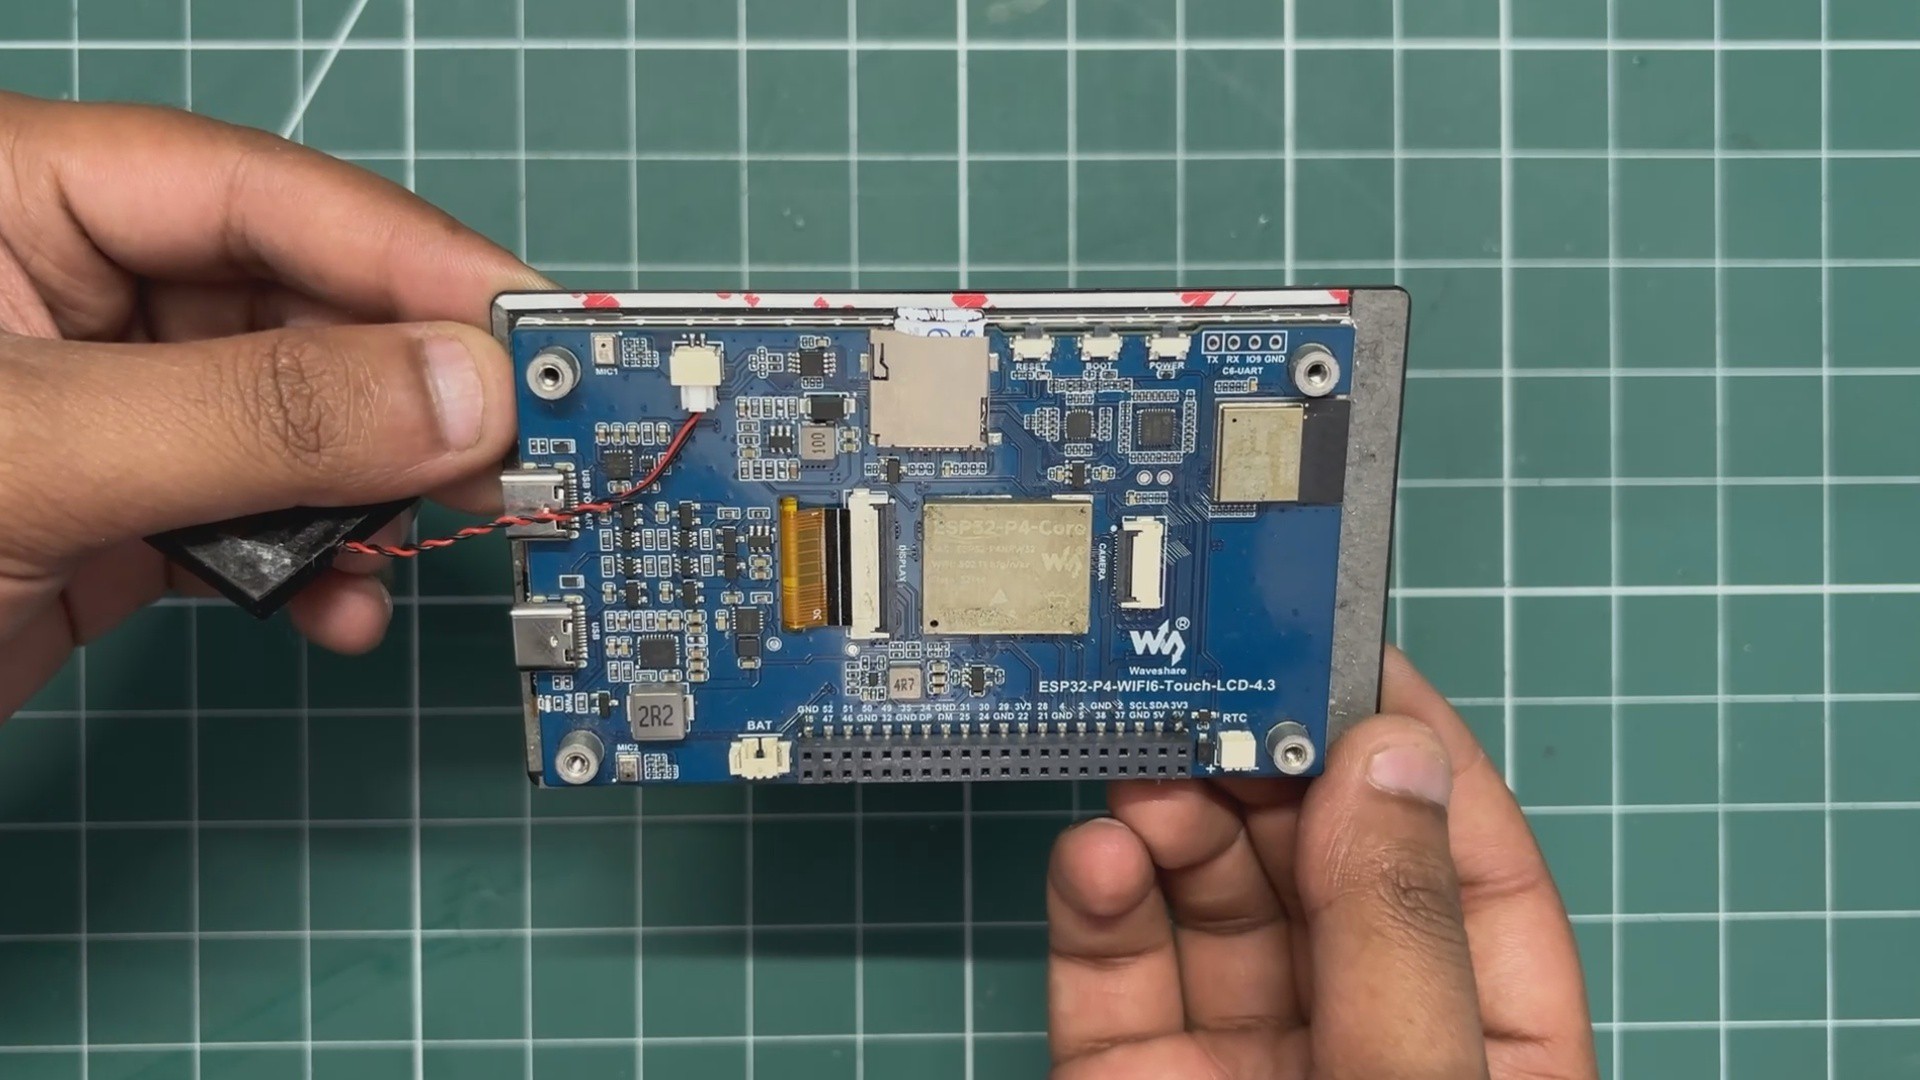
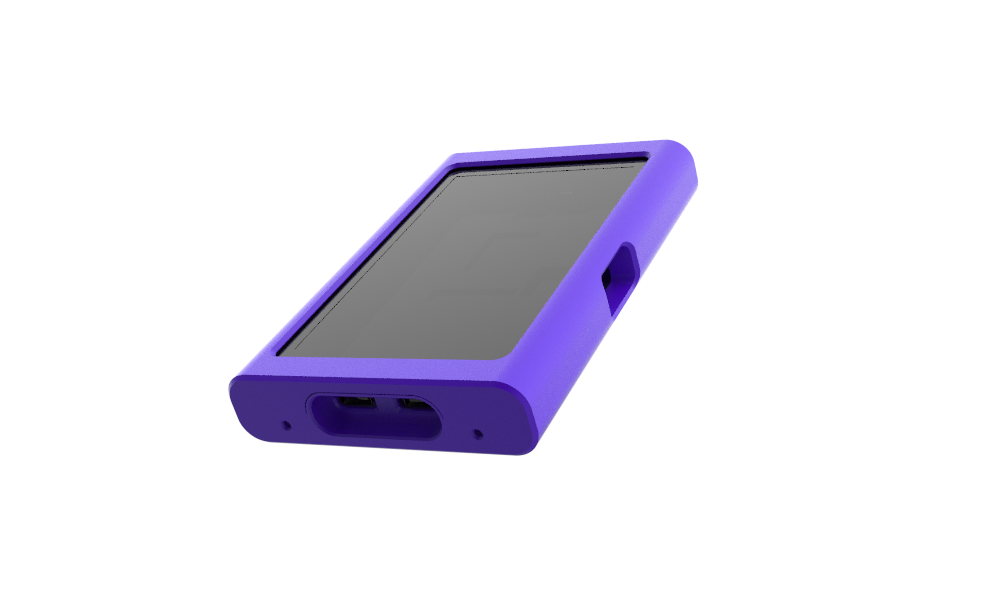
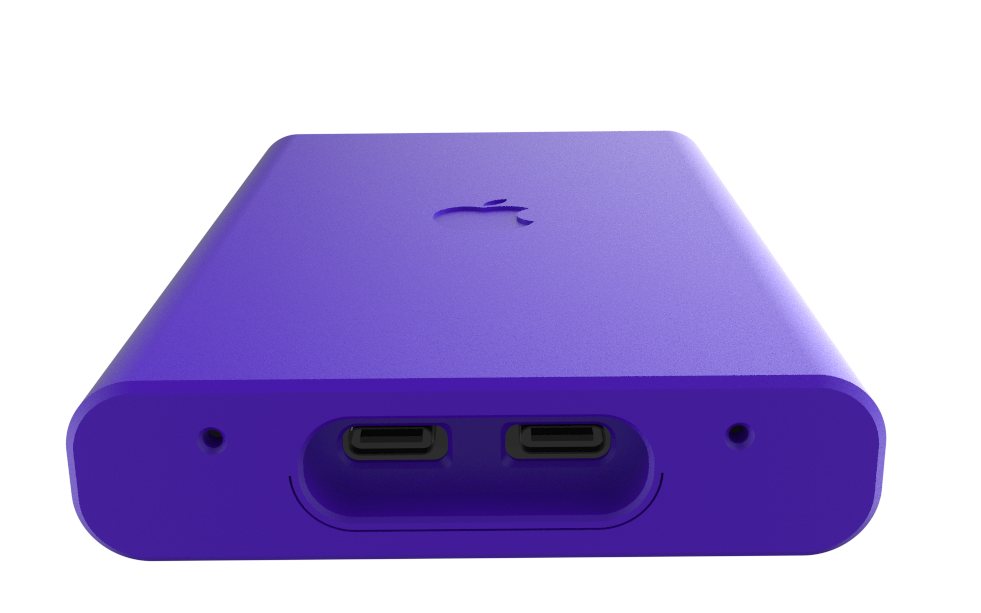
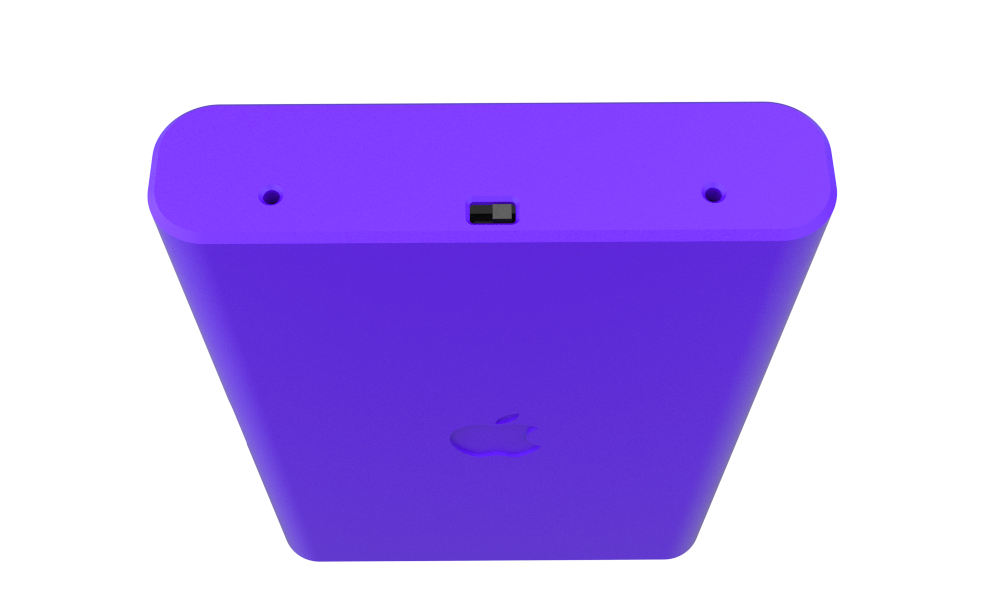
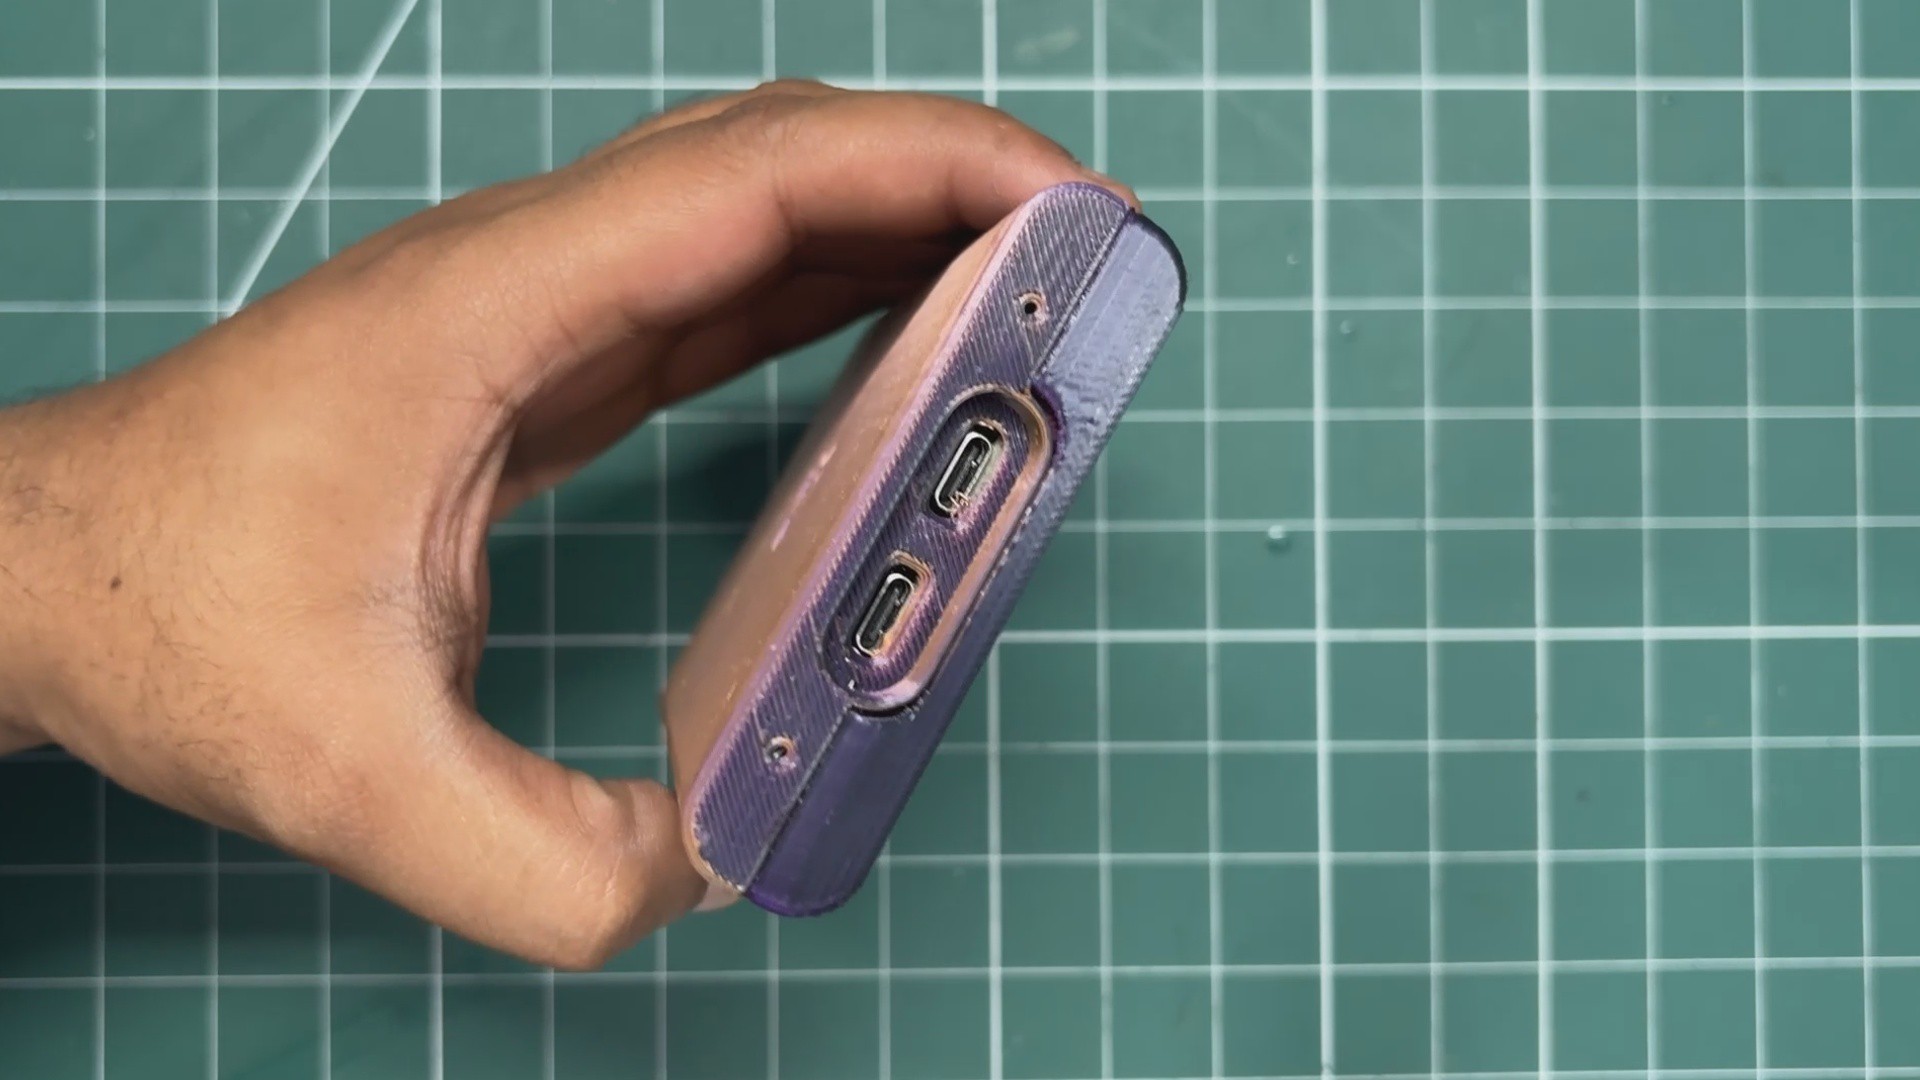
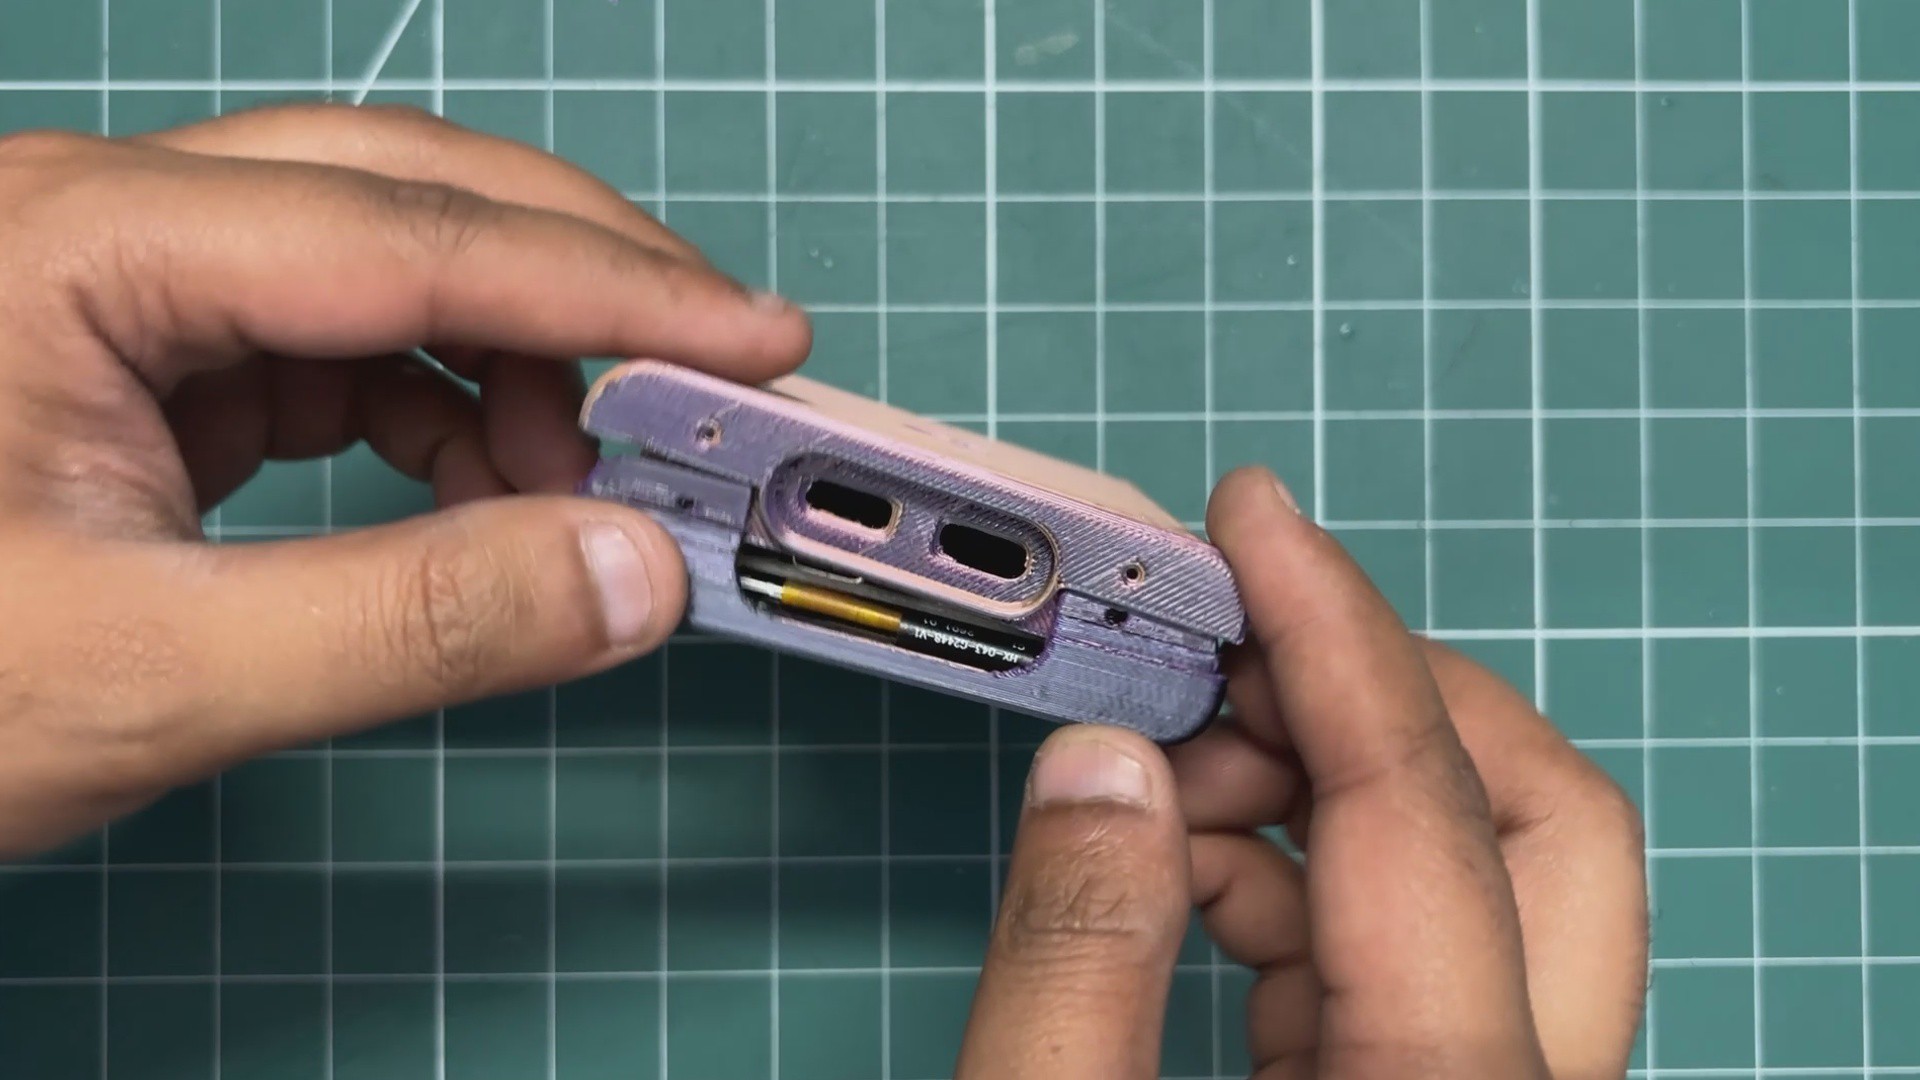
On the bottom, the ESP32-P4 board has two USB Type-C ports, so I designed a dedicated recessed area around them. This gives enough clearance to plug in a USB-C cable as well as USB-C earphones without having the enclosure get in the way.
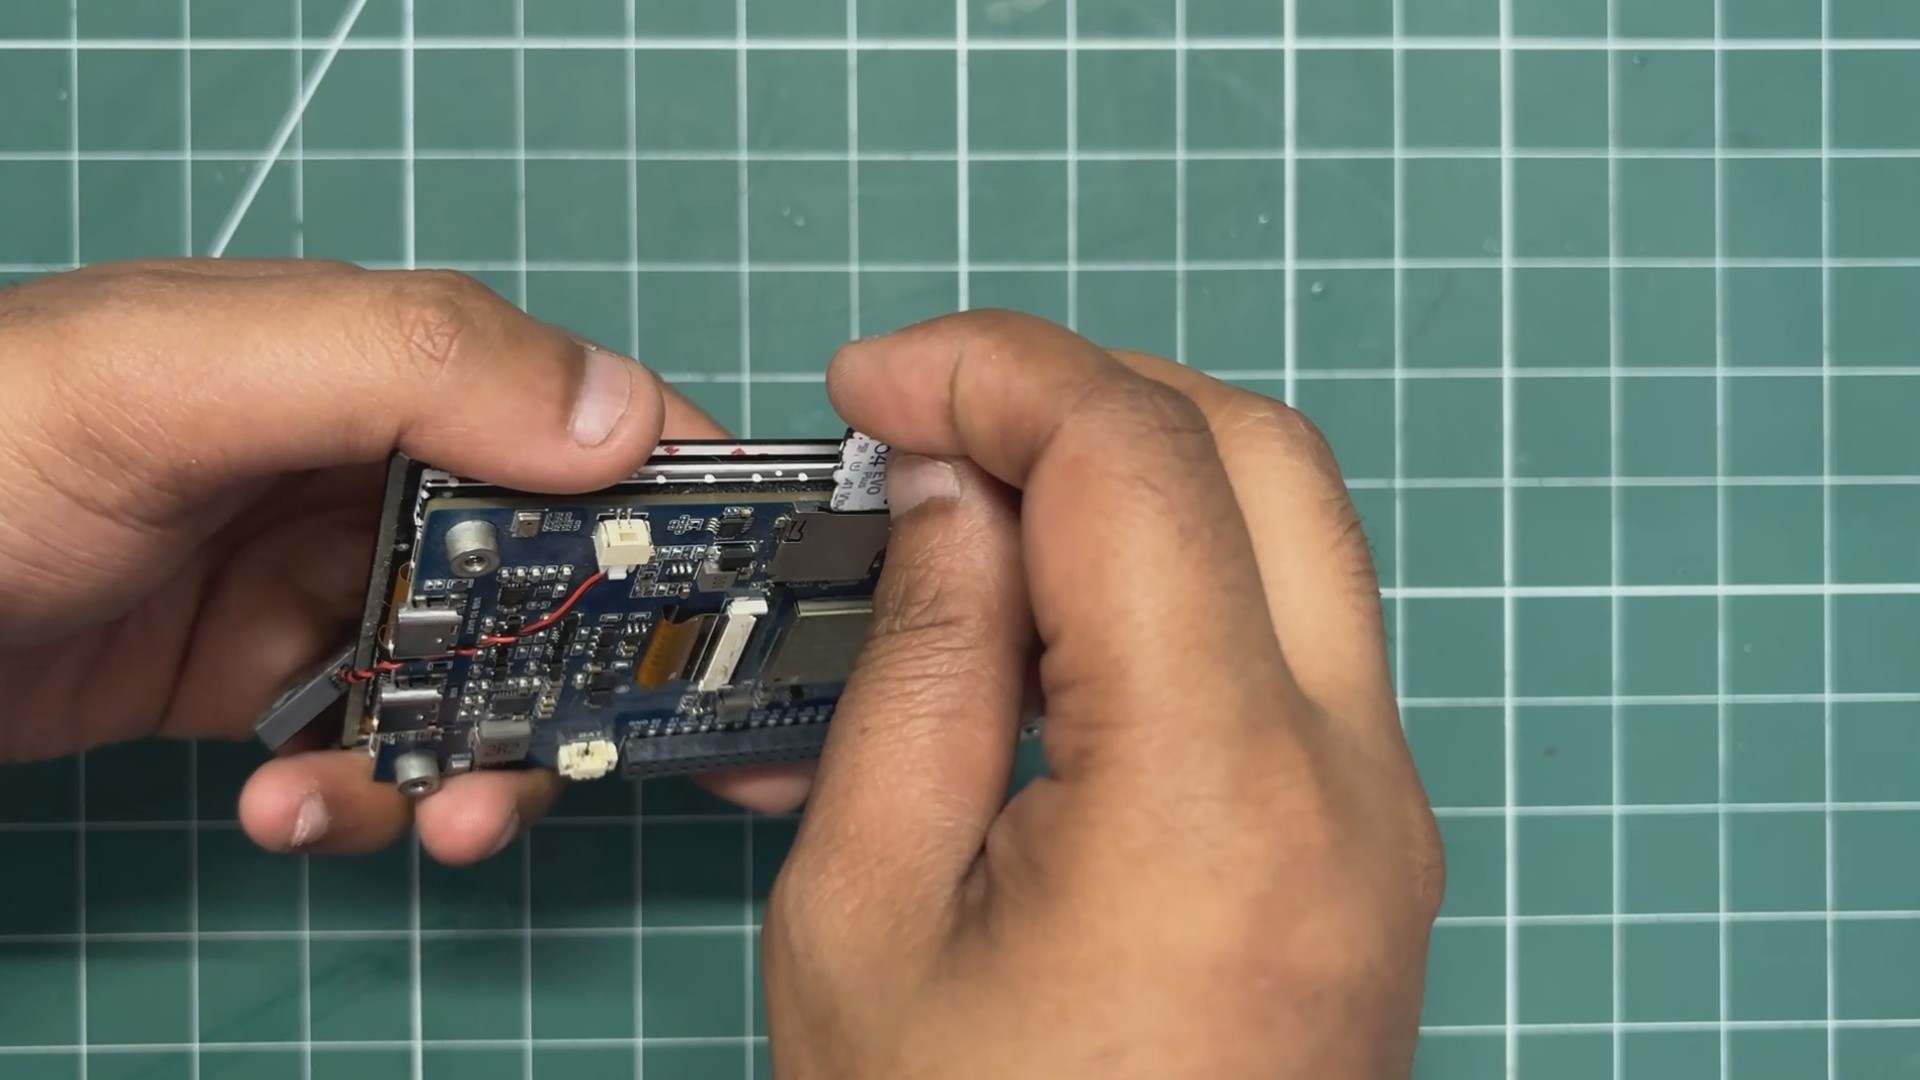
I also wanted the SD card to remain accessible without having to open the entire enclosure. To achieve this, I created an opening along the right side, aligned with the SD card slot on the development board. This allows the SD card to be inserted or removed directly from the outside.
And honestly, looking at the final design, it probably resembles a Nokia Lumia more than an iPod. But I actually really like how it turned out. It feels fresh while still retaining some of the simple, boxy character I wanted and more importantly, every part of the design has a functional purpose.
4
ASSEMBLY
As mentioned in the design section, the main body of the iPod consists of two separate enclosure halves, the front enclosure and the back enclosure.
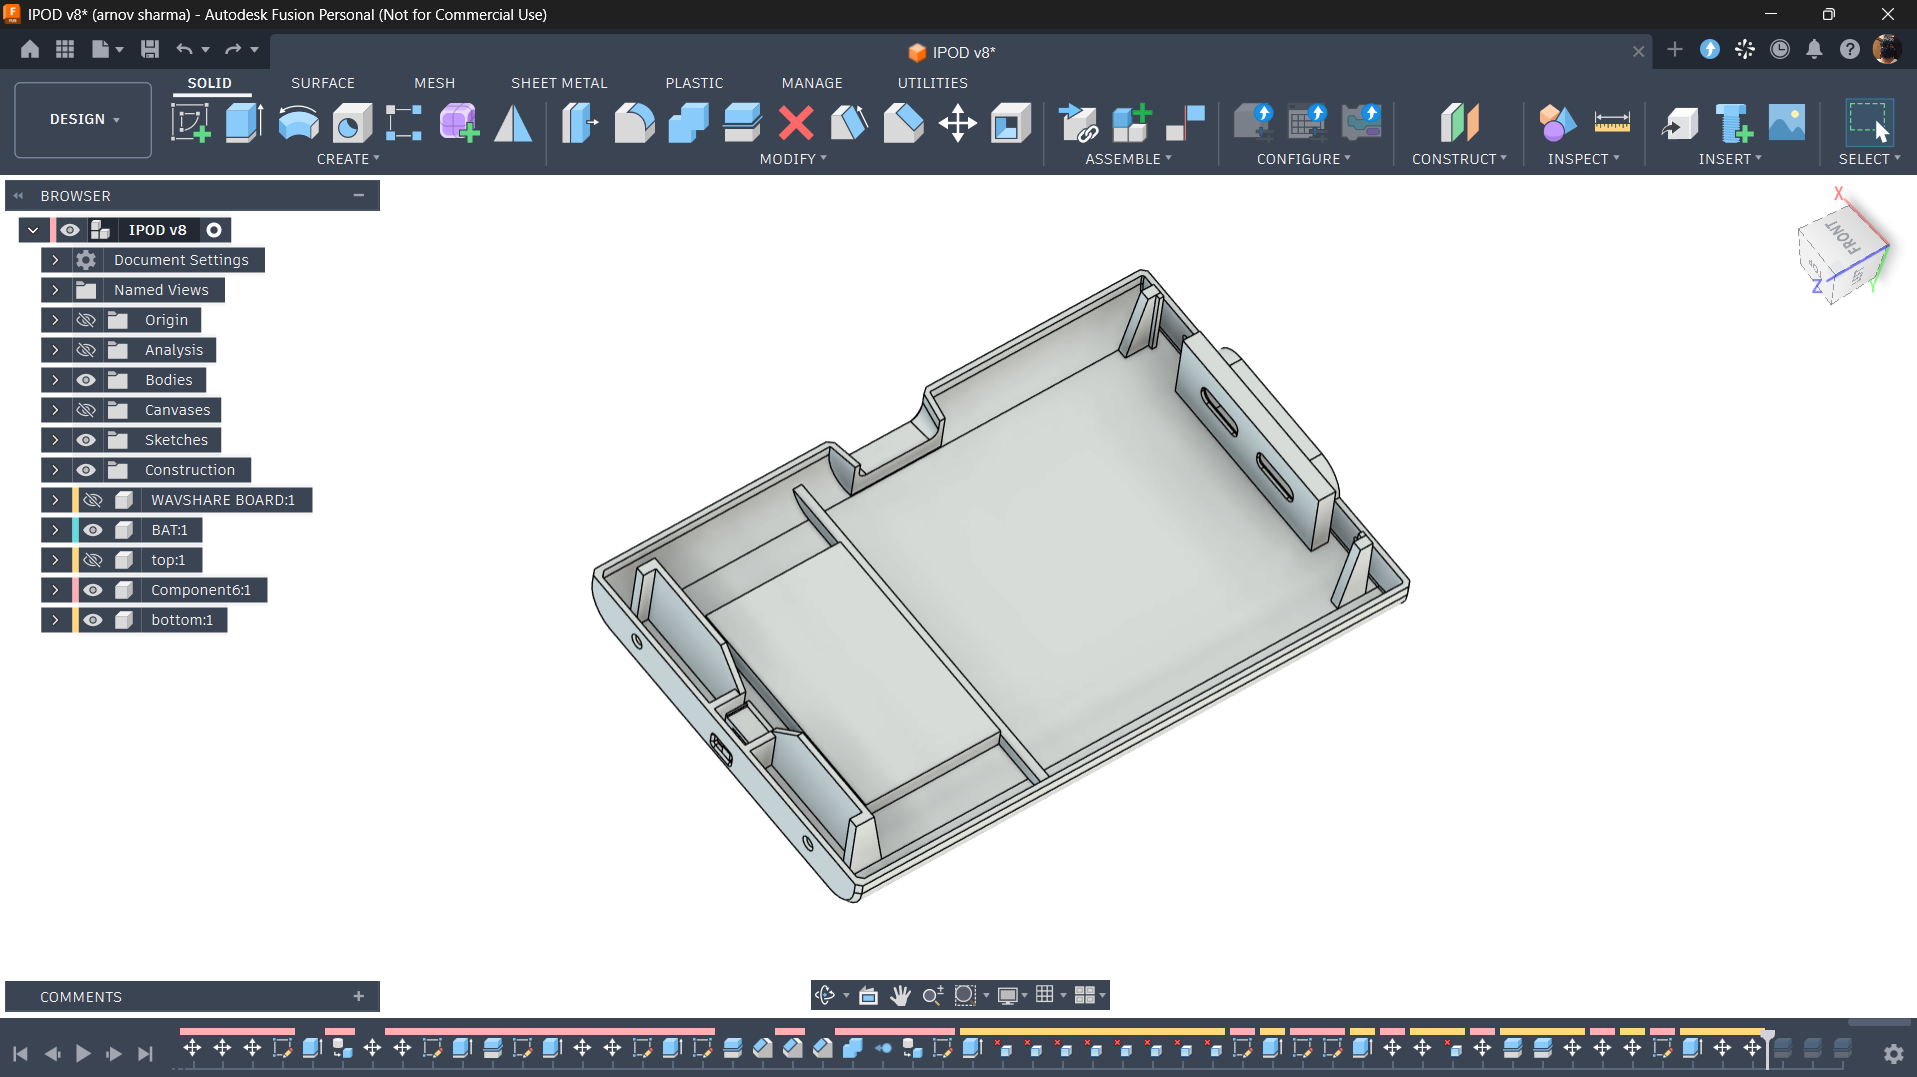
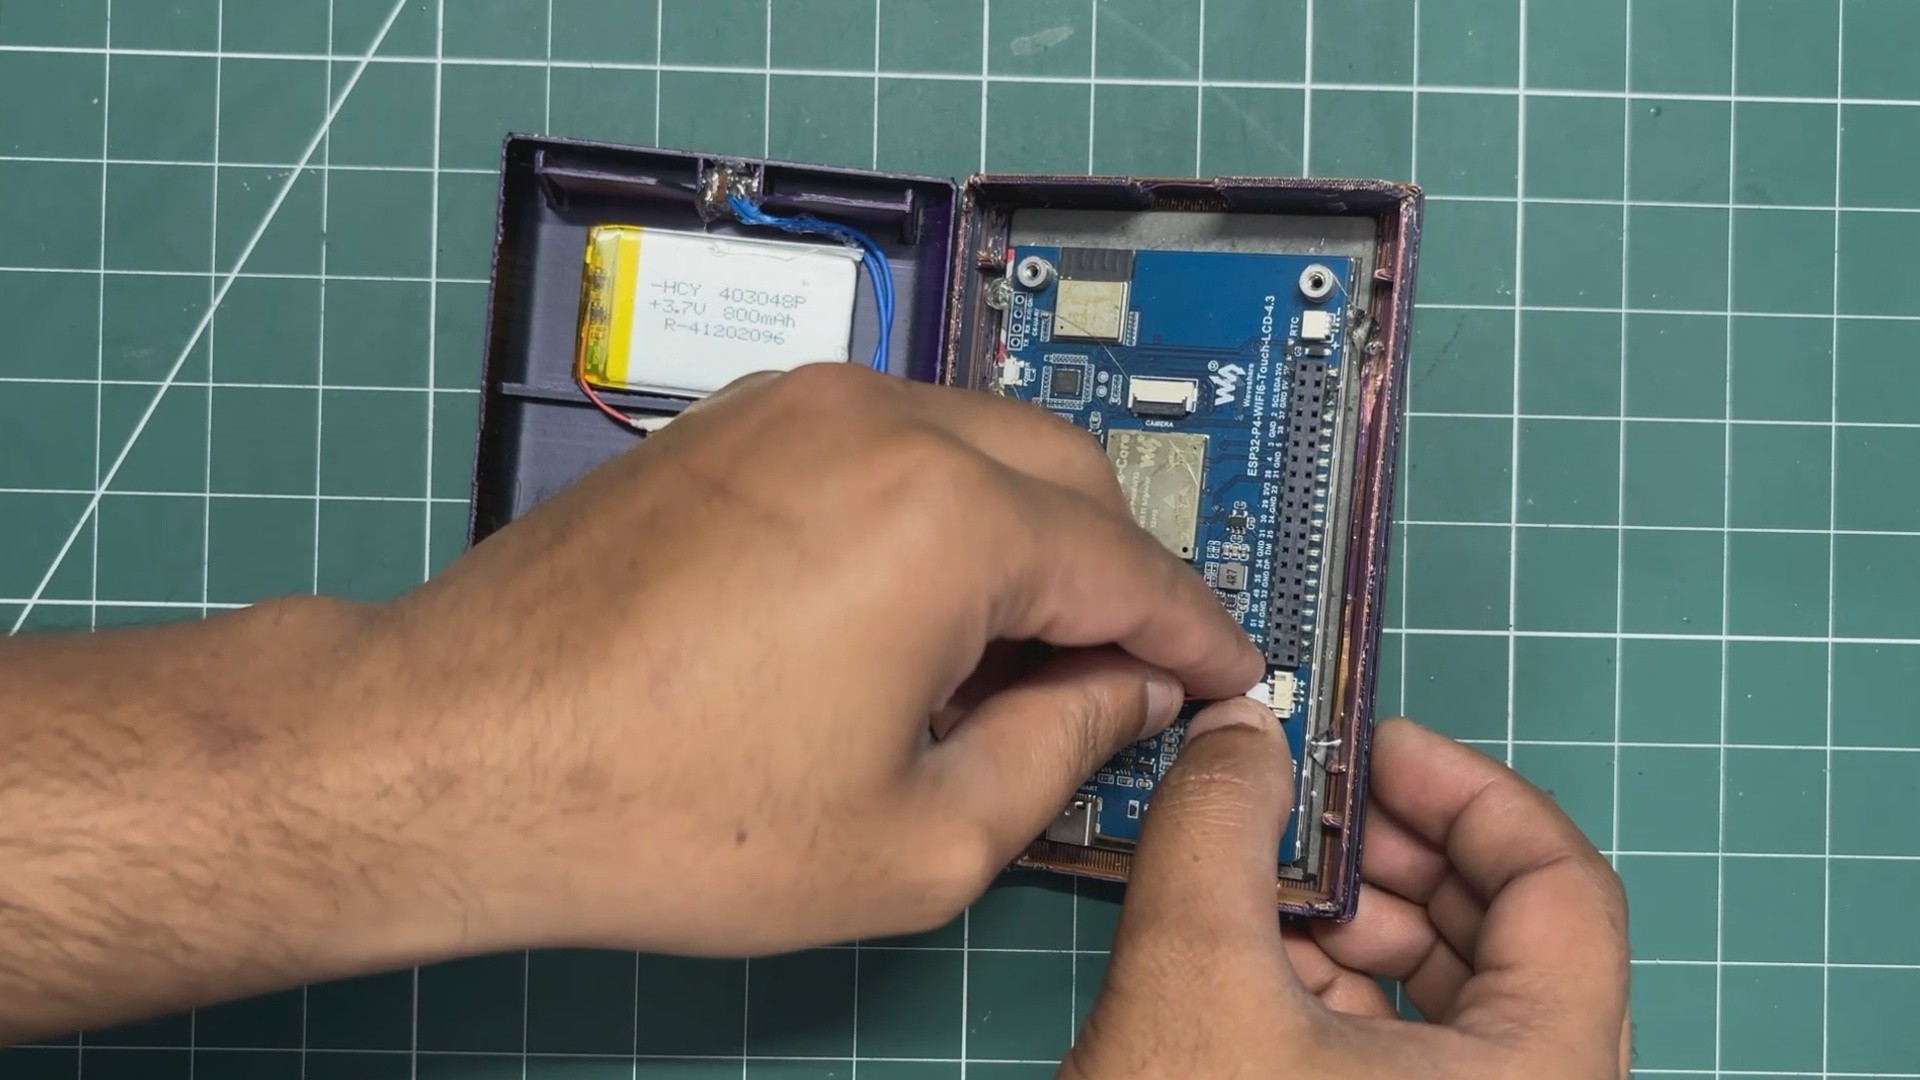
The display is essentially sandwiched between these two parts. It sits in the dedicated mounting area of the front enclosure, while the back enclosure has integrated support ribs that hold the display securely in position and prevent it from moving around inside the enclosure.
The back enclosure also houses the 3.7V LiPo battery and the slide power switch. I added a dedicated opening on the top face of the enclosure for the slide switch.
To join both enclosure halves together, I added mounting holes on the top and bottom faces. These mounting points allow the front and back sections to be secured using four M2 screws, keeping the entire assembly firmly together.
5
3D PRINTED PARTS
After finalizing the 3D model, I exported the enclosure as an STL mesh file and prepared it for 3D printing.
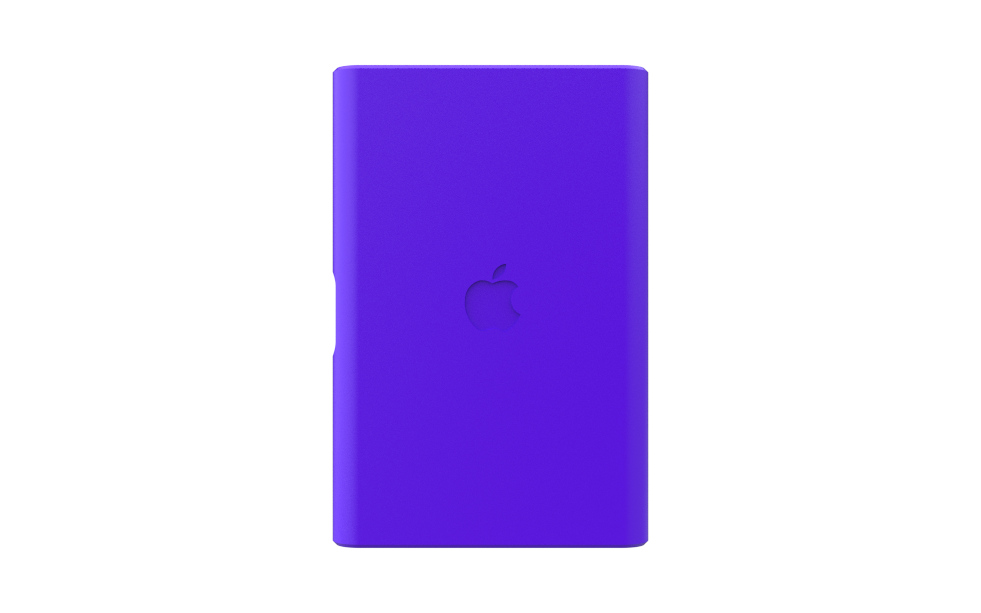
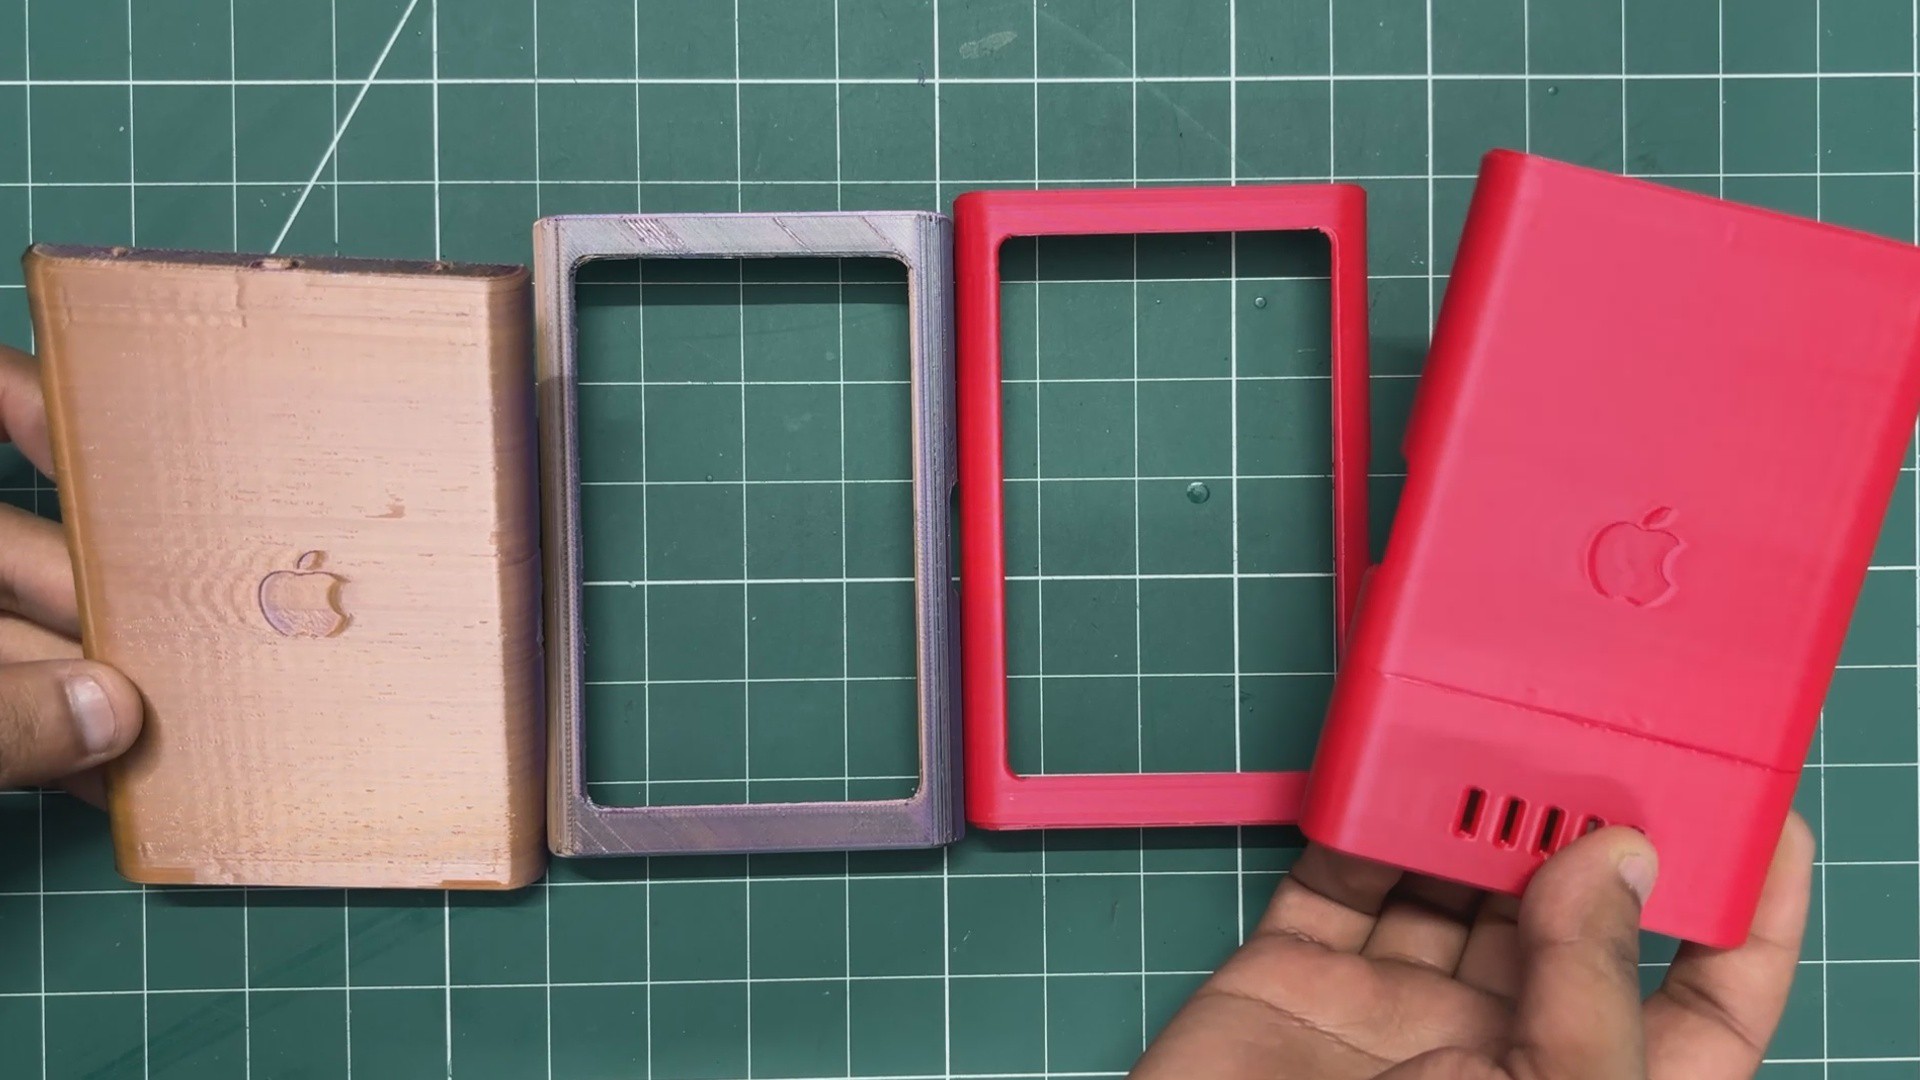
For the first prototype, I printed both enclosure parts using Red Hyper PLA. The print quality came out really well, but after assembling the parts, I noticed a couple of fitment issues. The overall design also had some unexpected Nokia Lumia vibes, so I decided to make a few changes before producing the final version.
I slightly modified the enclosure by removing around 0.1 mm of material from the inner lip. This gave the two enclosure halves a much tighter and cleaner fit when assembled.
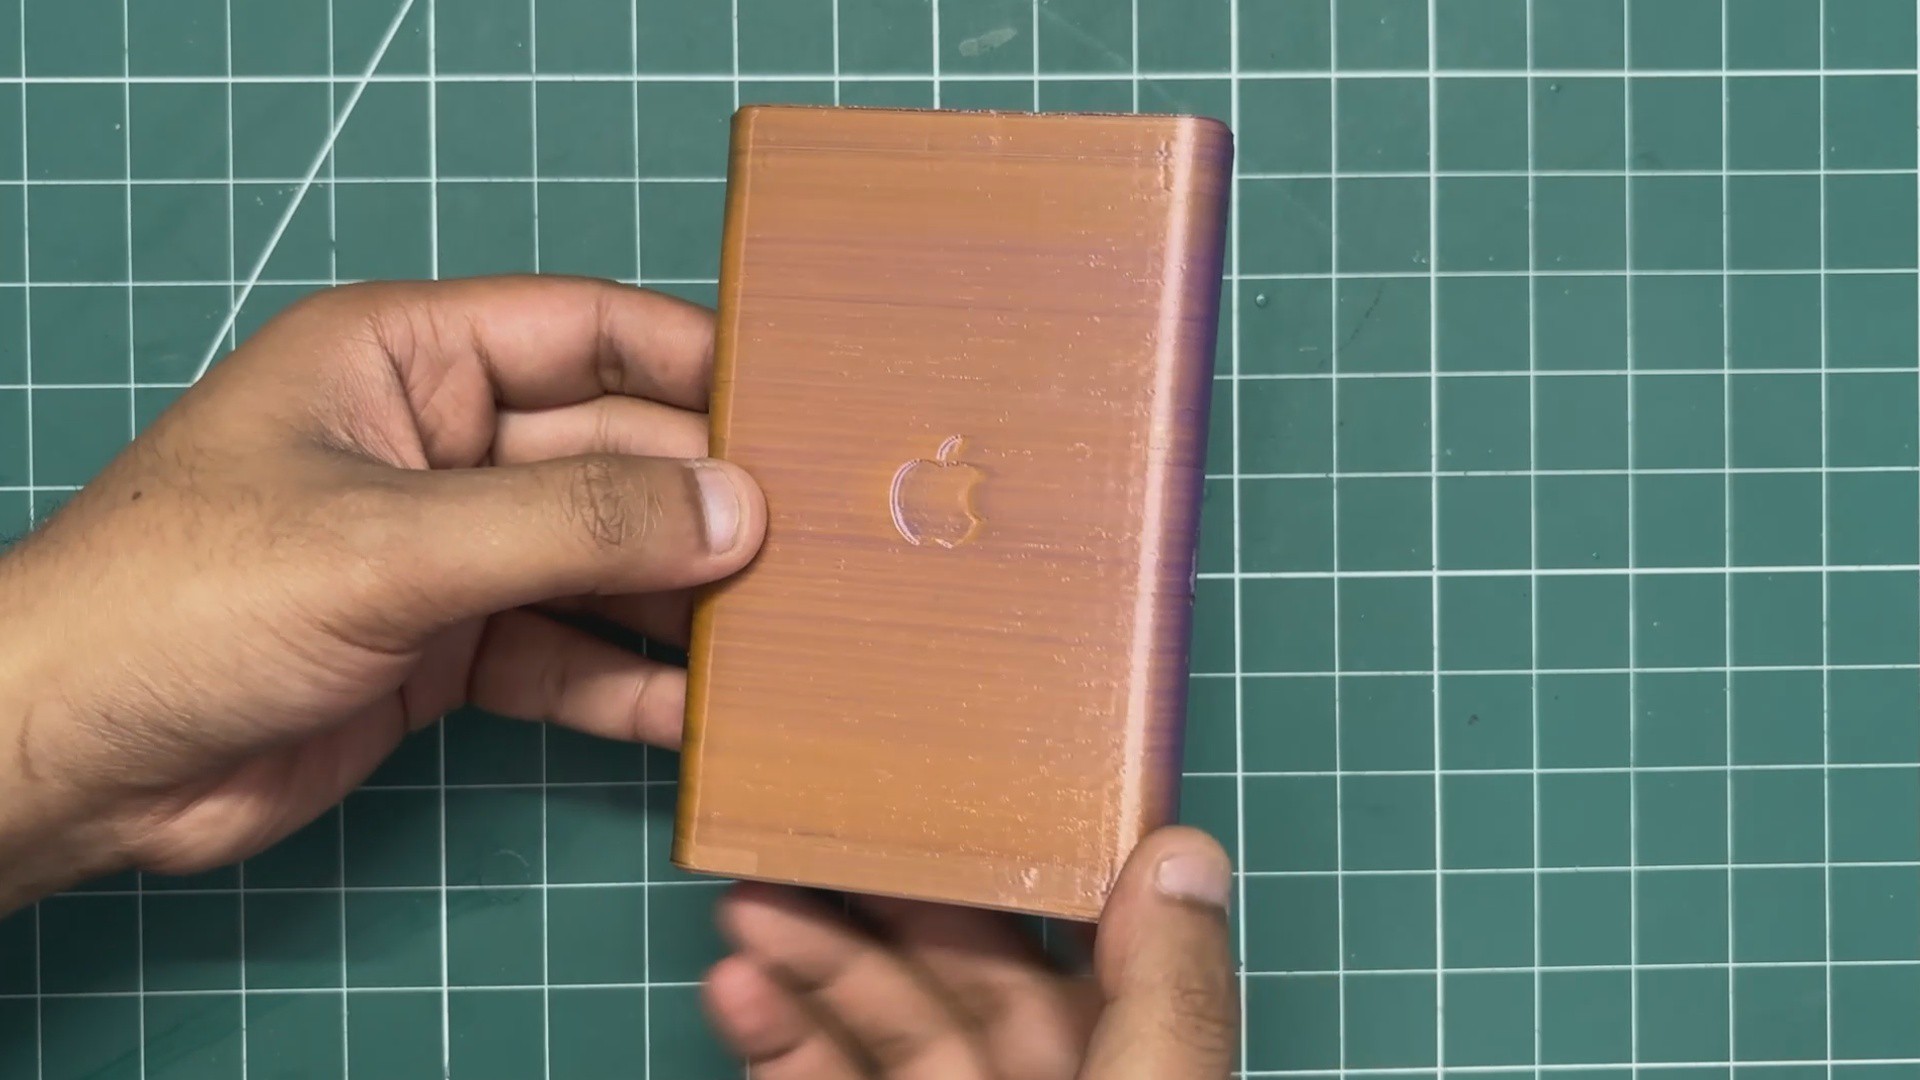
For the final print, I used a special tri-color PLA+ filament that I had. The filament contains three colors, copper, purple, and brown and the visible color of the enclosure changes depending on the viewing angle, giving the finished device a really interesting appearance.
Since this was a PLA+ filament, I sliced the model using the regular PLA+ profile rather than the high-speed printing profile.
The final print settings were
Material: Tri-color PLA+
Layer Height: 0.16 mm
Infill: 25%
Top Z Distance: 0.3 mm
Supports: Tree supports
Print Profile: Regular PLA+ profile
The combination of the fine layer height and the color-shifting filament gave the enclosure a clean finish while adding a unique look to the final device.
6
POWER SOURCE
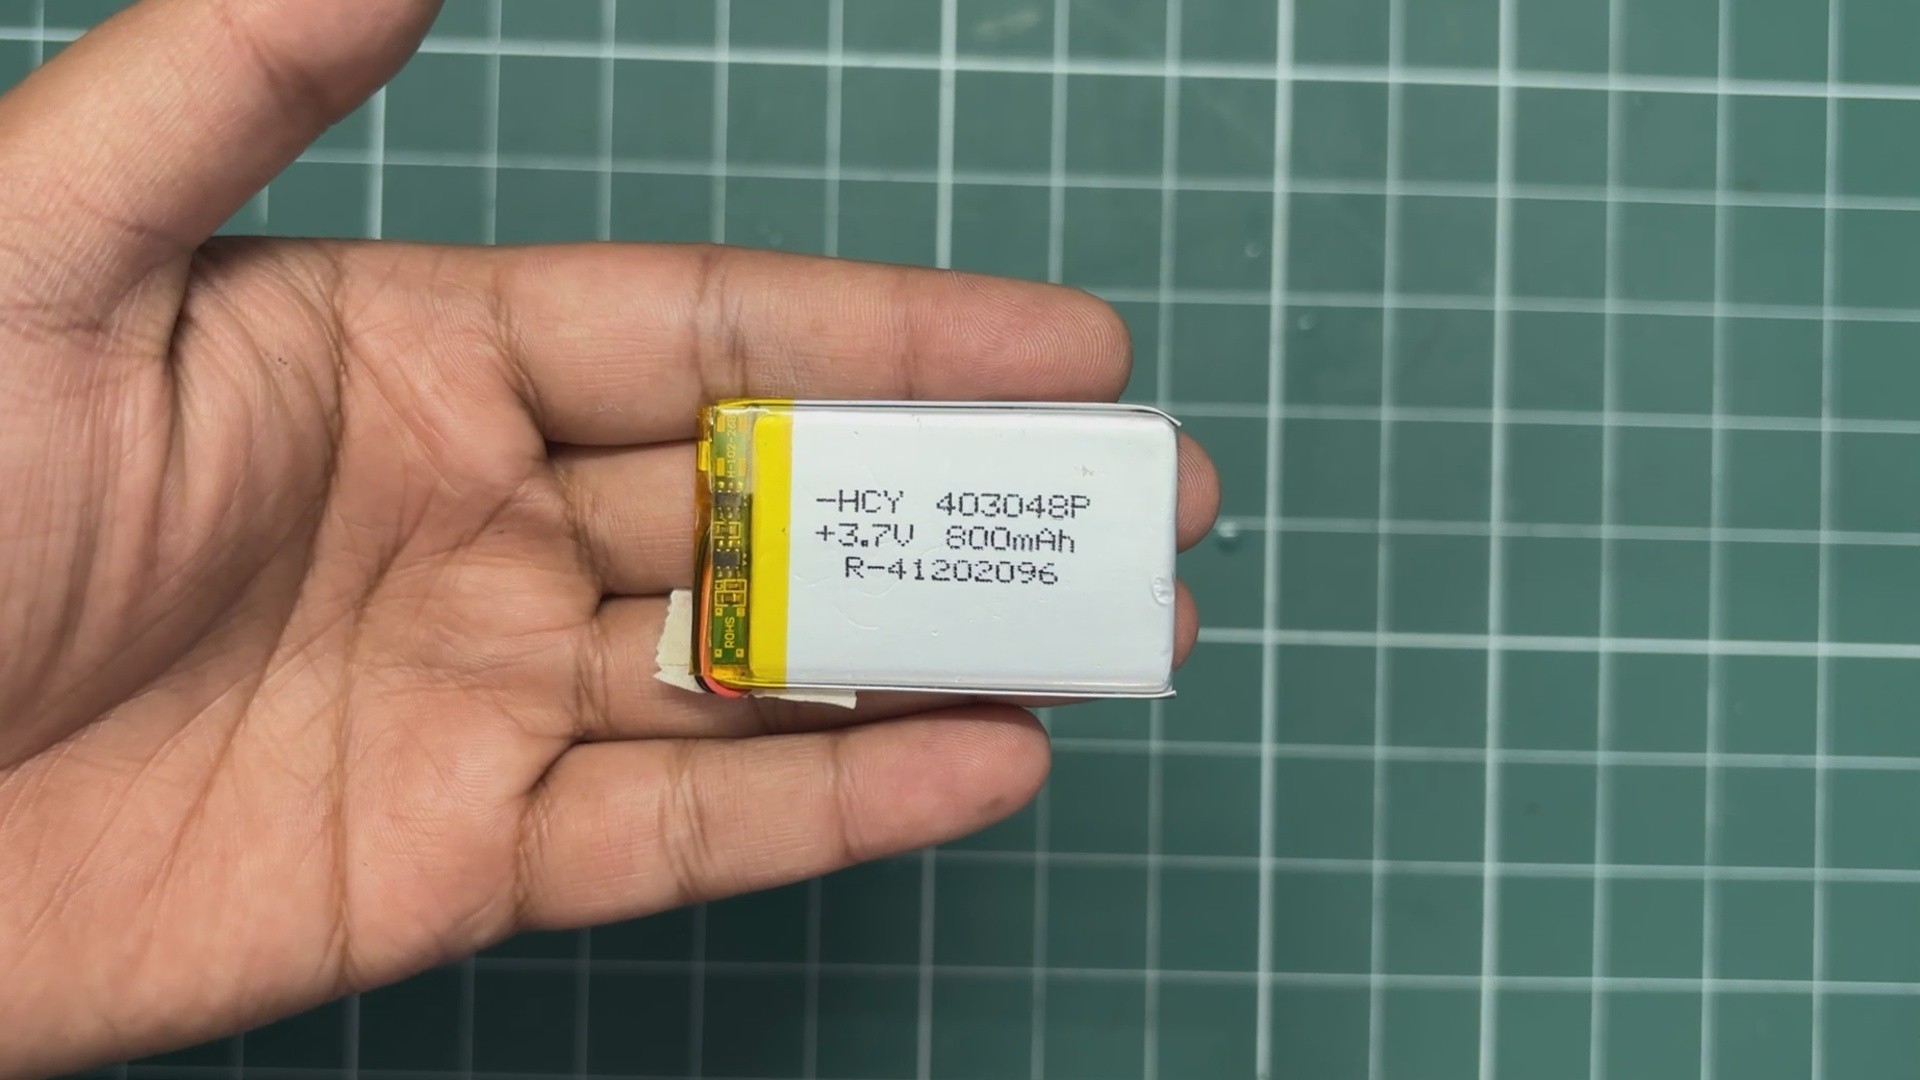
For the power source, I’m using a 3.7V 800mAh LiPo cell.
The main reason I chose this particular LiPo was its compact size. One of my main goals with this project was to keep the iPod as thin and compact as possible, so using a cylindrical 18650 cell wasn’t really practical for this enclosure.
The slim form factor of the LiPo cell allowed me to fit the battery inside the enclosure while keeping the overall thickness of the device relatively low.
7
BATTERY SETUP
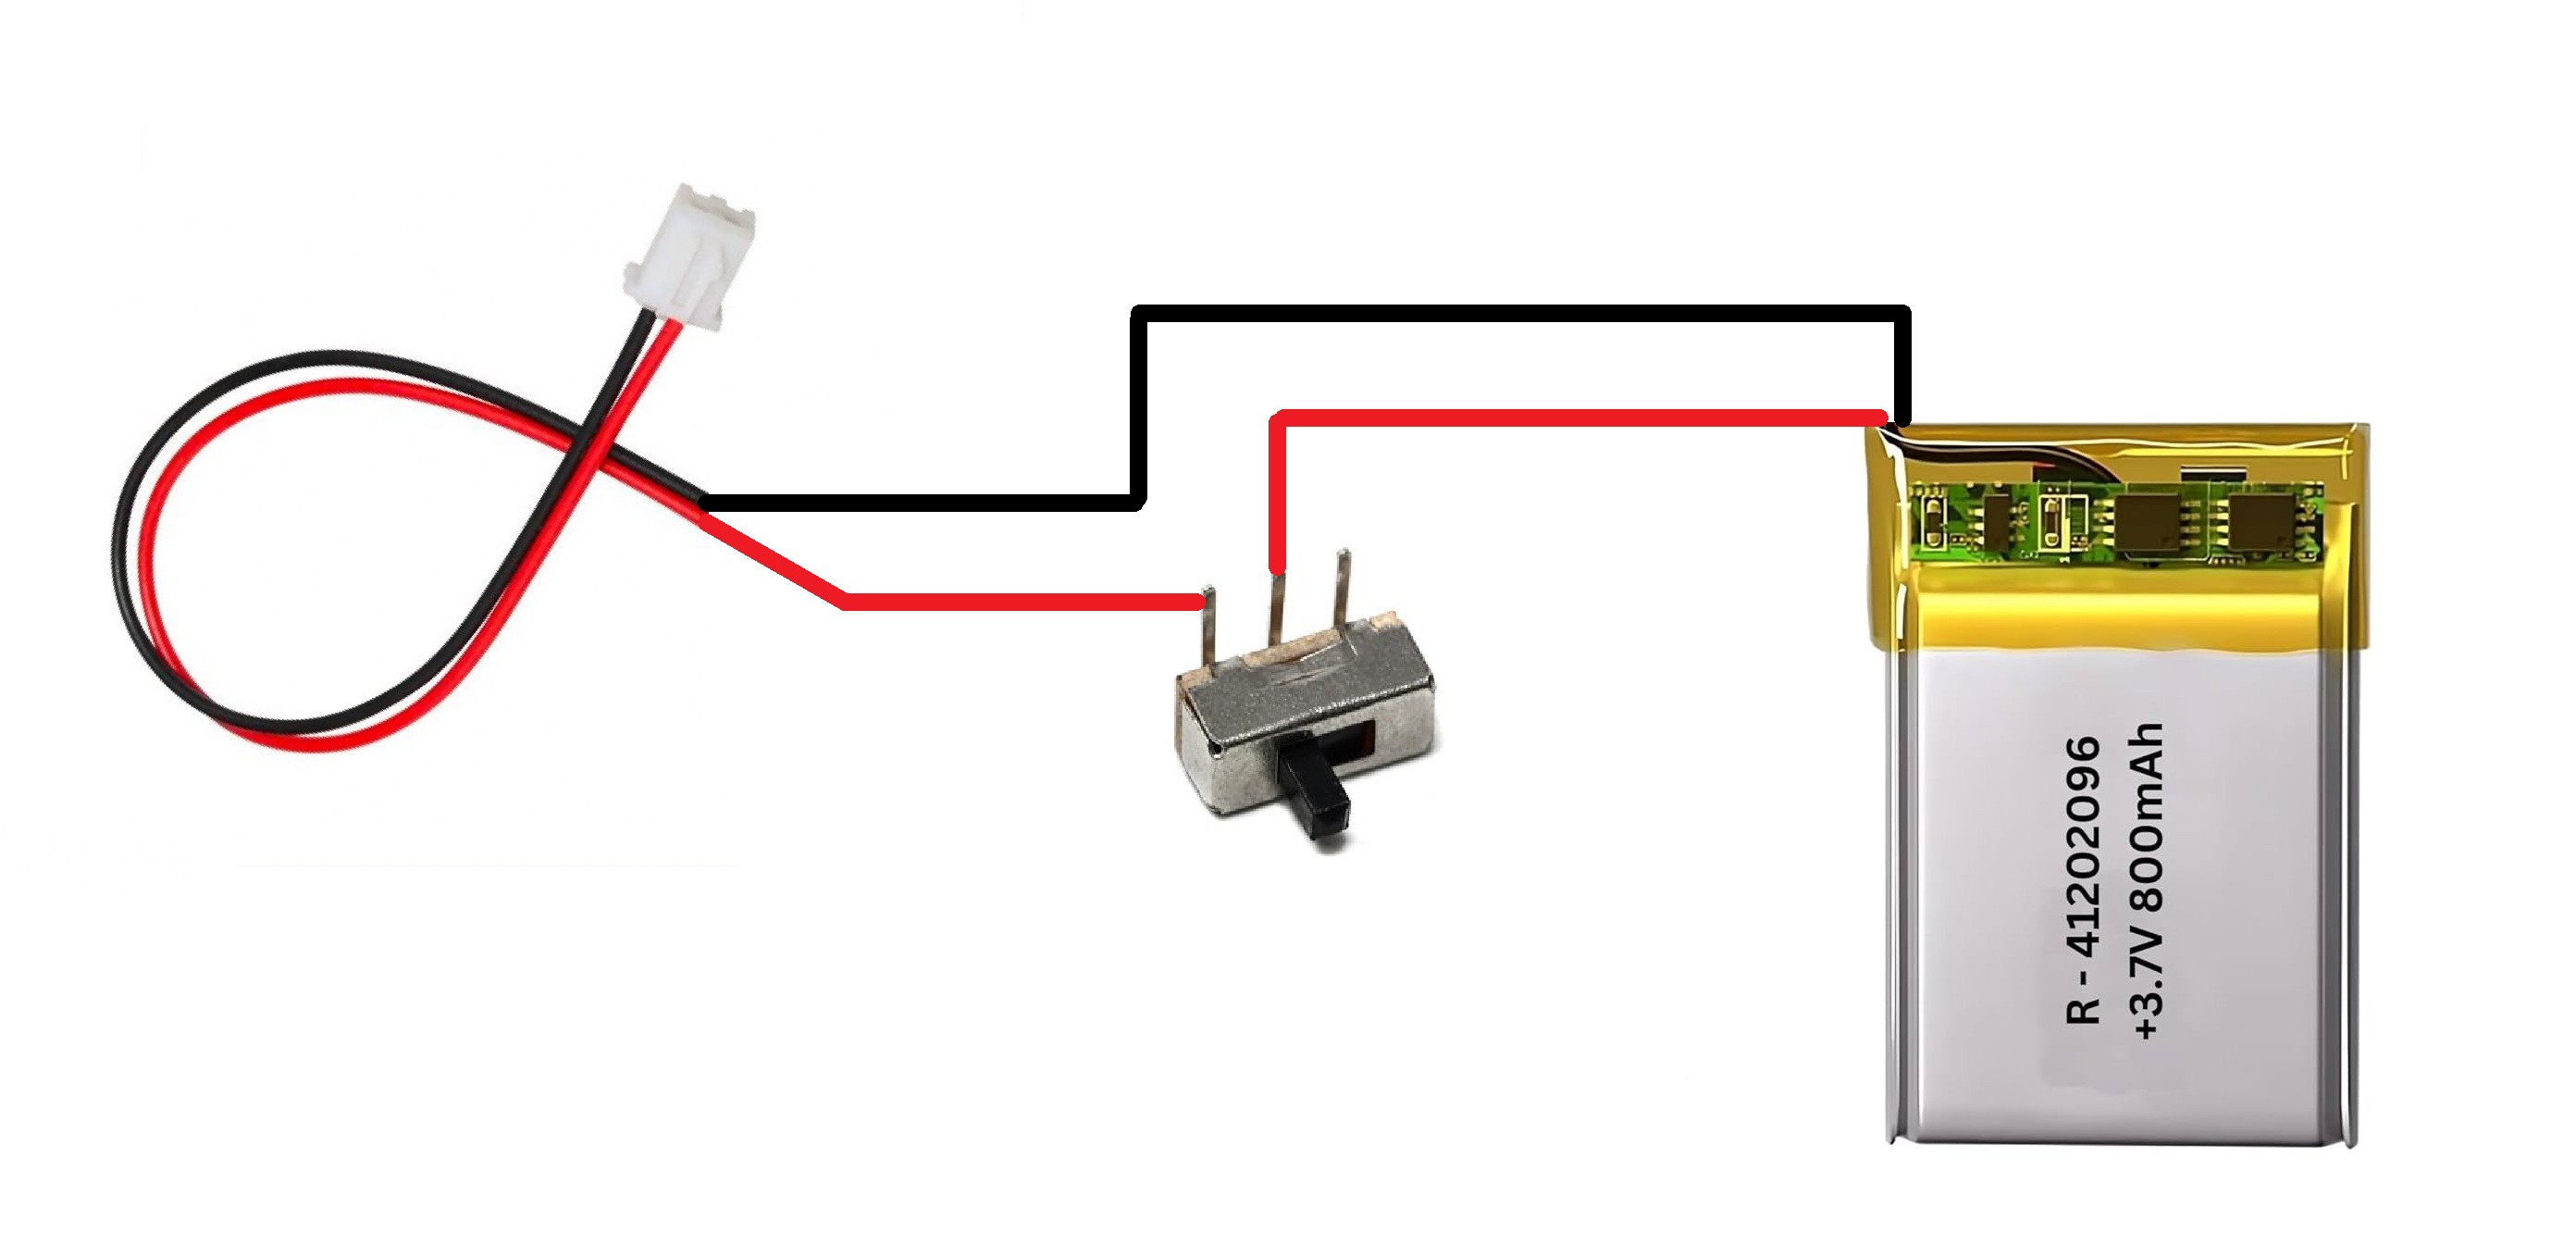
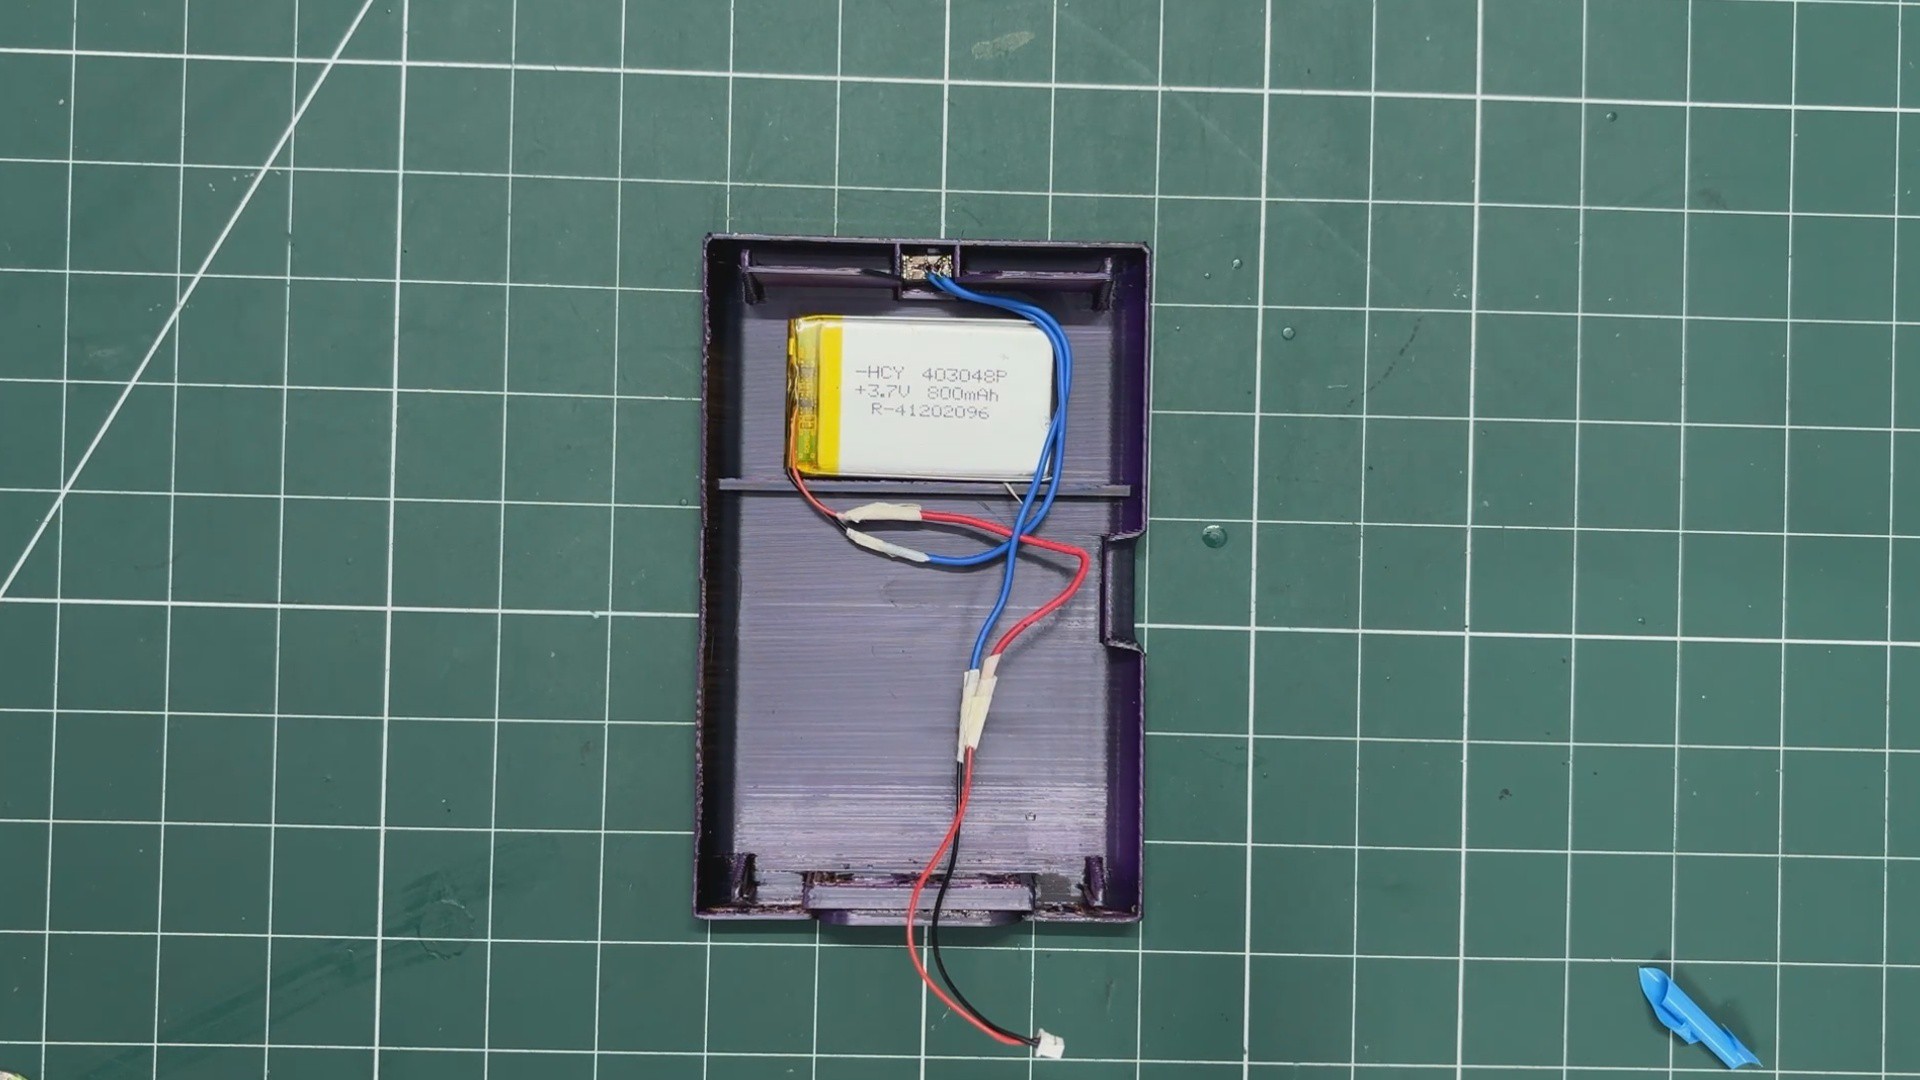
For the battery setup, we need two additional components along with the LiPo cell: a small slide switch and a 2-wire battery connector harness compatible with the battery connector on the Waveshare ESP32-P4 board.
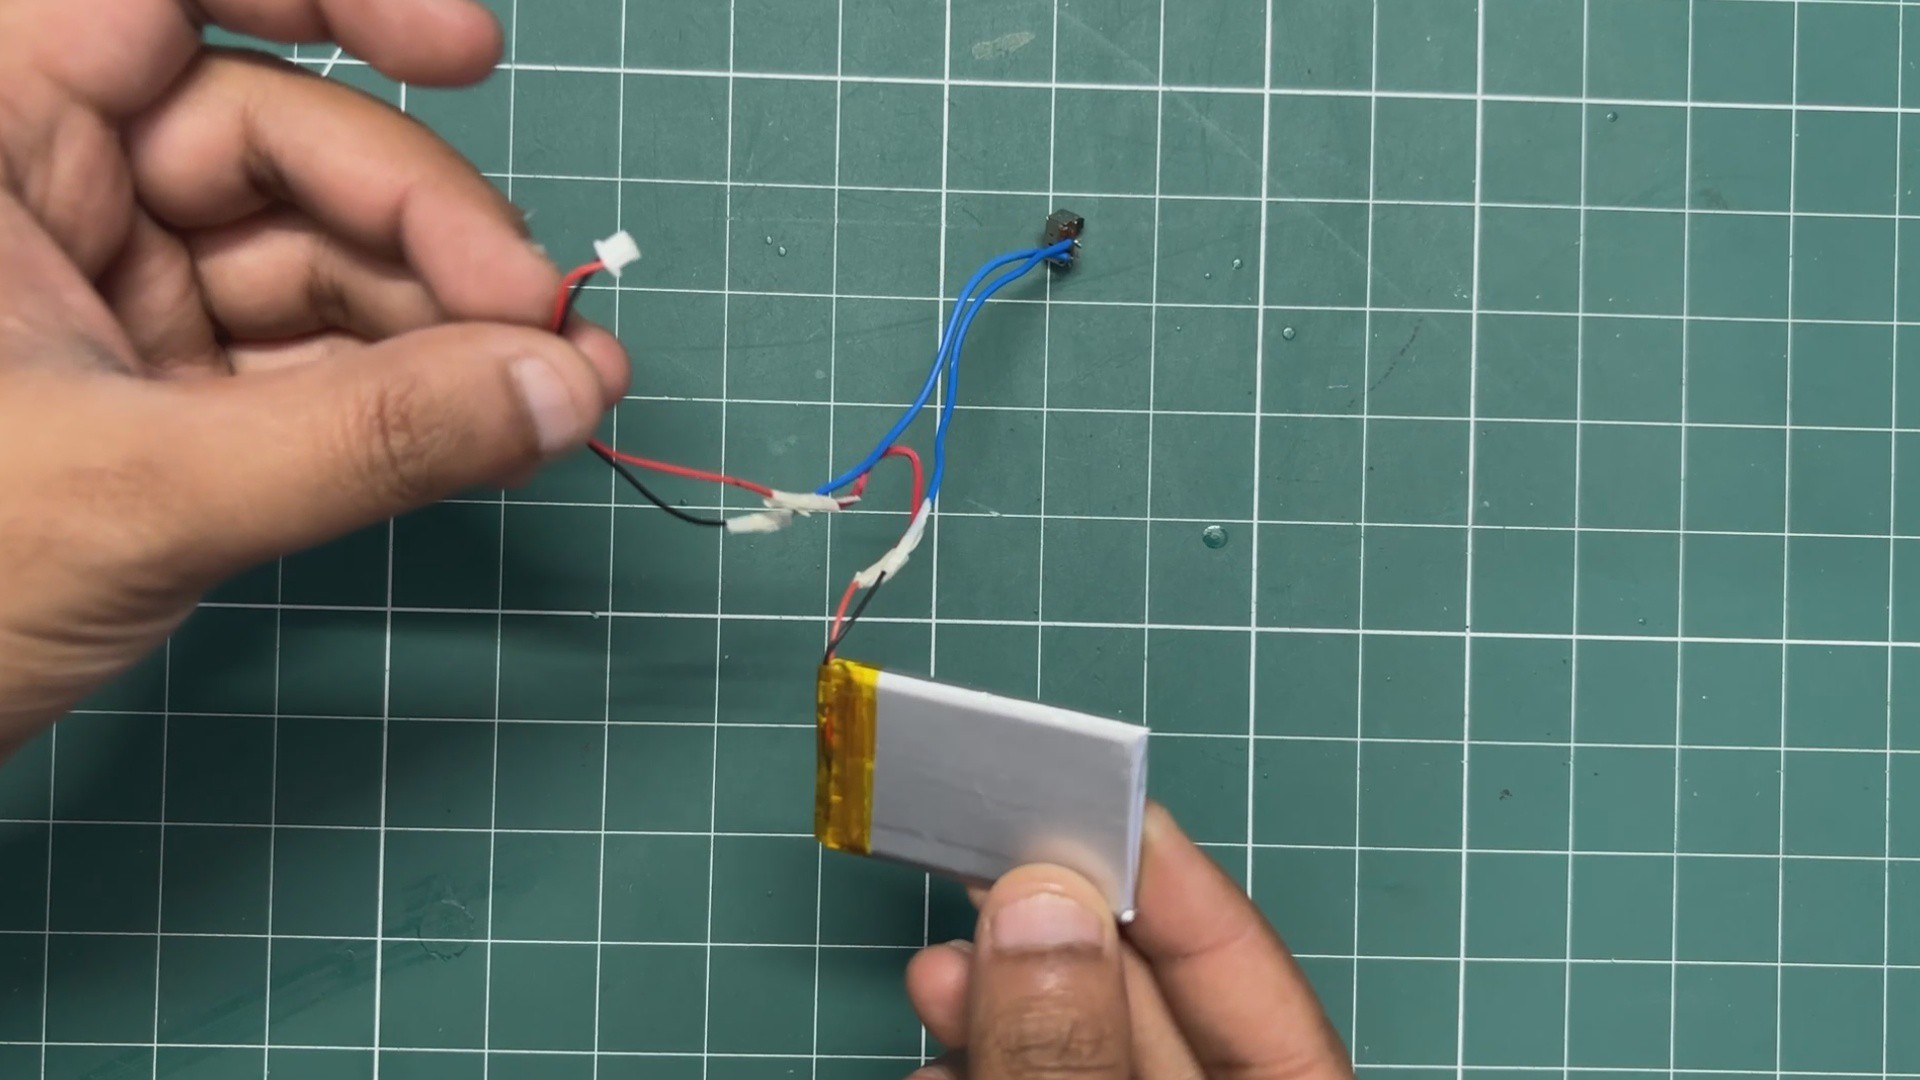
First, connect the positive and negative wires of the harness to the corresponding positive and negative terminals of the LiPo battery.
For the power switch, we place the slide switch in series with the positive wire. Connect the battery’s positive terminal to one terminal of the slide switch, and then connect the other terminal of the switch to the red positive wire of the battery harness.
The negative terminal of the battery can be connected directly to the negative wire of the harness.
This gives us a simple ON/OFF power switch, allowing us to disconnect the battery power from the ESP32-P4 board whenever the device is not in use.
8
BACK ENCLOSURE ASSEMBLY
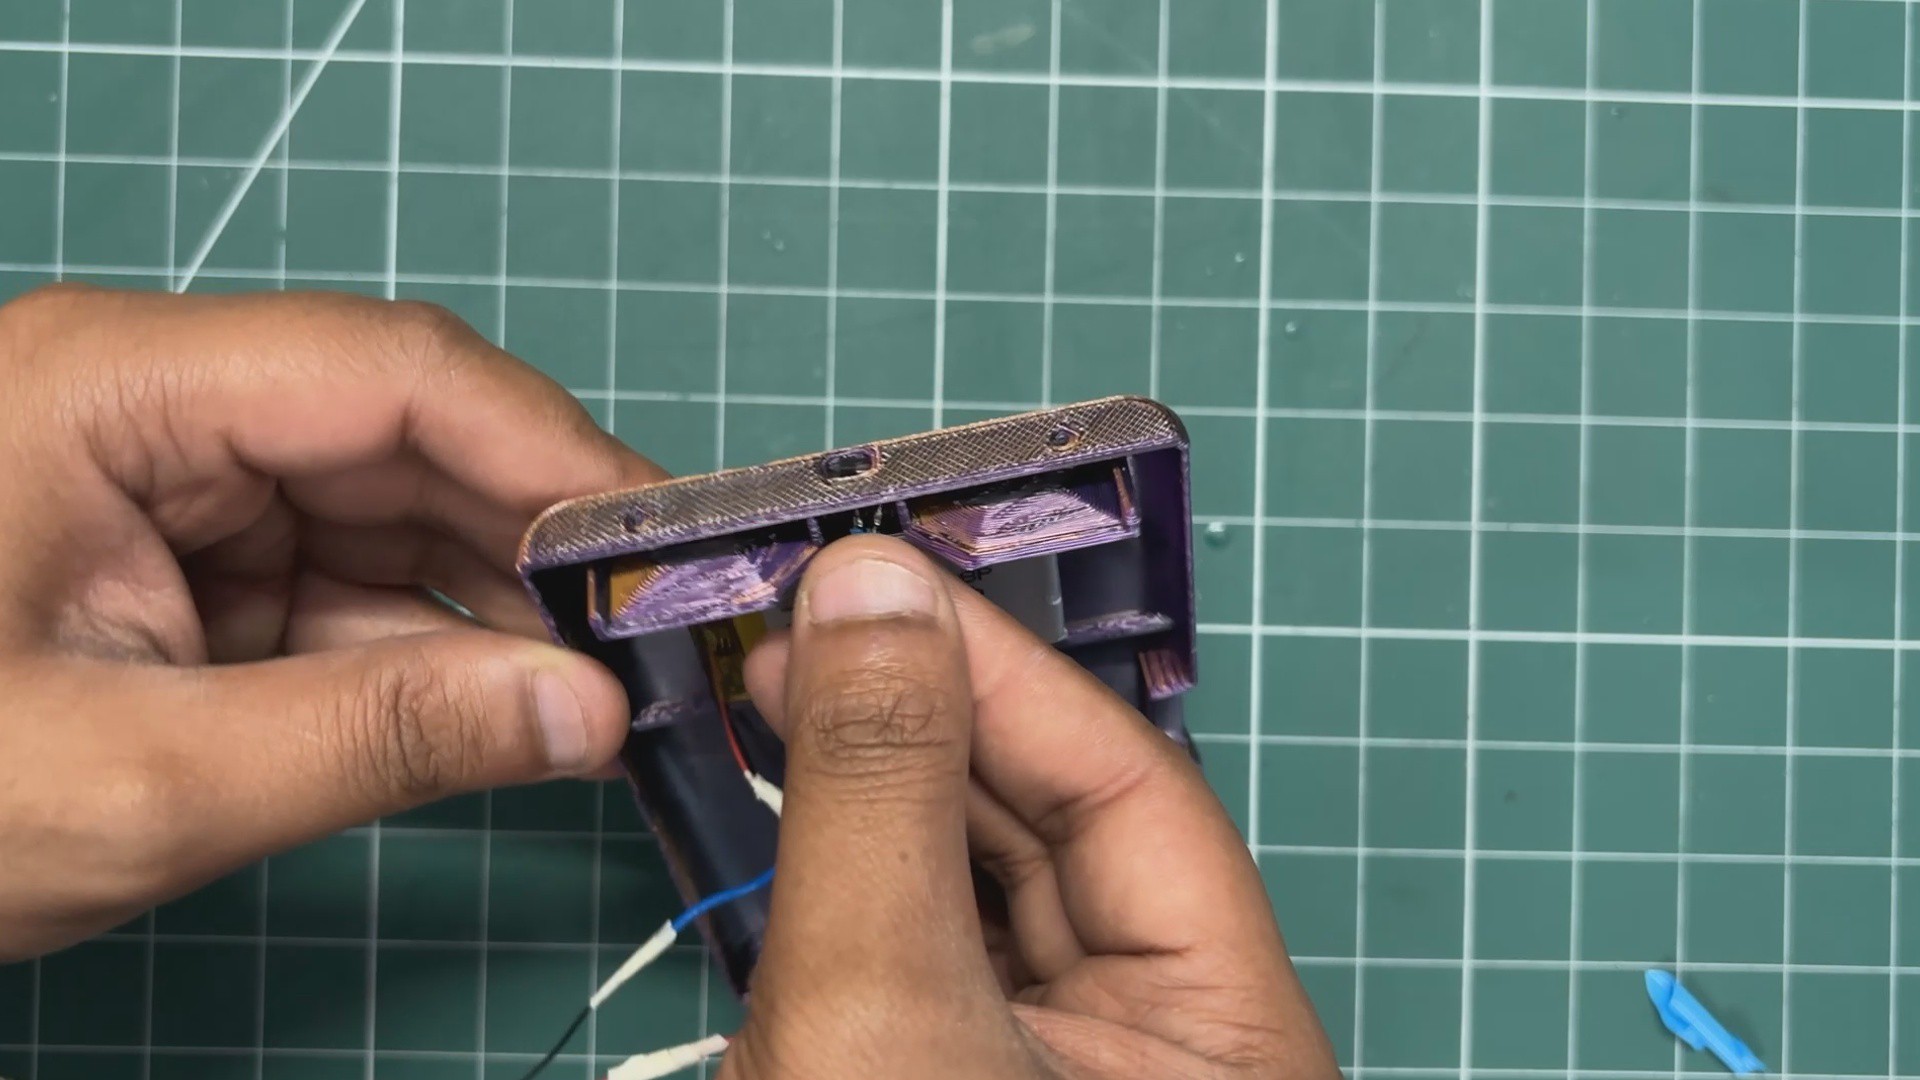
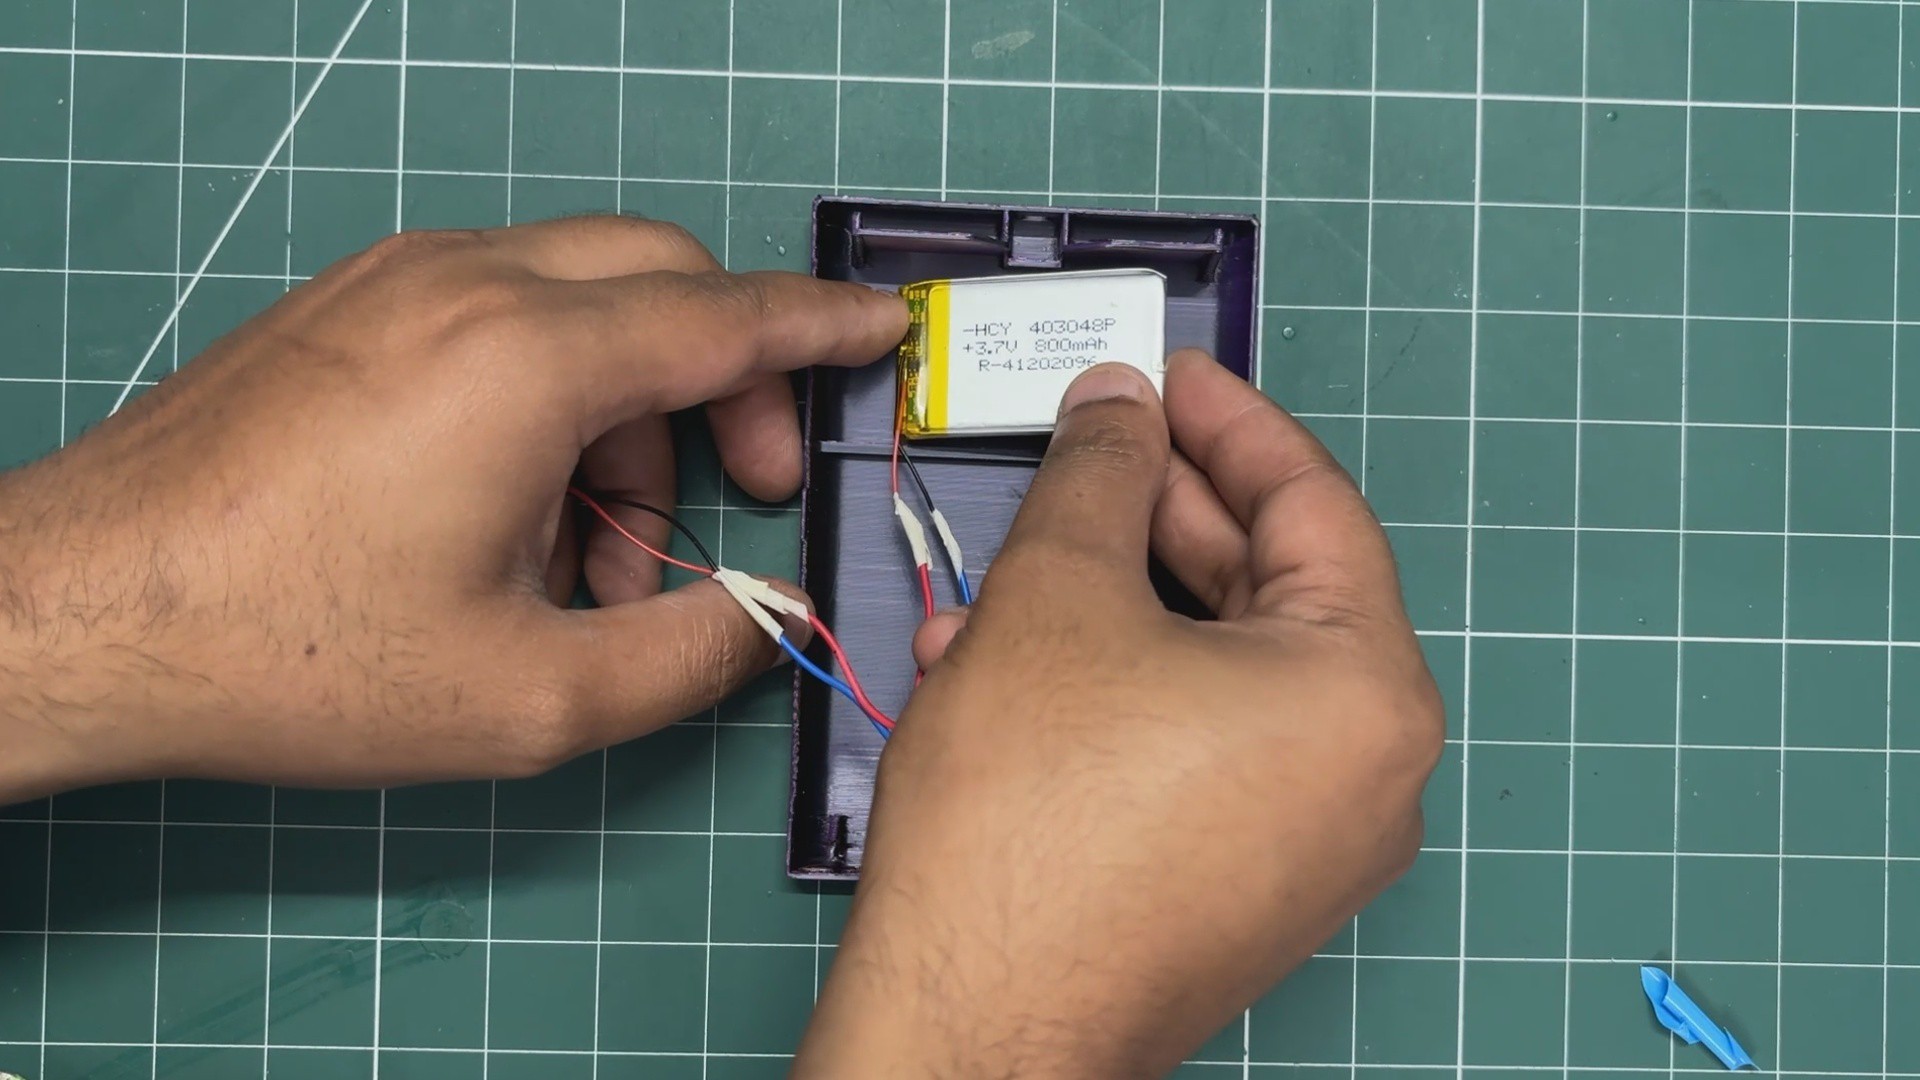
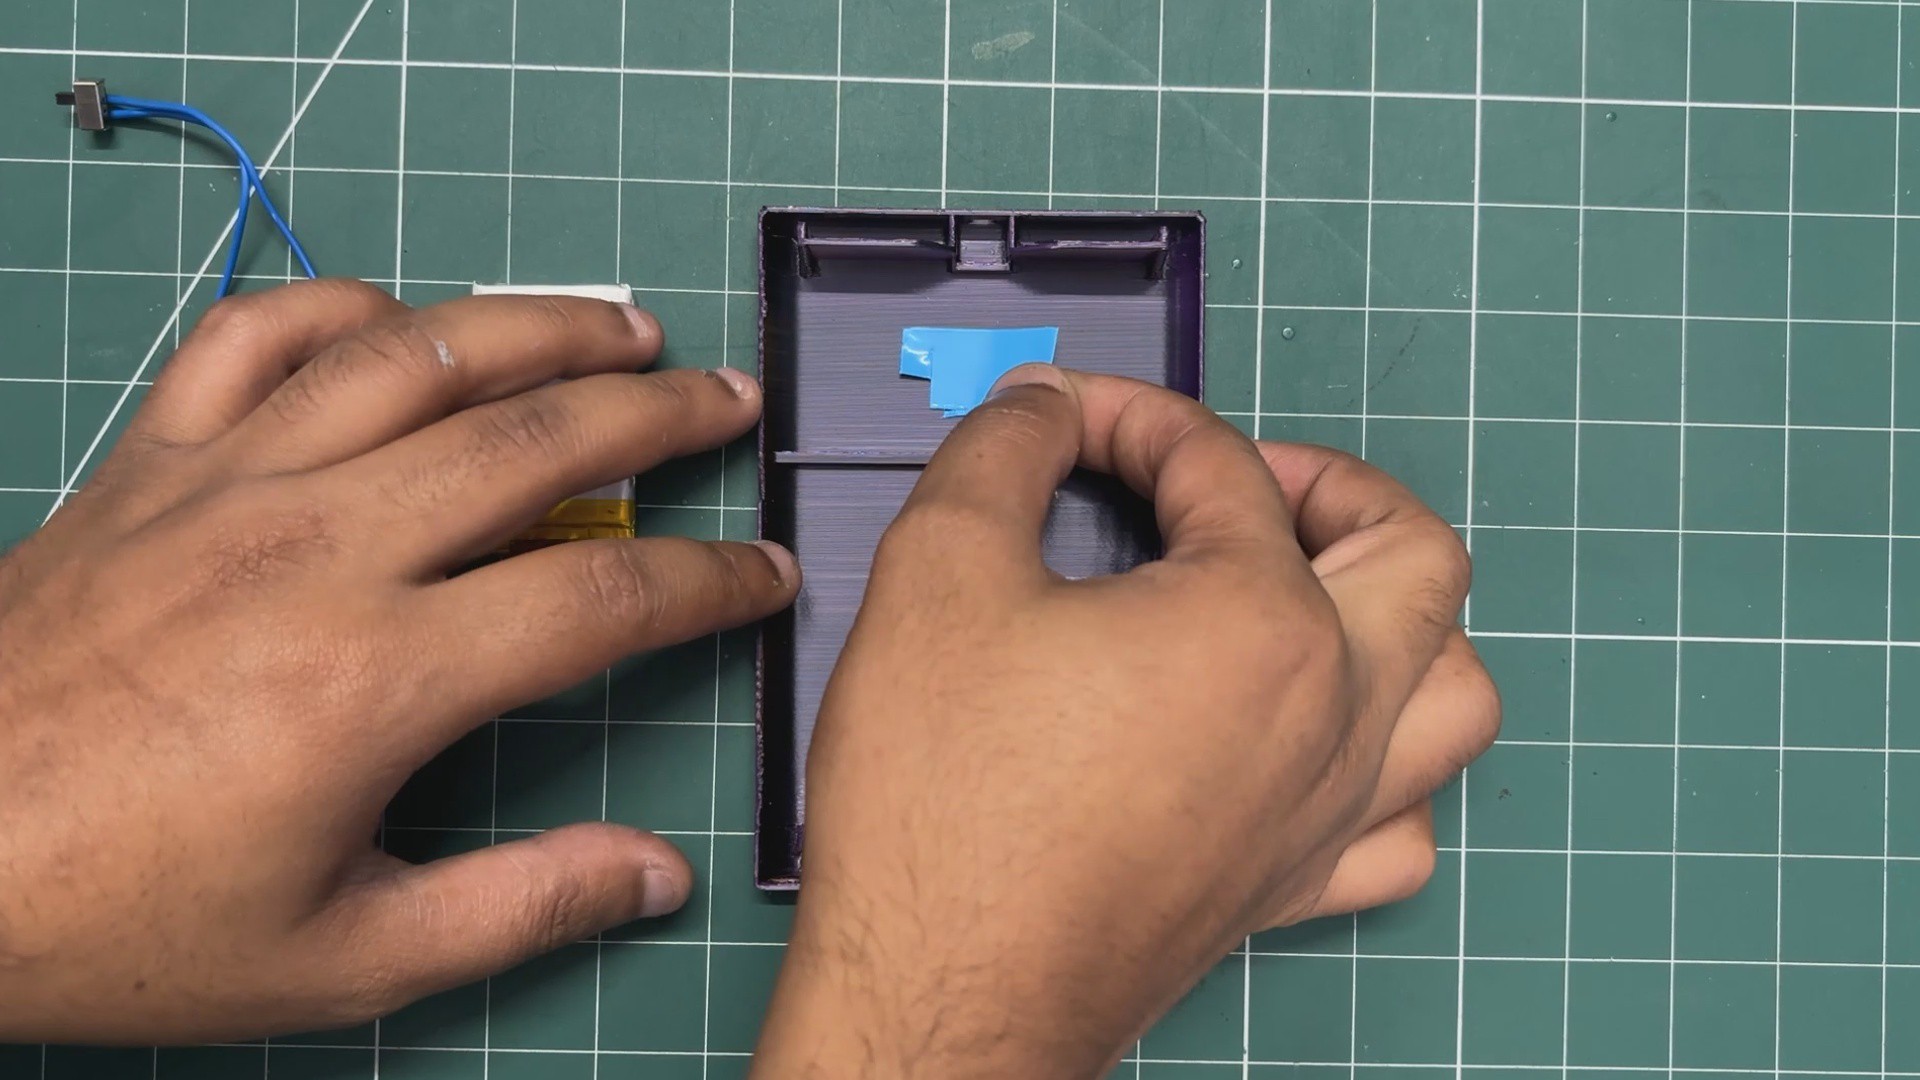
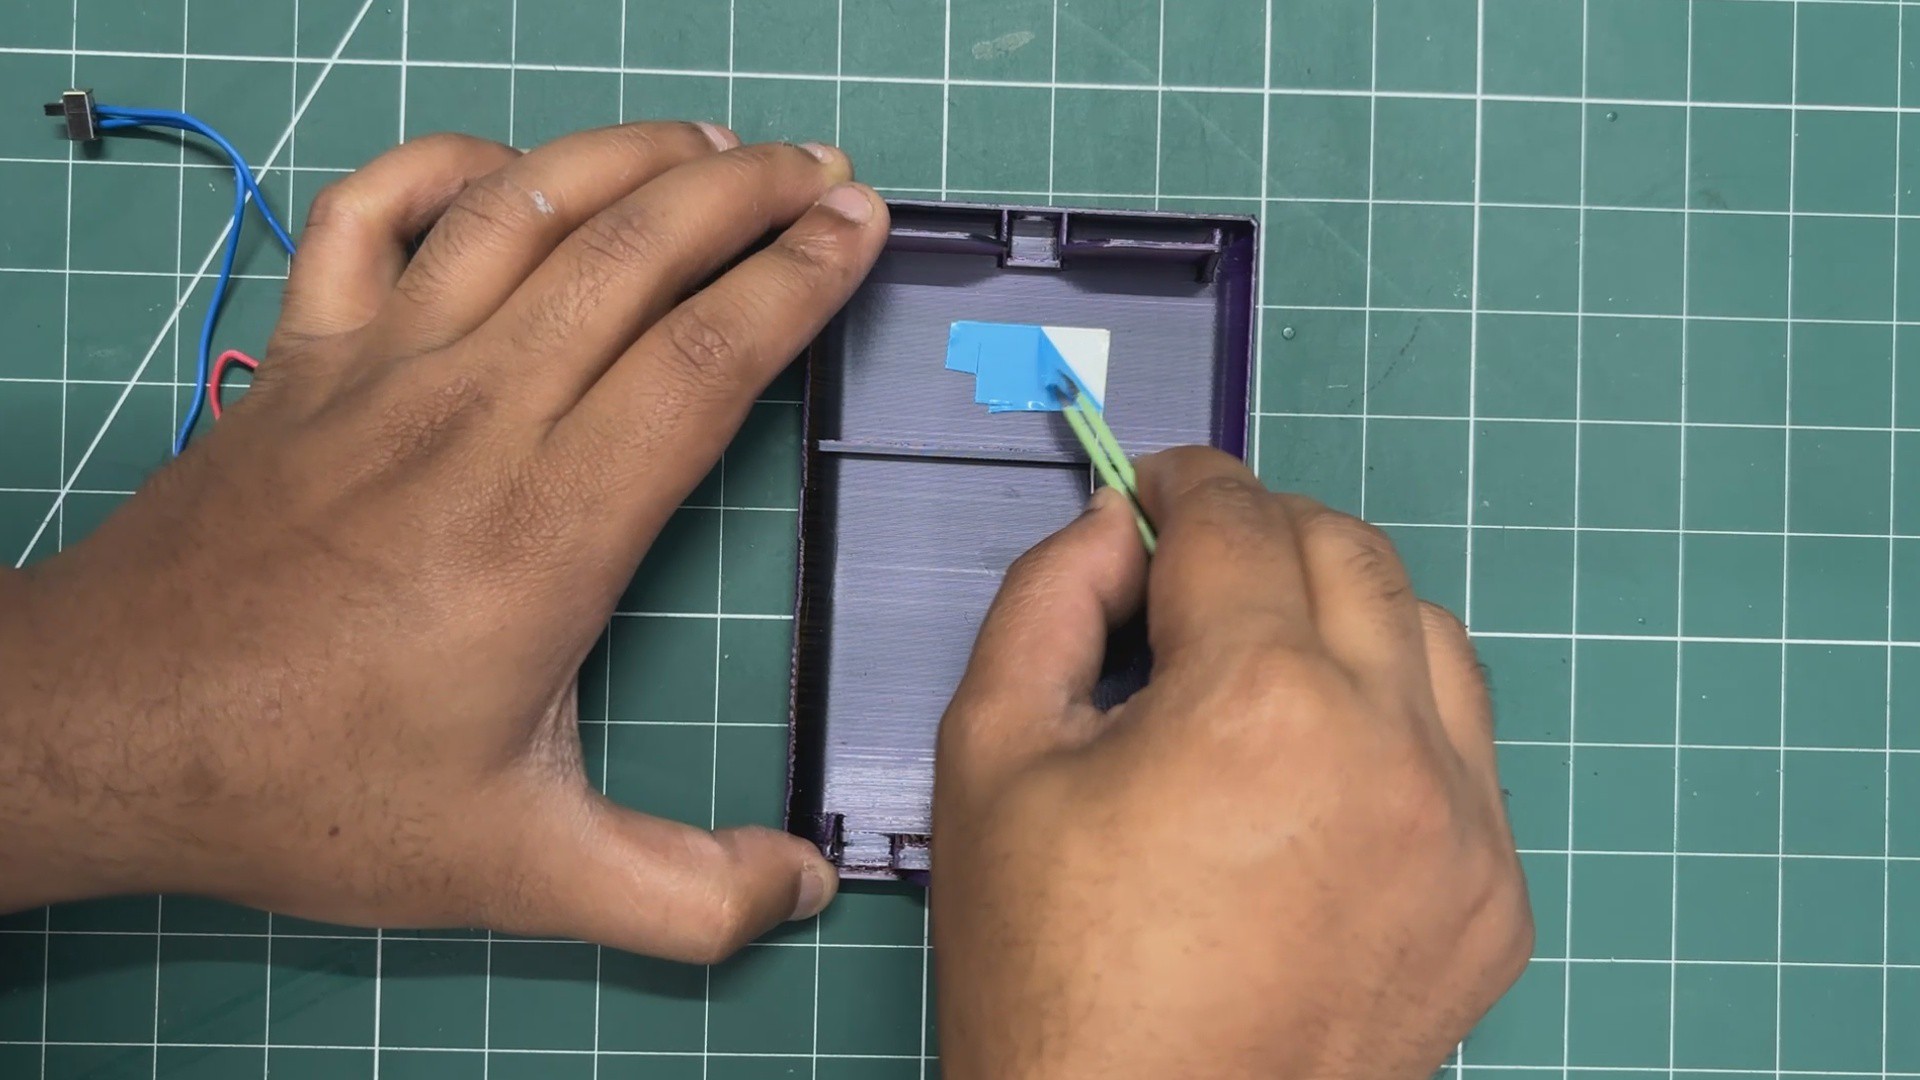
The back enclosure assembly begins by securing the LiPo battery in its designated mounting area. First, apply a piece of double-sided tape to the battery mounting position and remove its protective backing.
Next, carefully place the LiPo cell into position and press it down firmly to ensure good adhesion.
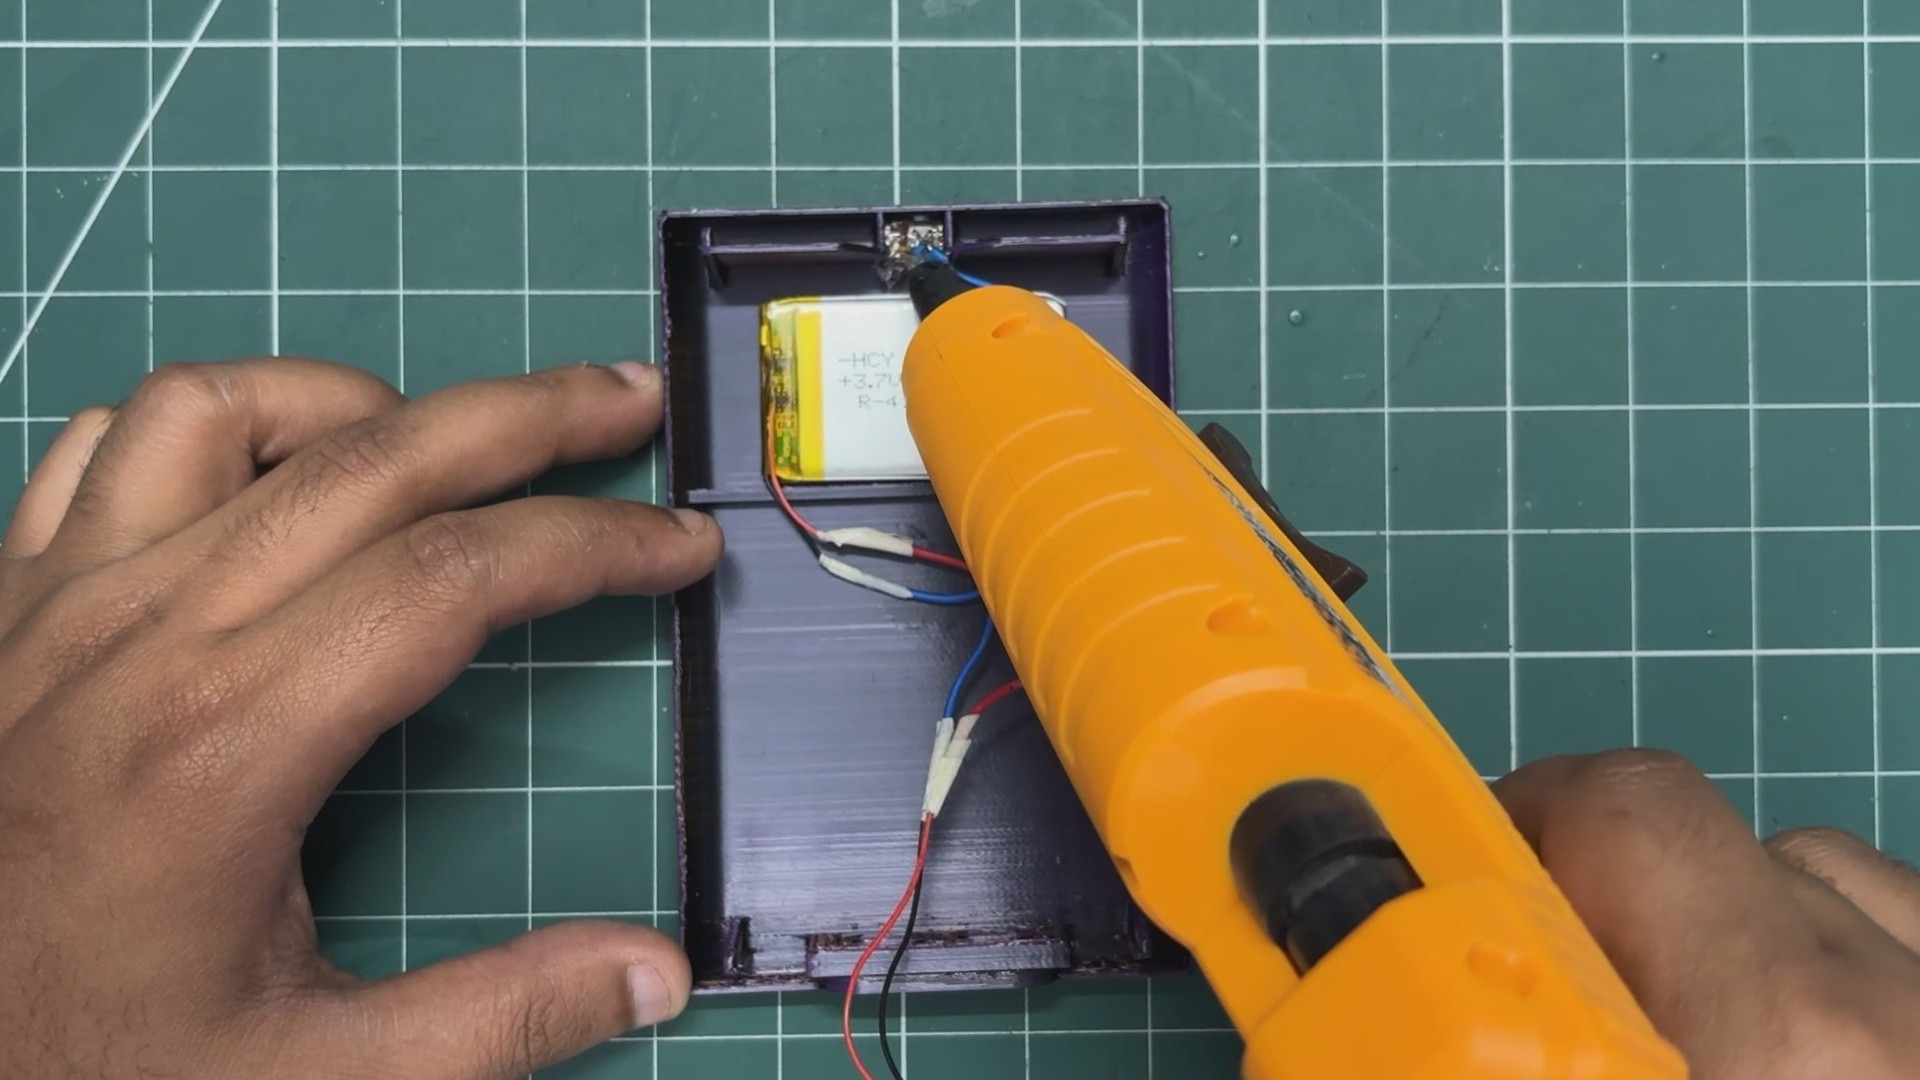
Just above the battery, position the slide power switch in its dedicated opening. The switch is already designed to be a pressure fit, but since it is a moving component that will be operated frequently, I also used hot glue to secure it in place.
This prevents the switch from shifting or coming loose during repeated use while still allowing the switch itself to move freely for turning the device ON and OFF.
9
FRONT ENCLOSURE ASSEMBLY
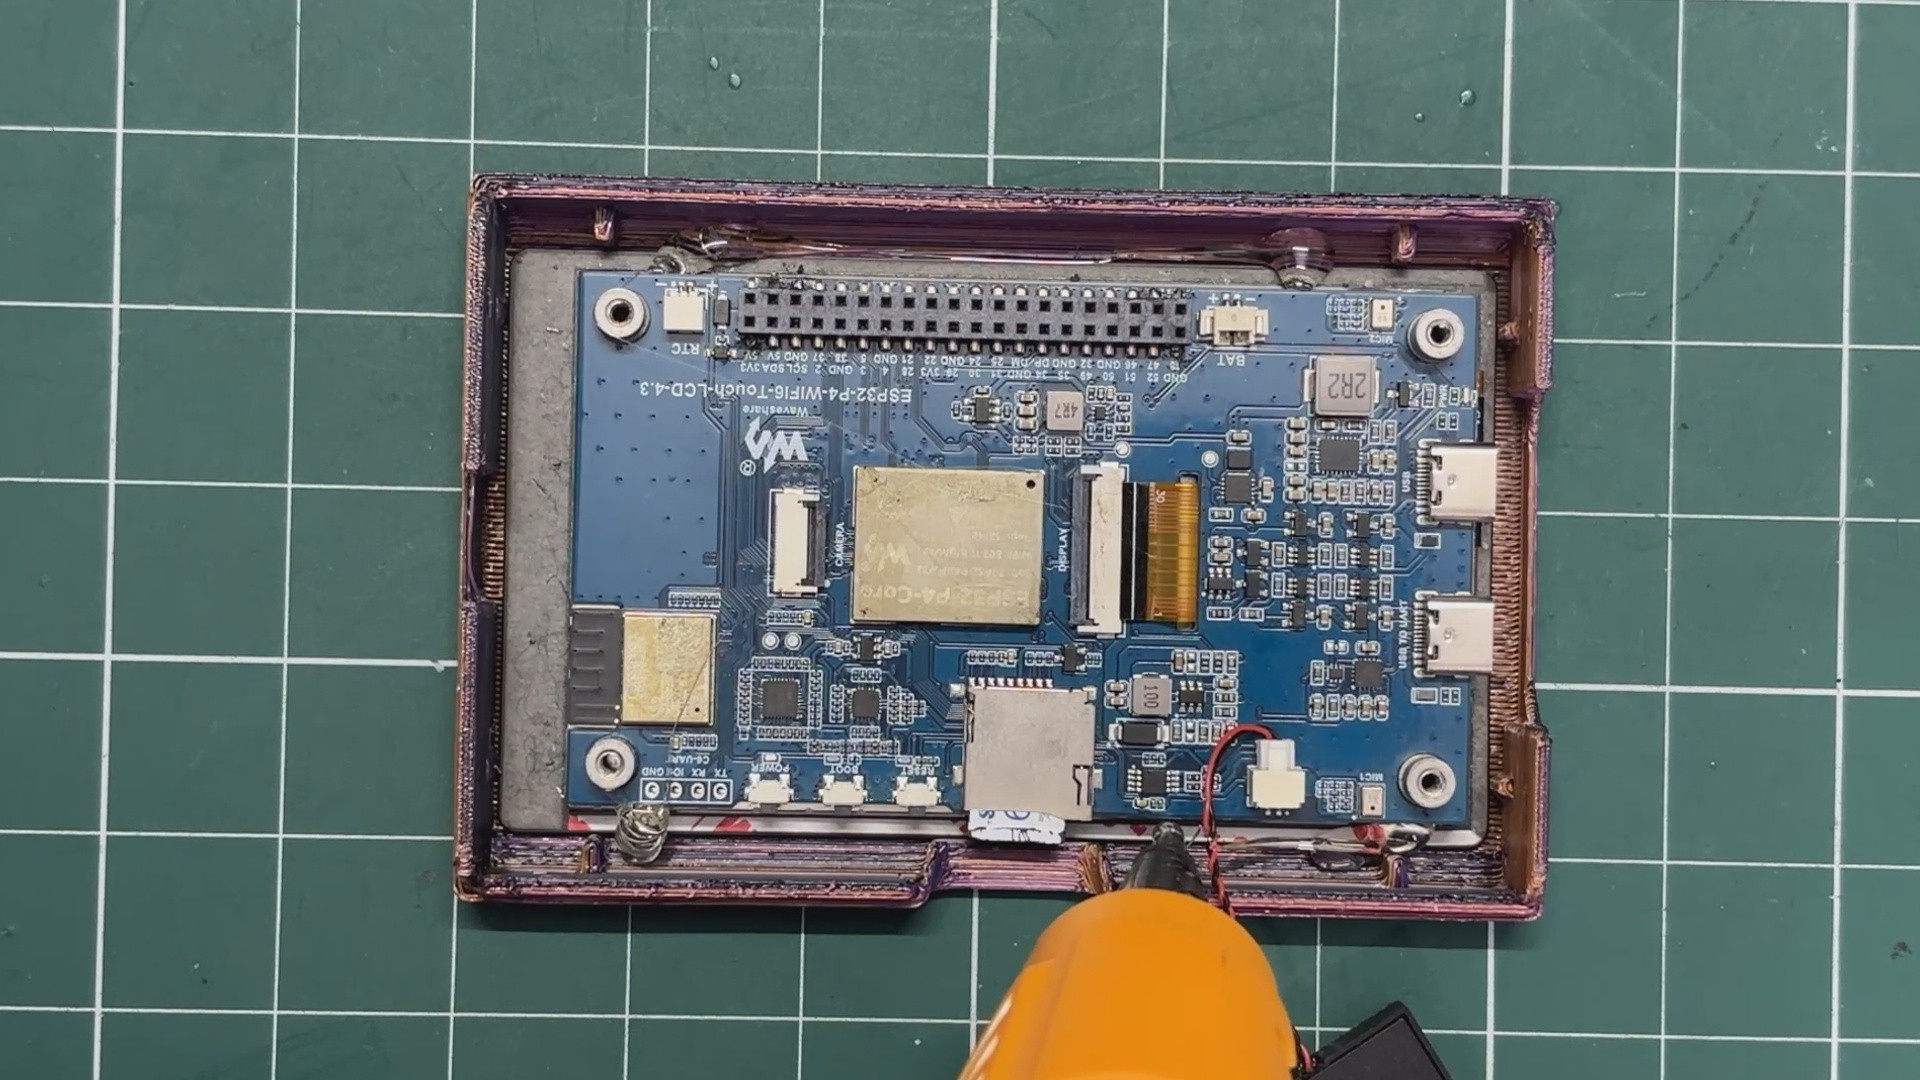
Next, place the Waveshare ESP32-P4 development board into its designated position inside the front enclosure.
Once the board is properly aligned, use a small amount of hot glue to secure it in place. This keeps the board firmly seated inside the enclosure and prevents it from shifting during assembly and regular use.
10
FINAL ASSEMBLY
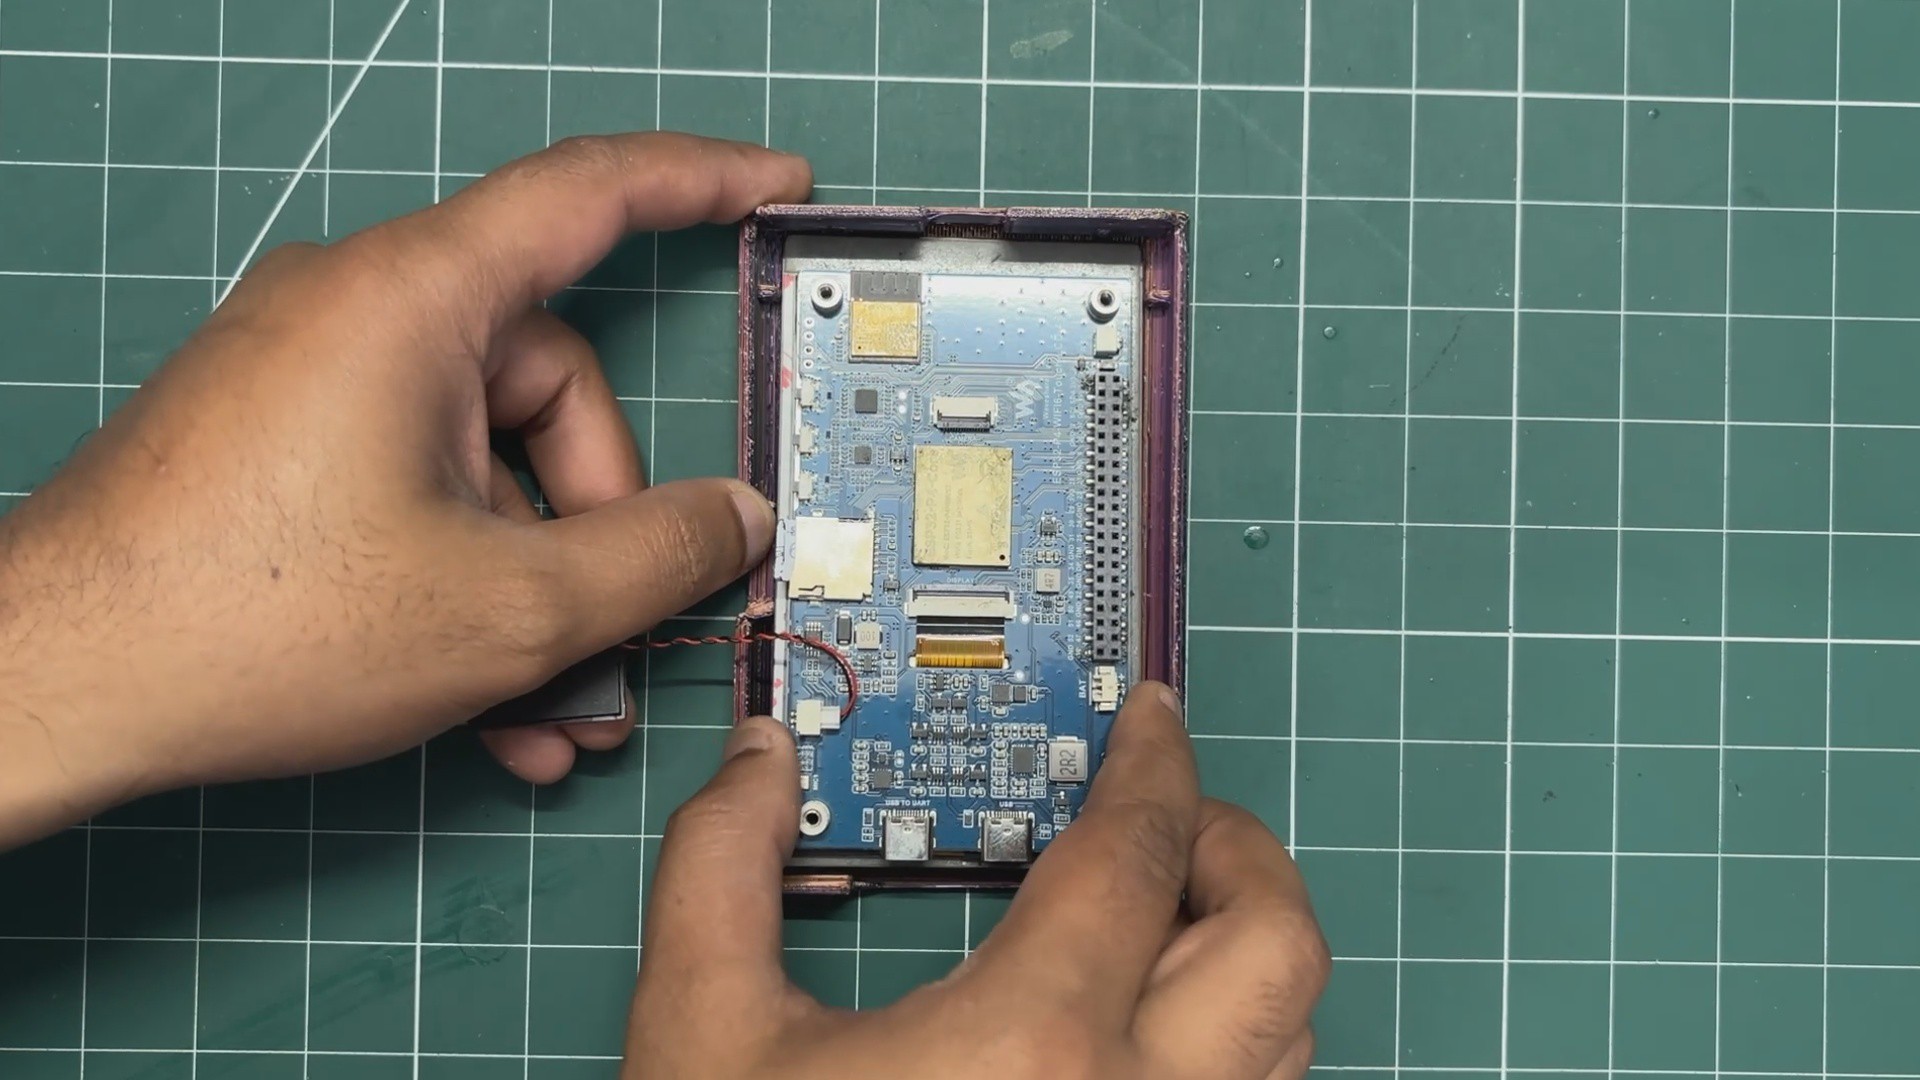
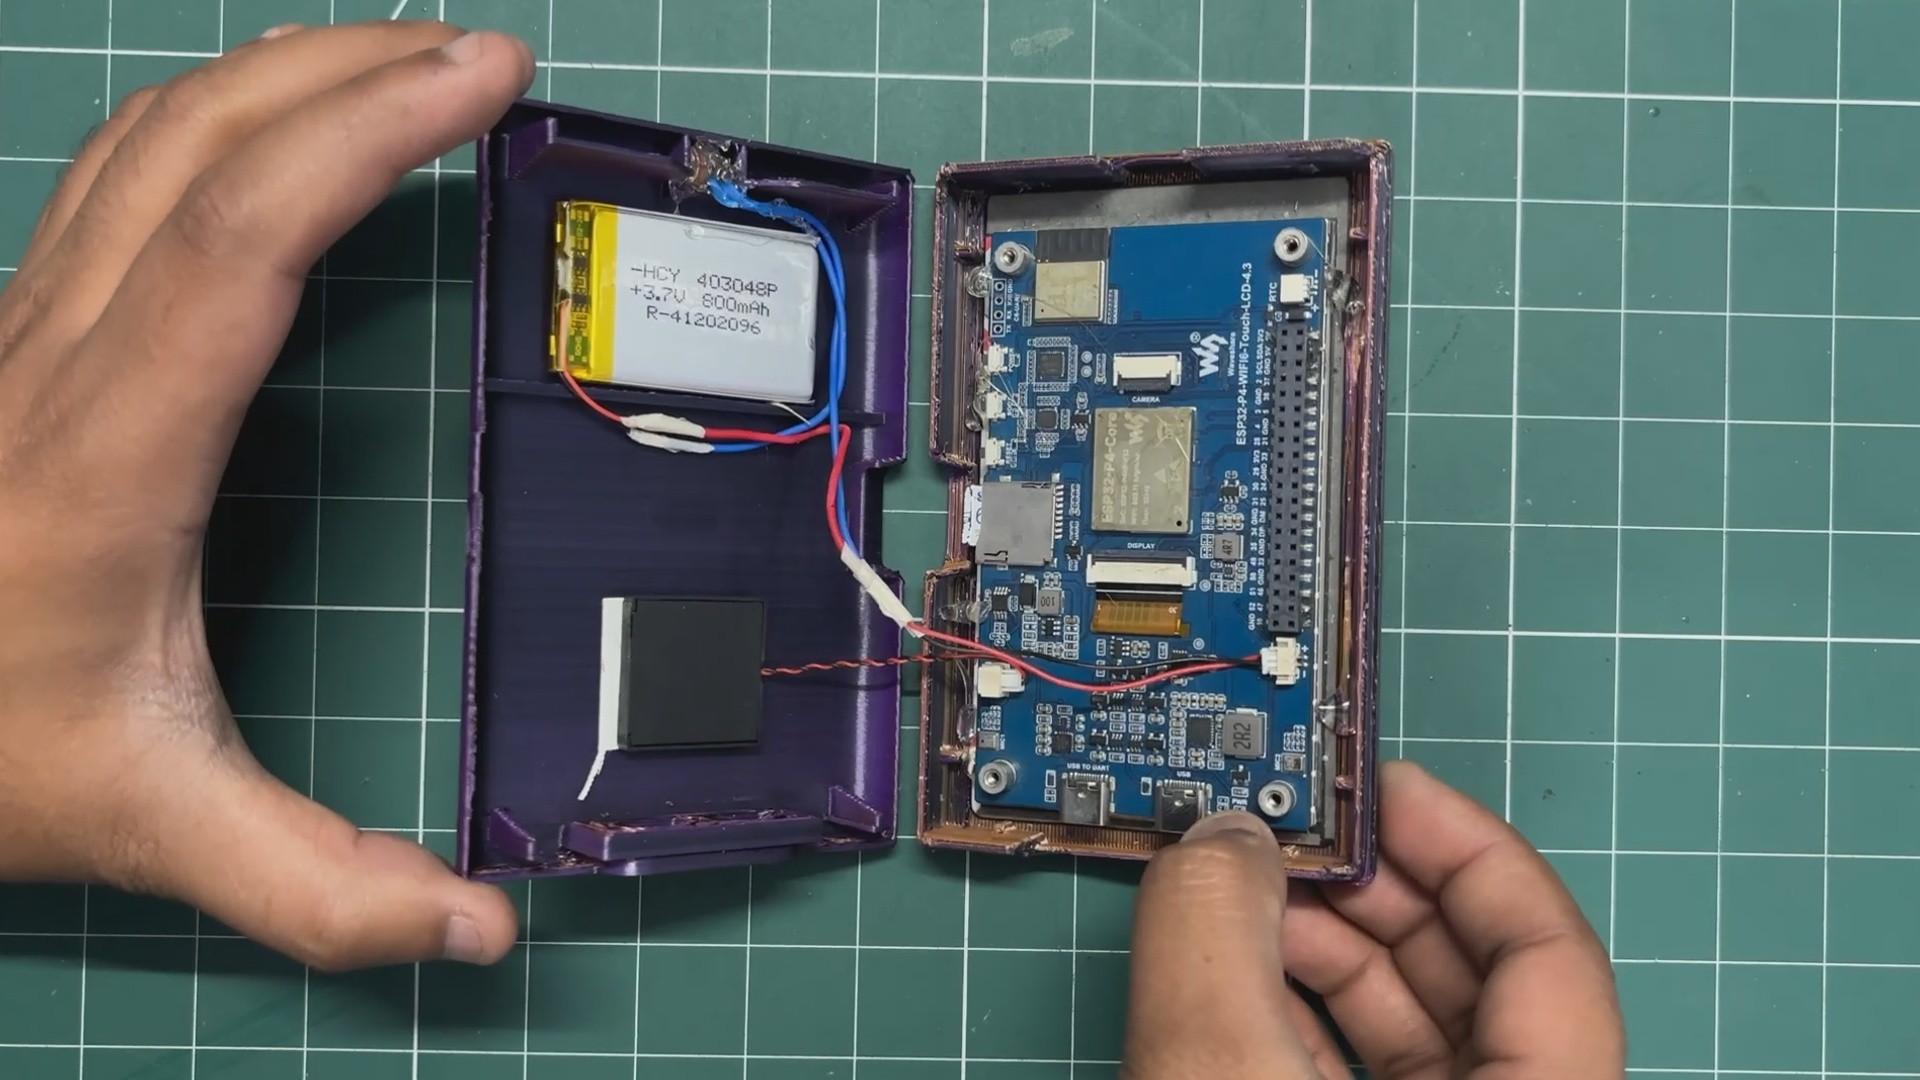
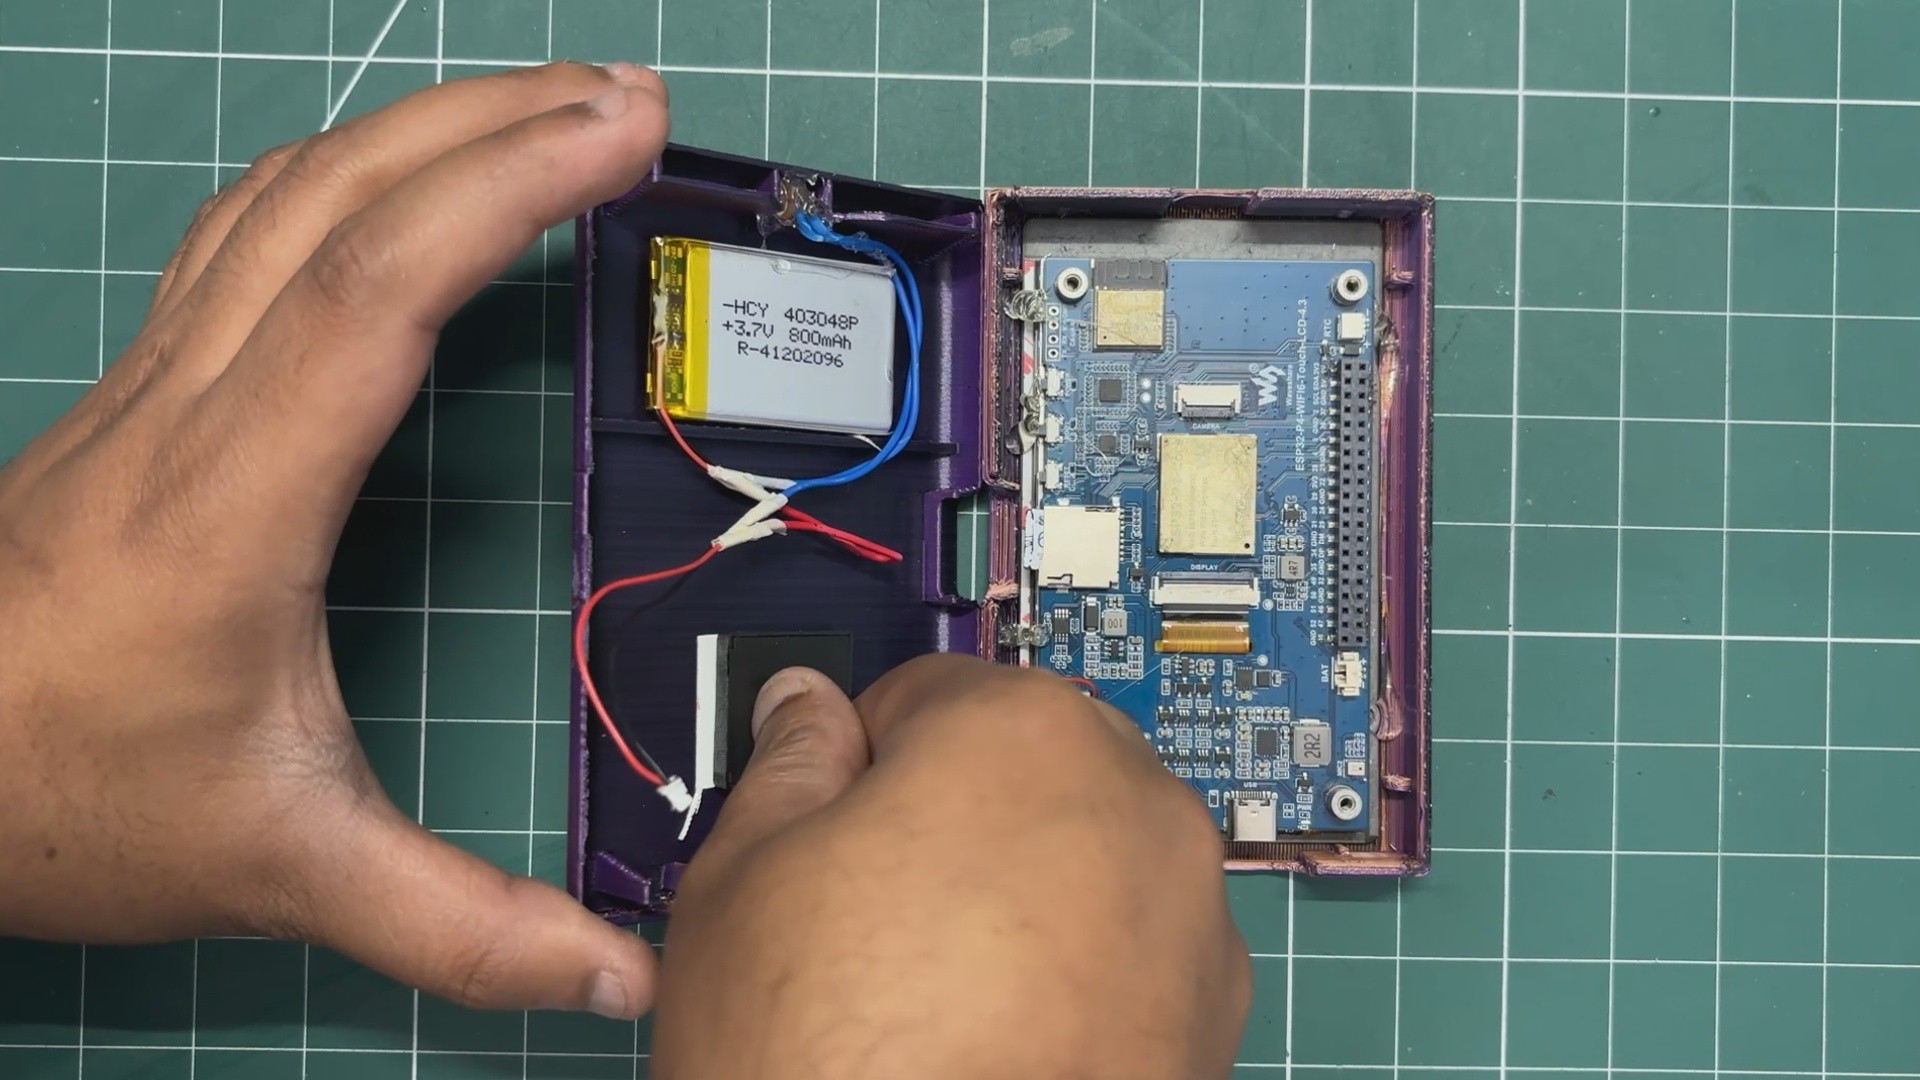
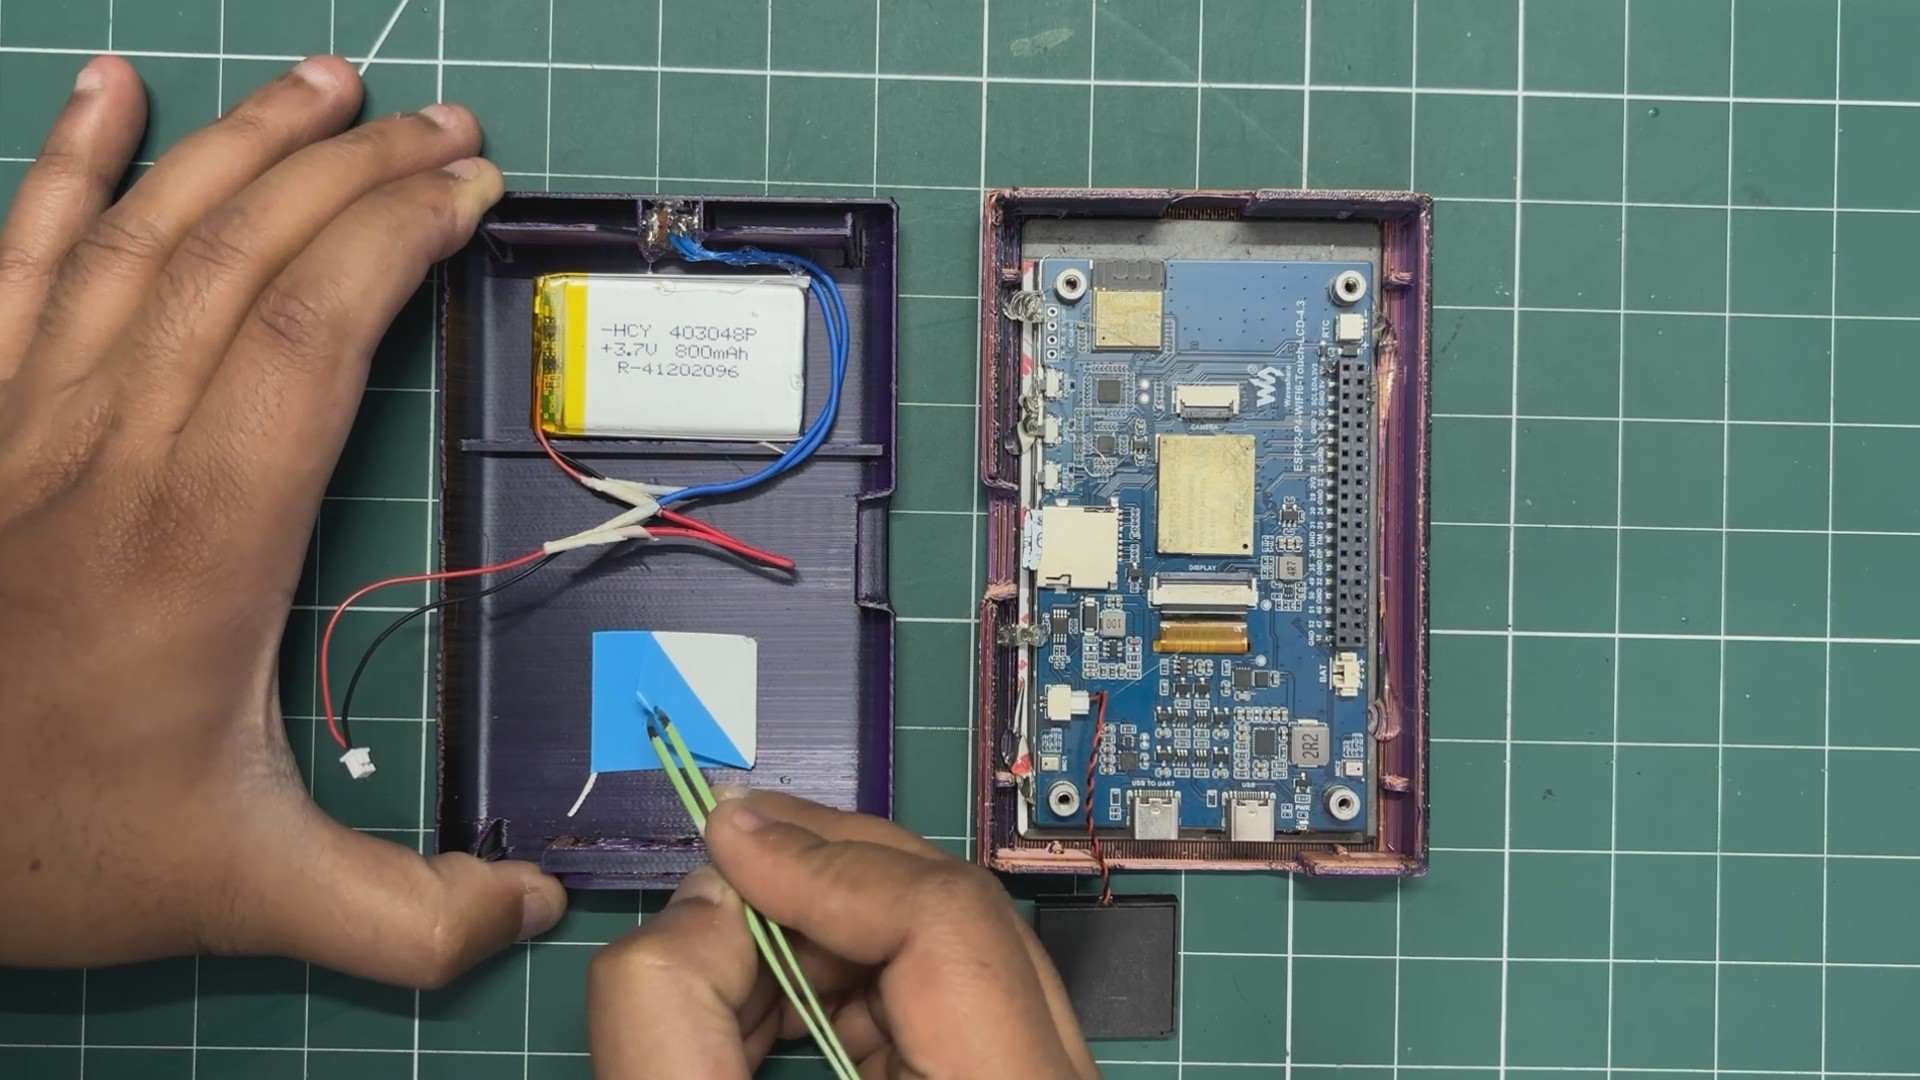
For the final assembly, we first add a piece of double-sided tape to the designated speaker mounting area on the lower section of the back enclosure. Remove the protective backing and carefully place the speaker over the tape, making sure it is properly aligned and securely held in position.
Next, connect the battery’s 2-pin JST connector to the corresponding battery connector on the Waveshare ESP32-P4 development board.
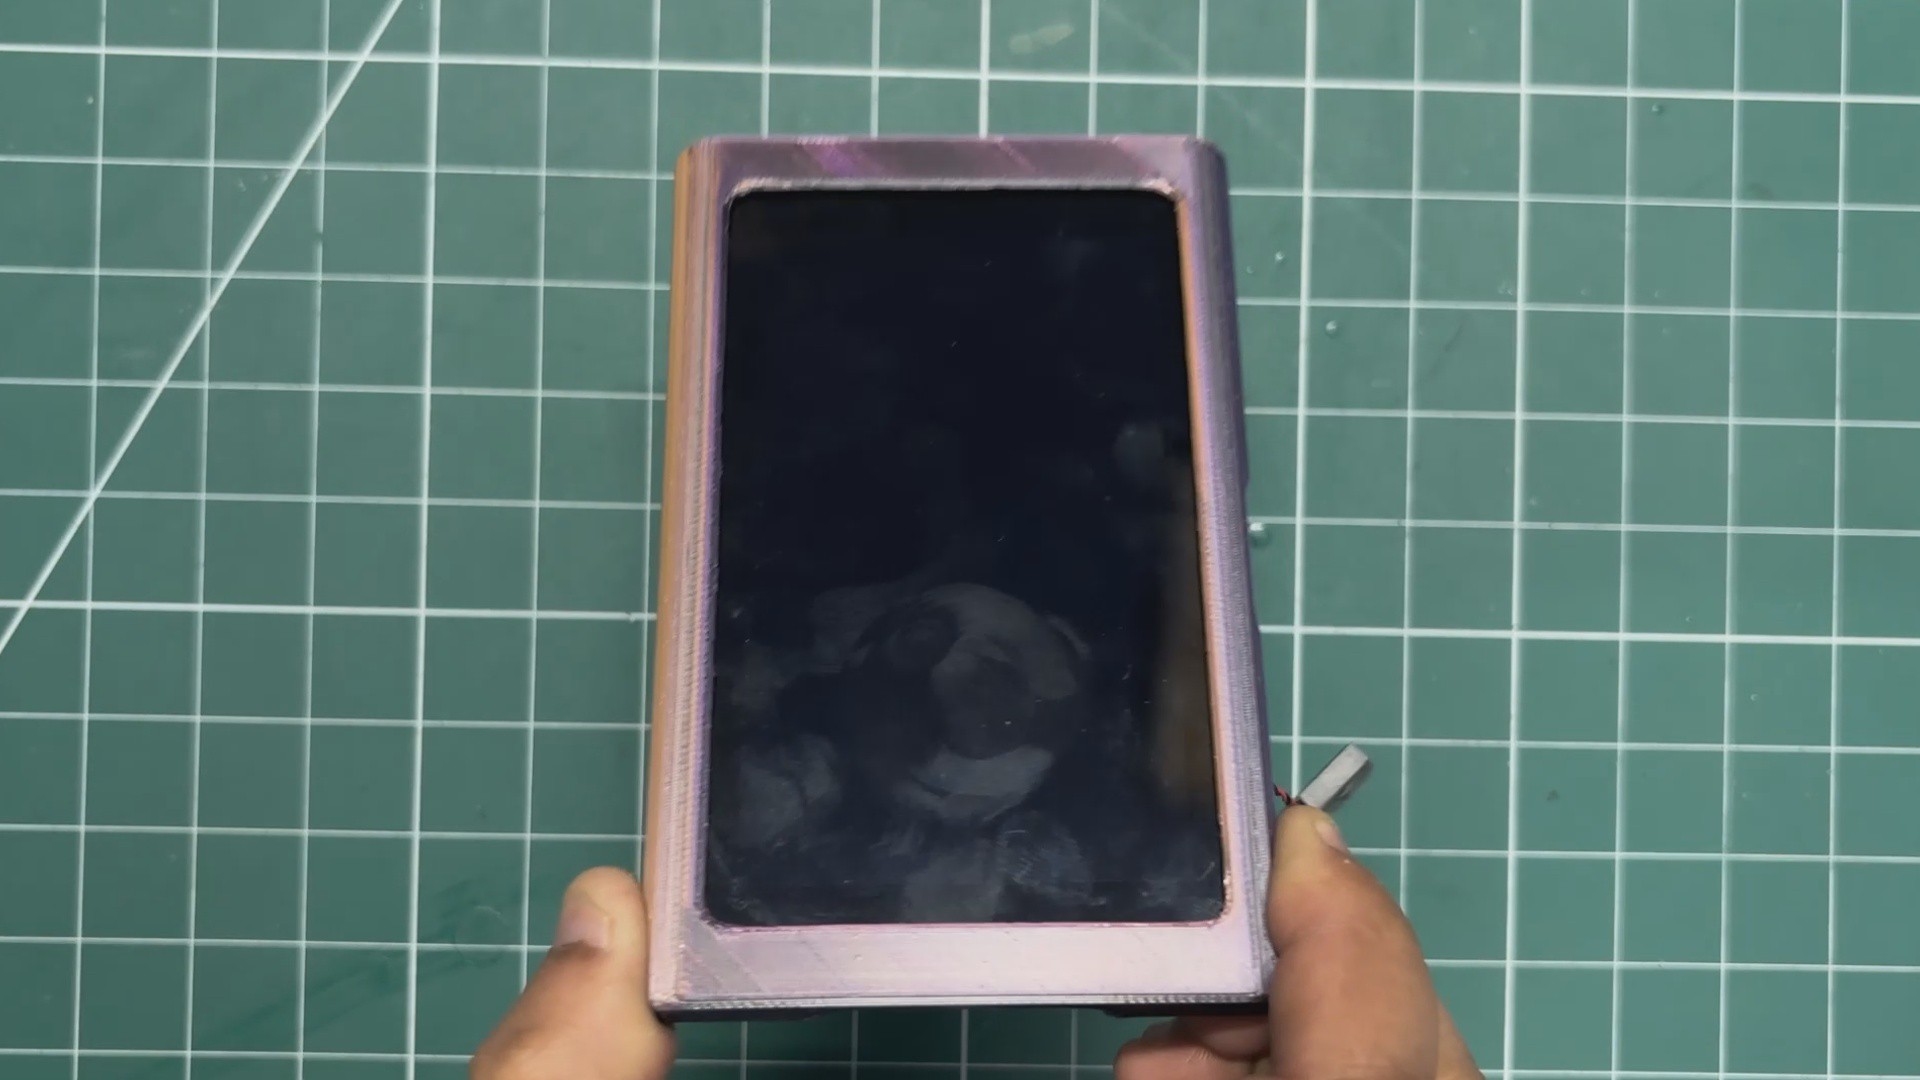
Once all the internal components are connected and positioned correctly, bring the front and back enclosure halves together and carefully close the assembly.
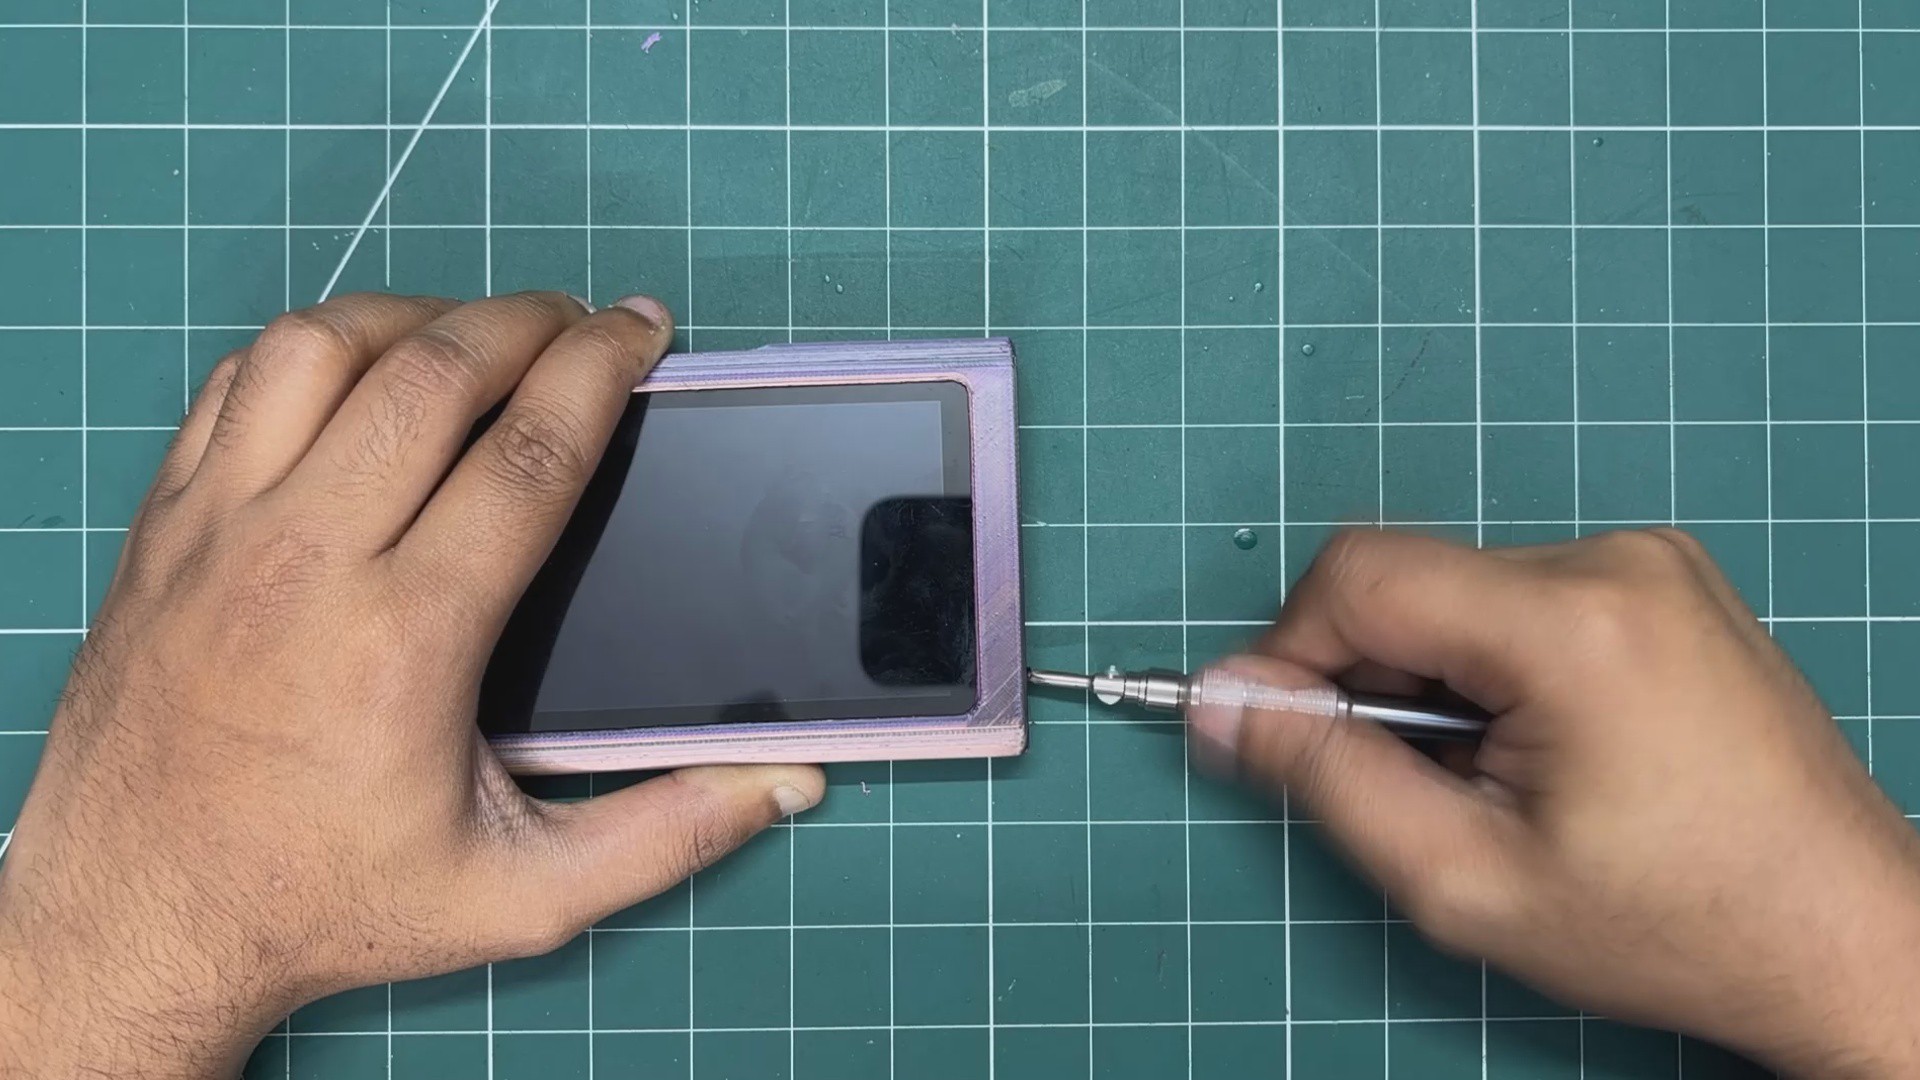
Finally, secure both halves permanently using four M2 screws—two from the top and two from the bottom of the enclosure.
 Arnov Sharma
Discussions
Become a Hackaday.io Member
Create an account to leave a comment. Already have an account? Log In.