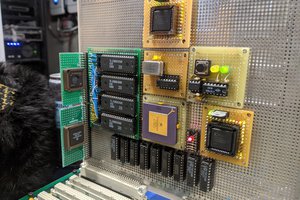
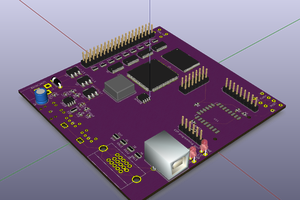
After completing the Nand2Tetris course, I had a hankering for creating an actual working computer that I could solder together and program. I took on this challenge mostly for the learning experience. My goals were to get some more experience with digital logic, learn assembly programming, and gain more familiarity with Kicad. I chose the 6502 processor since it was really well documented, fairly simple in design, and had a slew of projects I could glean information off of. These projects included The 6502 Home Computer found at grappendorf.net. This project, built by Dirk Grappendorf, was truly amazing. The level of detail he went to for the build logs and the design of the case and other areas of the computer were just incredible. This project greatly aided me in setting up the SID chip, and interfacing it with the 65C02. Another great project that helped me in getting my address decoding circuits up and running was Grant Searle's Simple 6502 Computer. Grant is a legend in my eyes. He seems to be a master at both hardware and software design. Along the path of learning, I also built an L-Star, designed by a true genius, Jac Goudsmit. Jac had the clever idea to interface the 6502 cpu with a Parallax Propeller microcontroller. The Propeller would take care of the address decoding, memory, and i/o. The L-Star works phenomenally well, and I had a blast just playing around with the Woz monitor and Apple 1 BASIC. It was the L-Star project that gave me the idea of using the Propeller to connect to the 65C02 by way of the ACIA UART. From there the Propeller outputs text onto a VGA monitor. The PS/2 Keyboard and the SD Card also interface with the Propeller chip. If you're interested in looking at some of my build/learning log, I attached it as a pdf to this project. Last but not least, the entire 6502.org forum provided a wealth of knowledge and many useful links in getting started with designing a 6502 computer.
Although this was my first computer design, I had a few design rules that I wanted to try and stick to. The first rule was that for the sake of diy, simplicity, and nostalgia for 8 bit computers of the 80s, I wanted to use mostly all through hole components. This led to a larger board size, but it would help make the finished board easier to test and modify later. I also stuck with a green solder mask, and red power led to complete the nostalgic motif. My second goal was to try and create a flexible design, that wasn't just a computer, but could also work as a learning platform later on. For this reason I tried to break out most of the unused i/o pins to edge connectors or headers that could be accessed if the need arose. Keeping with this second rule/goal, I also wanted to have a modular address decoding circuit, that I could modify and play around with. The address decoding part of the computer really fascinates me for some reason. This seems to be where a lot of the magic happens where the processor, the memory, and the i/o lines shake hands. If I found a better address scheme later on down the road, I wanted to be able to incorporate it. I finally decided on making the address module footprint the same size as a 40 pin .6" width DIP package. This way I could possibly use the Simple CPLD module I had created to act as a dynamic address decoder, or build/test any number of other schemes without needing to respin multiple boards. I've created 2 other decoding modules thus far, one giving 16K ROM, 32K RAM, and another with 32K ROM and 32K RAM (minus 256 bytes). Those modules can be found here. A third goal was to use as much of the original C64 SID circuit as possible in my design. To do this I dove into the original C64 schematics and tried to stay true to the original design as much as possible, complete with styrene filter caps.
For software I developed test scripts as I went to aid in the testing of new components. I guess this approach is similar to test driven development. This made it somewhat easy to see if modifying...
Read more » Jon Thomasson


 Jason Westervelt
 london almida
 Blair Vidakovich
 Marius Taciuc
Thank you for your kind words about my #L-Star project! I'm glad you enjoyed building it and that it inspired you to do Great Things (TM) yourself. By the way, I was not the first one to figure out you could bitbang a 6502 with a Propeller, that was Dennis Ferron who made the Prop-6502 Laptop project.
Keep up the good work!