Close
0%
0%

Broke Hackers' Model Railway

Cheap, fully automated model train system with 99.9999% 3D printed parts.

Similar projects worth following
I always wanted a model train but seeing the astronomical prices I instantly get rid of that idea, until now. This project's goal is to create a cheap, 3D printed, fully automated model railway system which can be built at home. The model railway is built using the cheapest and fewest parts possible. The brain of the project is a Raspberry Pi, so the entire system can be controlled over the internet from any device with netwok access. It's perfect for home modeling enthusiasts, and for learning and teaching electronics, programming, CAD modeling, 3D printing, etc. The whole project is open-source: the schematics, the 3D models, the source codes are all available on GitHub. This project is as simple as possible: no RF, no GPS, no FPGA, no CAN bus; only basic electronics and AVRs, with a little C programming. So will it change the world? Probably not, but we'll see...

The goal of the project is to create a cheap, simple, open source, automated, 3D printed, connected, DIY model railway system. Here are the details about why can it be useful and how can it help the world.

THE STANDARD KIT

Since the project is more like a DIY kit with individual parts rather than one single product, I collected some basic parts into one theoretical product called "standard kit", to be able to compare the prices, and the components. The raw material cost of the kit is about 93 USD. (and almost half of that is the cost of the raspi) If that's not cheap for a starter model railway kit, I don't know what is. The components needed for the standard kit are listed below, and you can also view a detailed bill of materials in excel format here.

Contents of the standard kit:

  • 1x Master station (the one with the raspi and the power supply)
  • 1x Normal station
  • 2x Train
  • 1x Right switch

HOW IT WORKS

Read more »

  • 1 × Raspberry Pi
  • 1 × MicroSD card 1GB is more than enough
  • 1 × Laptop charger At least 60W
  • 2 × ATmega328P-PU Microprocessors, Microcontrollers, DSPs / ARM, RISC-Based Microcontrollers
  • 2 × ATtiny84A-PU Microprocessors, Microcontrollers, DSPs / ARM, RISC-Based Microcontrollers

View all 59 components

  • Laying the tracks

    Szabolcs Lőrincz07/25/2015 at 13:52 0 comments

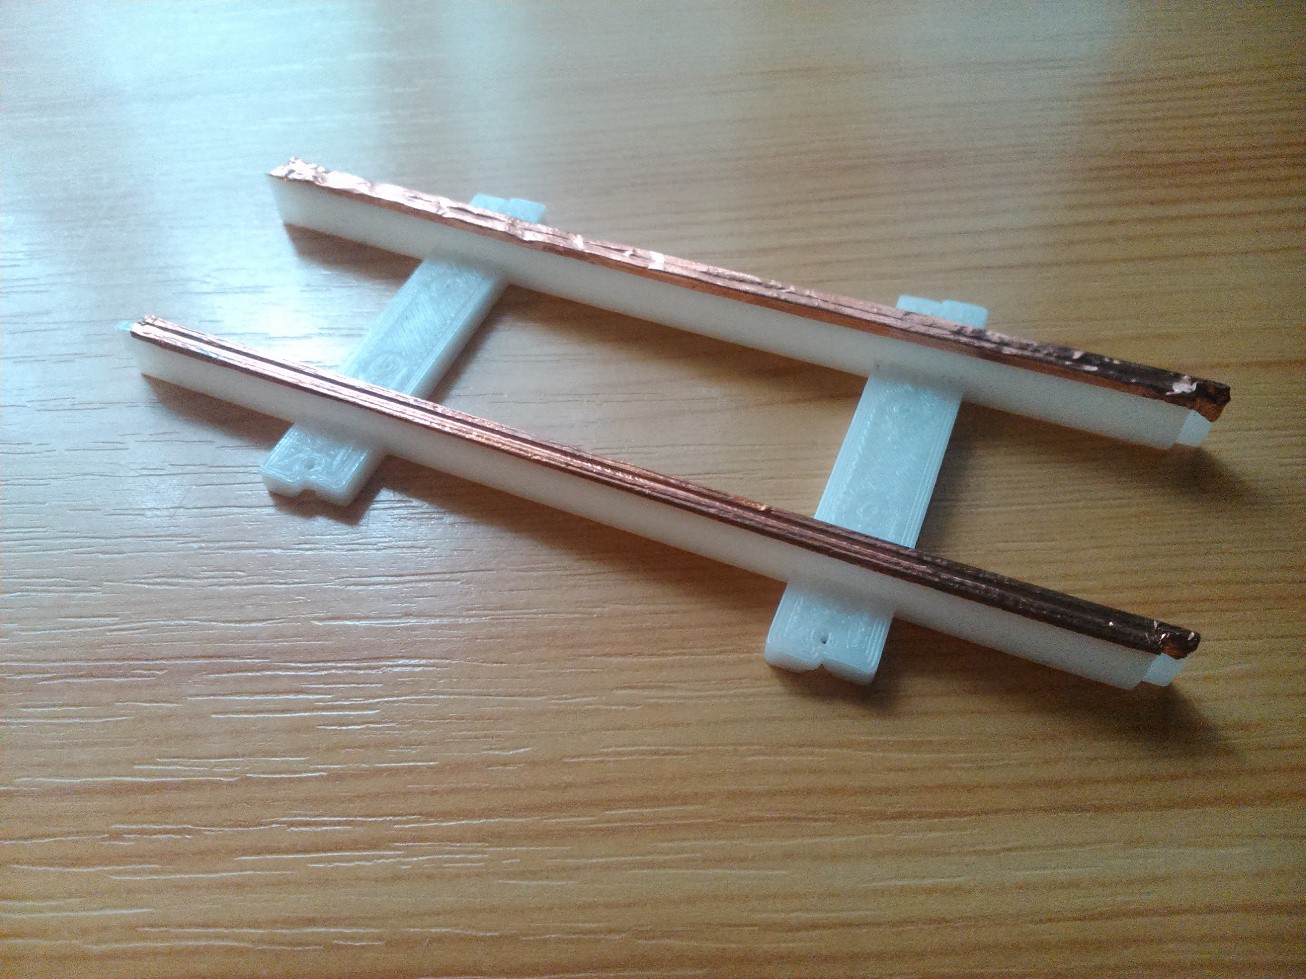
    After a successful test run, it was time to take my build to the next level. Instead of using copper wire and soldering, I came up with a much better solution: tape the track surfaces with conductive foil. After a short searching, I found this on ebay. It works perfectly, low resistance, easy to work with, solderable. Also, the tracks look somewhat better now.

    Read more »

  • First steps, test run

    Szabolcs Lőrincz07/21/2015 at 19:43 0 comments

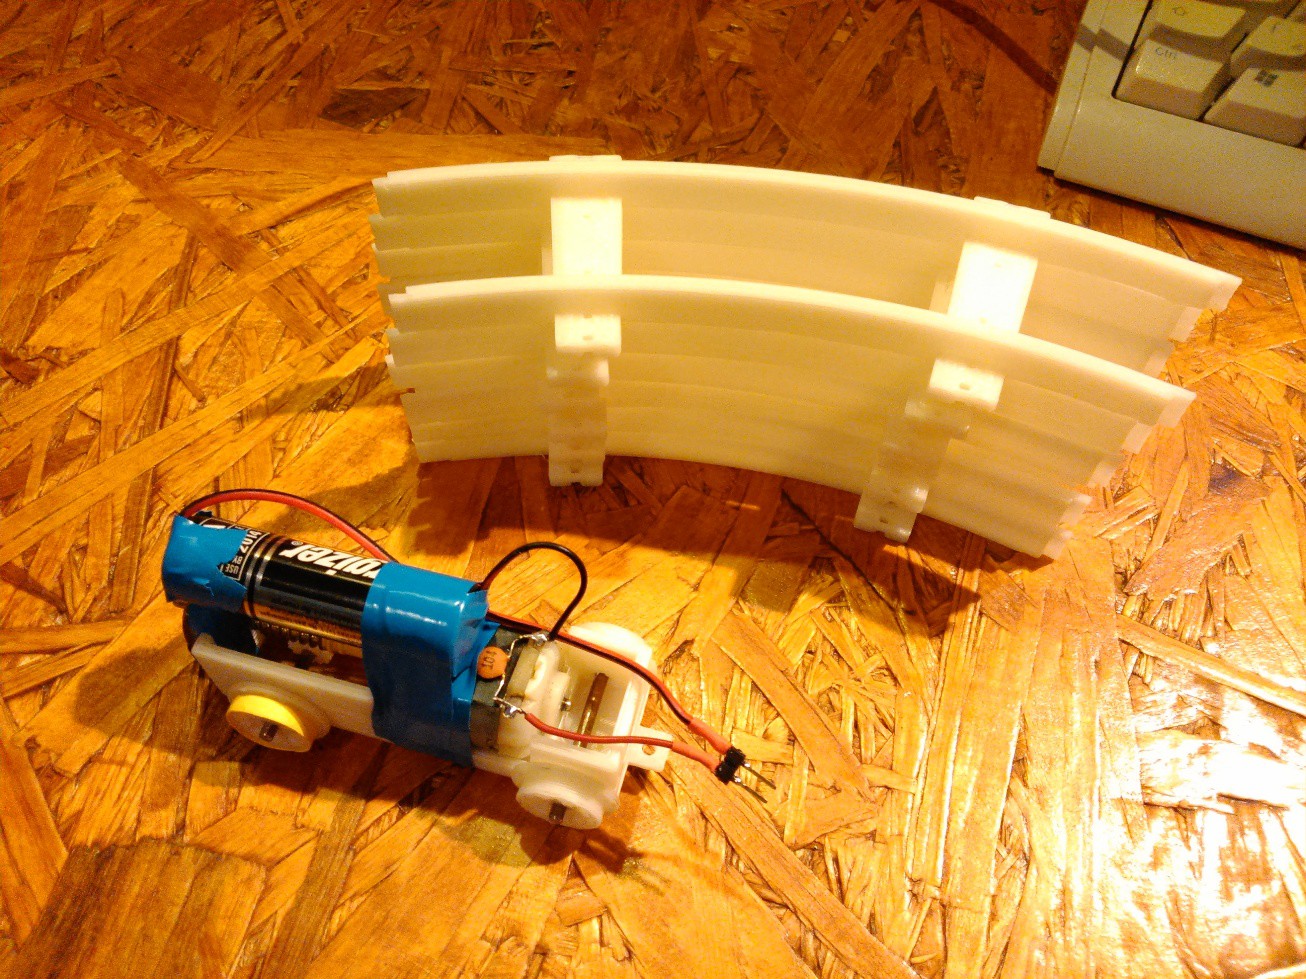
    It is finally time to assemble the whole creation. The parts are printed, so let's put them together! For now, I didn't use the electronics stuff, I just simply wired an AA cell to the motor to keep things easy.


    Read more »

  • Newly soldered electronics

    Szabolcs Lőrincz05/26/2015 at 19:35 1 comment

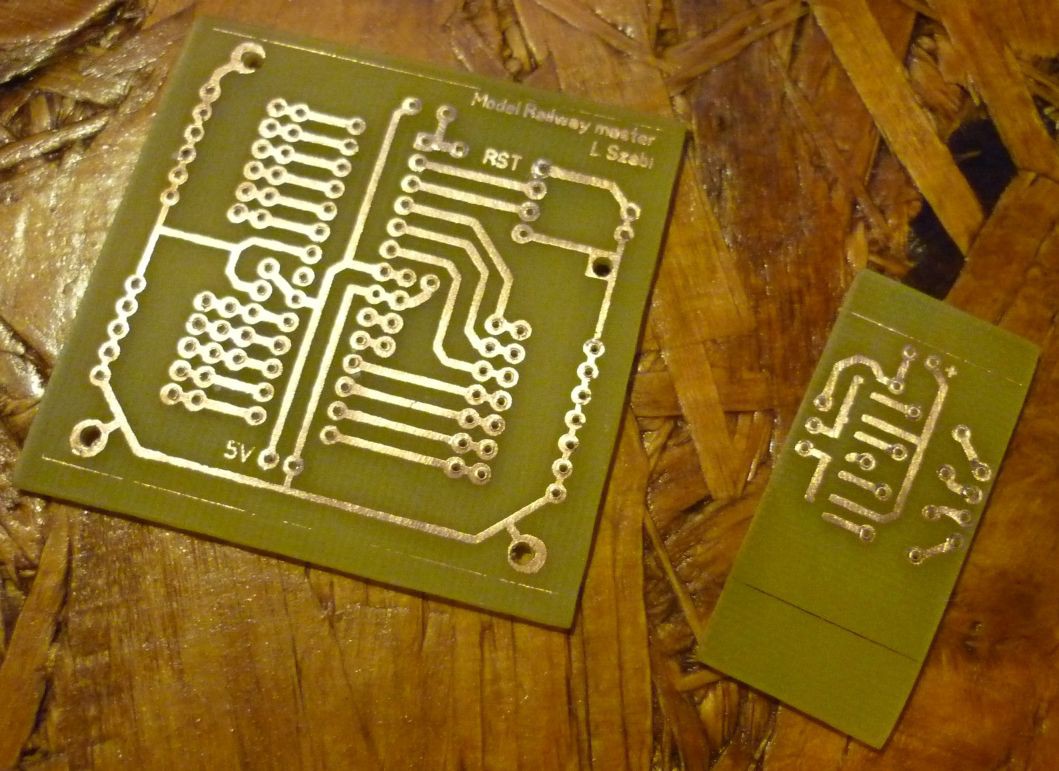
    I recently built the (hopefully) final master station and train h-bridge pcbs. Here are they, just out of the acid, freshly drilled:

    Read more »

  • First test print at last

    Szabolcs Lőrincz05/14/2015 at 10:43 0 comments

    So finally I printed the first rails. I came out just fine. The bottom rail is a very early prototype with embedded copper wire for as conductive stuff, it'll be better when the whole thing will be together.

  • Rebooting

    Szabolcs Lőrincz05/13/2015 at 16:00 0 comments

    Given up on waiting for Makibox, and ordered another printer from eBay, a Sintron Prusa i3 (take that, Jon Buford). It arrived, and I managed to make it work! So I started working on this project again, brand new code is available on GitHub for the new communication protocol. ( I'm using timer interrupt instead of _delay_ms this time, it's much better). Anyway, first images of test prints coming soon!

  • Motor control FTW

    Szabolcs Lőrincz11/02/2014 at 17:01 0 comments

    After a short break, I finally have some update. First, the motor. It works! The H-bridge is perfect, and runs only from the USB power it gets from the MEGA. Also, I get rid of the voltage-divider resistors and get a proper CD4050 for the Raspberry-MEGA UART connection.

    I also figured that connecting every device again and again one by one at every power-up can become really annoying. Who wants to do that? Not me, obvoiusly. So I came up with the idea of static IDs. Devices with static ID have to be connected to TWPC line when the master is offline. Then, when it starts, they'll be connected automatically. Connecting devices with auto-assigned ID is still possible though.

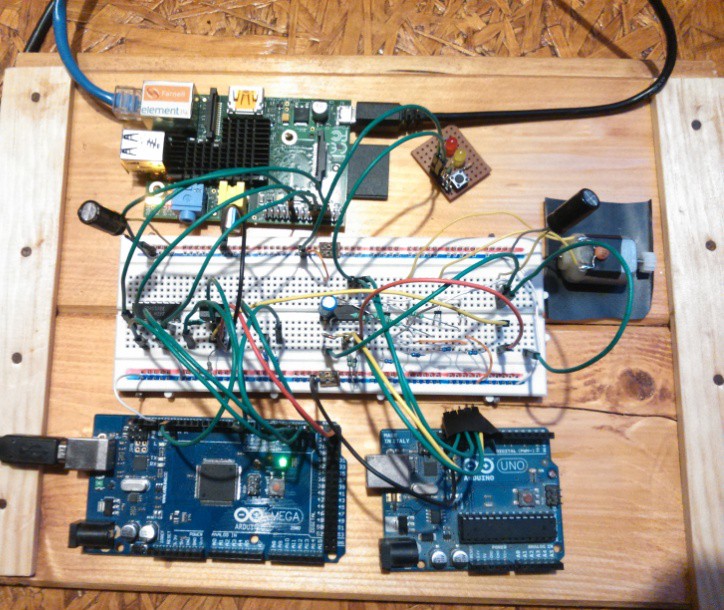
    Here is the new breadboard setup with the H-bridge:

    That's for the electronics, but that's not all I got. I designed brand new rails with holes and stuff to be modular. I also designed switches (only the static part yet) and assembled a whole train station. Go to my GitHub to see the STL files along with the codes and schematics.

    Still no news from the 3D printer...

  • Motor control

    Szabolcs Lőrincz09/07/2014 at 12:48 0 comments

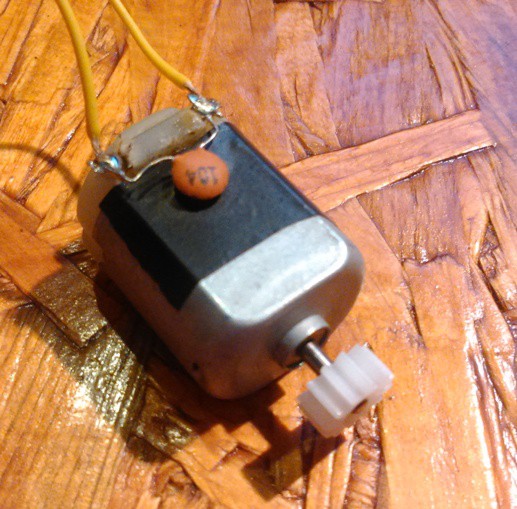
    I started developing the motor control part. The motor will be driven by a MOSFET H-brigde with PWM. Here's the motor of the train:

    As you can see, It's a basic, common DC motor, nothing fancy.

    Read more »

  • Power on hands

    Szabolcs Lőrincz08/20/2014 at 19:38 0 comments

    Finally managed to power the AVRs through the TWPC bus. It won't drive a motor yet, but it's enough for the MCU and some LEDs.

    Read more »

  • Model Railway control over the interwebz

    Szabolcs Lőrincz08/20/2014 at 15:35 0 comments

    Now that the circuit is complete, let's see the controls. The model railway is connected, meaning you can control it from anywhere from any device with a browser. All you need is a RaspberryPi and internet access. The Raspberry runs Apache2 with the control panel, and it communicates with the master station through UART. Then the masters sends out the commands for the slave devices through TWPC. You can control every device with one click.

    Read more »

  • One-wire communication protocol

    Szabolcs Lőrincz08/05/2014 at 17:48 0 comments

    The next step is the communication. Not the main protocol, that will come later. This is for determining position. There will be metal plates between the rails and a contact on the bottom of the engines. When these touch, the engine's AVR will sense the pulse and send back its ID. That's all. For now, I prototyped this with an Arduino UNO and MEGA.

    Read more »

View all 11 project logs

  • 1
    Step 1

    Print, build, program, enjoy!

View all instructions

Enjoy this project?

Share

Discussions

hajinaZEER123 wrote 01/29/2024 at 10:39 point

i am also very intrusted in train modles 

  Are you sure? yes | no

jenniferlopez72663 wrote 07/05/2023 at 12:28 point

There has been a great deal of value to me in my involvement with the project. Would like to share it with the train ticket team so they can also read it and implement something new.

  Are you sure? yes | no

Xasin wrote 01/05/2019 at 18:21 point

Ahhhhh this is fantastic!

I remember wanting to build cute model train stuff after getting to play with some of the devices at my Grandma's place, but oh BOY are you right about the prices.

A 3D printed alternative is cool, and using copper tape - smart move!

Any interest in replacing the Raspberry Pi with an ESP32?
It'd be a bit smaller and cheaper, but can be just as powerful, and I've had a really good time programming it.

  Are you sure? yes | no

Szabolcs Lőrincz wrote 01/06/2019 at 23:37 point

I'll definitely replace the pi, as it's currently the far most expensive part in the system, and a bit overpowered for it's job. I'm thinking about an ethernet driver for arduino (possibly ENC28J60), but an ESP would also be good.

I also have some other cool ideas, once I finally get to work on this again. Maybe in the summer.

  Are you sure? yes | no

Xasin wrote 01/07/2019 at 06:40 point

Heh, don't I know how that is. Take your time with these projects, they're just fun, so no need to rush them. 

But please, do keep us posted! I'm definitely going to play with something like this soon enough! 

  Are you sure? yes | no

thygate wrote 04/13/2018 at 14:37 point

love the worm drive made from a screw !

  Are you sure? yes | no

Gandalf Greybeard wrote 06/20/2017 at 18:30 point

Amazing! I love it! Now is that "99.9999% 3D printed parts" by weight or by volume? LOL

  Are you sure? yes | no

Frédéric Druppel wrote 01/04/2017 at 21:50 point

That's amazing ! I really like this project ^^

  Are you sure? yes | no

Adam Fabio wrote 05/27/2016 at 03:17 point

This is great! Model trains should be a right of passage for young hackers. It's unfortunate that the commercial ones have gotten crazy expensive. BHMR is the perfect solution!

  Are you sure? yes | no

Szabolcs Lőrincz wrote 05/27/2016 at 10:04 point

Well 3D printers are becoming more and more widespread, so new opportunities open up to hackers, just like this one.

  Are you sure? yes | no

emiliollbb wrote 05/23/2015 at 10:48 point

Wow!!

I've been thinking a way to do that since child!!

  Are you sure? yes | no

AVR wrote 05/22/2015 at 05:22 point

I grew up playing with model trains, keep up the good work!

  Are you sure? yes | no

Szabolcs Lőrincz wrote 05/22/2015 at 09:20 point

Thanks, I will!

  Are you sure? yes | no

Shane Morris wrote 09/01/2014 at 00:49 point
I'd love to use this system for a layout I am designing using 3D printed locomotives. Can you comment on using a 5VDC coreless motor with the TWPC system, or would I be better just using a straight DC motor?

I'm thinking of using Tinyduinos on the locomotives themselves, with a Tiny Motor Shield.

I'm willing to help out in any way I can as I build my own version of the system - I believe I have a github account...

  Are you sure? yes | no

Szabolcs Lőrincz wrote 09/01/2014 at 13:42 point
Sure, I'm planning to use plain DC motors with MOSFET H-bridge and PWM control. I'll post the schematics and code soon. If you can give me help, I'll gladly take any!

  Are you sure? yes | no

Szabolcs Lőrincz wrote 09/01/2014 at 13:45 point
You can use any type of motor you want, I just chose these simple motors because I already have them and they're easy to operate.

  Are you sure? yes | no

Shane Morris wrote 09/02/2014 at 04:56 point
Is there any way I can contact you? I've had some ideas, some of which may or may not be applicable to your system...

By the way, I've just gone with a standard 6VDC motor through a H bridge, nothing too fancy, controlled by an MSP430 programmed with Energia.

See: https://github.com/KensCode/TrainMotor and: http://www.instructables.com/id/Wii-Nunchuk-Controlled-Model-Train/?ALLSTEPS for some hints on where I'd like to go.

  Are you sure? yes | no

Szabolcs Lőrincz wrote 09/02/2014 at 13:25 point
You can write to me on lorincz.szabi at freemail.hu. What I'm now working on is the H-bridge motor controlling, and the power suppliment. I'll post more pictures and codes in the weekend, but I'm not at home currently.

  Are you sure? yes | no

shamylmansoor wrote 08/04/2014 at 18:32 point
I always wanted to do this! Hope to see this project finished so I can also build one for my hackerspace!

  Are you sure? yes | no

Szabolcs Lőrincz wrote 08/05/2014 at 09:10 point
Thanks, I'll do my best.

  Are you sure? yes | no

Similar Projects

Does this project spark your interest?

Become a member to follow this project and never miss any updates