Andre Baptista
-
Homebrew CPU Webring
01/11/2019 at 01:02 • 2 commentsNow we are honoured to be featured on the great https://www.homebrewcpuring.org!!!
Thanks!
-
New Year commitments
12/19/2018 at 15:46 • 0 commentsAs it's standard on all end of years, I'm trying to make a promise and finally make this thing work. It's already more than a year and a half since I got into this trap.
The deadlines are as follow:
- Jan - make the ALU to work standalone (I'm now stuck at this problem)
- Jan - finalize and order Control Unit PCB
- Feb - finalize and order Registers PCB
- Feb - assemble Control Unit PCB
- Mar - assemble Registers PCB
- Mar - put it all together
- Mar - design and order the Program Counter and memory PCB
- Apr - assemble Program Counter and memory PCB
- Apr - put it all together again
Then that's it. Let's cross our fingers and hope that, on the second anniversary of the project, the first full version would be running on real hardware.
Thanks for reading.
-
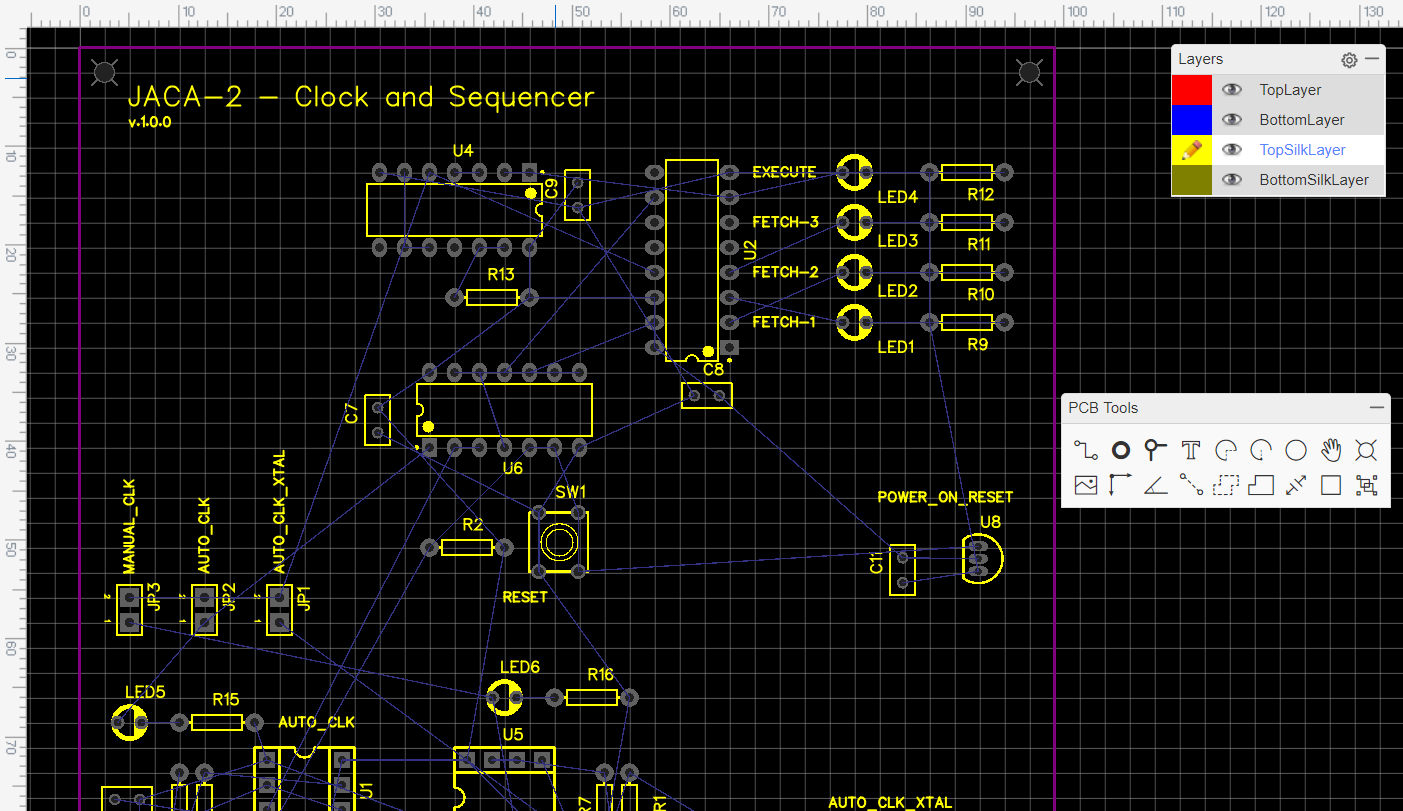
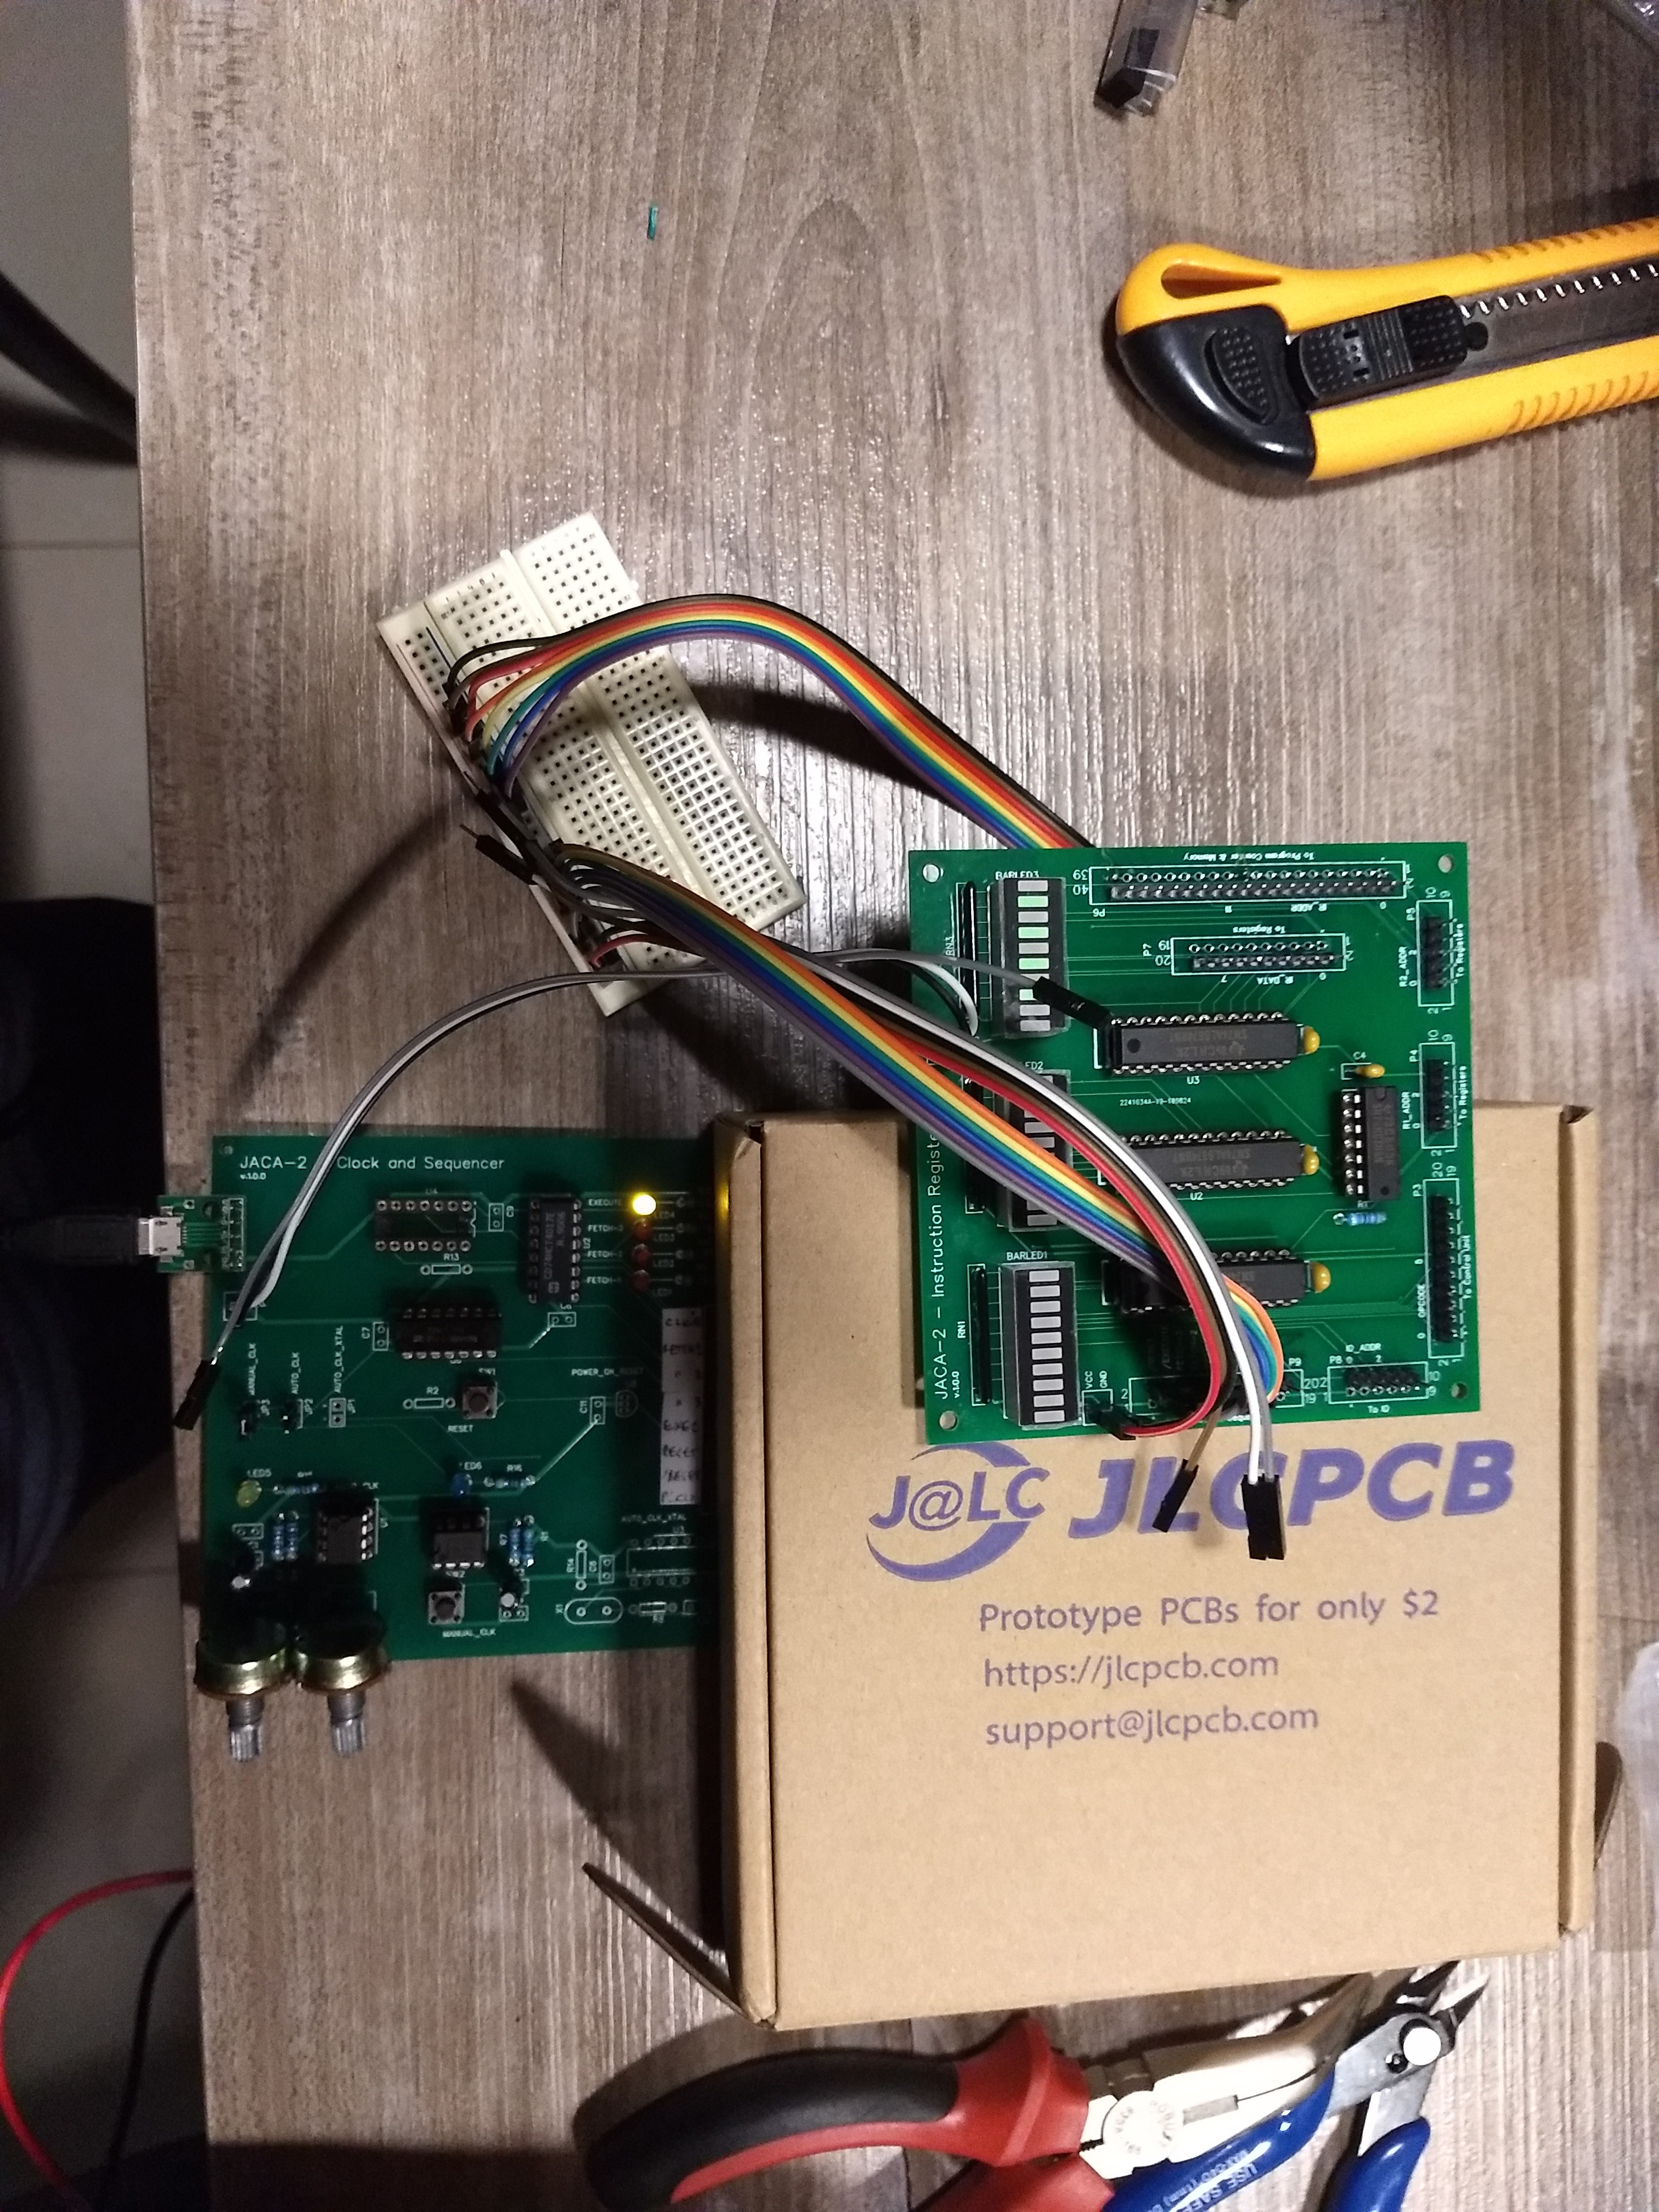
Loading instructions from memory, now with PCBs
11/20/2018 at 23:49 • 0 commentsI connected two modules that are now converted to PBCs, the Clock and the Instruction Register. Between them is the Program Counter and Memory, still in a breadboard. This is the last module I plan to turn into PCB.
Everything worked fine, despite some stupid mistakes I made (these chips don't fry easily).
This video shows the modules working together:
Thanks for reading and see you next time.
-
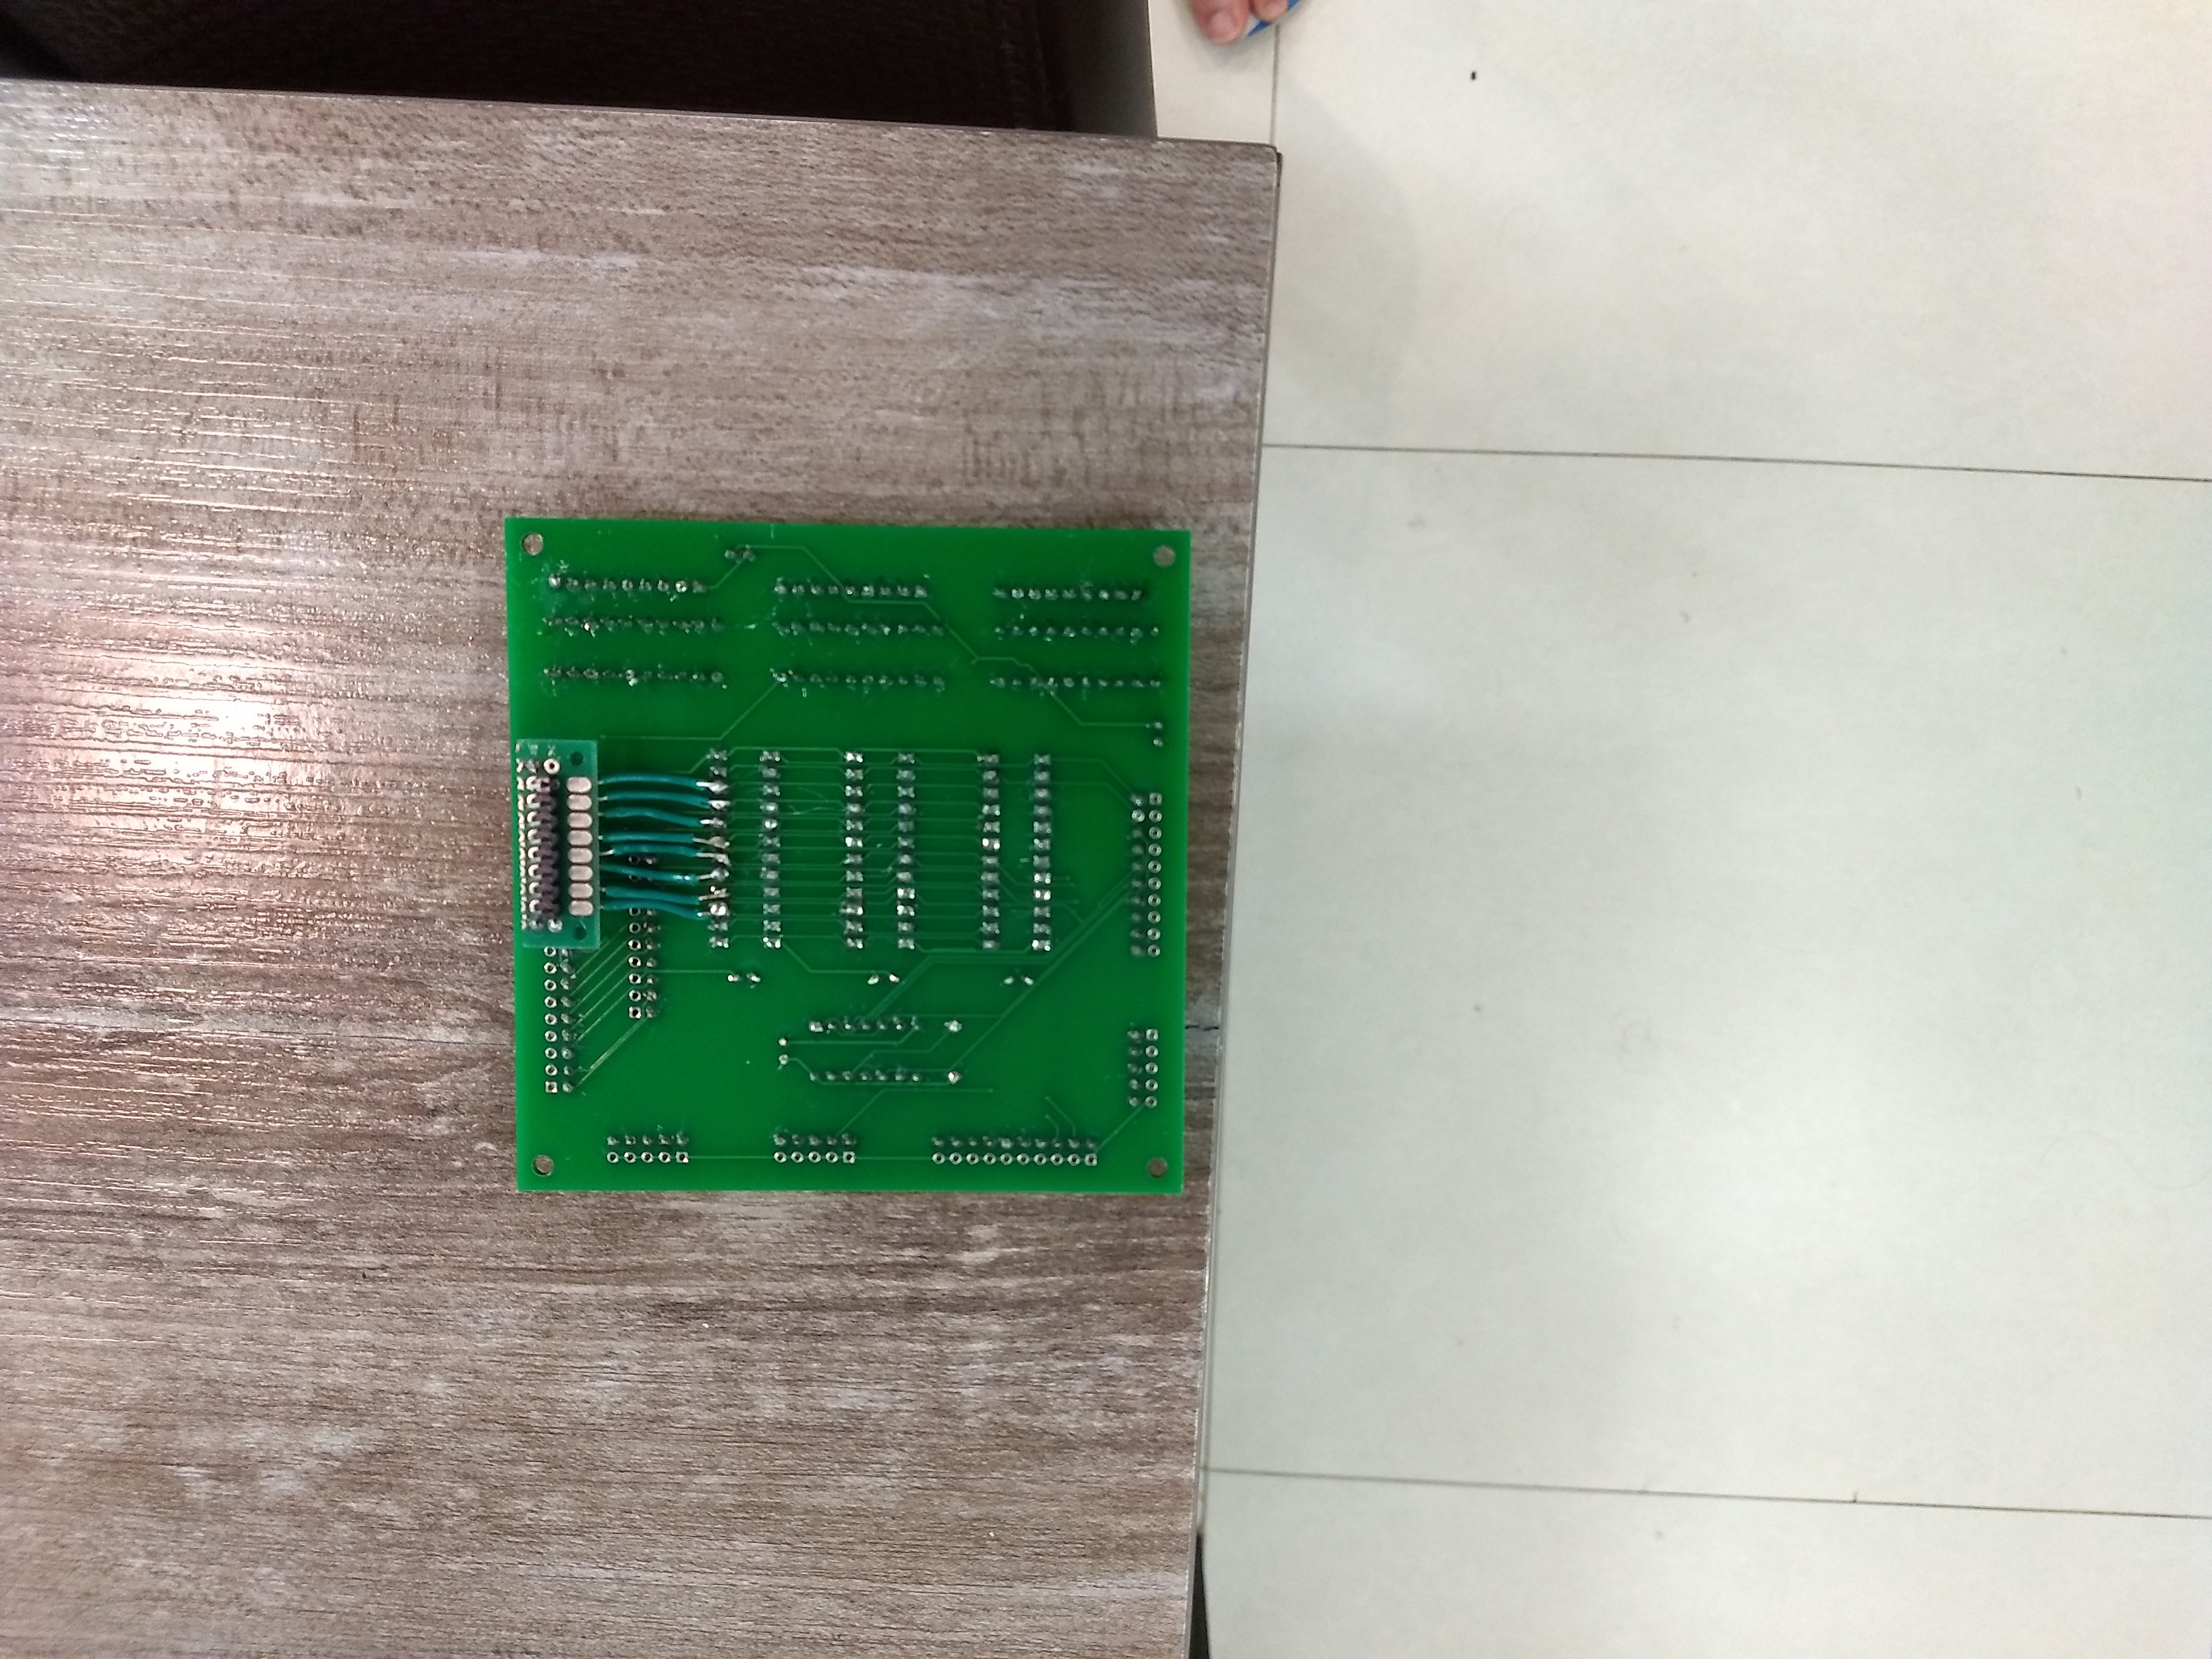
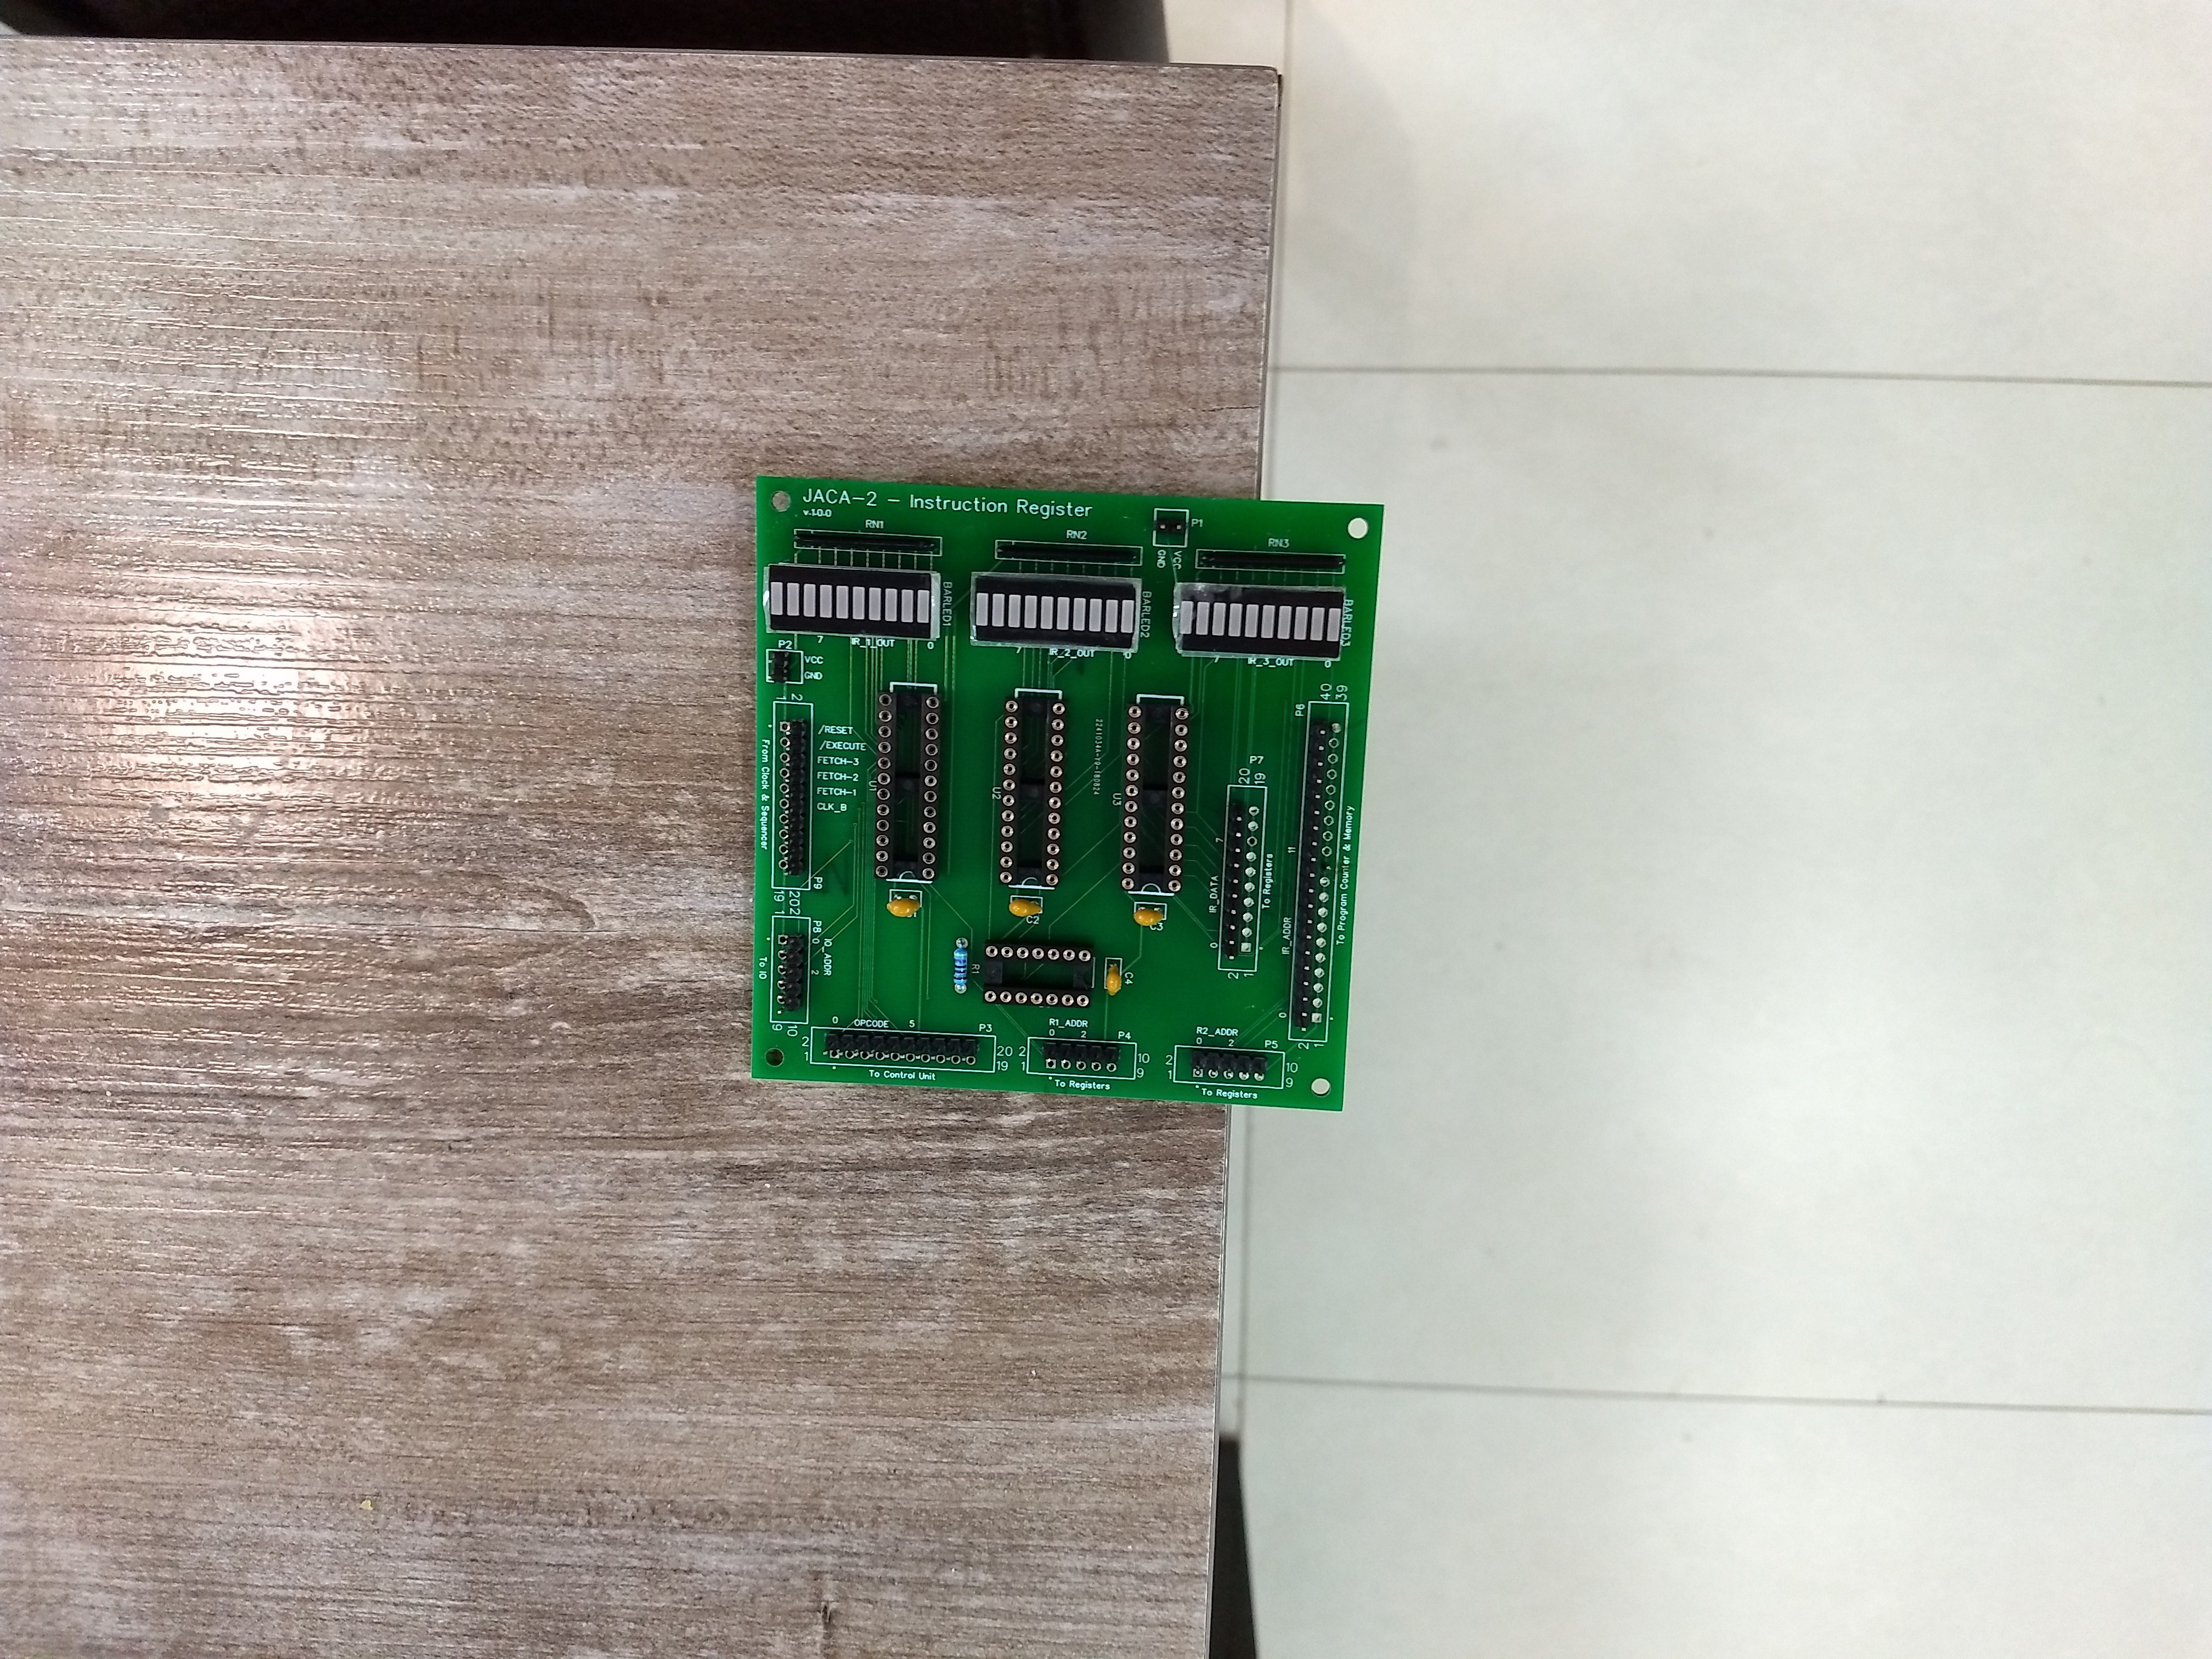
Instruction Register PCB working
11/09/2018 at 11:01 • 0 commentsFinally build the IR PCB and it works fine.
One issue: I forgot a pin header and had to make an ugly workaround:
![]()
![]()
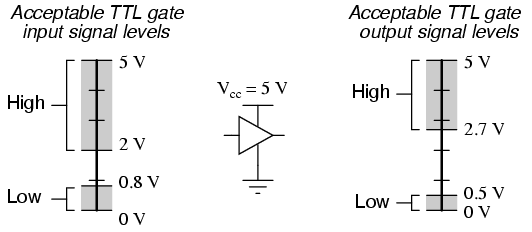
Other (small) problem: the green leds are very weak (look the led bar at top, it is showing the 01010101 pattern). I measured the 74ALS874 output and it reads only 3,5V, and while it is still inside the TTL standard, I am used with 5V on outputs. So I will need to lower the resistors but it is a simple and painless change.
![]()
TTL accepted voltage levels:
![Image result for ttl voltage levels]() Thanks for reading.
Thanks for reading. -
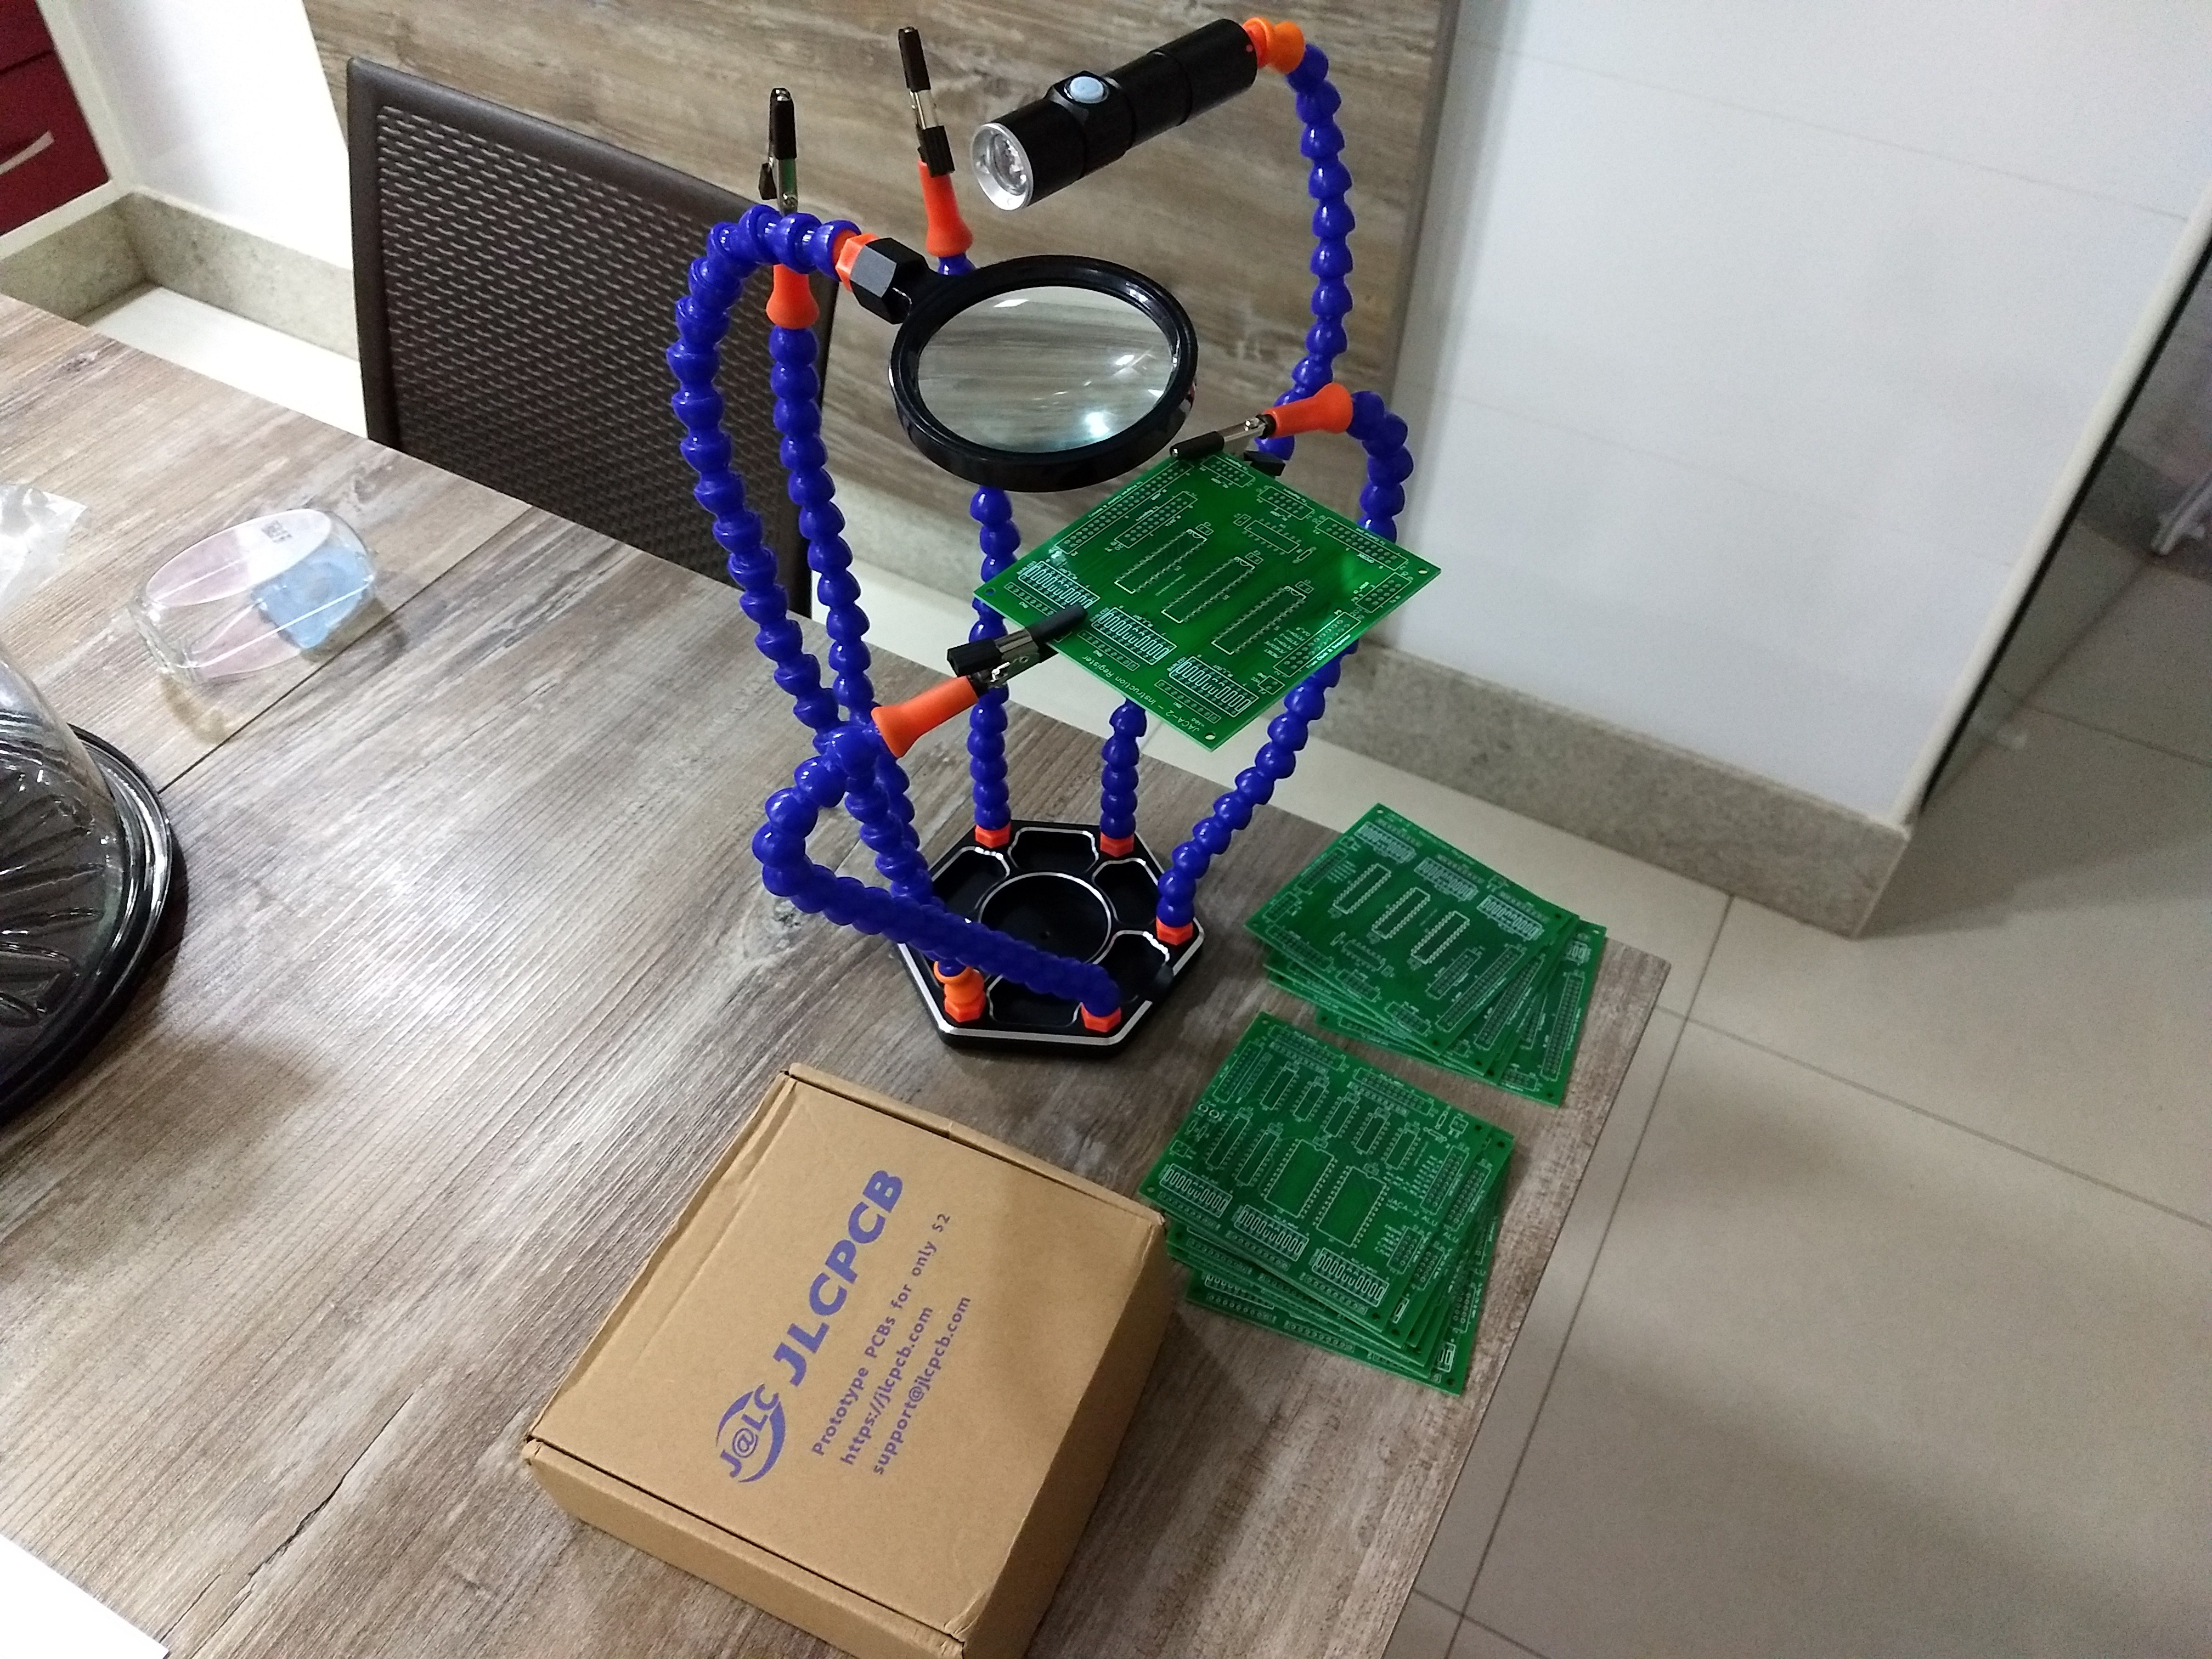
Two more PCBs
10/12/2018 at 00:35 • 0 commentsLong time since last update.
Meanwhile, today two packages arrived: 2 PCBs and one octopus board support:
![]()
See you next time.
-
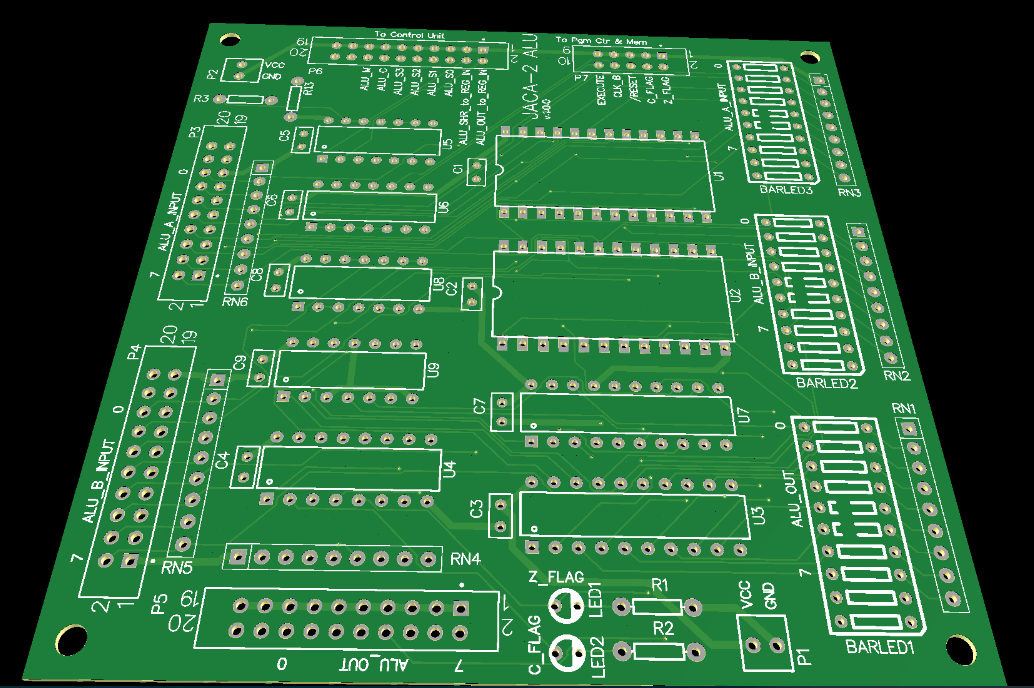
Newborn, two more PCBs ordered
08/25/2018 at 15:48 • 0 commentsMontly update (there was a time I updated this project 2 or 3 times a week...):
Thanks to the arrival of my second son, time for project shrunk to almost zero.
Finally I ordered two more PCBs (expected time to delivery: 4 weeks), lets see the modules status right now:
- Clock and sequencer: Completed and working fine;
- Program Counter and Memory: ?
- Instruction Register: Ordered;
- Control Store: 90% designed, will be ordered this week;
- ALU: Ordered;
- Registers: 20% designed.
Since a log entry without pictures is useless, lets see the 3D view of the two just ordered modules:
Thanks for reading.
-
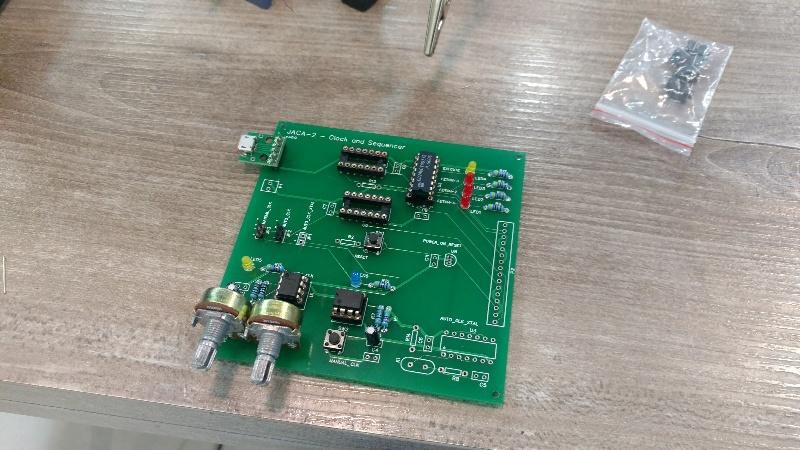
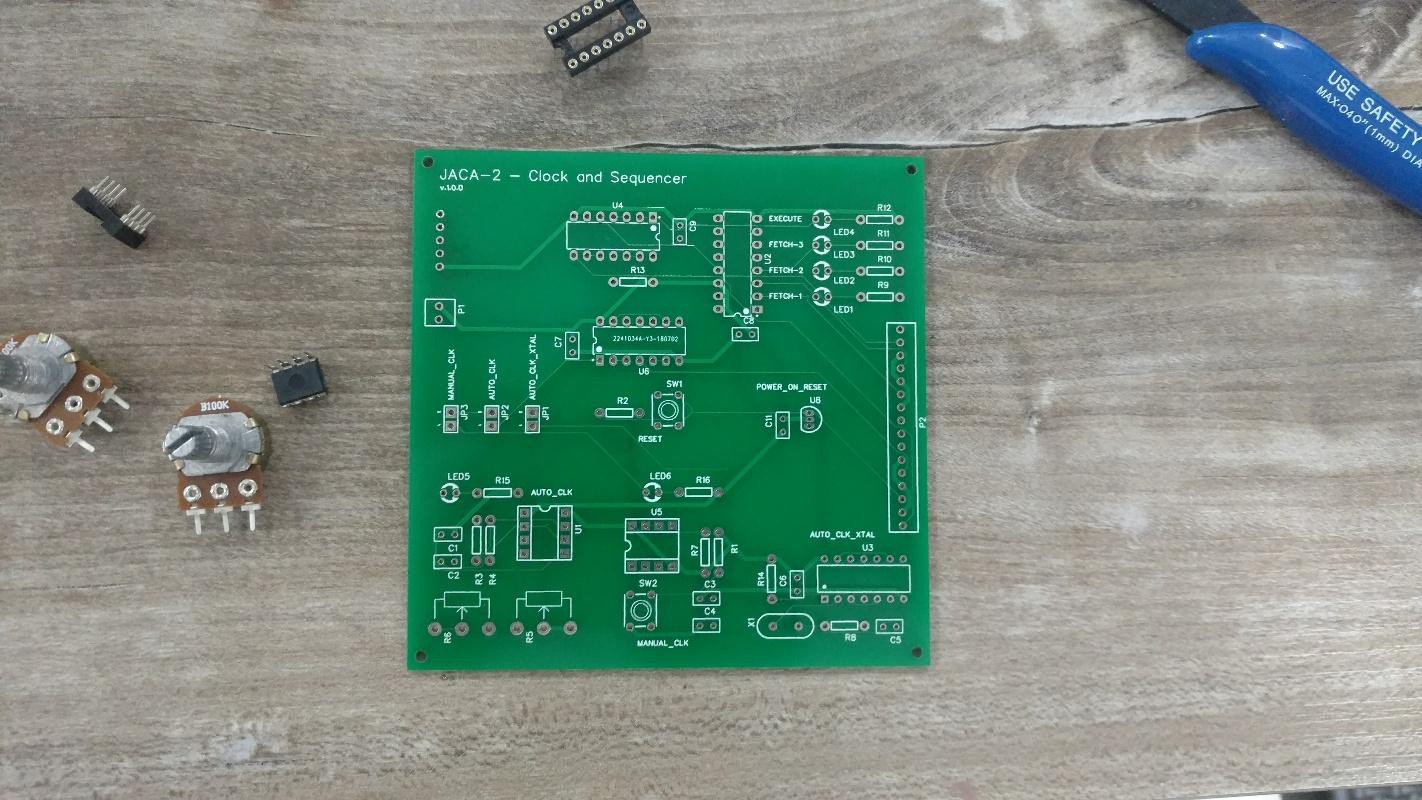
First PCB
07/30/2018 at 18:34 • 0 commentsFinaly the PCB of the Clock and Sequencer module arrived:
![]()
![]()
Apart from small mistakes (e.g. the two potentiometers where placed very close) everything went generally well and I'm very satisfied with the overall quality of the PCBs (https://jlcpcb.com/).
I hope in the next weeks I could manage to design and order the other modules.
Thanks for reading.
-
World Cup, vacations and PCBs
06/24/2018 at 22:34 • 2 commentsAfter a long time, I'm finally updating the prjoject.
Despite being on vacation, very small progress due to watching World Cup (another one just in 4 years).
I was stuck in the indecision between:
1 - Stick on breadboards, trying to find good ones;
2 - Use universal PCB boards, like these ones:
![]()
3 - Go right to the definitive PCBs.
This last one is my choice, and this is the first drawing in EasyEDA (unfinished):
![]()
Thanks for reading.
-
Logisim video of computer running test programs
05/12/2018 at 23:01 • 0 commentsApart from the extreme frustration because of the bad connections on breadboards, I did something I was postponing for a long time: a small video showing the computer working in Logisim simulator, doing things like write in the LCD display (the ubiquotous Hello World...), playing with leds on the LED 8x8 Matrix, and even assembling (in the Assembler made by me) a simple Tetris clone and running it.
Enjoy:
Thanks for reading.
-
Registers A and E working
05/03/2018 at 16:48 • 0 commentsSmall update: now there are two registers working: A and E. Next step: connect the ALU module and perform operations with them.
Video:
PS.: probabily due to poor quality breadboards, i'm running into problems of bad connections that are driving me crazy...
Thanks.
JACA 1 & 2 Homebrew Computer
JACA - Just Another CPU Again Homebrew CPU, starting by a simple POC 4-bit CPU on circuit simulator soft. (done), then 8-bit (in progress)
 Thanks for reading.