artist_edge
-
Lessons Learned
06/27/2017 at 23:47 • 0 commentsFollowing the rule of "awful dress rehearsal, flawless show," the show went well especially the technology pieces.
That said, there are some key lessons learned and places to improve upon for the next iteration:
- Rechargeable batteries that do not require opening the enclosure. This was so time consuming for 12 tubes. The change to LiPo can lower the weight as well.
- Moving to another soldered in or robust connector power source and connector. This was a key pain. The first point can probably resolve this.
- Use a slow frequency sampling accelerometer to resolve the issue of which end is up. Requires a new driver, display improvement to handle orientation , and support feature in light design software (gosh, still need to upload here).
- If the tube lost power or connection, it lost the time stamp and was stuck back in "bootloader" awaiting the synchronizing tone. Also if we wanted to rehearse from middle of a piece, the lighting was not available. Ability to time synchonize to the rest of the system even if not from the beginning would be helpful.
- Port light design software to an digital audio workstation plug-in model. Audacity allows for people to develop plugins using Nyquist(Lisp). This would allow each tube to be an "audio track" in the DAW and be able to play back things with the music immediately in both simulator and on-target.
- Following from this, over the air tube update would be great to update the programs on each tube as need be. Once again another reason to not open the device. Even better: Use the DAW plug in to support OTA.
-
Getting Into The Guts of It All
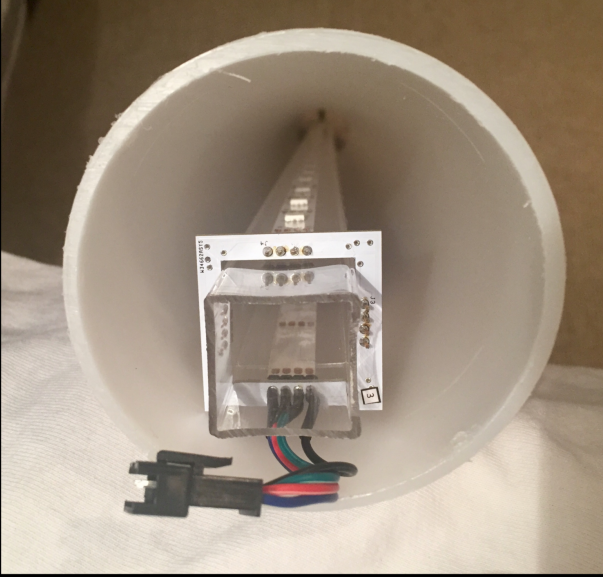
06/22/2017 at 00:39 • 0 commentsWe are servicing the tubes in preparation for this weekend's show. It's a good time to take some pictures of the tube internals.
When you first pull out the central portion of the electronics (see directions for assembly instructions), You can see the battery section which is shown without the stabilizing cover, LED strips along length, and then end cap with the wireless module and microcontroller.
![]()
When seated inside the tube without the main board, the placement of the LEDs is clear. The Connector provides the bus connection to light up whole tube.
![]()
Here is a close up of the wireless module and how it is affixed to the central tube. There is some room for improving robustness but live and learn.
![]()
-
Getting Closer - Video
06/12/2017 at 23:22 • 0 commentsThis weekend we starting seeing results. Checkout this snippet of the bigger piece using the light tubes.
-
2 weeks before we are live
06/09/2017 at 07:47 • 0 commentsOnly a few weeks to go before we roll out this project in public.
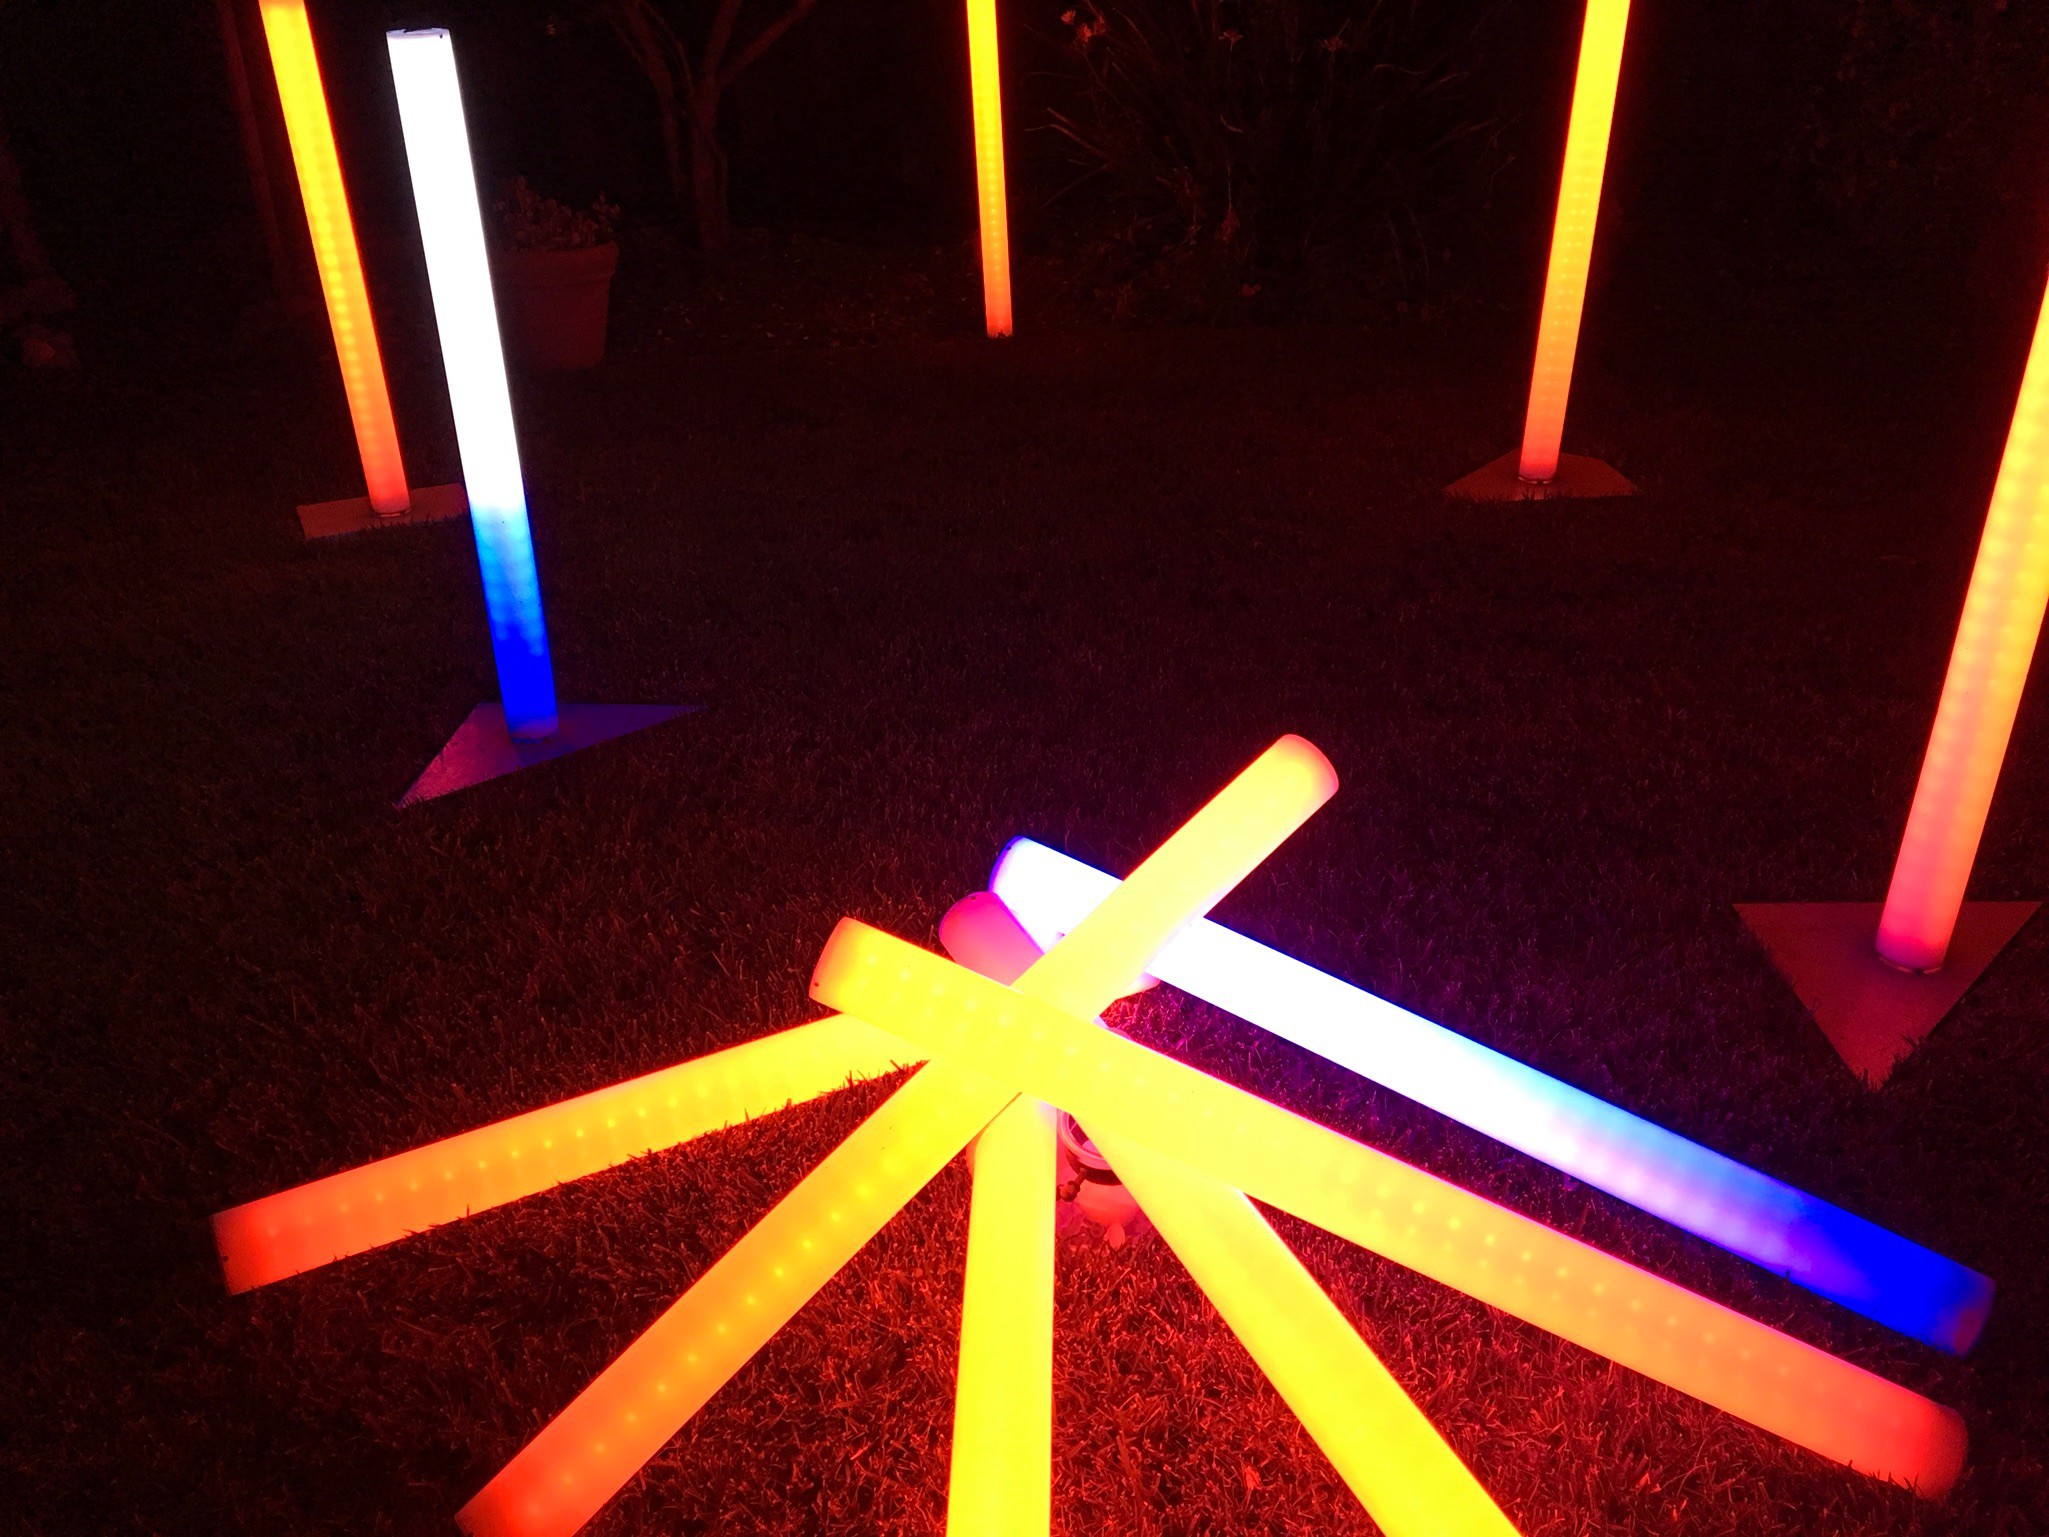
We are finishing up the programming for the each of the tubes such that they are synchronized with the music and dance choreography. It has been a lot of on going work with the choreographer to find the things that are wrong (a tube is wrong or the timing is off for all of them). The dancers are mesmerized by them but making sure they put them the right side up for all the effects to work has been an extra challenge.
In the meantime, check out these picks of them in the dark as they cycle through a pattern.
![]()
a
Programmable Light Props for Theatrics
Music-Synchronized light sticks that work in difficult RF environments like theaters for intense artistic applications.