ptrav
ptrav-
Now on Github
07/07/2019 at 22:38 • 0 commentsUploaded all files to Github:
PCB source/GBR; body STL/NC; source code for version 9.0
-
Completed Top Covers
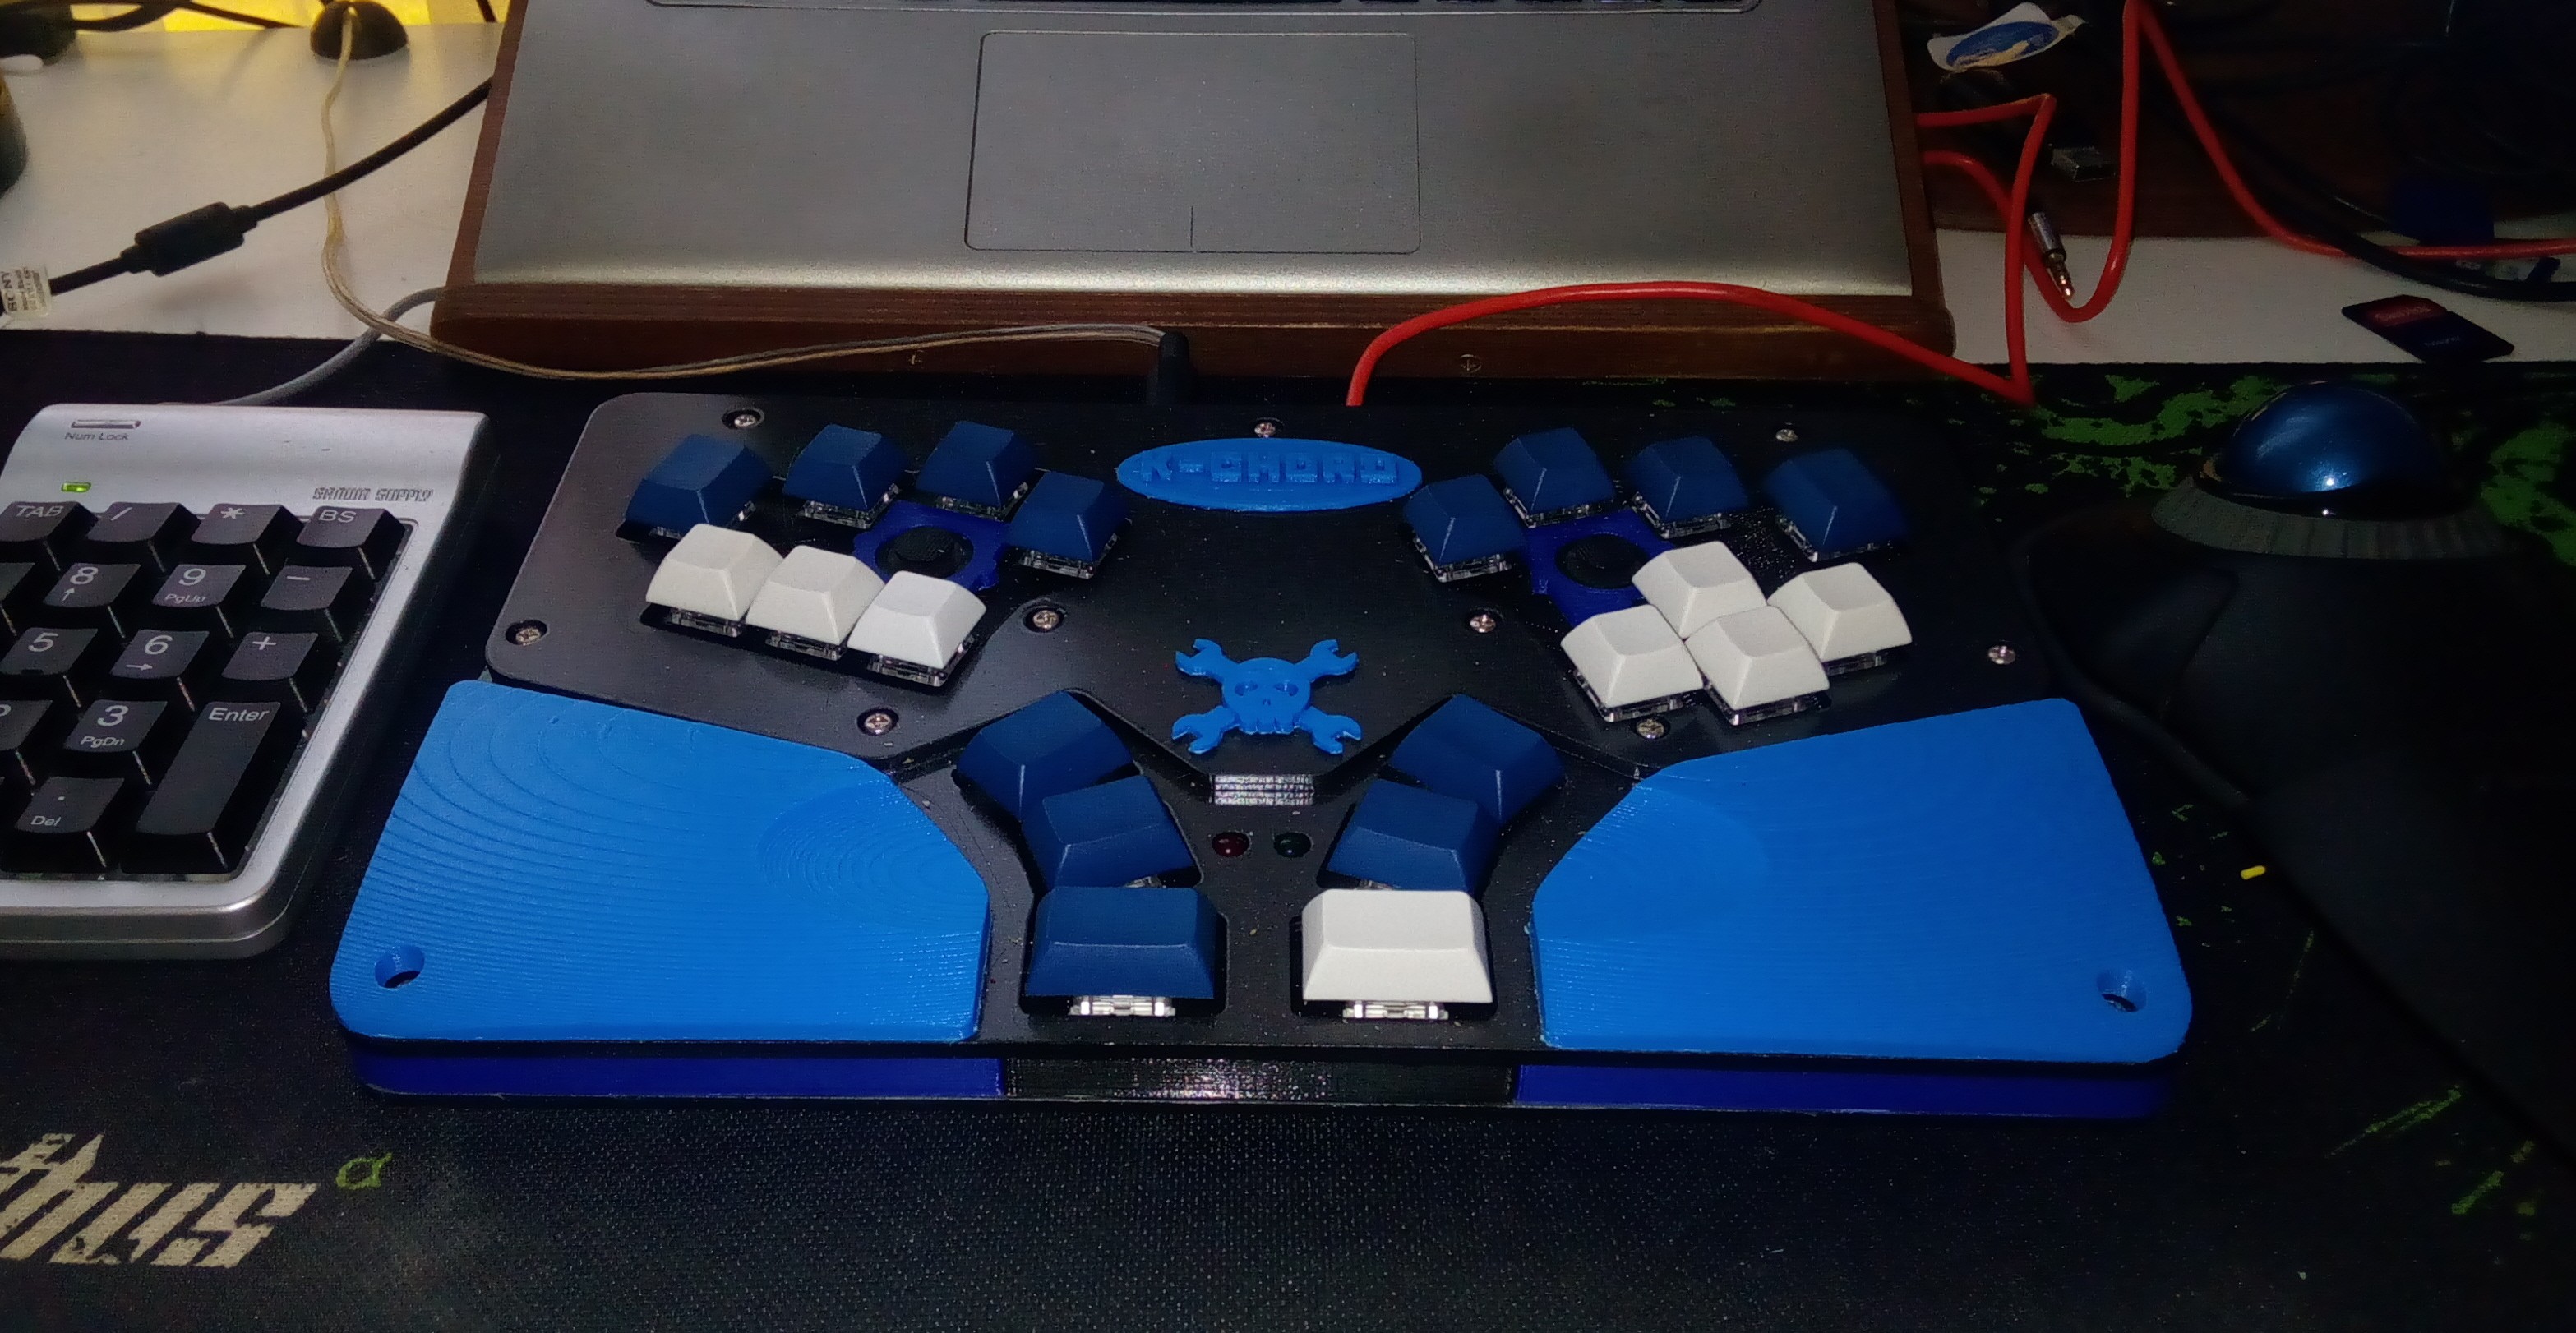
03/08/2018 at 07:04 • 0 commentsDesigned and cut on a CNC the top covers for the prototype 2:

The wrist rests were printed with 0.2 mm step (see the files attached)
The right joystick is currently set as a mouse, and the left is a two-directional scroll.
-
Second Mechanical Prototype Completed
01/28/2018 at 01:26 • 0 commentsFully assembled working keyboard less the top cover. Wooden wrist supports for testing.
-
Ballistic Mouse Algorithm
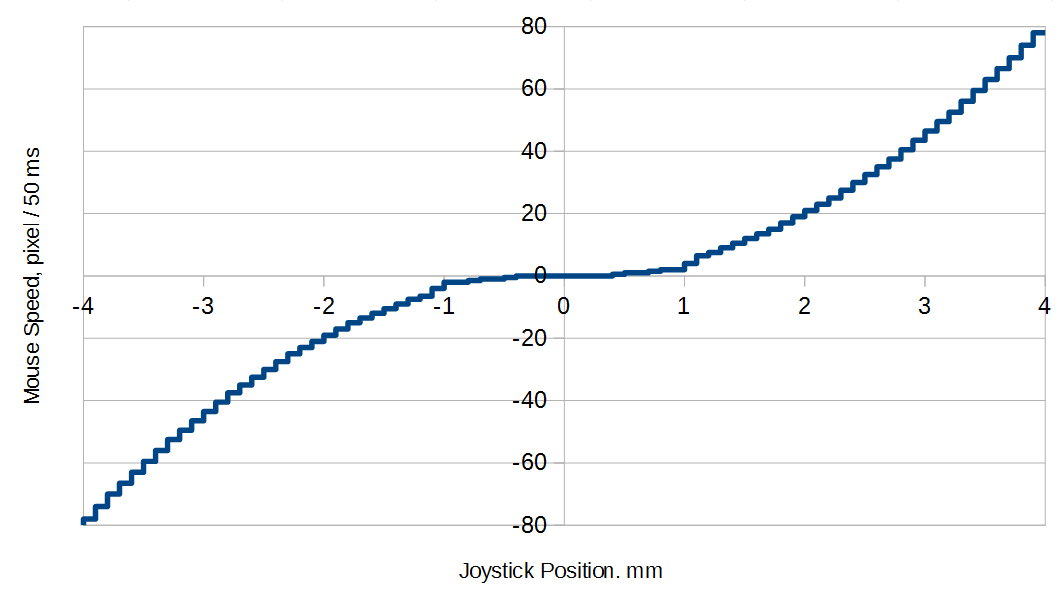
12/26/2017 at 00:37 • 0 commentsUpon experimenting with the mouse pointer, I discovered that control it not accurate at short distances. If you need to move the mouse pointer by several pixels, have to be very careful with the joystick. The solution is to implement a "ballistic" algorithm, and give the mouse pointer some "virtual mass".
#define _NULLMOUSE (signed char)0
    if( data < -10)
    {
      if( pot_Position[i] > 0) pot_Position[i] = _NULLMOUSE;
      if( pot_Position[i] > -data*data/20) pot_Position[i]-=2;
    }
    if( -10 <= data && data < -4) pot_Position[i] = (signed char)(-1);
    if( -4 <= data && data <= 4) pot_Position[i] = (signed char)0;
    if( 4 < data && data <= 10) pot_Position[i] = (signed char)1;
    if( 10 < data)
    {
      if( pot_Position[i] < 0) pot_Position[i] = _NULLMOUSE;
      if( pot_Position[i] < data*data/20) pot_Position[i]+=2;
    }
Basically, if the joystick cap moves more than 1 mm, the pointer starts accelerating towards the maximum speed of 80 pix/dt and reaches the max after 40*50=2000 ms. If the cap is moved less than 1 mm, the pointer crawls at 1 pix/dt, providing accurate pointing. Releasing the joystick (position less than 0.4 mm) causes an instantaneous stop; -- well -- the joystick itself has some minor mechanical inertia.
I left the dt=50 ms for now. 80 pix/dt is darn fast -- 1600 pix per second, so the mouse pointer flies from one end of a large monitor to the other in about a second, which is comparable to the classic mouse agility. After reaching the wanted screen corner, one just needs to release the joystick momentarily, and then precisely point the wanted pixel.
The algorithm is fully integer-based and suitable for Arduino. -
Code Modification Completed
12/24/2017 at 04:17 • 0 commentsAdded the code for joystick support. Currently the left joystick scrolls like a mouse wheel, the right one -- controls the mouse pointer. The joystick sensitivity is as shown:
The joystick is checked every dt=50 ms. The "dead zone" is .4 mm, then 1 pixel/dt till .7 mm, then 2 pix/dt till 1 mm, then a quadratic function to the maximum speed of 80 pix/dt.
-
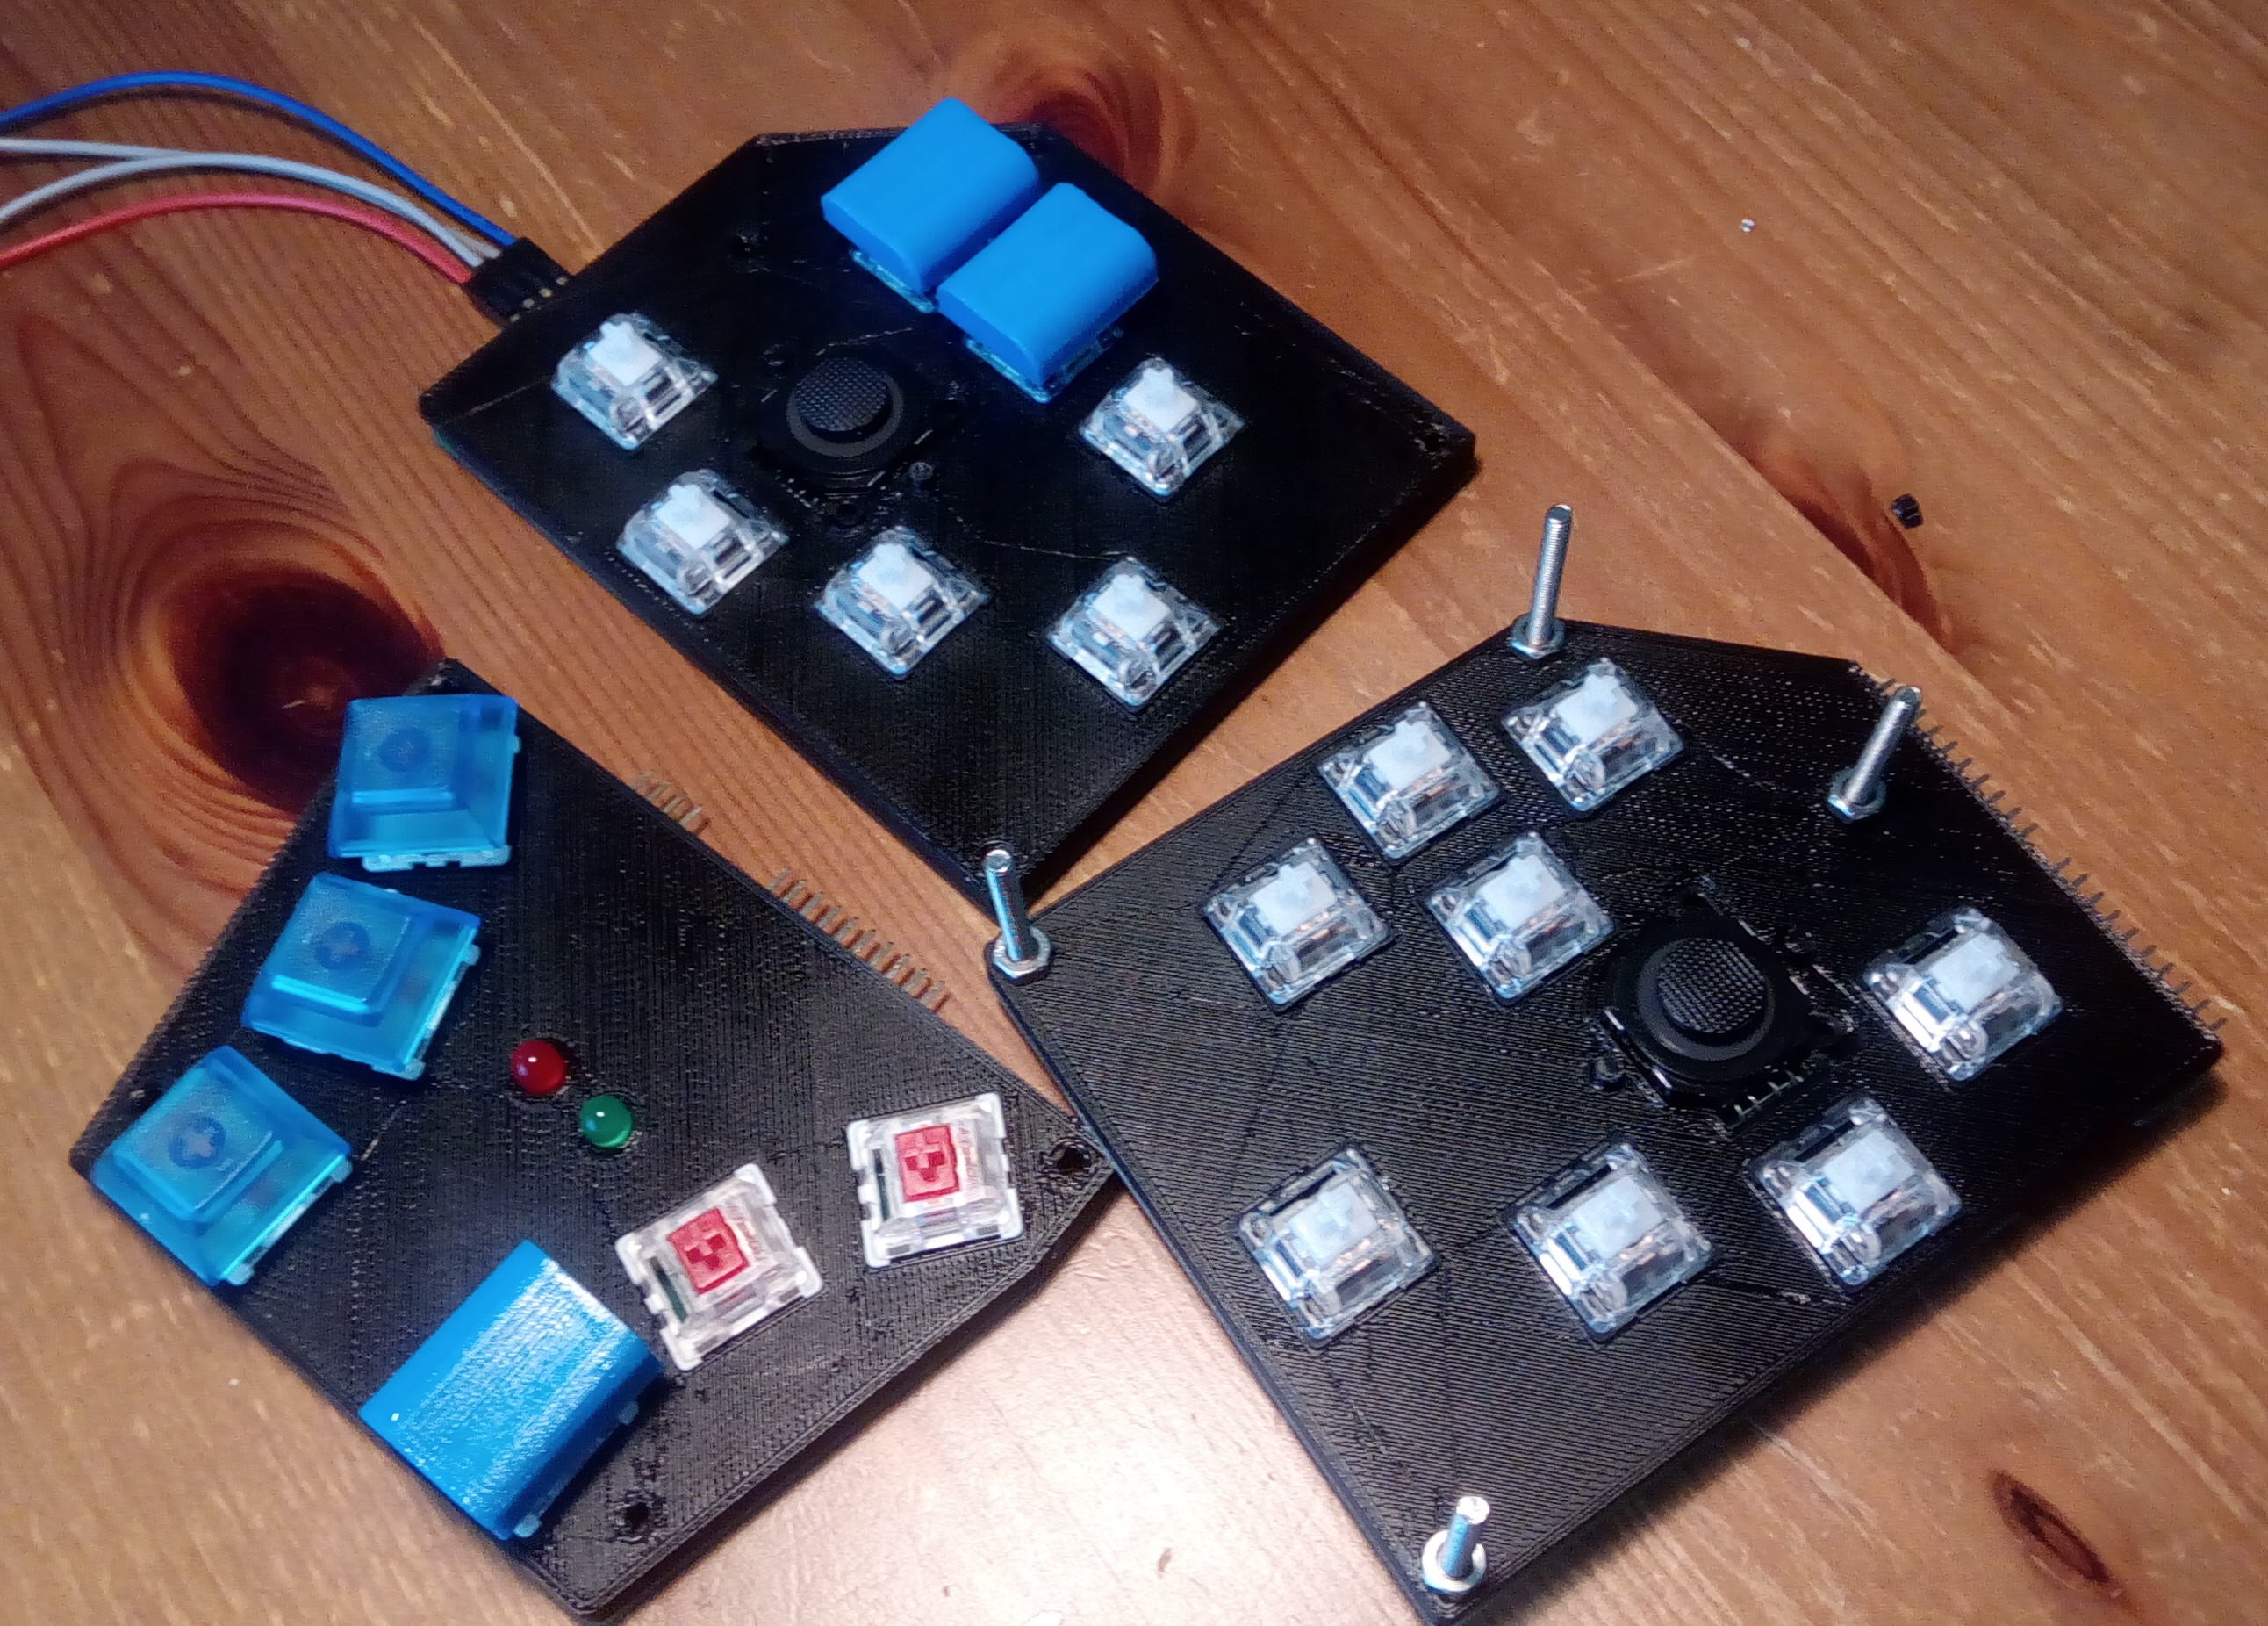
PCBs Arrived and Soldered
12/20/2017 at 10:26 • 0 commentsPCB arrived!
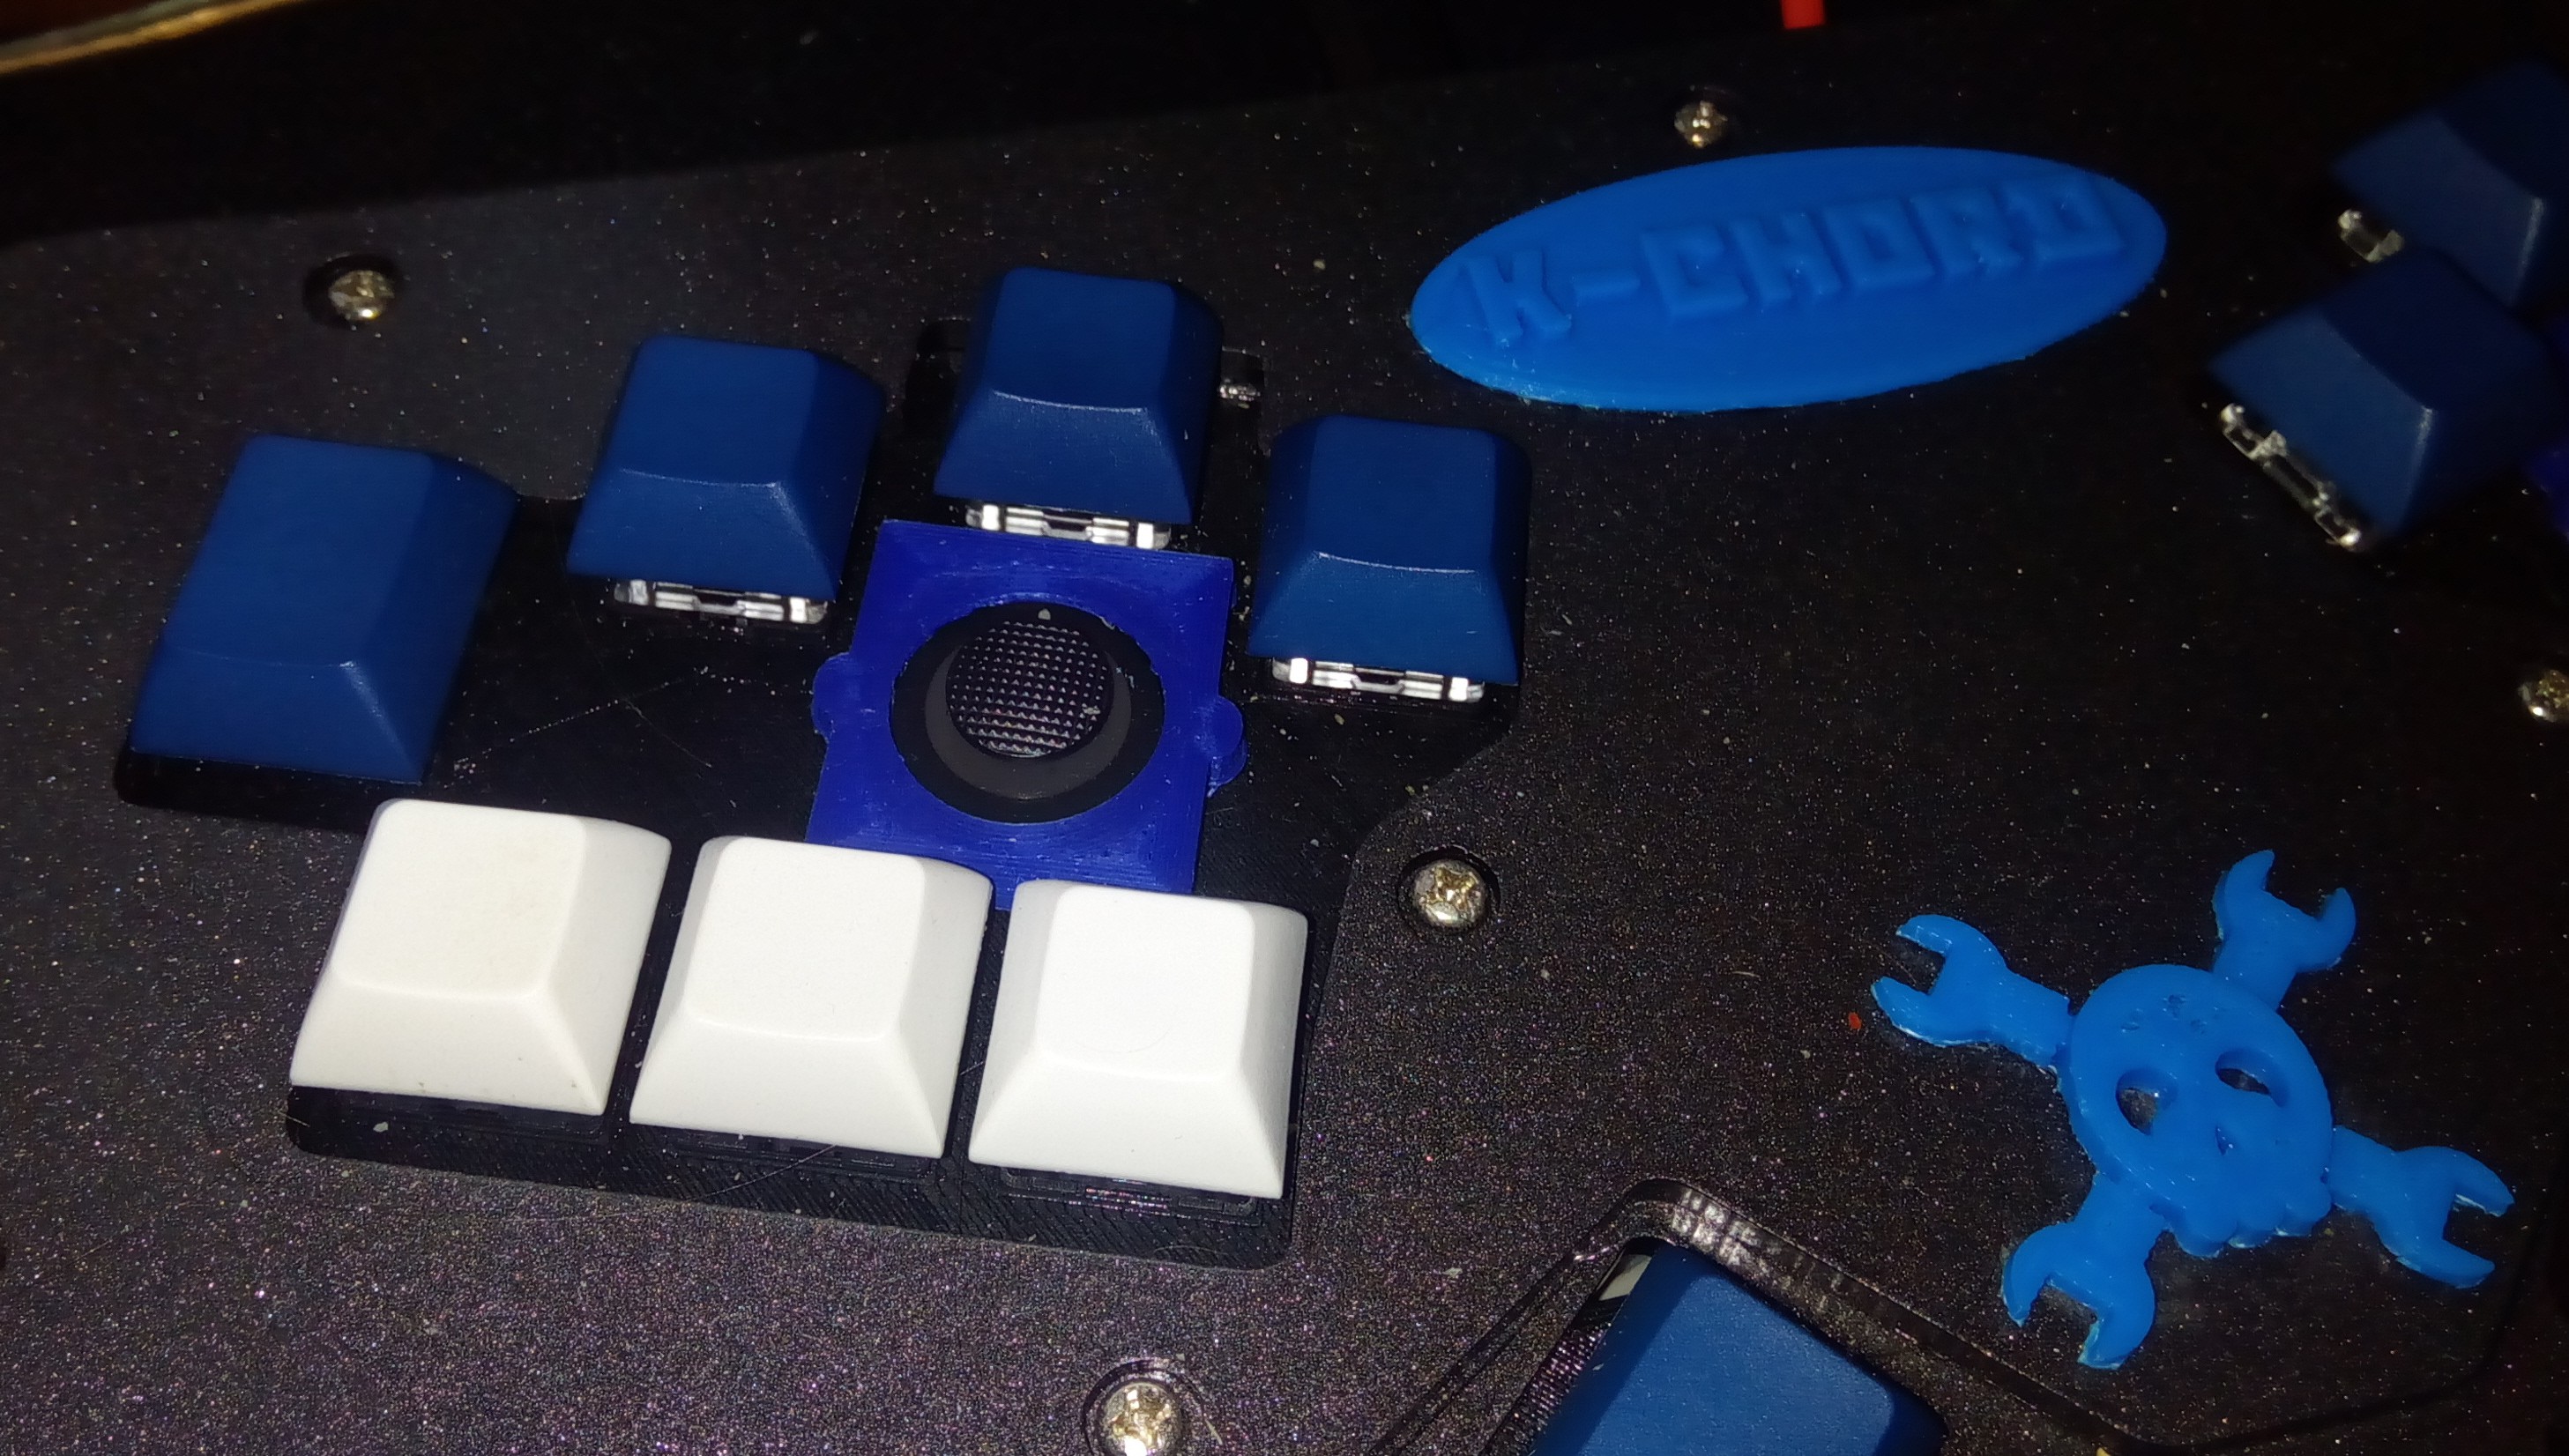
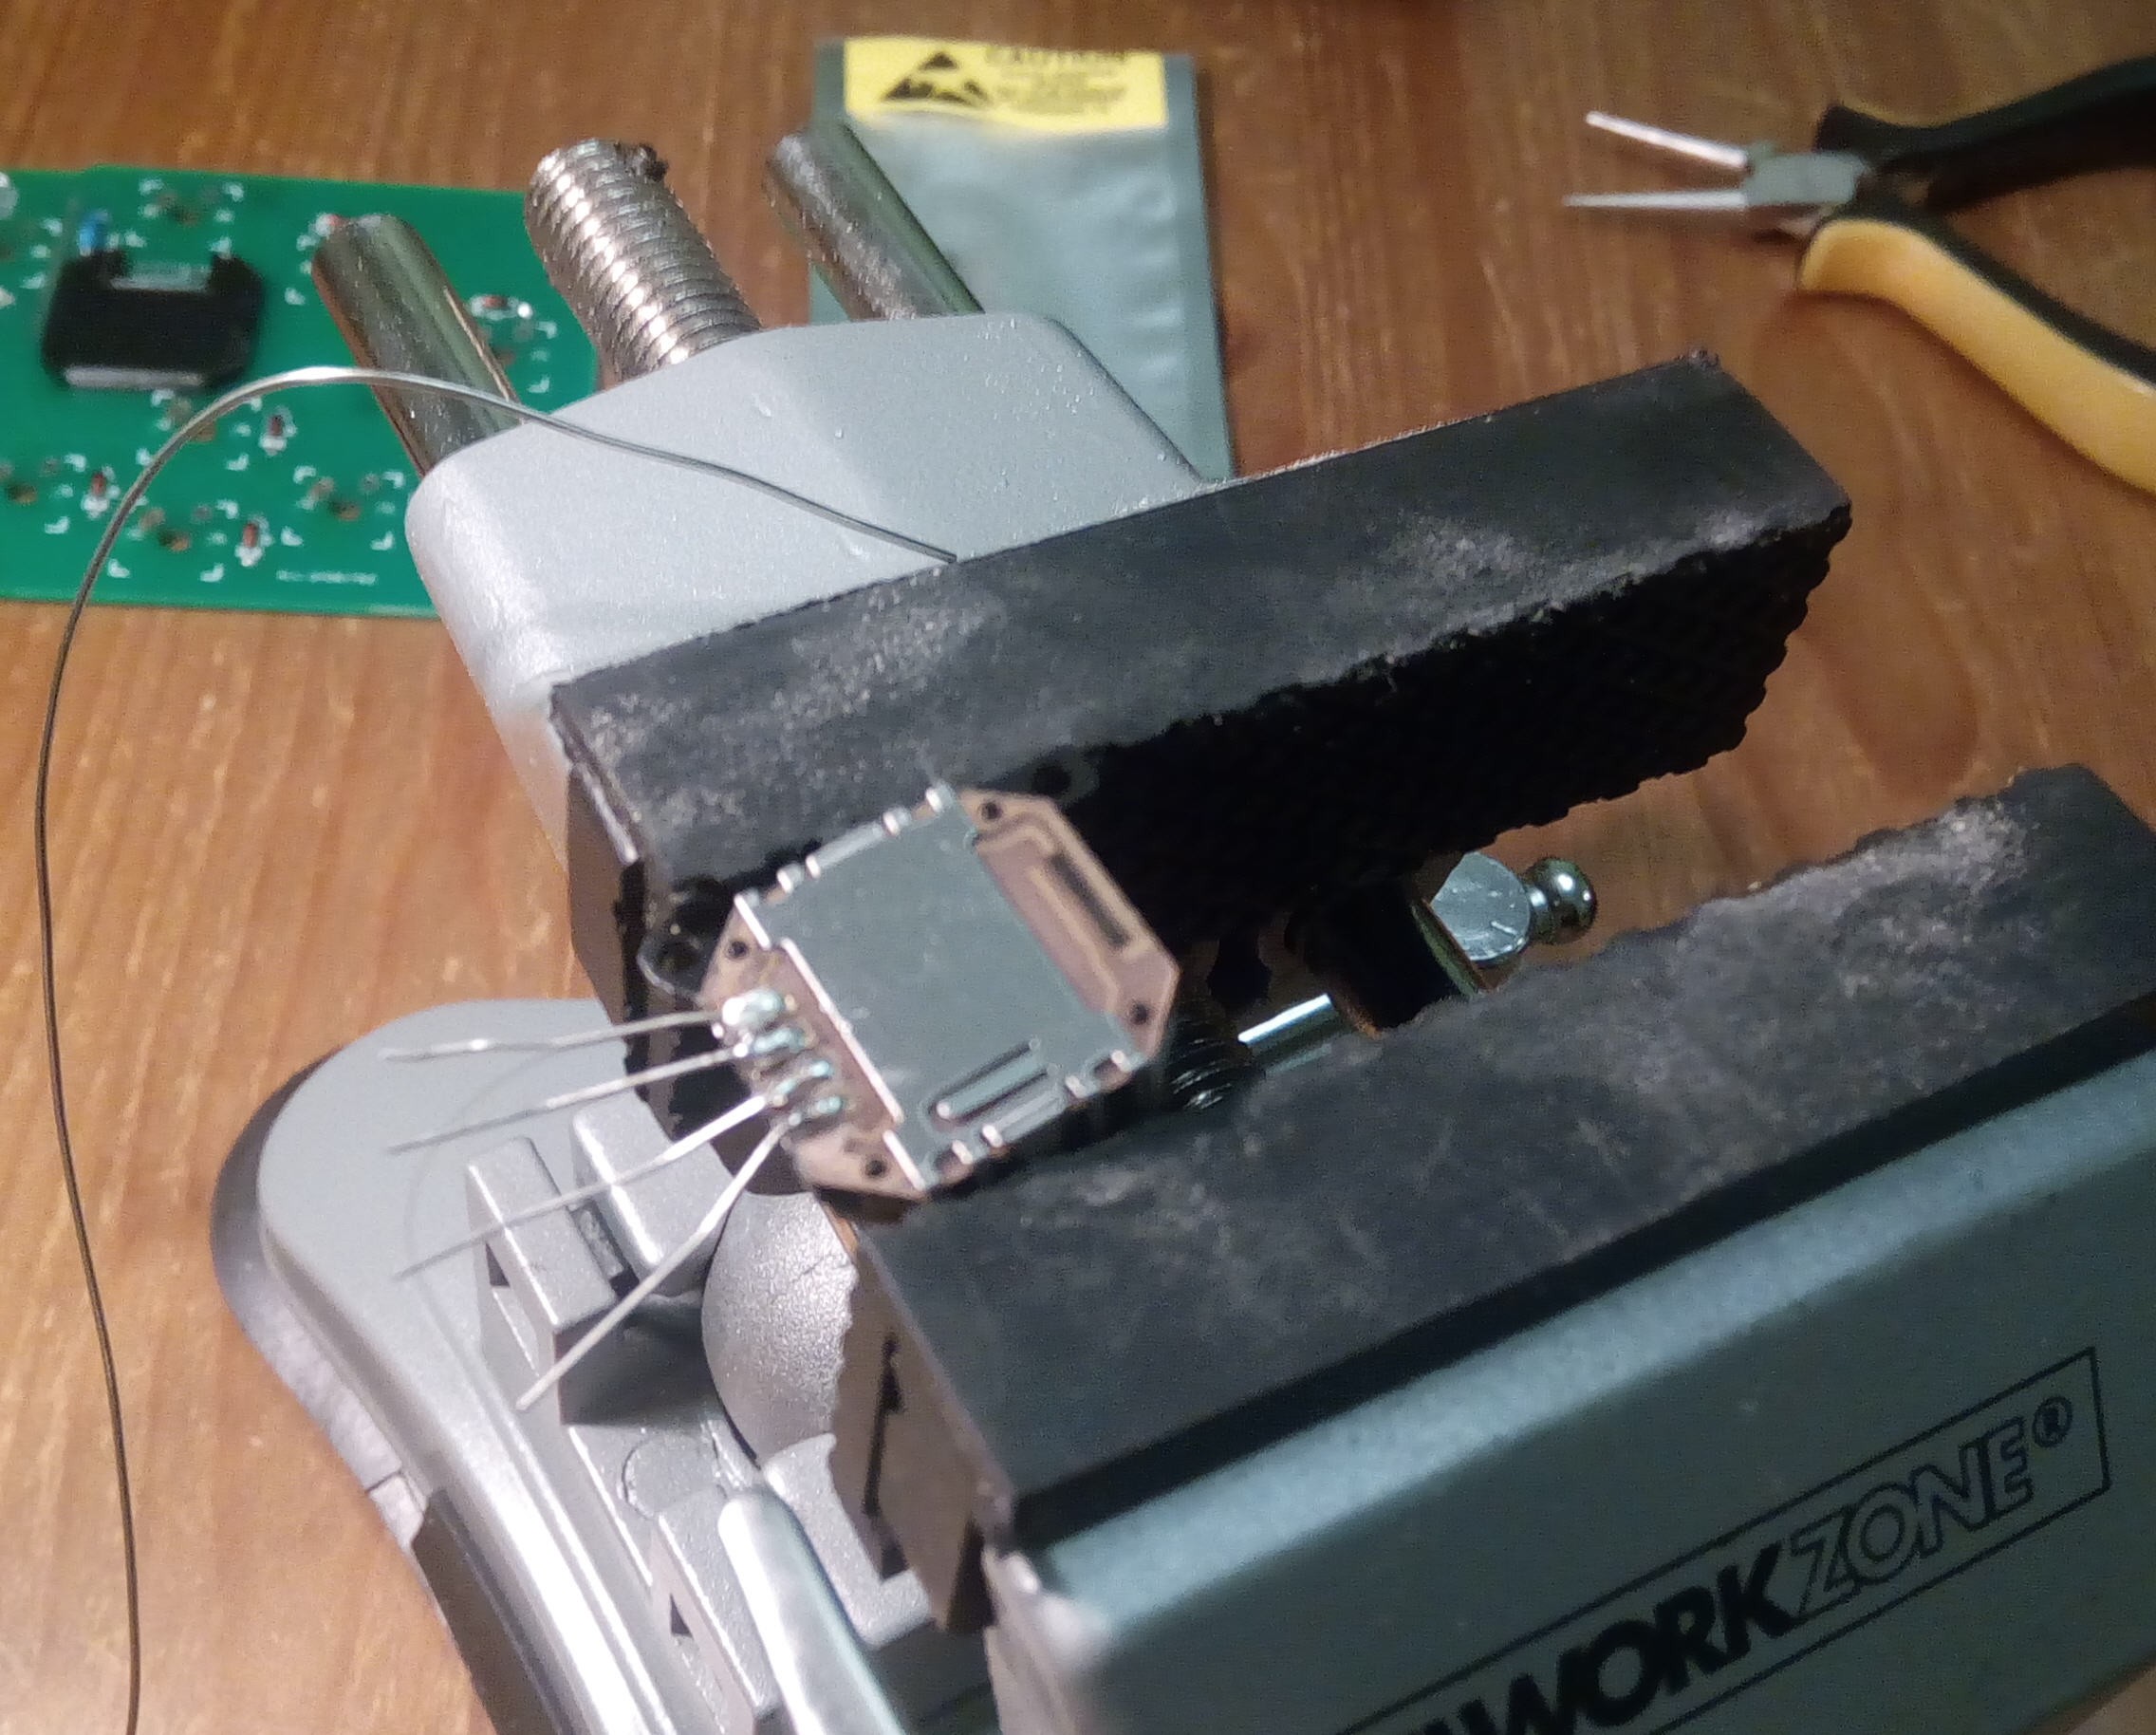
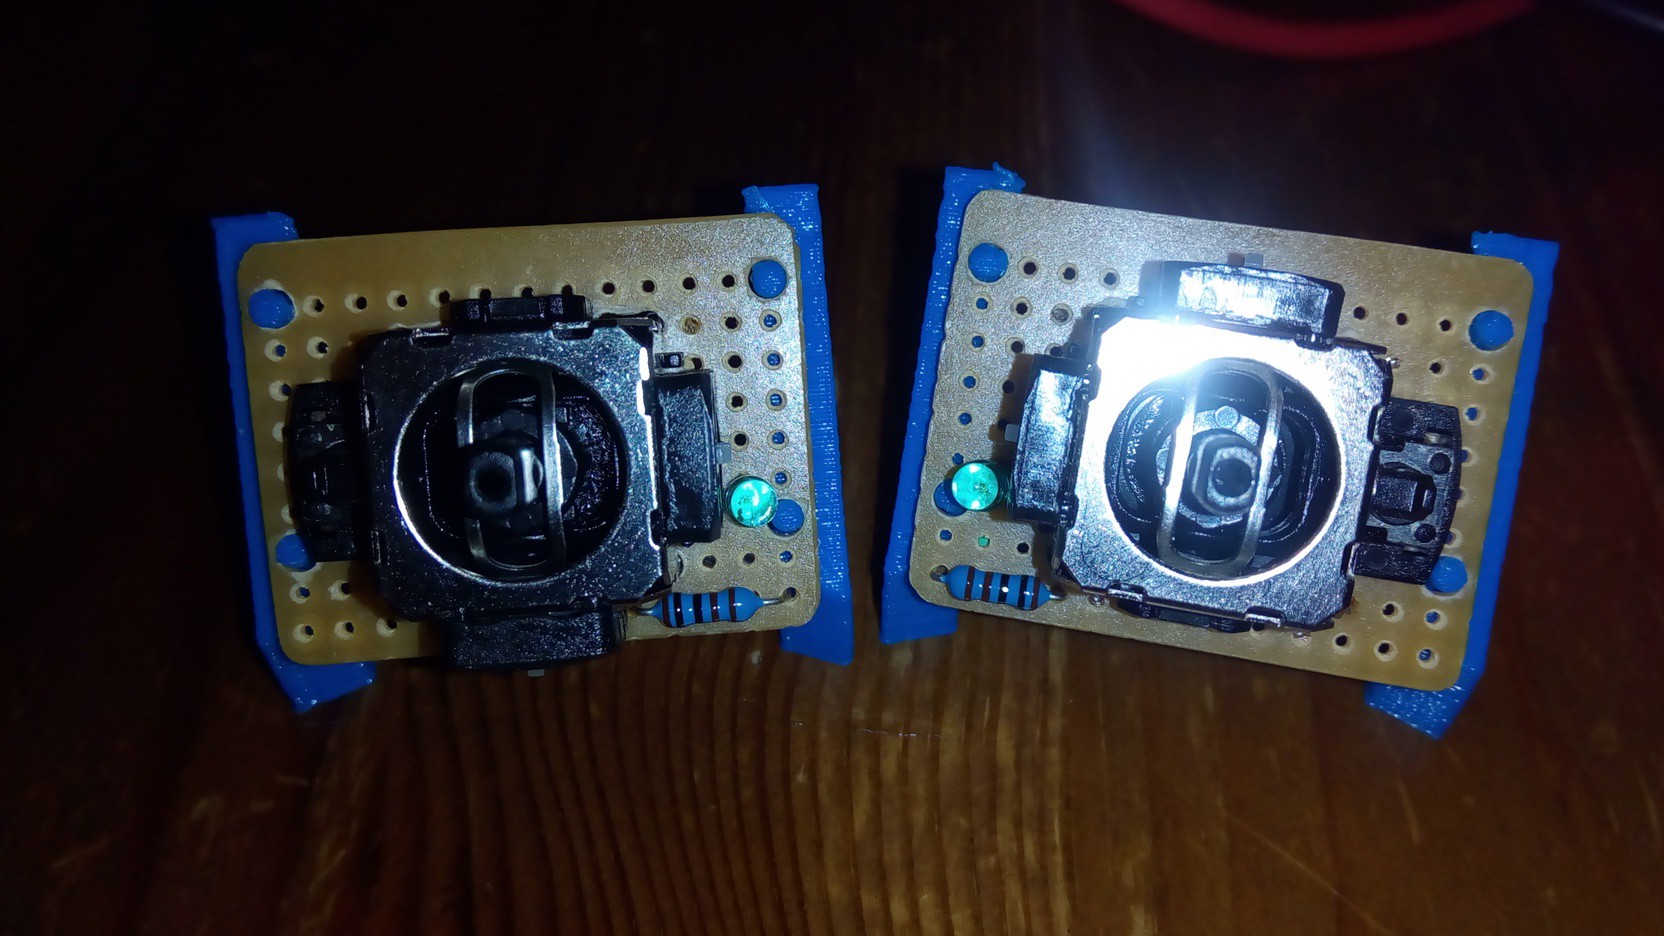
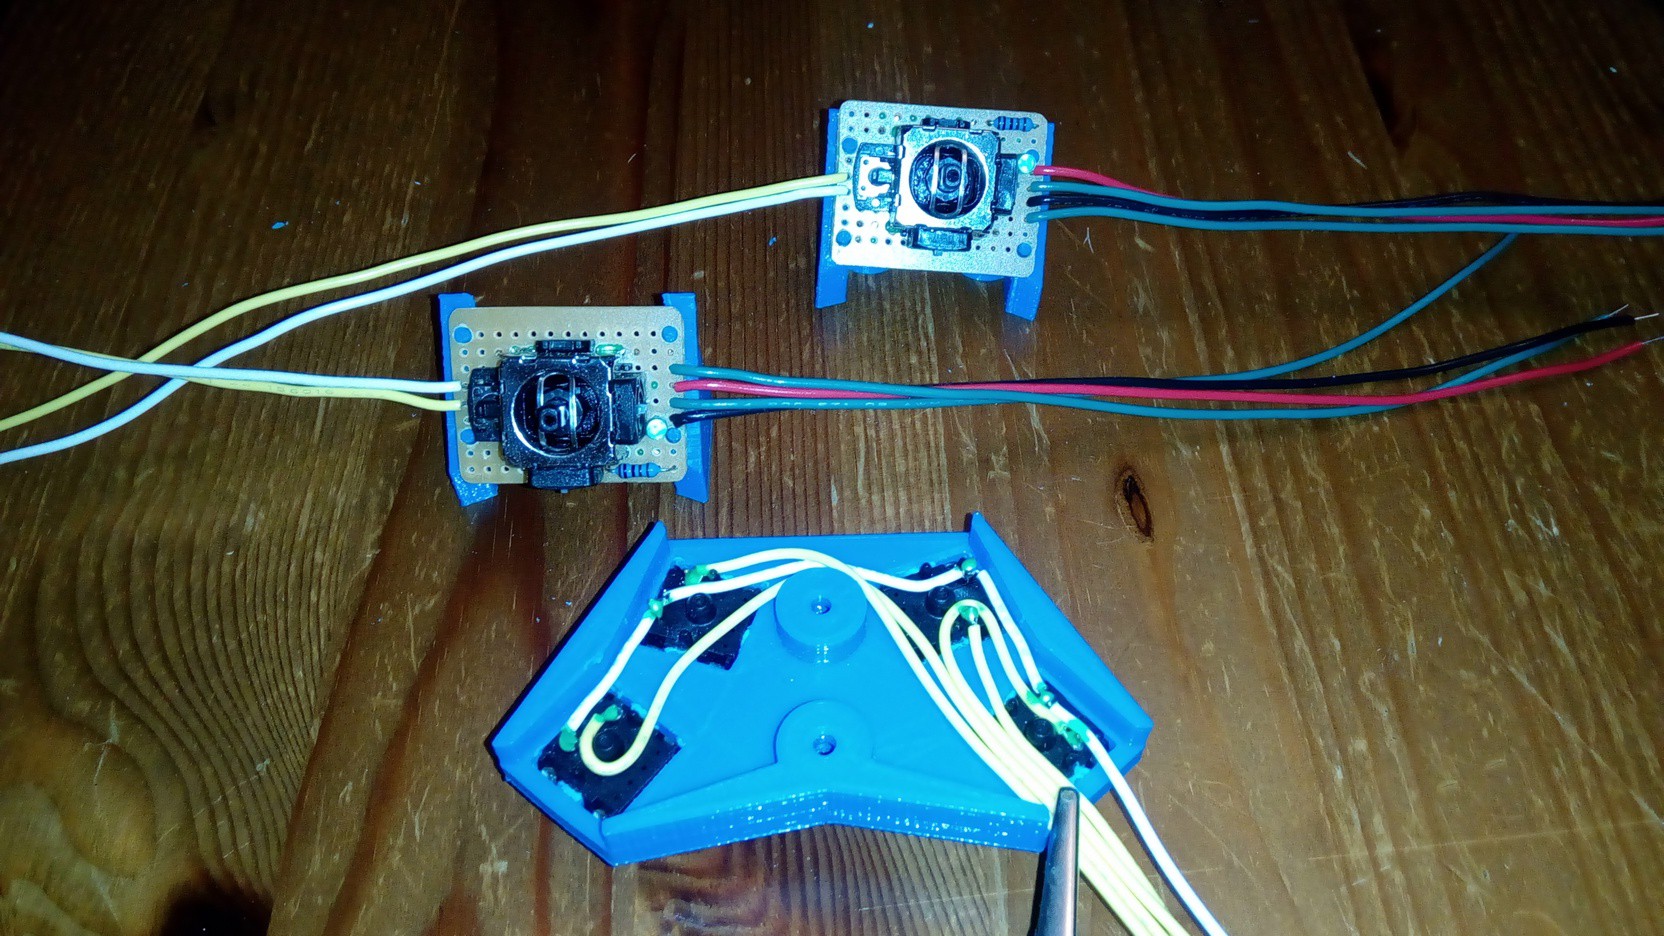
I've decided replacing the large joysticks with small PSP clone version. For that, needed to print a stand:
PSP joysticks soldered in place:
And the rest of the boards:
-
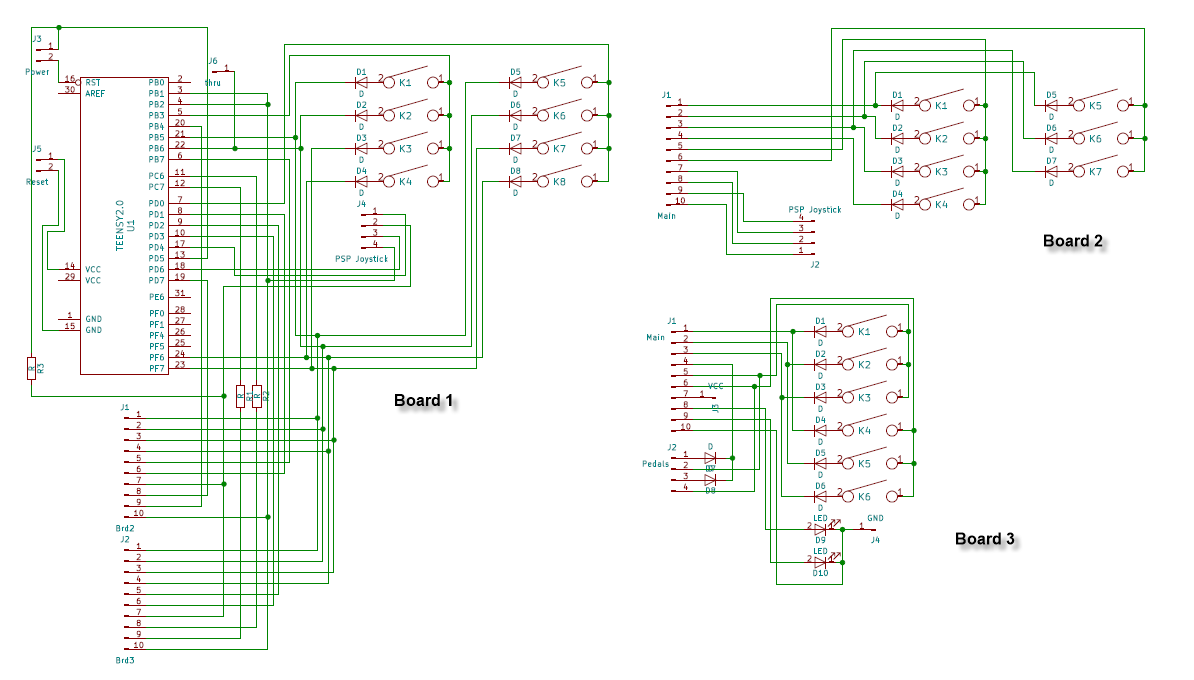
Completed PCB Design
12/18/2017 at 22:23 • 0 commentsBoards were designed in KiCAD and ordered on AllPCB. The schematics were as following:
Currently it uses all available ports on Nano Pro board:
D2 (pin5) – right fingers WRITE
D3 (pin6) – left fingers WRITE
D4 (pin7) – arrows WRITE
D5 (pin8) – service buttons WRITE
D6 (pin9) – left thumb WRITE
D7 (pin10) – right thumb WRITE
D8 (pin11) – left LED
D9 (pin12) – right LED
D10 (pin24) – READ 8
D16 (pin23) – READ 4
D14 (pin22) – READ 2
D15 (pin21) – READ 1
A0 (pin20) – left joystick RL
A1 (pin19) – left joystick UD
A2 (pin18) – right joystick RL
A3 (pin17) – right joystick UD
The KiCAD outputs are uploaded here.
-
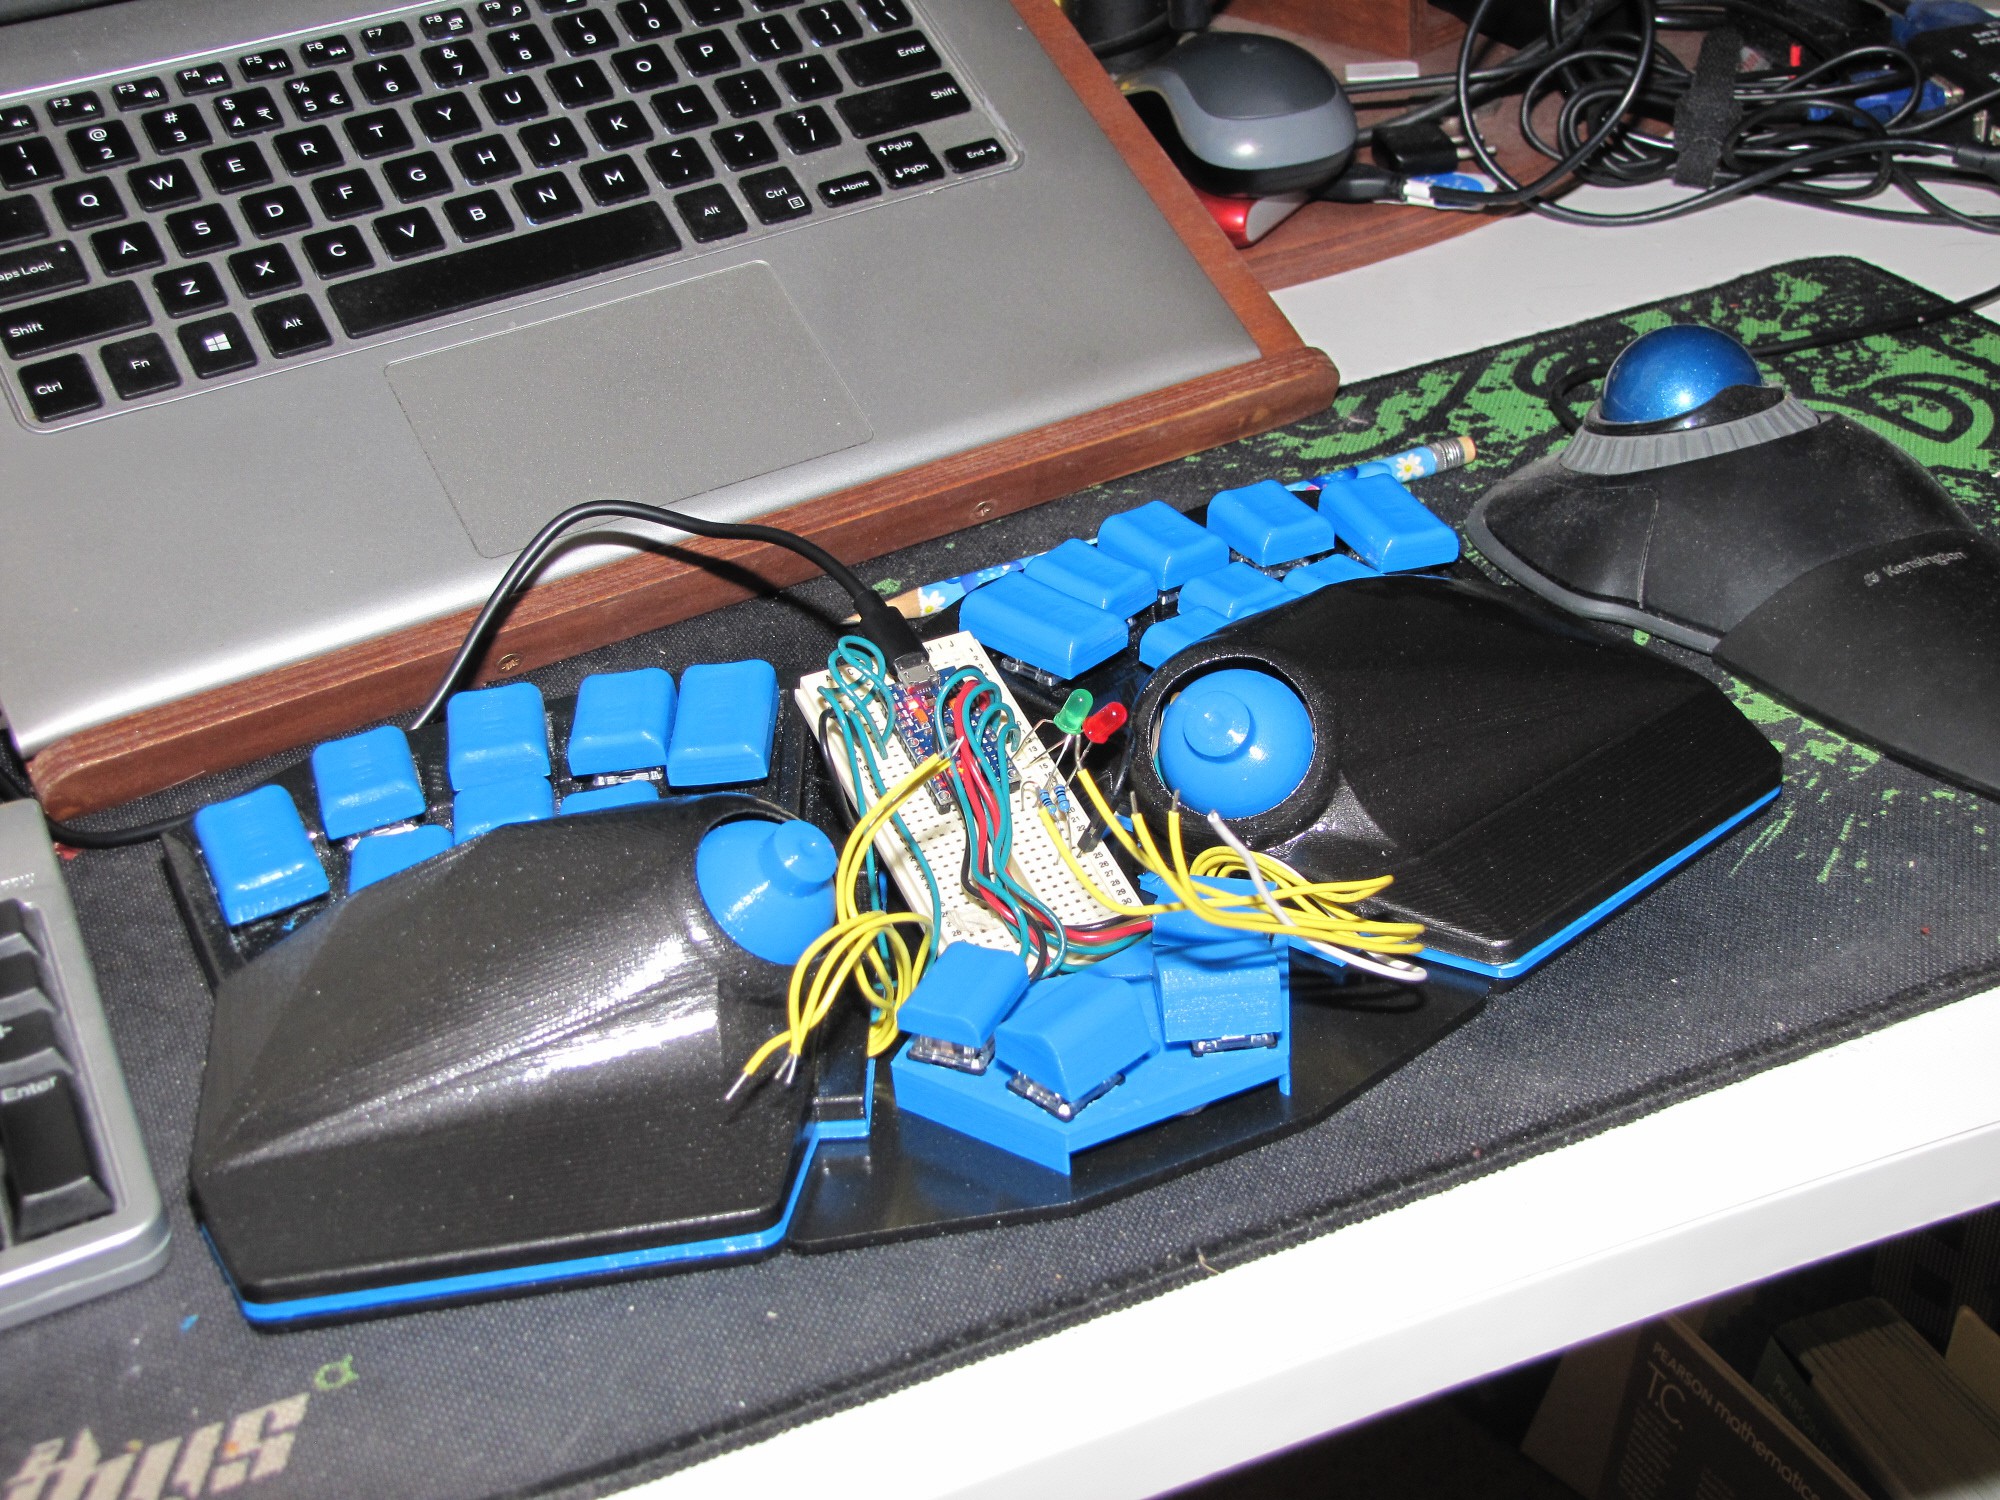
Mechanical prototype completed
08/26/2017 at 08:35 • 0 commentsCut the base on CNC and assembled buttons and joysticks. Tested mouse operation with a breadboard.
Everything looks sturdy, the plastic parts are solid and have zero play. The wrist pads felt too thin for my hands, so 3-mm inserts were printed -- note the blue inserts between the base and the wrist pads. The STL files have been modified for the extra thickness. I have also made the files which combine the wrist pads and the switch slots for printing in one go.
The original plan was to print the joystick caps from a semi-transparent filament to make them glow in the dark (both joystick boards have LEDs). Well, no filament for now, may replace later.
-
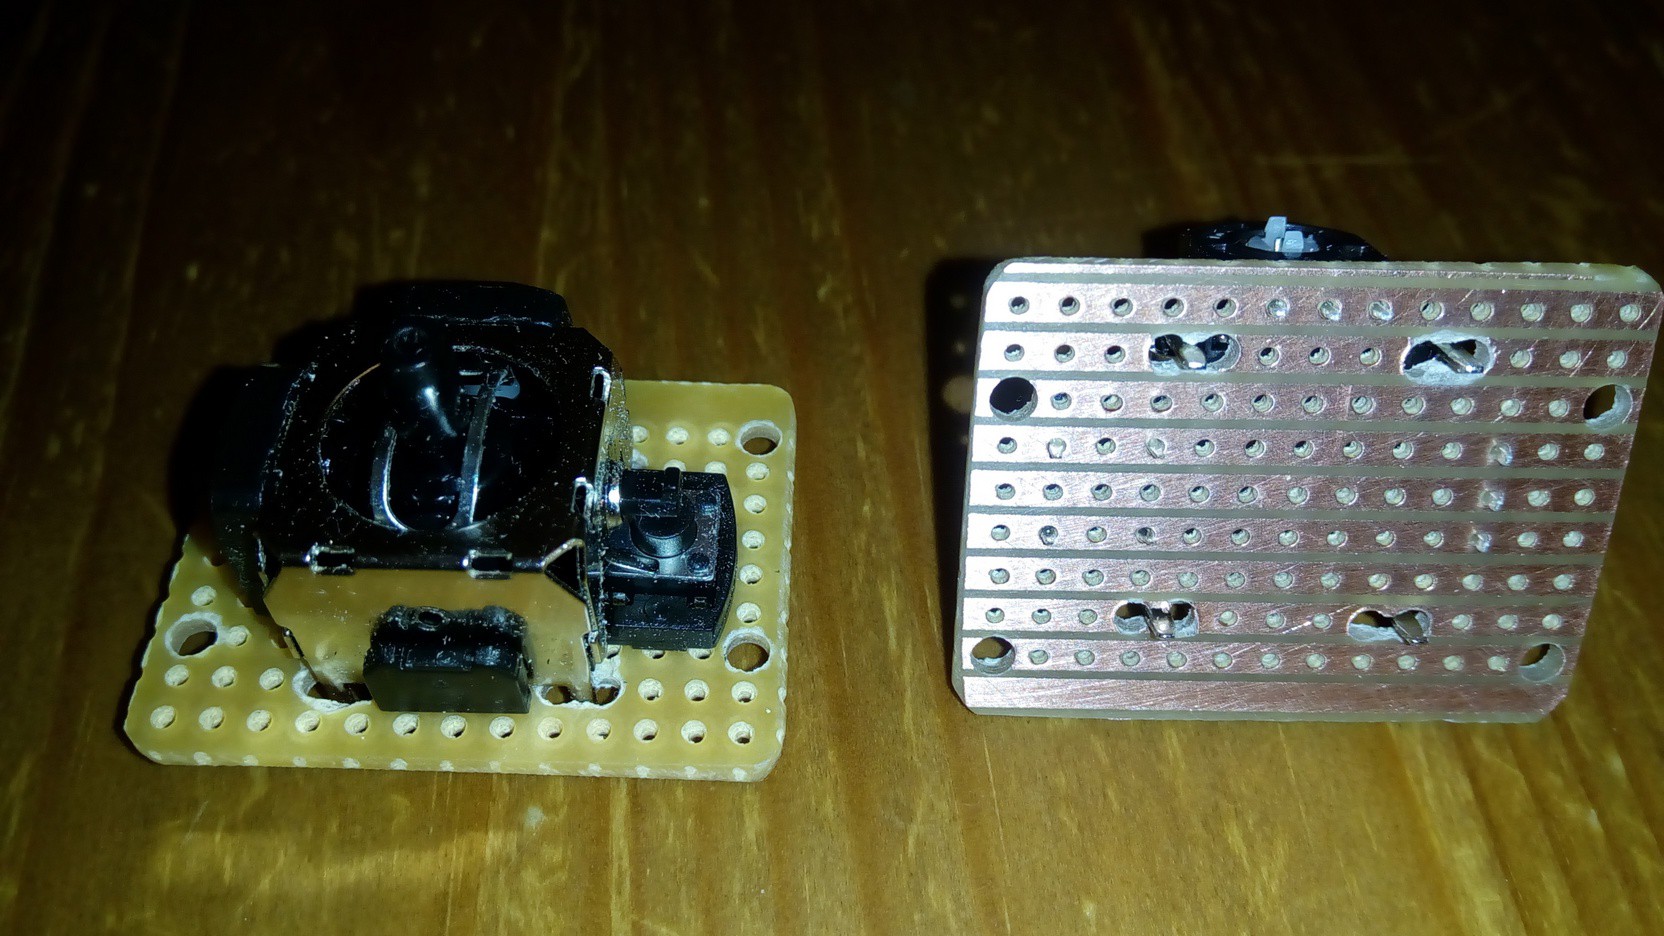
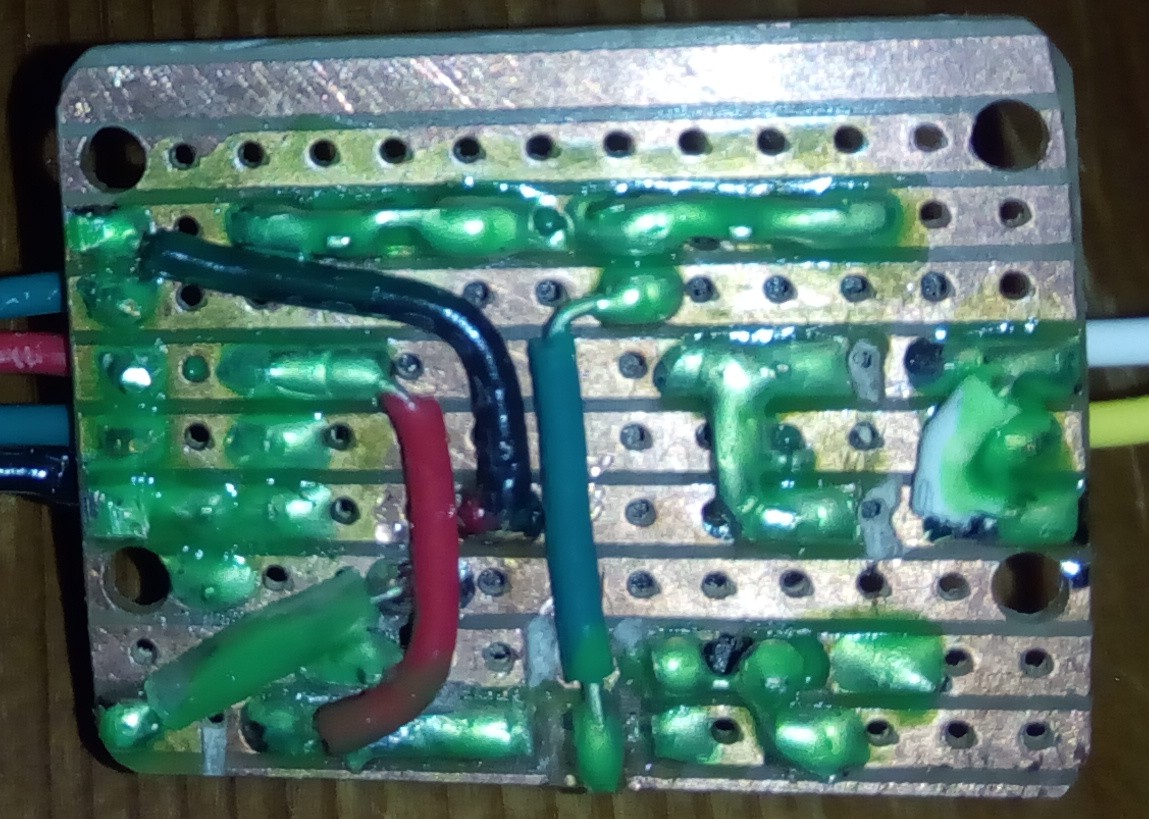
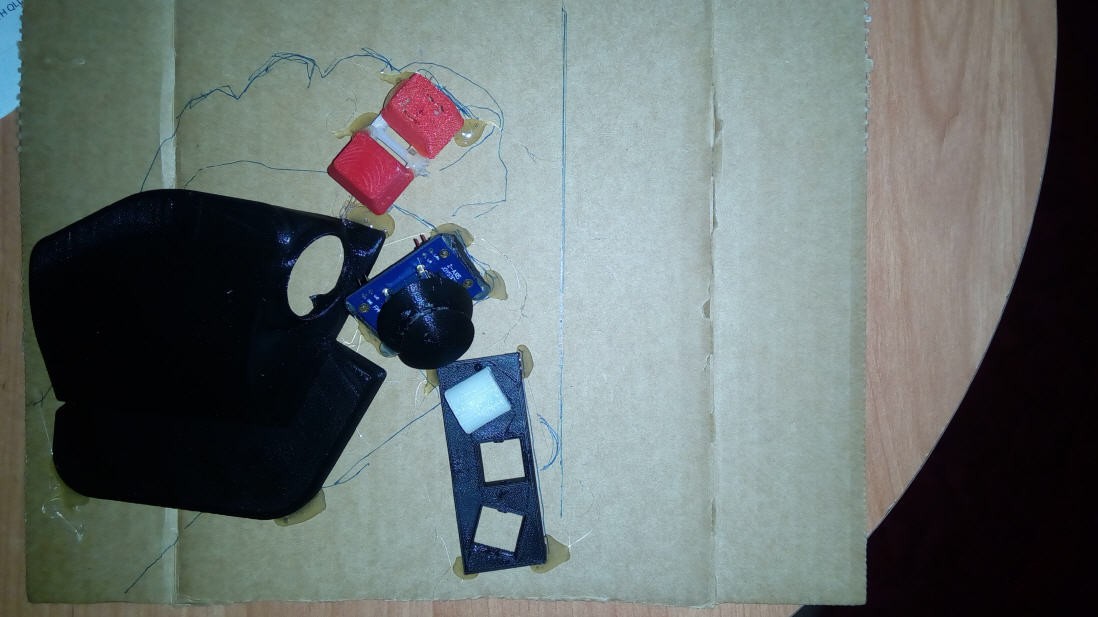
Joystick boards and thumb keys
07/09/2017 at 11:17 • 0 commentsThe joystick boards and thumb keys have been designed and built.
For the prototype, a prototyping board is sufficient; sometimes in the future can do traces :)
The body parts have been printed. Everything fits so far.
-
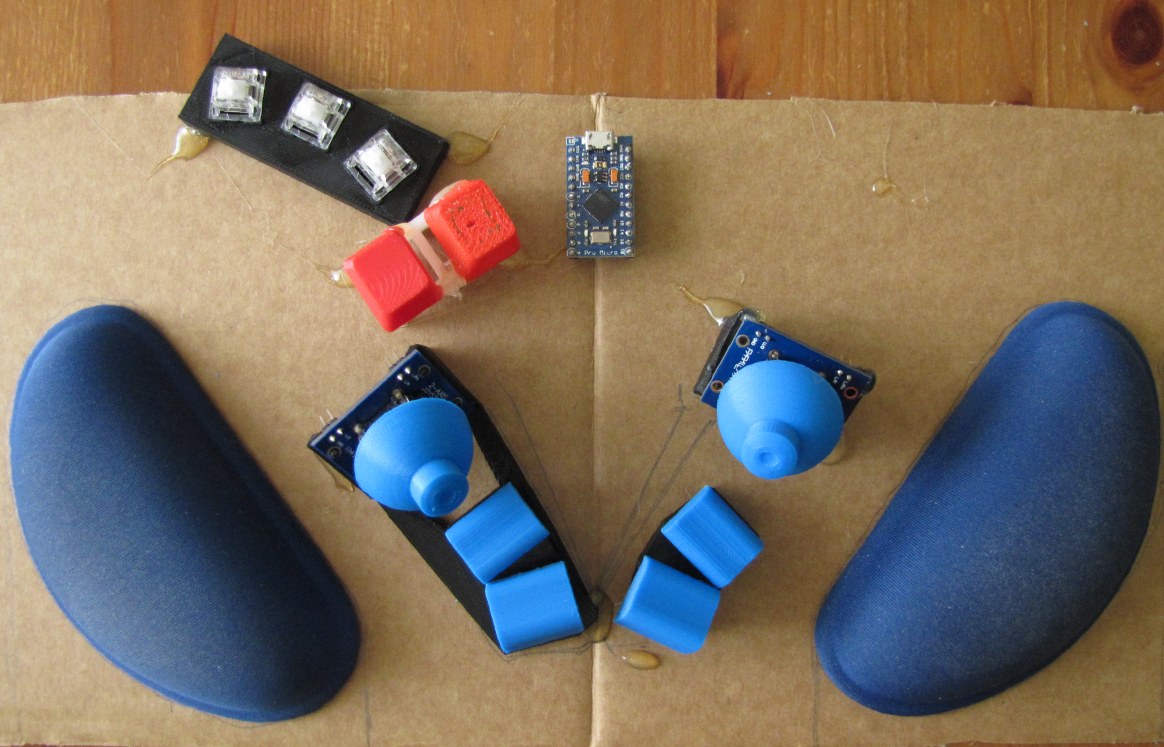
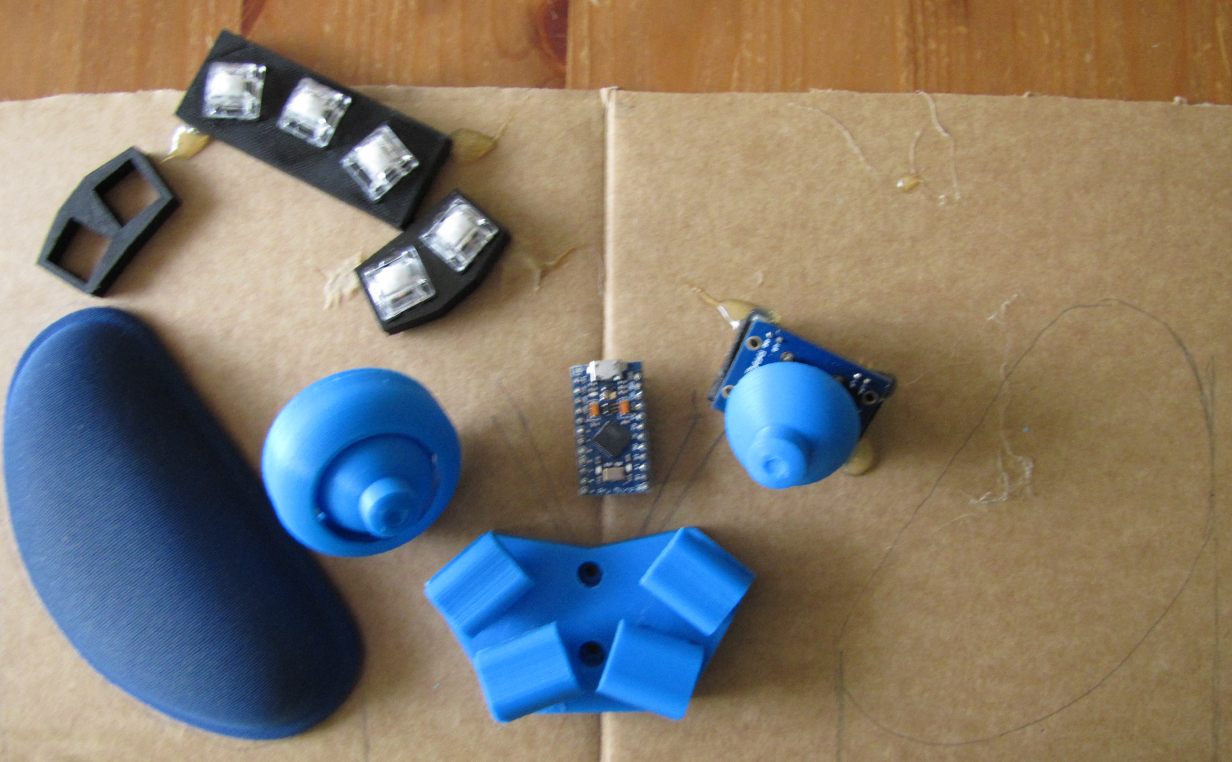
Initial Mockups Done
06/11/2017 at 02:18 • 0 commentsI've completed three initial mockups using cardboard, junk prints, and hot glue. The dimensions were progressively fed into the Blender model and actual components printed.
Iteration 1. Initial layout with 3 thumb buttons.
At this point, decided to drop one thumb button from design: one joystick plus three buttons is a bit cumbersome to handle.
Iteration 2. Initial layout with 2 thumb buttons and approximate positions for wristpads and joysticks. Actual joystick caps and key caps are used.
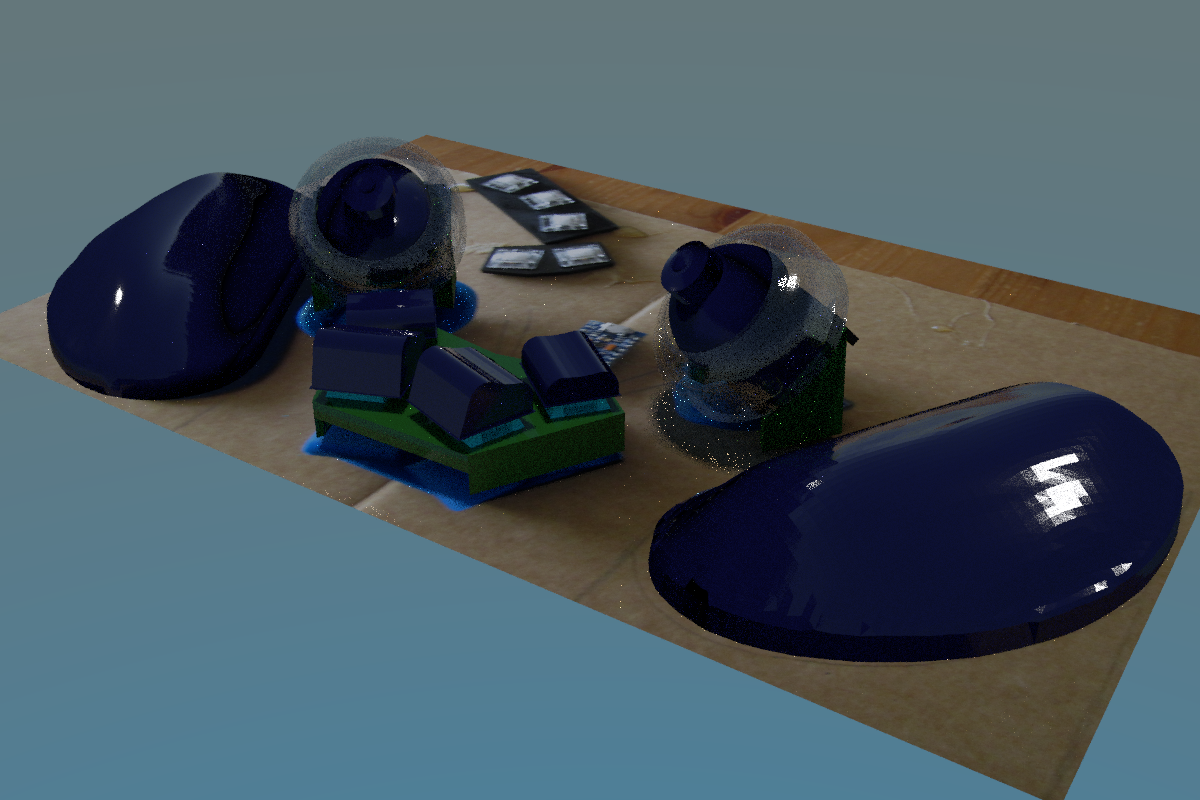
Iteration 3. The thumb layout is now final. Experimenting with the joystick offsets and finger buttons.The same layout ported to Blender:
Chording Hybrid Keyboard
Based on experience with the previous chording keyboard, fully 3D printable version with two joysticks.