-
Final 3D case
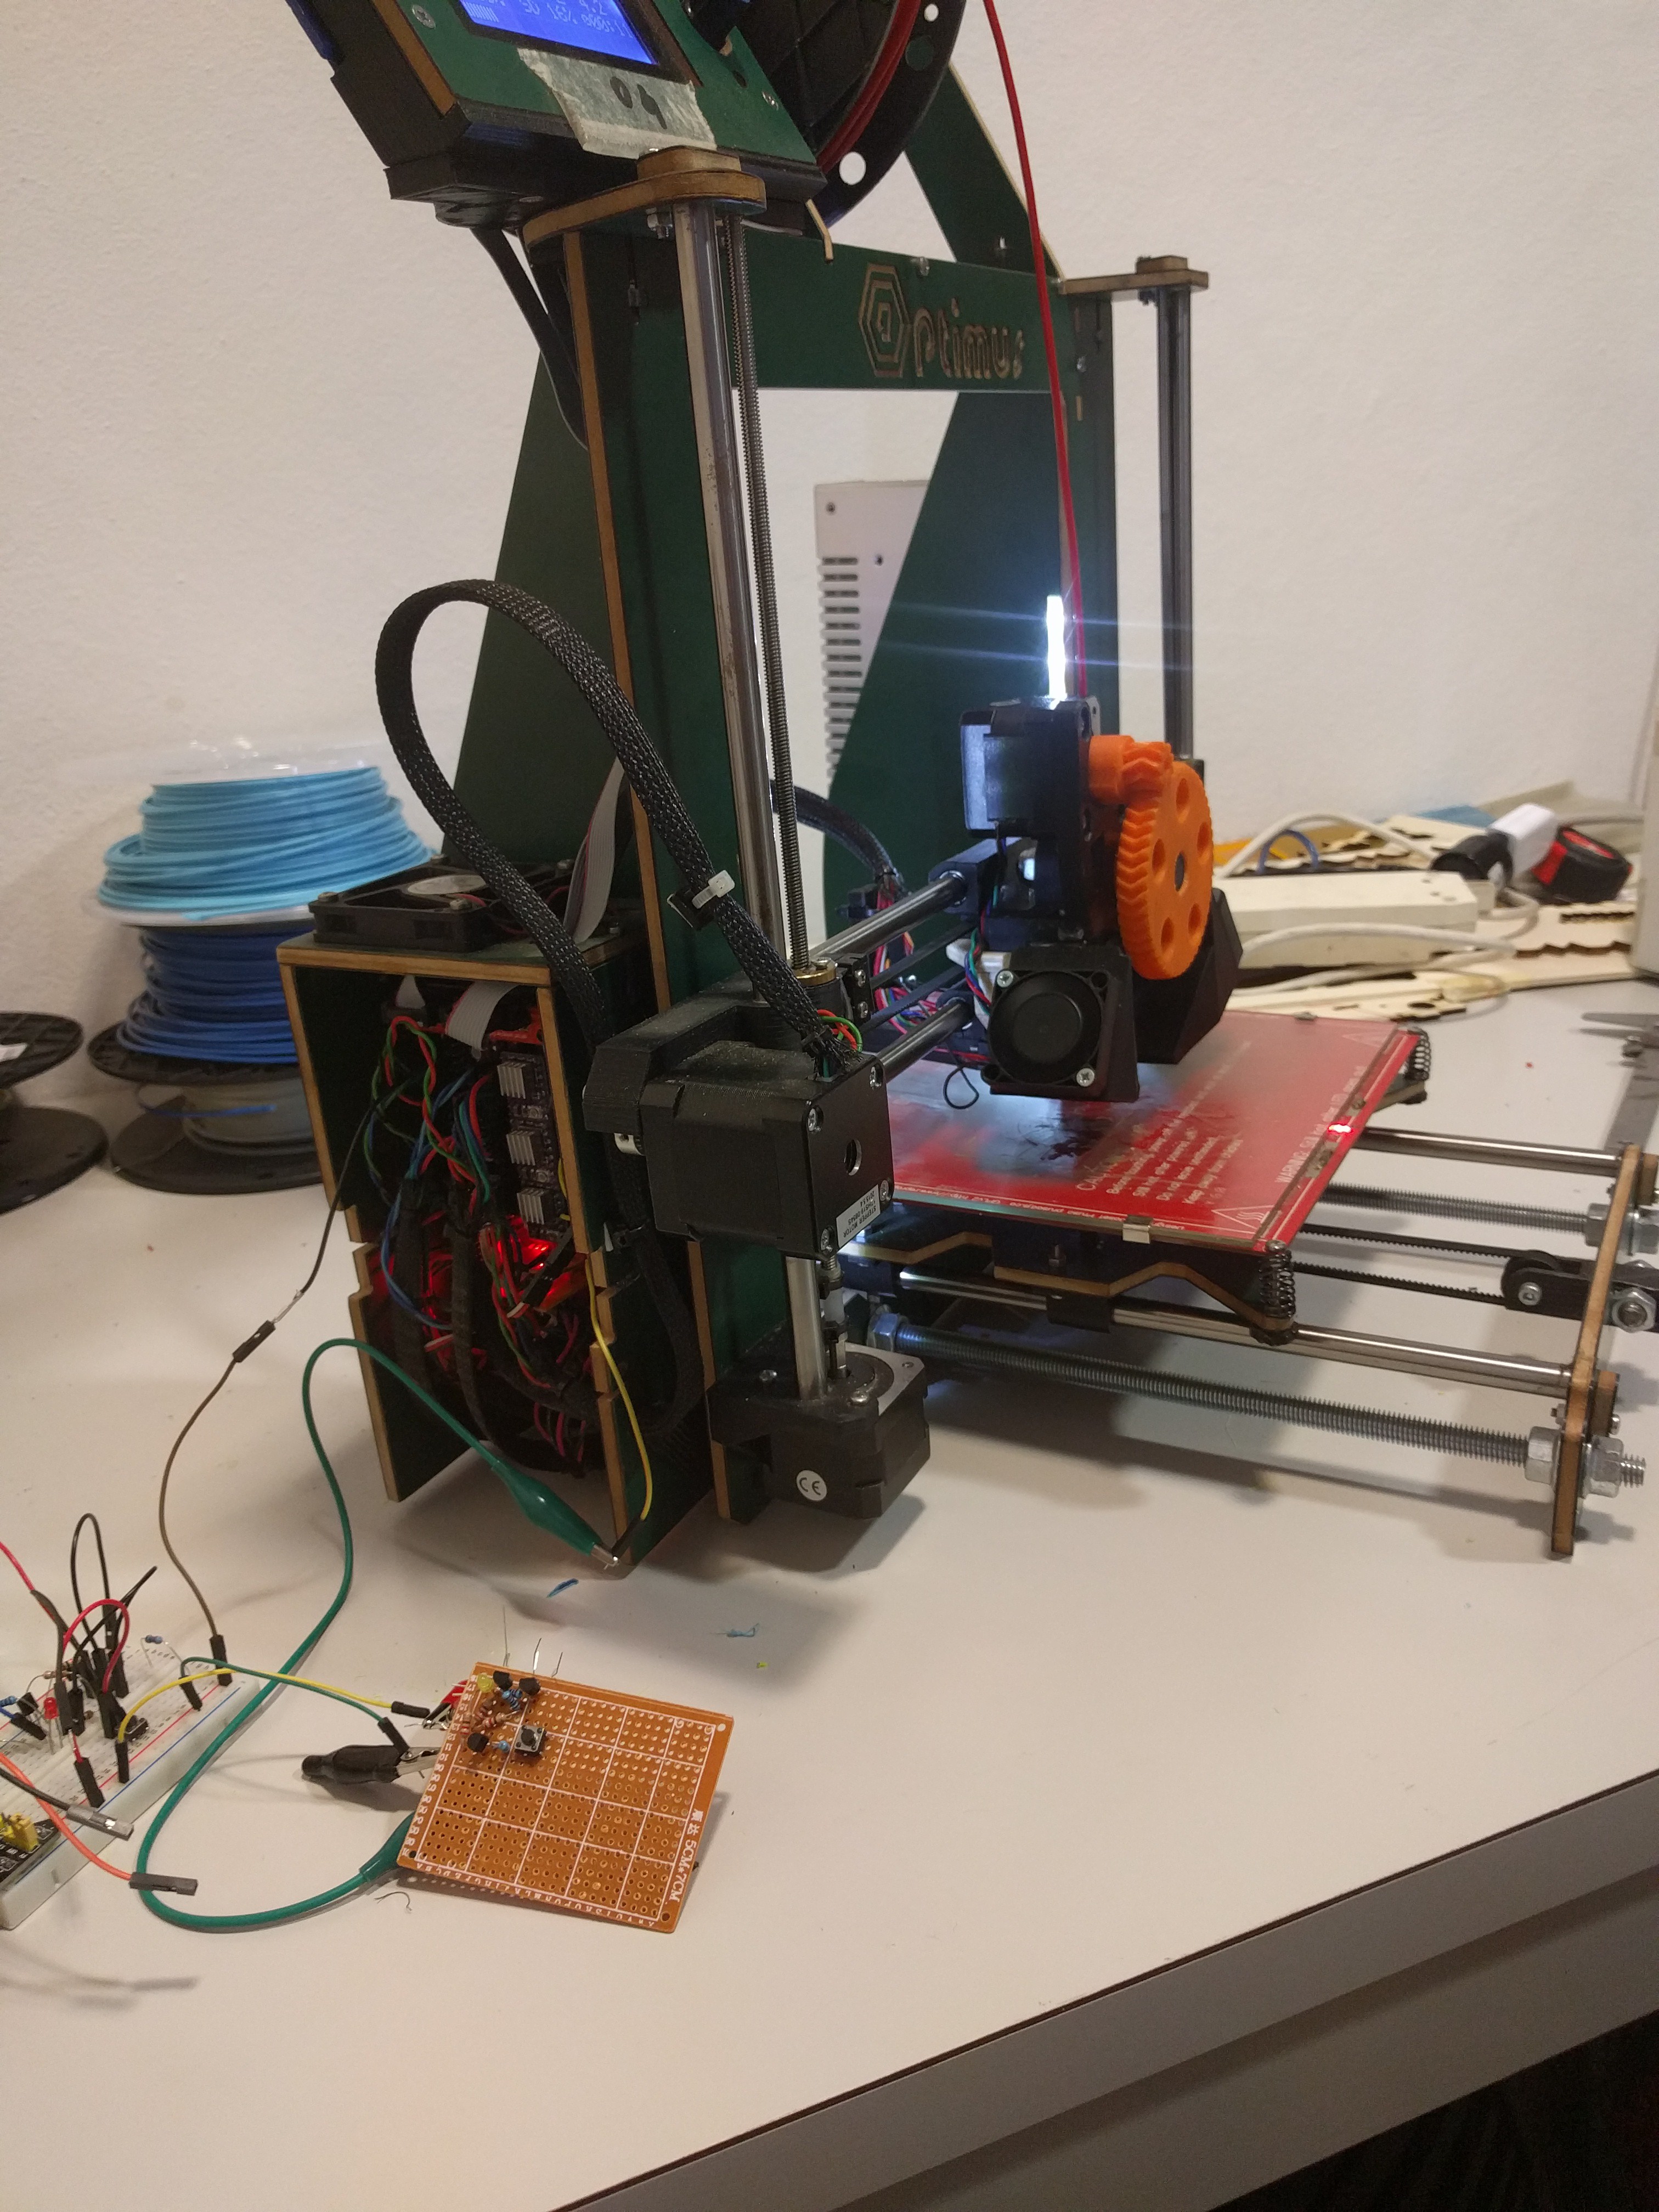
07/11/2017 at 15:47 • 0 commentsToday i have printed an easy case for my 3D ShutDown project.
It's not amazing but it works pretty well.
![]()
I leave you the link for my 3D model: http://a360.co/2tabOlG
![]()
-
The case
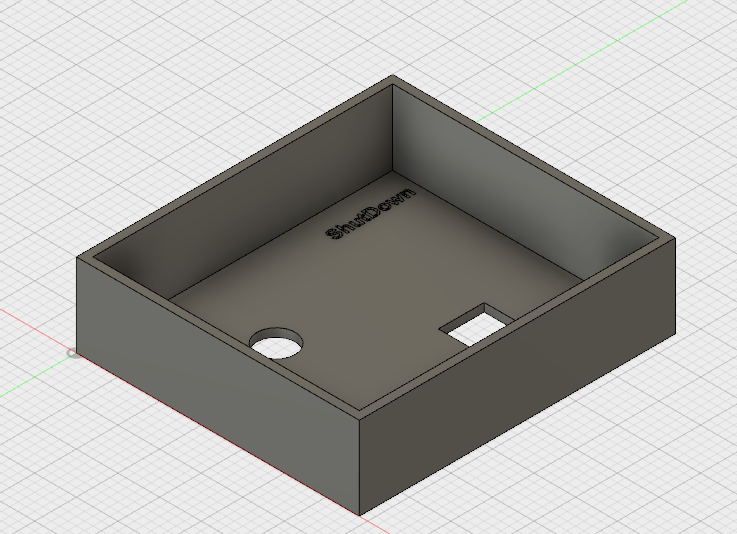
07/08/2017 at 13:42 • 0 commentsUnfortunately i'm not a good drawer, but my 3D Shutdown need a case.
![]()
For now i'm have been doing a very easy case, for a protoboard, i hope to arrived to the end in a fast way.
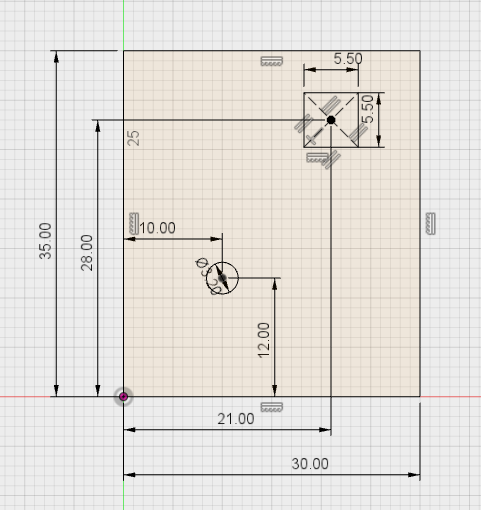
The part where I will start is the top, i need to find some position for the objects that that will be easily accessed when the case is closed.
![]()
-
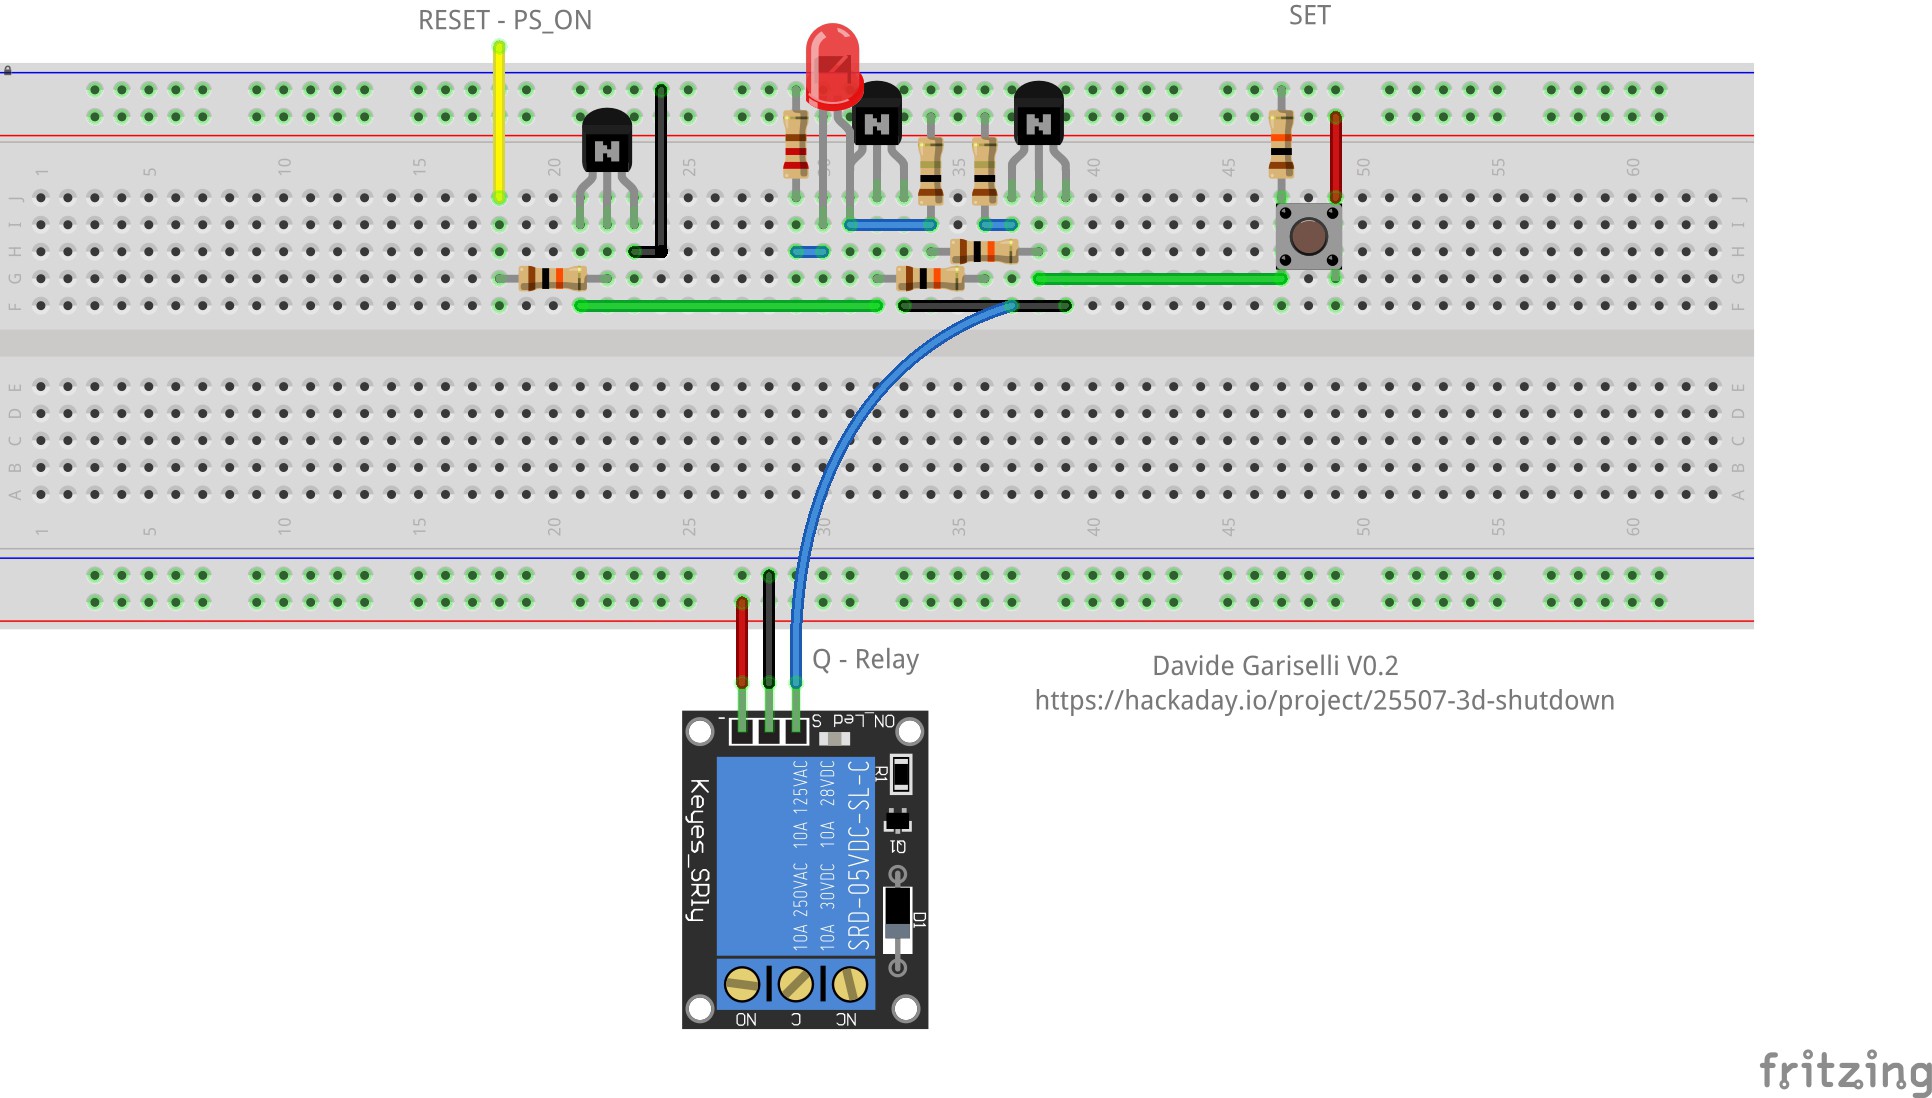
Schematic update with relay
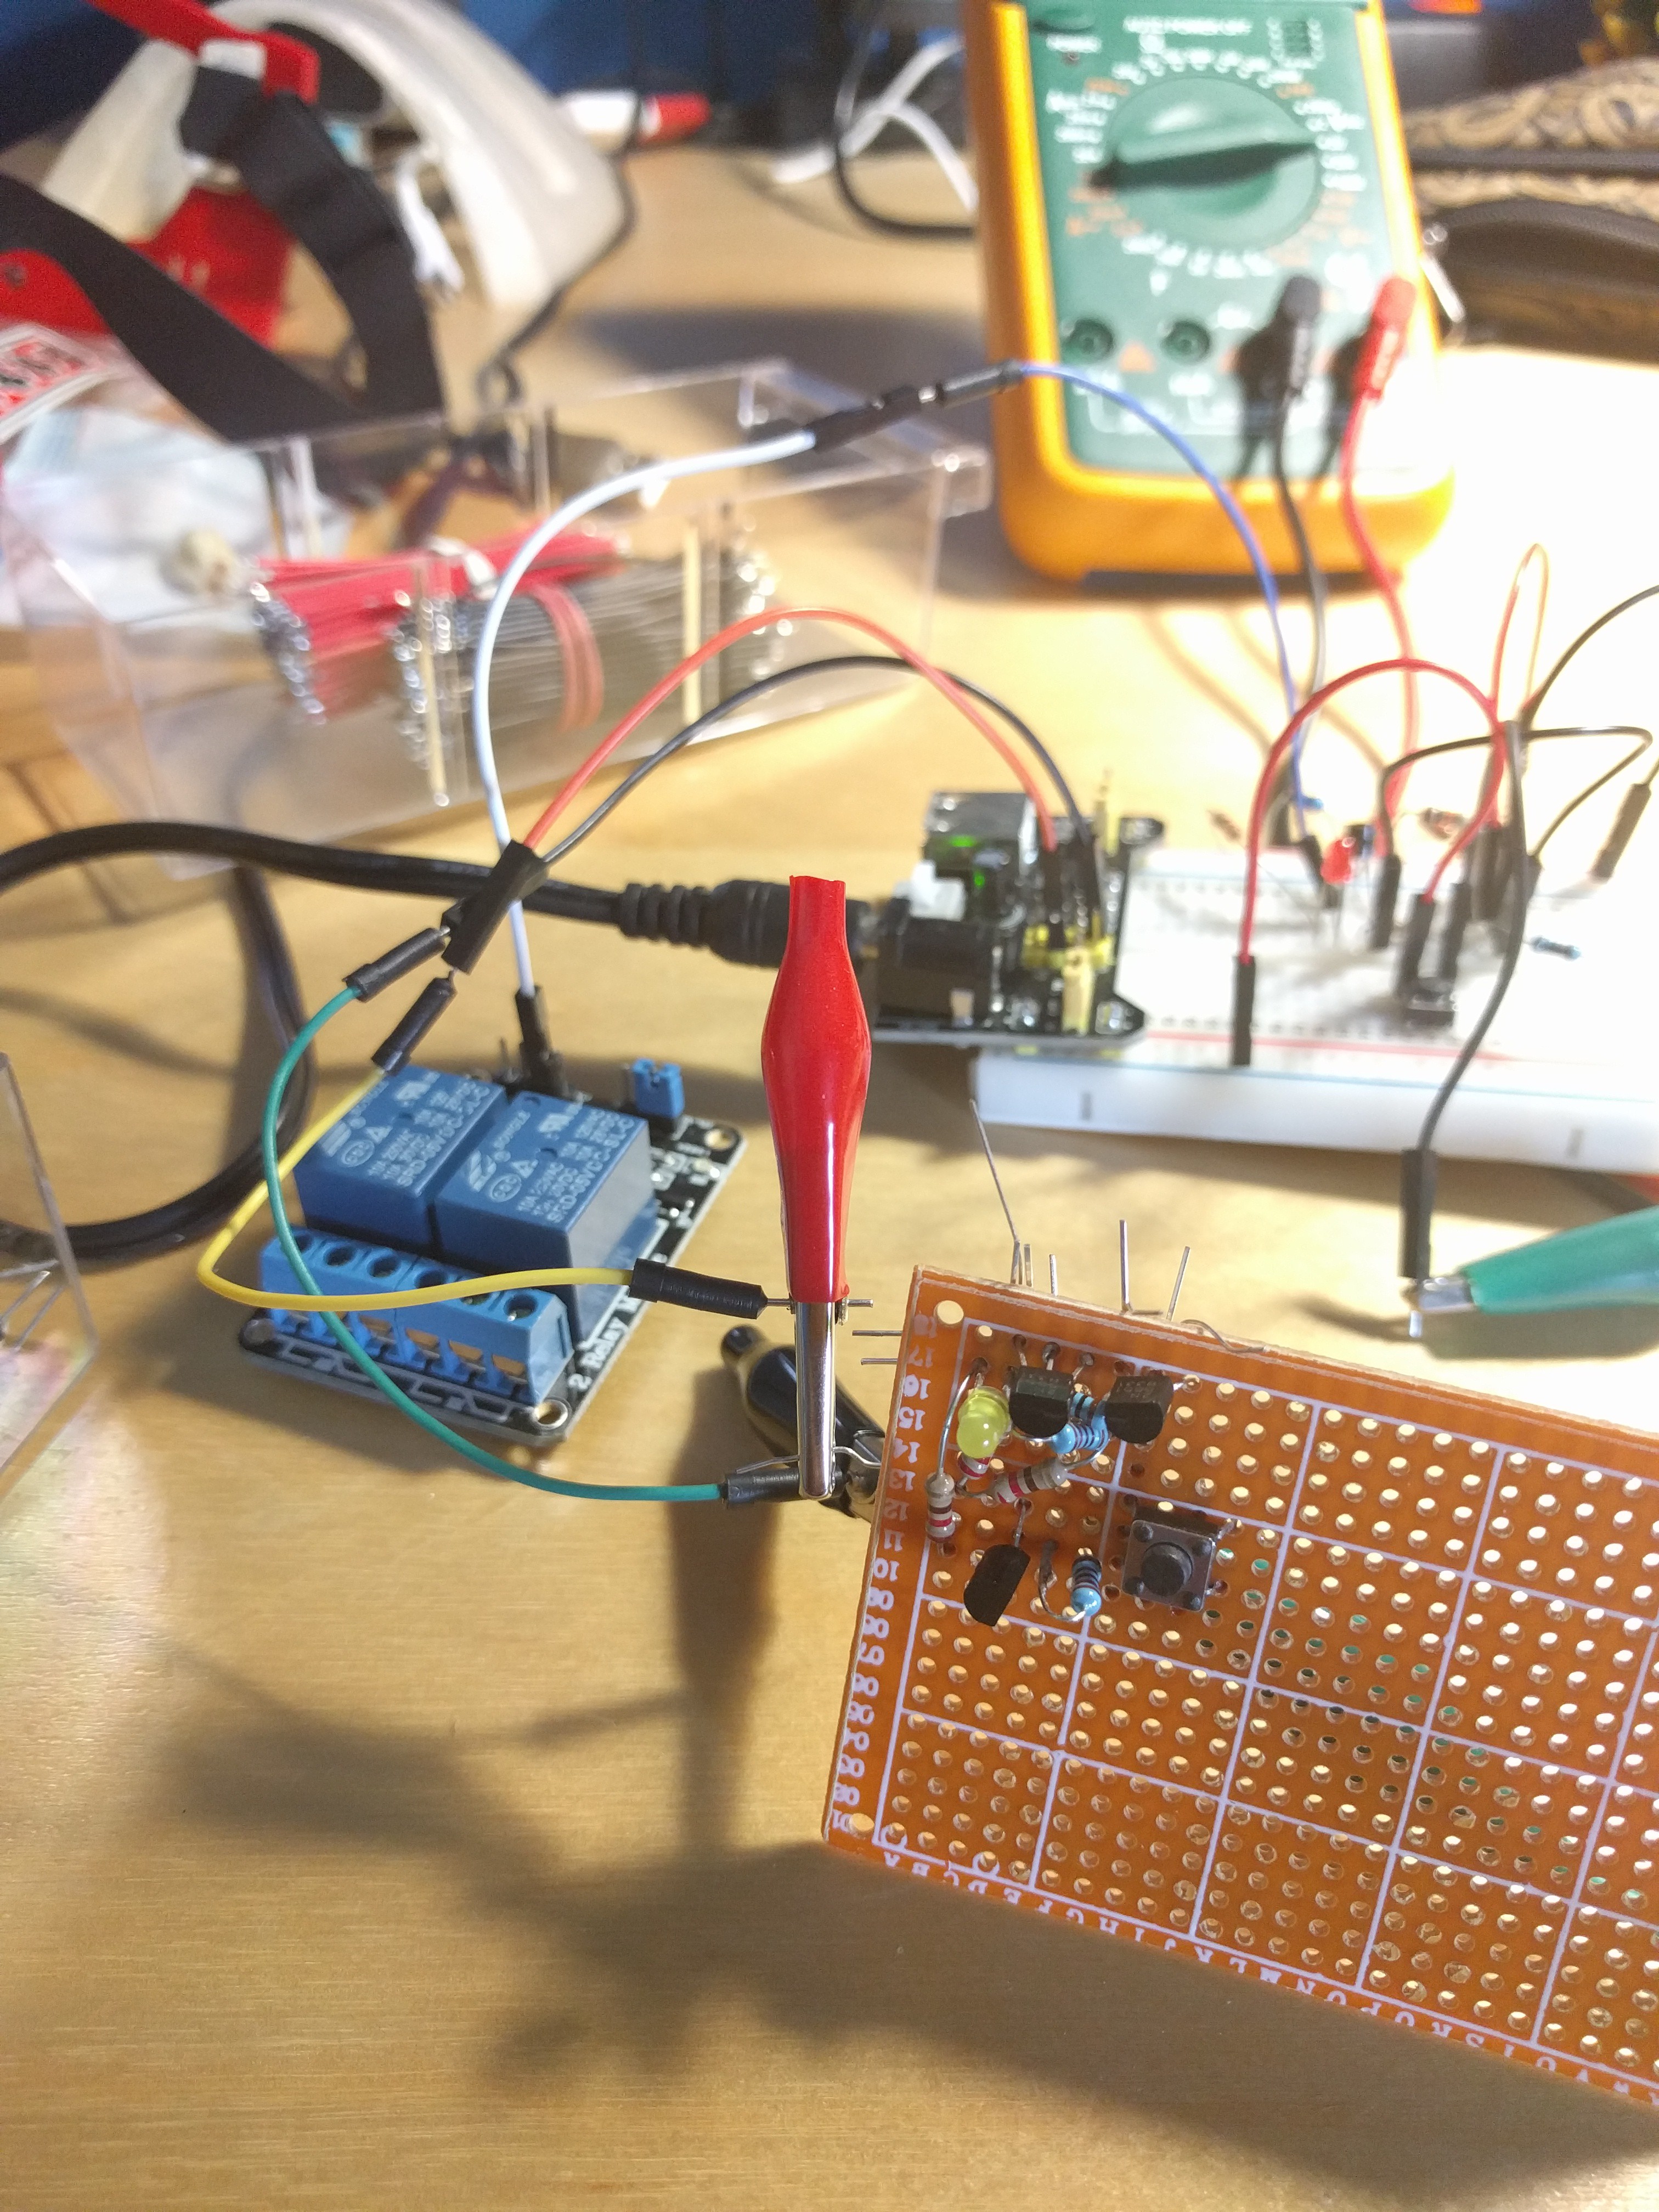
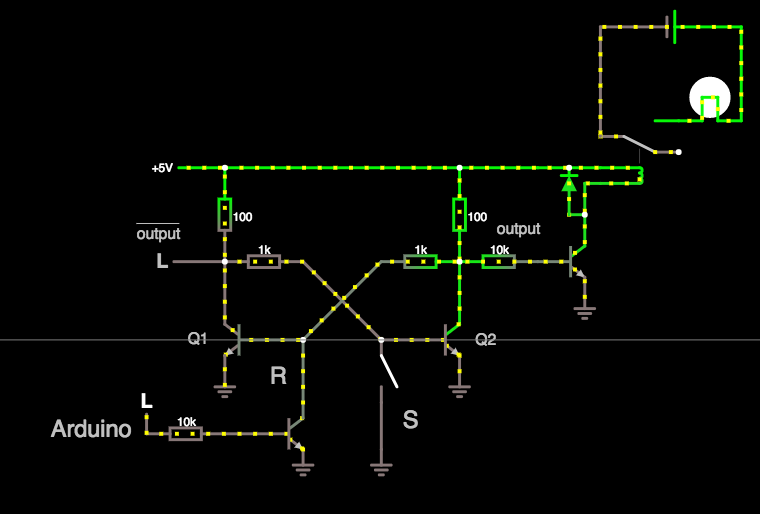
06/28/2017 at 00:10 • 0 commentsIt's time to add a relay on the out pin of my Flip Flop.
According to the schematic, i connected the Collector pin to the input of relay:
![]() Now I created a 3D printer file with, at the end of the "final code", I entered the M81 command.
Now I created a 3D printer file with, at the end of the "final code", I entered the M81 command.Let me to show you what happens:
When the print finished, the relay open the circuits and the printer shut down.
In the same time the led turn on.
When i press the button next to the led, the printer will turns on.
-
First video
06/24/2017 at 21:18 • 0 commentsAfter i have changed the parameters written in the preview log - about PS_ON level after start - now the printer put down the PS_ON pin during the start up.
I decided to show you my first success with the proto board:
The yellow LED will turn on when the printer is switched off.
The printer is turned off as long as you do not press the button next to the yellow led.
The relay is not connected yet. When i will connect it, the printer will shut down completely and only the shutdown circuit stay on.
-
First practical test
06/24/2017 at 07:37 • 0 comments![]()
The first test works fine, but i noticed a problem when the printer power on.
The pin PS_ON is put hight - 1 - when the printer start print.
This mean that the Flip Flop circuit cut off the power of the printer immediately!
I suppose i need to edit the checkbox equal for this pic:
![]()
Well, i will try that parameter tomorrow.
-
Is PS_ON high or low?
06/19/2017 at 20:36 • 0 commentsAt this time of project, we need to verificate if PS_ON work well.
Take the multimeter!
According with the Marlin's guide, the PS_ON is LOW when the printer is powered.
Good, i connect my "+" to the PS_ON pin and the "-" at a free GND on the RAMPS.
It looks good, i read on my multimeter "0V".
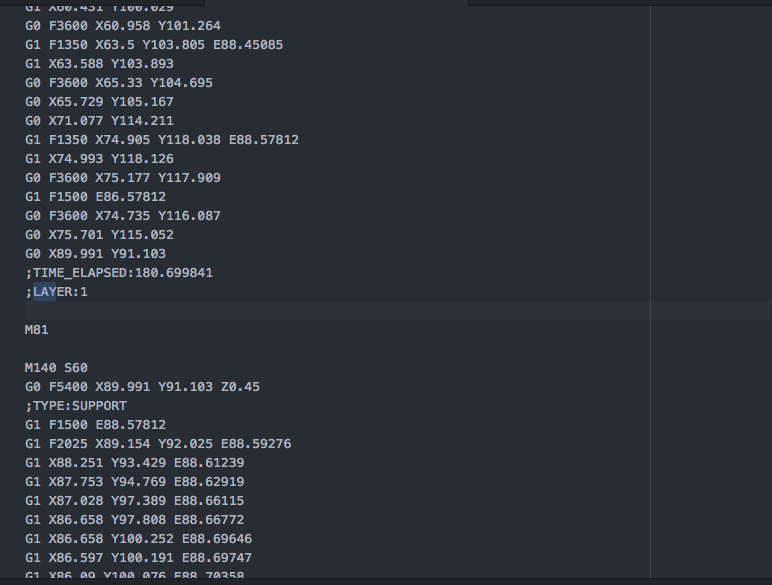
Now i edited my Gcode, i added "M81" command somewhere...
Now i put the SD card on my 3D printer.![]()
When the 3D machine arrived in line with "M81", my LCD display came out of with the written "Printer OFF".
But wait, why my multimeter does not show me "5V" ?
Very strange.... i repeated the same process many time and i will have to read some guide about the Marlin power.
According with the Marlin/Ramps power guide - https://goo.gl/fWFoKp - i have a problem with Diode.
In my specific case, i have both of the diode, D1 and D2 on my RAMPS.
If i want to use my PS_ON pin, i need to cut the Diode D1.
But wait, if i cut the D1 Diode, i need to connect and external power supply - 5V stable - for power the Arduino board....
It's not a good solution.... I need to find another approach.
Marlin/Kimbra firmware
This version of Marlin is called Kimbra.
It's a very nice and easy - smart - way for customize your parameters of your 3D print.
And they have a solution with out cut off the Diode D1, amazing!
If you go to "firmware_configurator" you could edit your "Overral.h" file with a lot of new parameters.
We need this part of guide:
![]() Now we have the functionality on!
Now we have the functionality on!If you will repeat the process on top, now the multimeter will show 5V when the RAMPS will read the M81 command.
PS:
I strongly recommend the Marlin Kimbra firmware for your 3D printer, it's very powerful and highly configurable.
-
Build it on protoboard
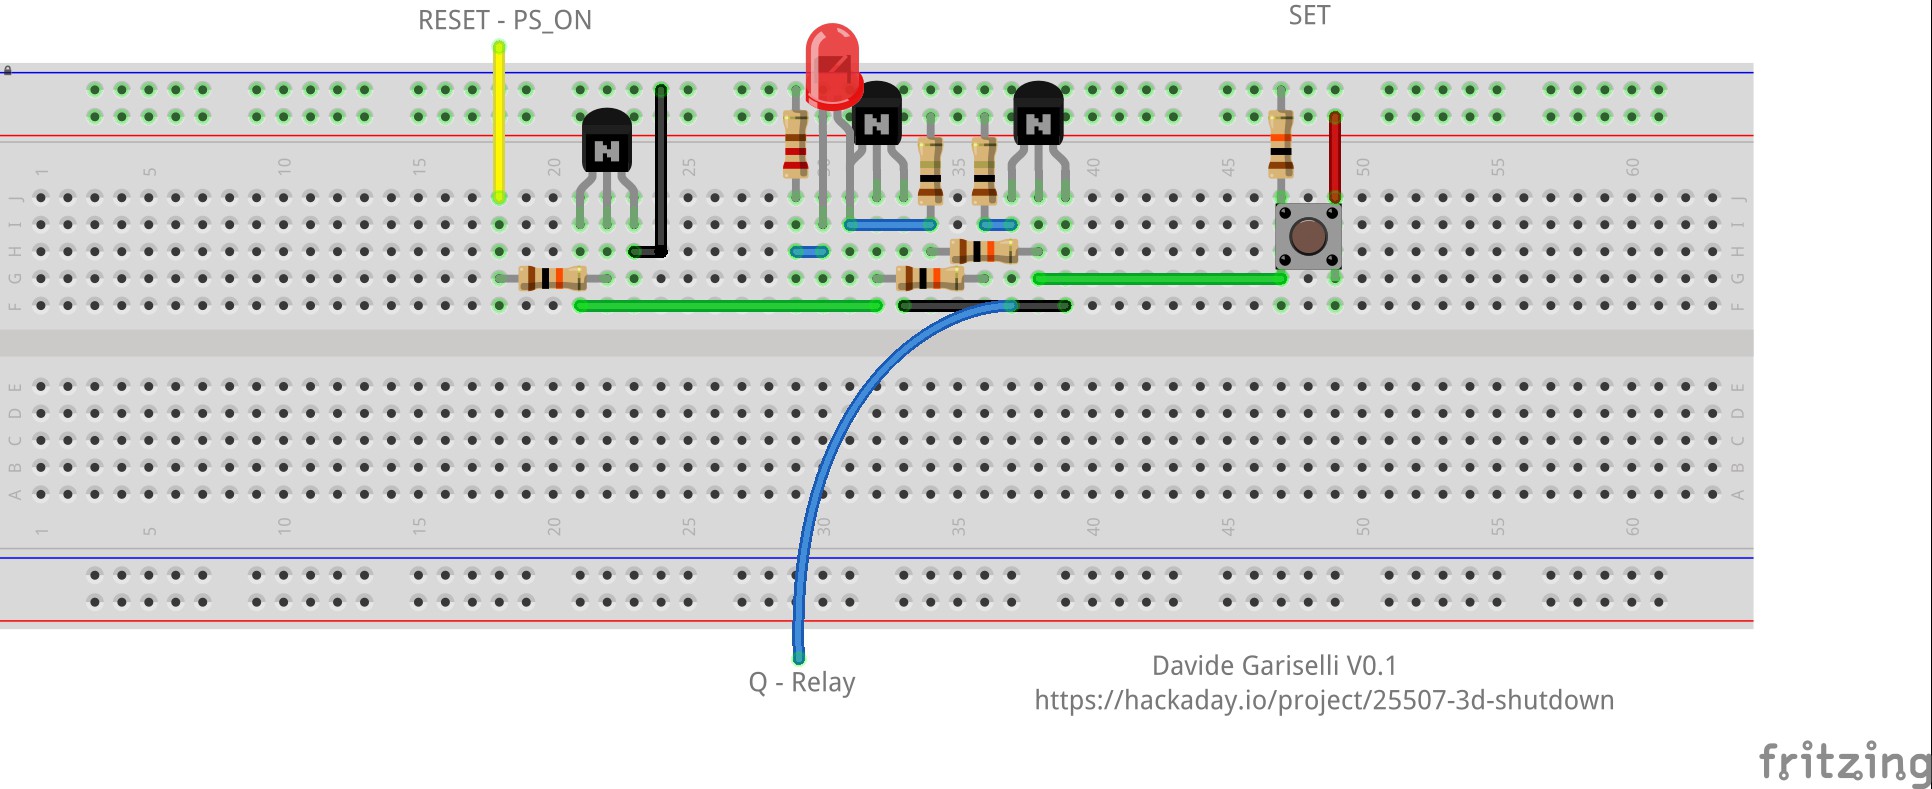
06/19/2017 at 20:02 • 0 commentsAccording with my last circuit schematic, it's time to build the first protoboard!
![]()
You can download the version 0.1 in "Files", or see the image below.
![]()
-
The relay and how control it
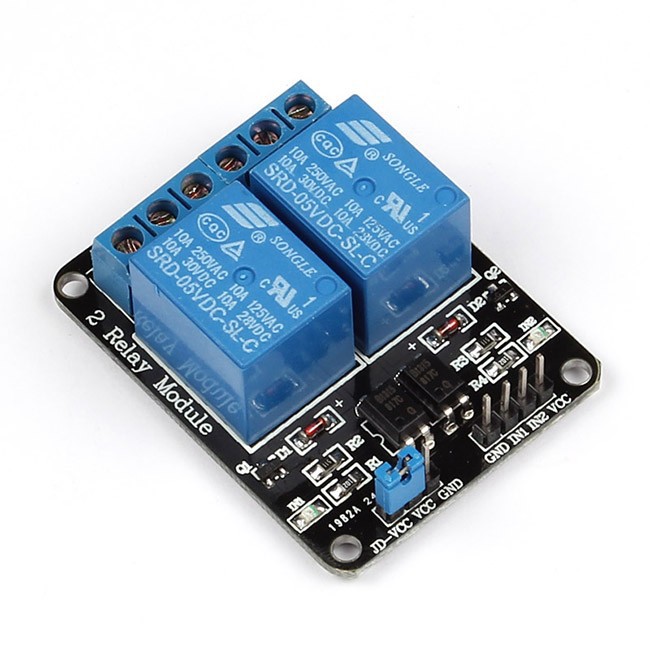
06/18/2017 at 14:39 • 0 commentsThis is a standard 2 relays for Arduino, very cheap and easy to find online.
![This one have 2 relay]()
This module is made with some components inside, like optocoupler and diode.
The microcontroller is a low power supply device, without relay it can not control high power supply, like the power supply in the 3D printer.
The basic function is schemed in this picture:
The rule of this component it's easy:
when the current pass through a coil - the component draw like a punch - the switch move, the C connection, from NC to NO. So, when the current not pass in a coil, the circuit return at NC.
![]()
Online simulator: http://tinyurl.com/yagvhscd
Why i added the transistor, resistor and diode on the output of the Flip-Flop?
These three components are integrated in the relay module. The resistor is put to put the transistor in the saturation region and the diode prevents the voltage spike when the inductor is discharged.
Now is the time to build the first prototype on the PCB board, according with the last circuit on the top.
-
The Ramps with remember pin
06/18/2017 at 08:26 • 0 commentsI want to add in the Gcode ( in the end ) the Marlin "M81" command for turn on a specific pin on the RAMPS.
What is a RAMPS?
The RAMPS 1.4 is the last shield for Arduino Mega with you can control the stepper motor on the 3D printer.
The RAMPS is completely passive, the Marlin firmware in the Arduino, make the magic staff.
So the Marlin firmware has a lot of command ( Gcode ) for control motor and some more I/O in your 3D printer. See the commands list: https://goo.gl/3qTD6h
Ok but, how create the Gcode for the Marlin? The slicer, likes Cura.
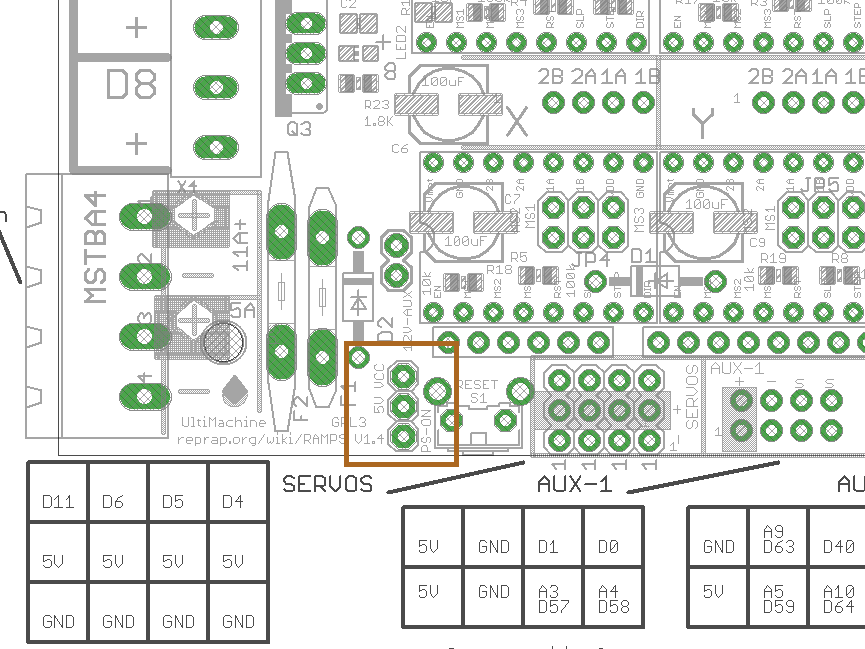
Now what pin is connected to "M81" ? if you see on the command list, is the pin "PS_ON".
Take a look of the schematic: https://goo.gl/aBv75V
![]()
When the Marlin reads the "M81" command, rise up the pin PS_ON. Easy.
Why we need the Flip-Flop to control the power off?
The flow is this:
- When the printer will end, the Marlin will reads the "M81" command
- The PS_ON pin rises
- Now the relay will open the circuit and the printer power off
- So the ramps will power off, and the PS_ON pin will fall
- The relay will close
- And in the end the printer will power on, again....
We need something with a memory to control - remember - the last state!
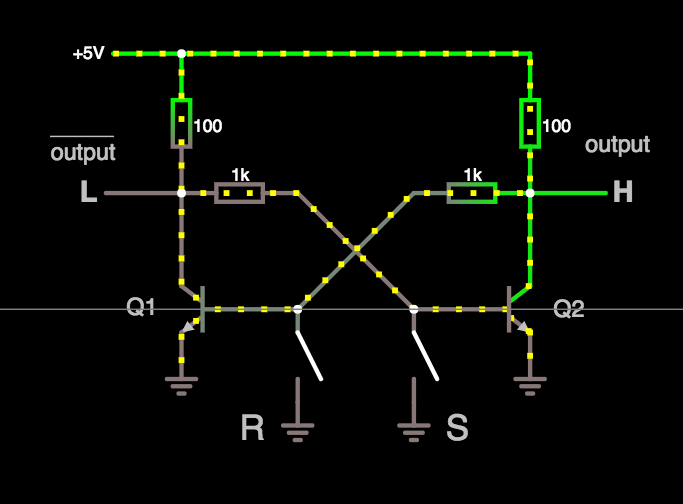
In the easy word, the Flip-Flop.
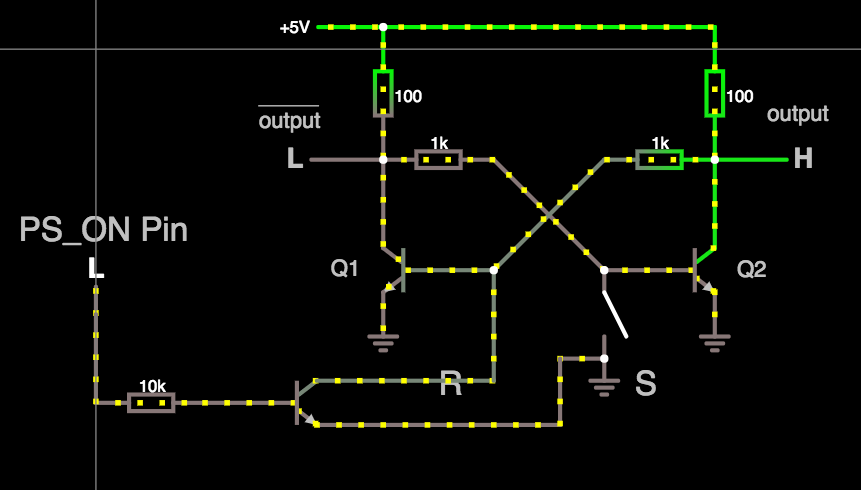
Now we can edit the schematic in this way:
![]()
Online simulator: http://tinyurl.com/yclb7cu2
-
First step: the theory
06/17/2017 at 14:43 • 0 commentsThe NOR:
I need to search some theory about Flip-Flop for the first step:
This is the first model you see on Google/Wiki if you search Flip-Flop SR.
The true table: https://goo.gl/w9dPSh
It's pretty easy to understand, only 2 Nor, and very fast to build, if you want, with IC 7402.
Online simulator: http://tinyurl.com/yabdpq28
The NOR with the transistors:
In this project we want to use only transistors and resistors component, and we need to go a little bit deeper inside the Nor component.
This "clickable" image is the base of what is inside the NOR component:
We can play with this schematic on the simulator: http://tinyurl.com/y7753y8x
Now we could simplified the schematic in this way: https://goo.gl/RPZZFU
![]()
Perfect, the last - simplified - schematic is a good point to start and grow up the project.
The next steps for the projects are:
- connect the RAMPS shield to the Flip-Flop
- connect the Relay shield to the Flip-Flop
Notes:
Key note is that: the circuit is symmetric.
- What happen if i change the top side resistors? what is change in the output?
- Moreover, when the transistor is in Saturation region? This condition is define by which resistors?
 Dave
Dave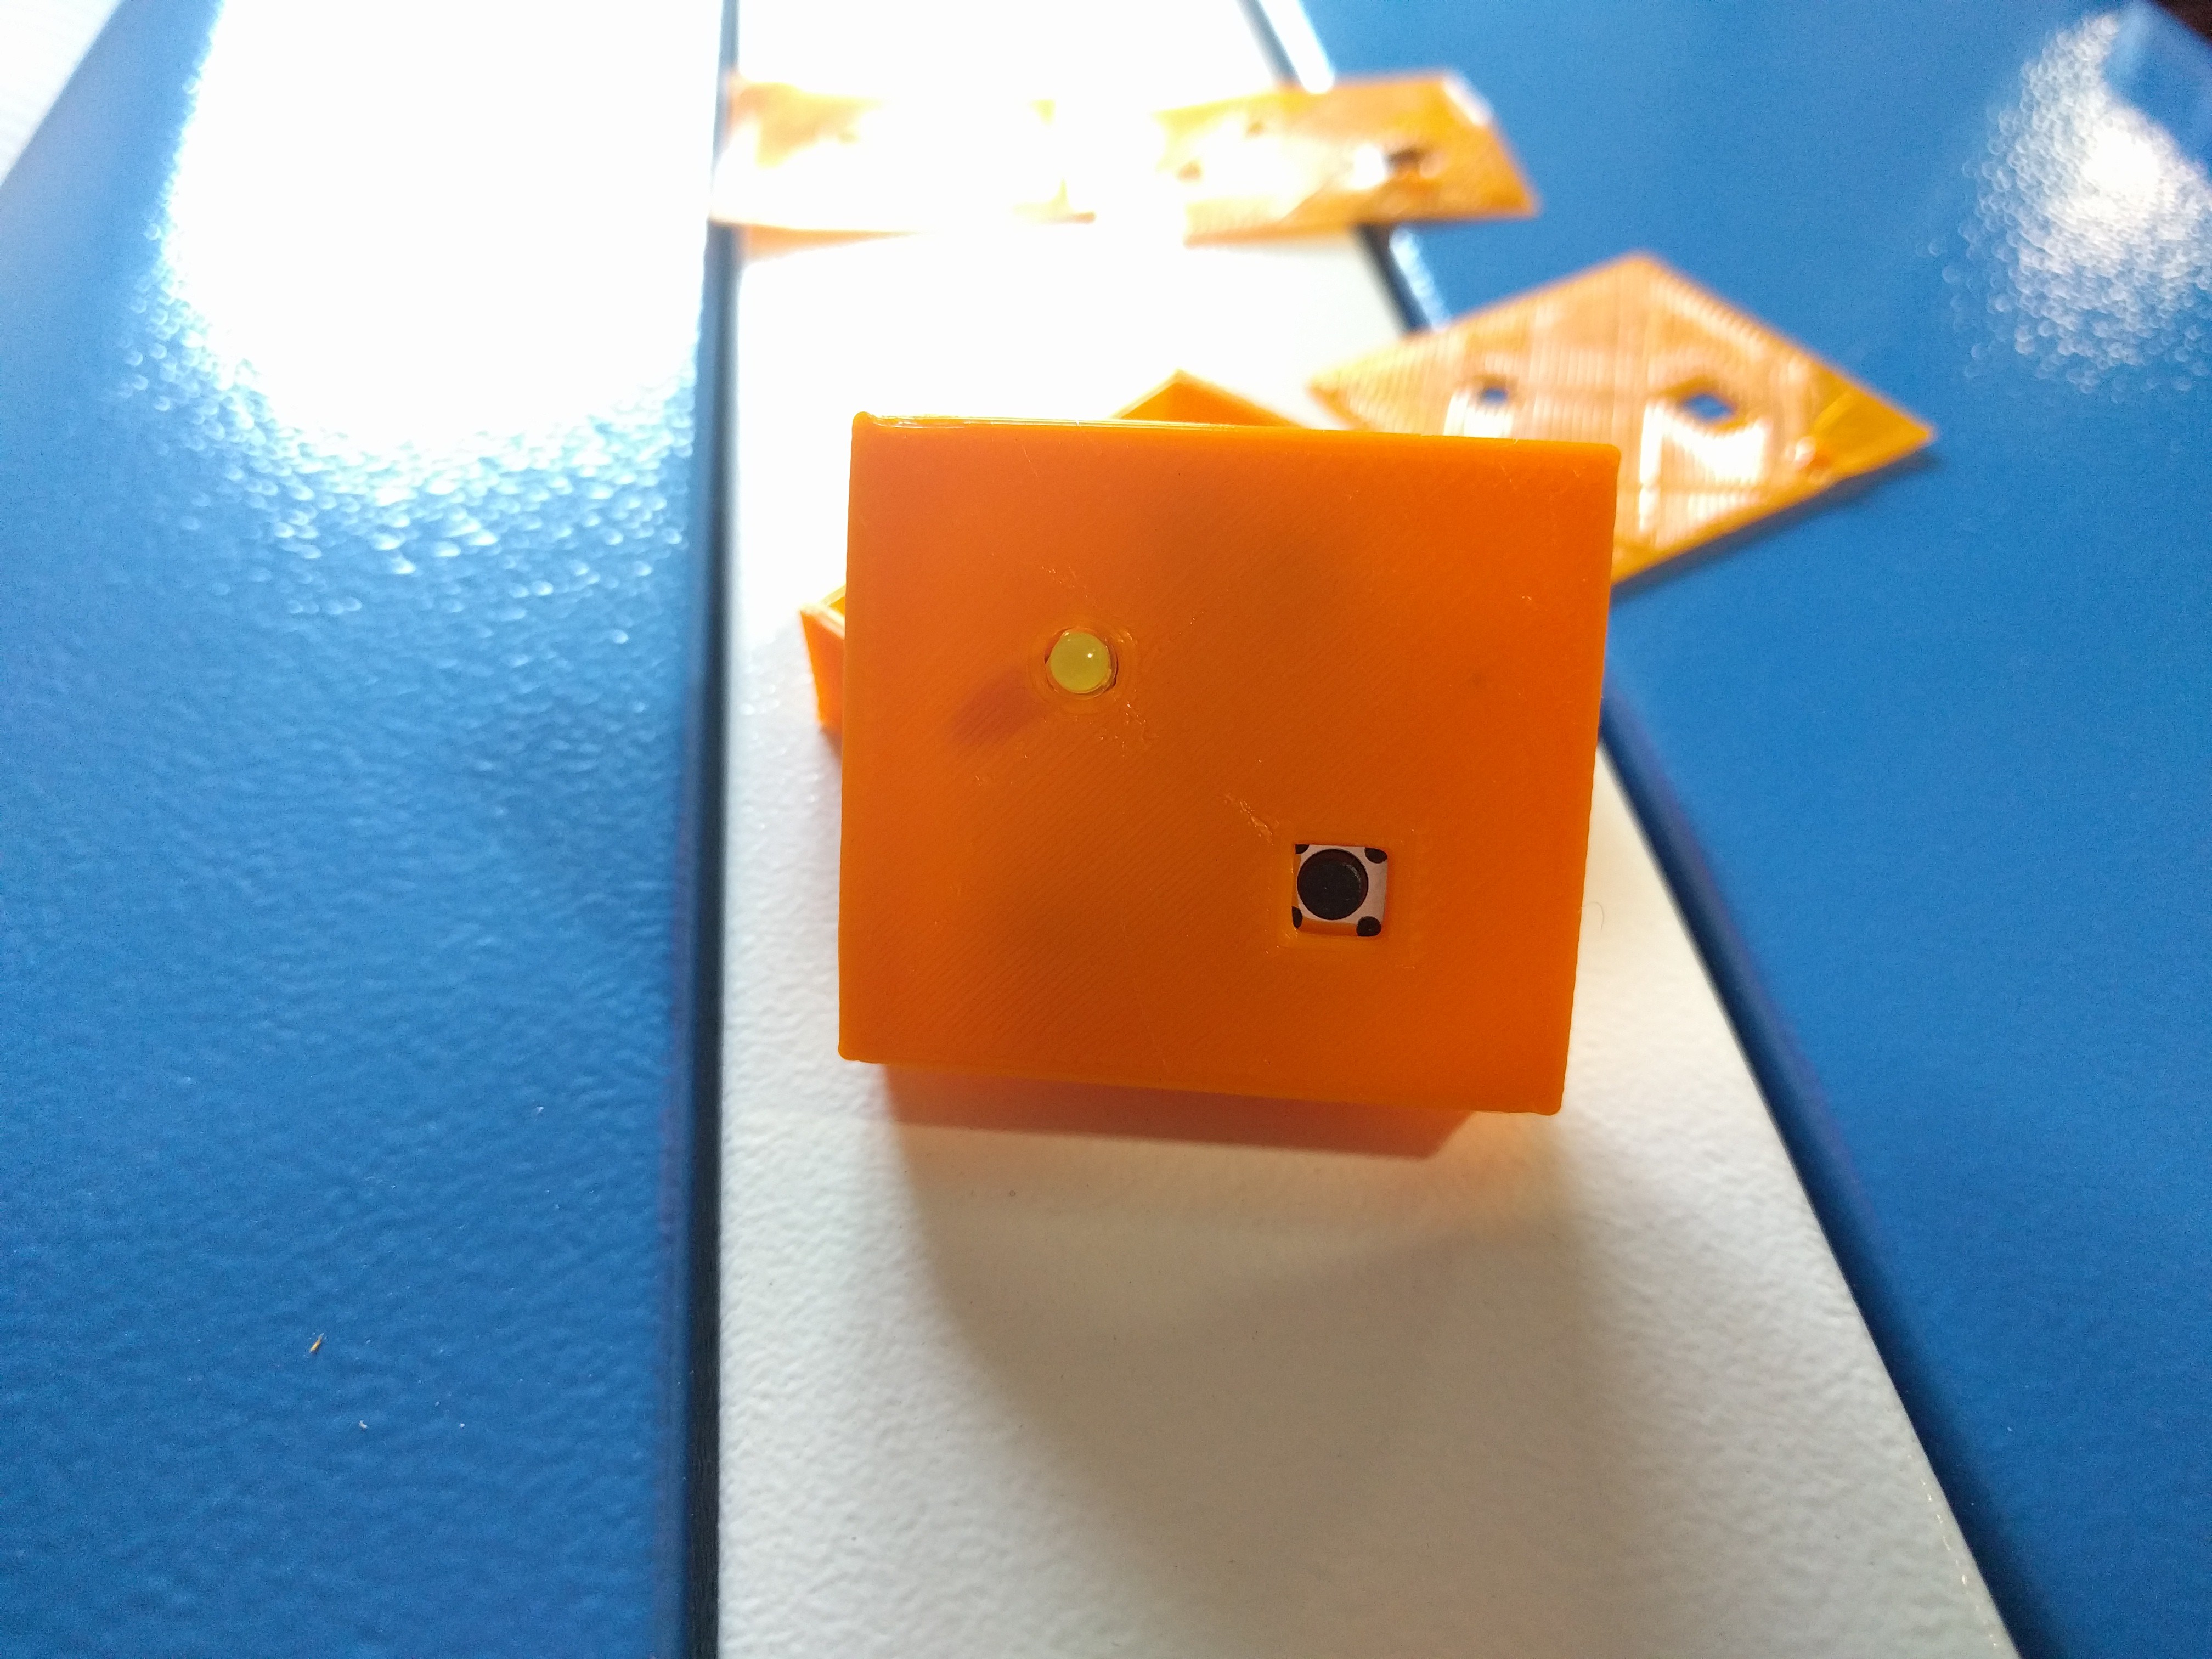

 Now I created a 3D printer file with, at the end of the "final code", I entered the M81 command.